Leaderboard


.thumb.png.f735f4bf293030b5aad4d67e65a35e67.png)

Popular Content
Showing content with the highest reputation since 04/25/23 in Posts
-
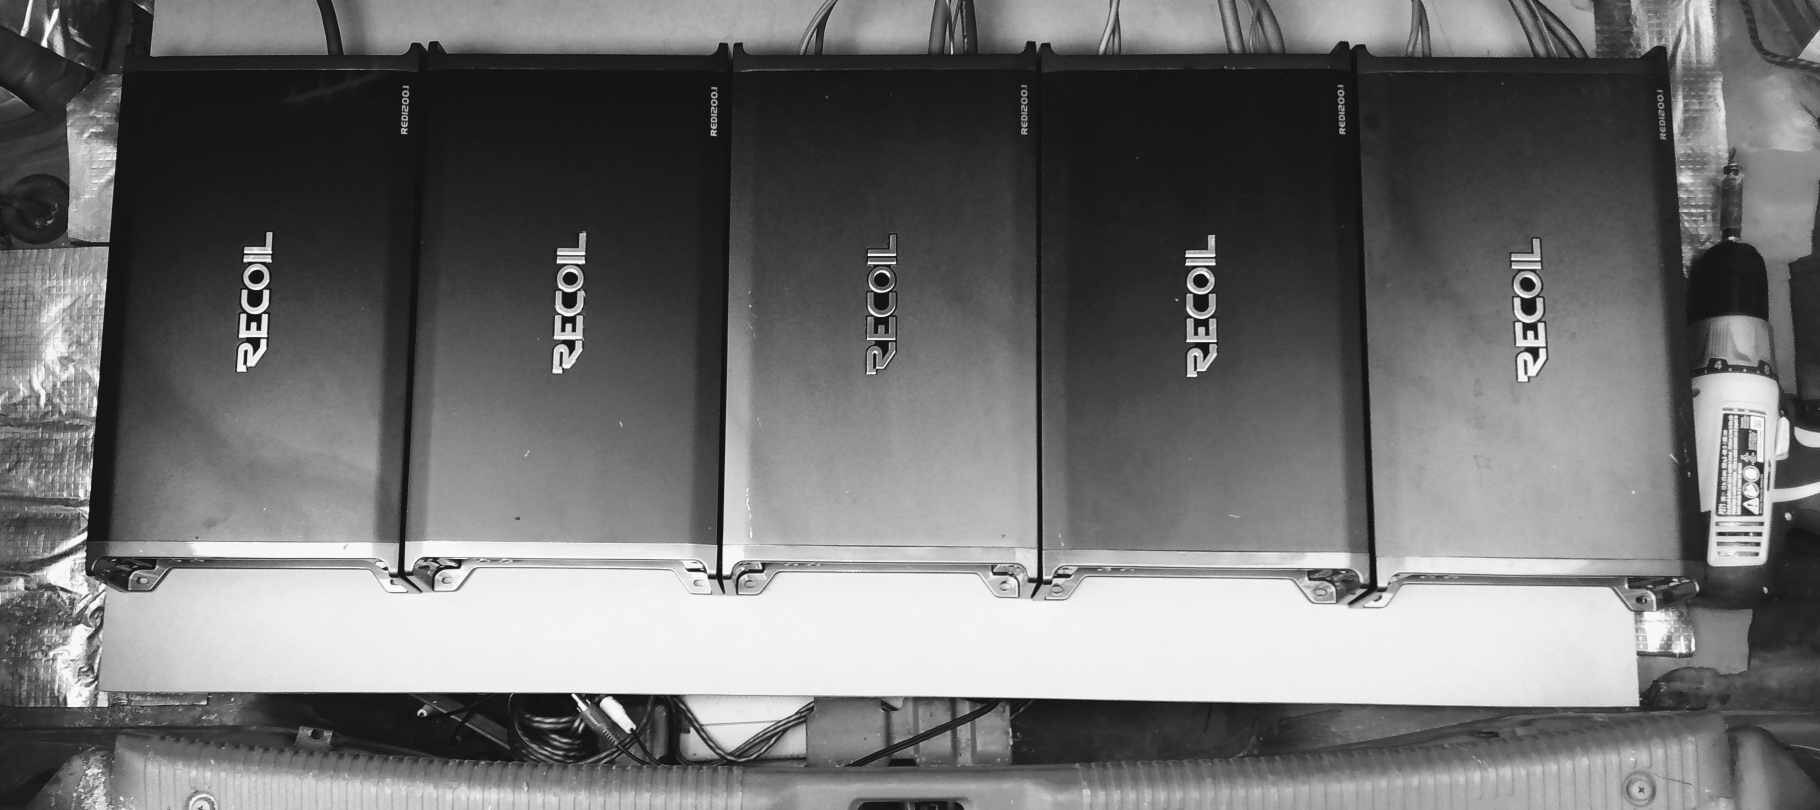
getting close to having the wall done and wired up on 5 of the small amps( swaping to 5x 2500w rms amps in the near future , still need to seal it to the b pillars and other work but i got plenty of time before the next comp
 3 points
 -
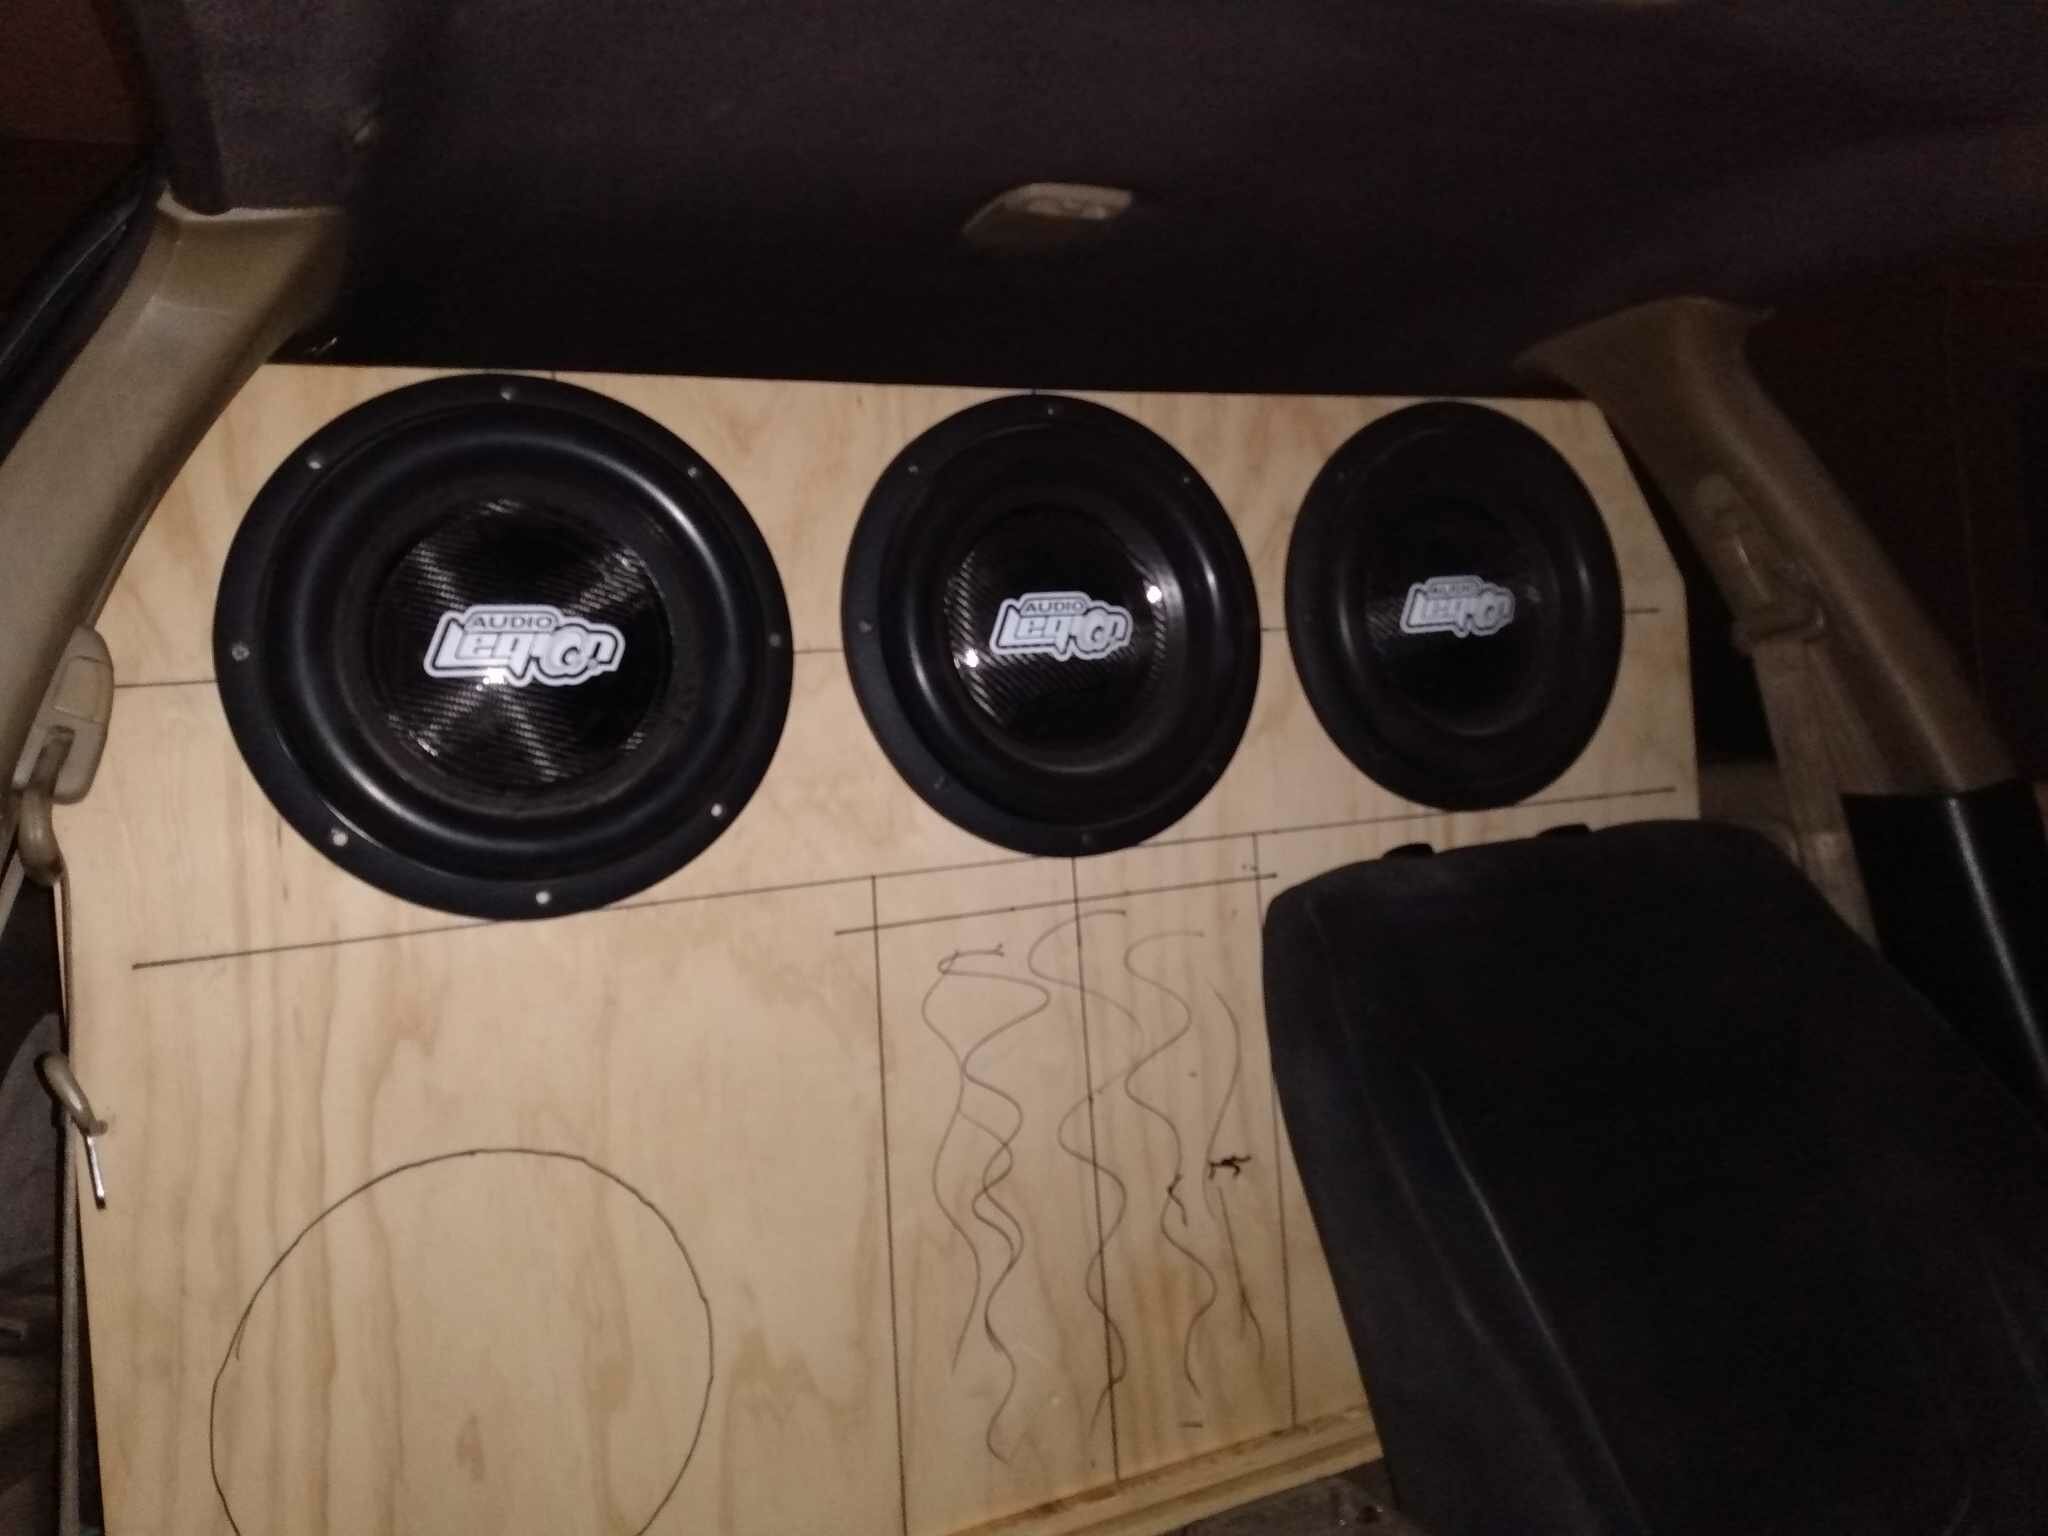
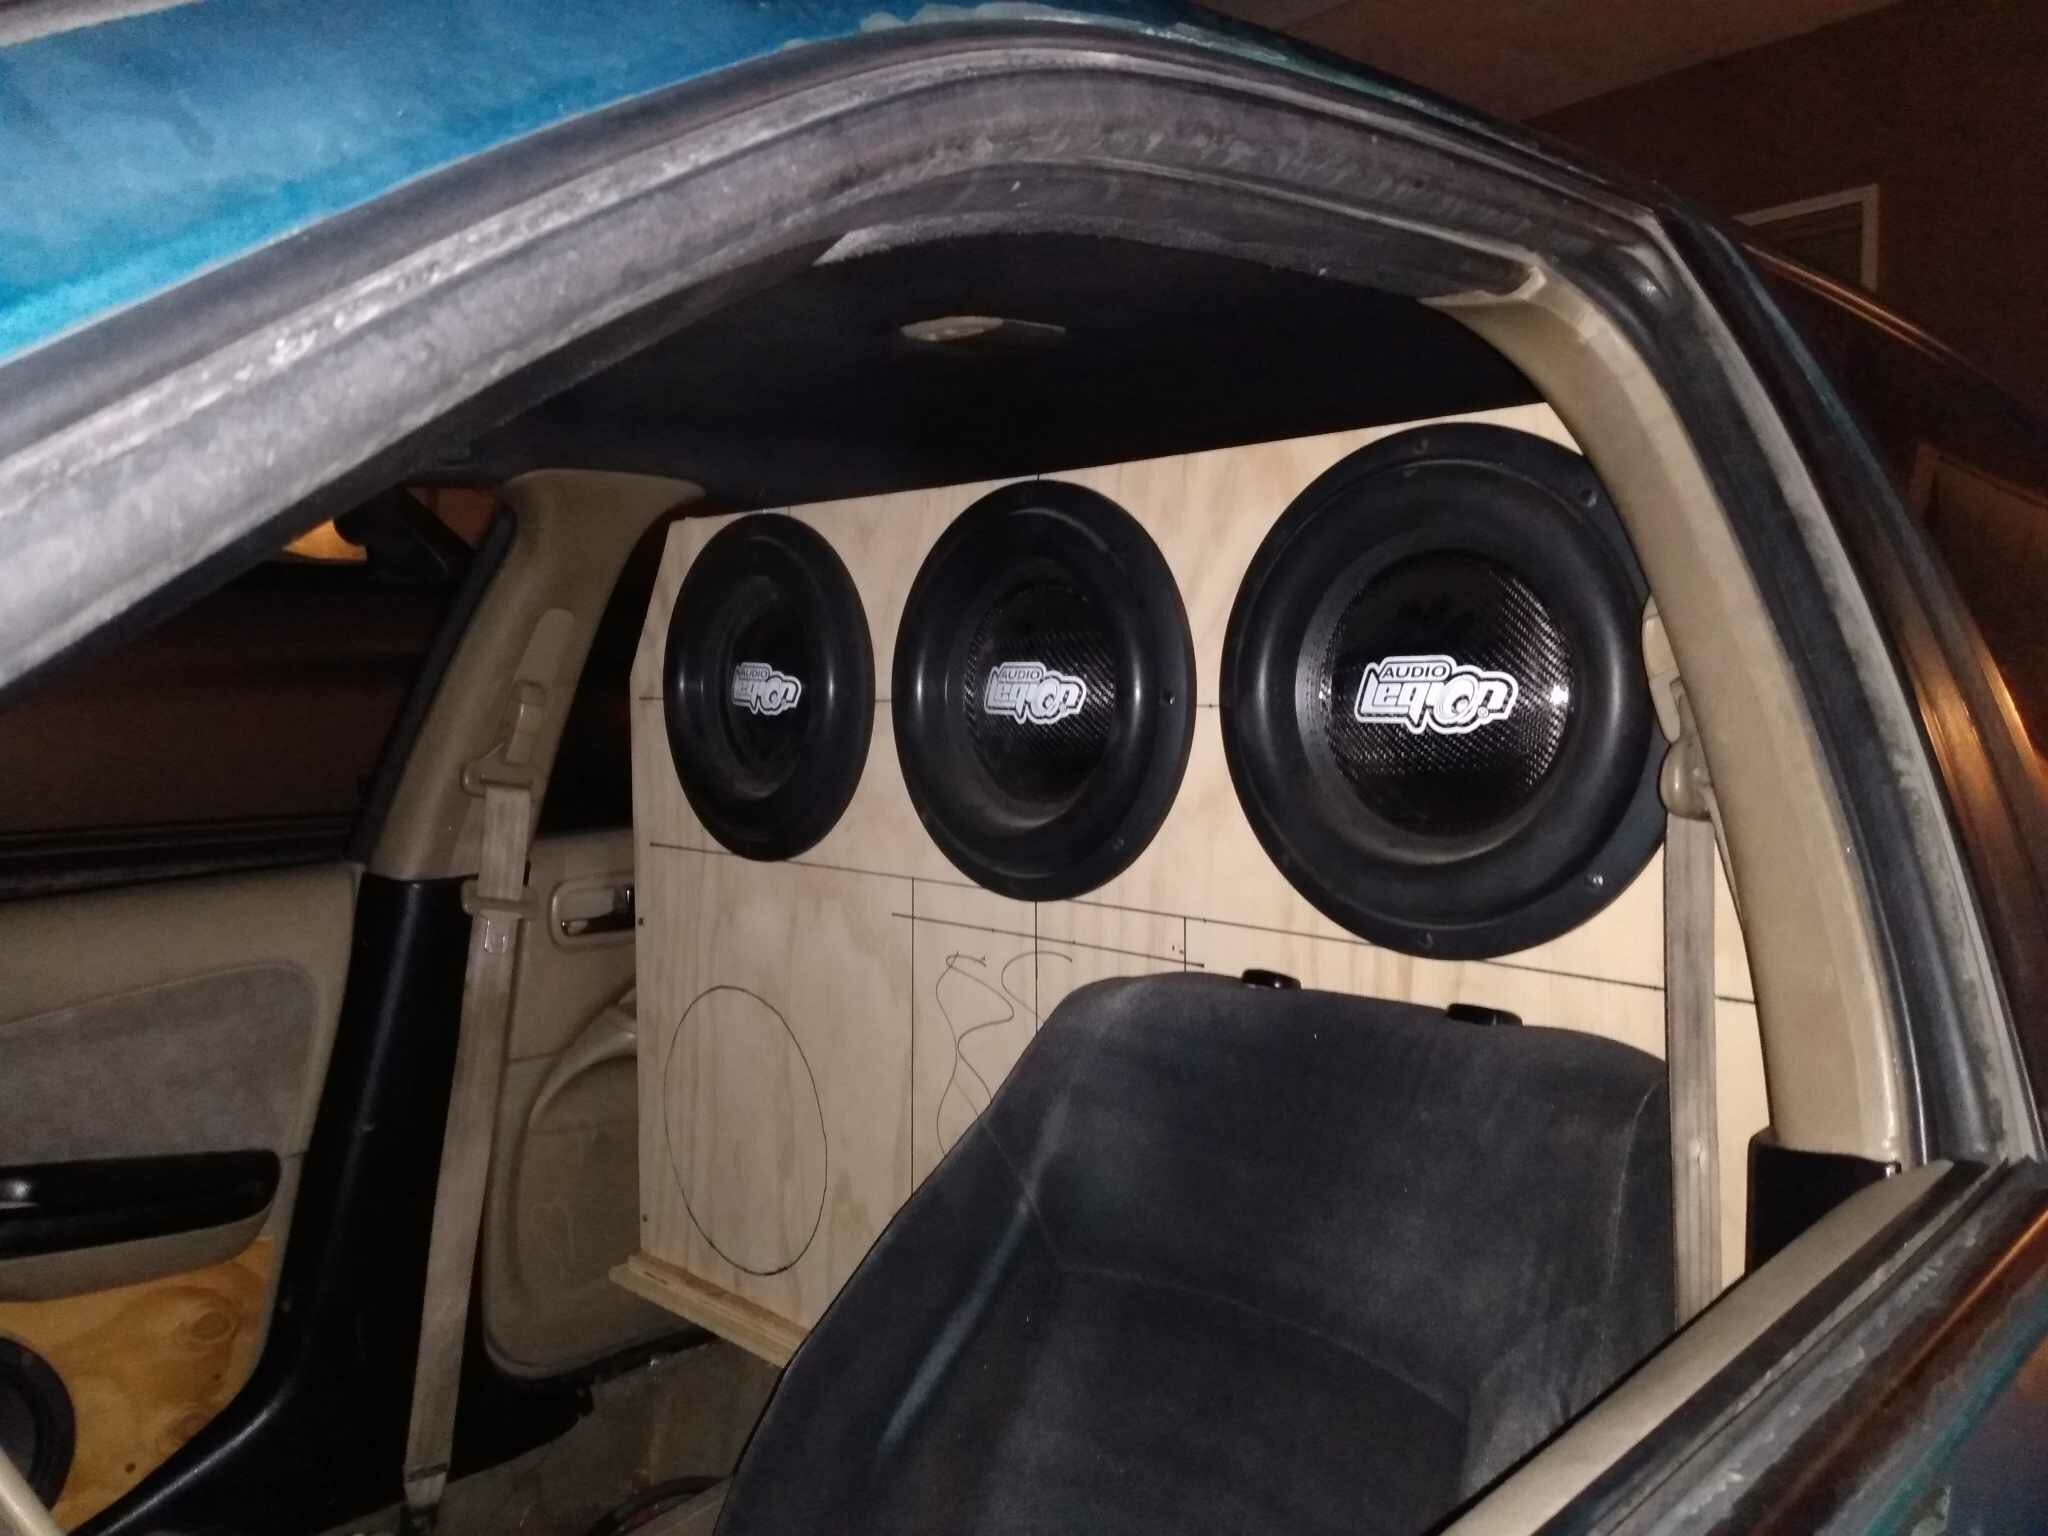
progress is slow but i got the port cut and in today for testing and 3 out of the 5 sub amps installed its enough for some low power testing /checking making sure the enclosure doesnt have anything loose etc hopefully ill have enough time this weekend to get all 5 wired up and playing3 points
-
closer , waiting ont he first 2 baffle layers to dry and then i can glue this one to those and install it for real
2 points
-
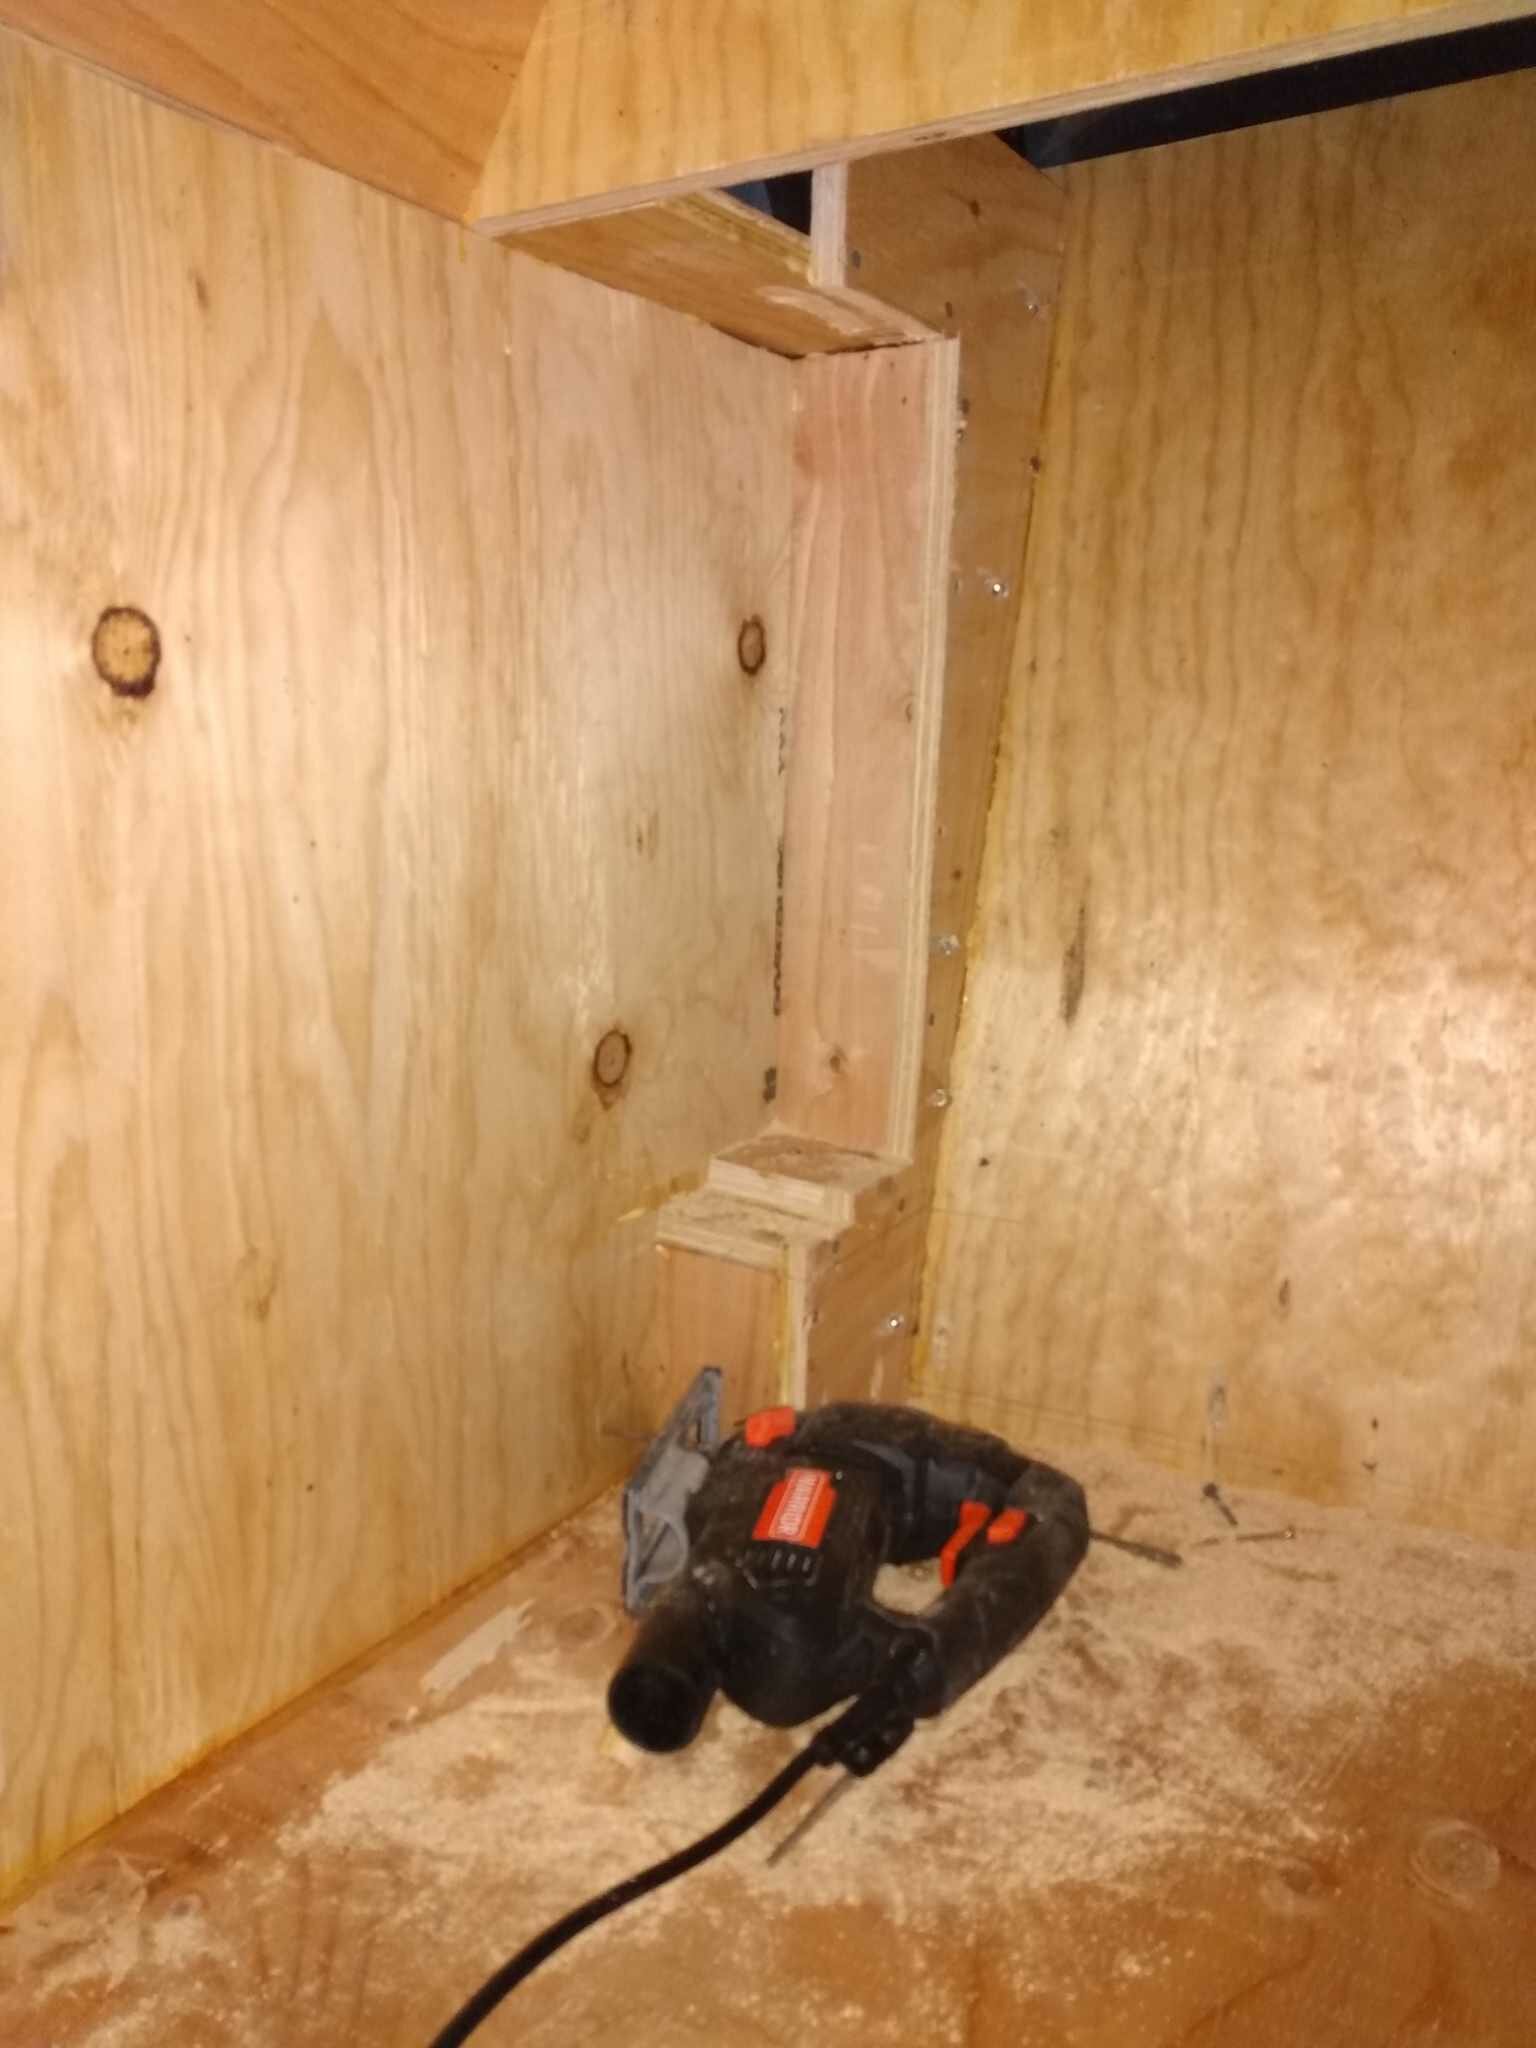
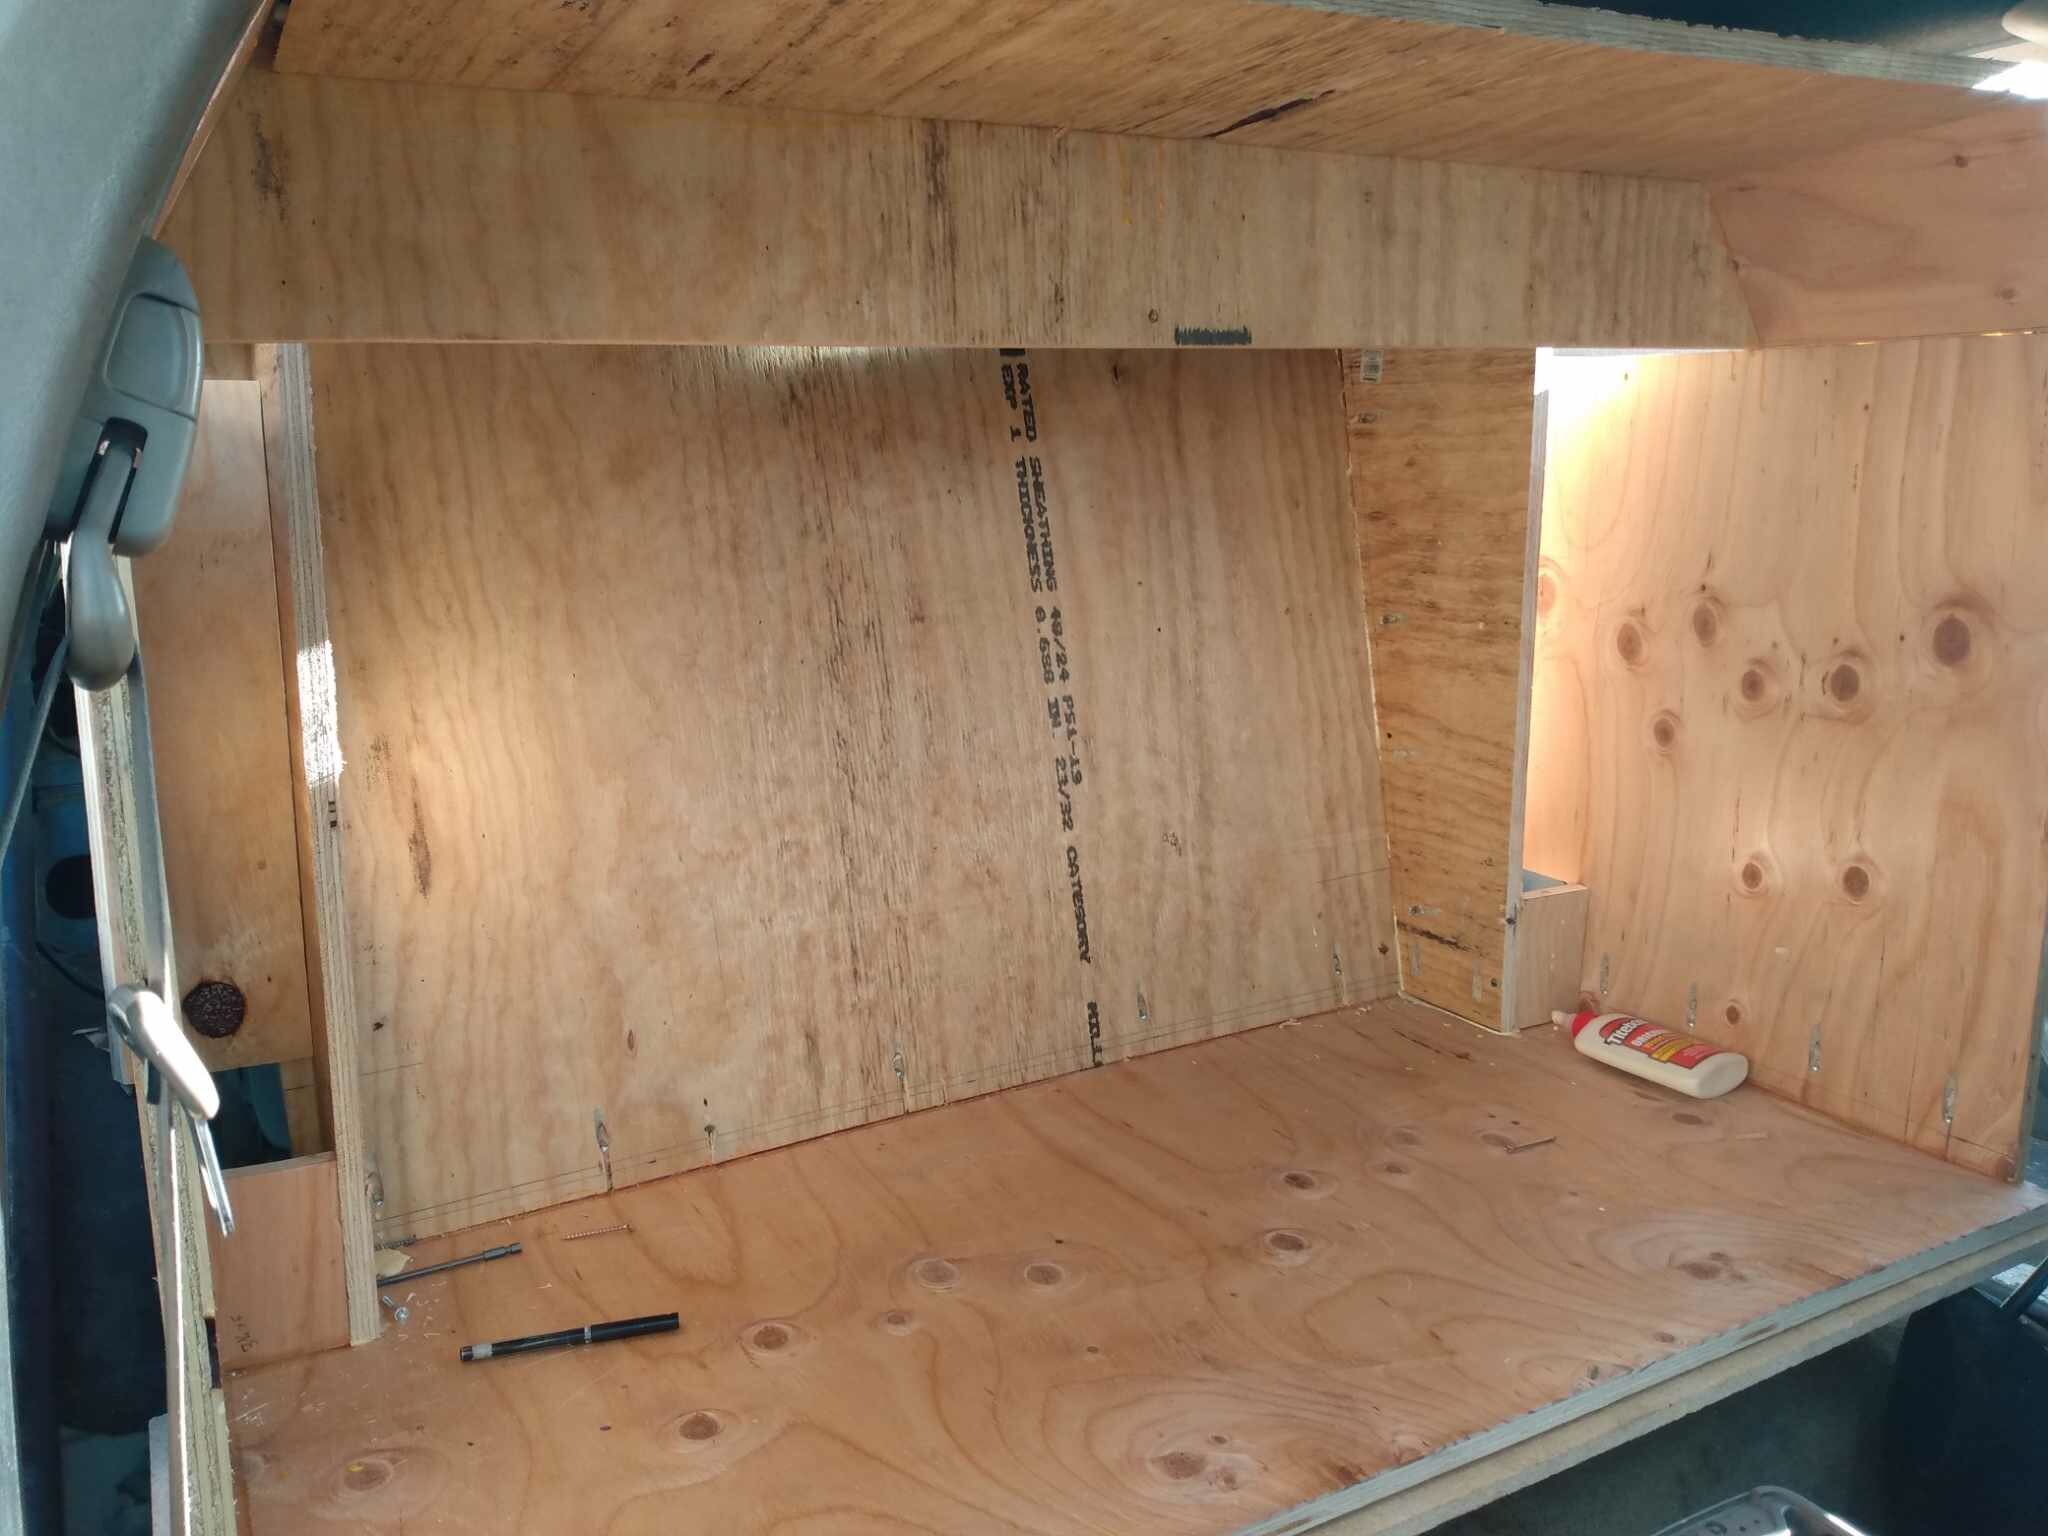
getting the inner shell done tonight
2 points
-
2 points
-
Who remembers when I use to post my "REALTIME" videos? Well they are coming back2 points
-
getting older sure does suck2 points
-
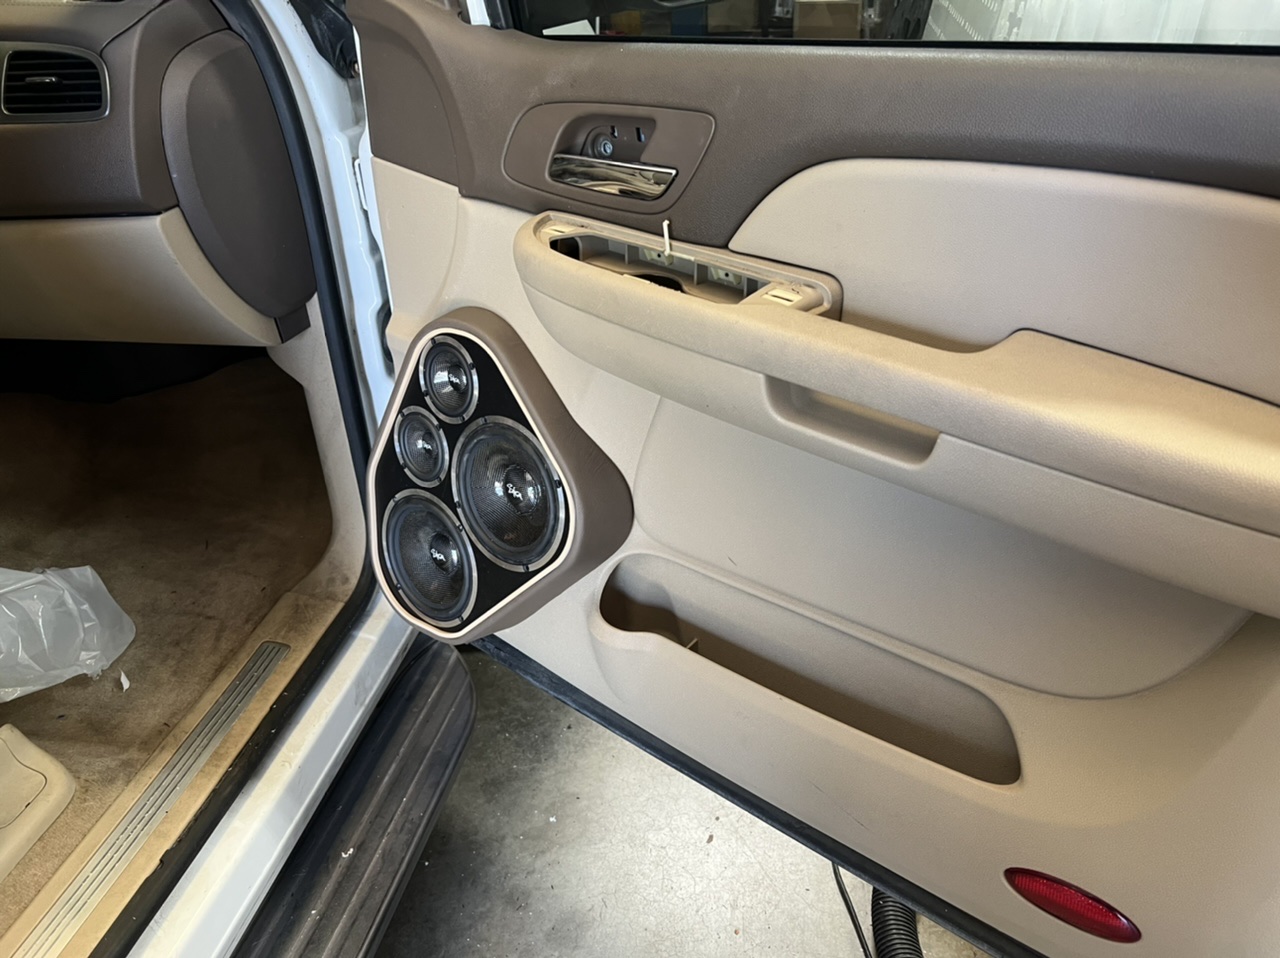
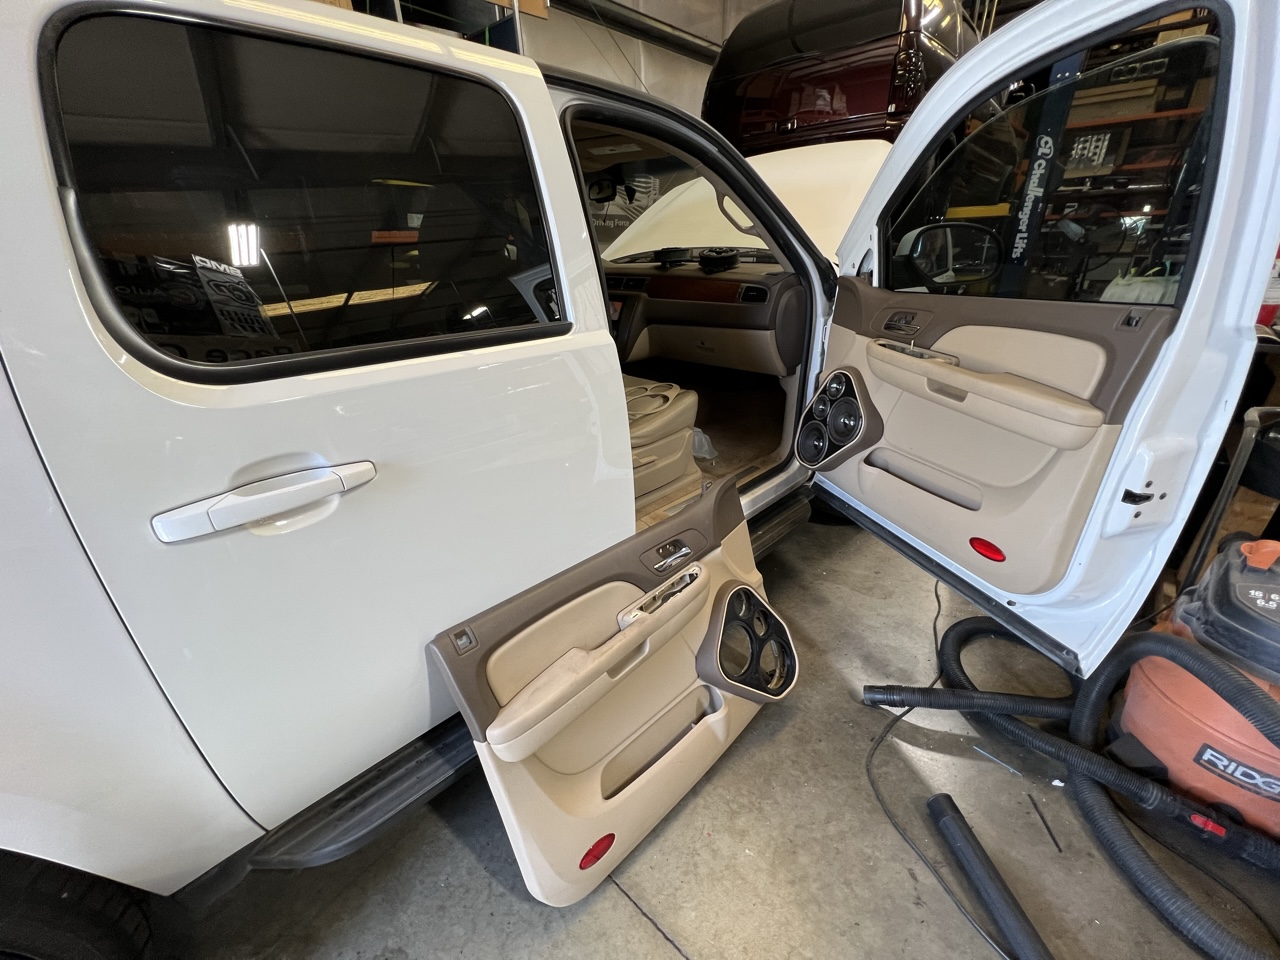
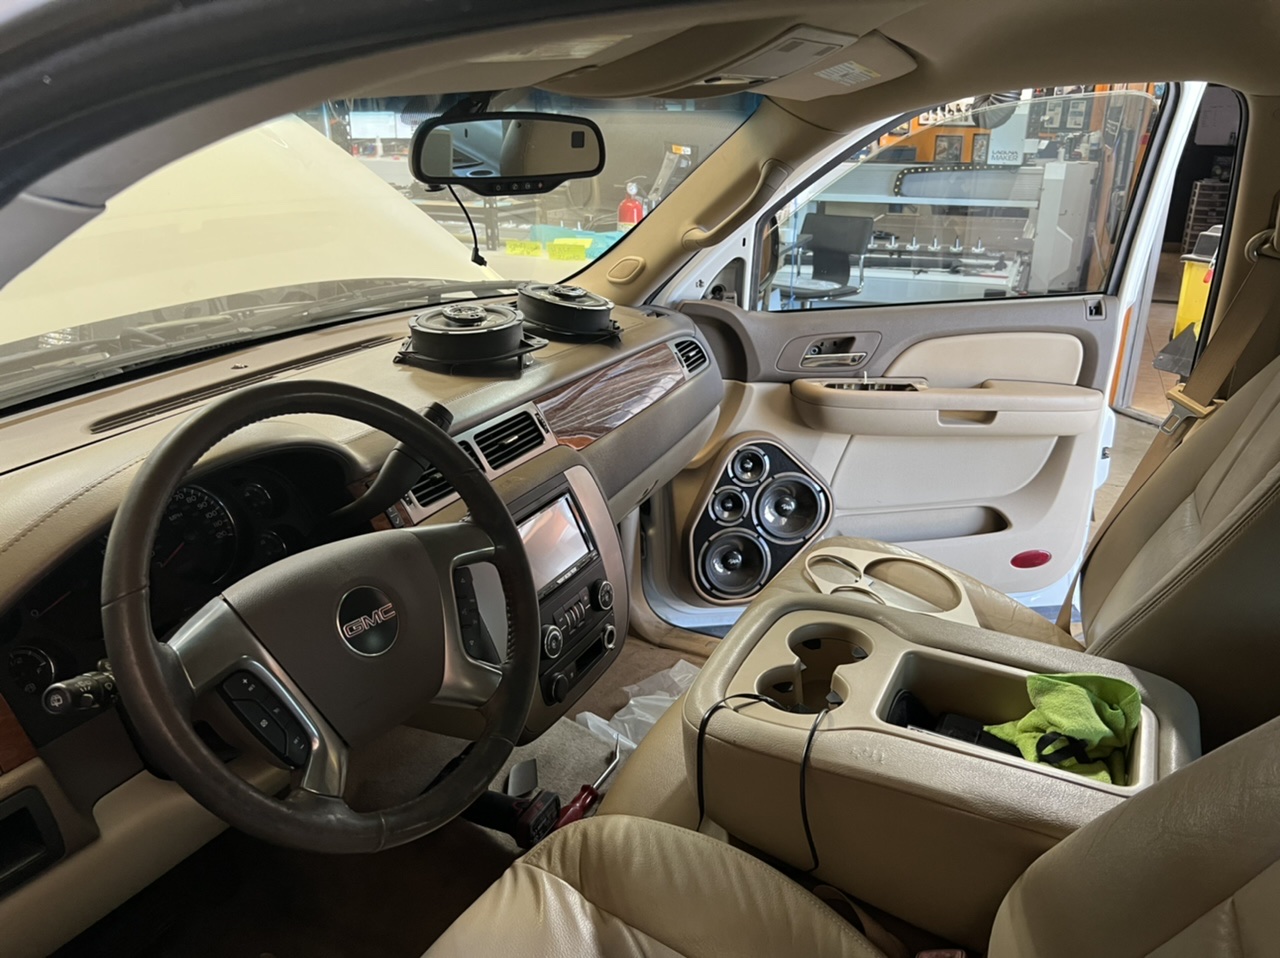
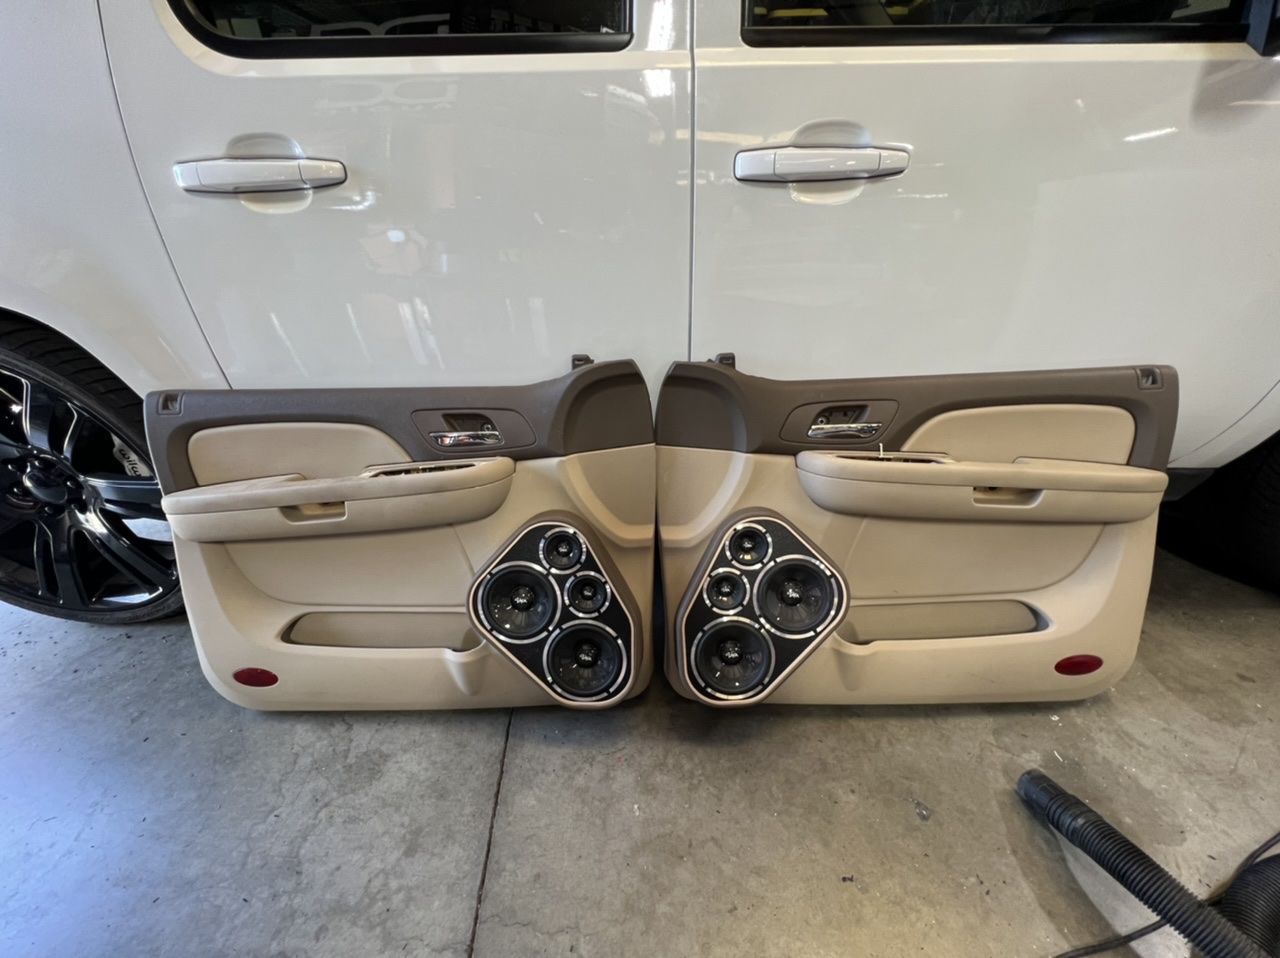
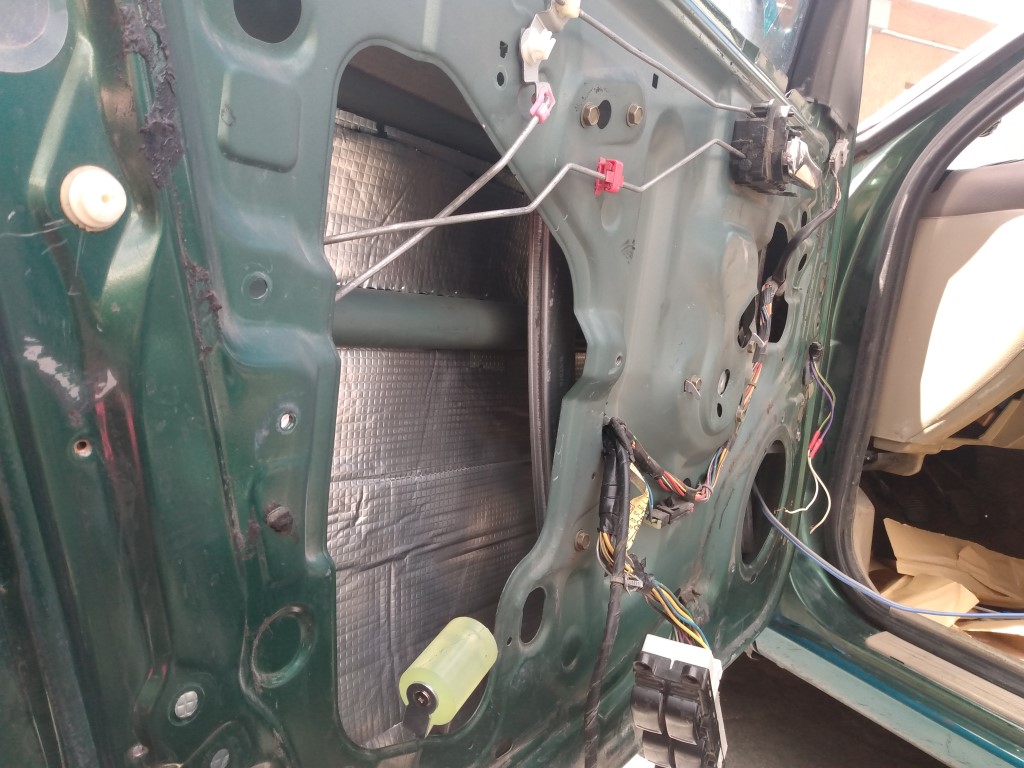
recoil has new amps coming amp ill be getting 3x of the 2500's to replace the 1200's , i also did start to deaden the doors got the driver side door outer skin done today , hoping to get one door done each day , i think im going to get some 150 mil stuff to do the inner panel with instead of using the 394mil stuff on that as well
2 points
-
I would definitely look into seat lift kits to fit a box of proper size for those subs, make that enclosure with 3/4" birch wood, dual layer for the baffle, proper bracing inside, specs are 4 cubic feet net 64 square inches of port area tuned to 32Hz, I believe the sub cutouts need to be 7.34". Depending on how much space you find to work with I could fine tune that spec to increase output and low end extension as possible.1 point
-
I did not go the LOC route. I have a helix Dsp with high level input. And yes that was the only issue I had. We even adjusted the internal resistance of the DSP. Otherwise it would have been perfect im definitely lucky on having an easier time to get an aftermarket headunit with trim plate
1 point
-
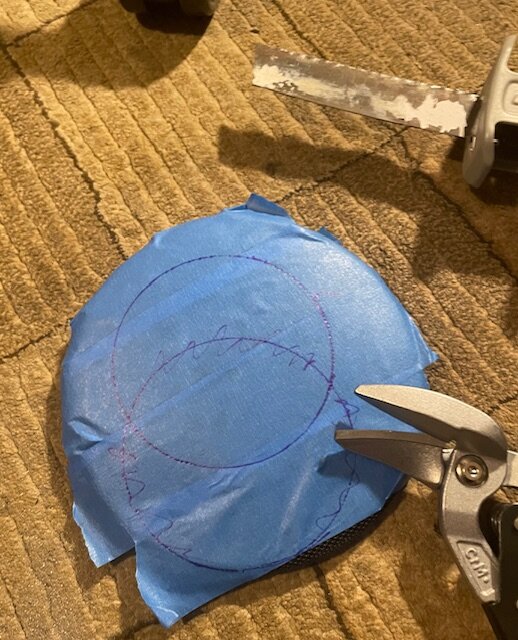
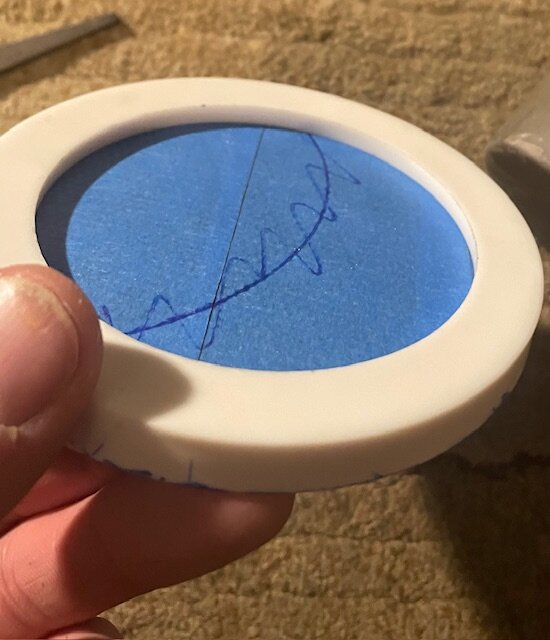
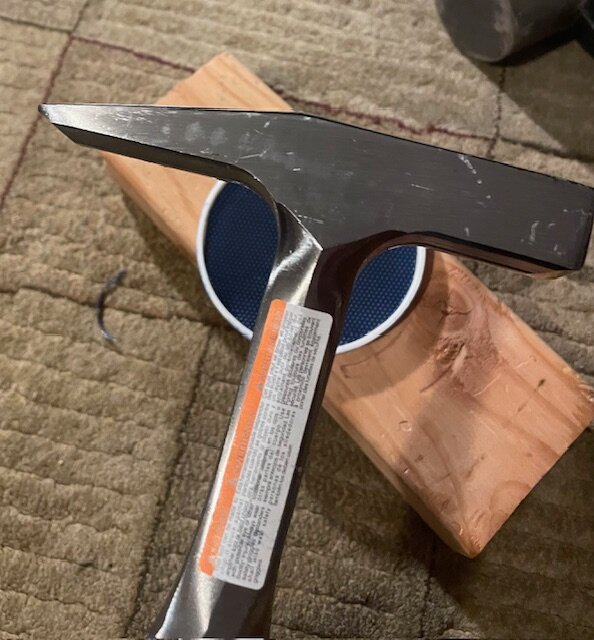
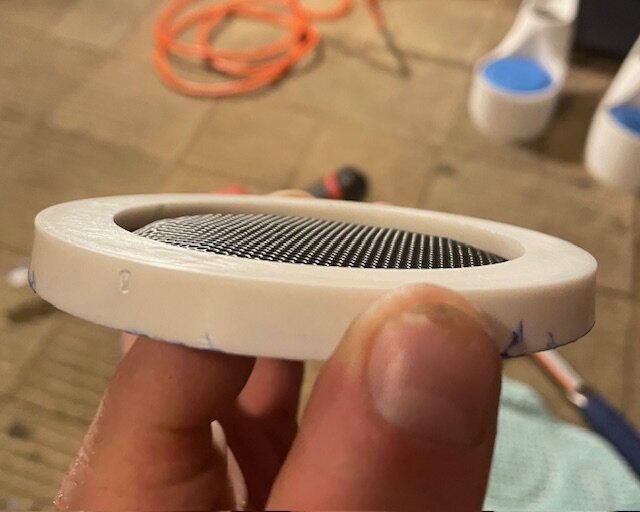
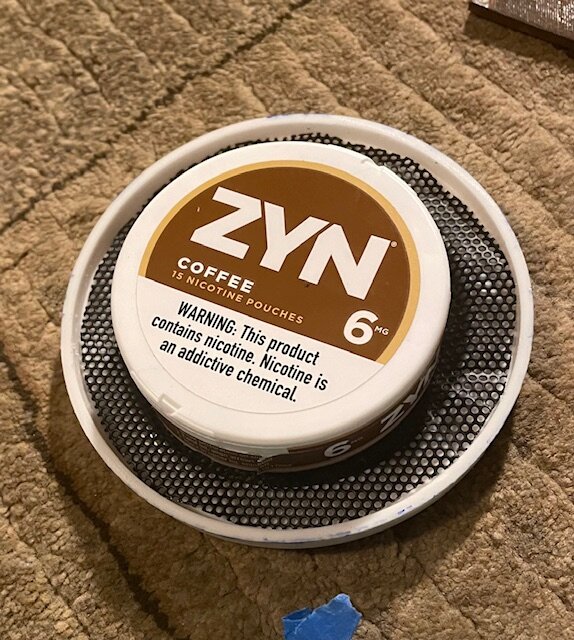
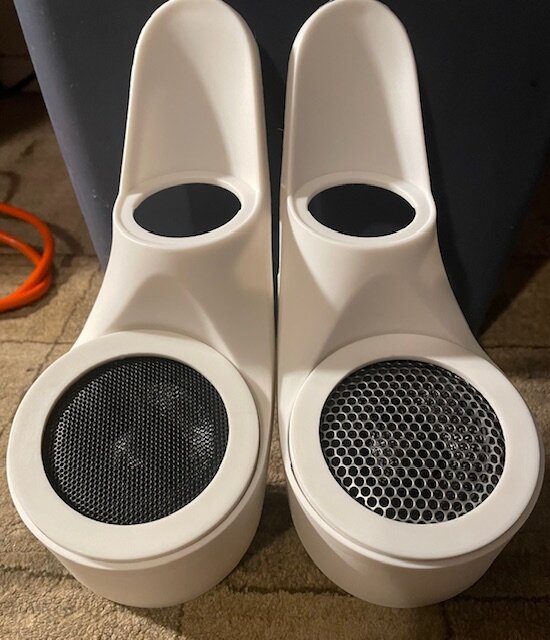
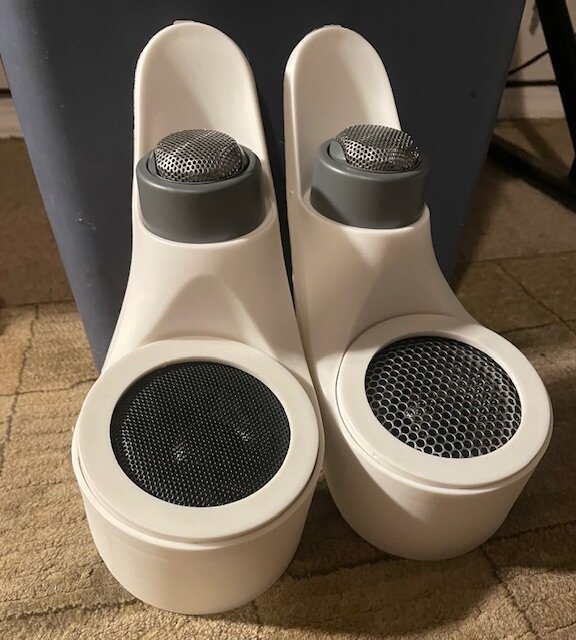
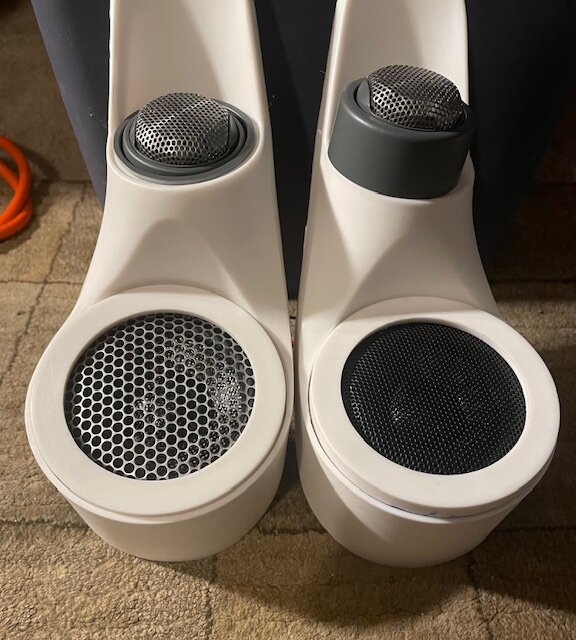
Sorry I've been MIA. As for the 74AH pro I'm not sure you should get it. I'm second guessing my purchase already and I cant send it back. I'm still going to try and use it but i wish I would have done more research. Apparently these cells have a really narrow voltage range. It might work for me but I'm still a ways off from testing them out. ----------------UPDATE 2/25/24--------- I decided to revamp my system entirely. I sold everything from my old car except 2 SA x-8's, my SIA2500.1d, and my wiring. I got rid of my Infinity Kappa 3-ways and purchased Infinity Kappa Perfect 3-ways. The new setup is as follows Helix M Four DSP running my tweets and Midrange 2 Sound Digital 800.4's running my midbass, center channel, and rear speakers SIA2500.1d running 2 SA X-8v.4's - 2ohm's @ 2000watts - Also contemplating building a T-line enclosure for these Also I decided to do custom a-pillars. So on with that! These are my Infinity Kappa 300m midranges all taped up and ready to be trimmed. The two things i dislike about these are that the mounting tabs add an inch of width and they don't come with grills. Gonna have to fix that. Left one trimmed, on the right you can see the problem. These are some funky a pillar pods I found on amazon. I'll still need to do some fiberglassing and trimming once my second set of a-pillars come in. Not gonna modify the originals. Thank you skar audio for the sacrificial grill Fit's but is not done. This is a tinner's hammer hammer. Time to shape some metal Not perfect but you can see what I'm going for. A can of zyn fit's nicely to help with the shaping Also had some steel round mesh from another project So I decided to try that as well Side - by - side of the two grill options Now for the tweeters. The flush mounts we too big so originally I was going to use these. But it looks hideous and bug-eyed. So I trimmed one of the flush-mounts to fit. And ditched the black grill. The steel looks better imo, especially when matching the tweeter. There's still a lot I need to do to these. Currently the grill is sitting on the midrange surround so I need to fix that, and the pods still need to be fiber glassed to the a-pillars and covered with some kid of material. But that is for another day.
1 point
-
You just need to make sure your subs do not go over Xmax at the operating power, but since your amplifier exceeds by far the RMS of your subs you will have to be very careful not going too far, generally oversized enclosures and sub overpowering in a hazardous mix with a very likely outcome of subs mechanical damage so you need to set the gain of the amp not to the clipping point but rather lesser that the subs can can tolerate. You can find maximum power in a similar way as before, in WinISD up power until Xmax is reached in the enclosure size you chose and you can clamp the amp to roughly reach that power and set gains accordingly so you can't go over the limit on normal use.1 point
-
Swapped it without losing a single piece of resolution, thank you so much!!!1 point
-
Bumping up this oldie but goodie here. So for the past 2 years or so I've been using this same T-Line box with this same now 14 year old Subwoofer from the now defunked company in my home theater build. I'm getting ready to build a second one as I have a still never used eD 13kv.4 subwoofer that I'm gonna use to have a dual 12 subwoofer setup in my theater room. If anyone is interested in seeing said theater room I have linked it over from my Reddit page here: Reddit Theater Page1 point
-
Correct. The reason for so many is due to some people using multiple runs of power wire from the front of the vehicle to the back. In my truck for example I have 9 positive runs of 1/0 and 9 negative runs of 1/0 (18 total) coming from my 3 alts under the hood to the back batteries. So when people have larger systems with over 1600amps worth of alternator charging, multiple 5,000+ watt rms amps, etc one single run of 1/0 or even 4/0 coming from under the hood simply cant handle the current load. Now take into consideration of the length of said wire which reduces its current rating, resistance and voltage drop in the wire, hell even if you're pulling the maximum current limit from whatever wire you're running your going to have to factor in heat and even more resistance. So that is why there's multiple spots for additional wires to be connected so you can adapt to your needs and overcome obstacles and restrictions in the wire. Hopefully that helps.1 point
-
The Skar Audio RP 1500.1D 1500W RMS amp which has been tested to do rated power requires a 120A fuse. So your amp simply does not do rated power at all just looking at the fuse it uses. And the fact that your 60A fuse in the power line never blows just gives you an idea how little power you are actually running looking at the math Power = 120A x 13V = 1560W or just above the power rating. For 60A fuse: Power = 60A x 13V = 780W which never blows so you not even that (you don't even need electrical upgrades at this power). Factoring in amplifier efficiency at 60A you would be delivering about 300W to each driver but again not even that. I am going to guess you are actually delivering 200W to each 1250W driver or barely moving. If you are comfortable at that level you could just leave it like that but what needs to be done to get those subs moving is a new amp and an electrical to match, a cheap amp that does 2500W RMS is the D4S JP23 1.5 which is 299 and is ideal for systems with light electrical upgrades.1 point
-
Cool. None of my enclosures even have screws. Never had a "leak" or anything break apart. Odd. 80 amp, and not blowing the fuse. You are no where near, peak power. Not even half. Sooooo, your good. No breaking shit,.. from power anyway. Edit- maybe just a really poorly built enclosure. I've never, in my decades of audio, had the privilege of seeing anyone "blow" their box apart,, unless it was a pile of wood just hucked together, or a prefab. Even then, it wasnt from "power". But good luck to your goal mate.1 point
-
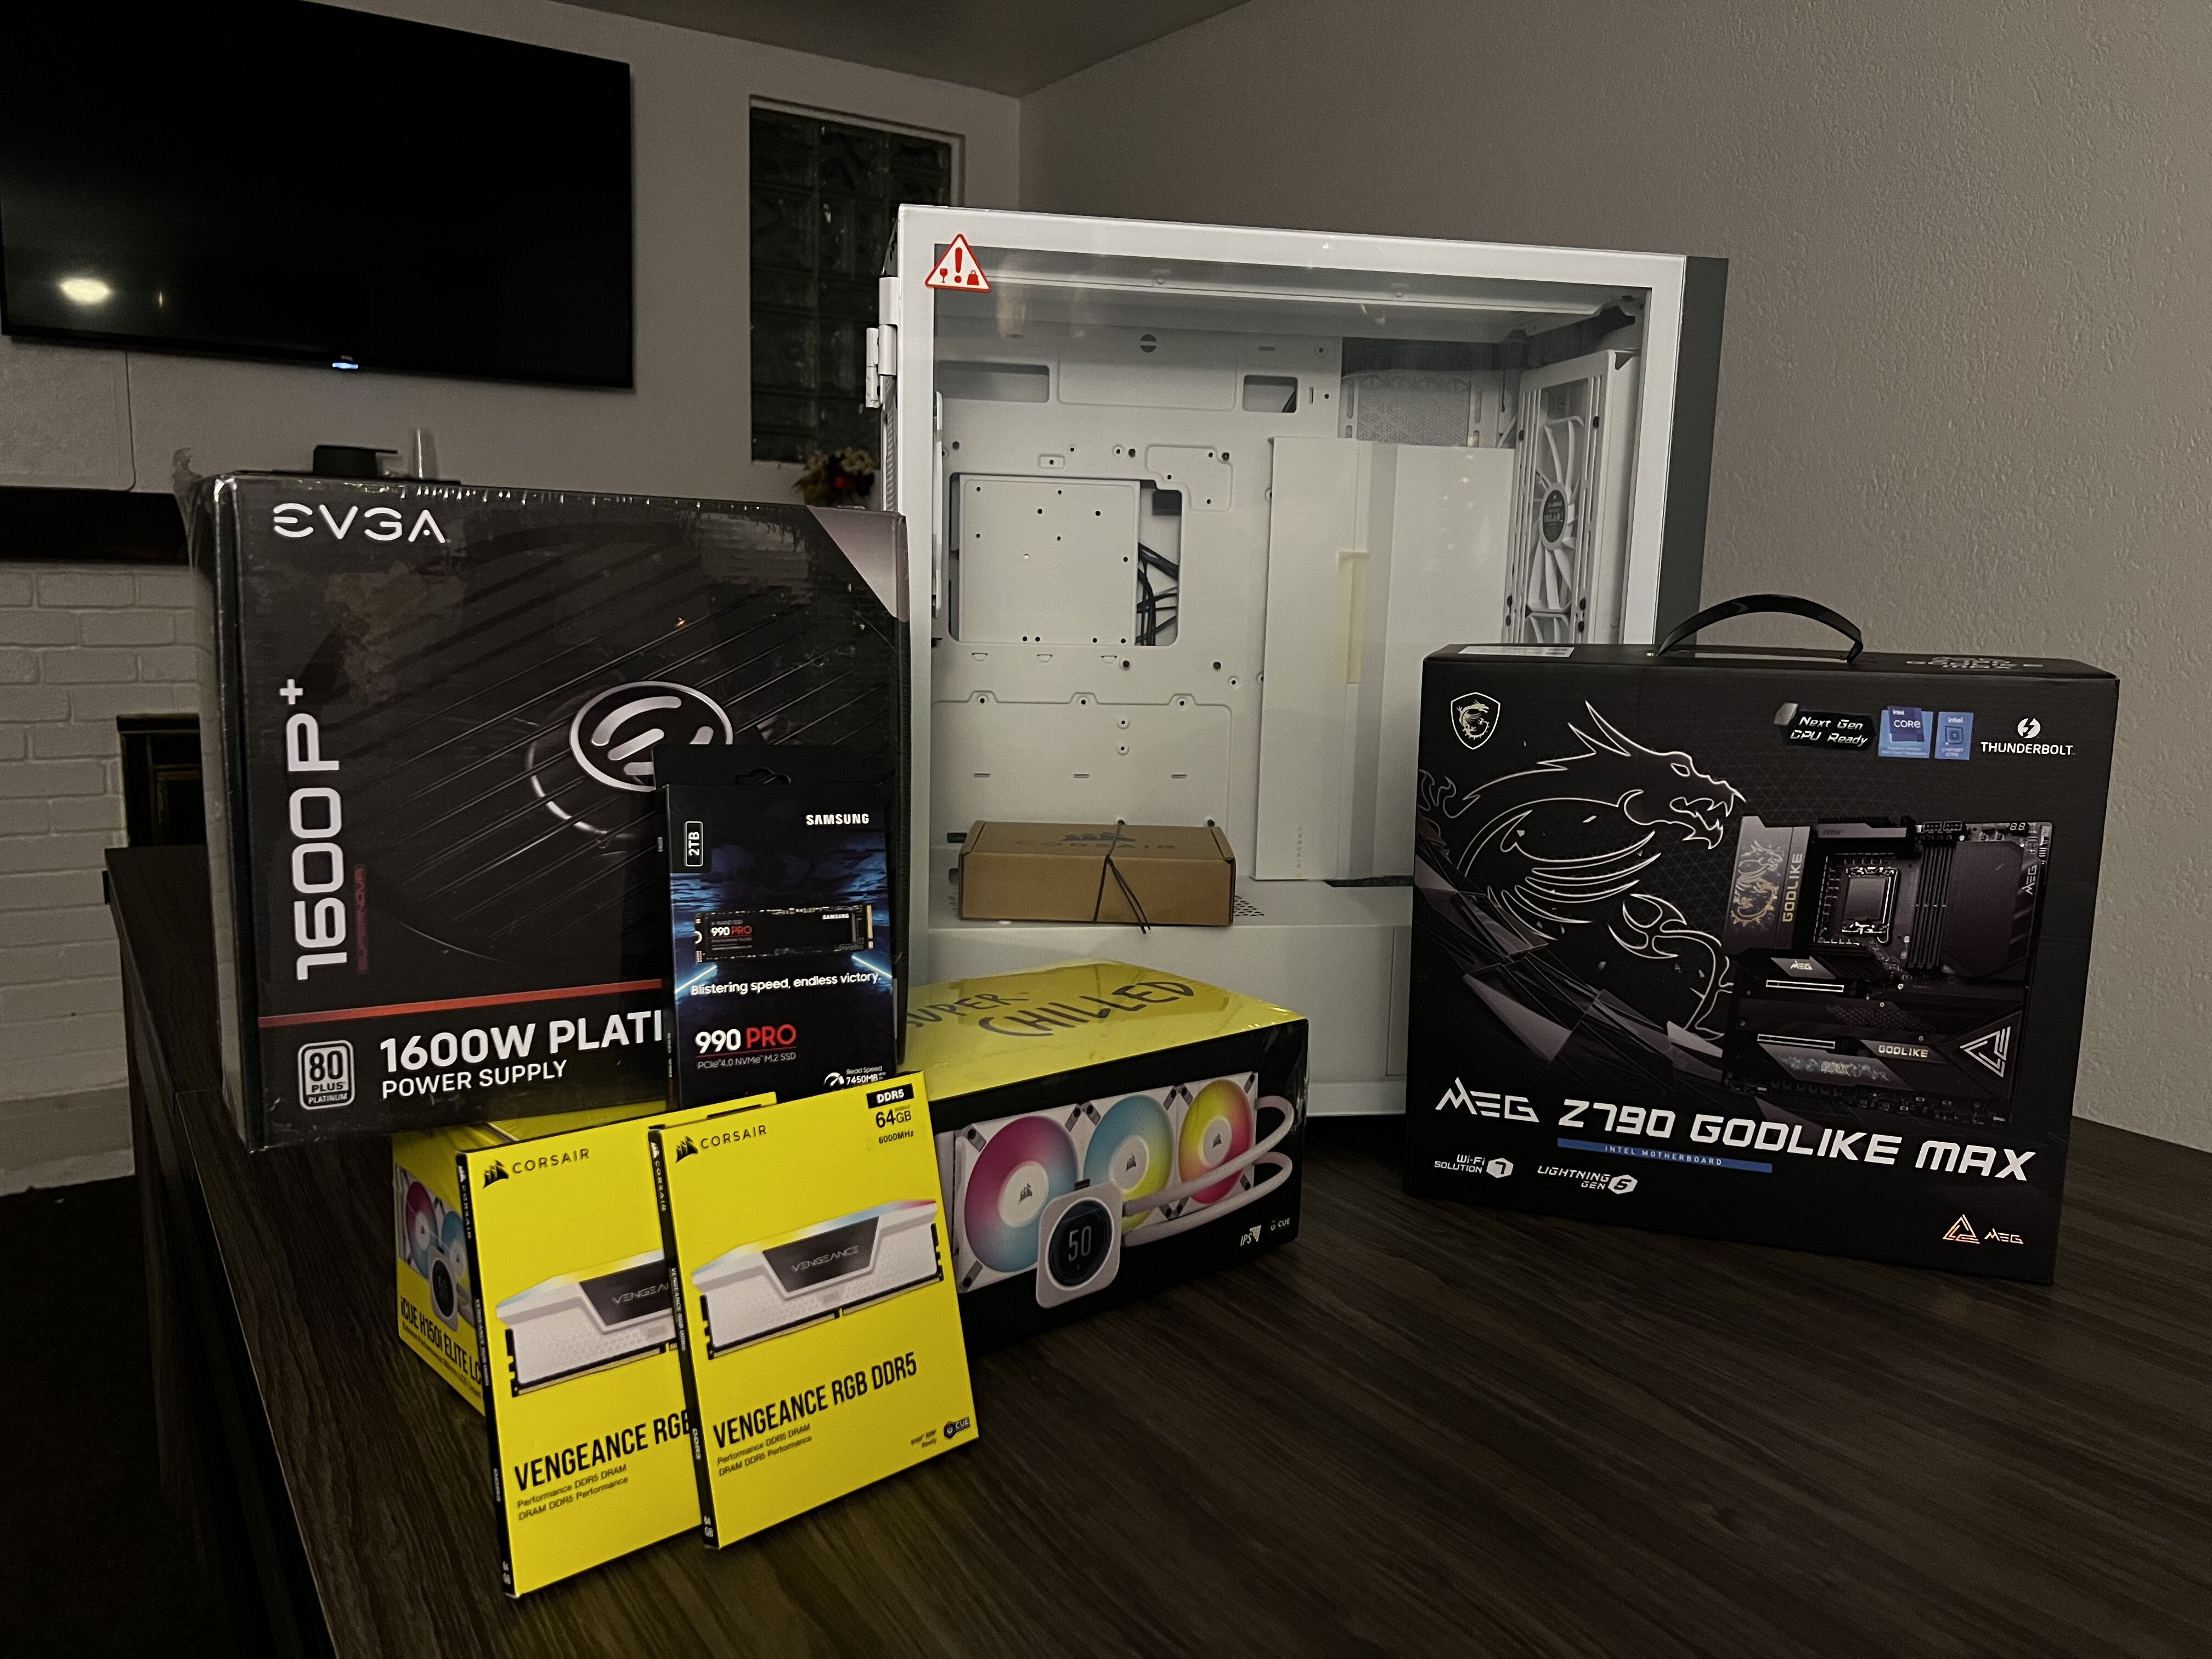
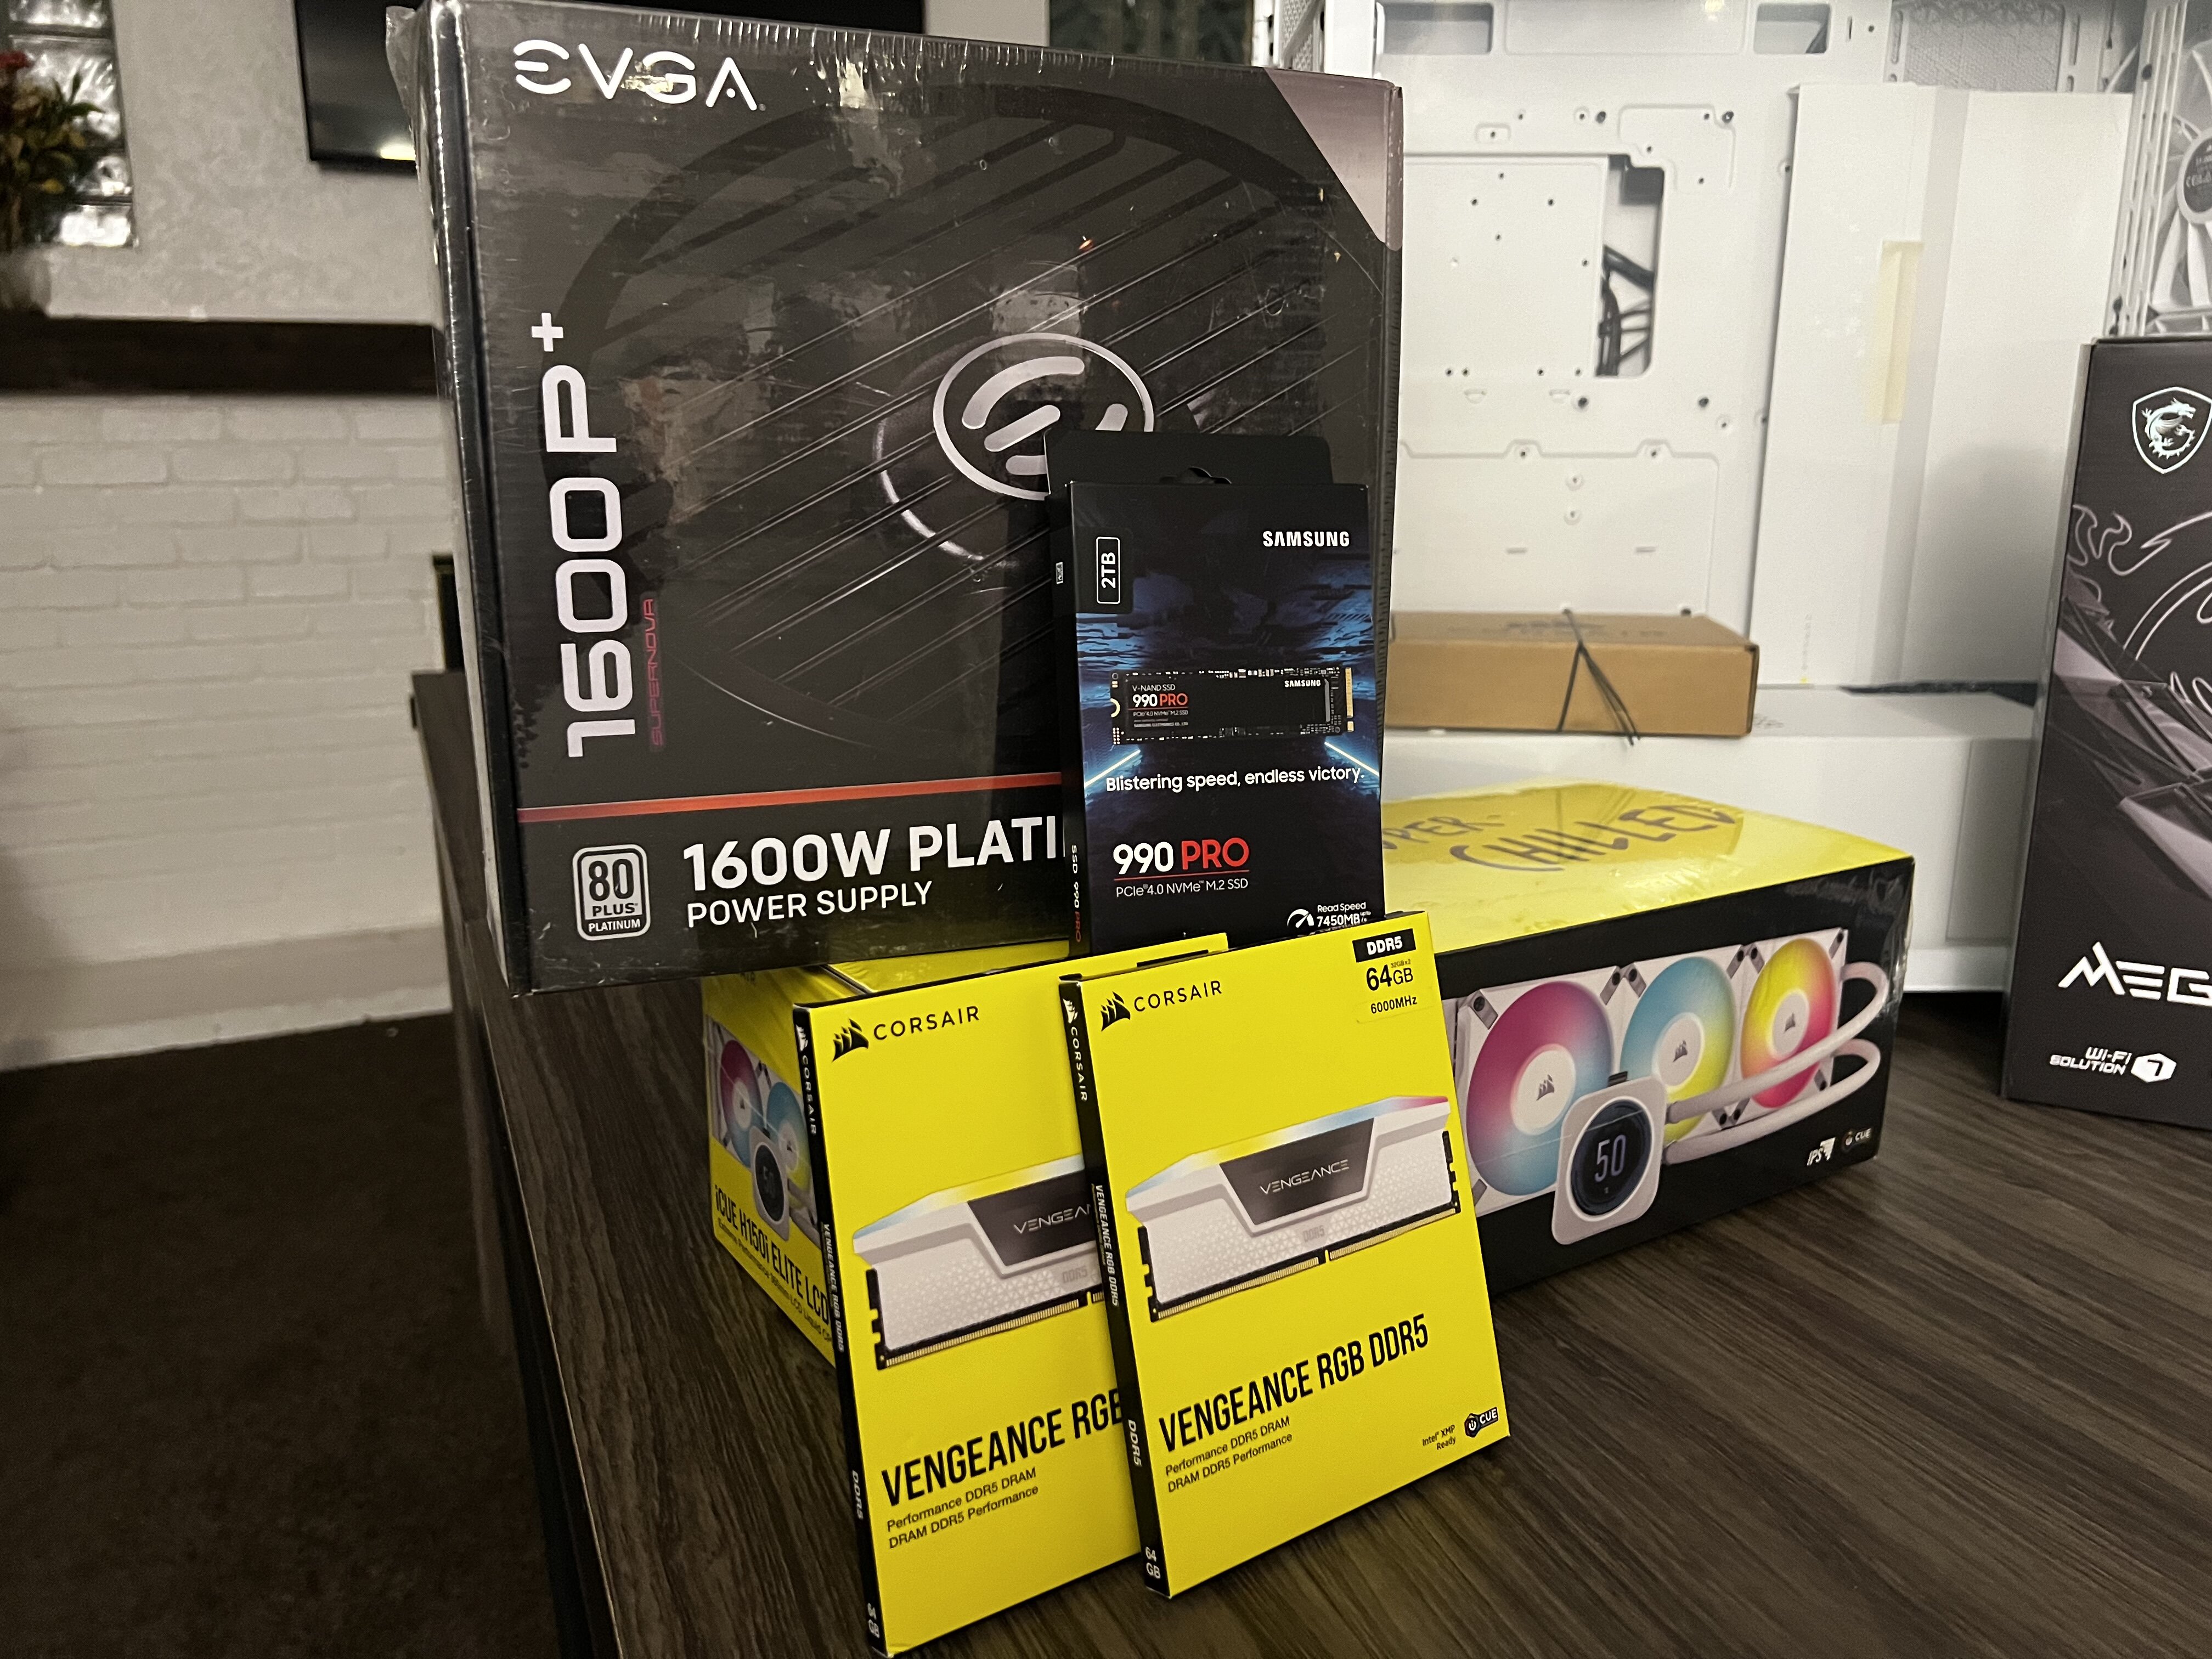
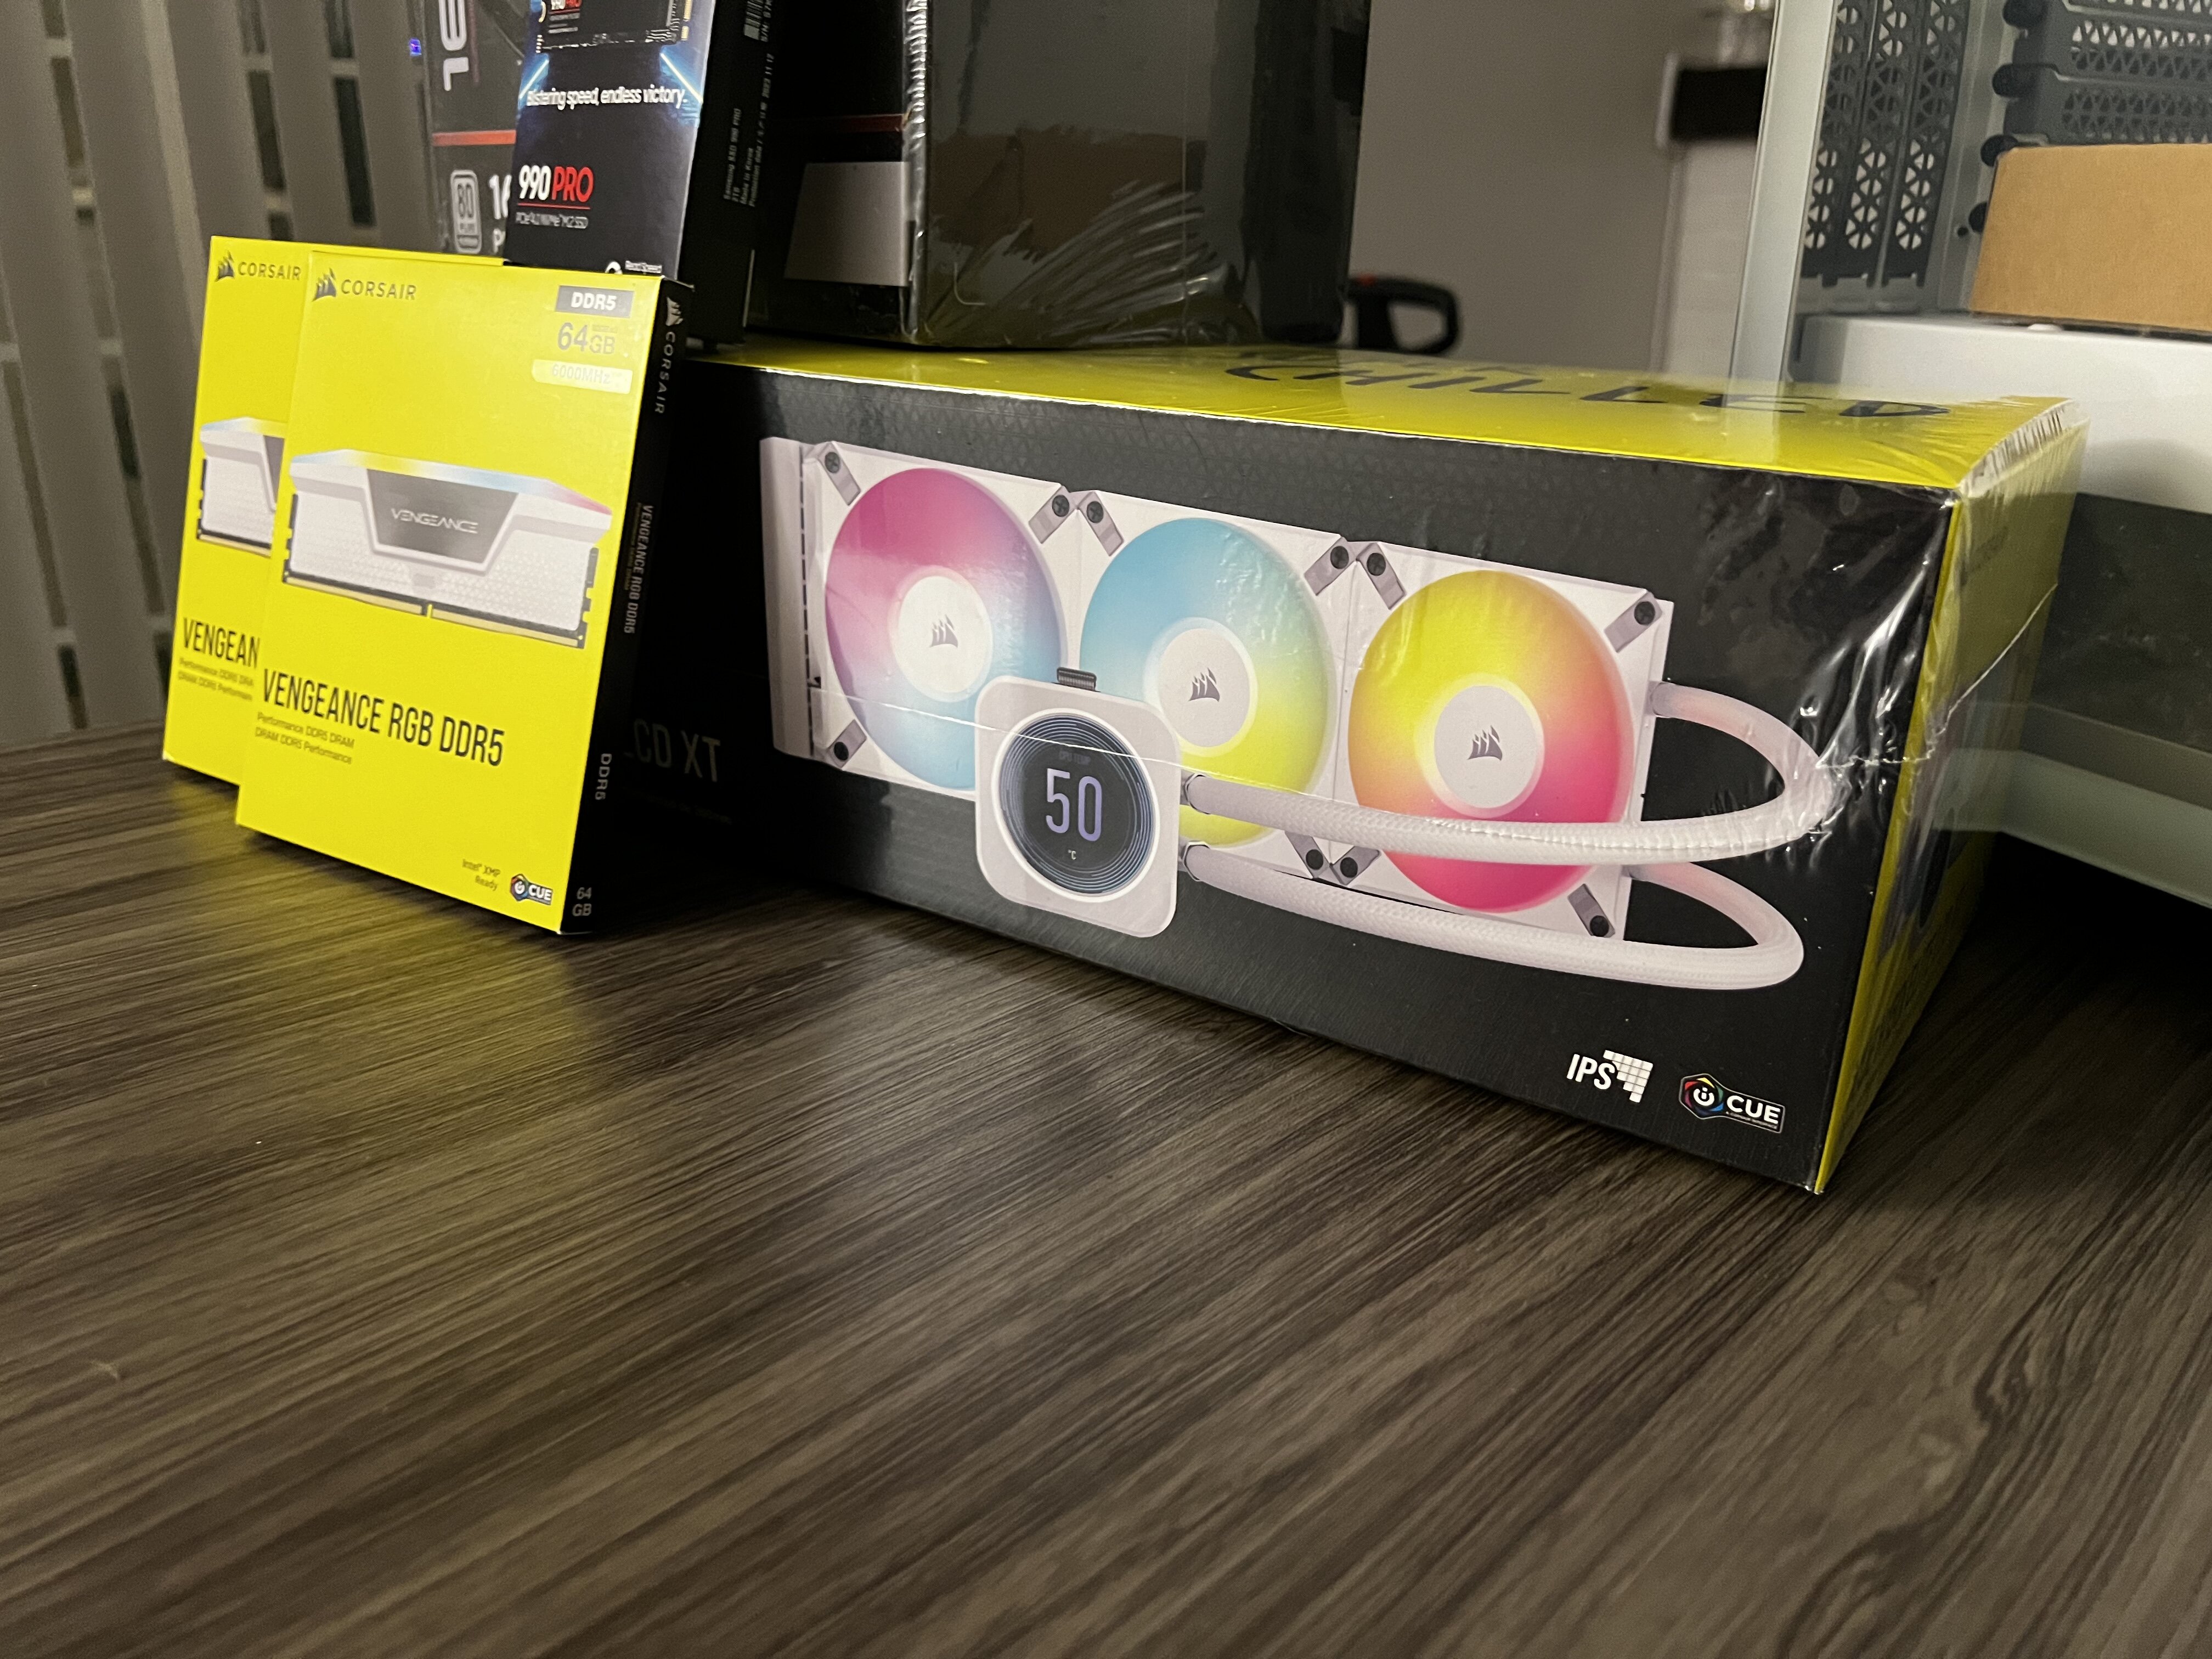
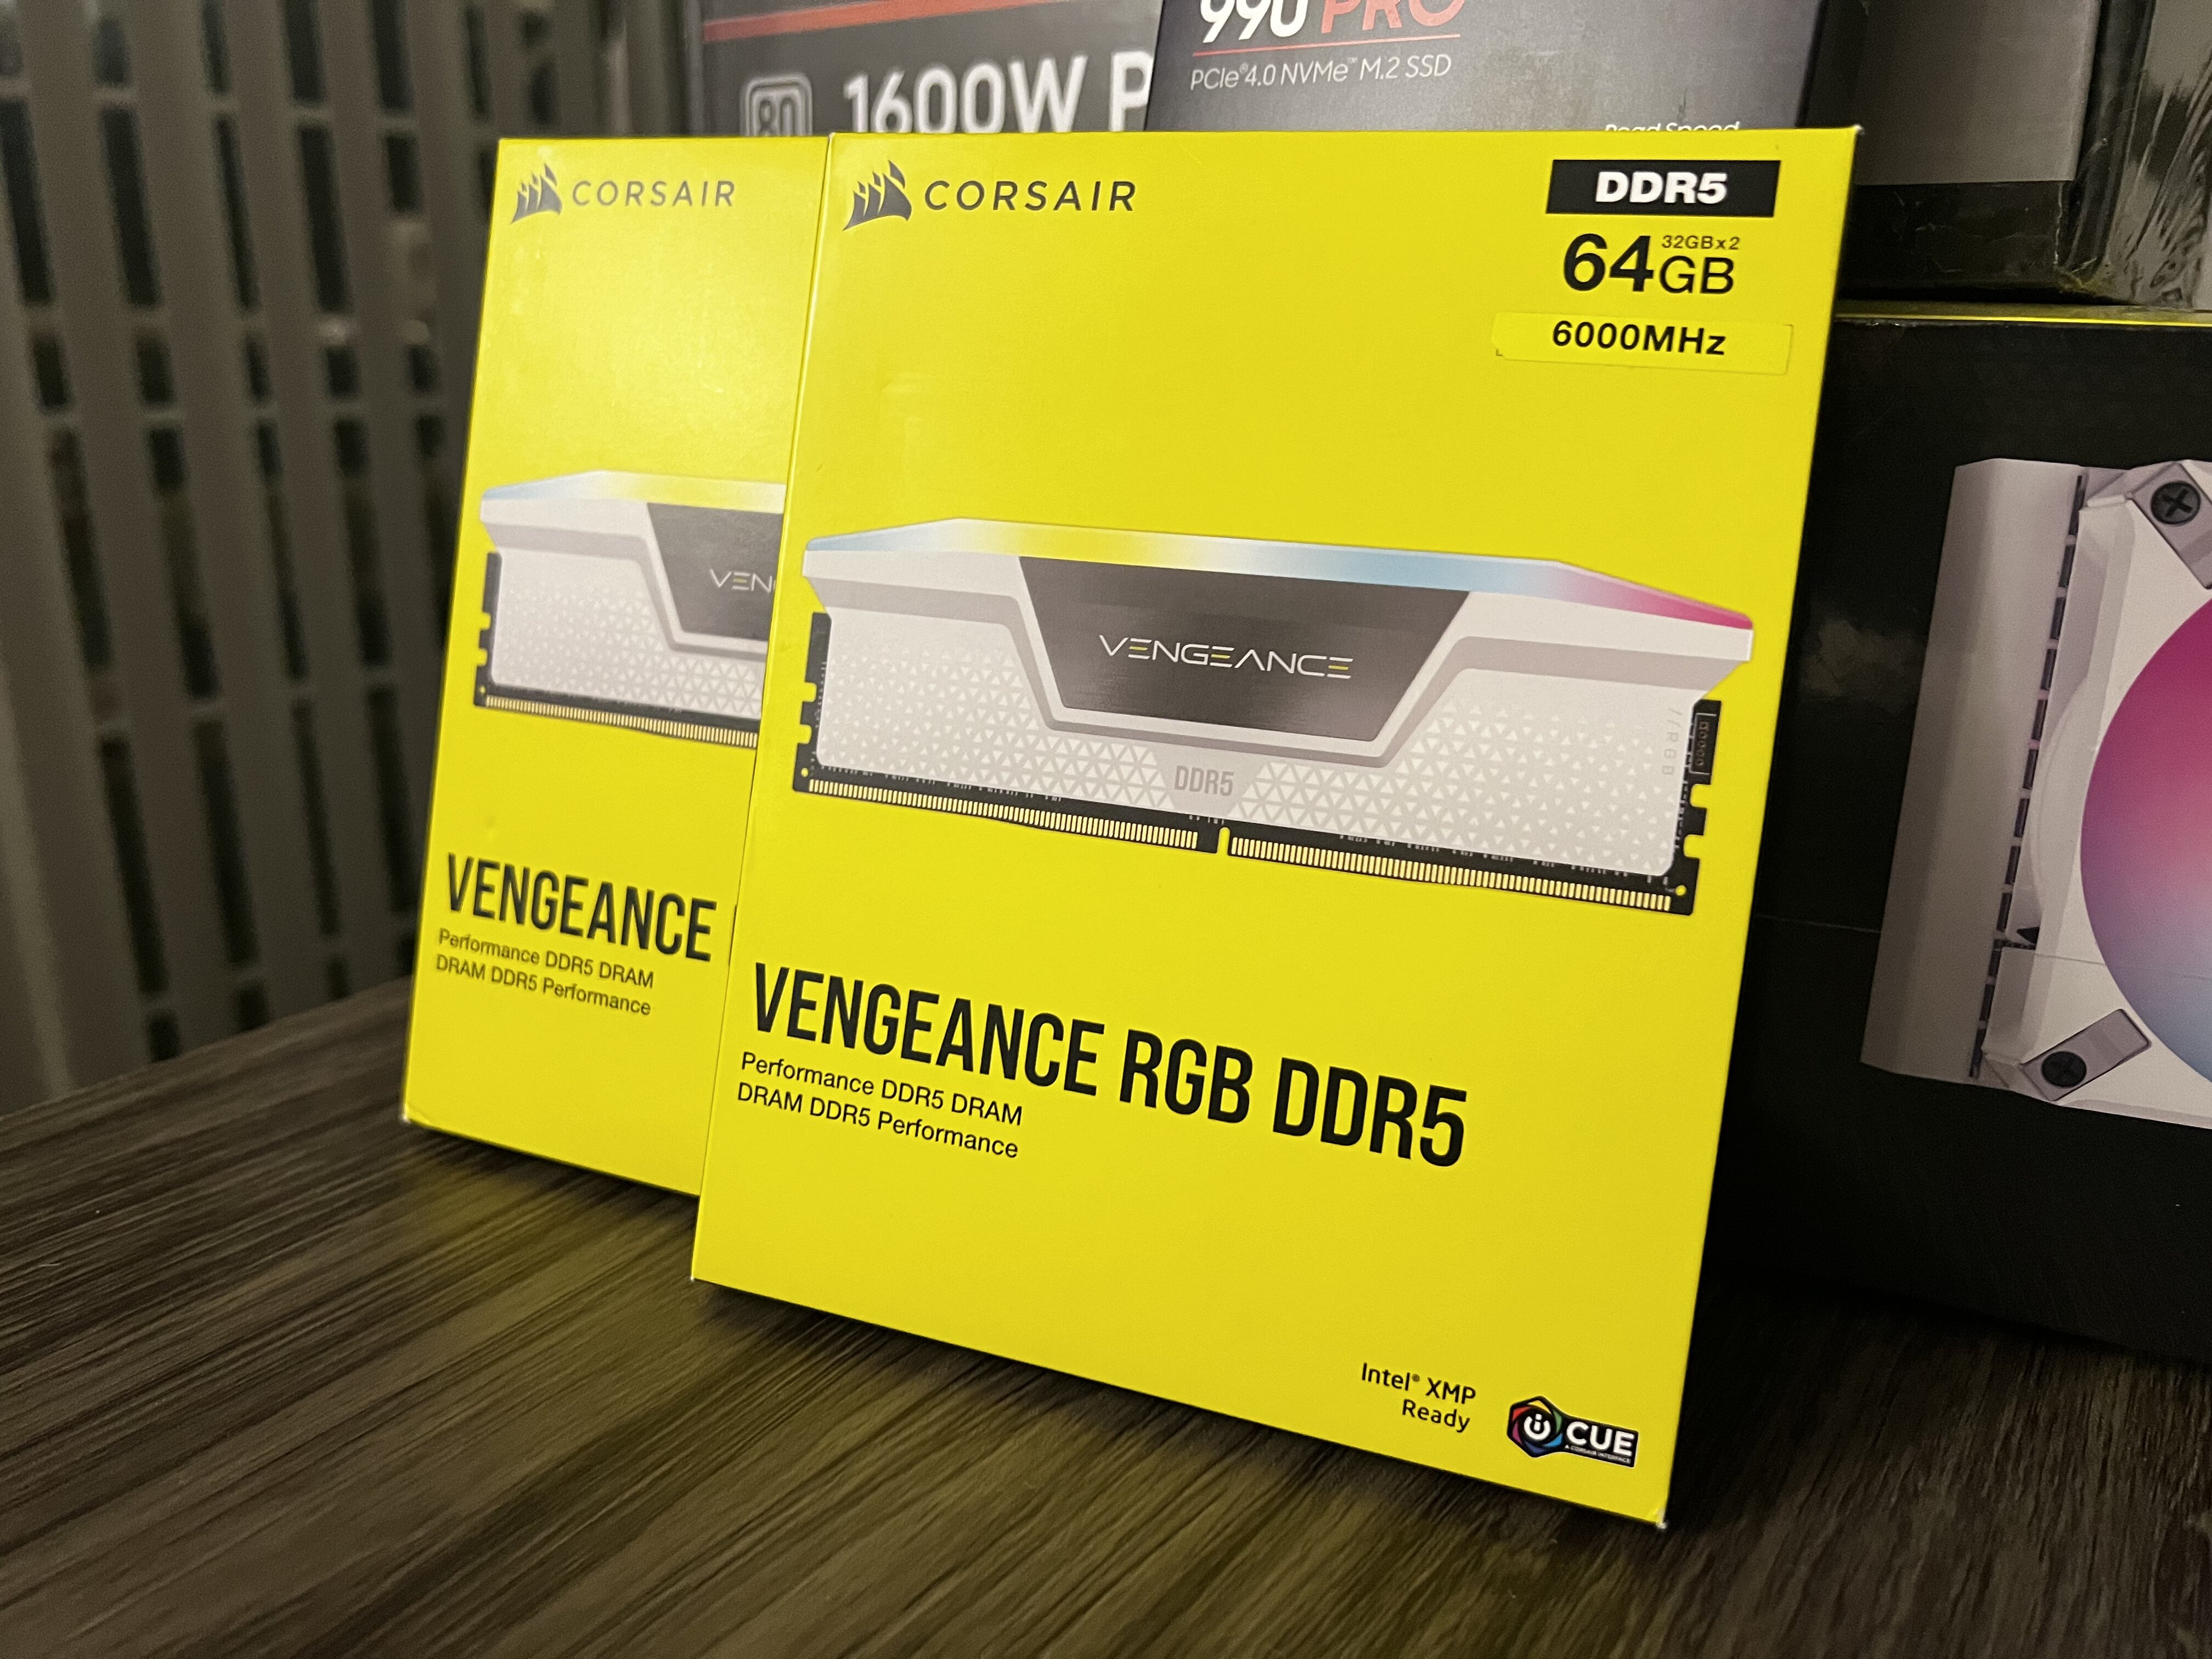
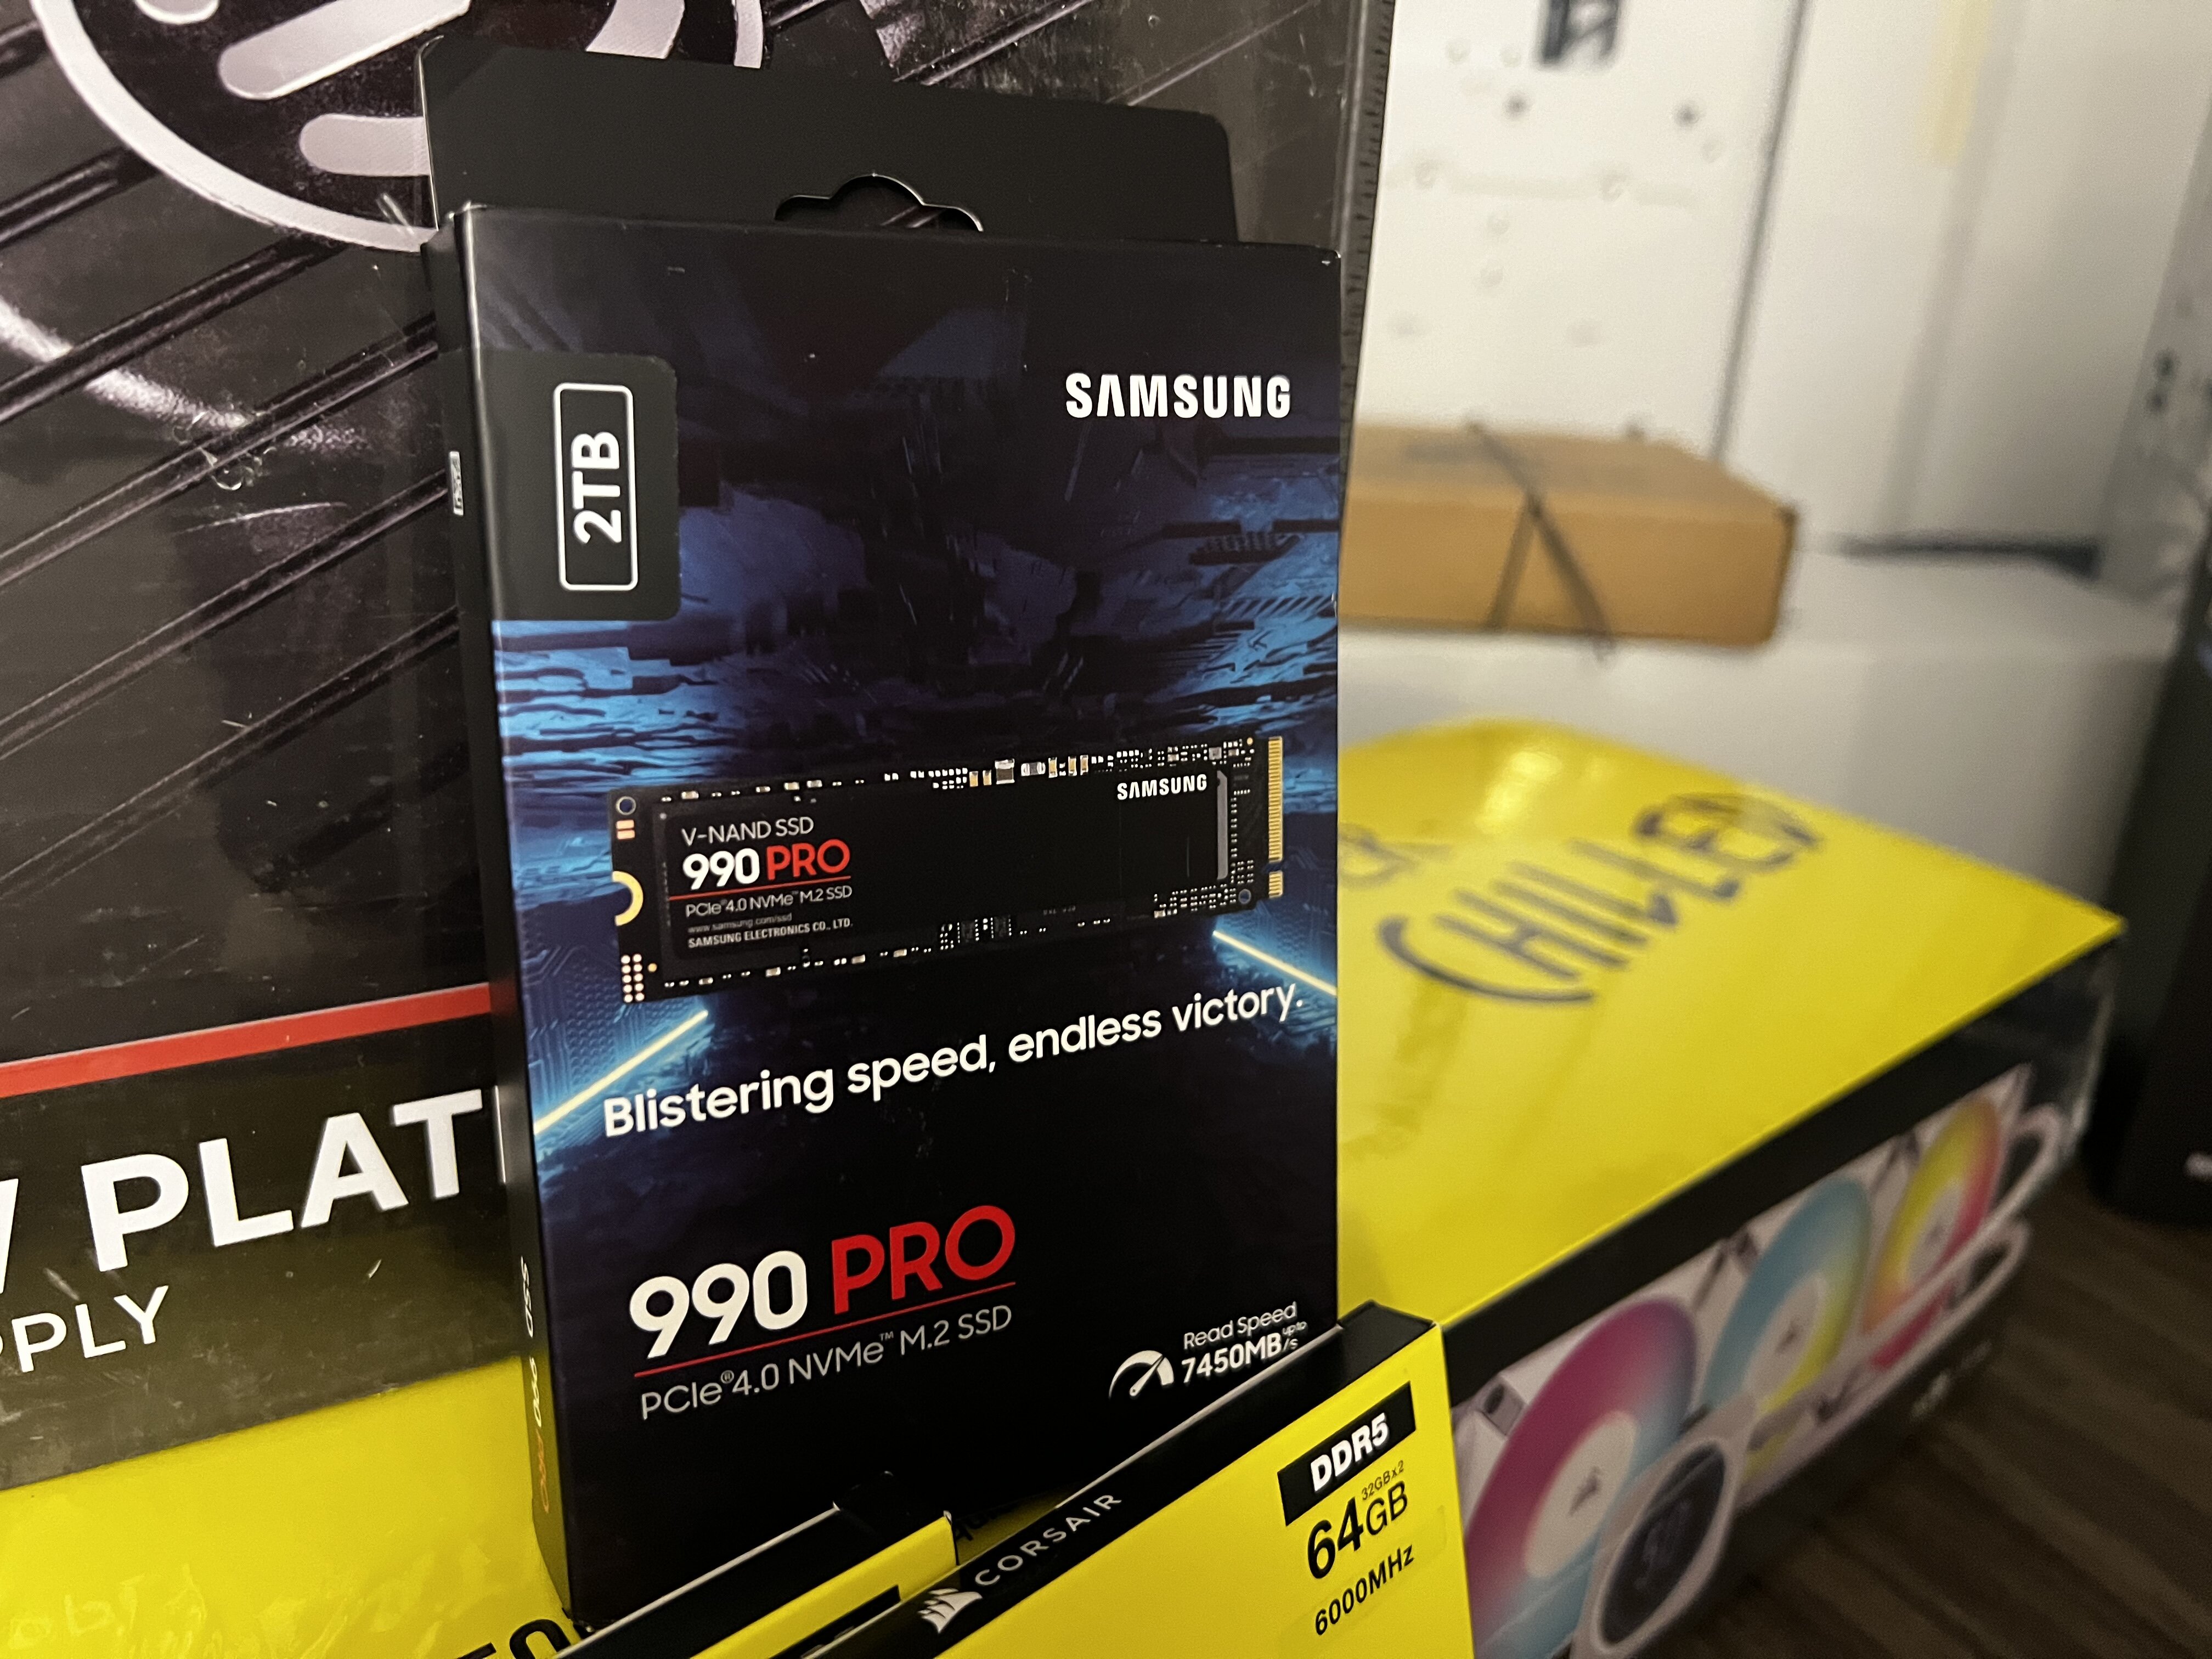
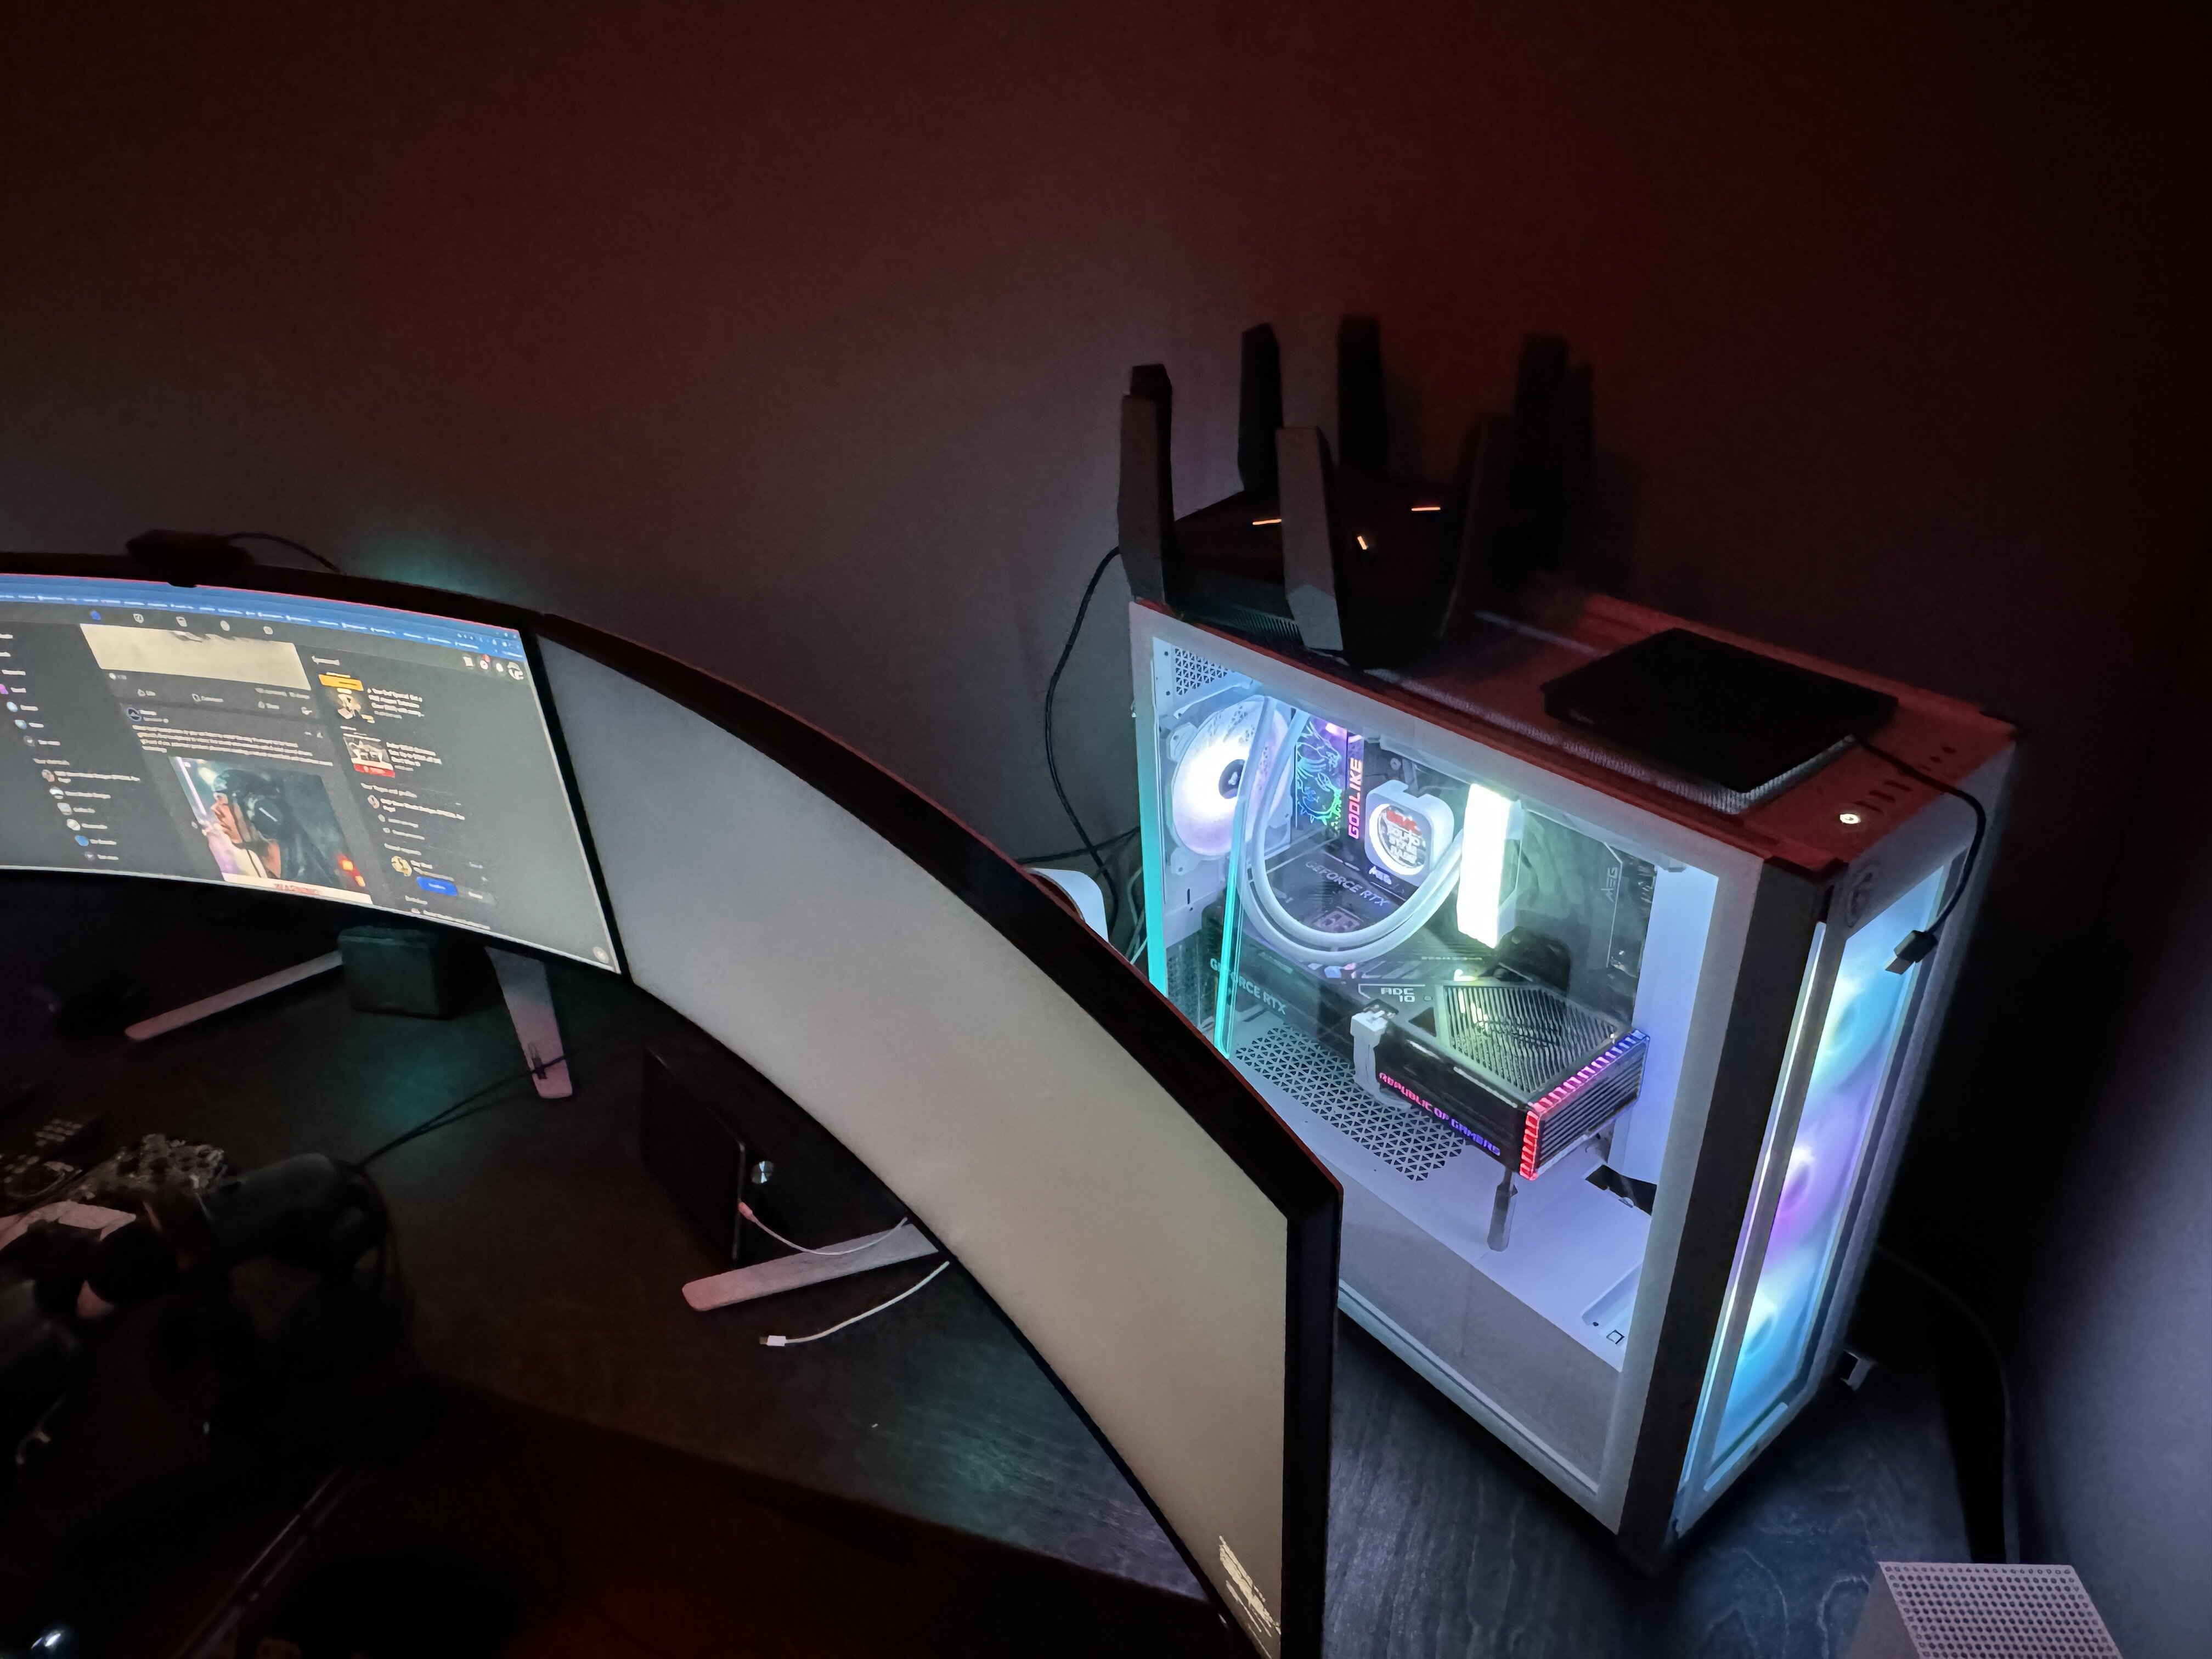
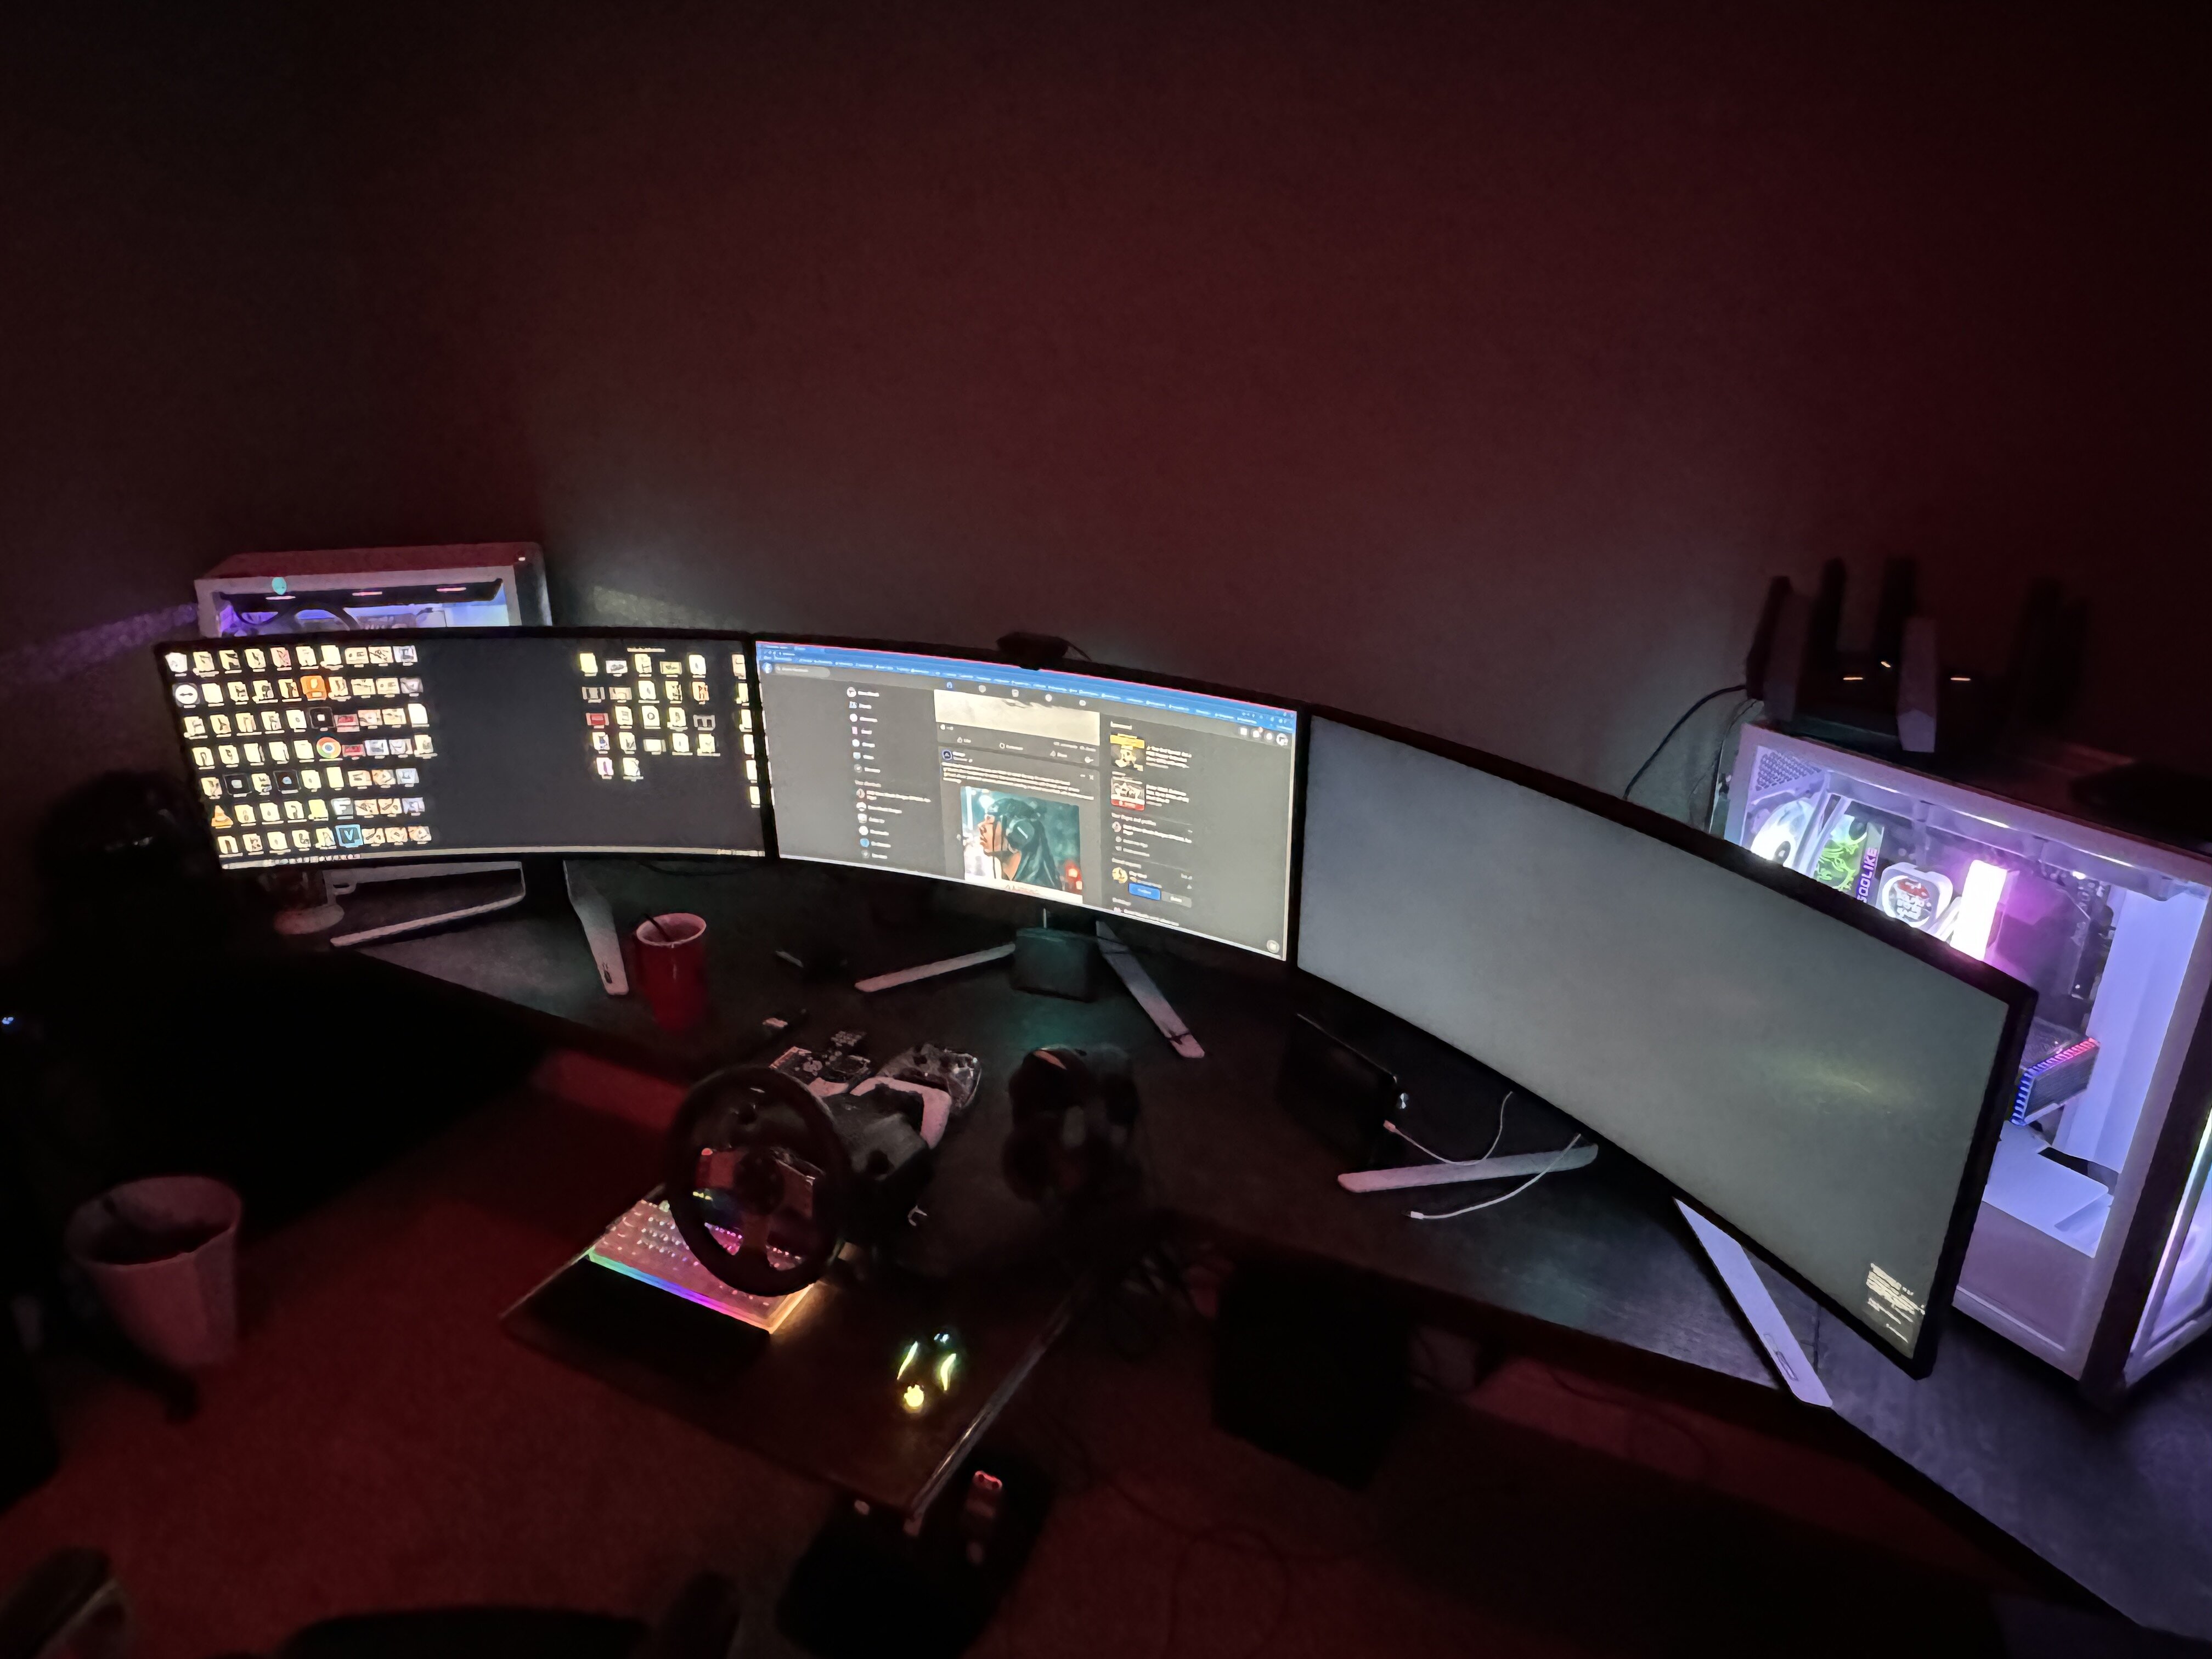
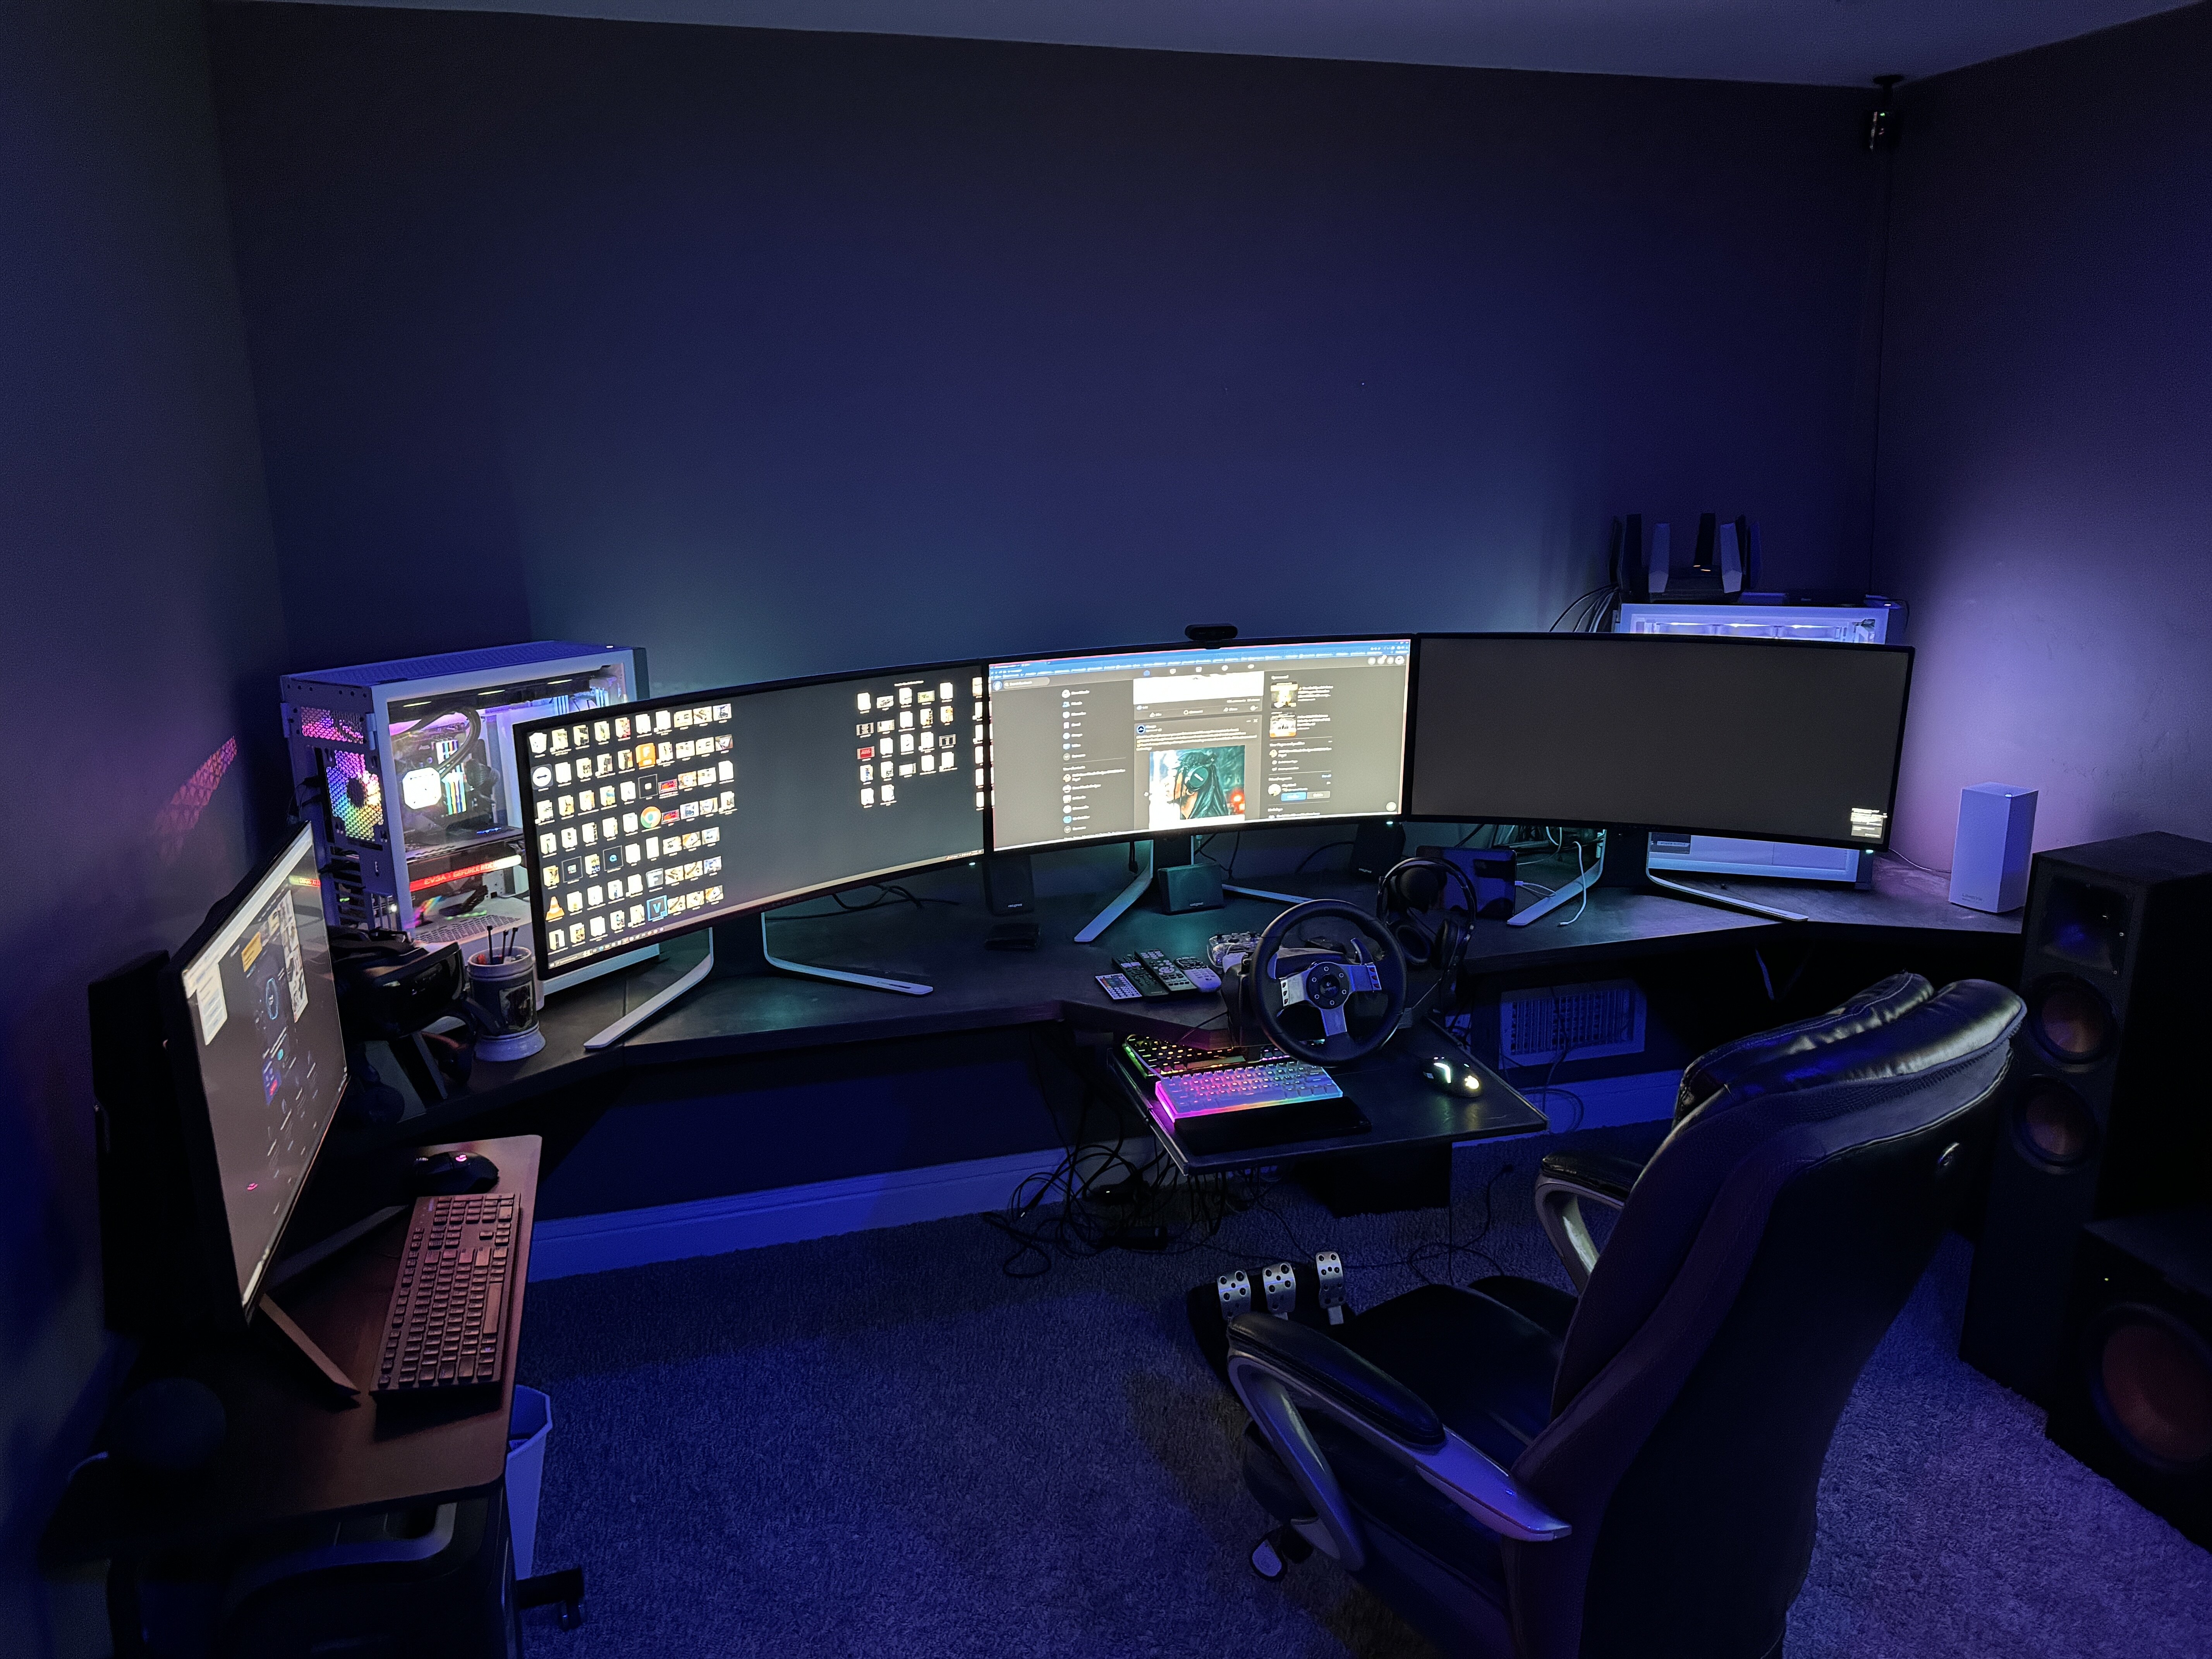
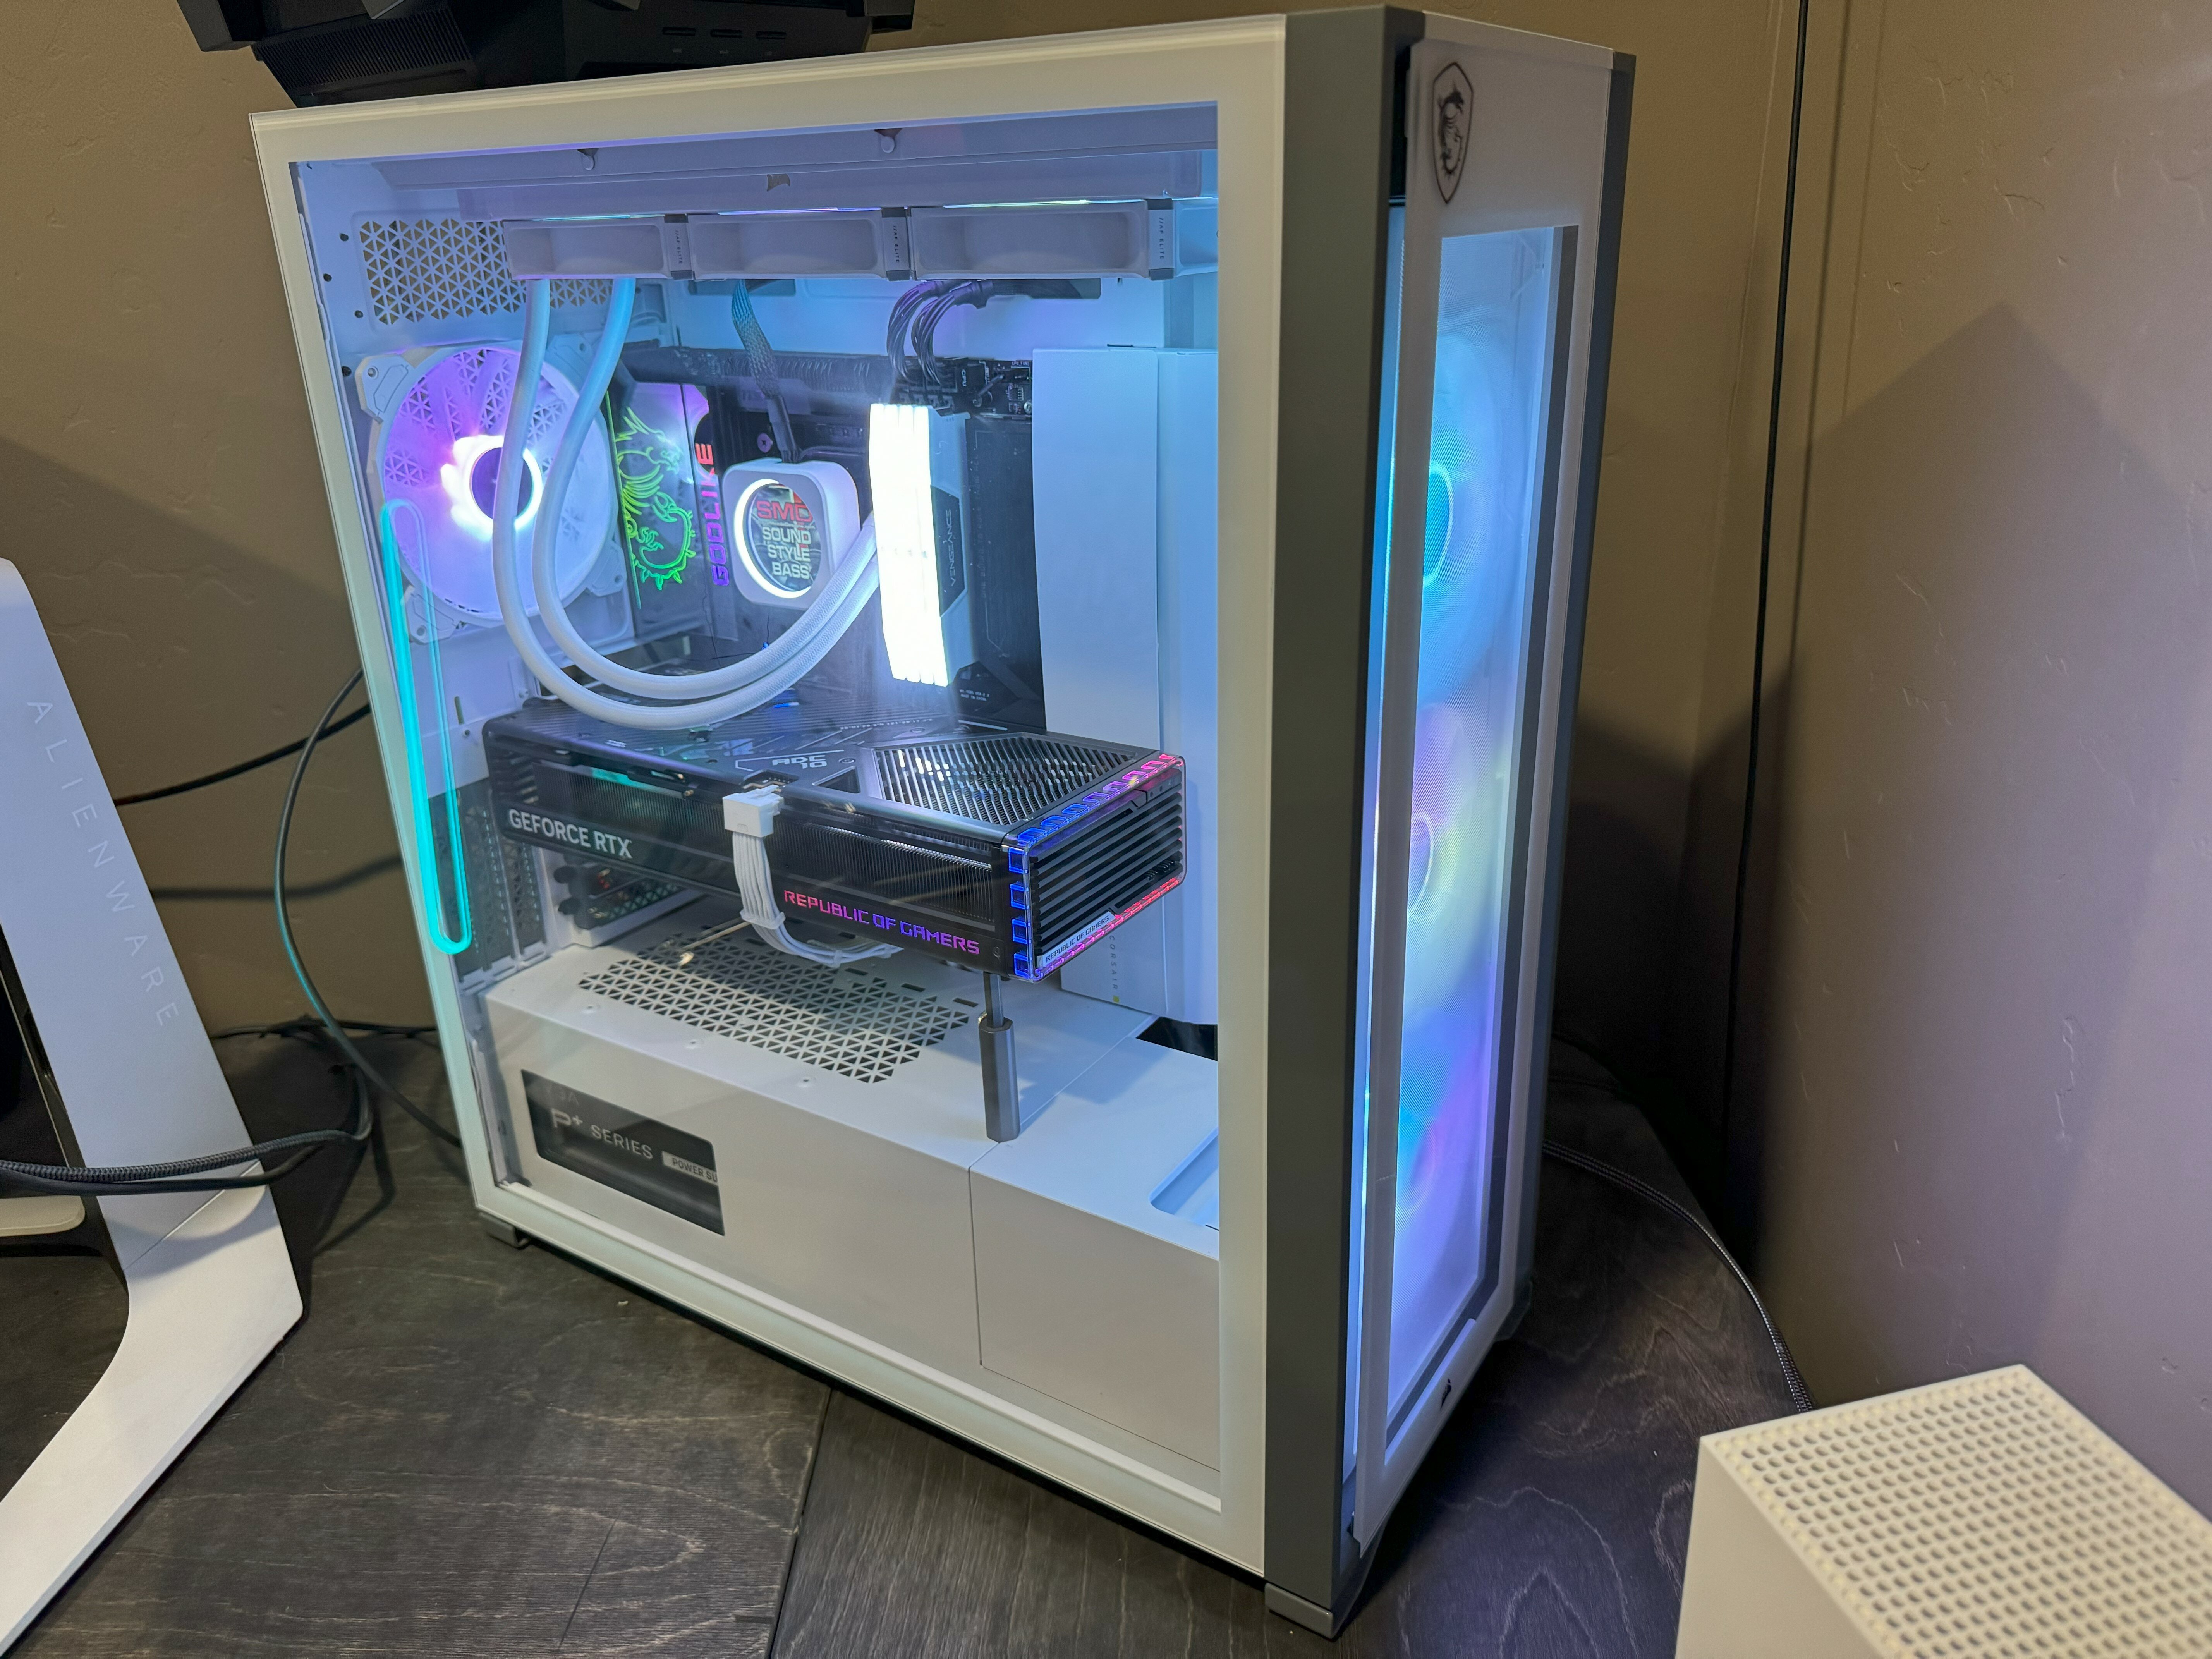
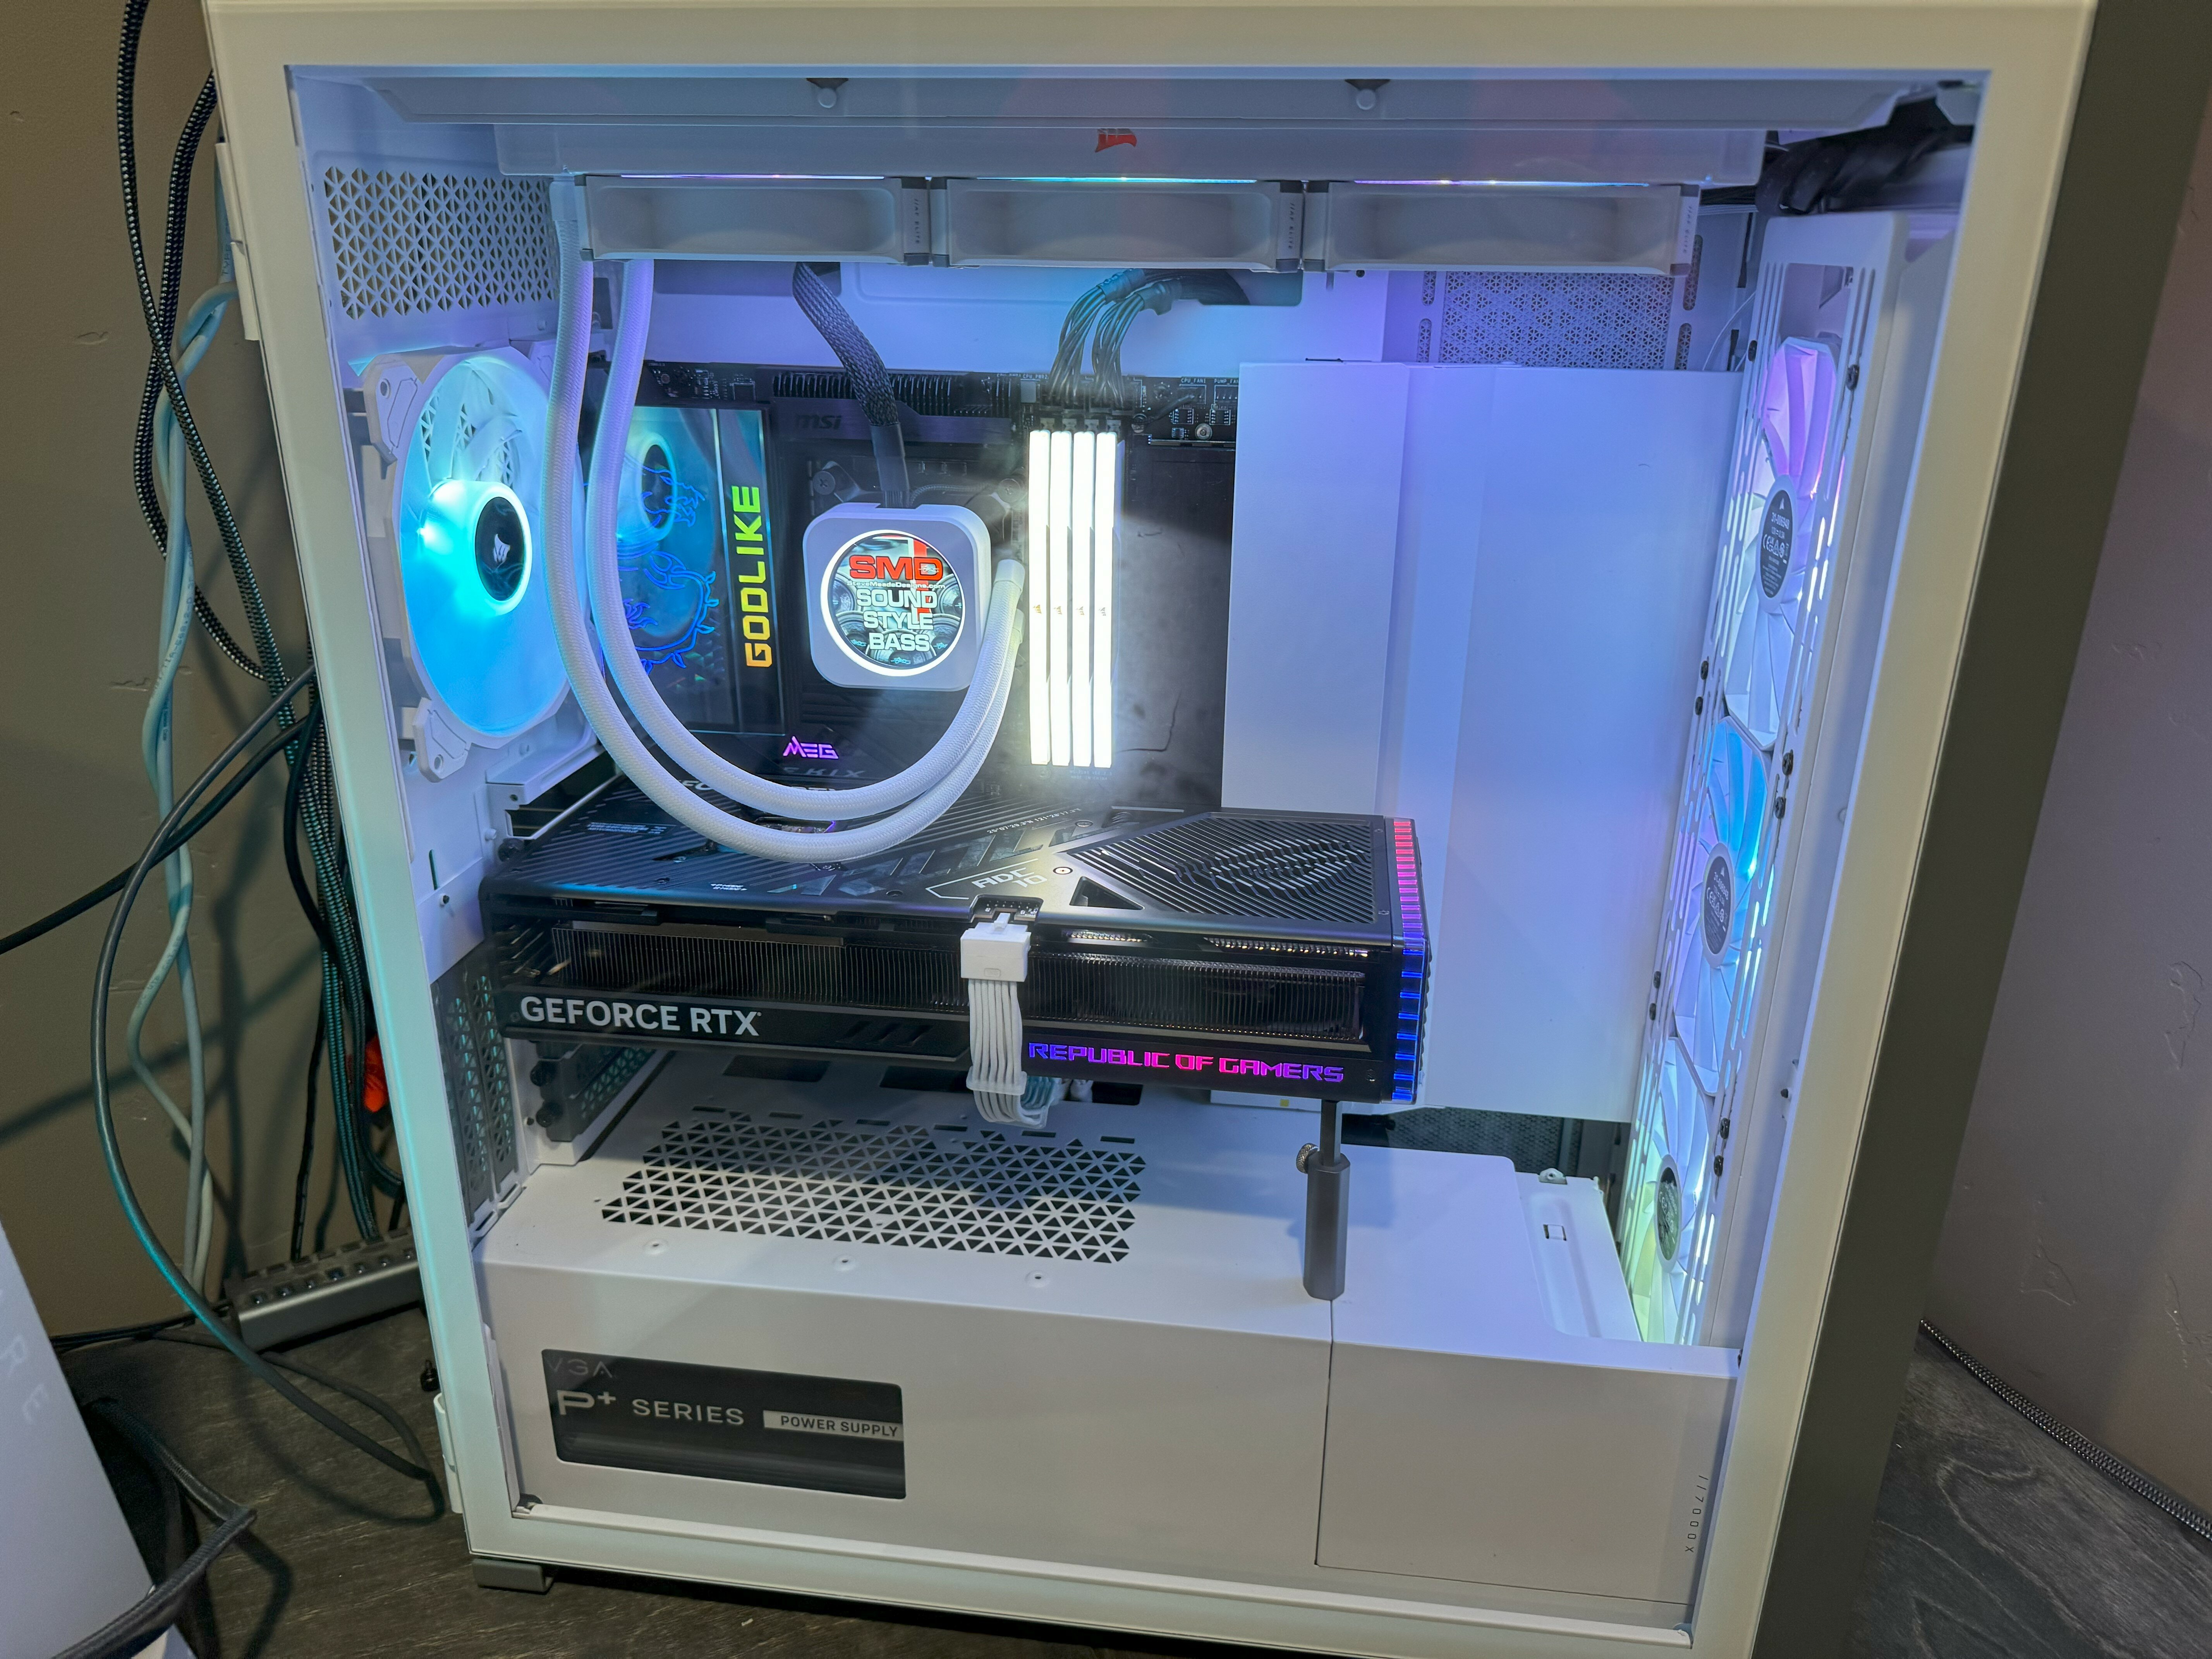
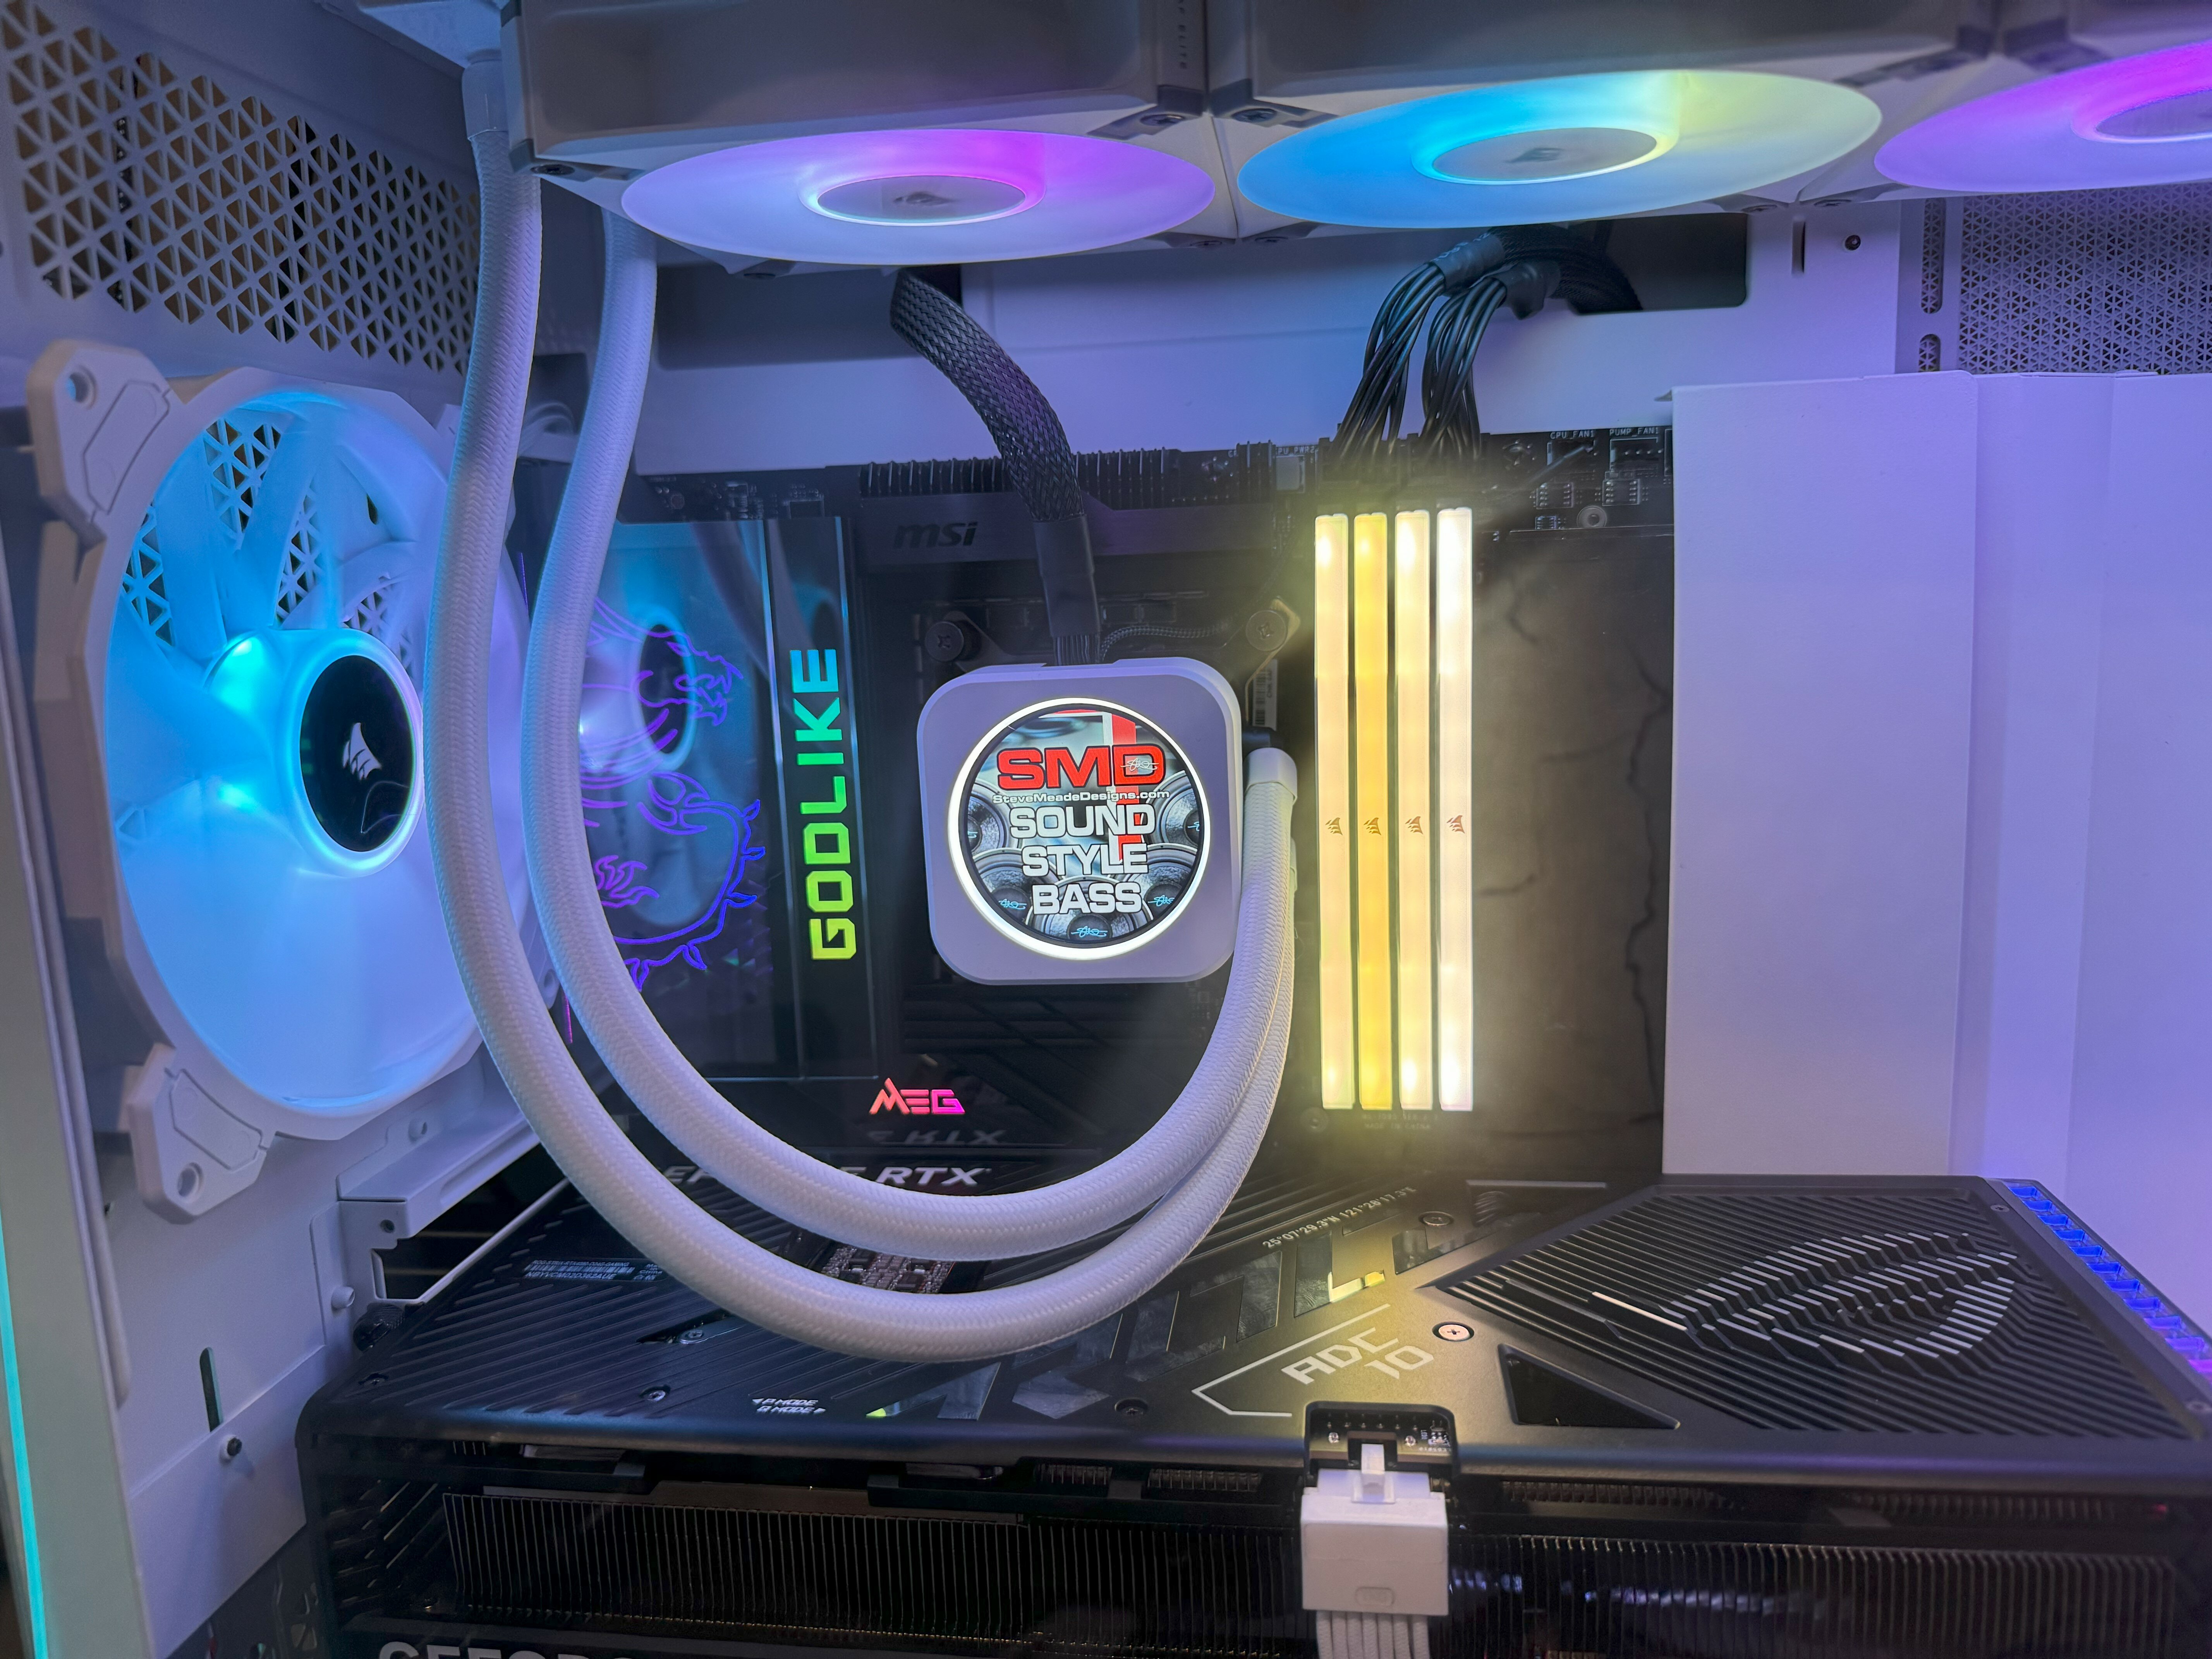
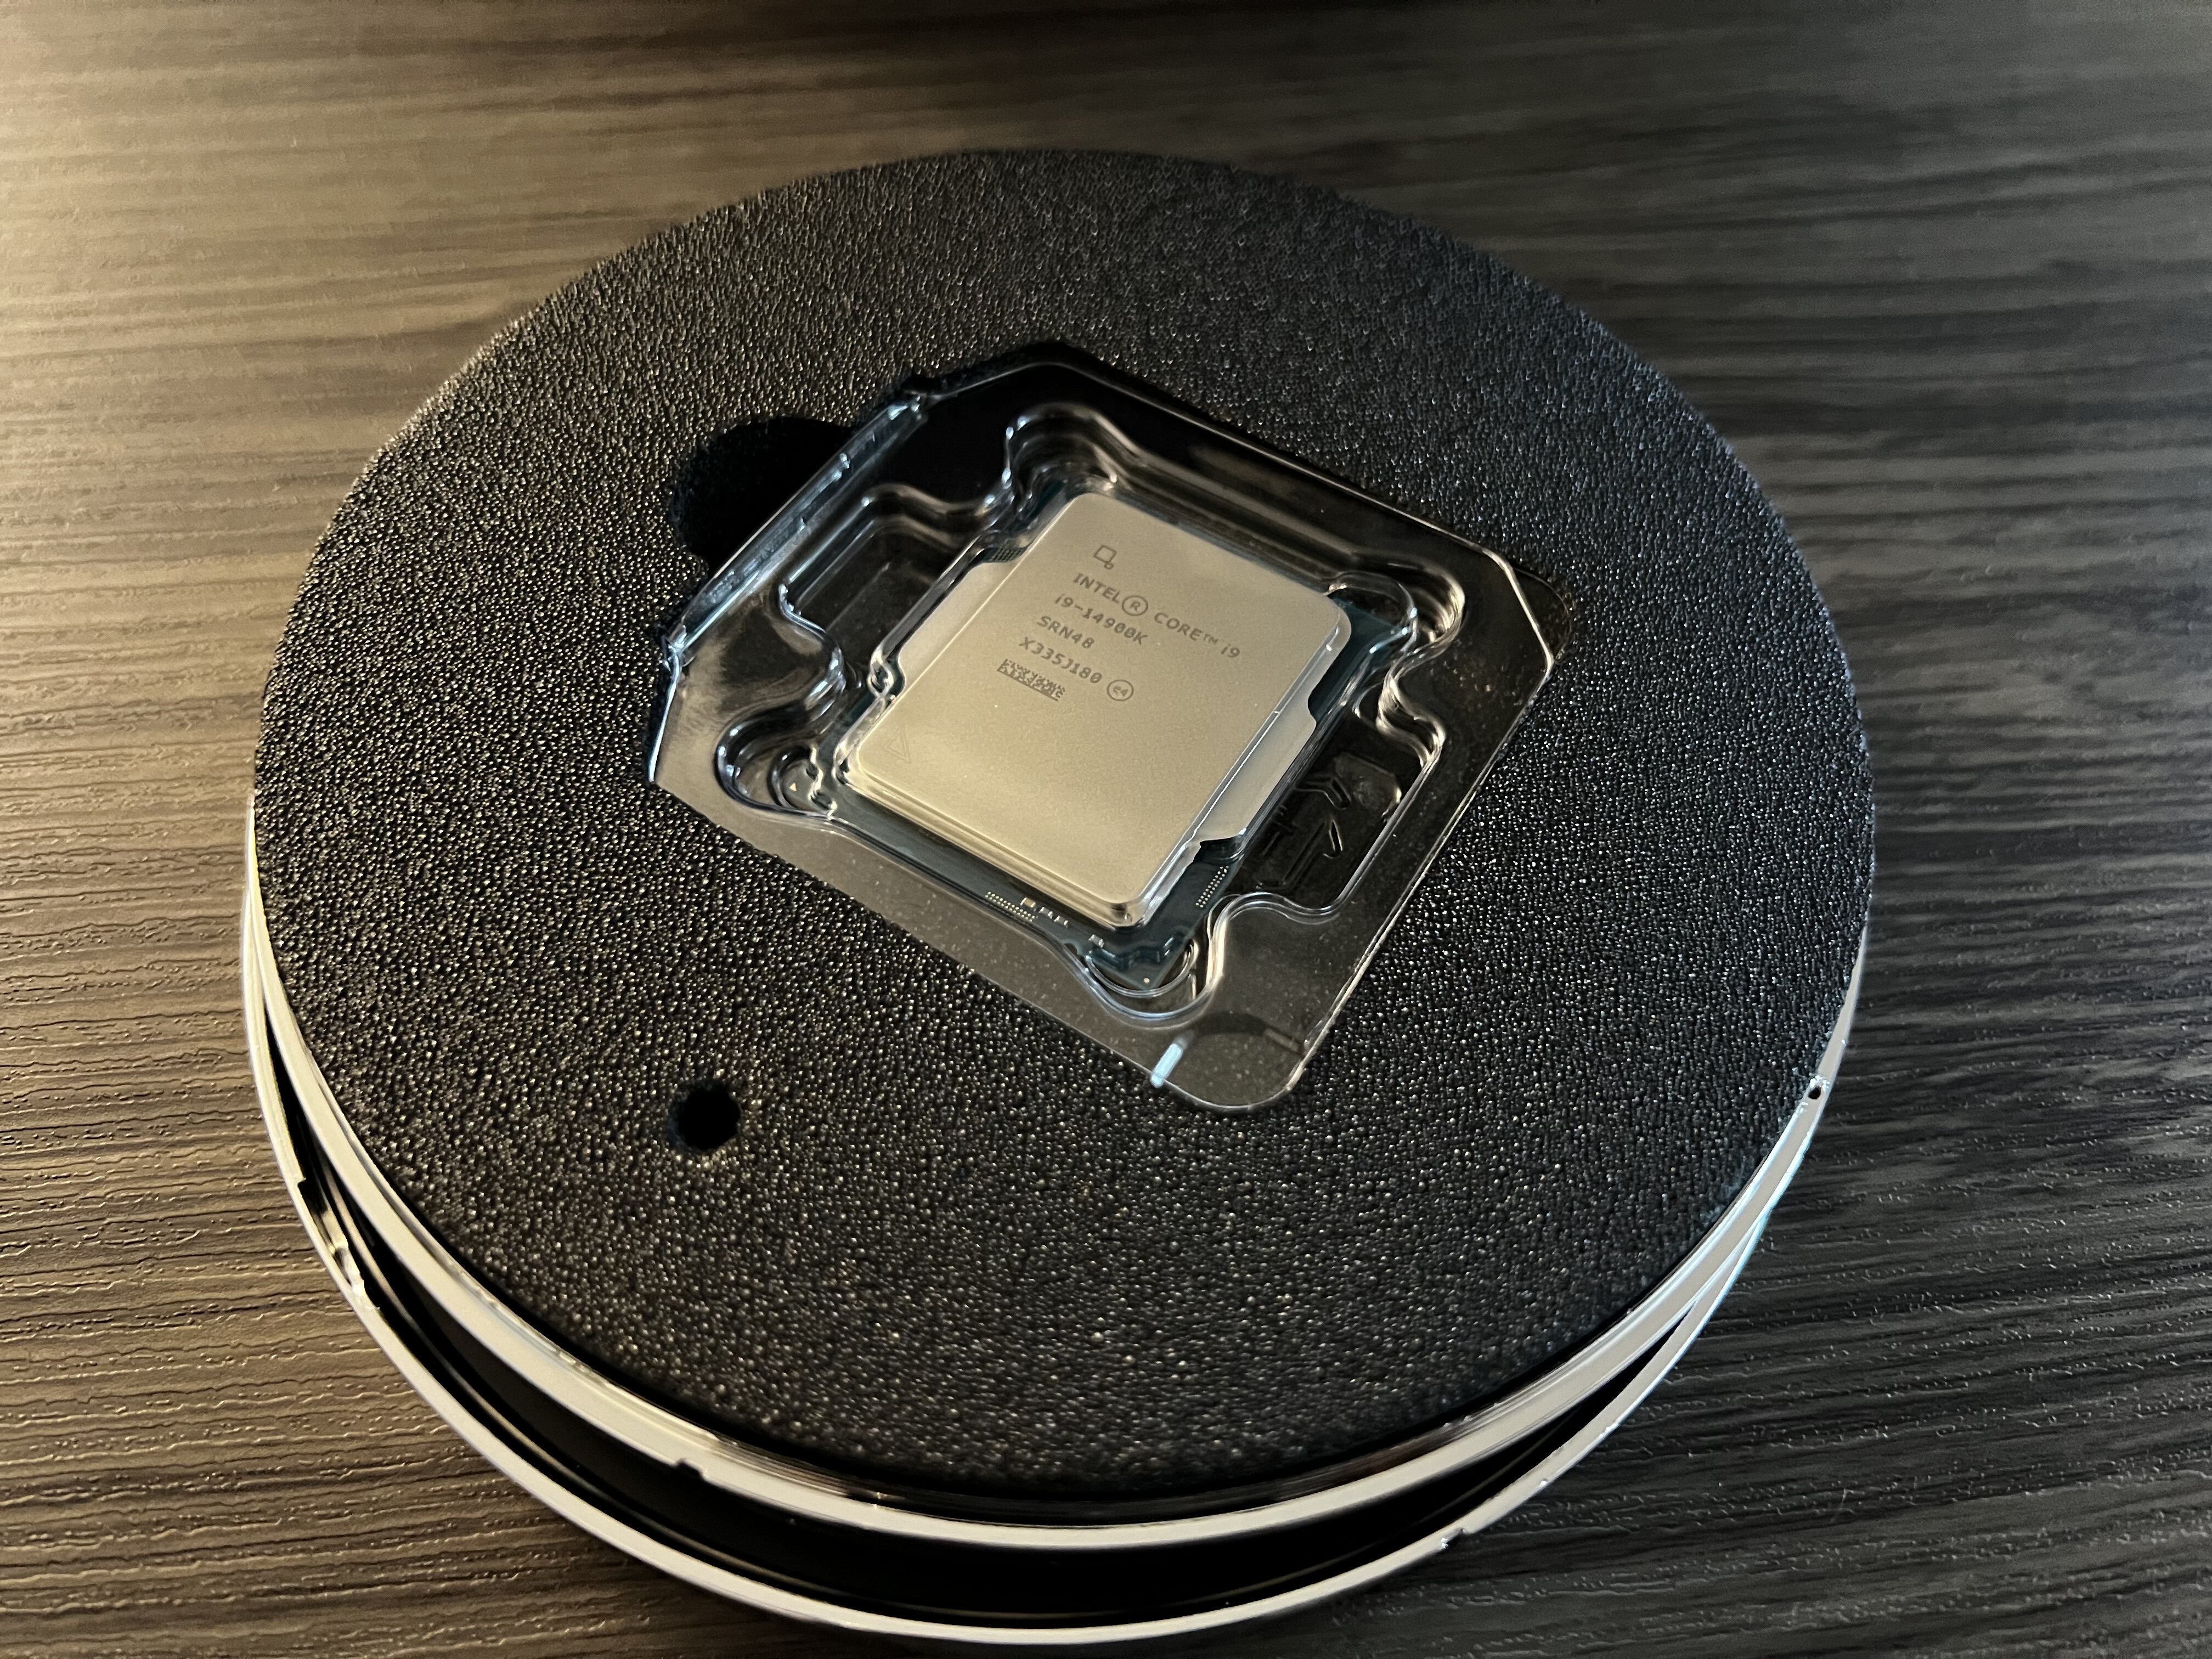
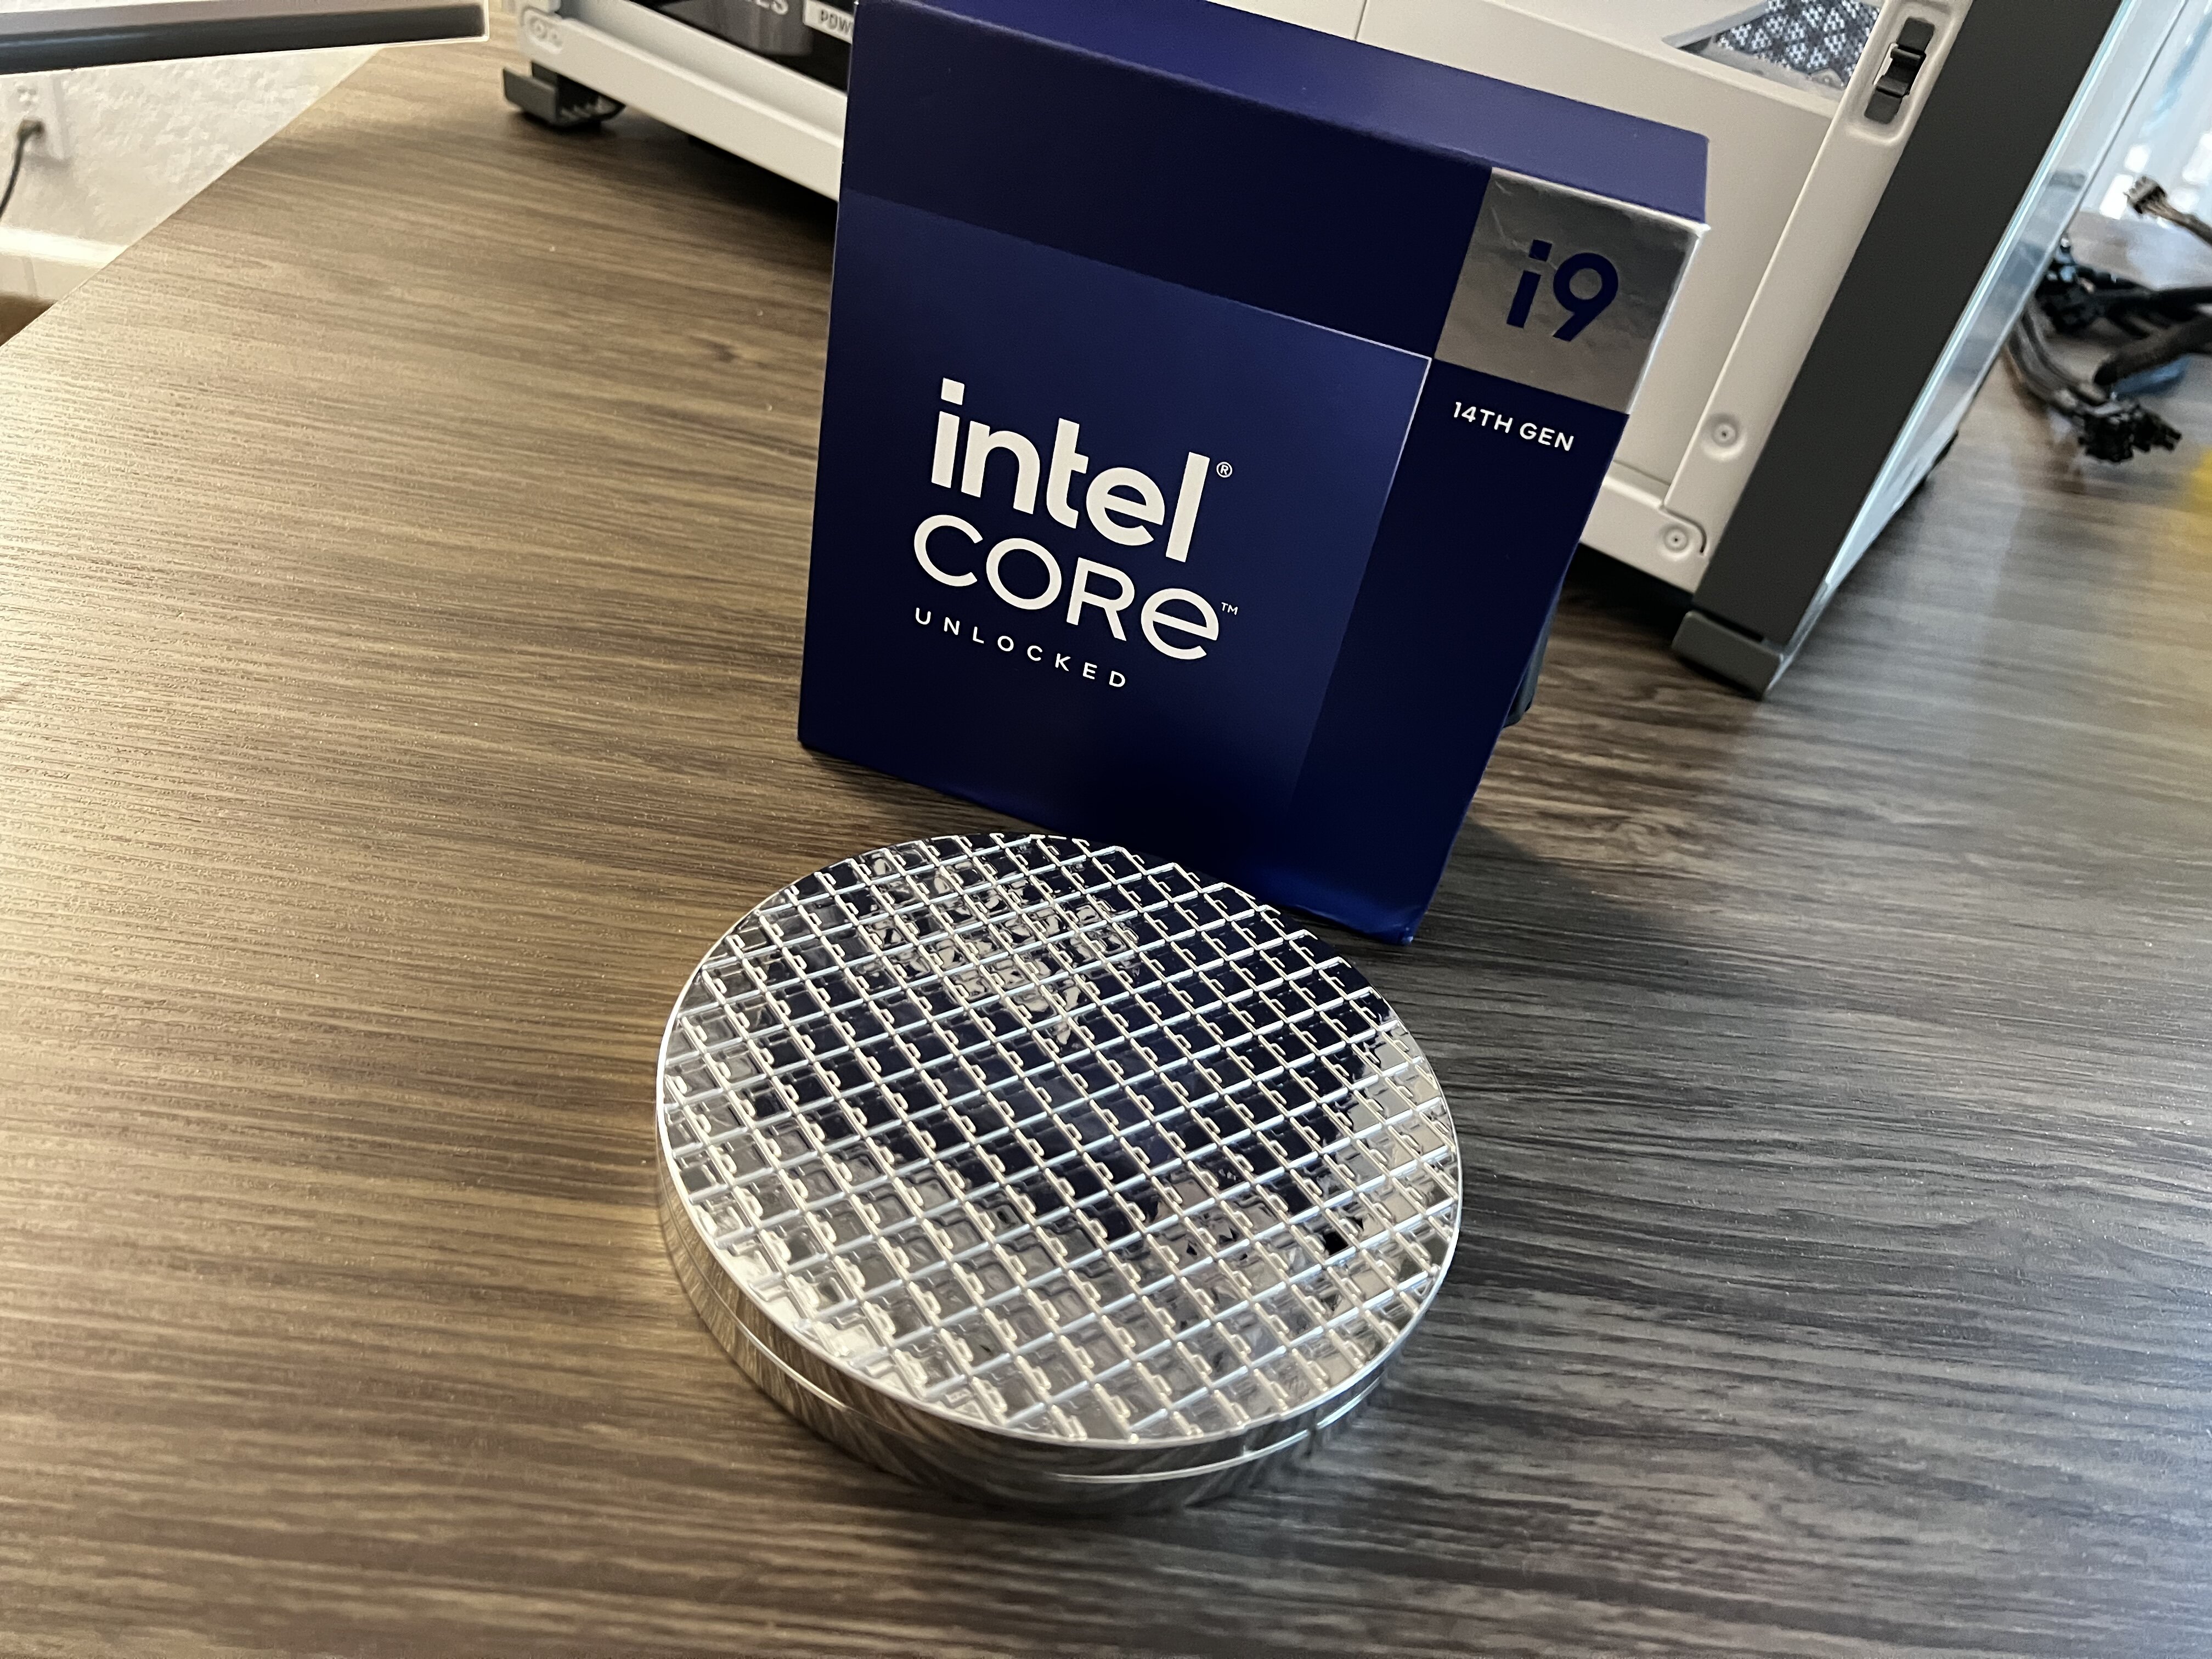
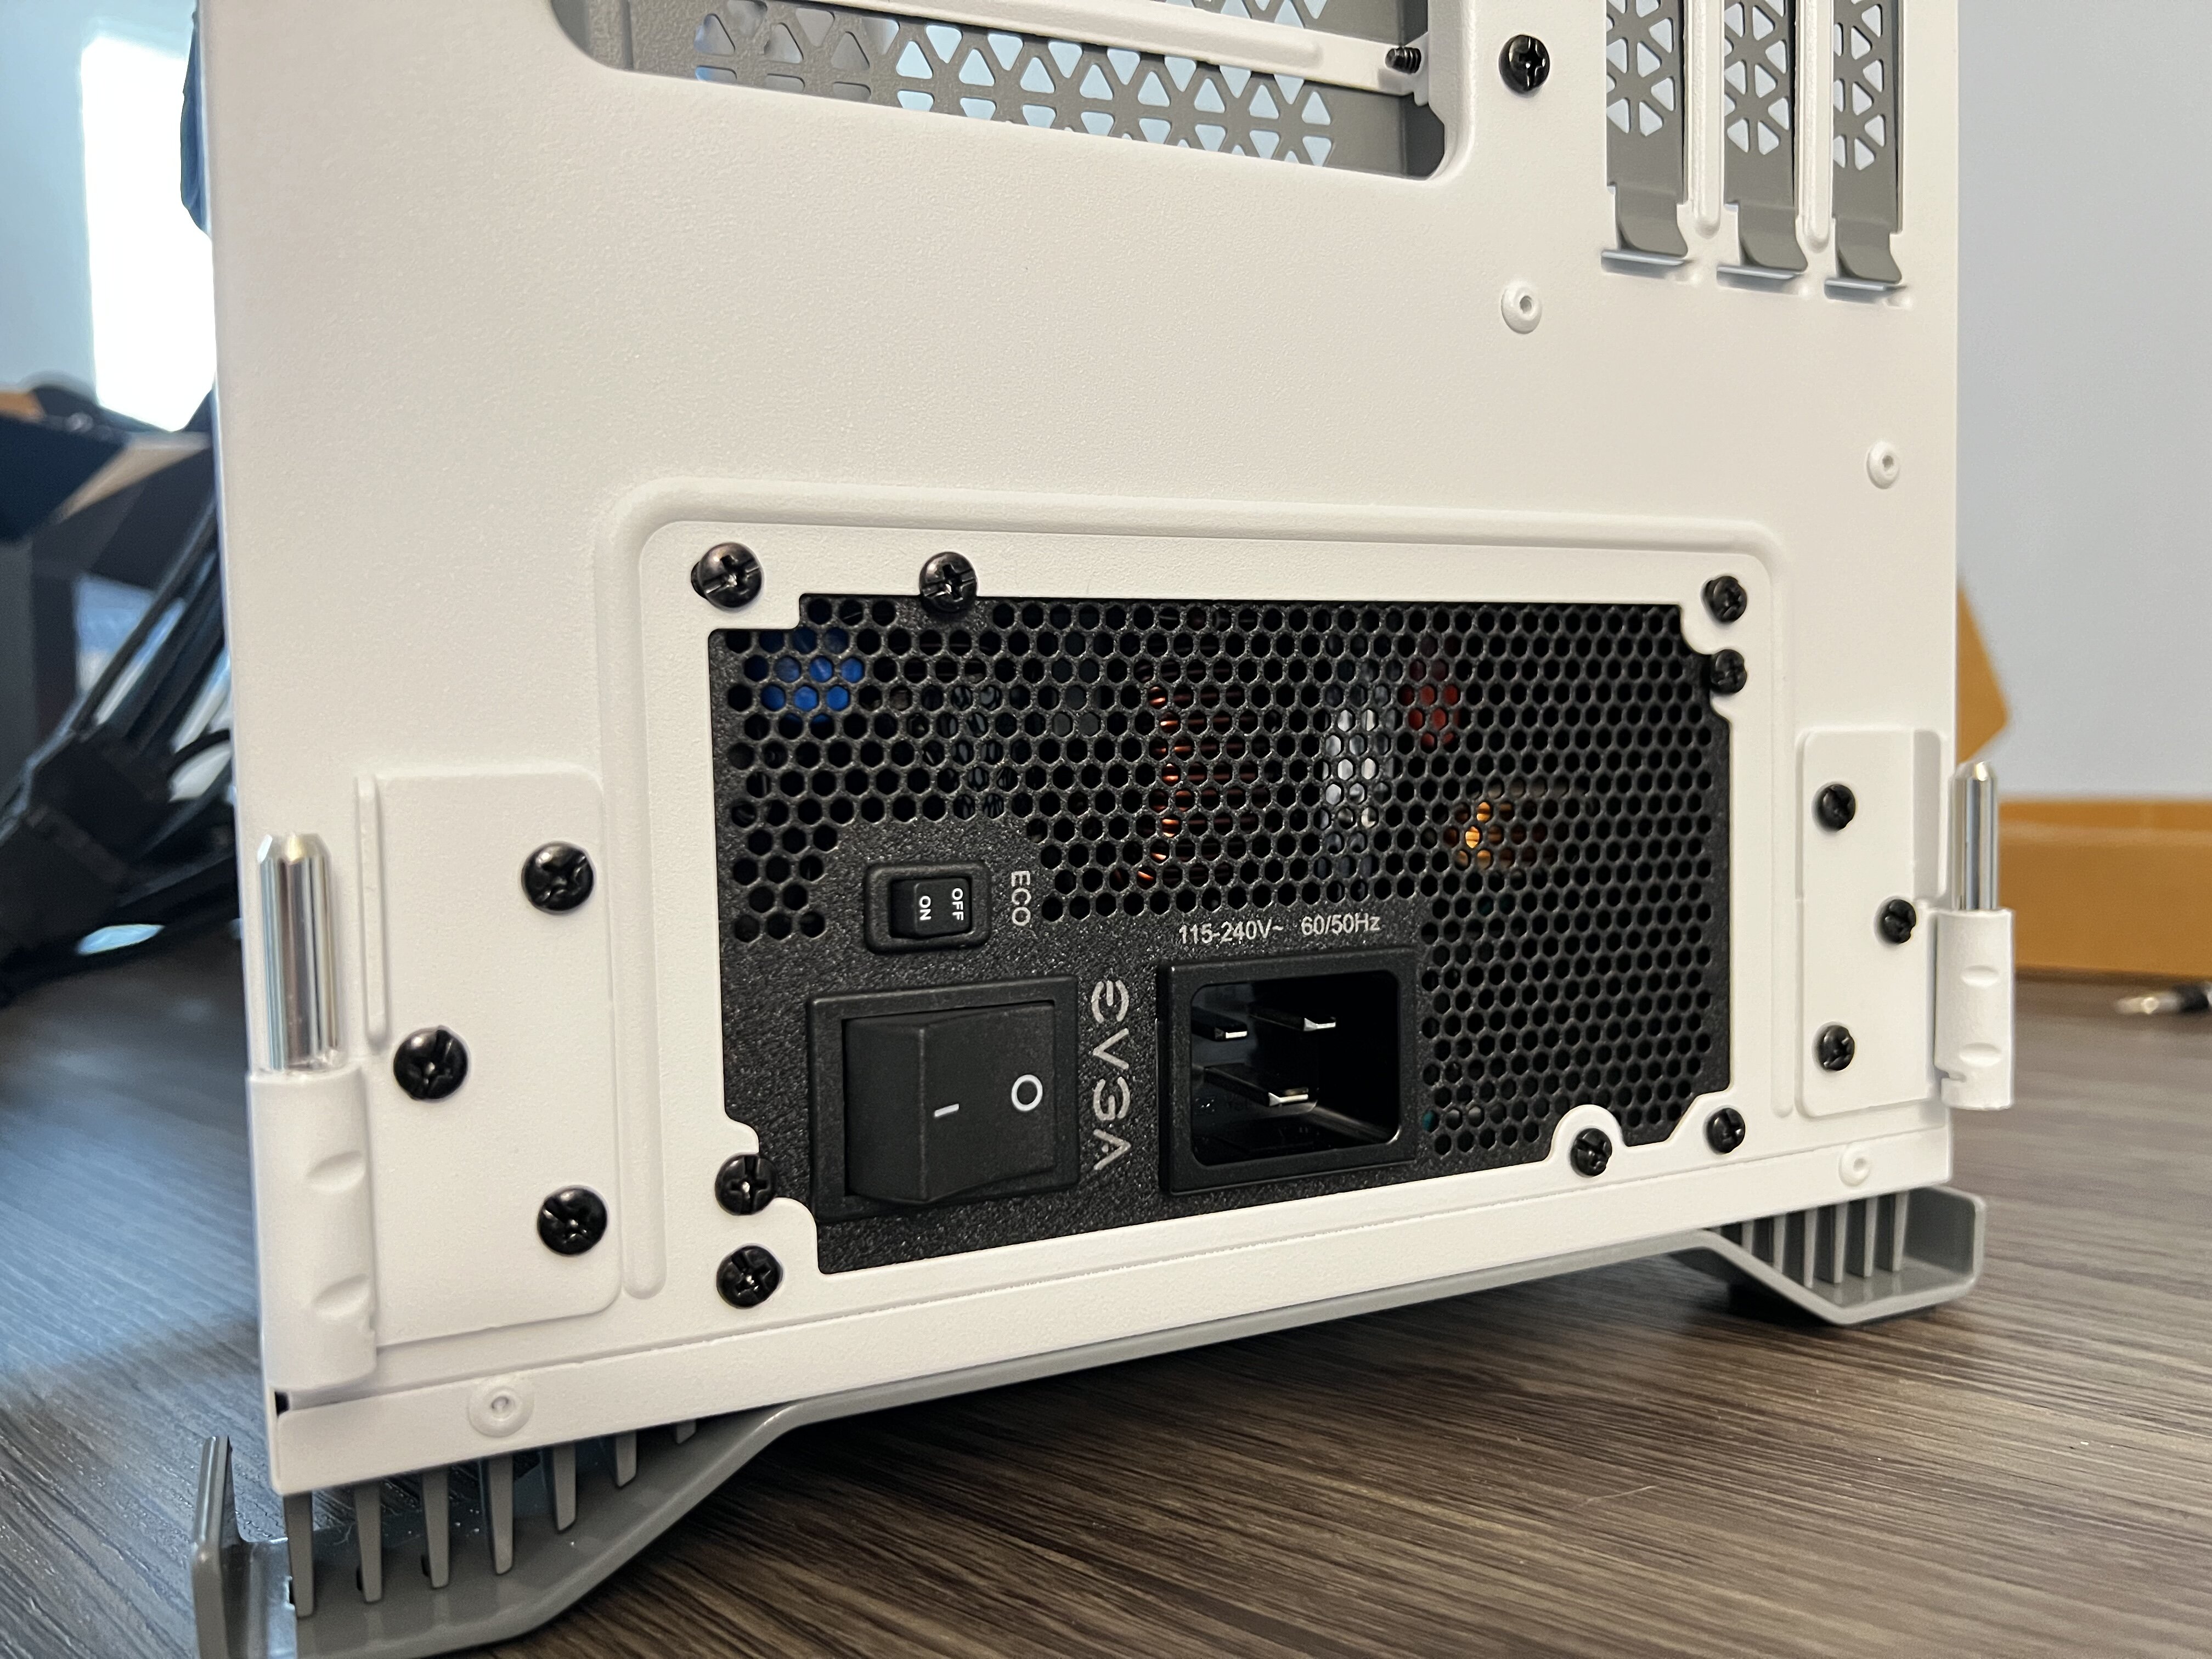
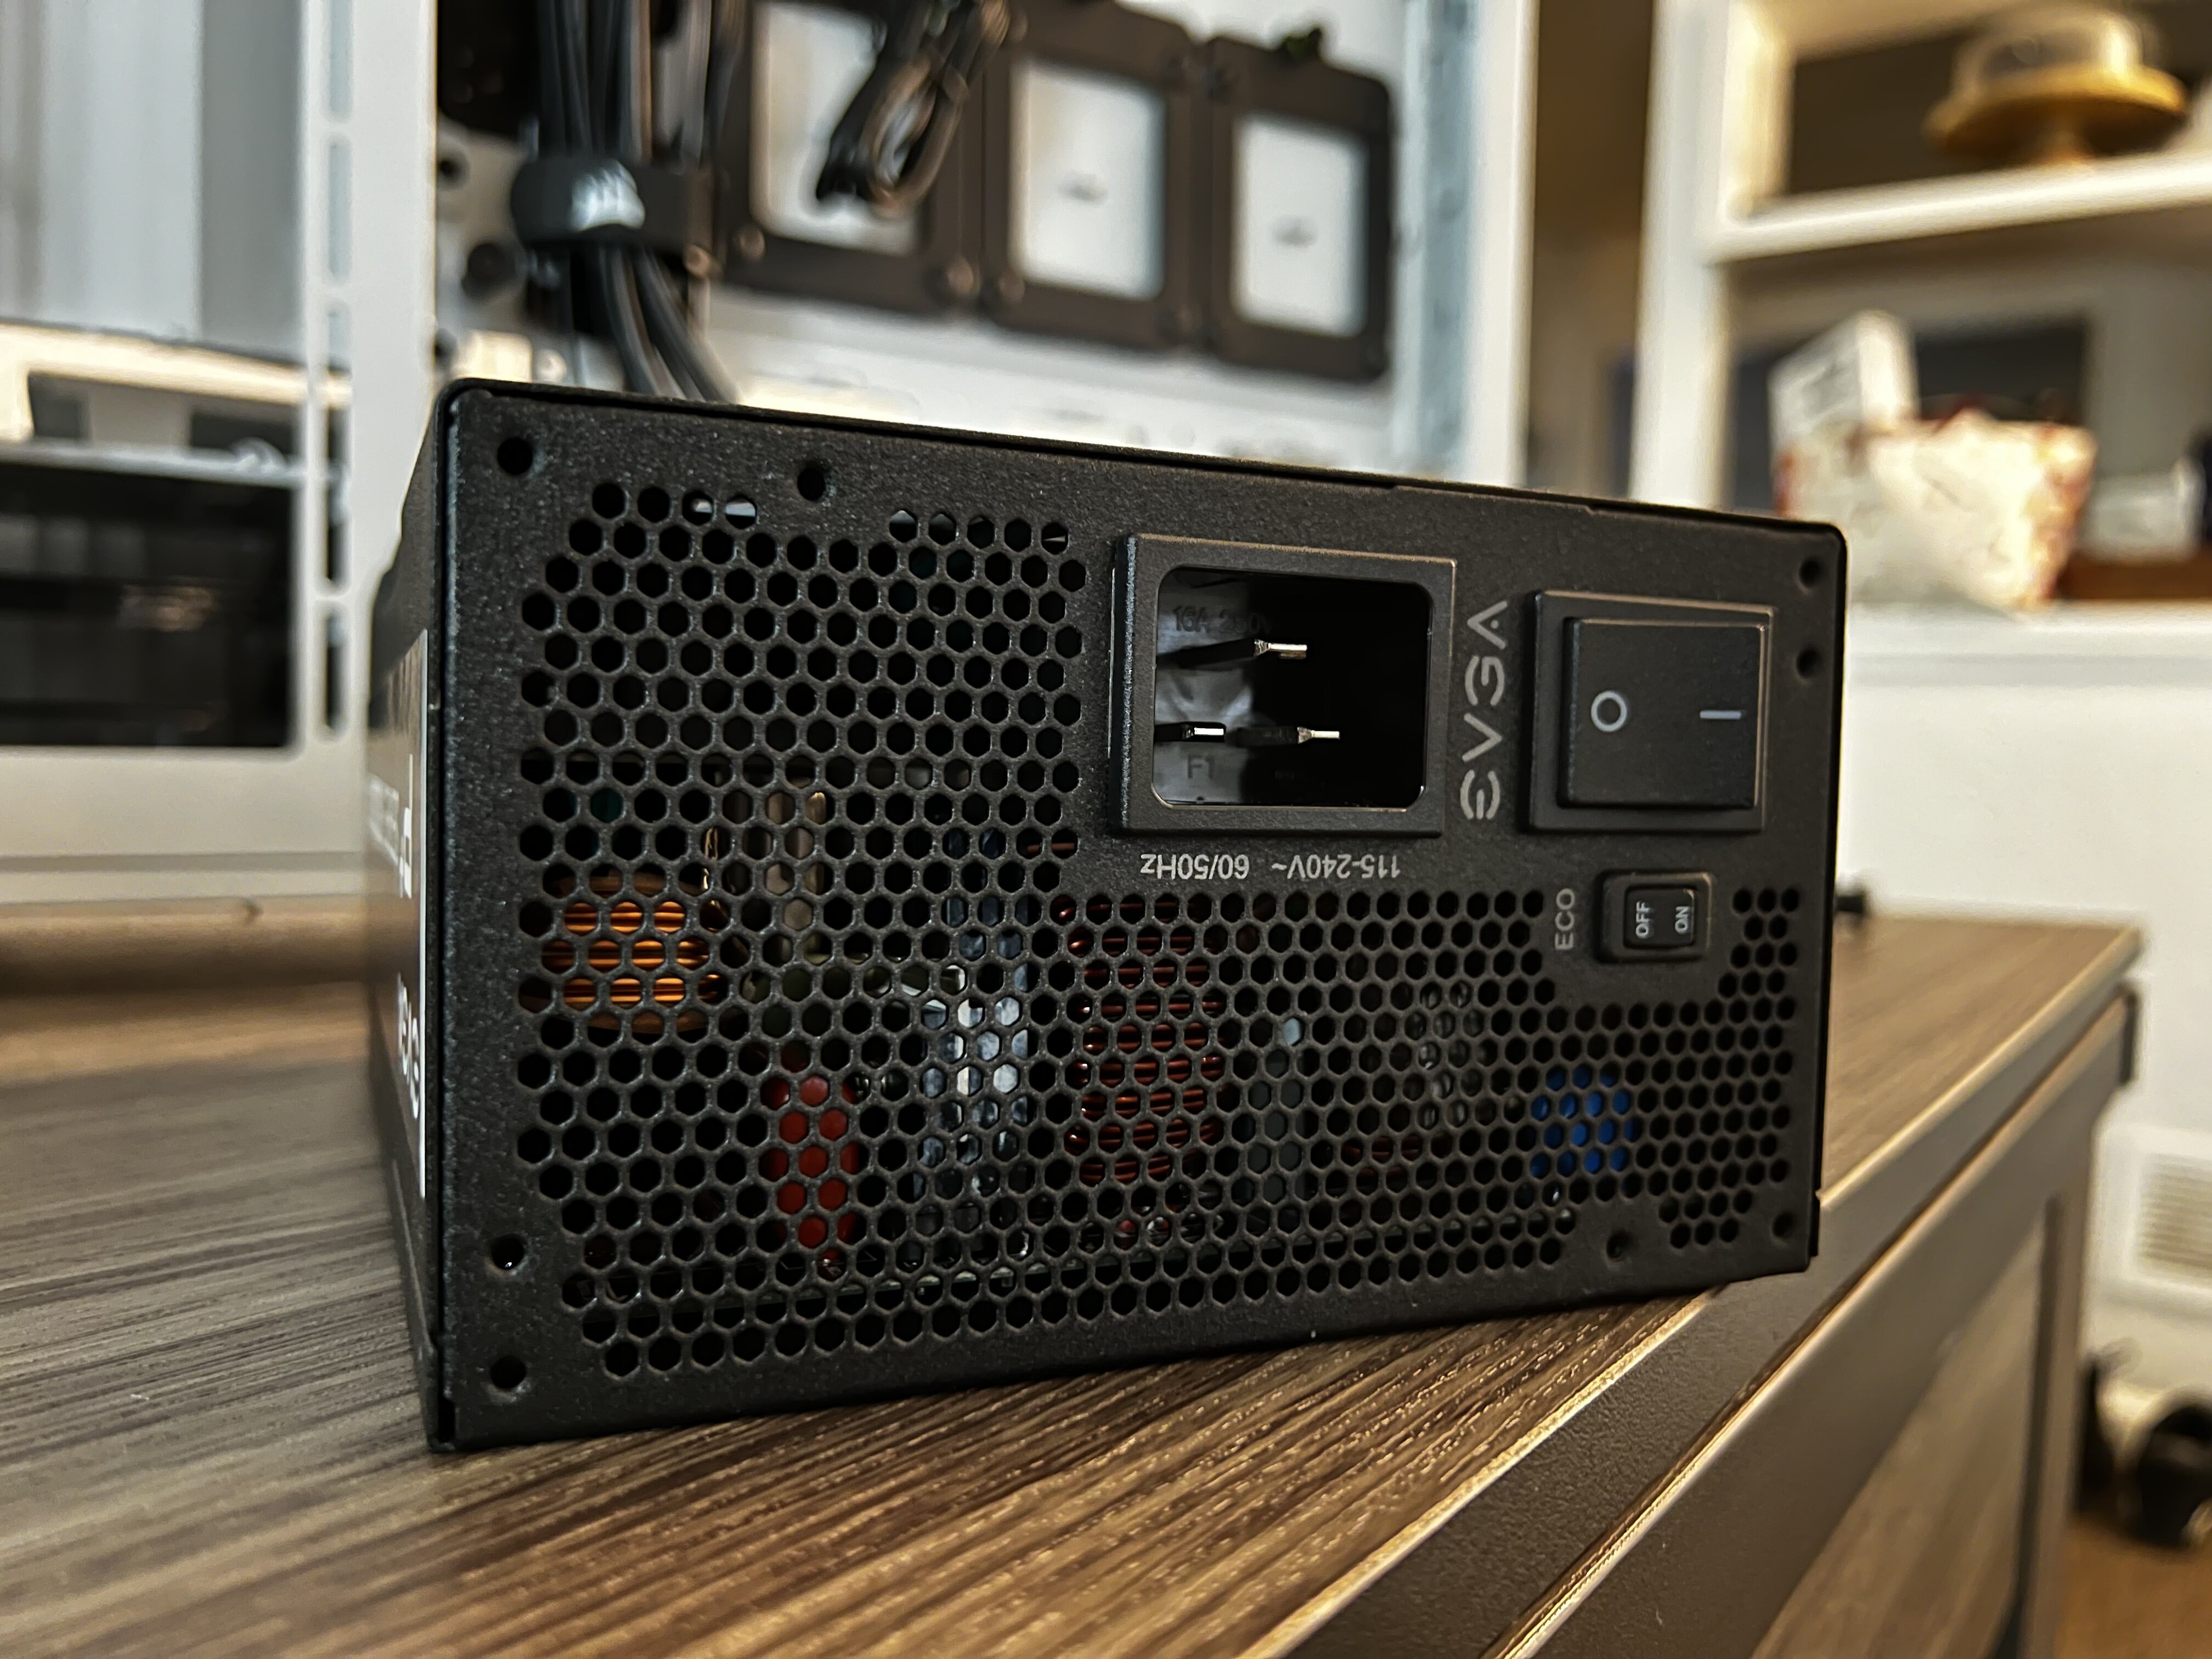
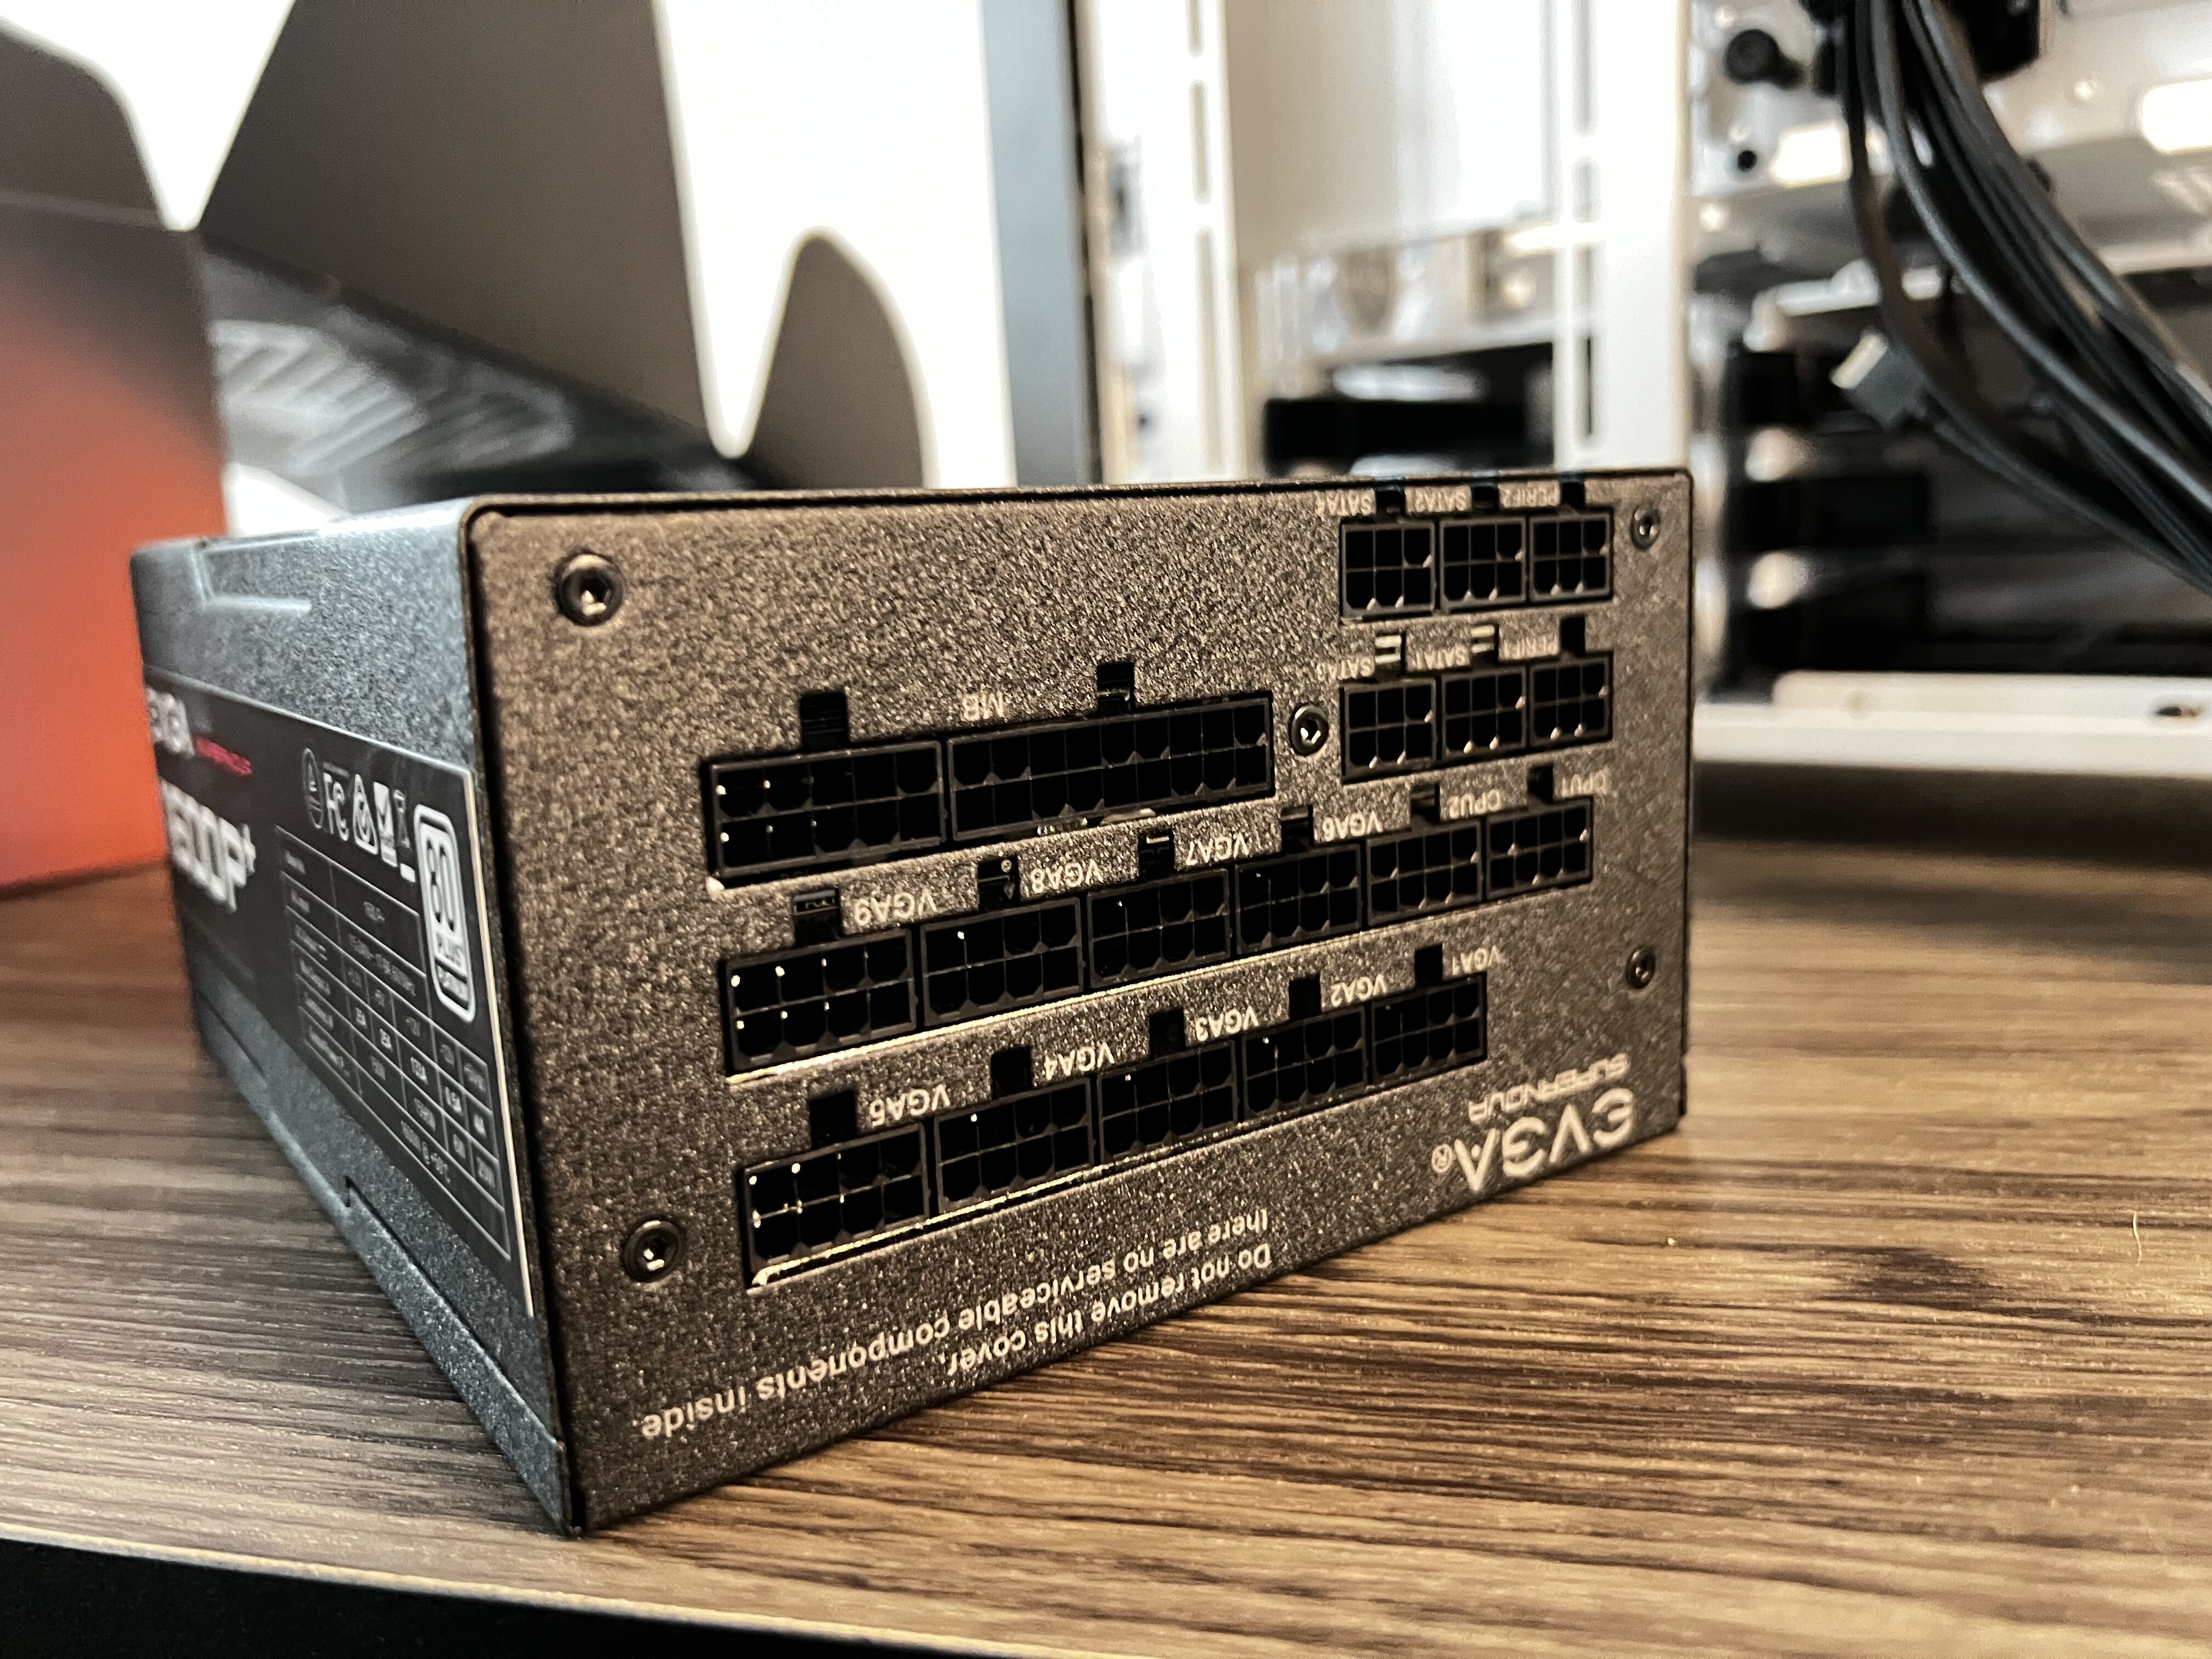
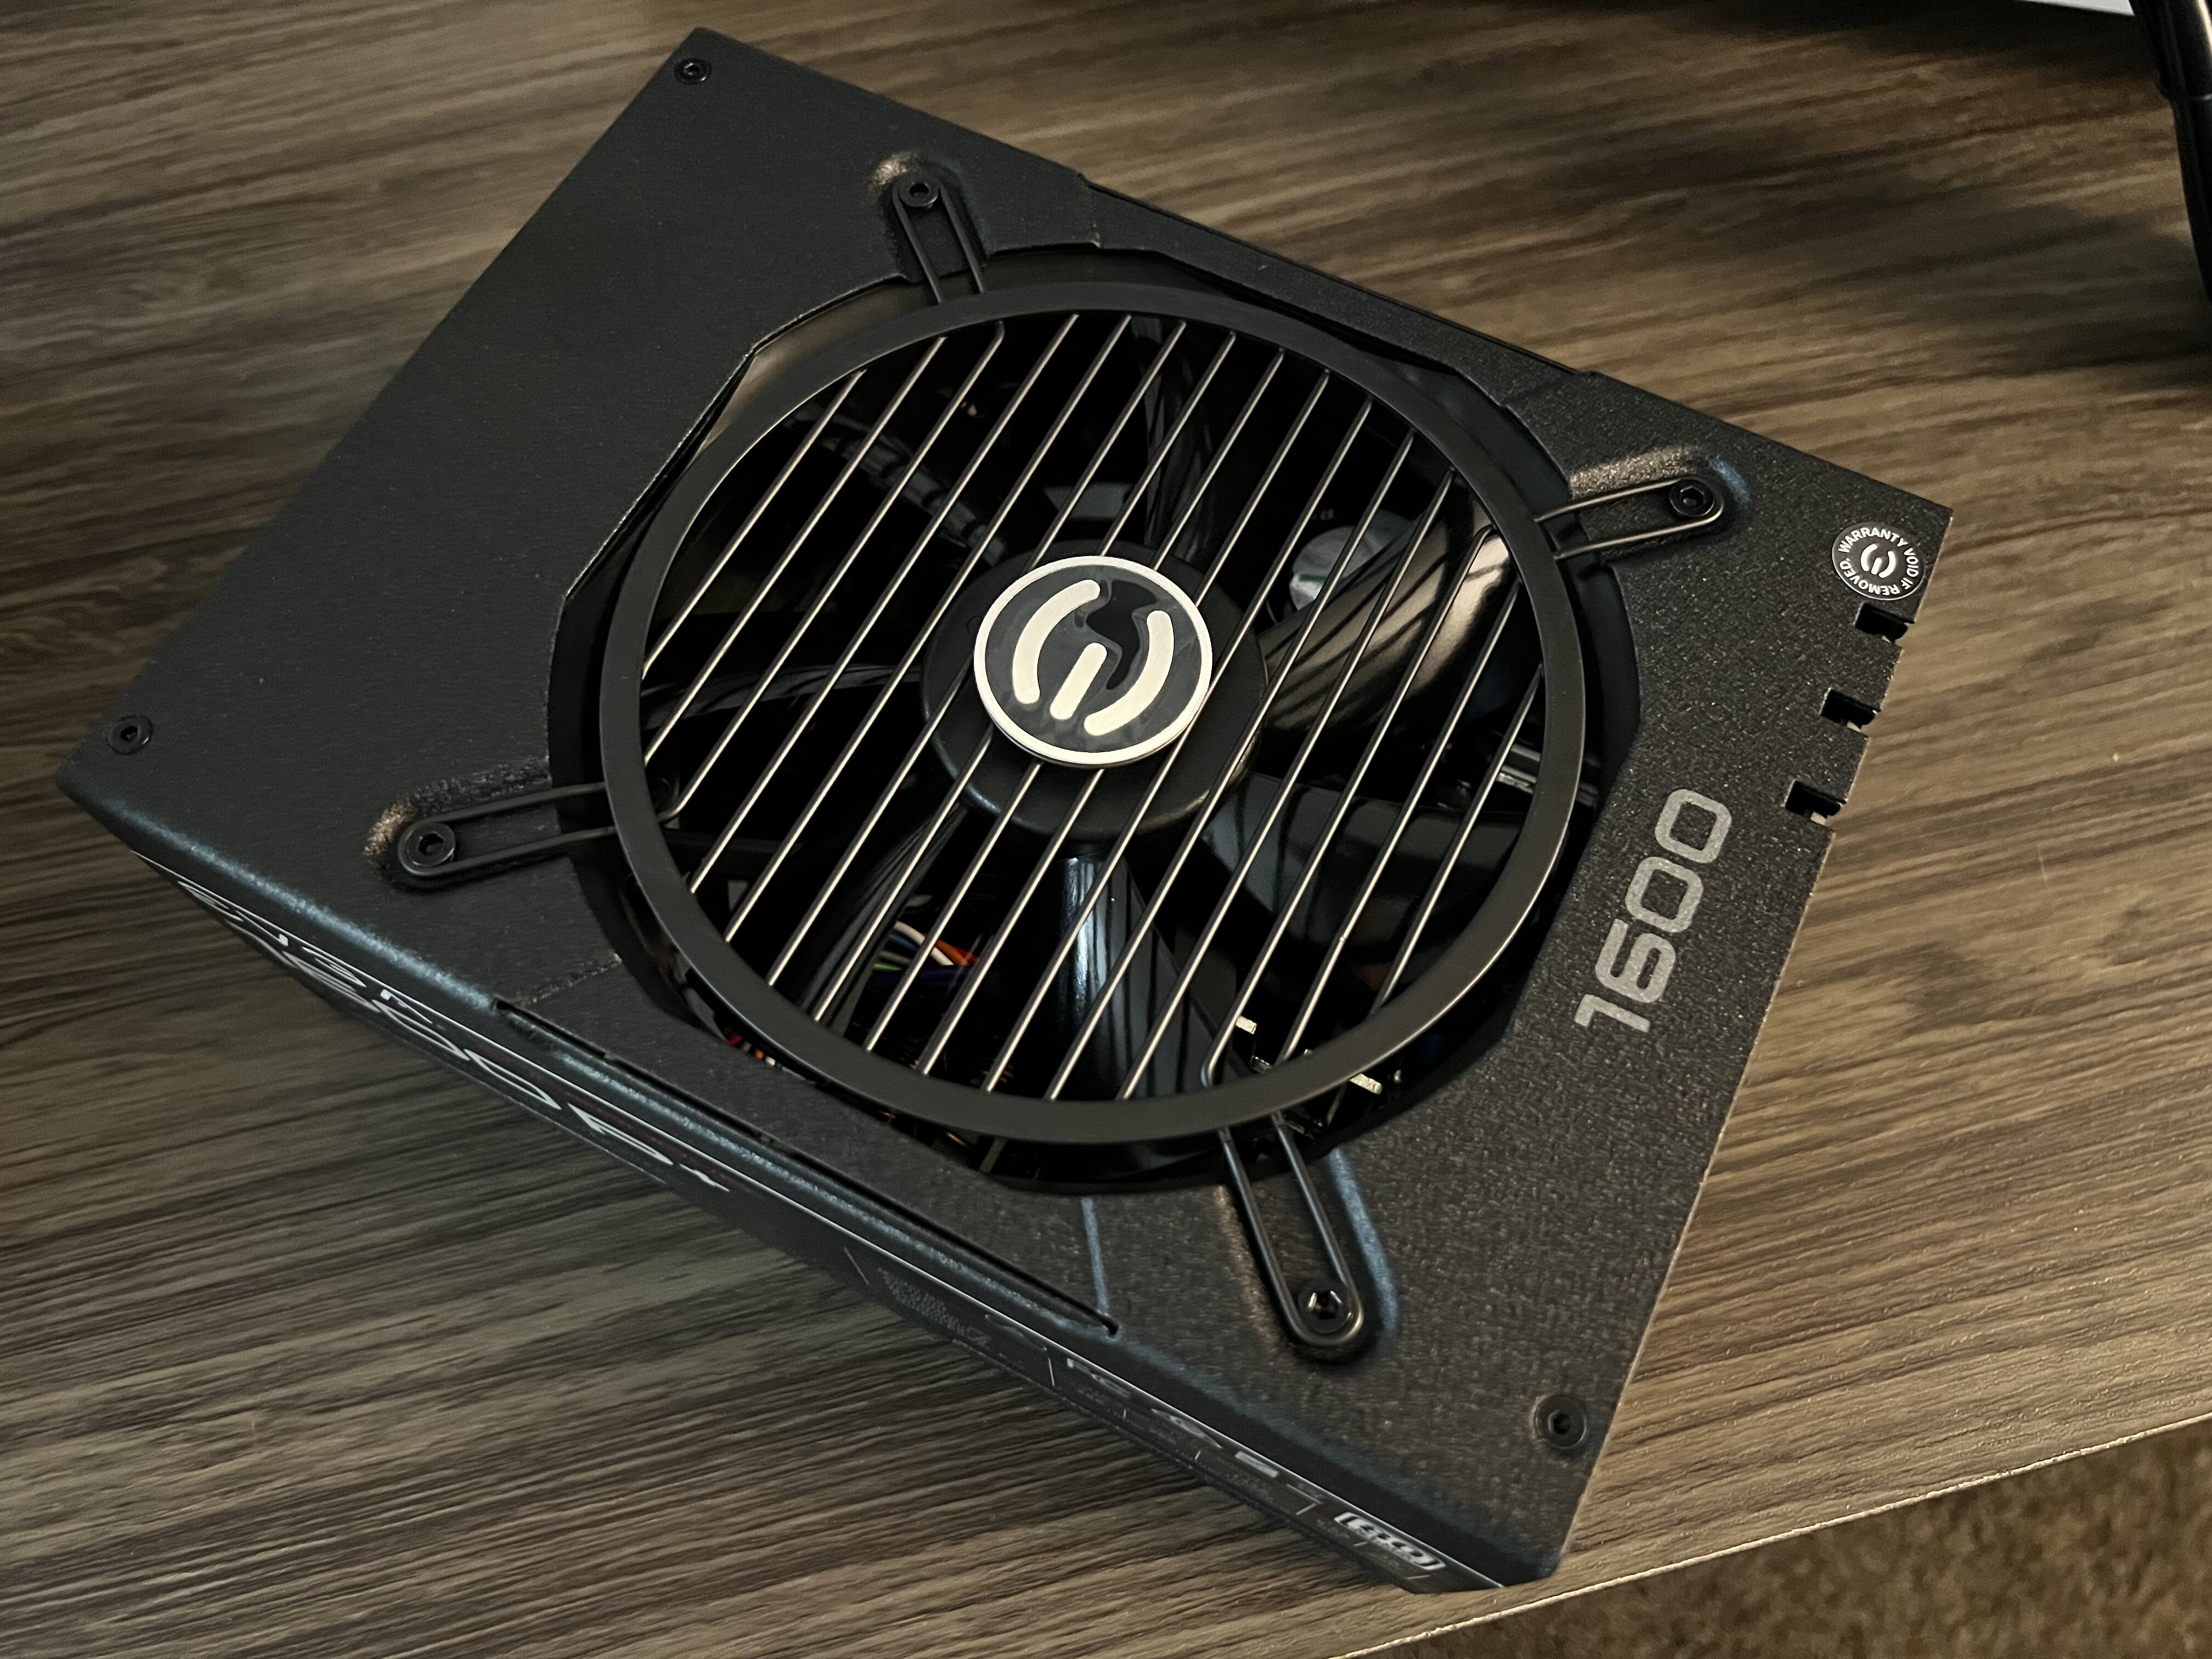
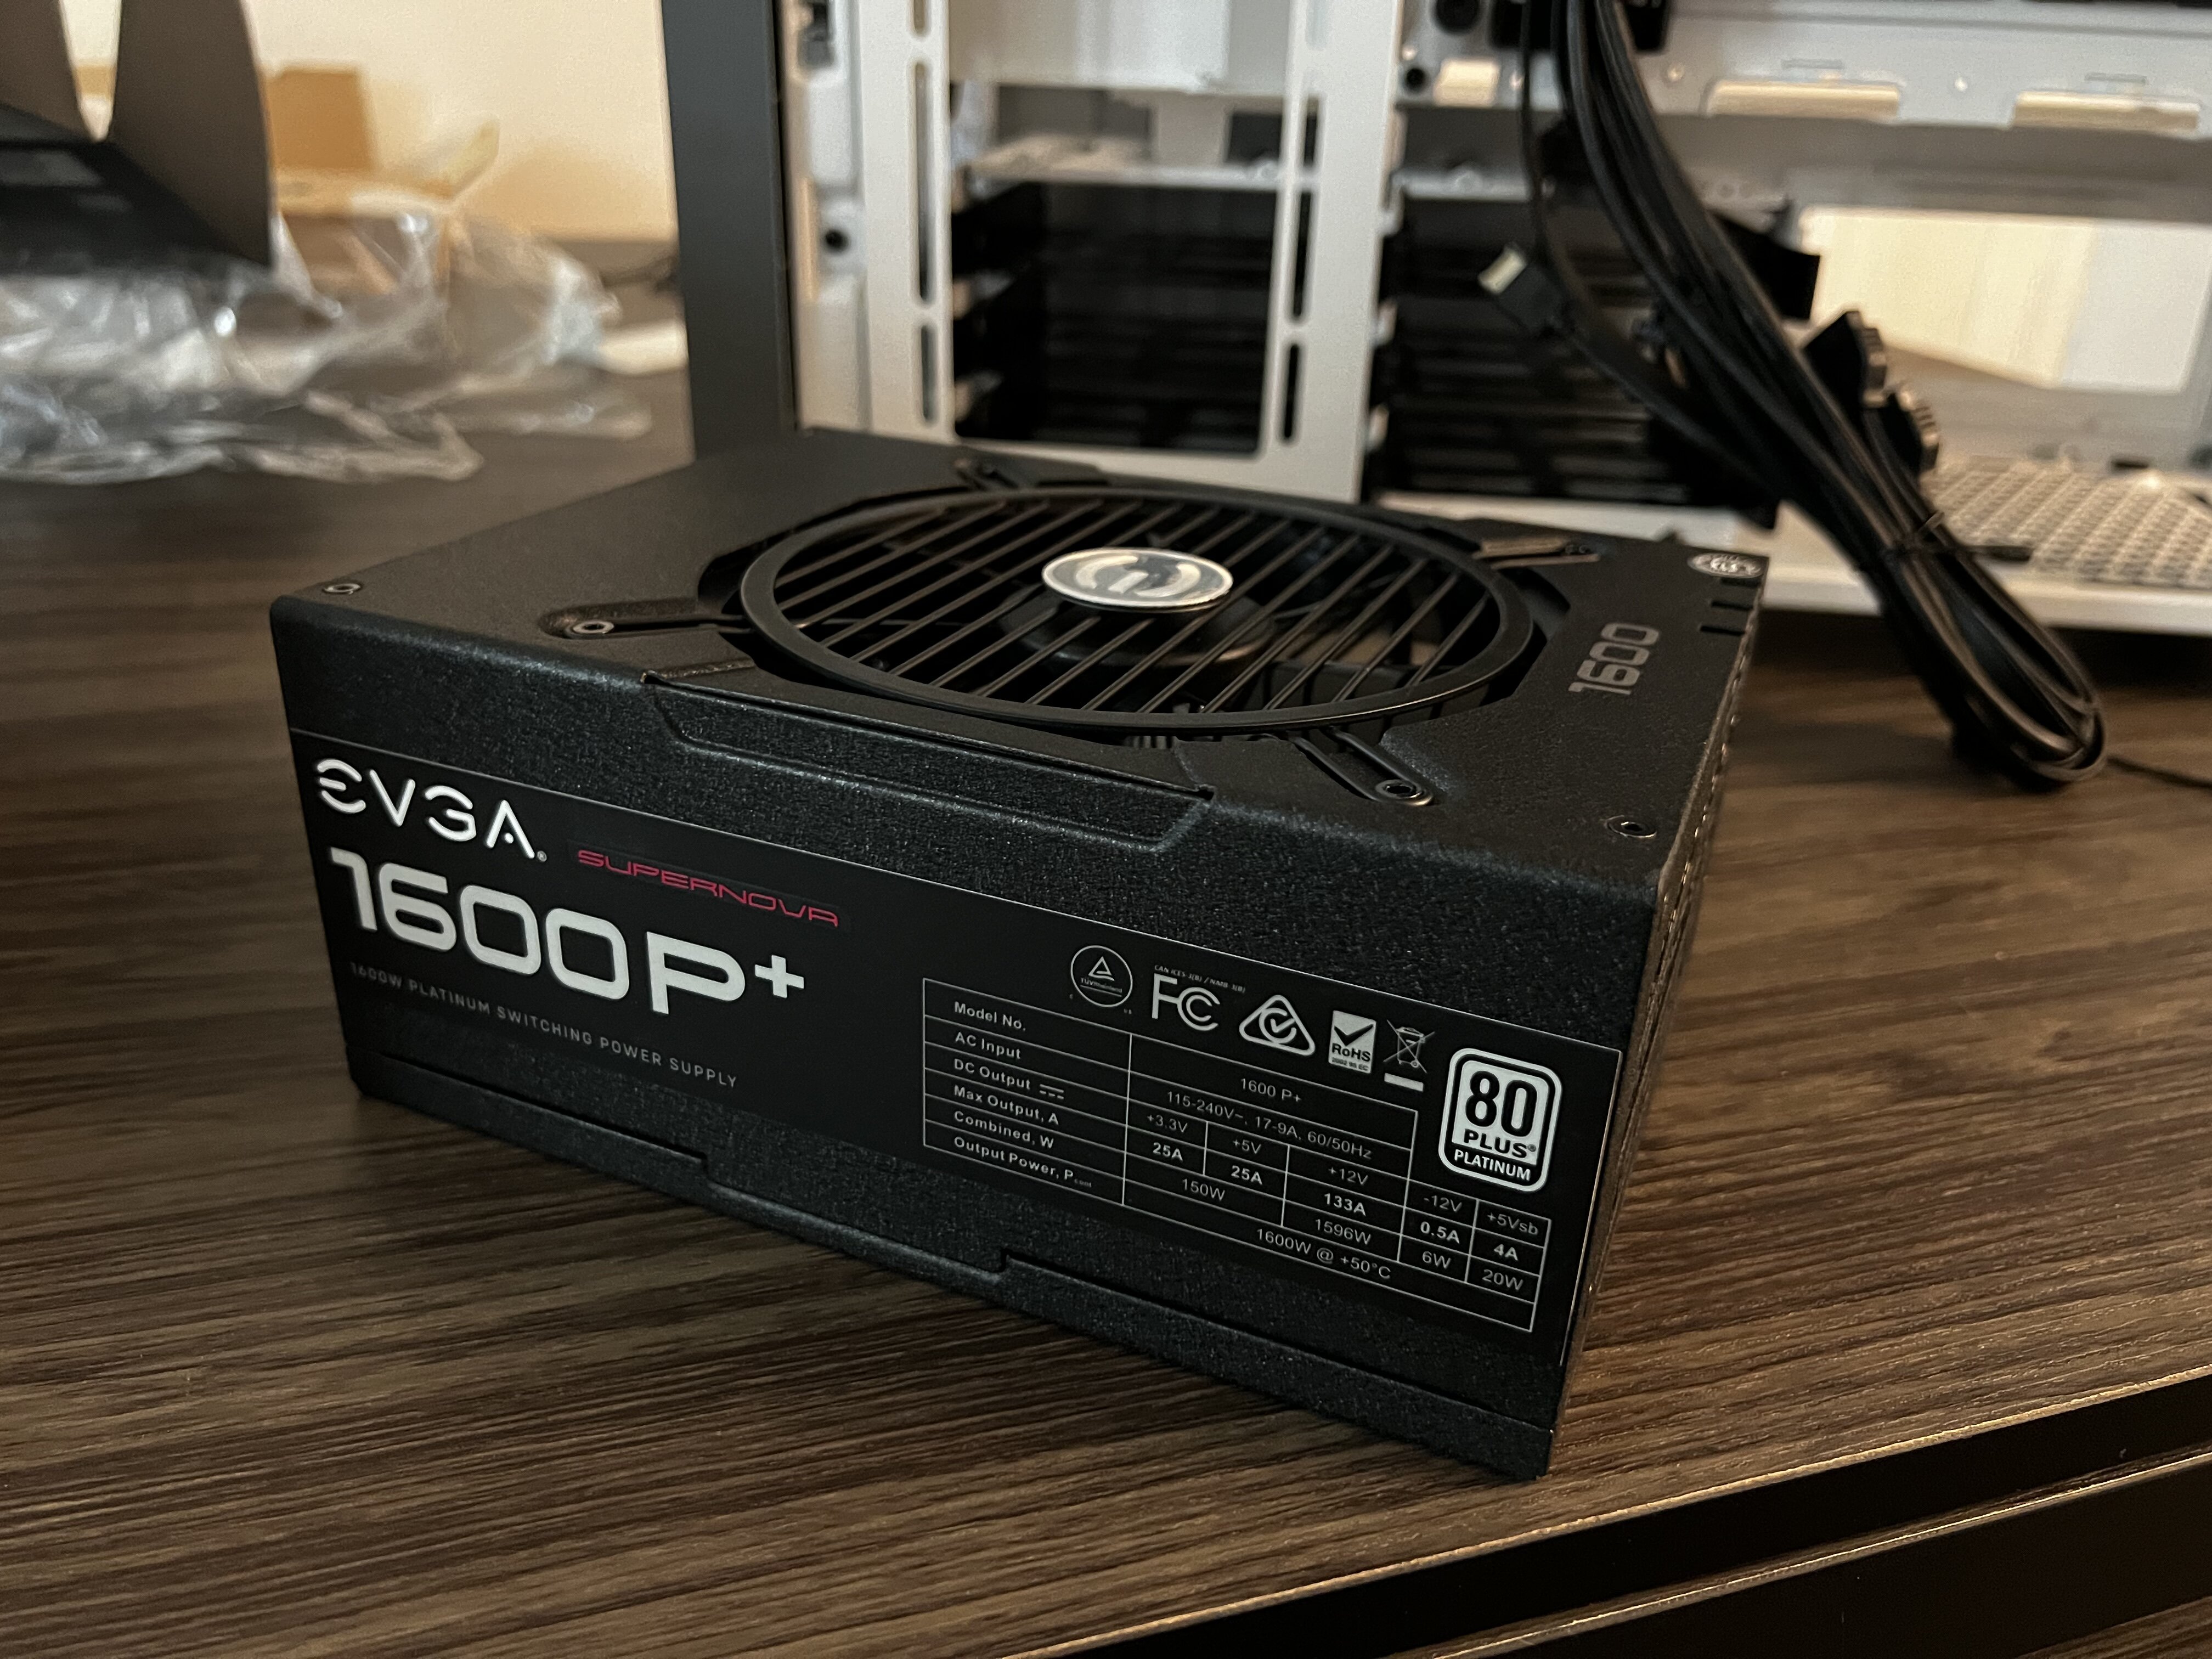
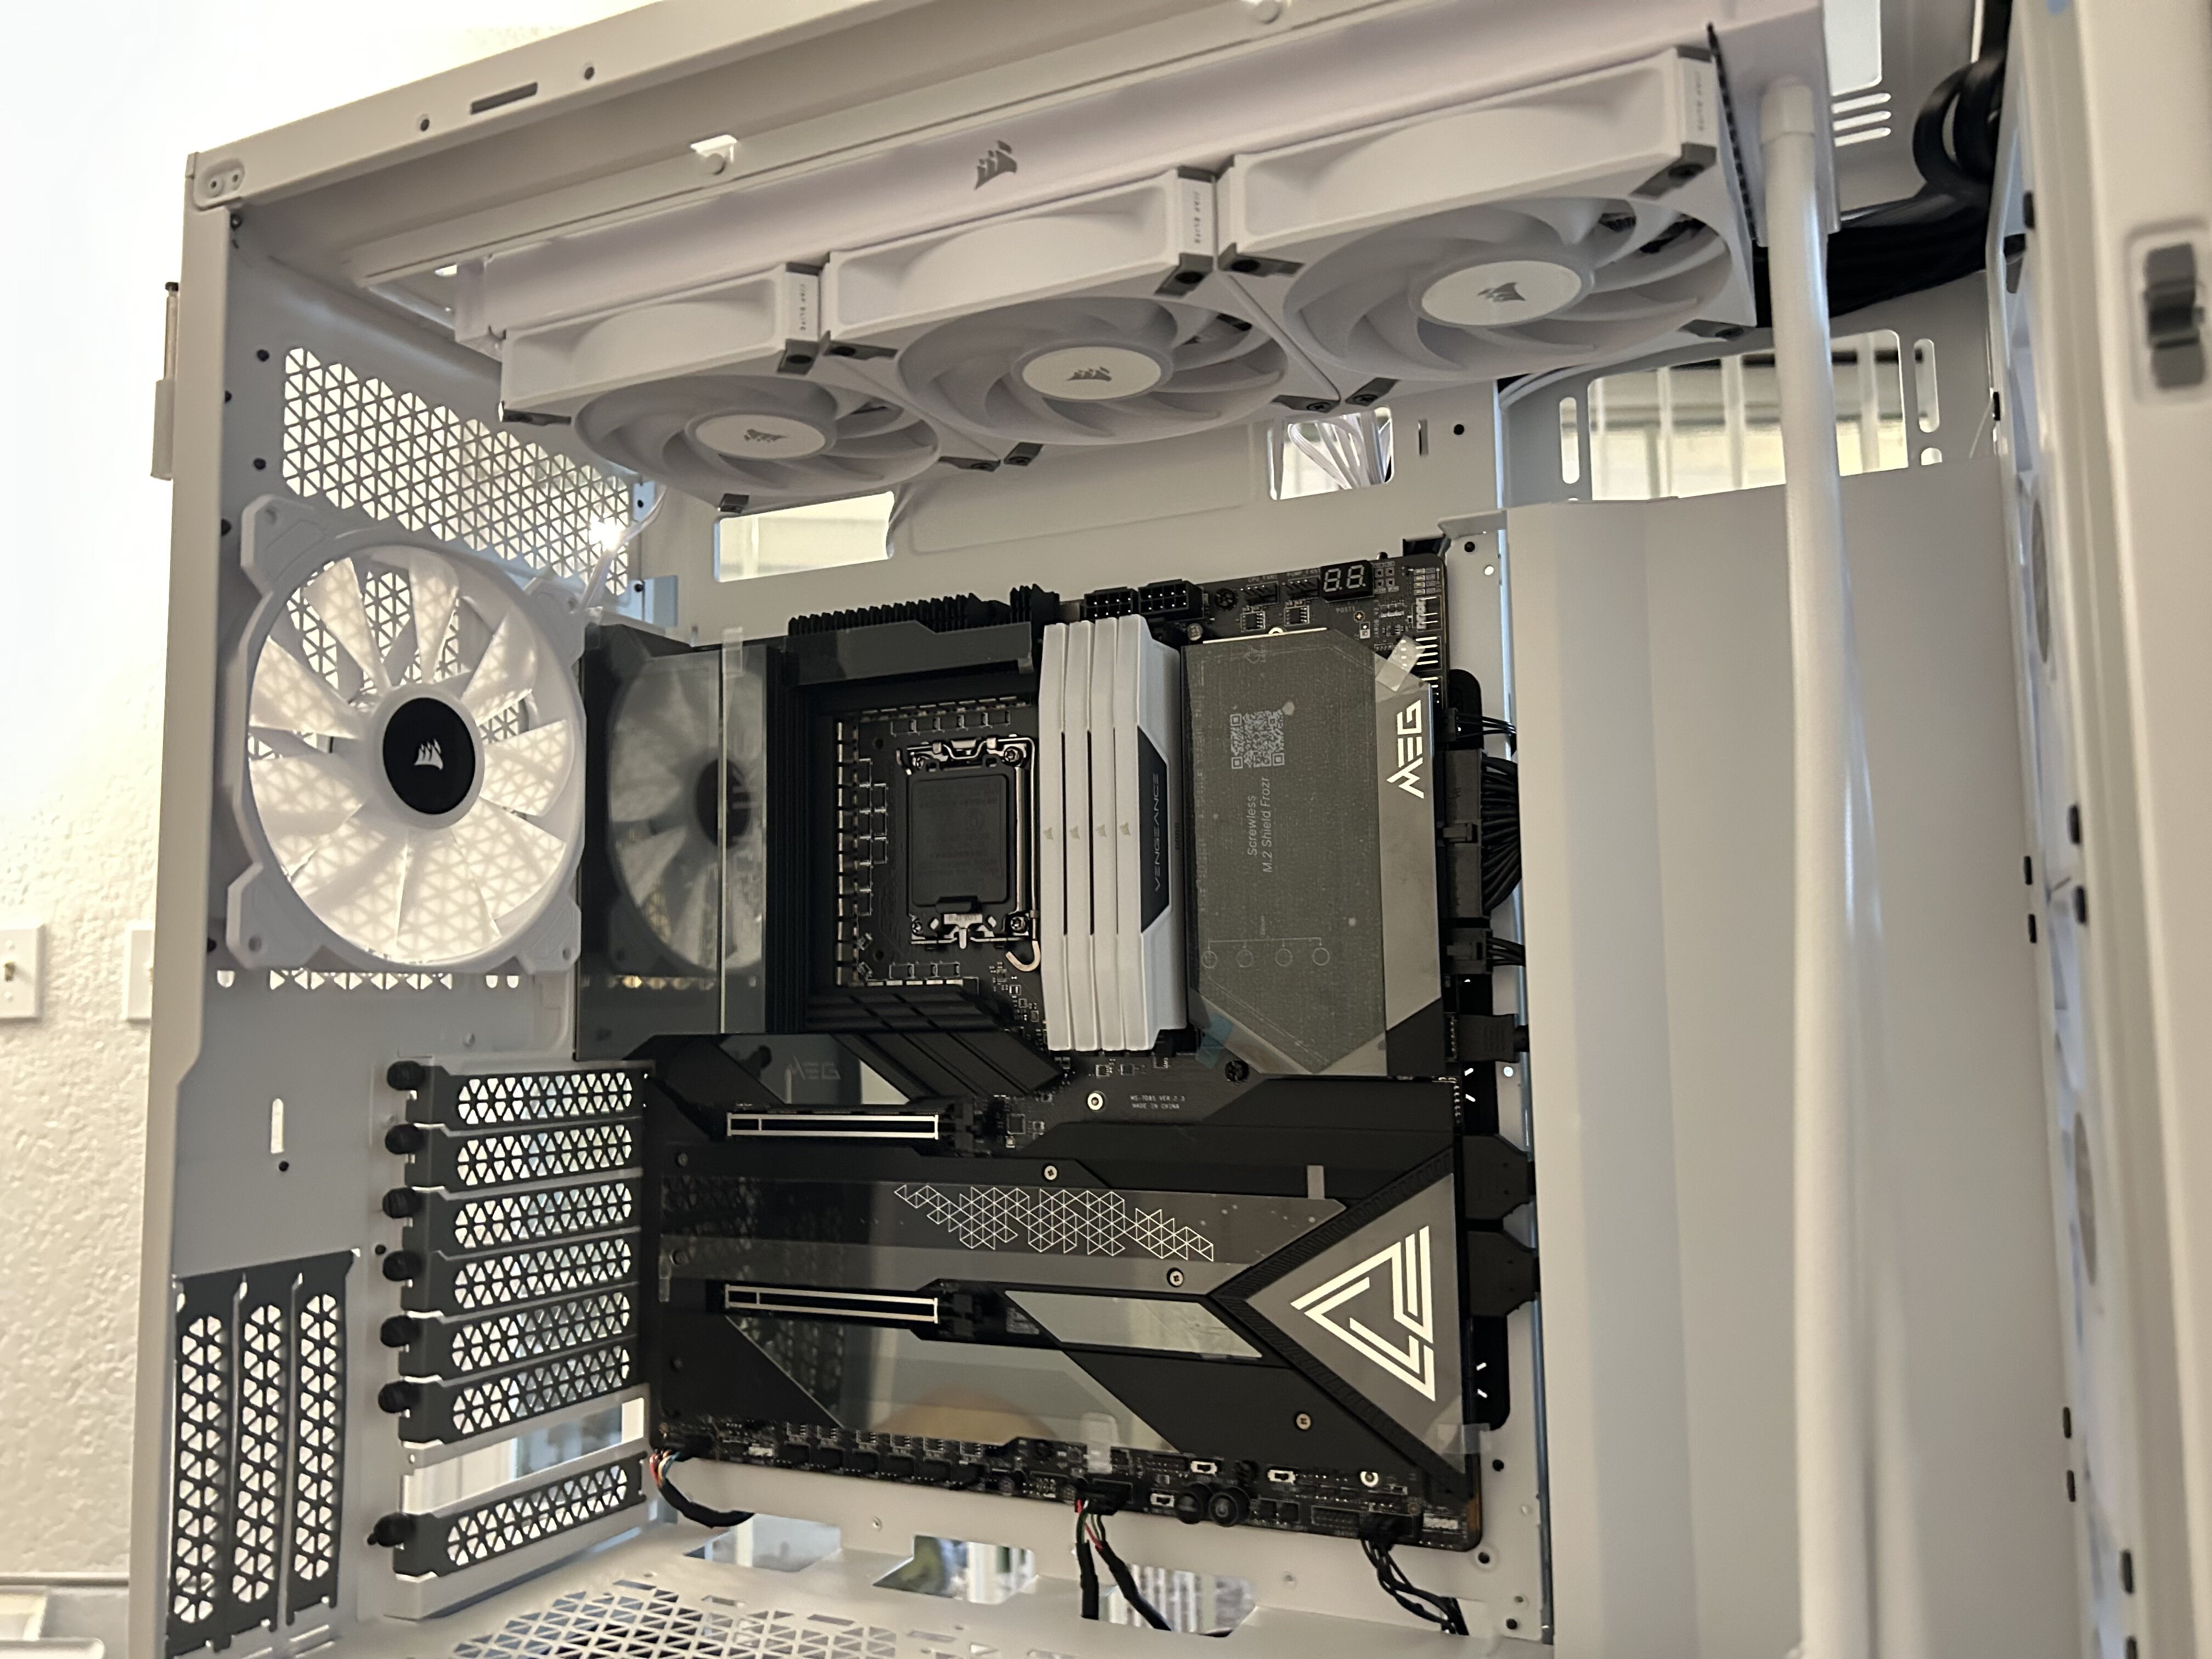
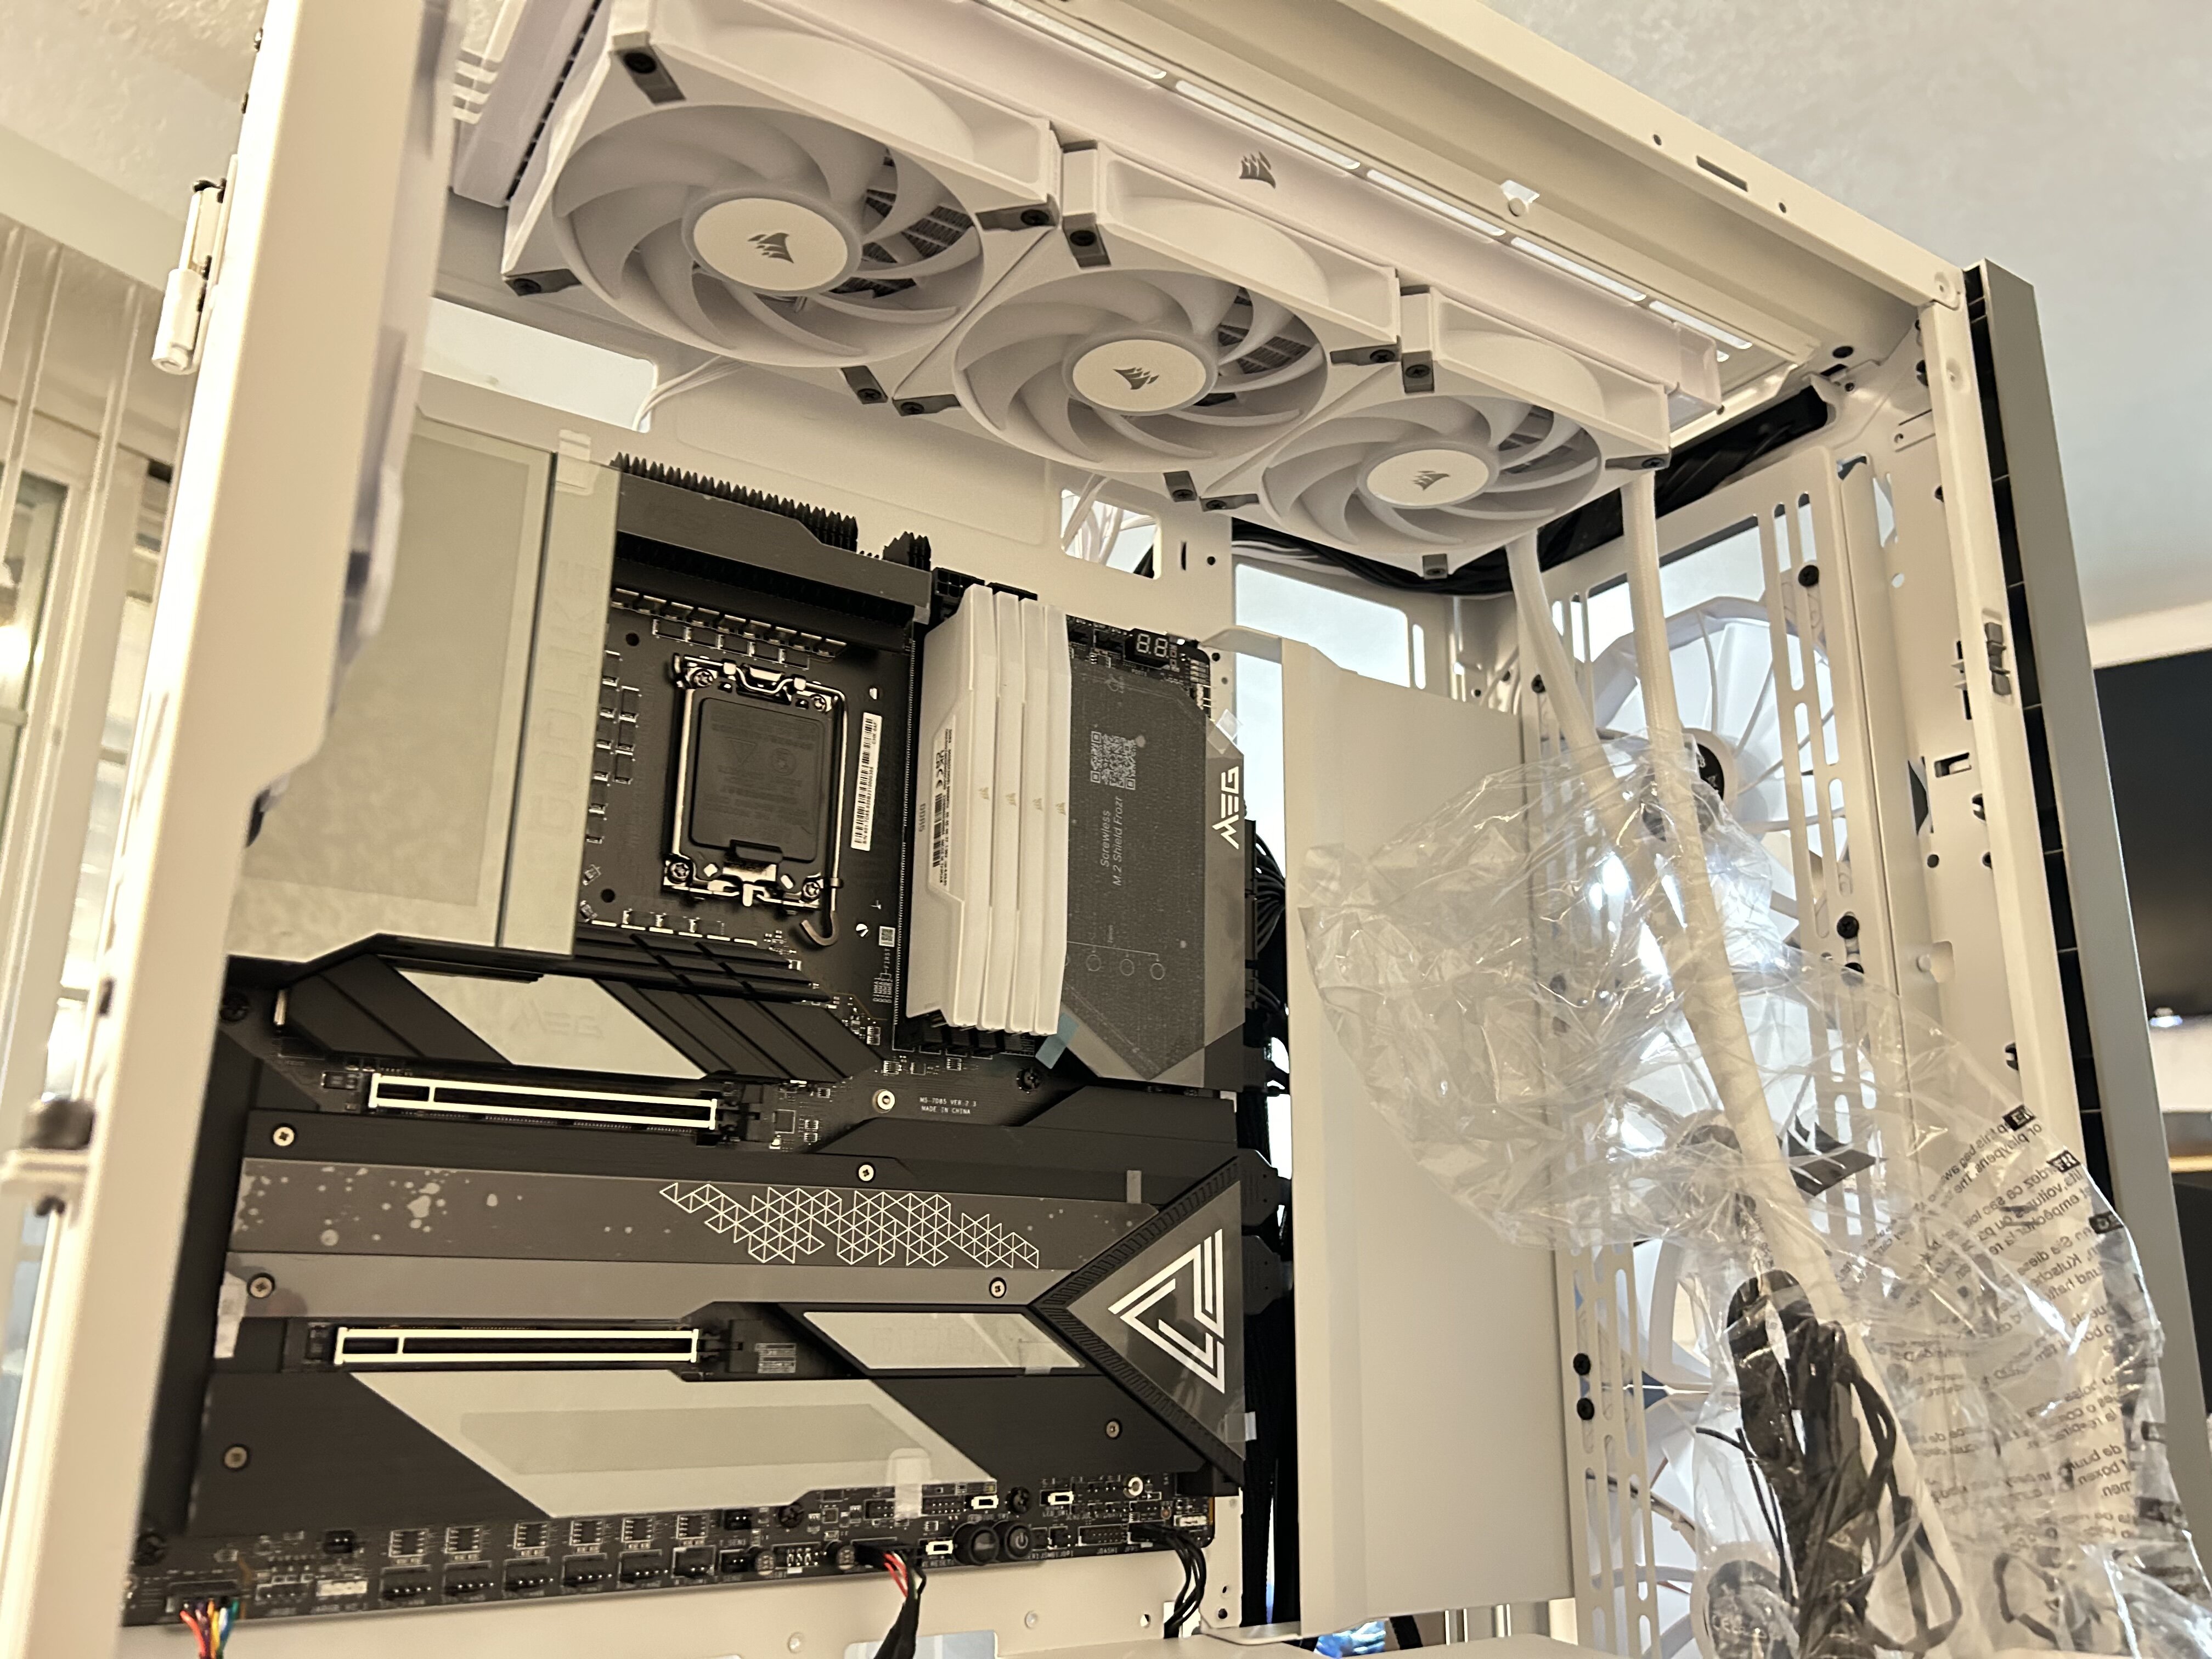
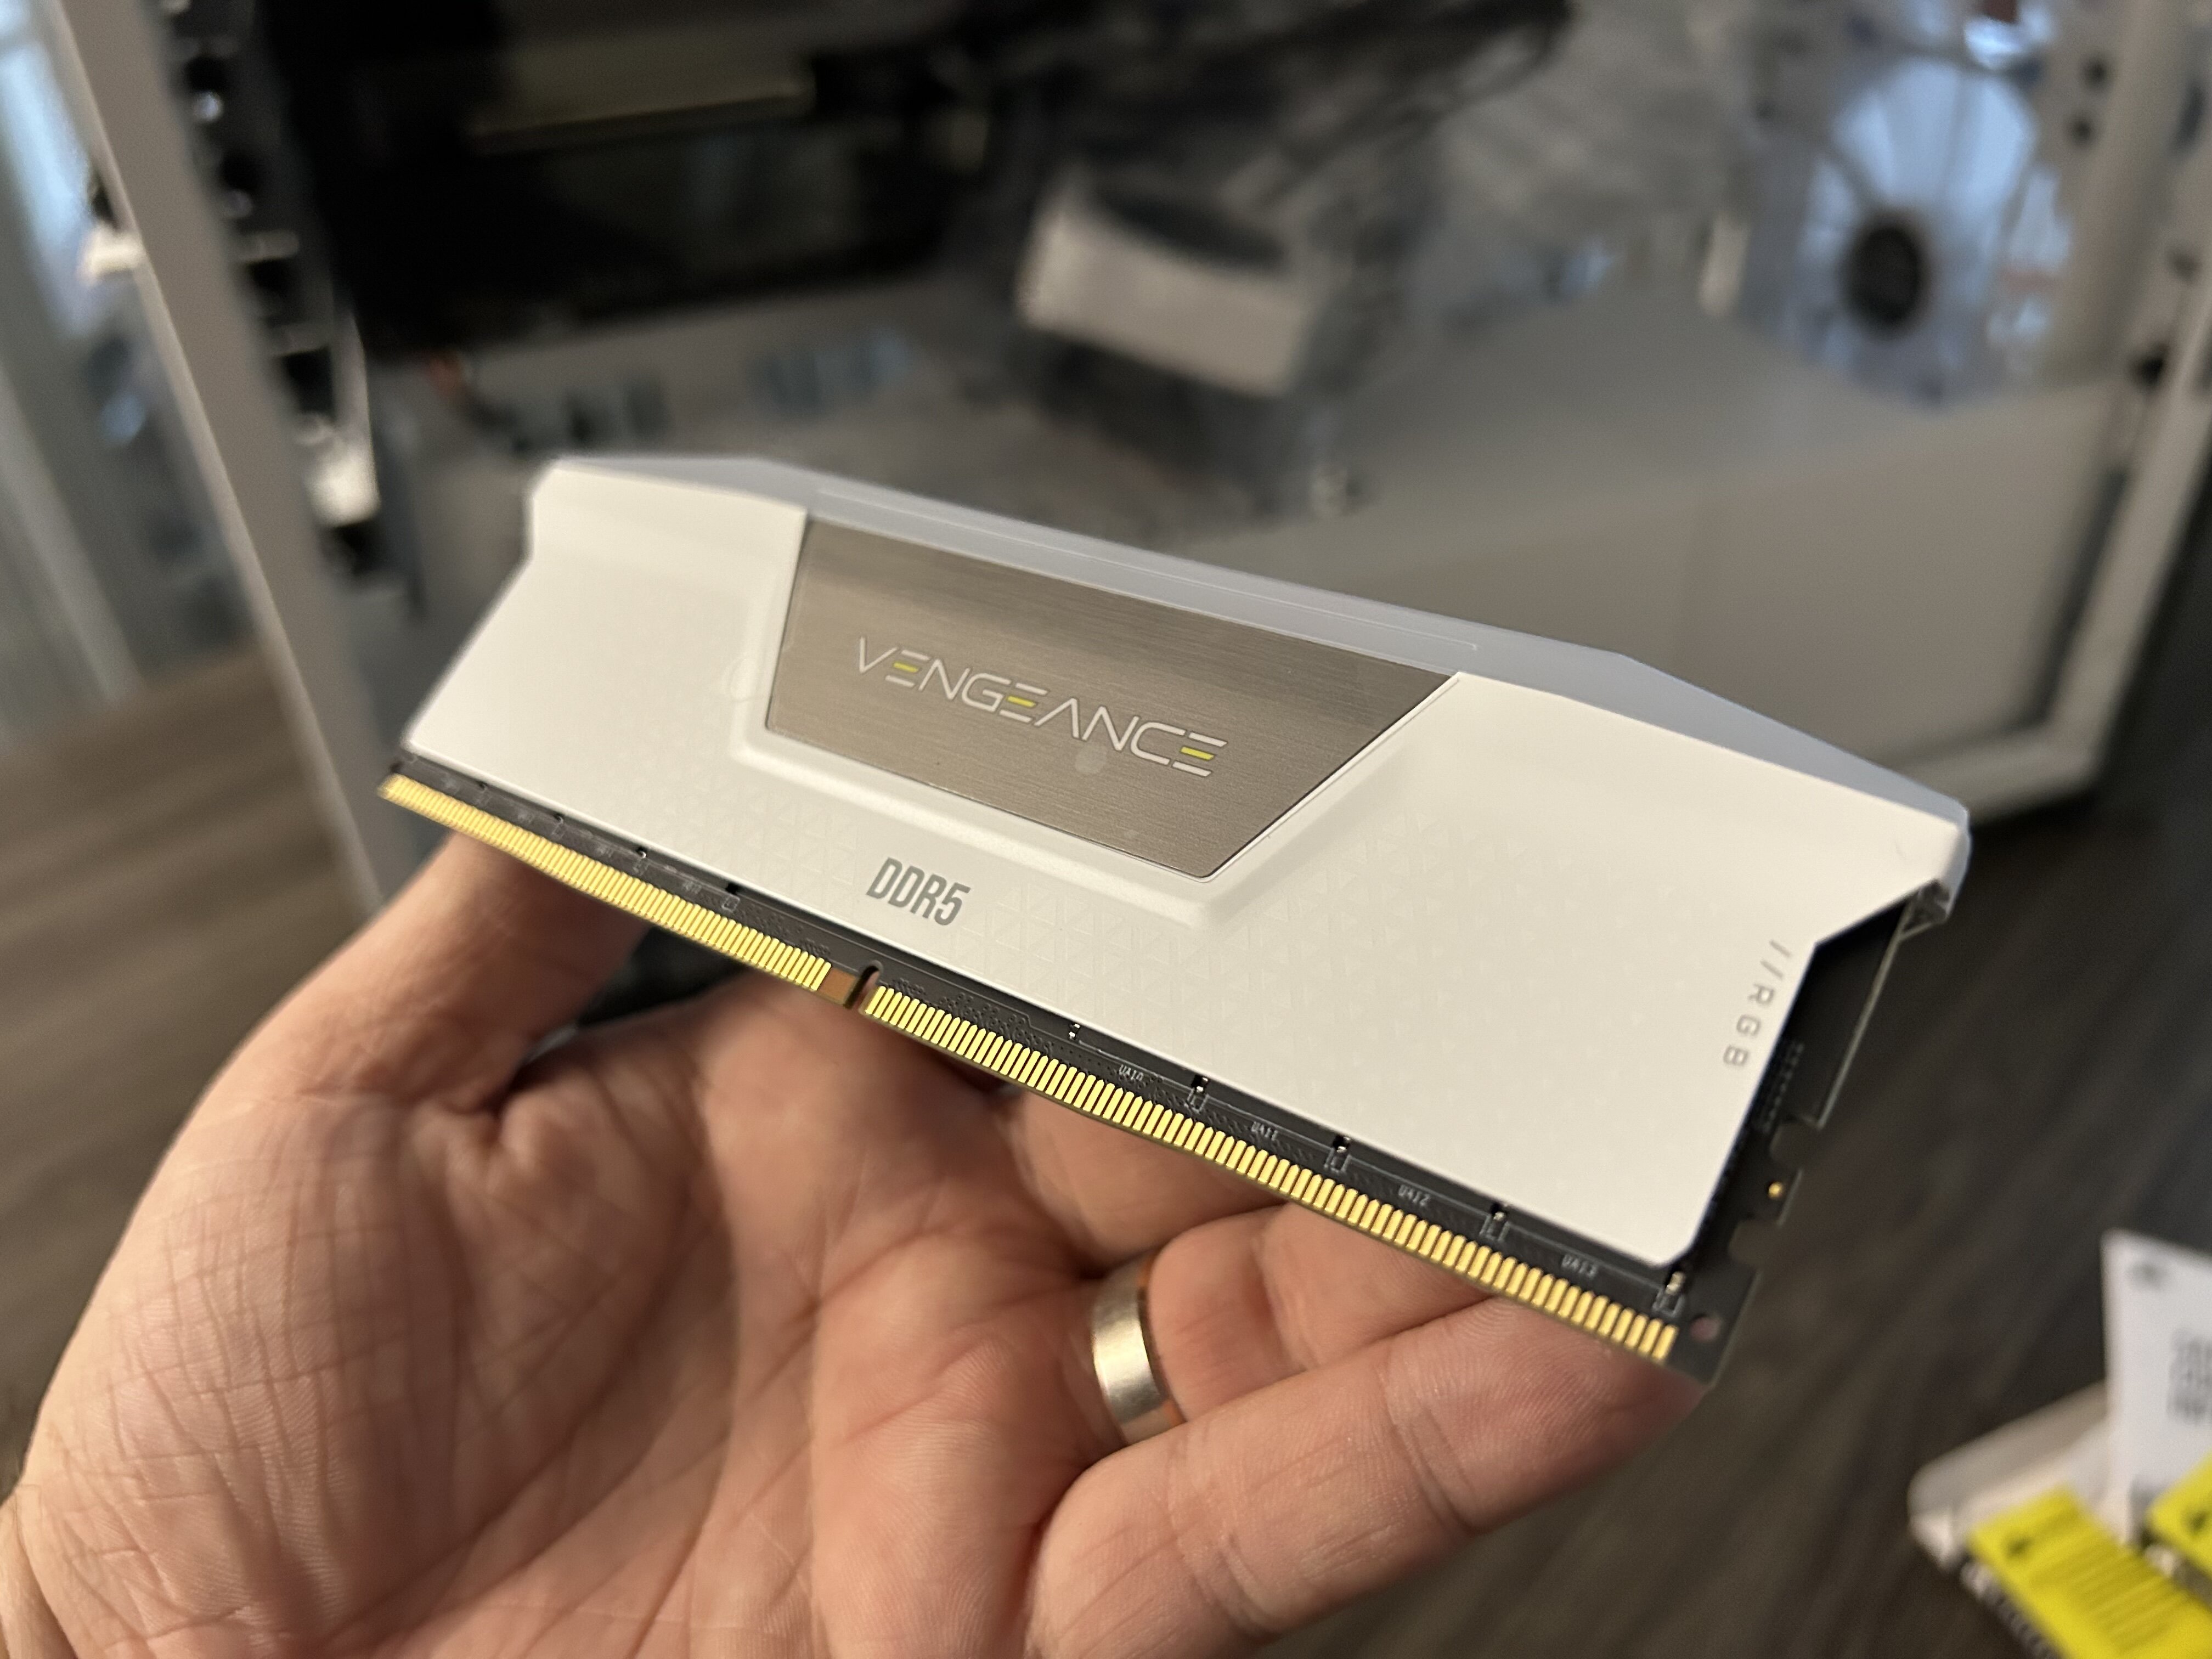
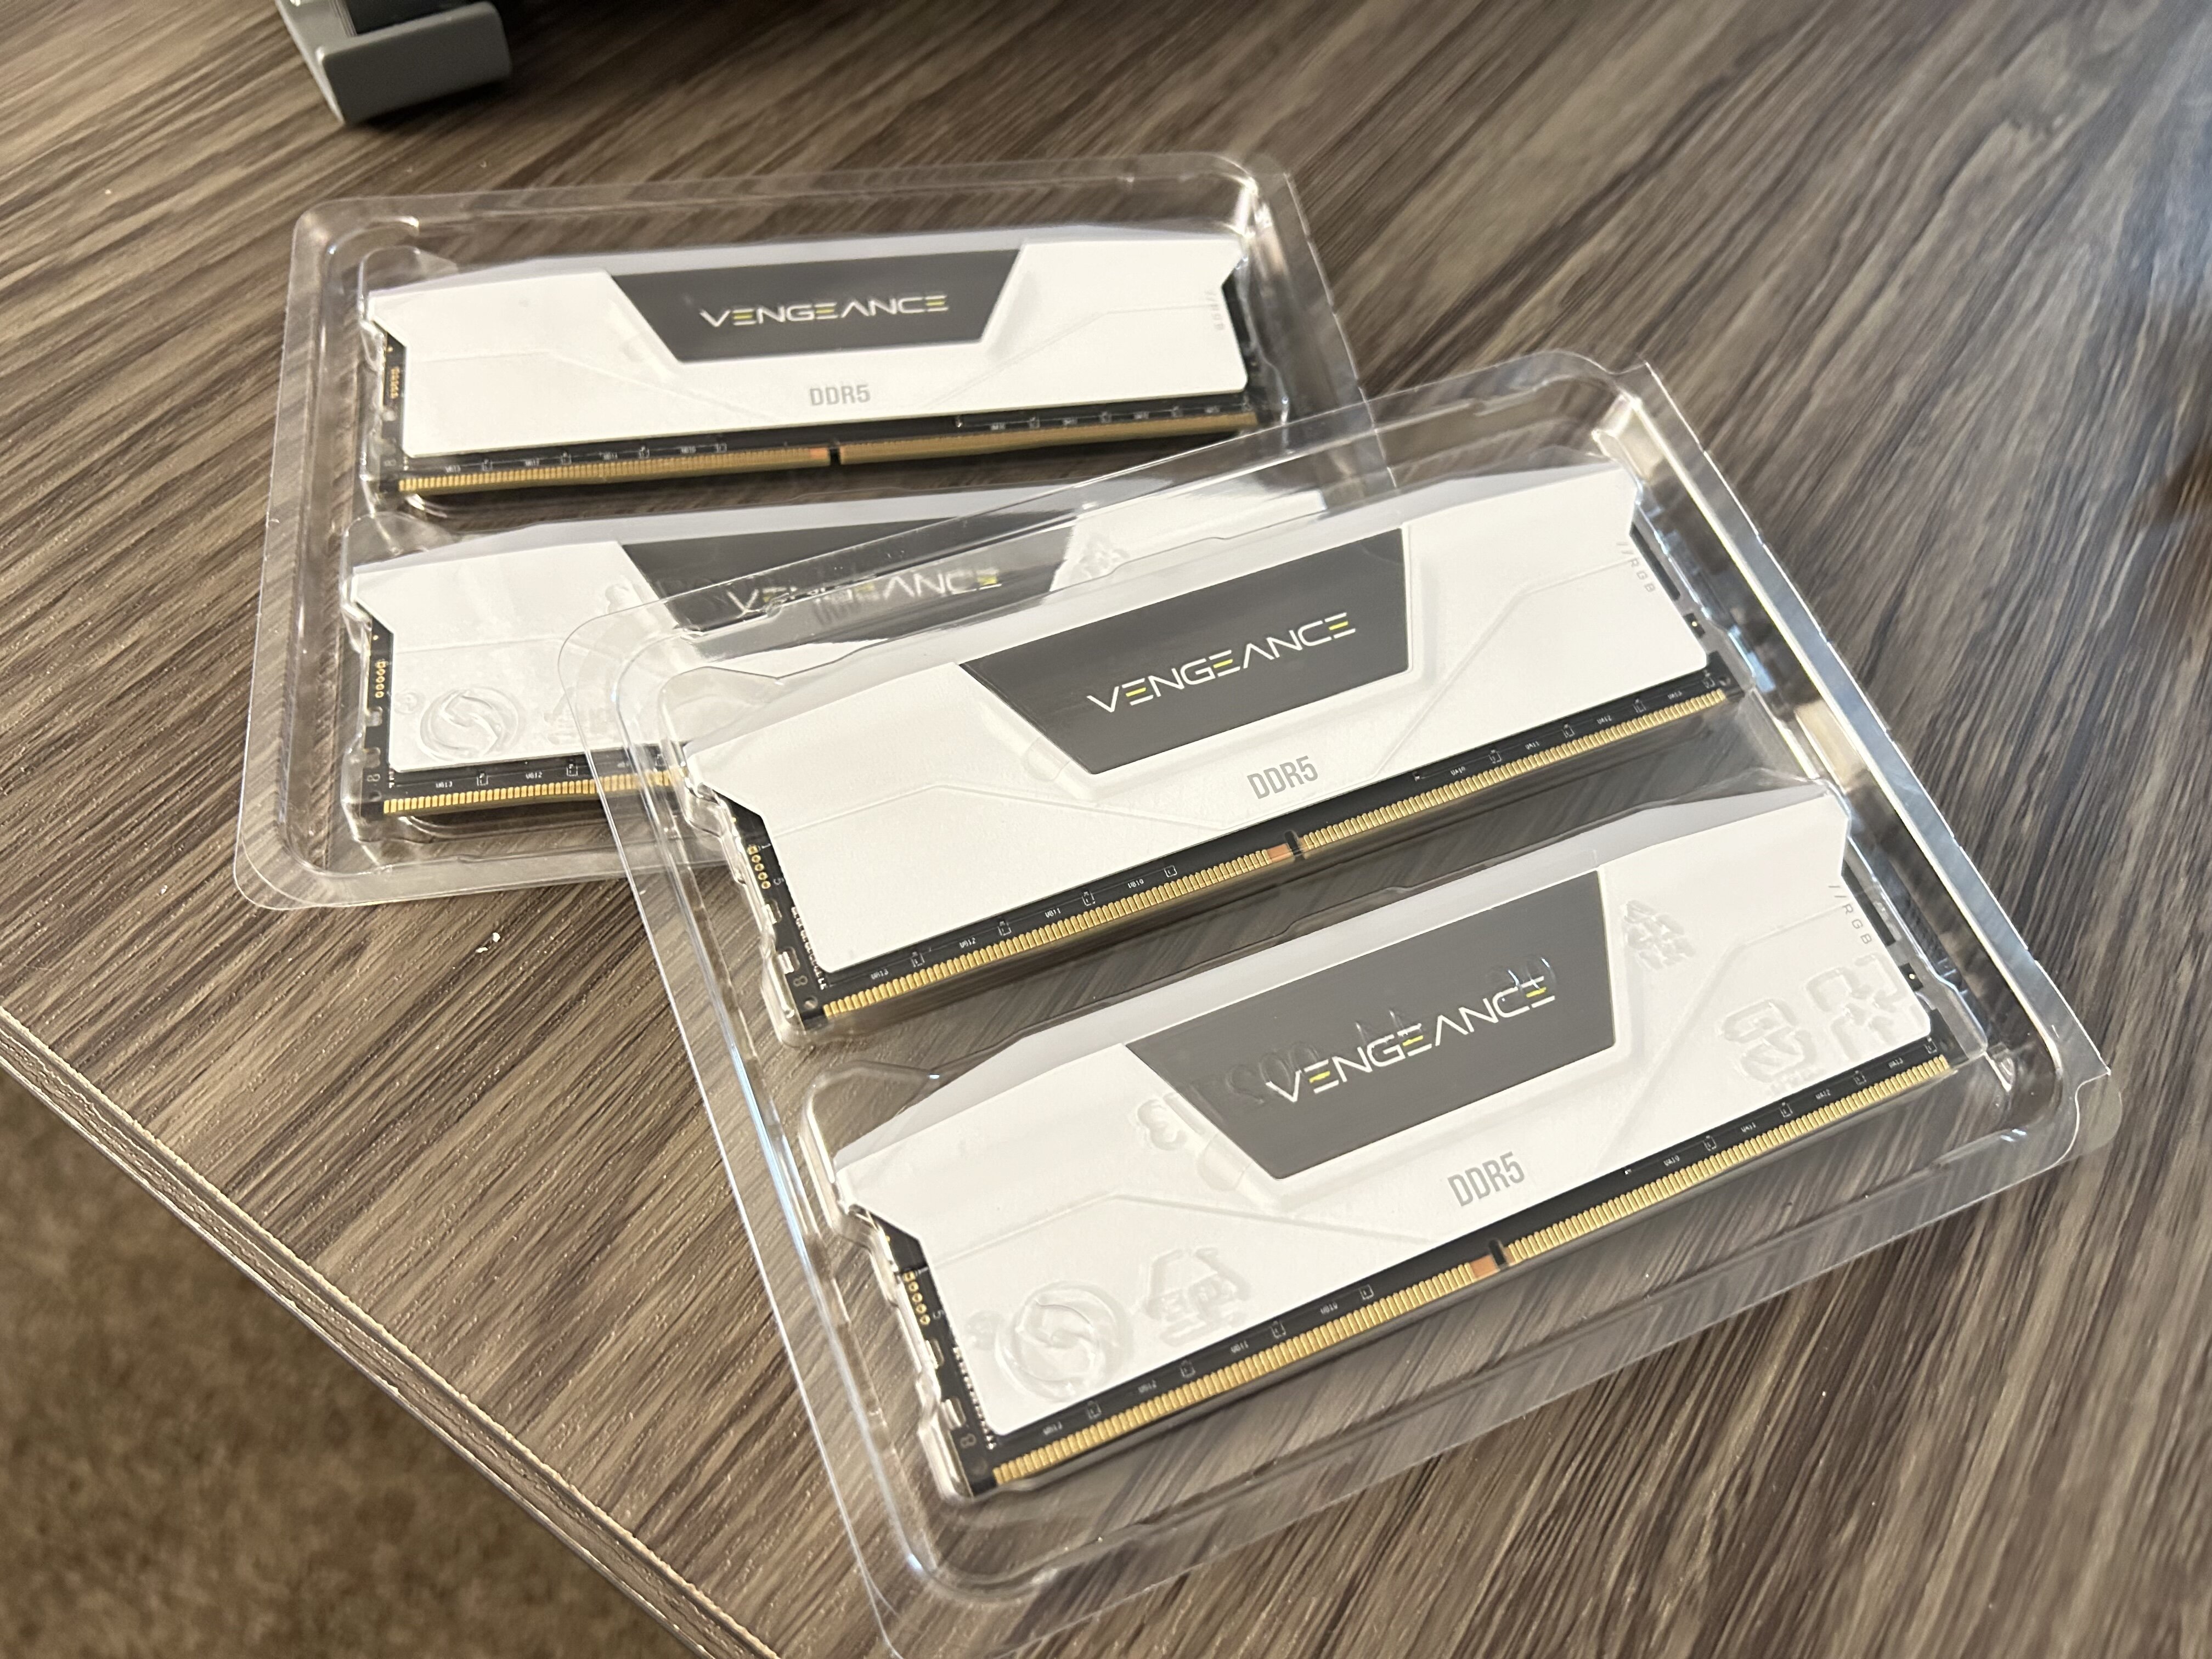
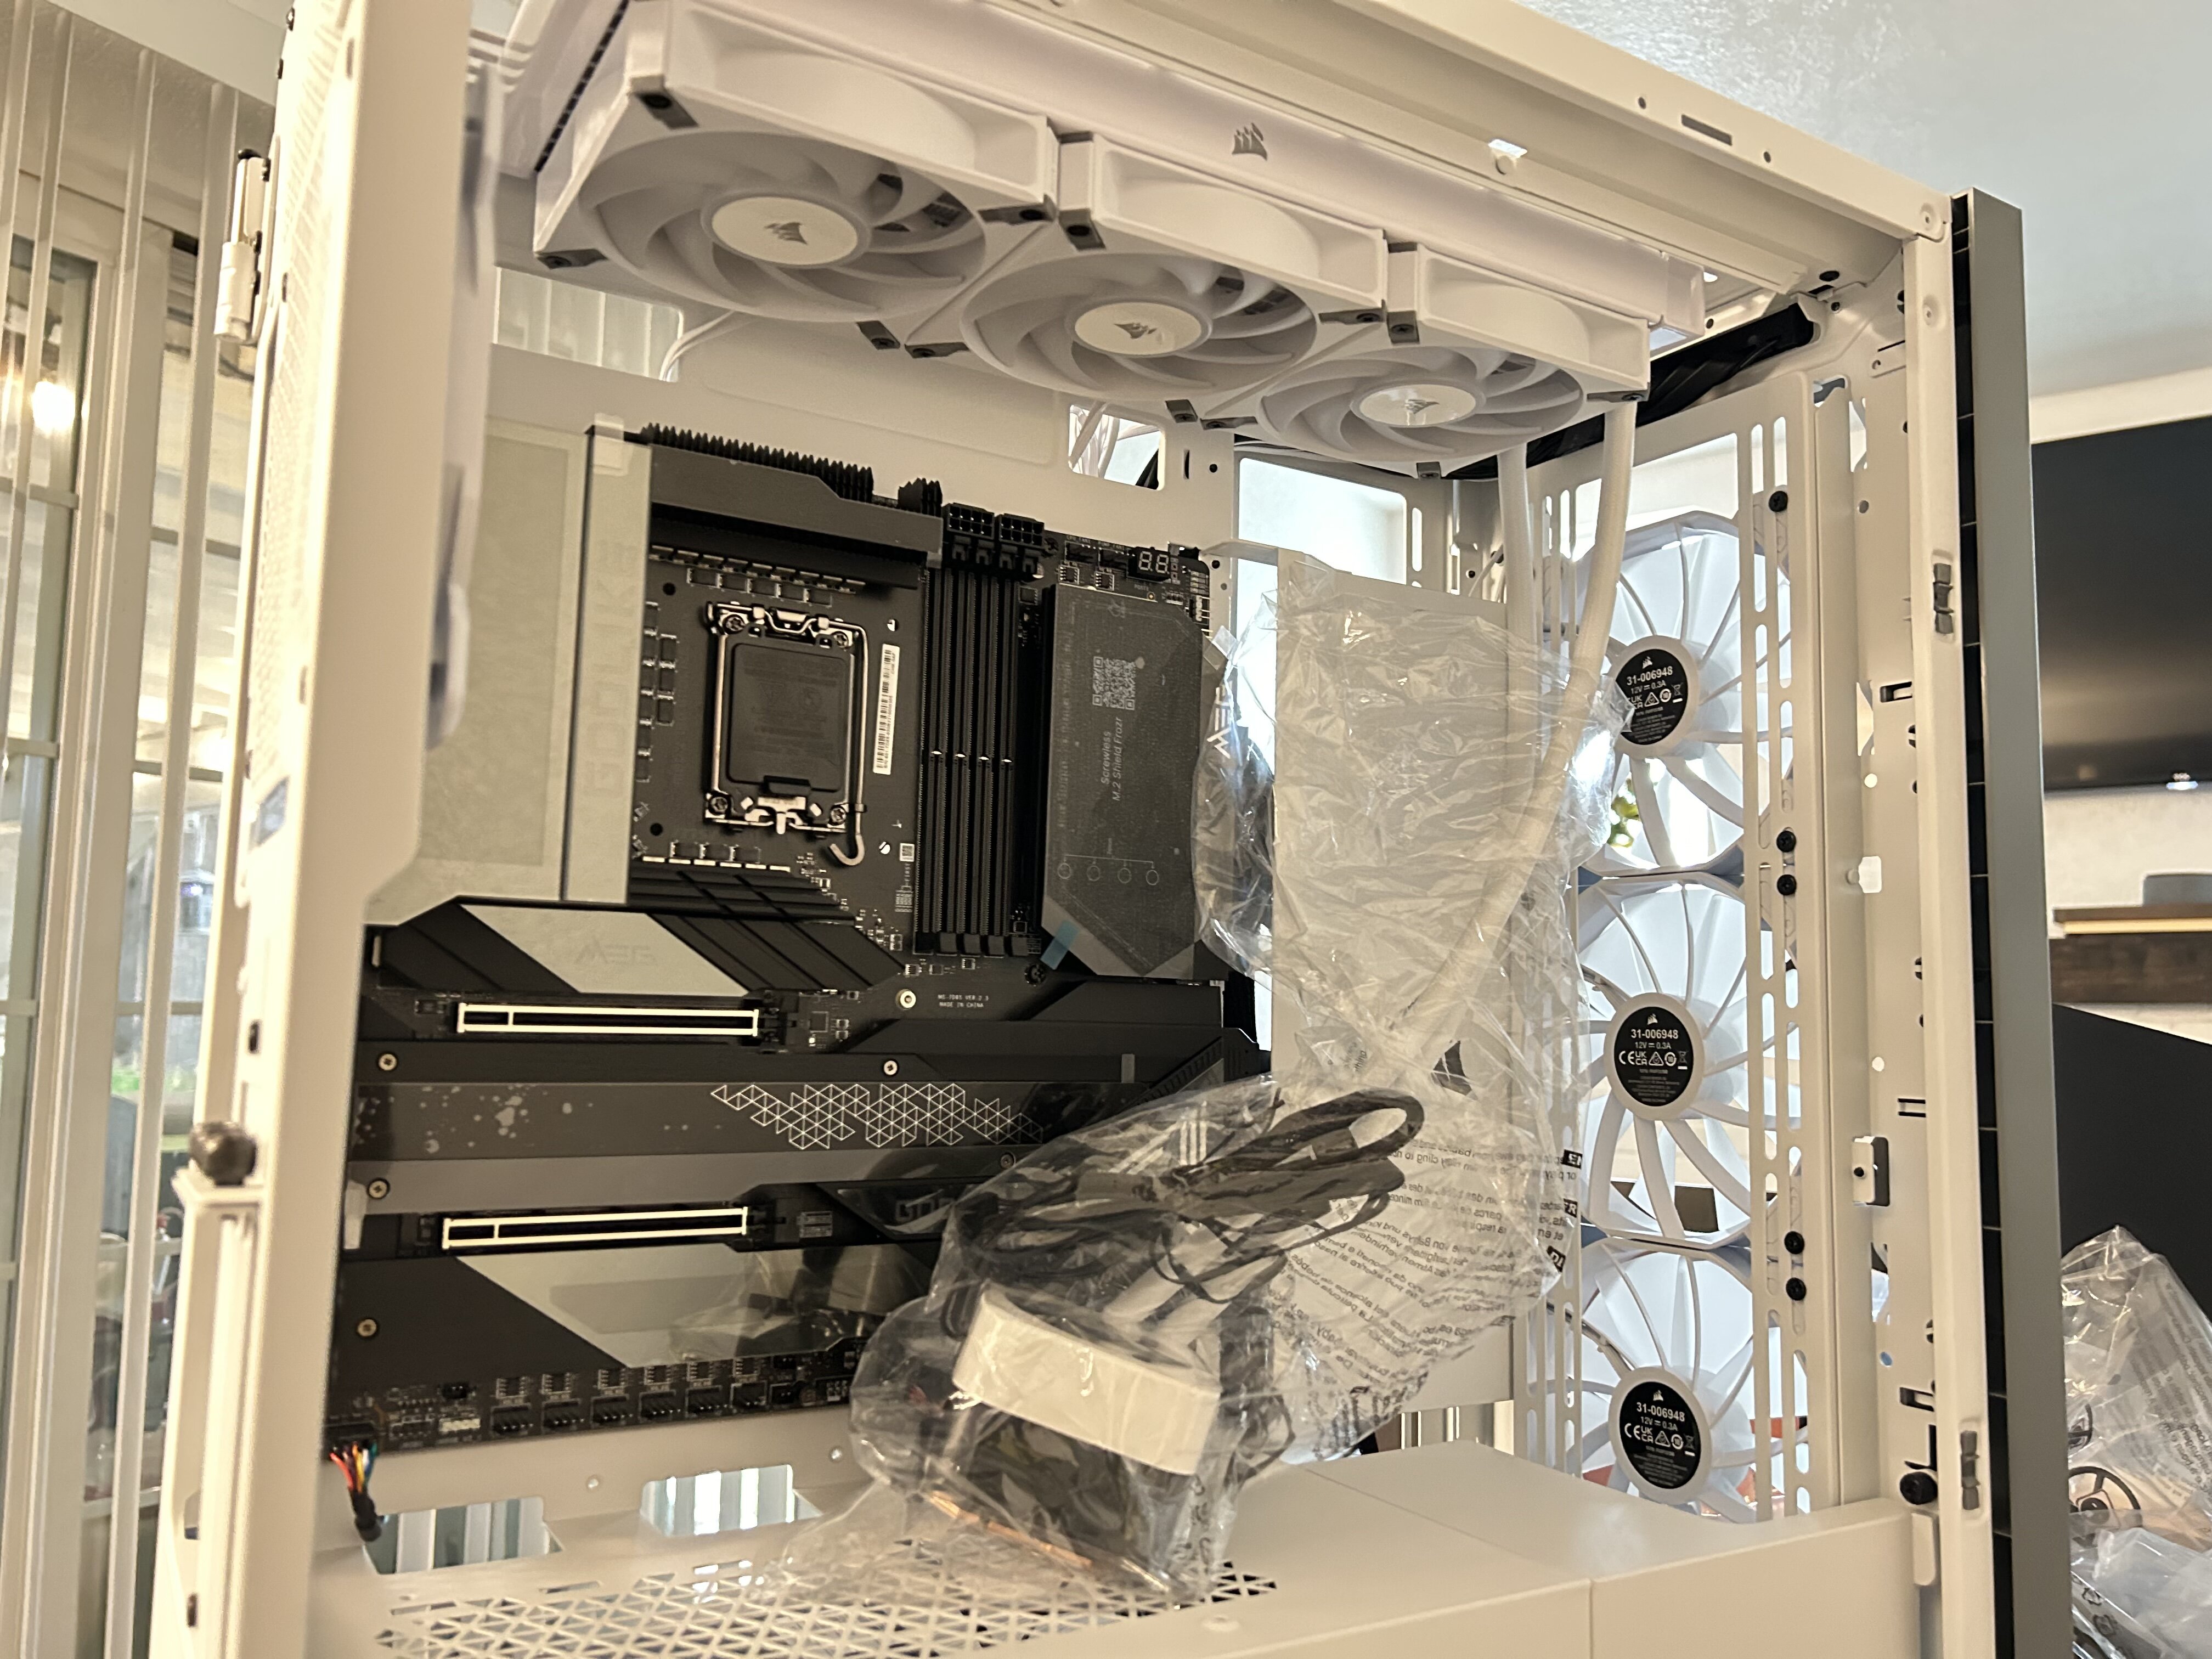
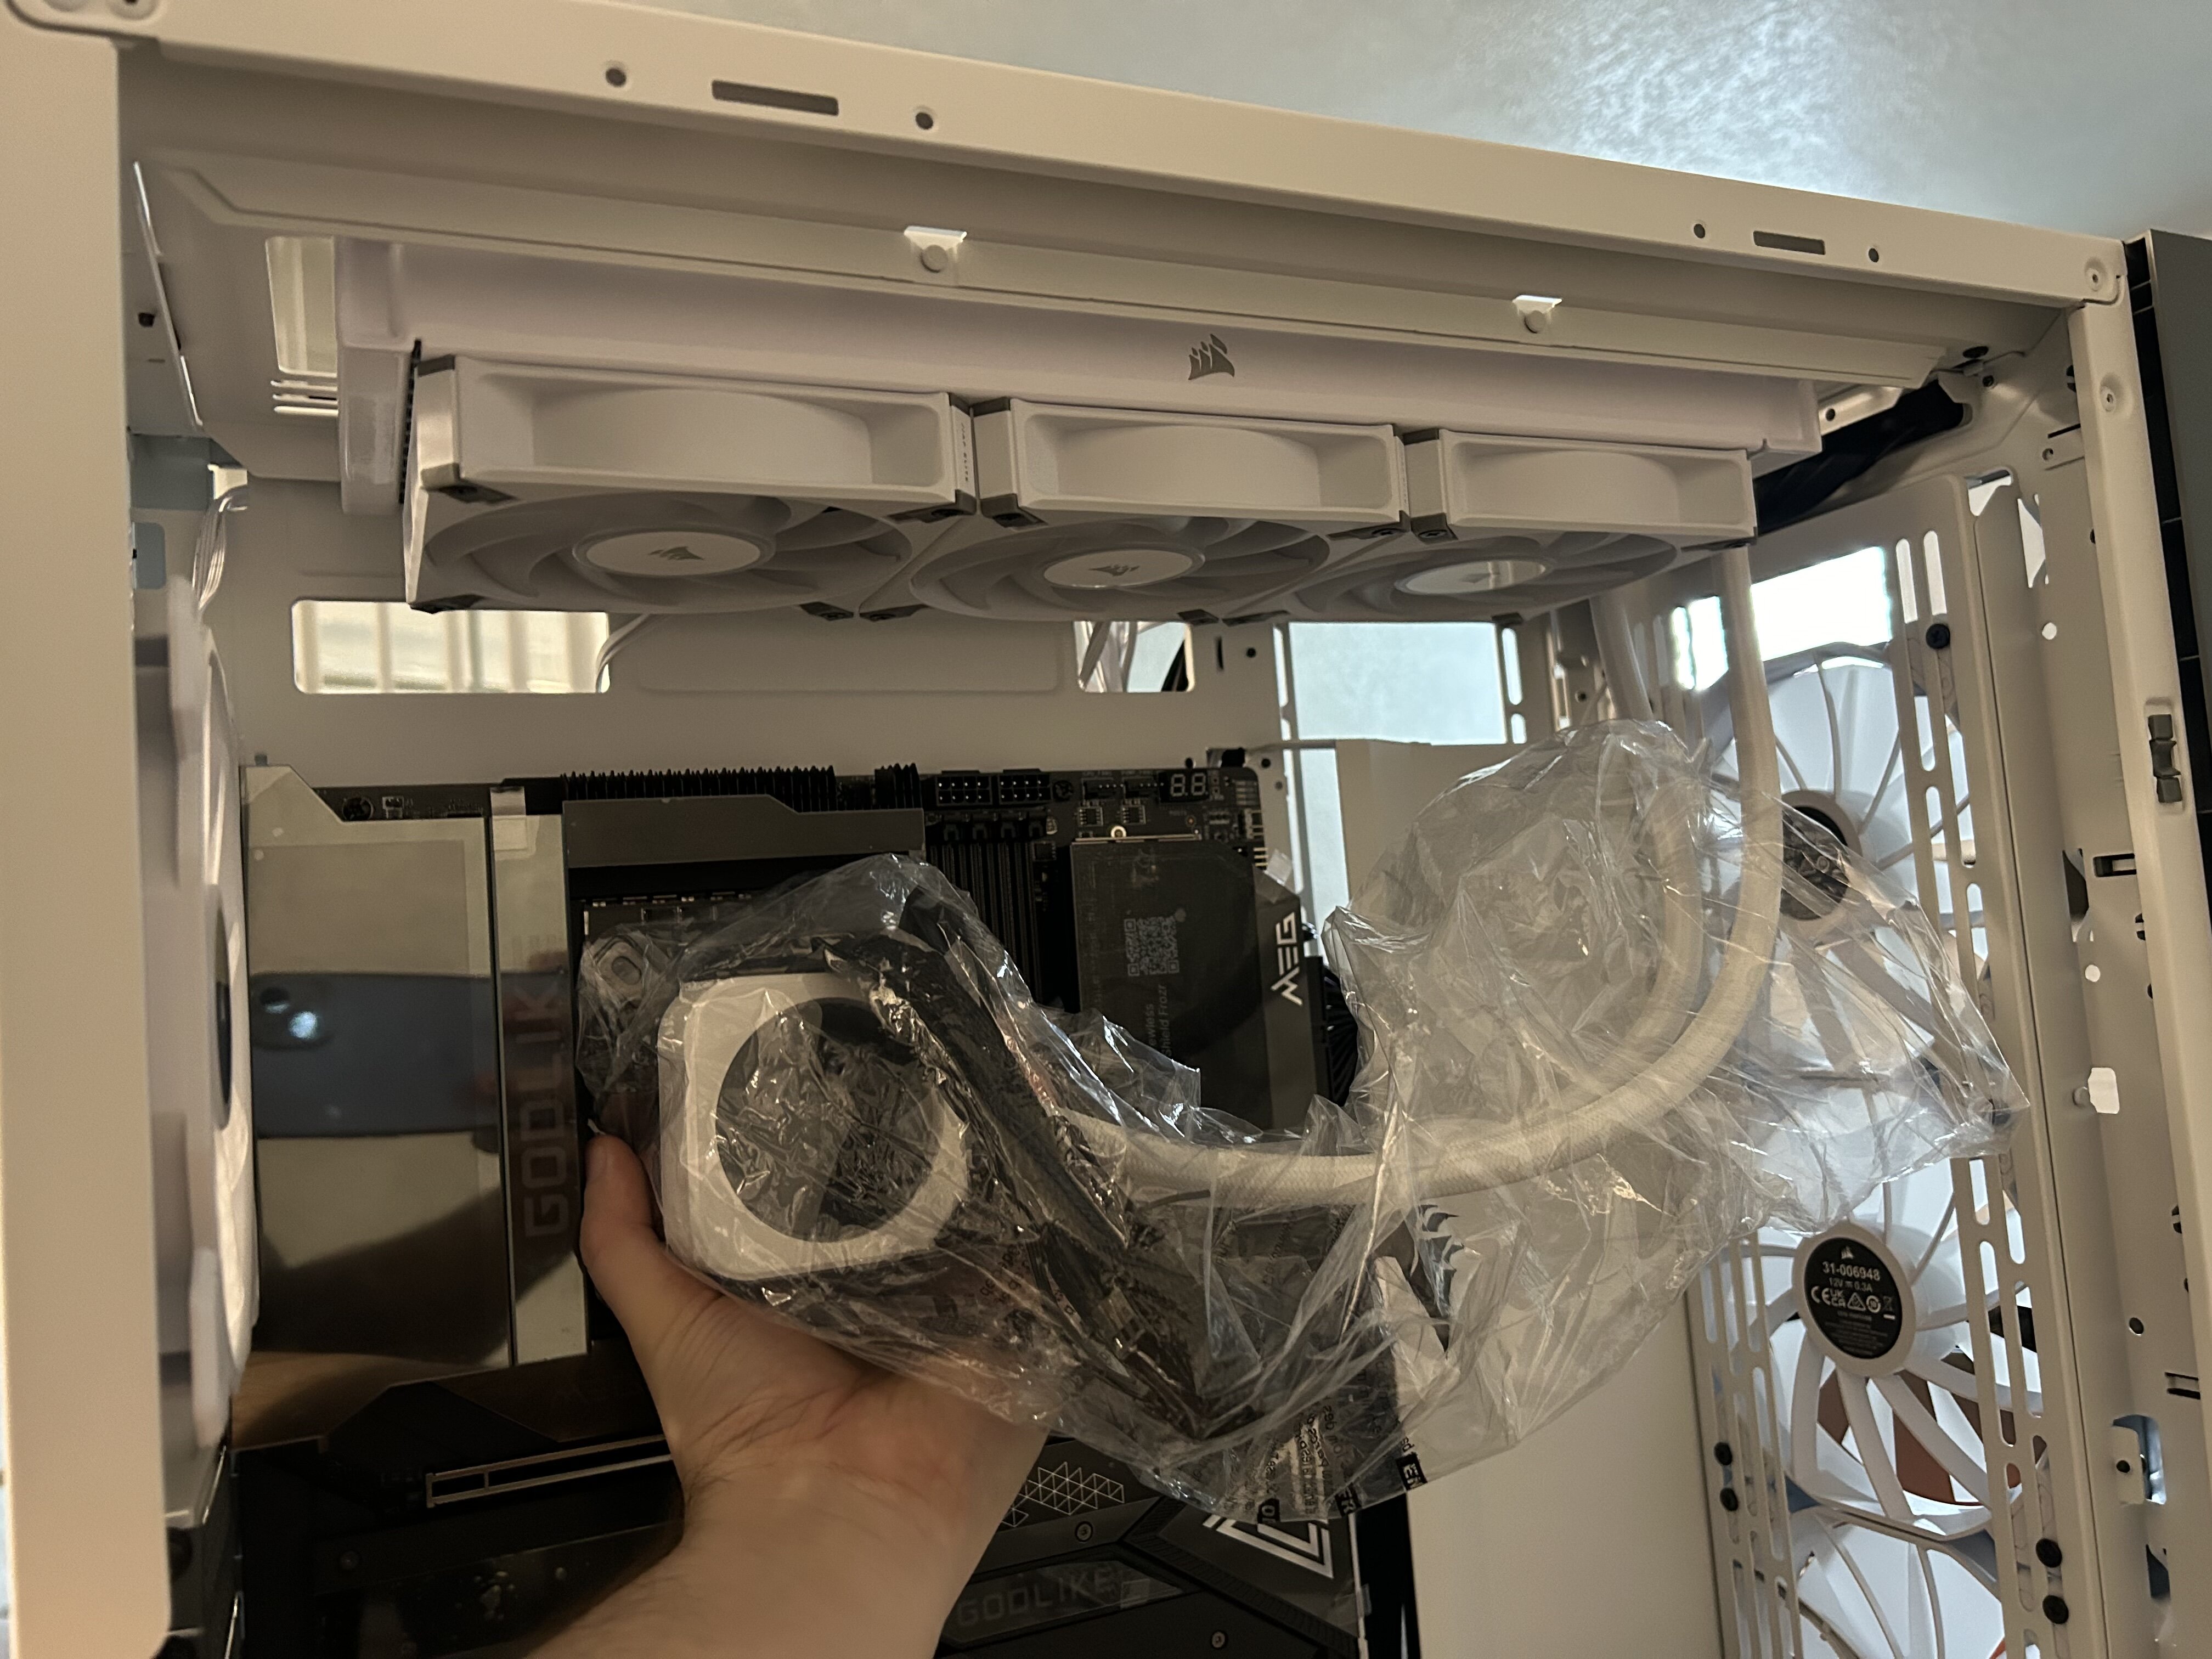
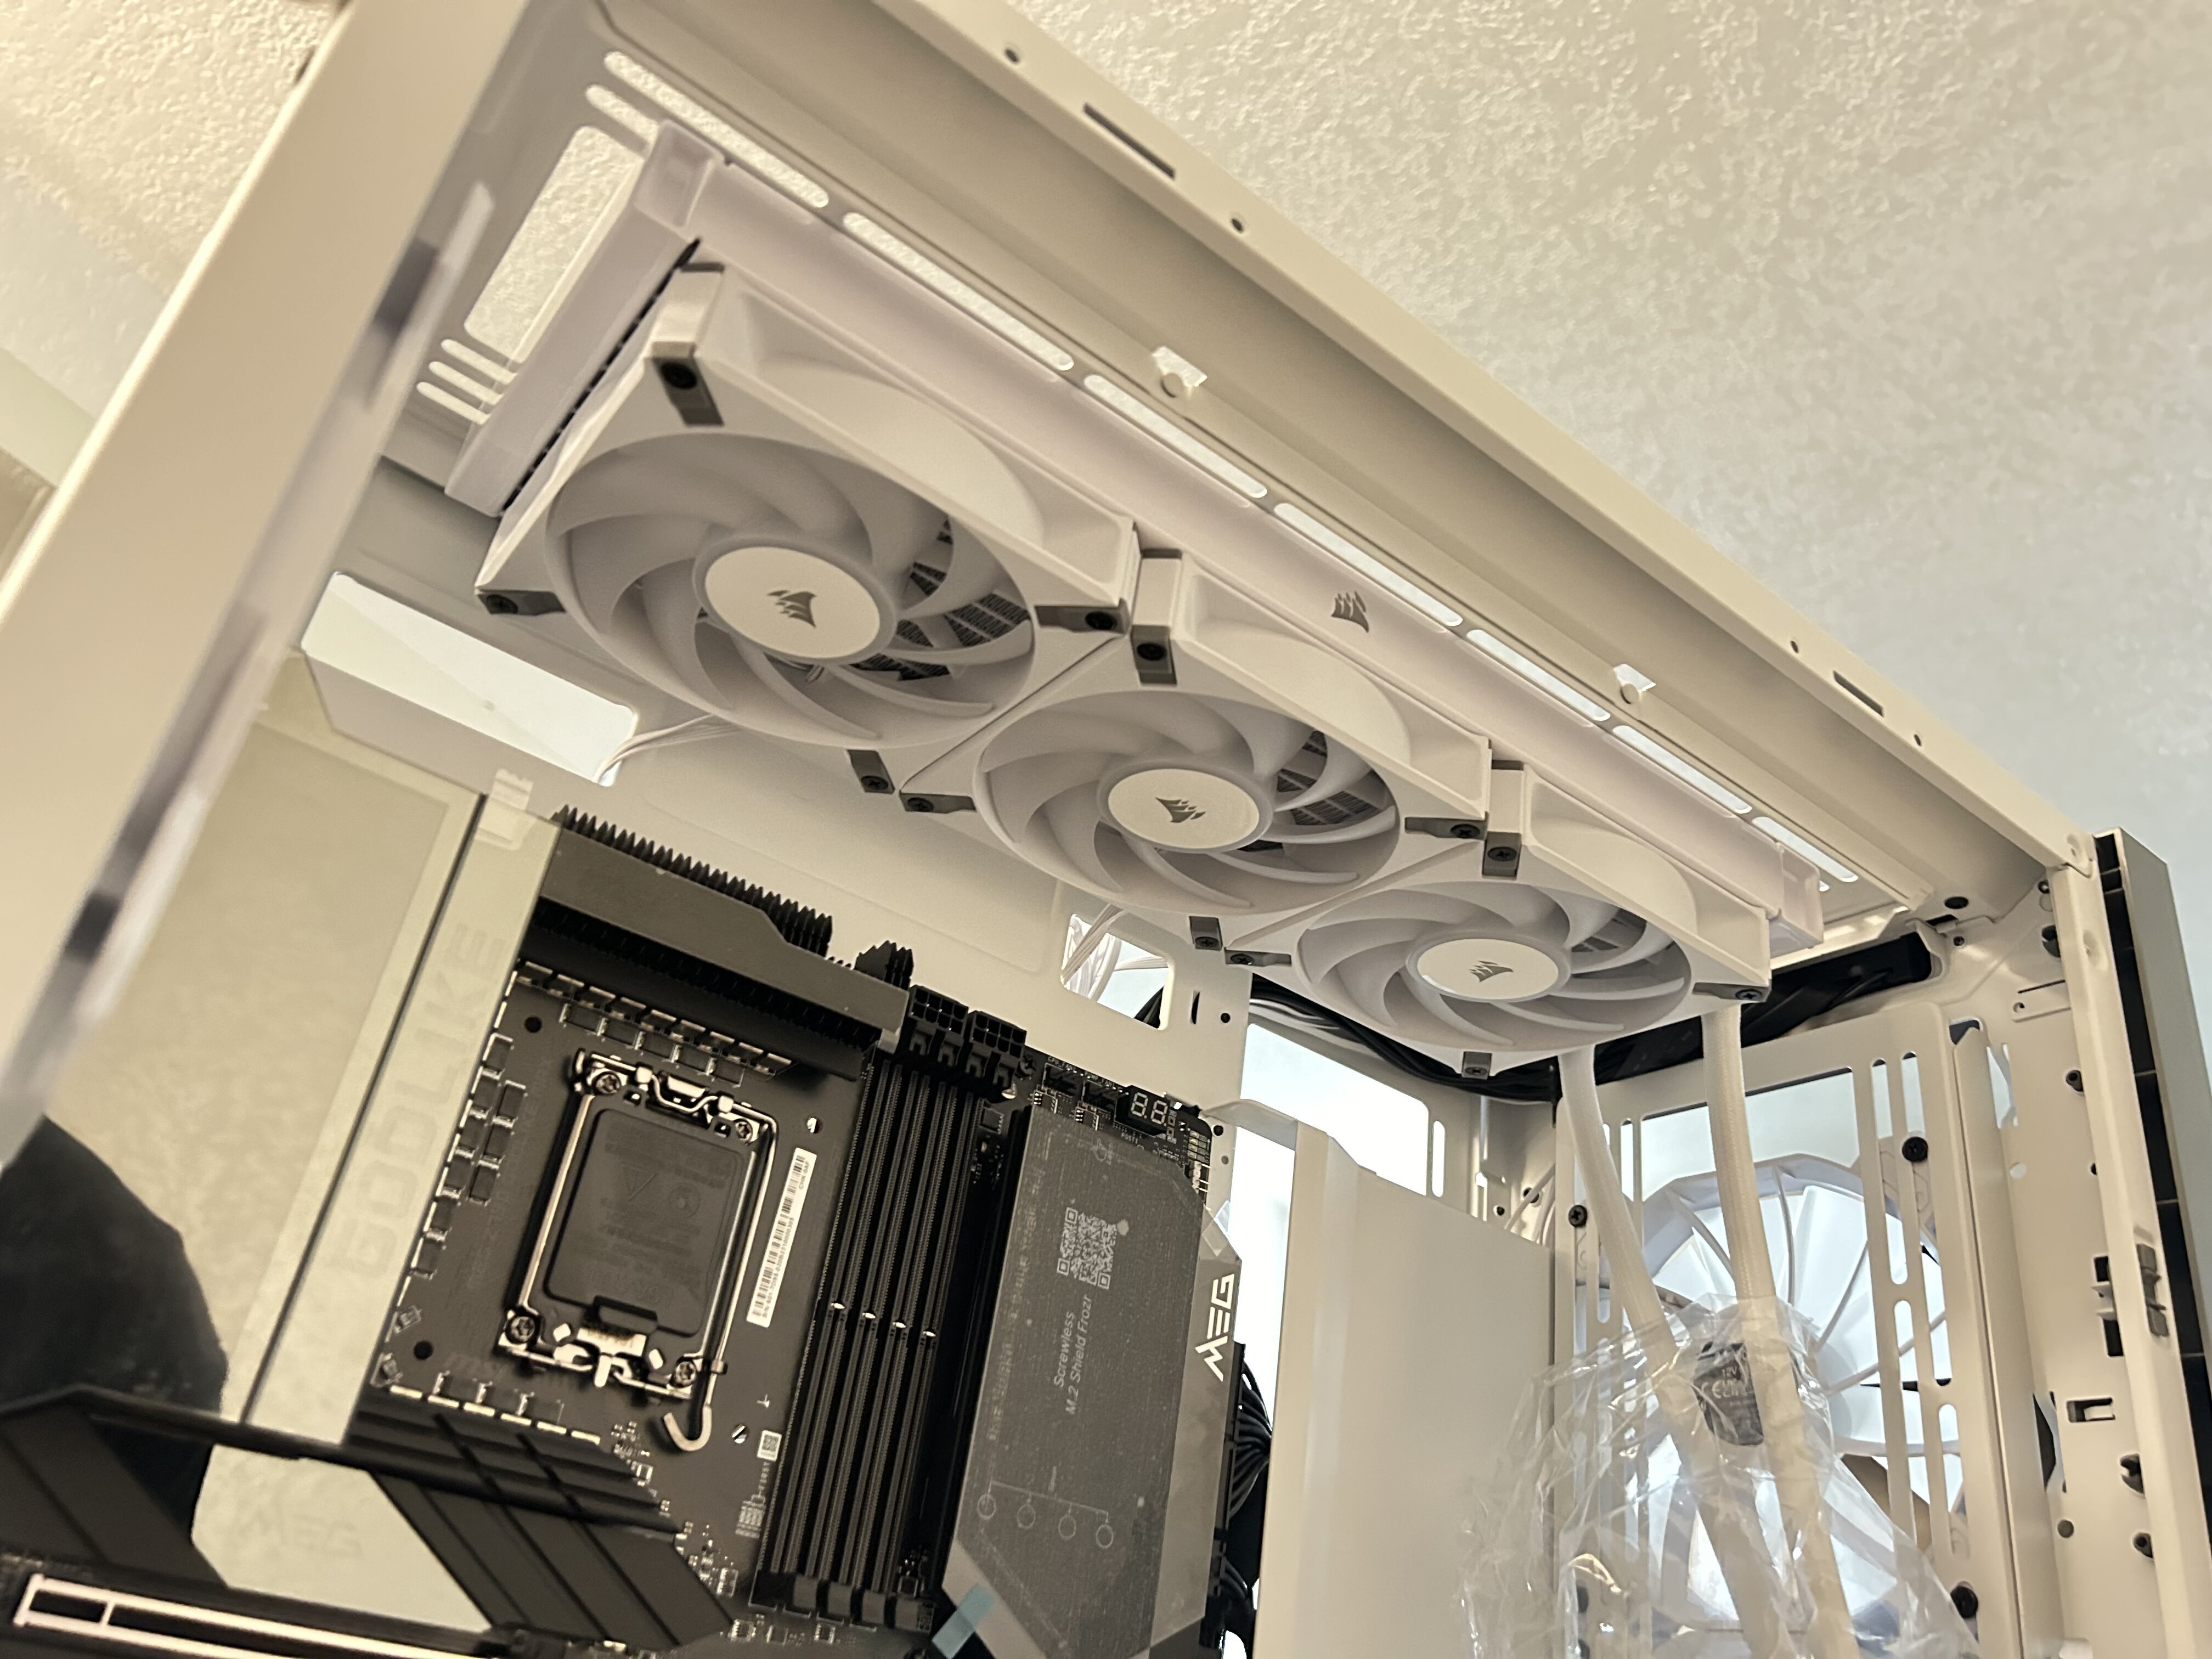
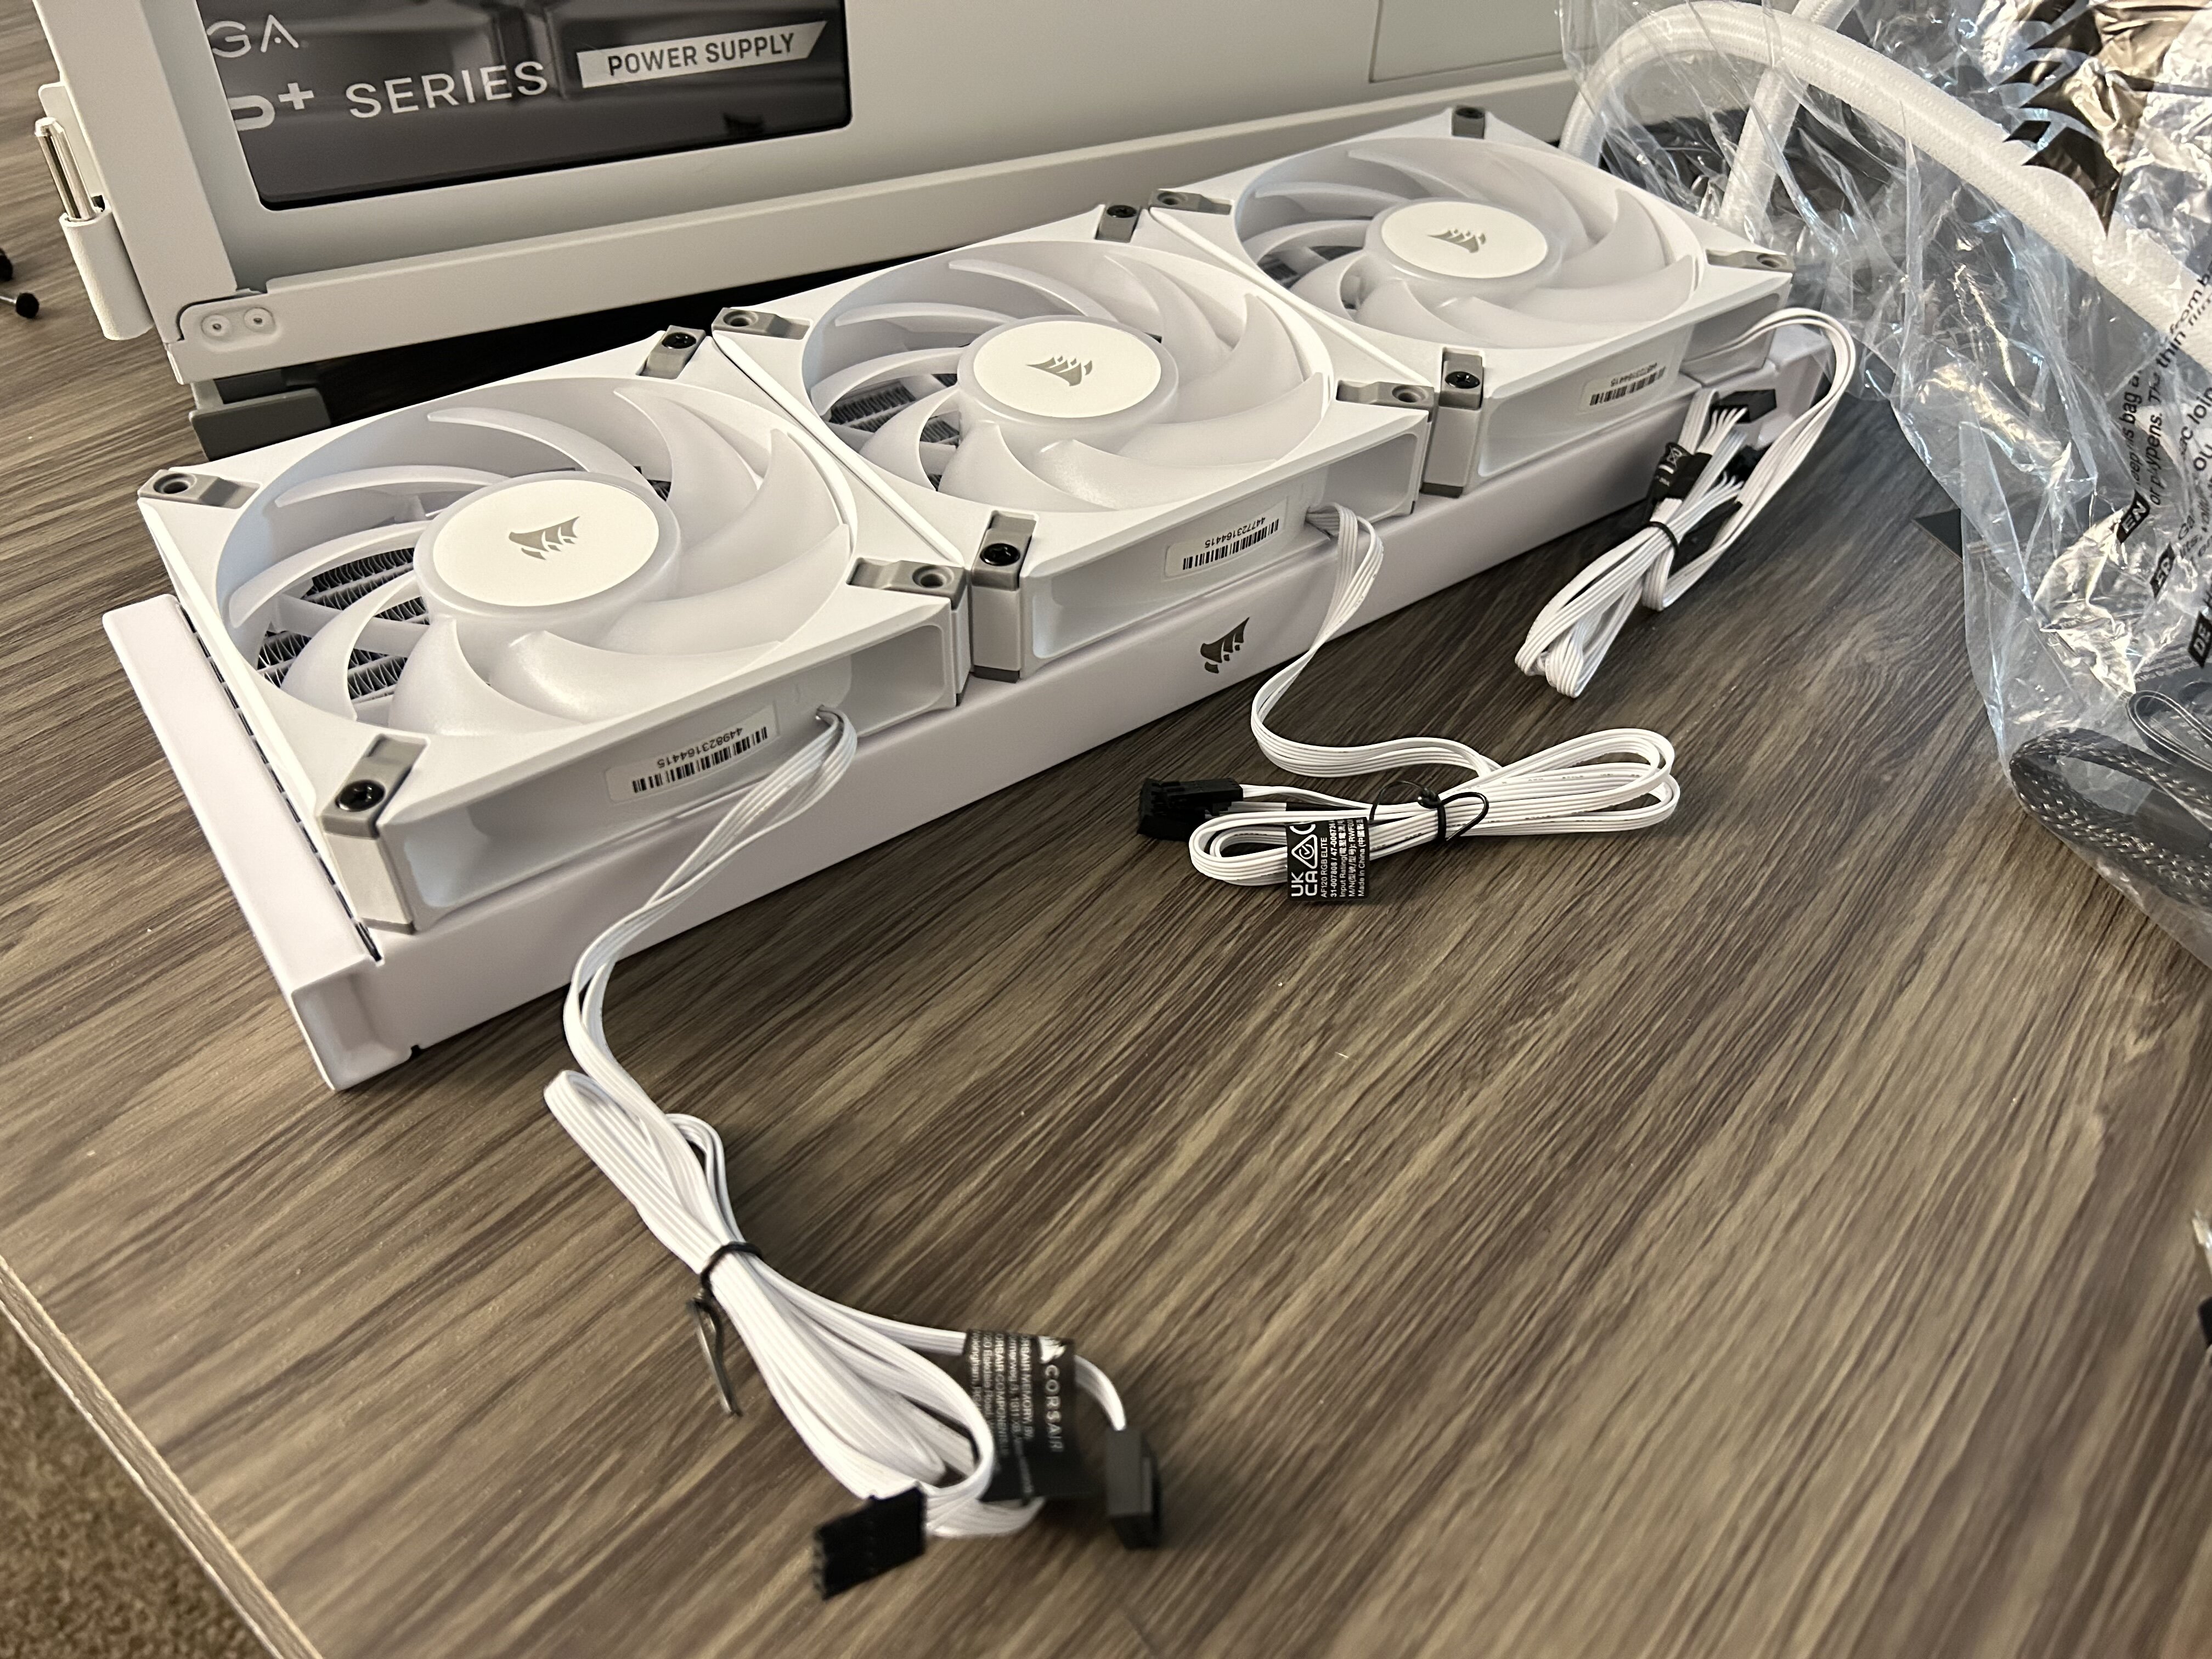
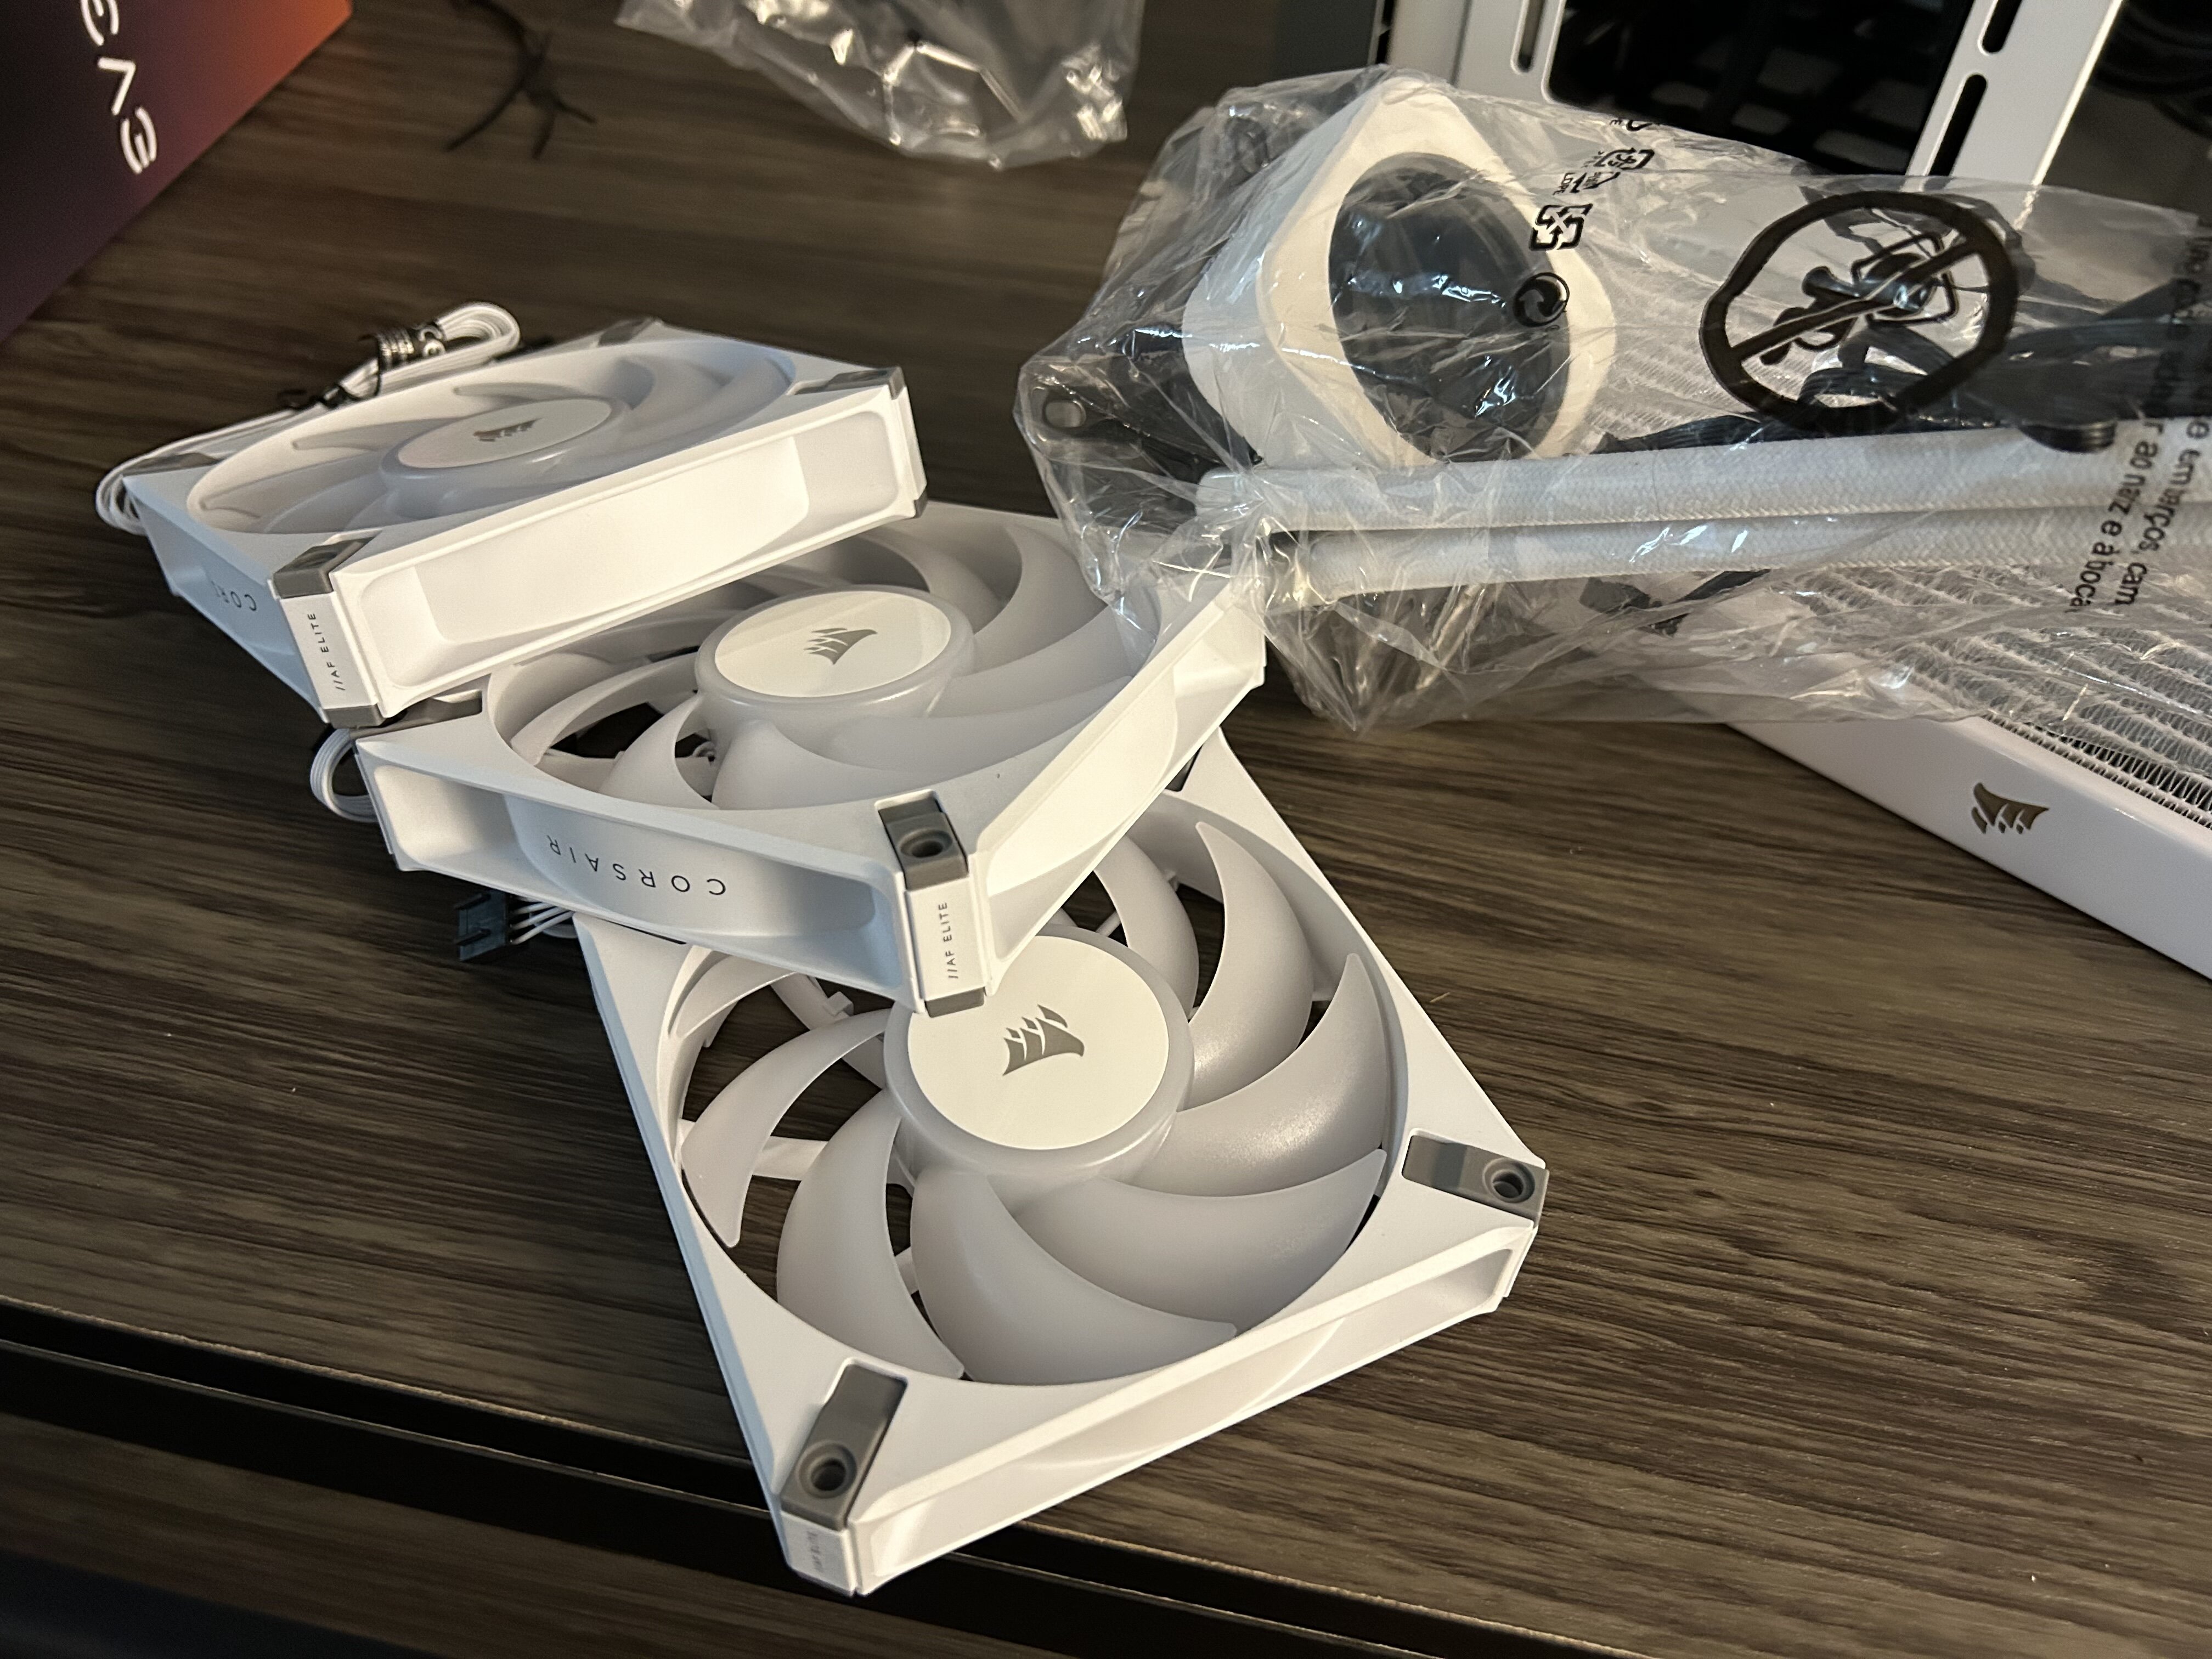
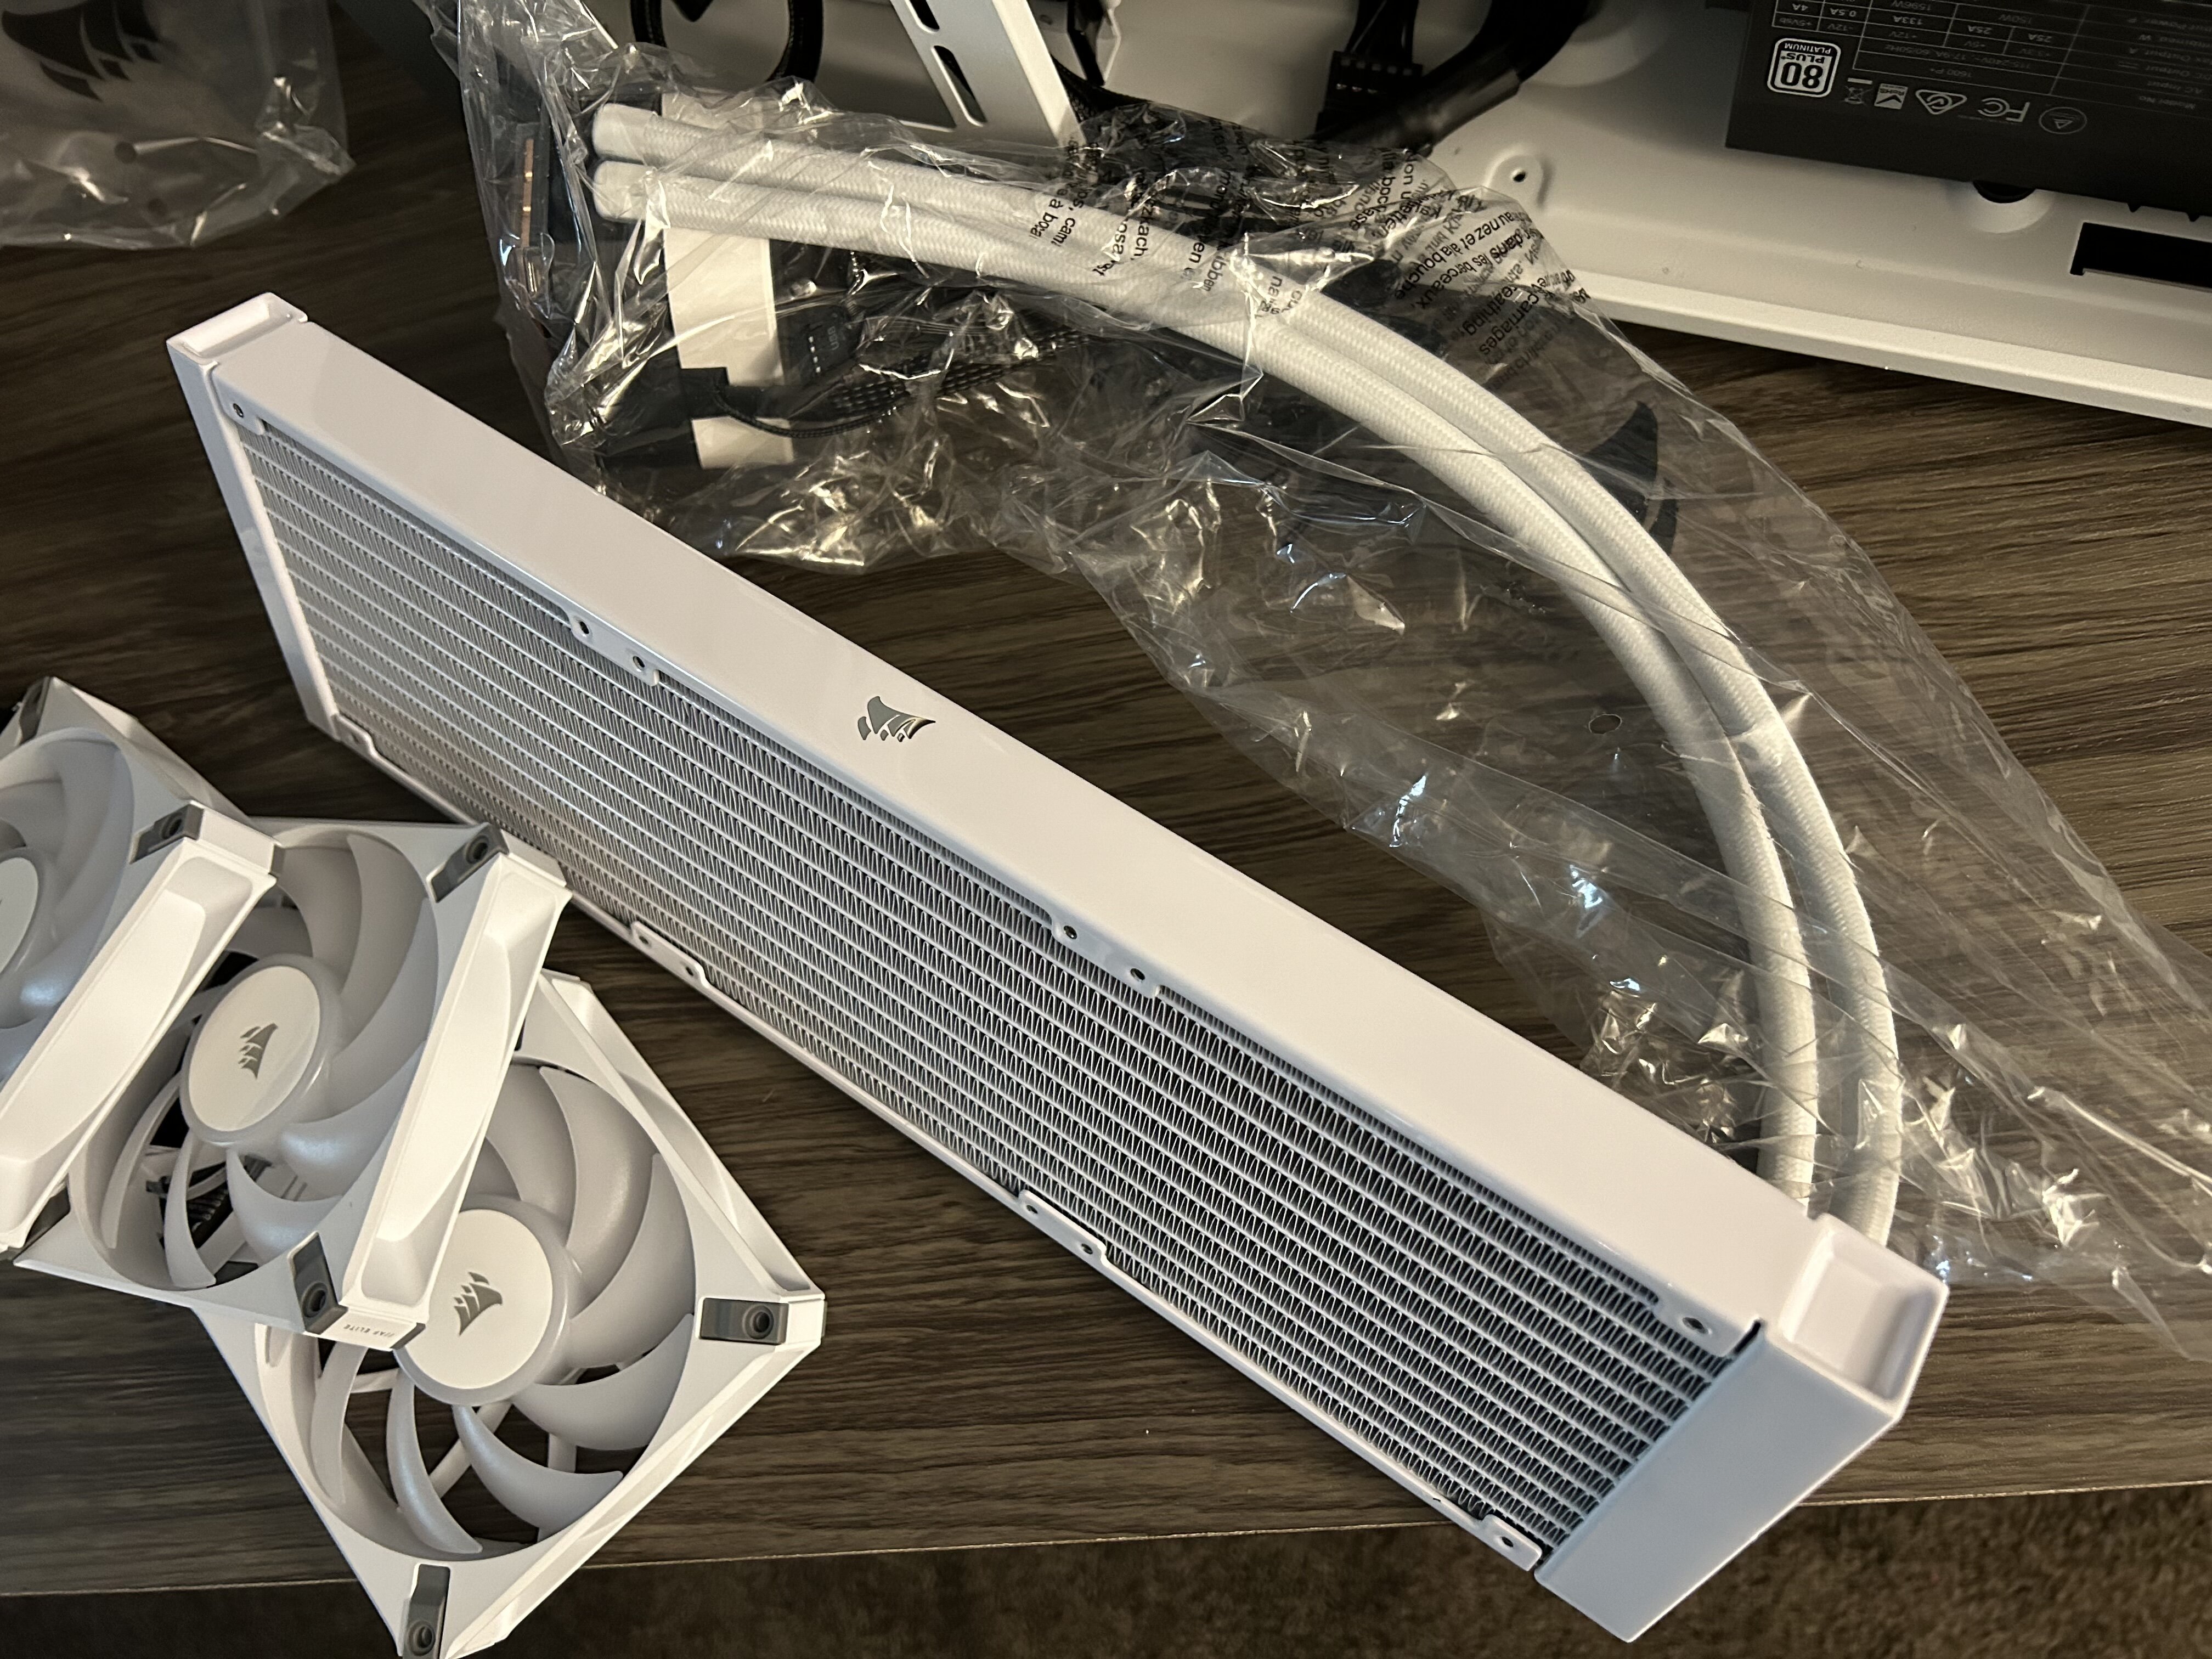
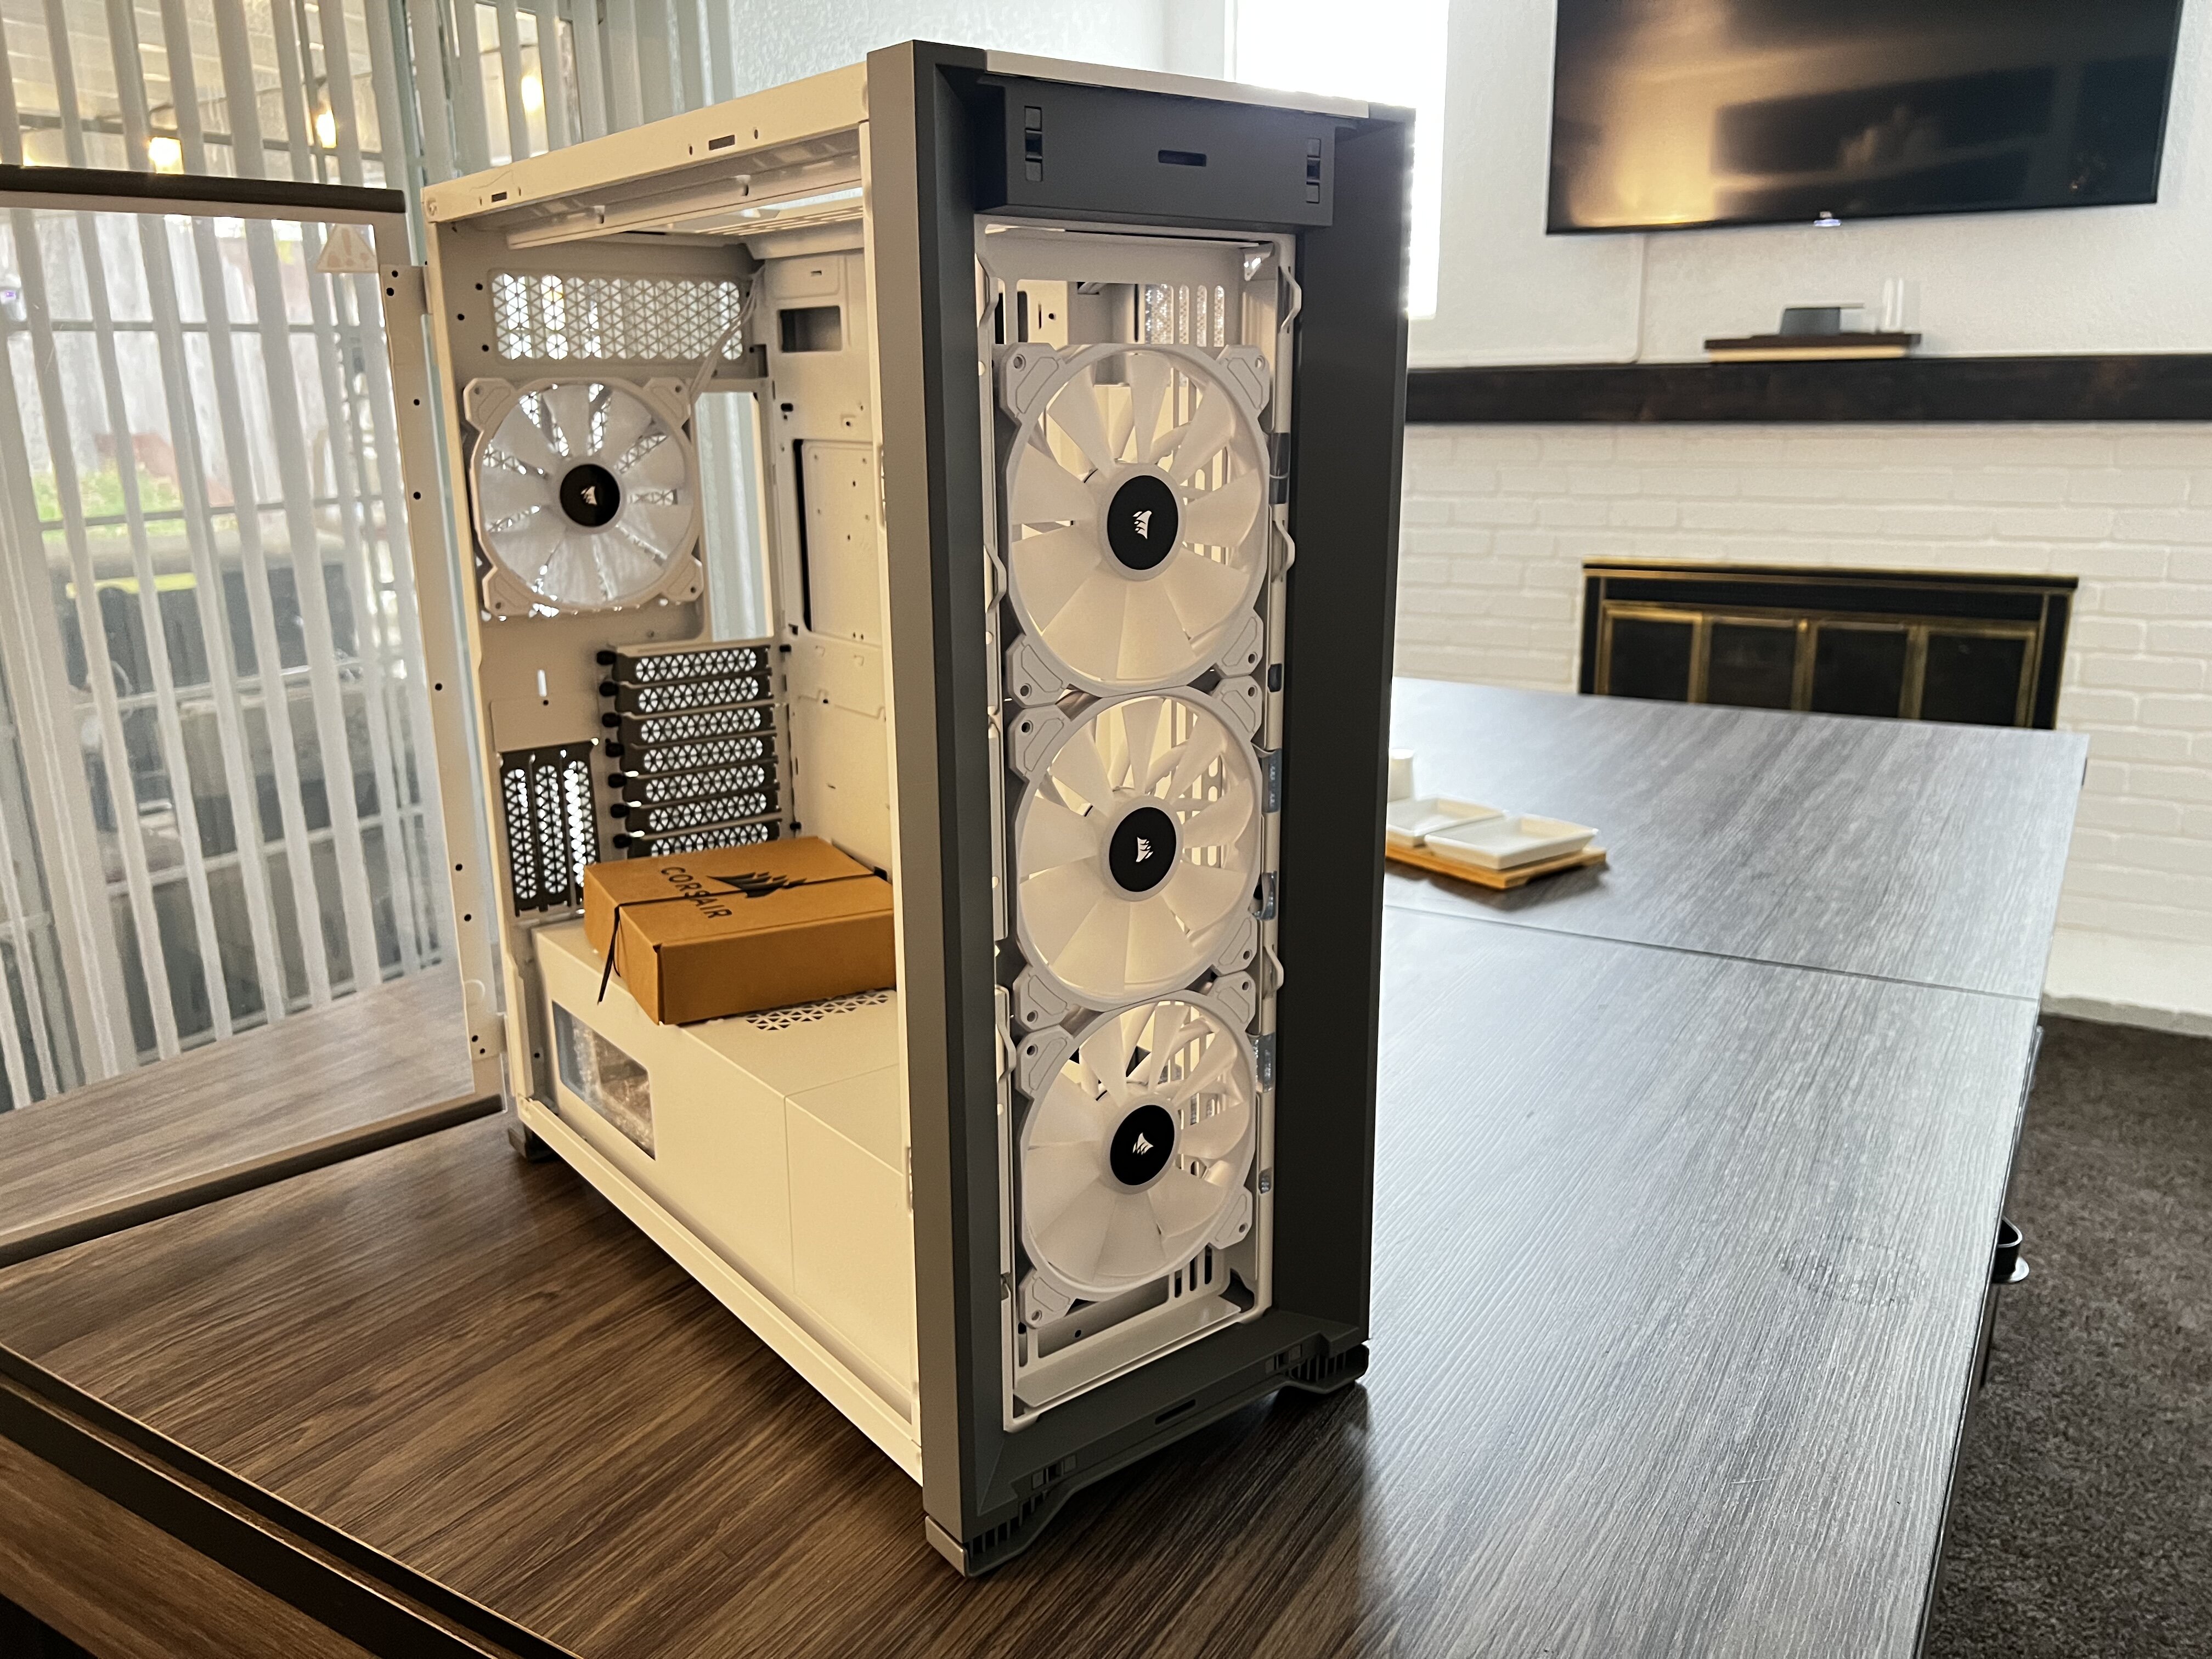
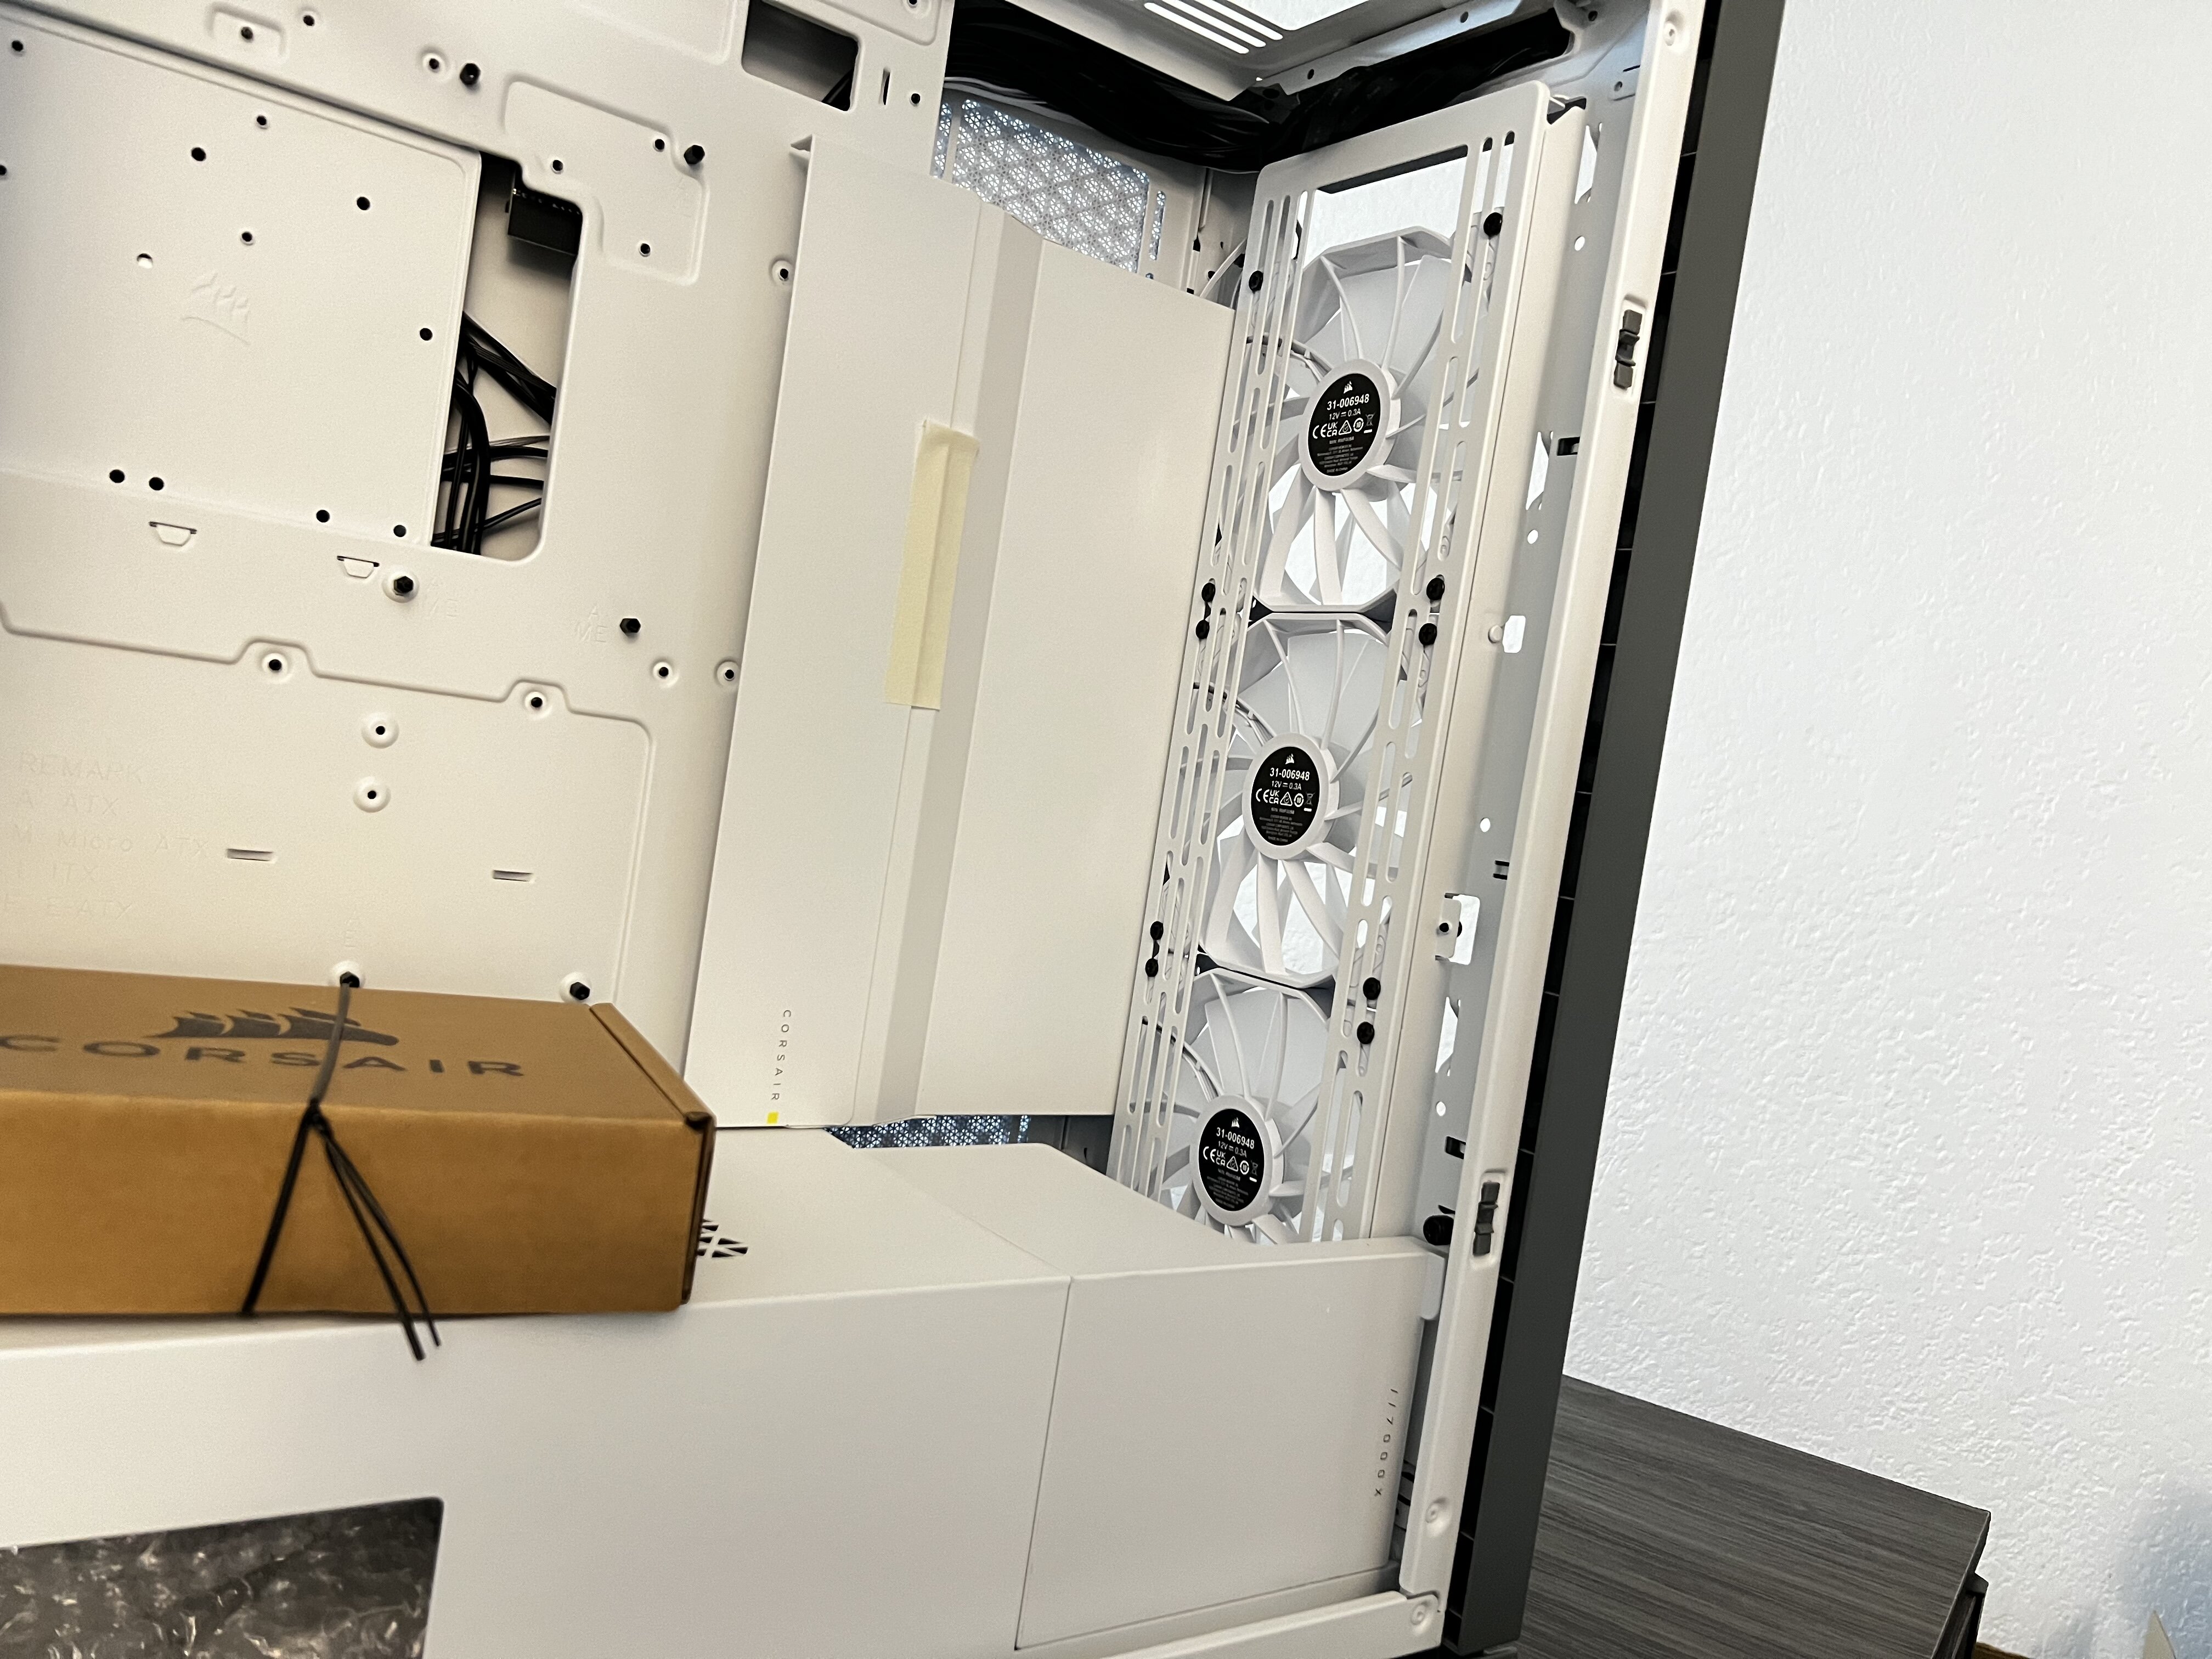
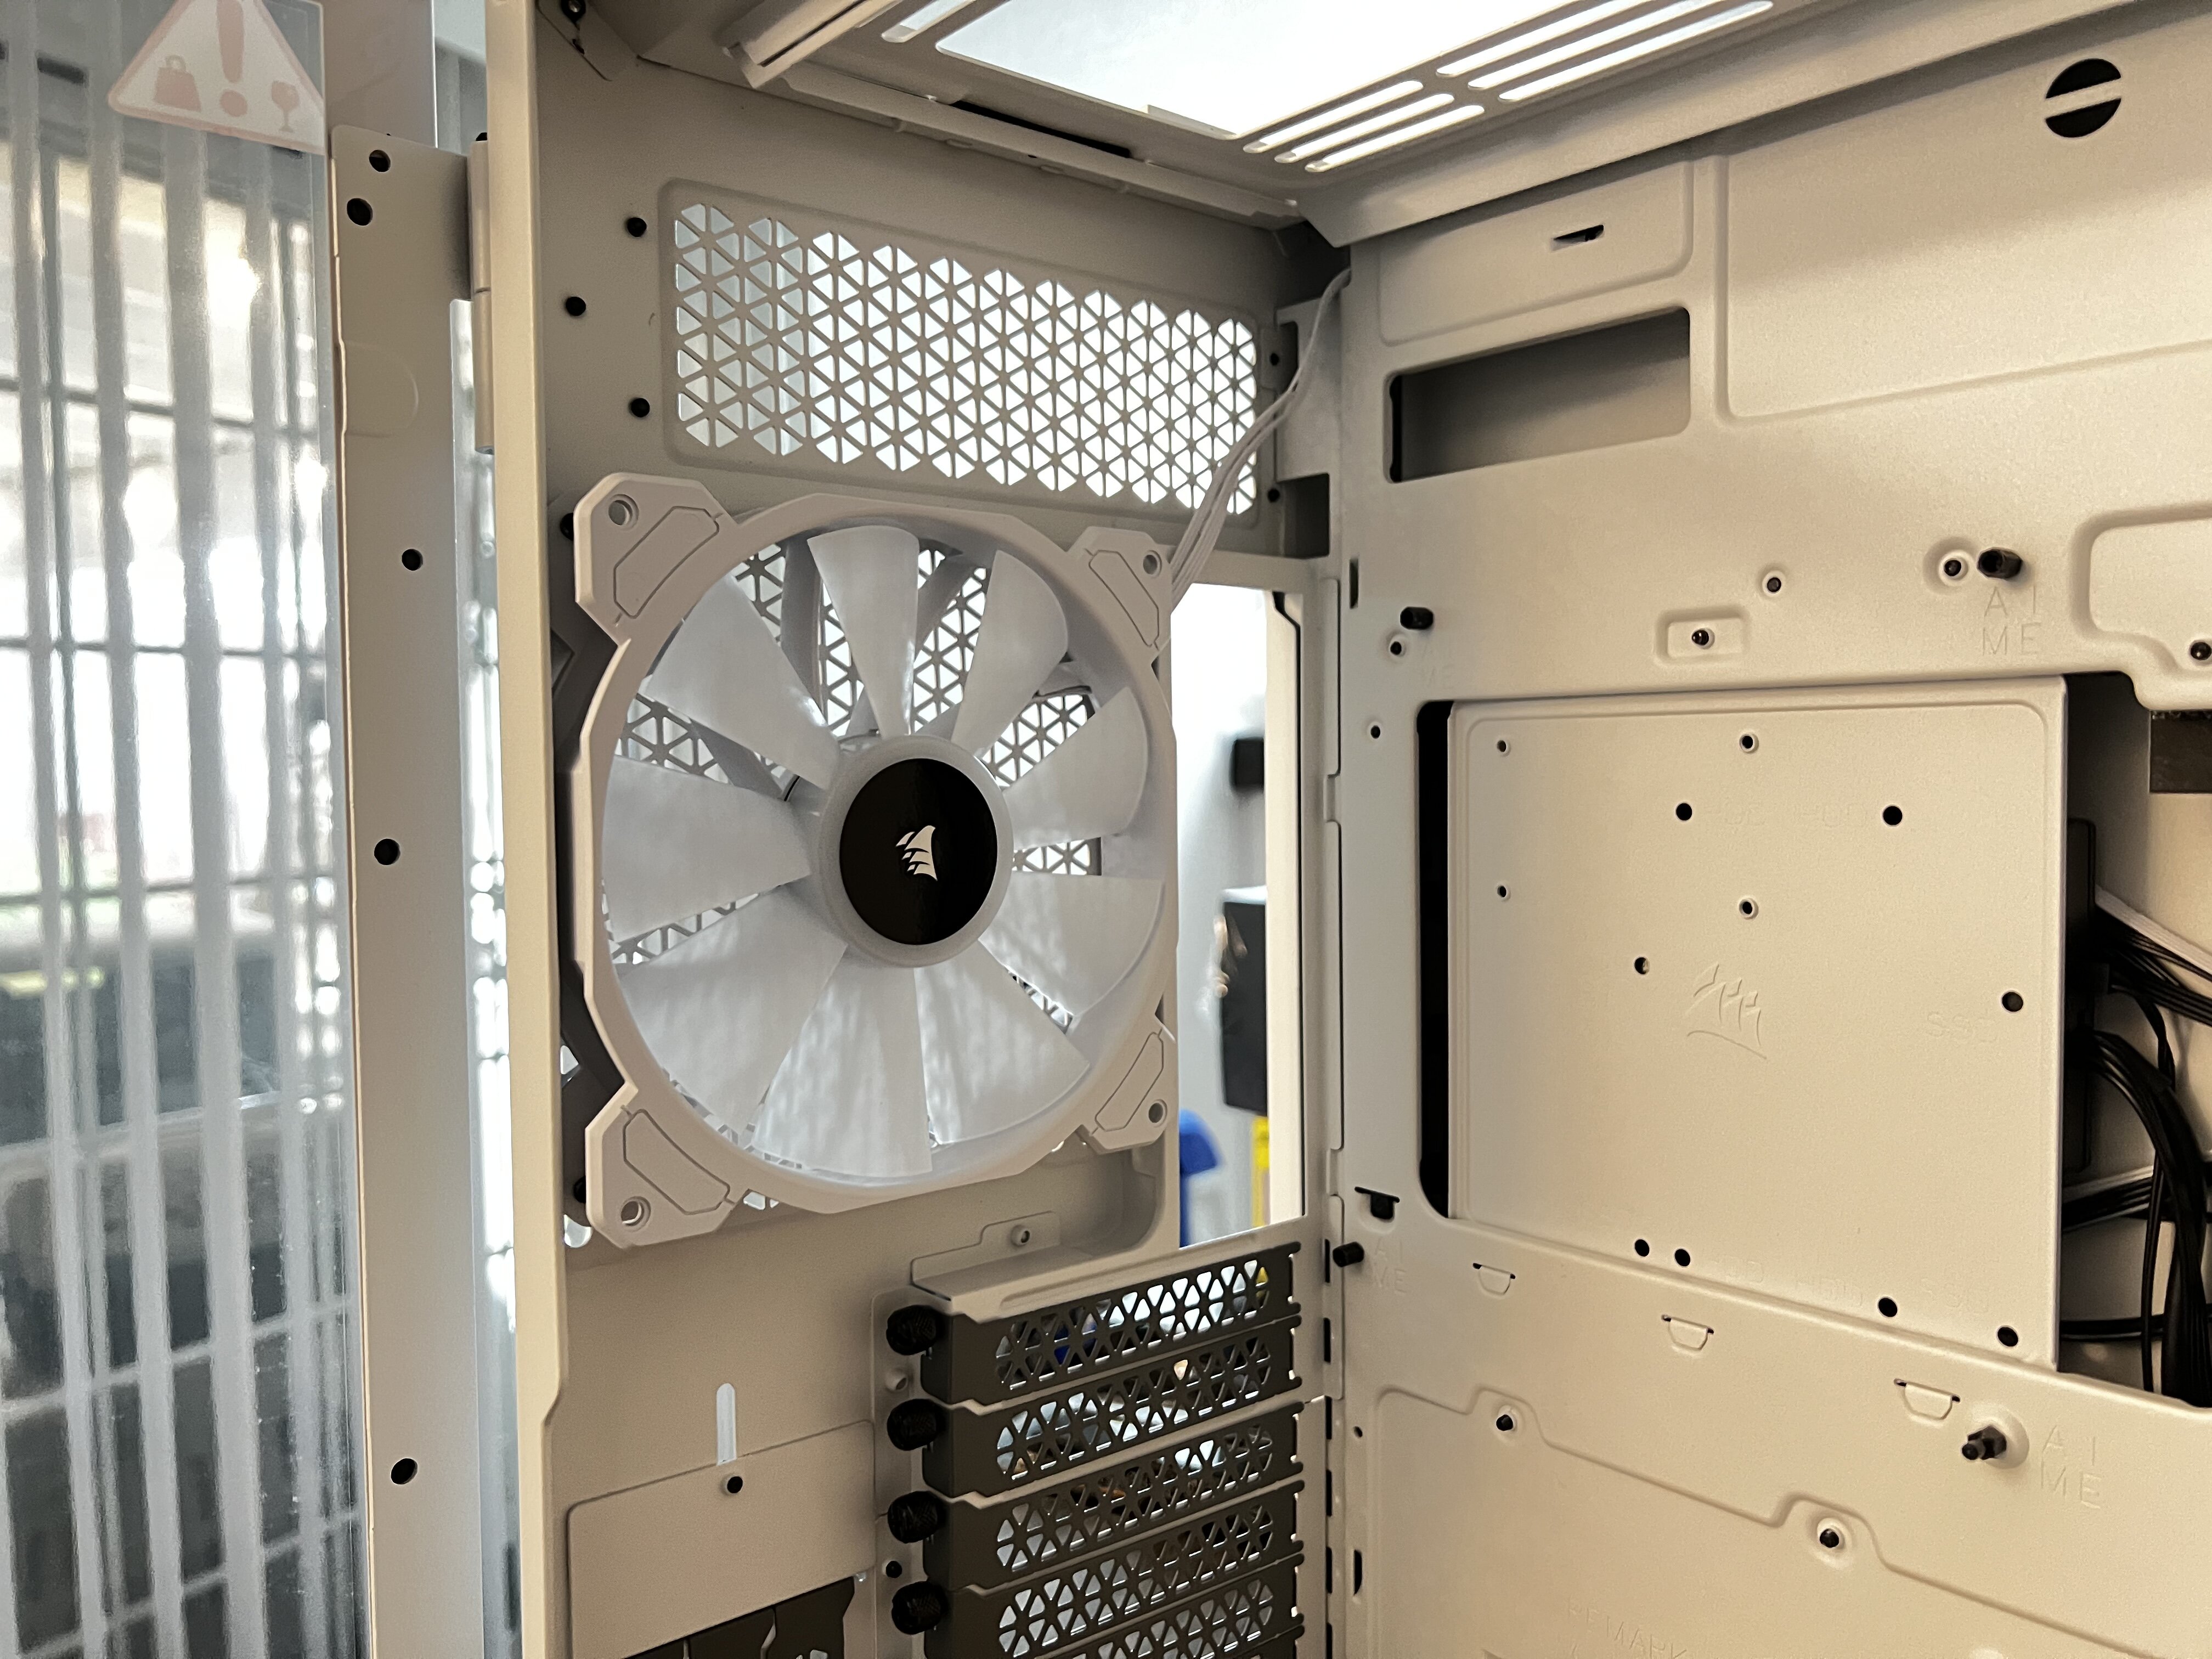
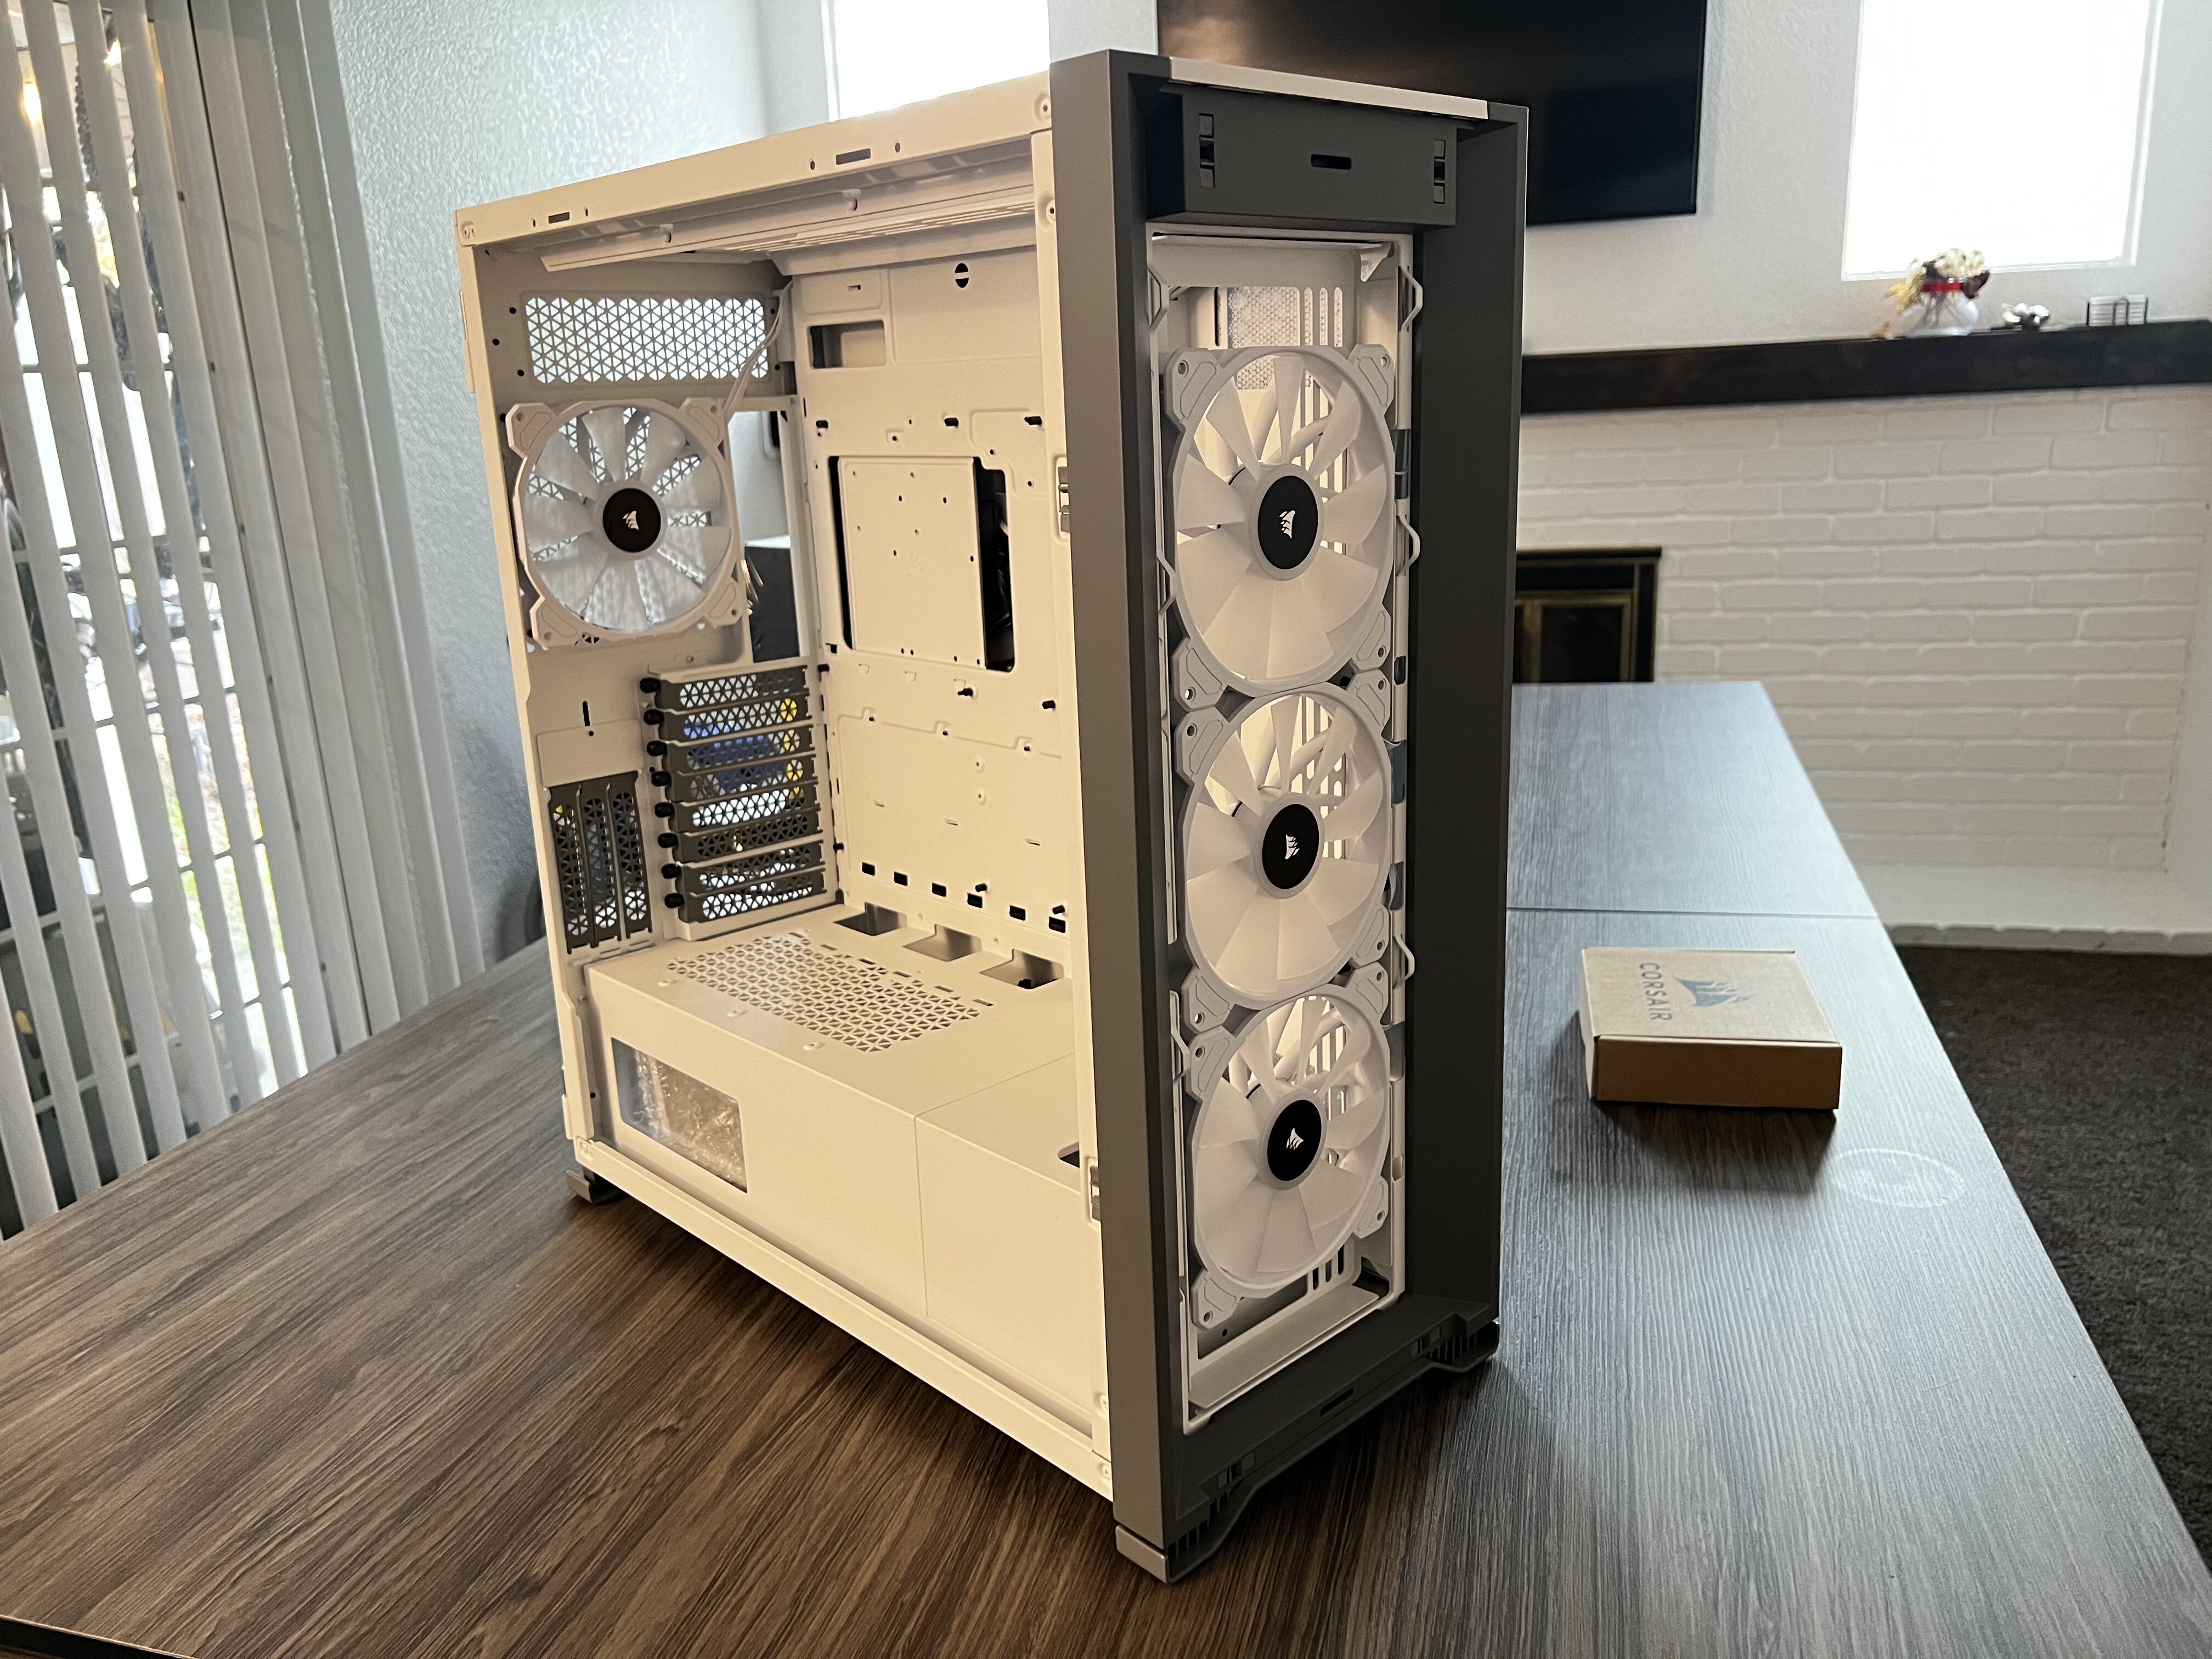
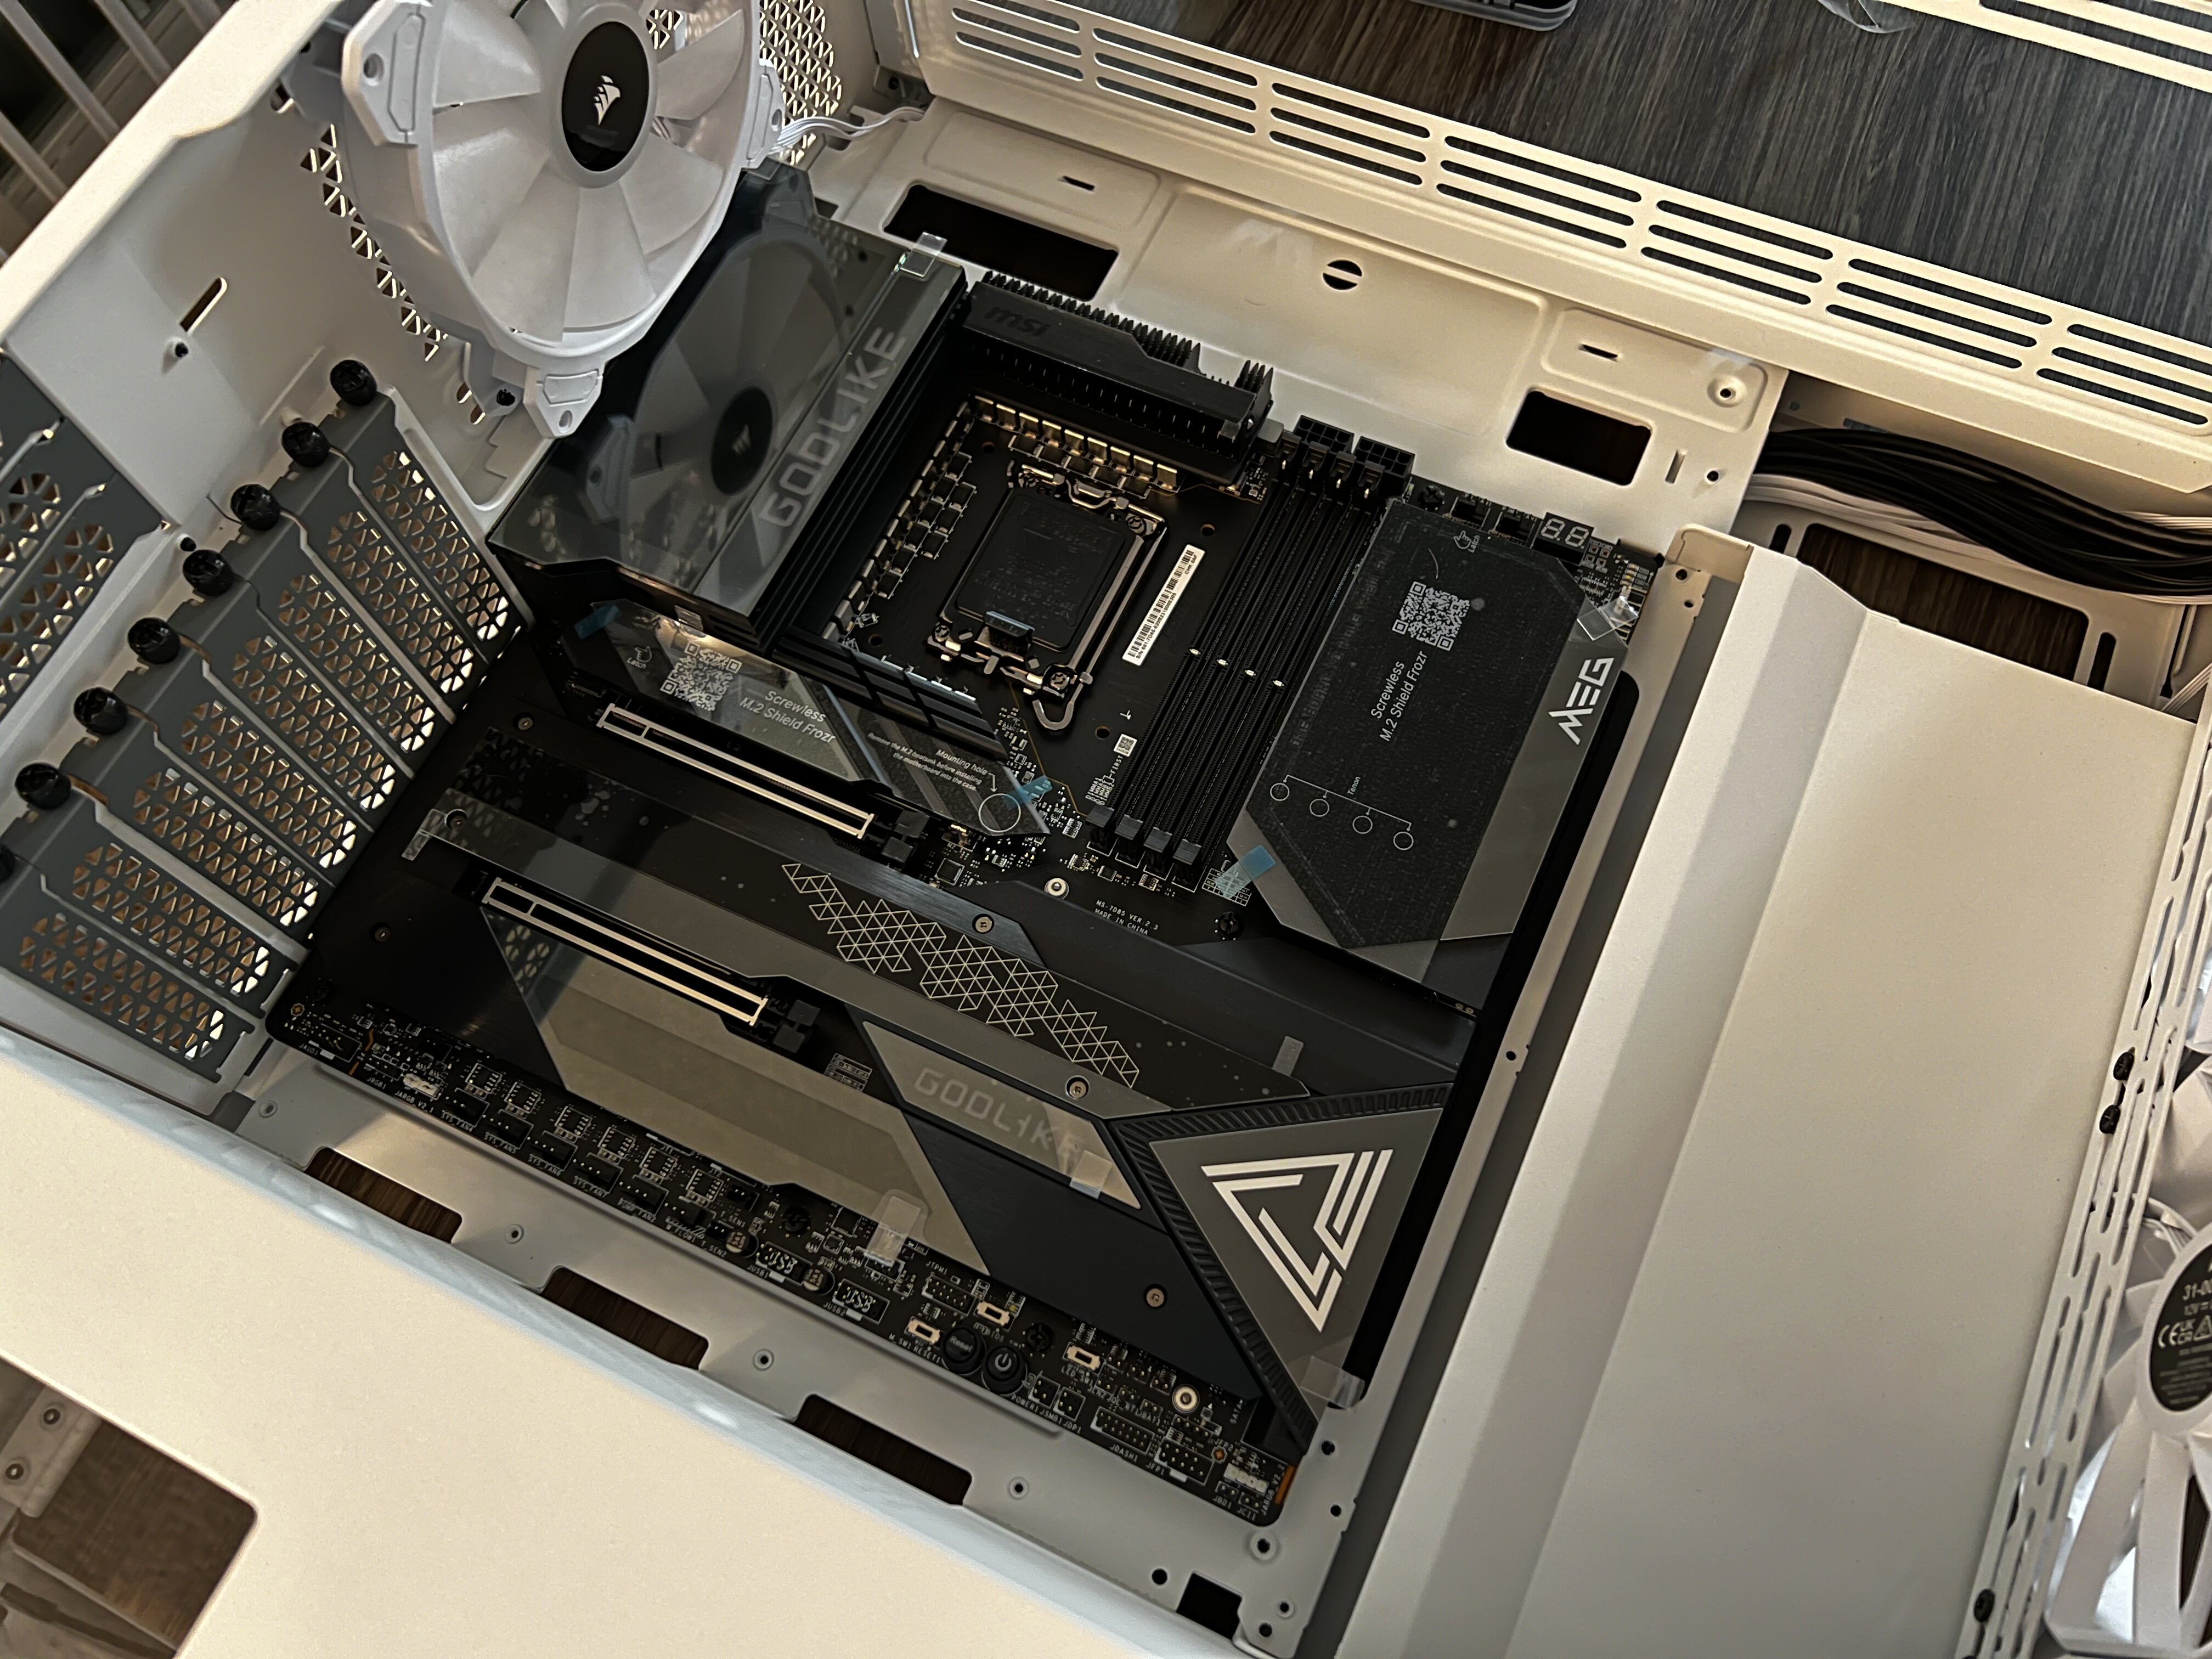
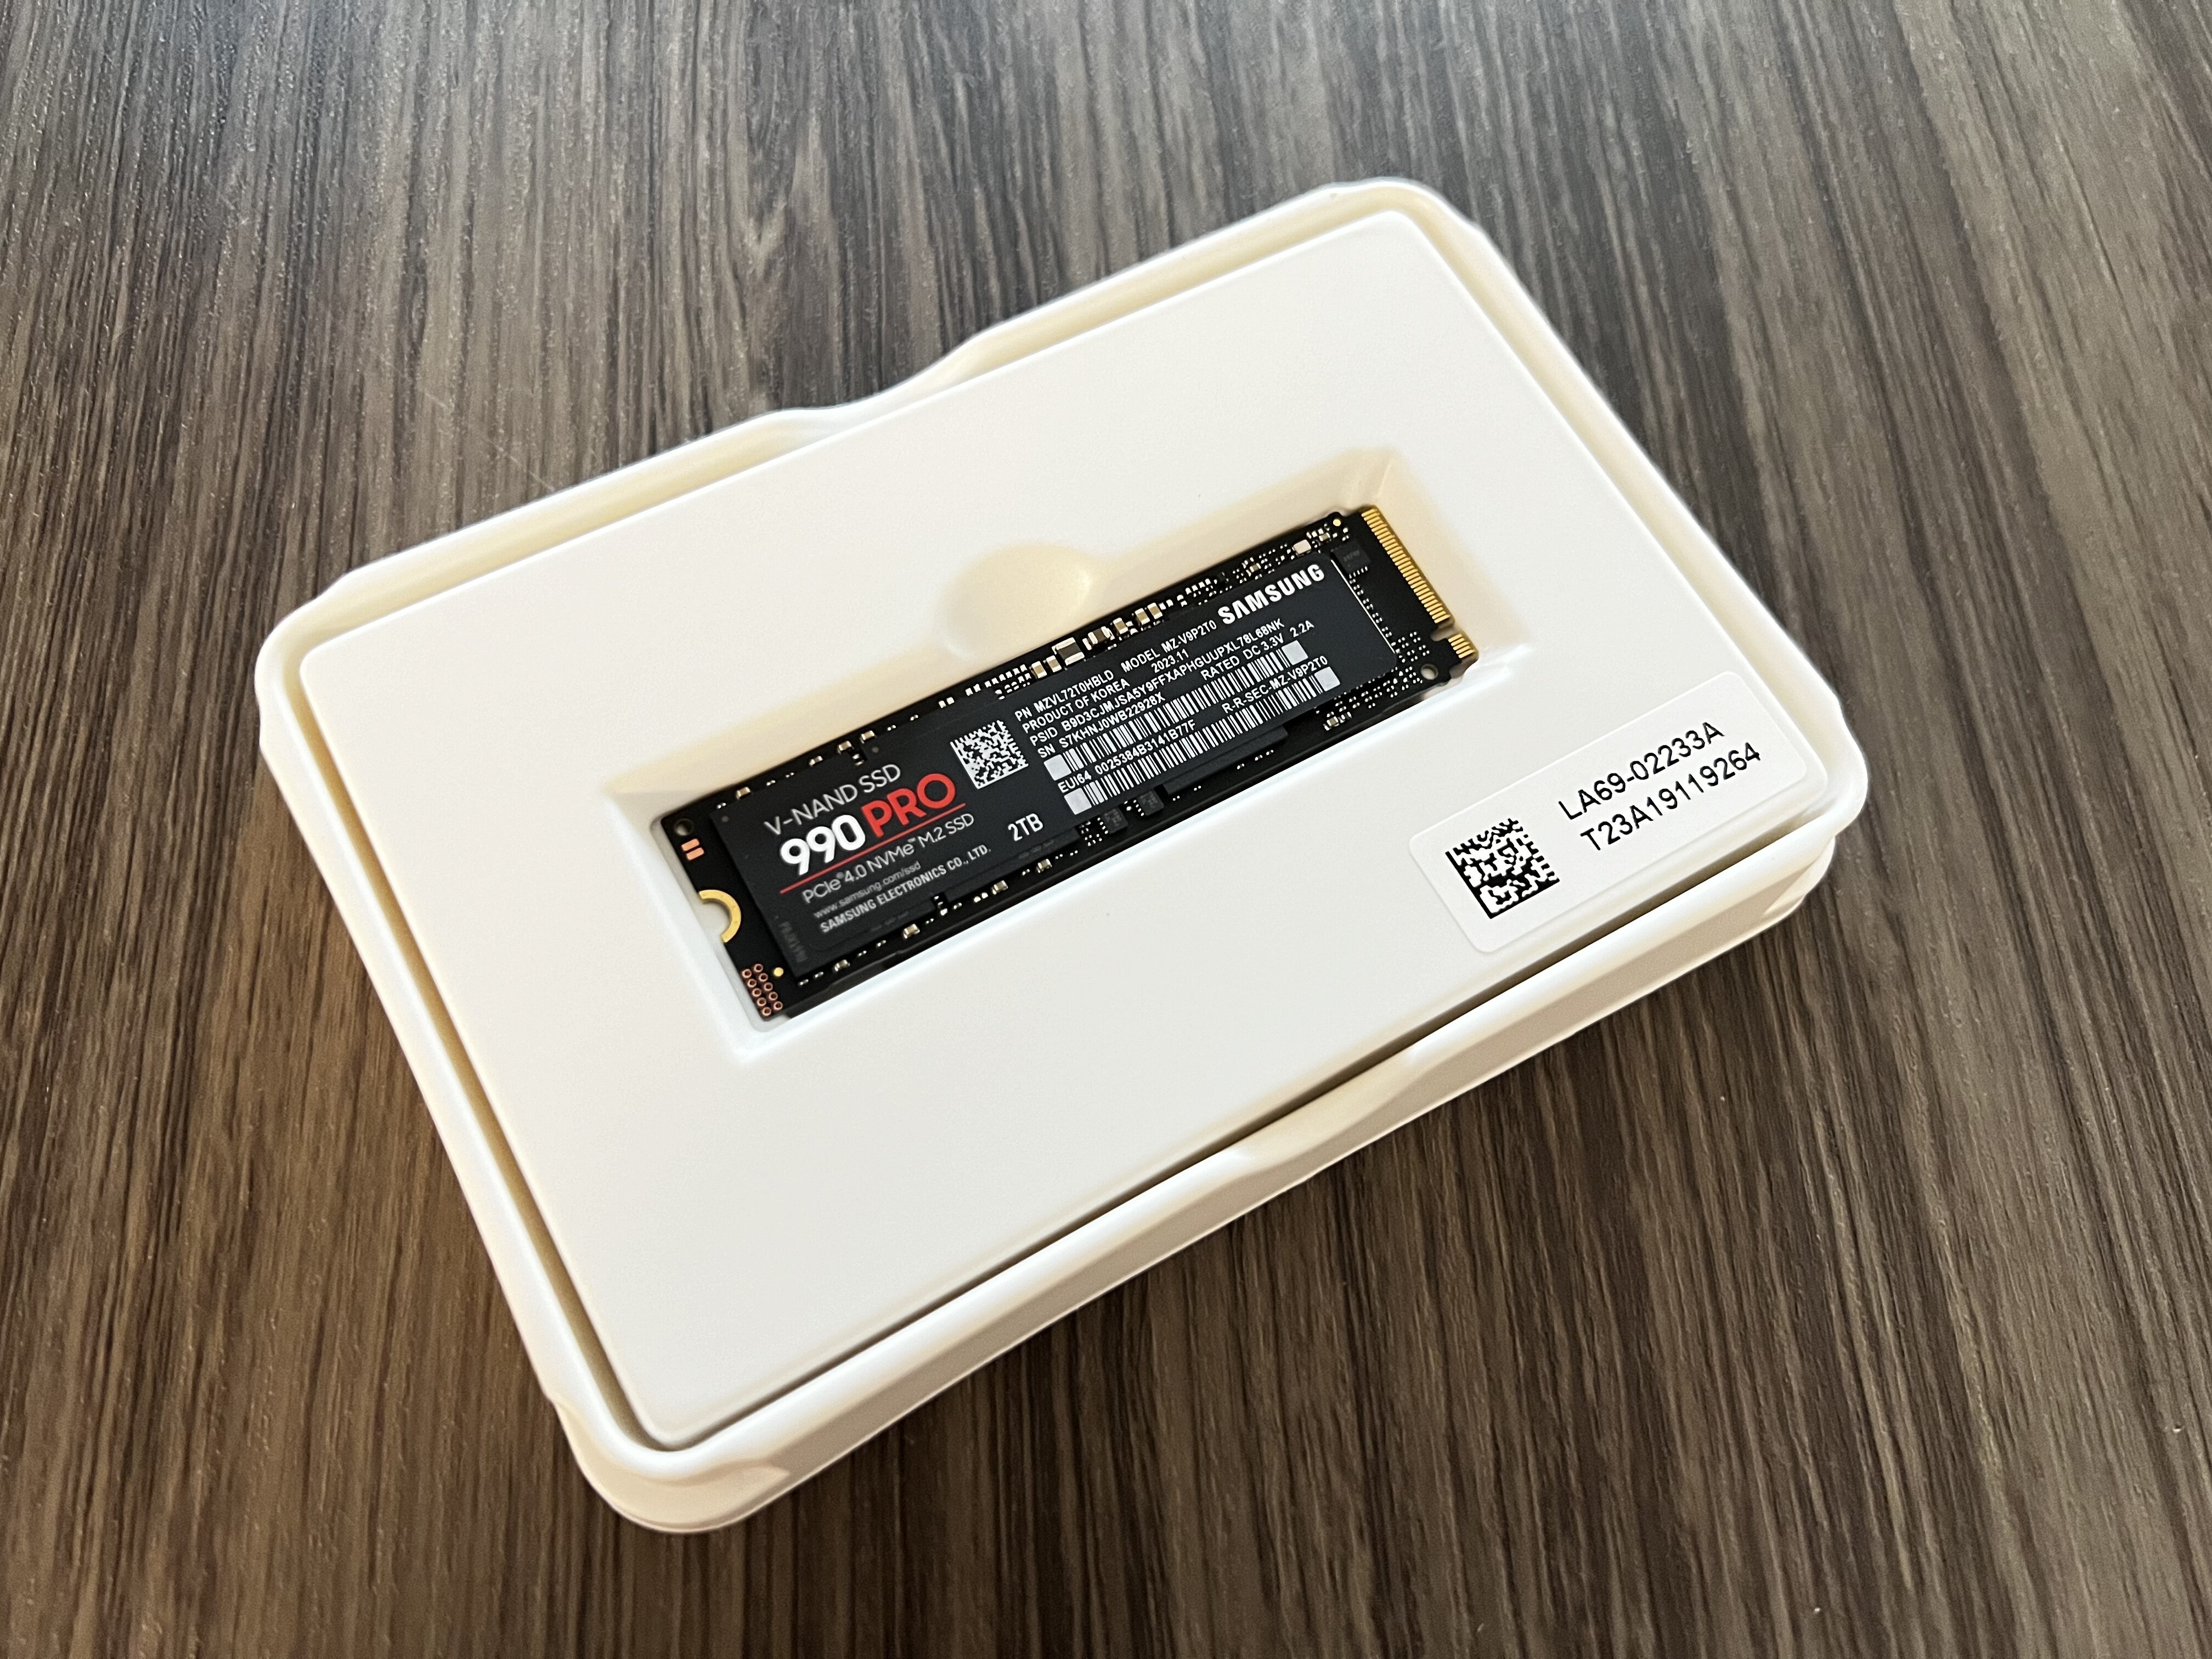
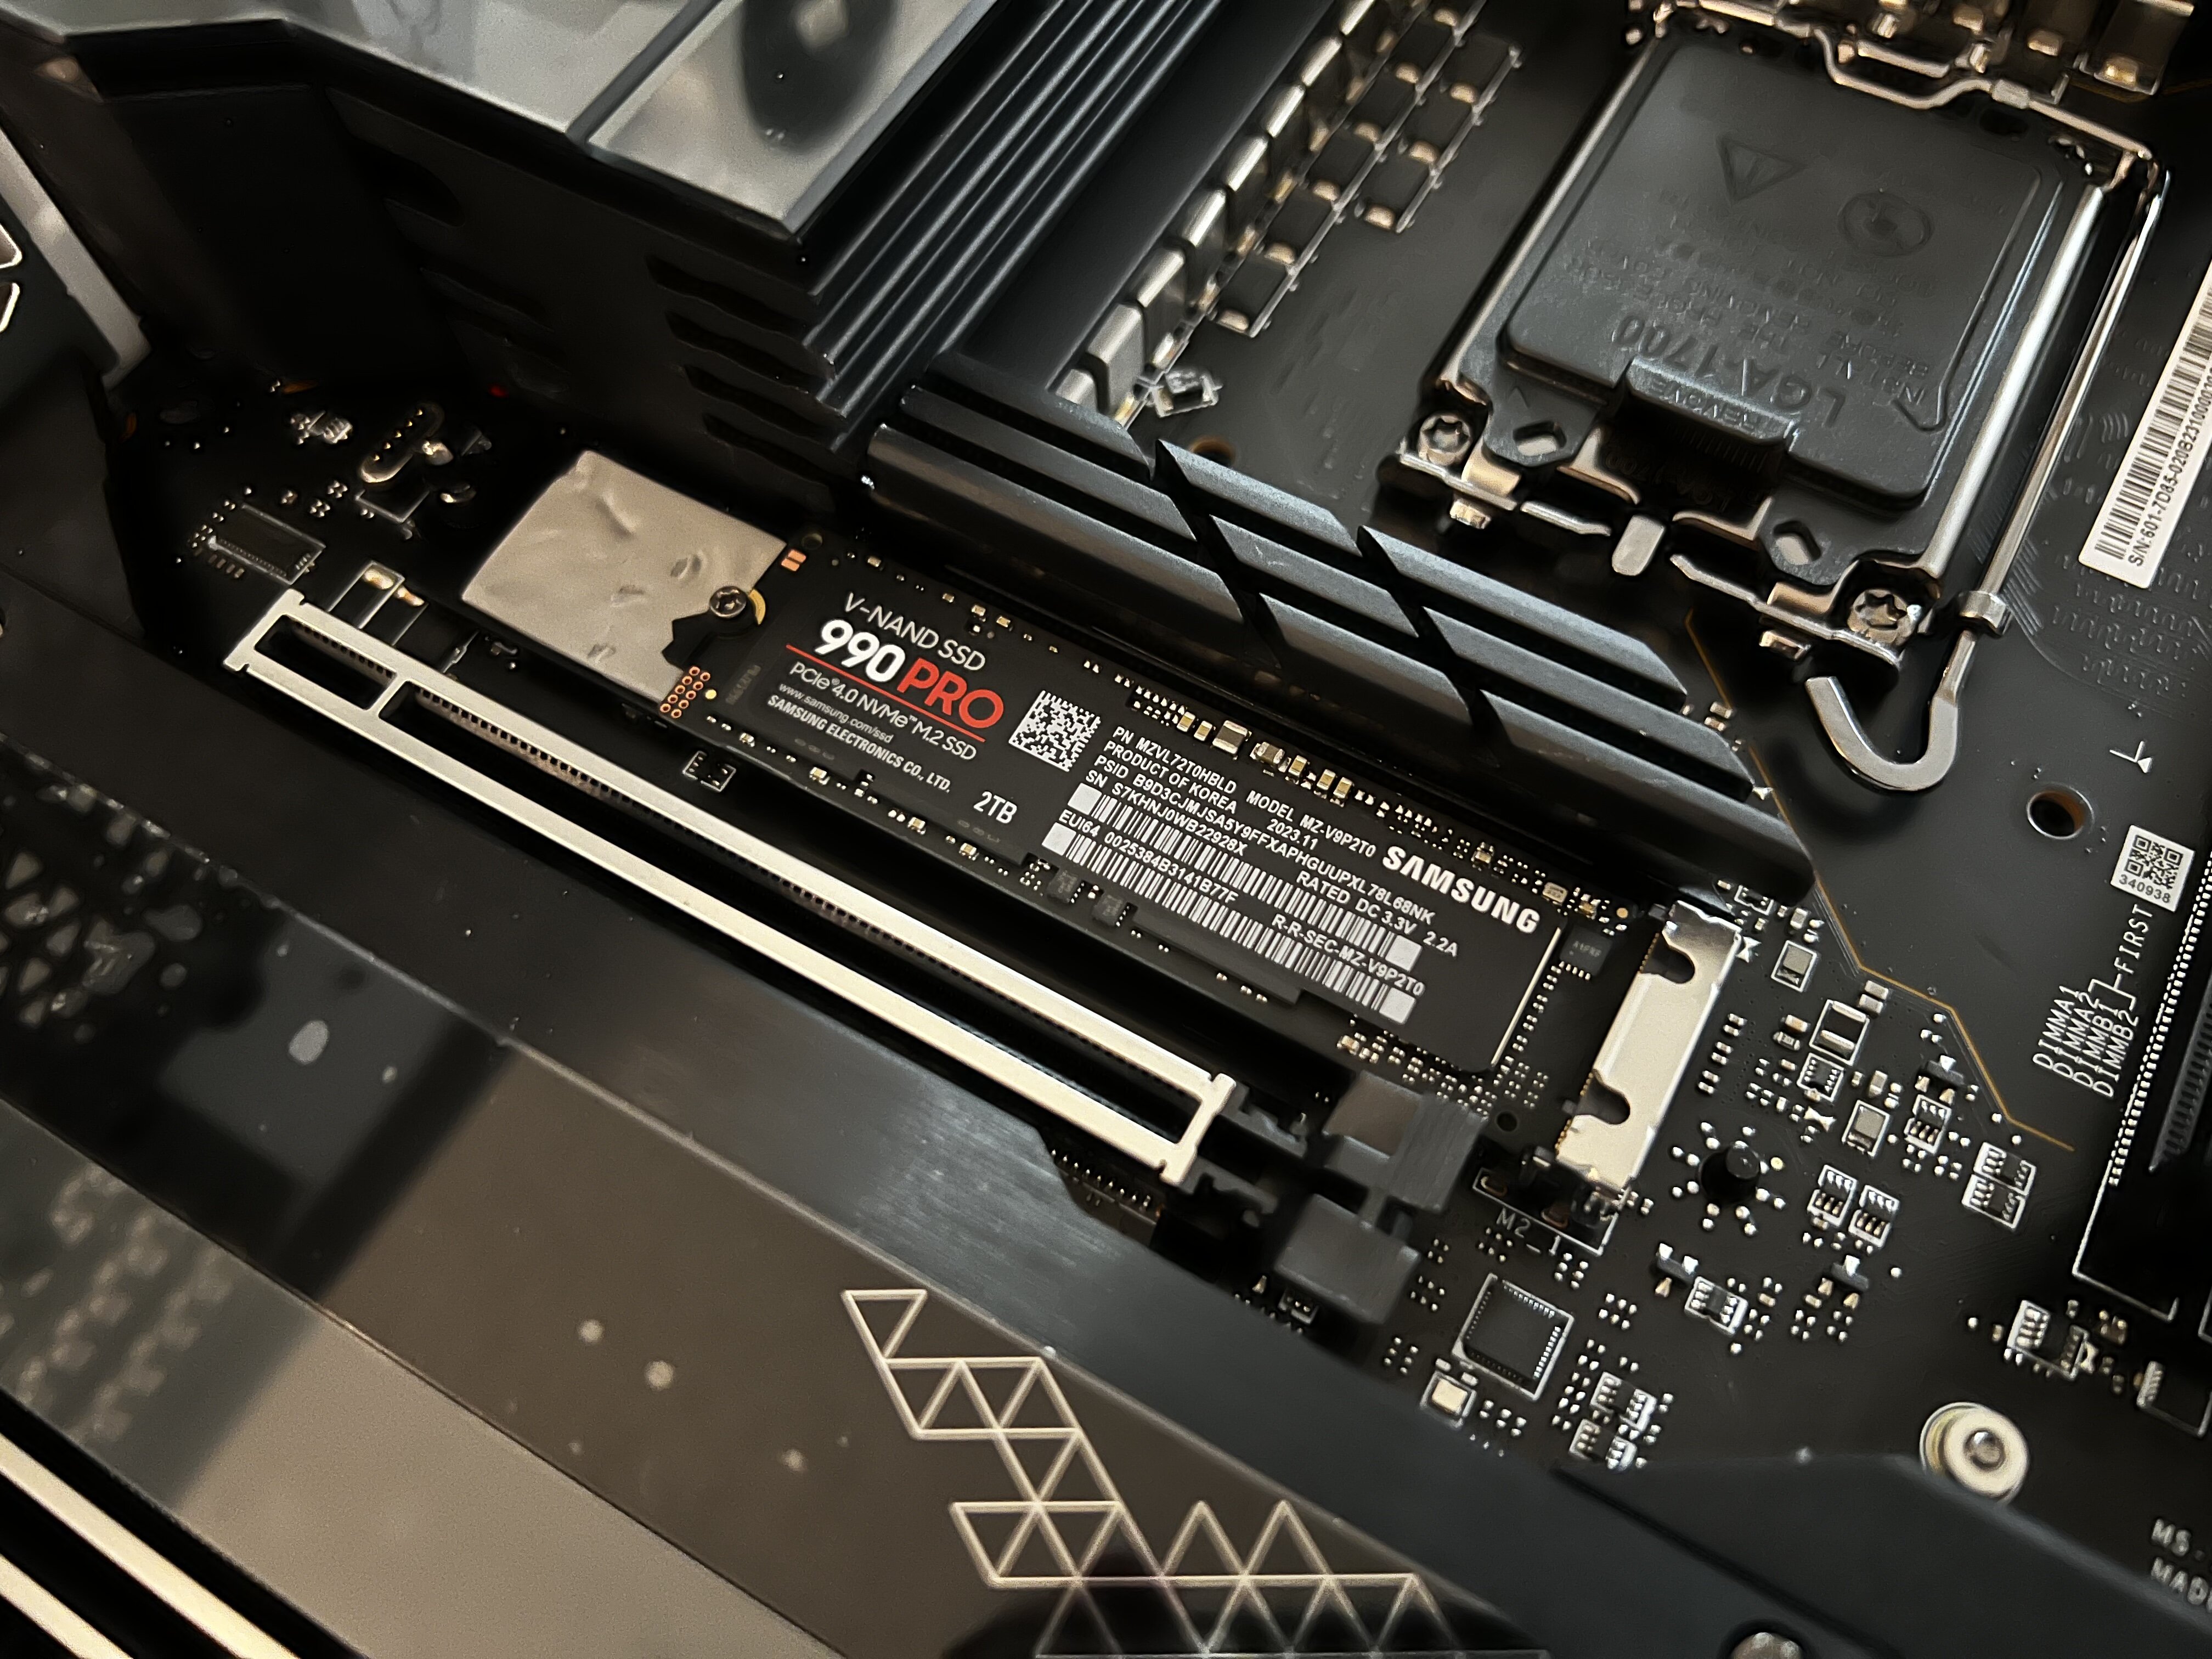
I just built my last rig not to long ago and I am already at it again. The reason I chose the parts for the last build was due to not having a mainboard that could support my new 5gig Fiber internet. There wasn't many boards in the latest gen at the time that had what I needed. You can see that build here **** This link below is the OLD 11th Gen build that is now my VR rig, you can see the NEW 14th gen if you keep scrolling**** While that build worked GREAT, I also have another issue. I have a Valve Index VR setup. My main PC runs 3 monitors and every time I want to use VR I have to unplug display ports and restart the PC. When I am done I have to plug it all back in and restart the PC again. And then after that I have to reset my monitor configuration because it flips out when I start making changes like that. Easy to put back, but a pain none the less. I just want to pick the headset up and use it without all that drama. So I decided I wanted a PC dedicated JUST for my VR. My first choice was a gaming laptop. I have one I use all the time that has an RTX 2070 in it. I plugged it in and it works pretty good (for VR). The only problem is for fast games like VR racing, it is pretty weak. Not anywhere near the quality of my PC. So I decided to build another gaming rig instead that I can dedicate to that. While trying to figure out what I was going to use for the build, I decided that my "old" rig from March (2023) with the 11th gen could be the perfect tower instead and I can build a NEW NEW for my main rig instead. I also have a spare RTX 3090 not being used that I spent $2500 on during covid lockdown. So my VR PC will be my "old" PC with a 3090 in it and I will take my 4090 and put it in the new rig since it is still the latest card. A little confusing but it might make sense by the time I am done with both of them. New build: CORSAIR iCUE 7000X RGB Full-Tower ATX MSI Meg Z790 Godlike Max Motherboard EVGA Supernova 1600 P+, 80+ Platinum 1600W PS Intel Core i9 14900k Corsair H150i Elite Capellix Liquid Cpu cooler 128G Corsair Vengeance DDR5 Asus ROG Strix RTX 4090 OC Edition GPU Samsung 990 Pro m.2 2TB (main) Samsung 990 Pro m.2 2TB Samsung 990 Pro m.2 2TB (3) Alienware 38" 3840x1600 @ 144hz 1ms (in Surround mode @ 11520x1600) I g
1 point
-
Jesus my guy. Come play some warzone with me. Edit- my next buy is a 240 (plus) Hz oled. Maybe the Rog rig. Not sure. May wait a tick. Monitors are just getting sooooo good. But, i want a rad oled thats wicked fast. Just 2 g7 240hz (27 and 32 inch) here. I want a nice oled.1 point
-
I still cant get over how huge those 4090s are LOL. Like putting an cinderblock on your motherboard.1 point
-
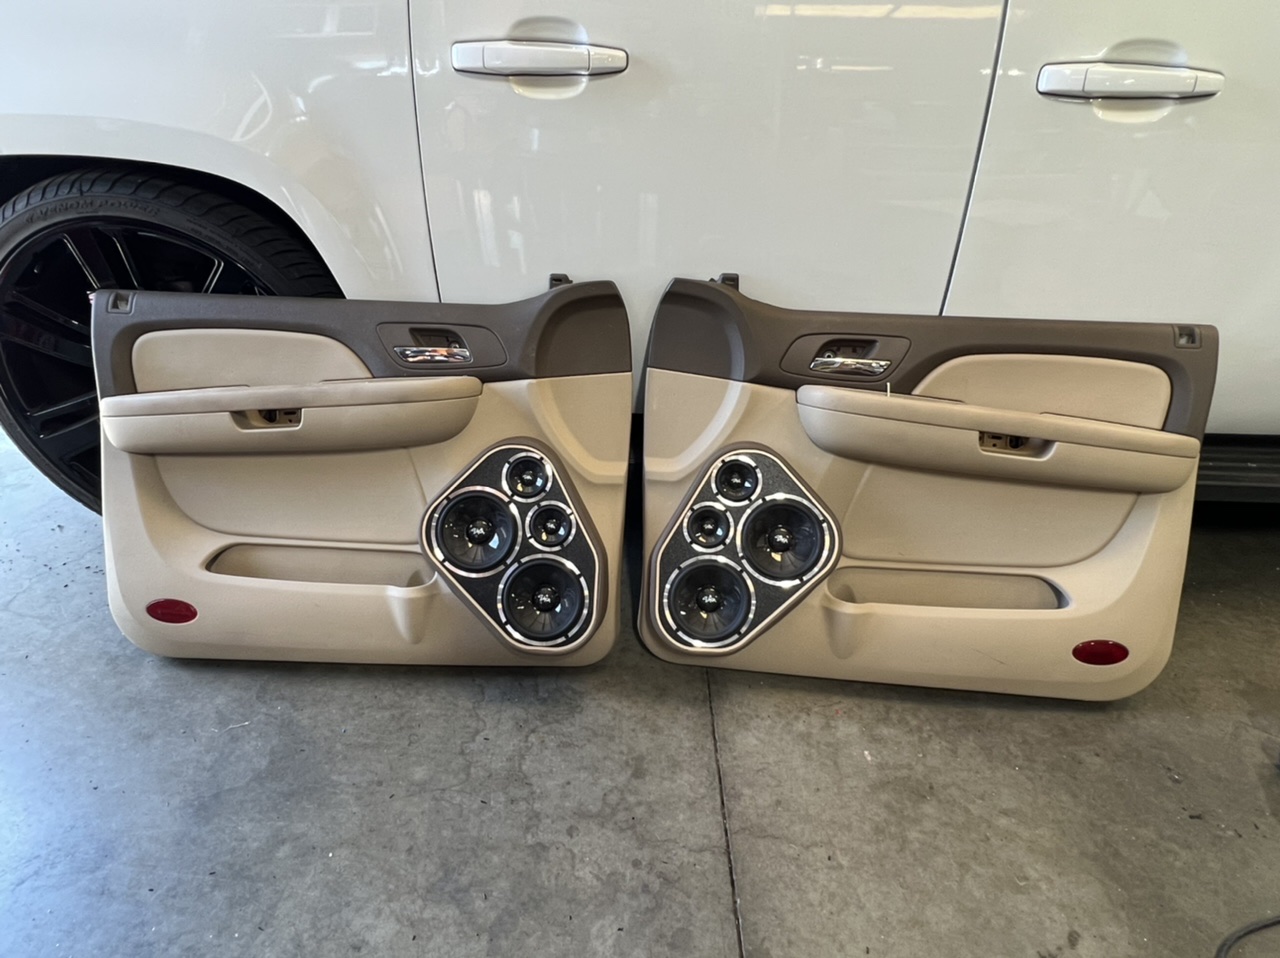
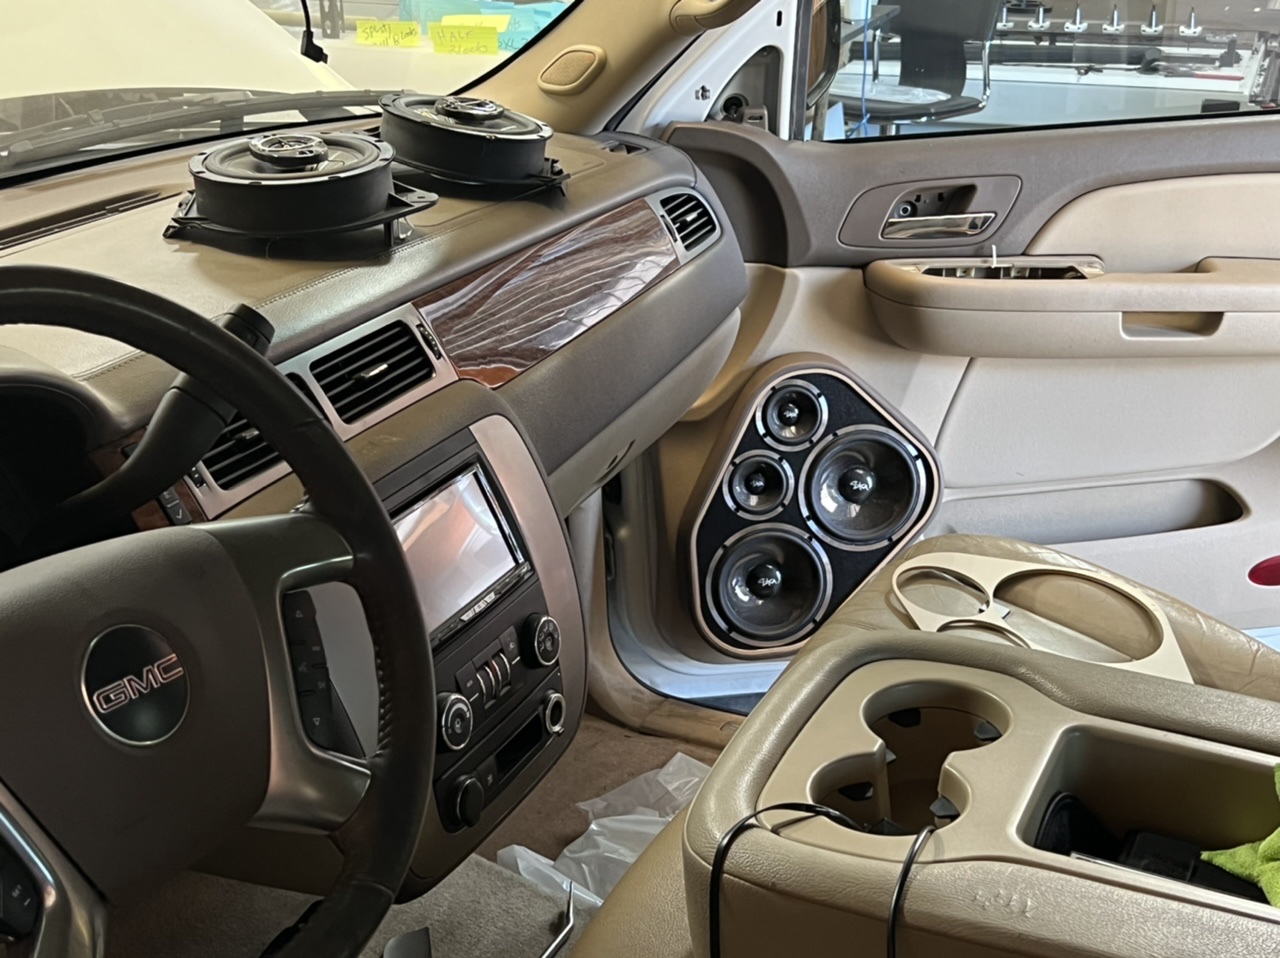
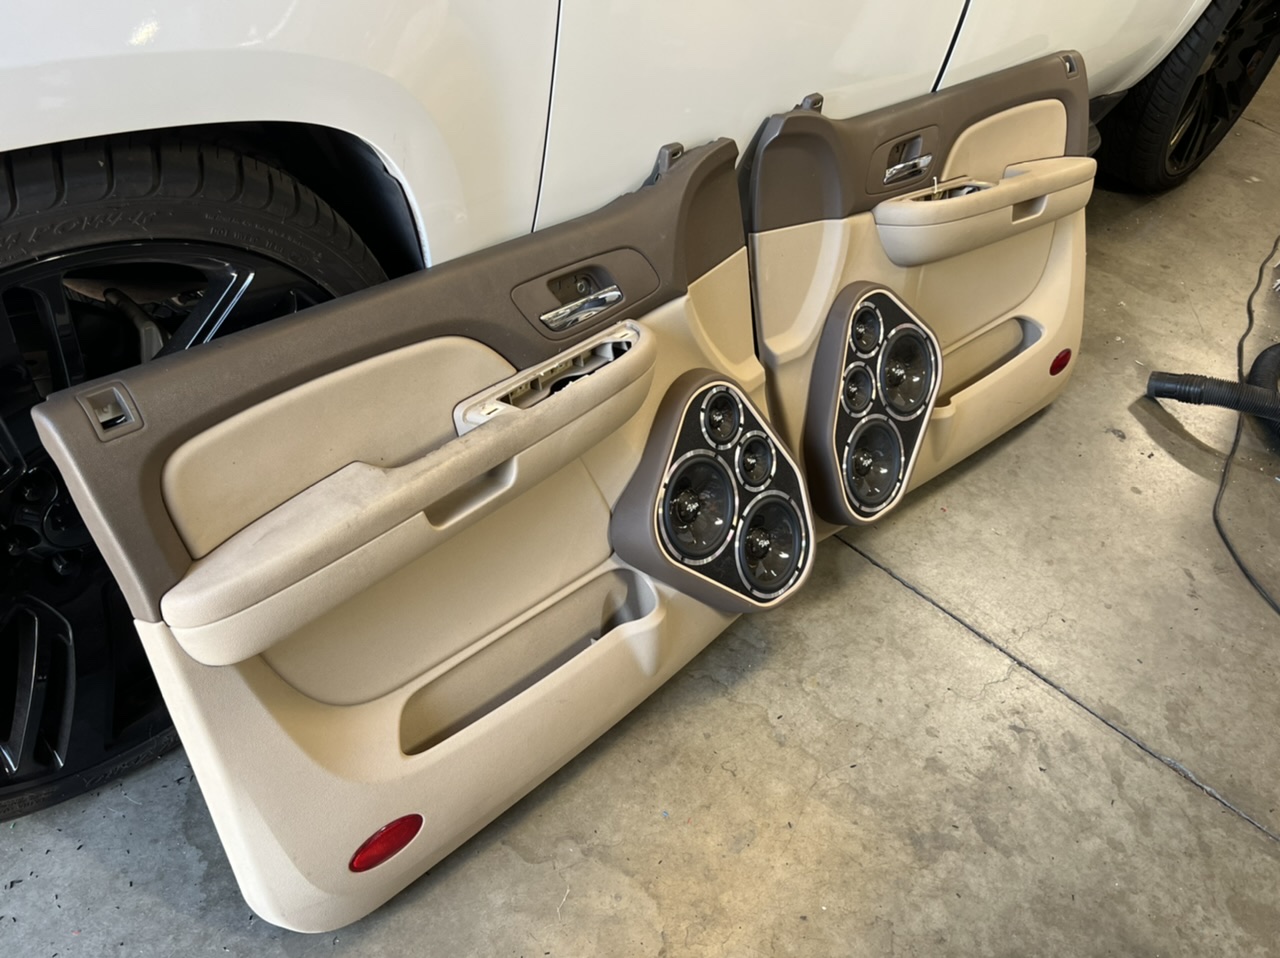
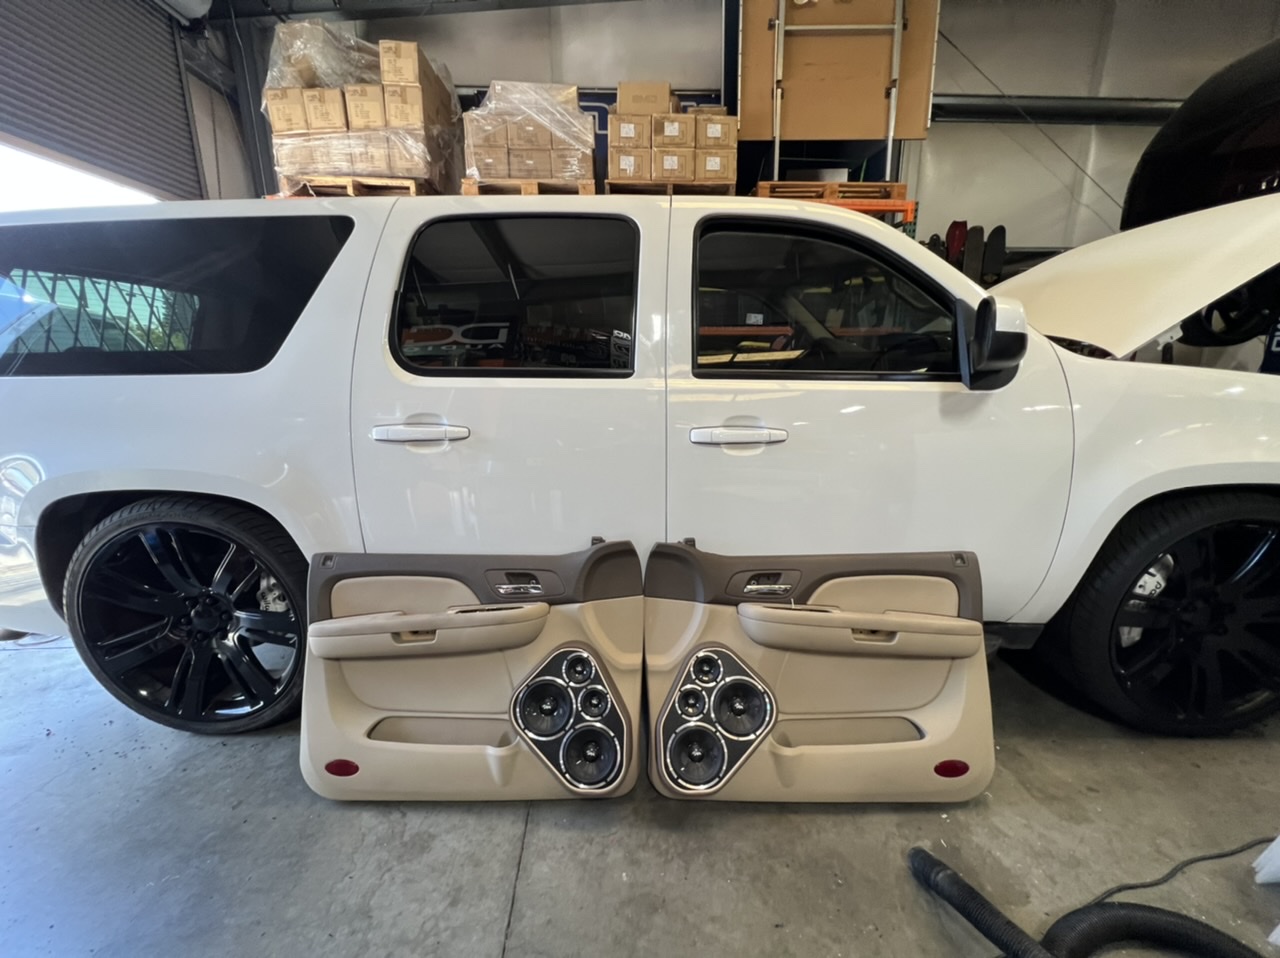
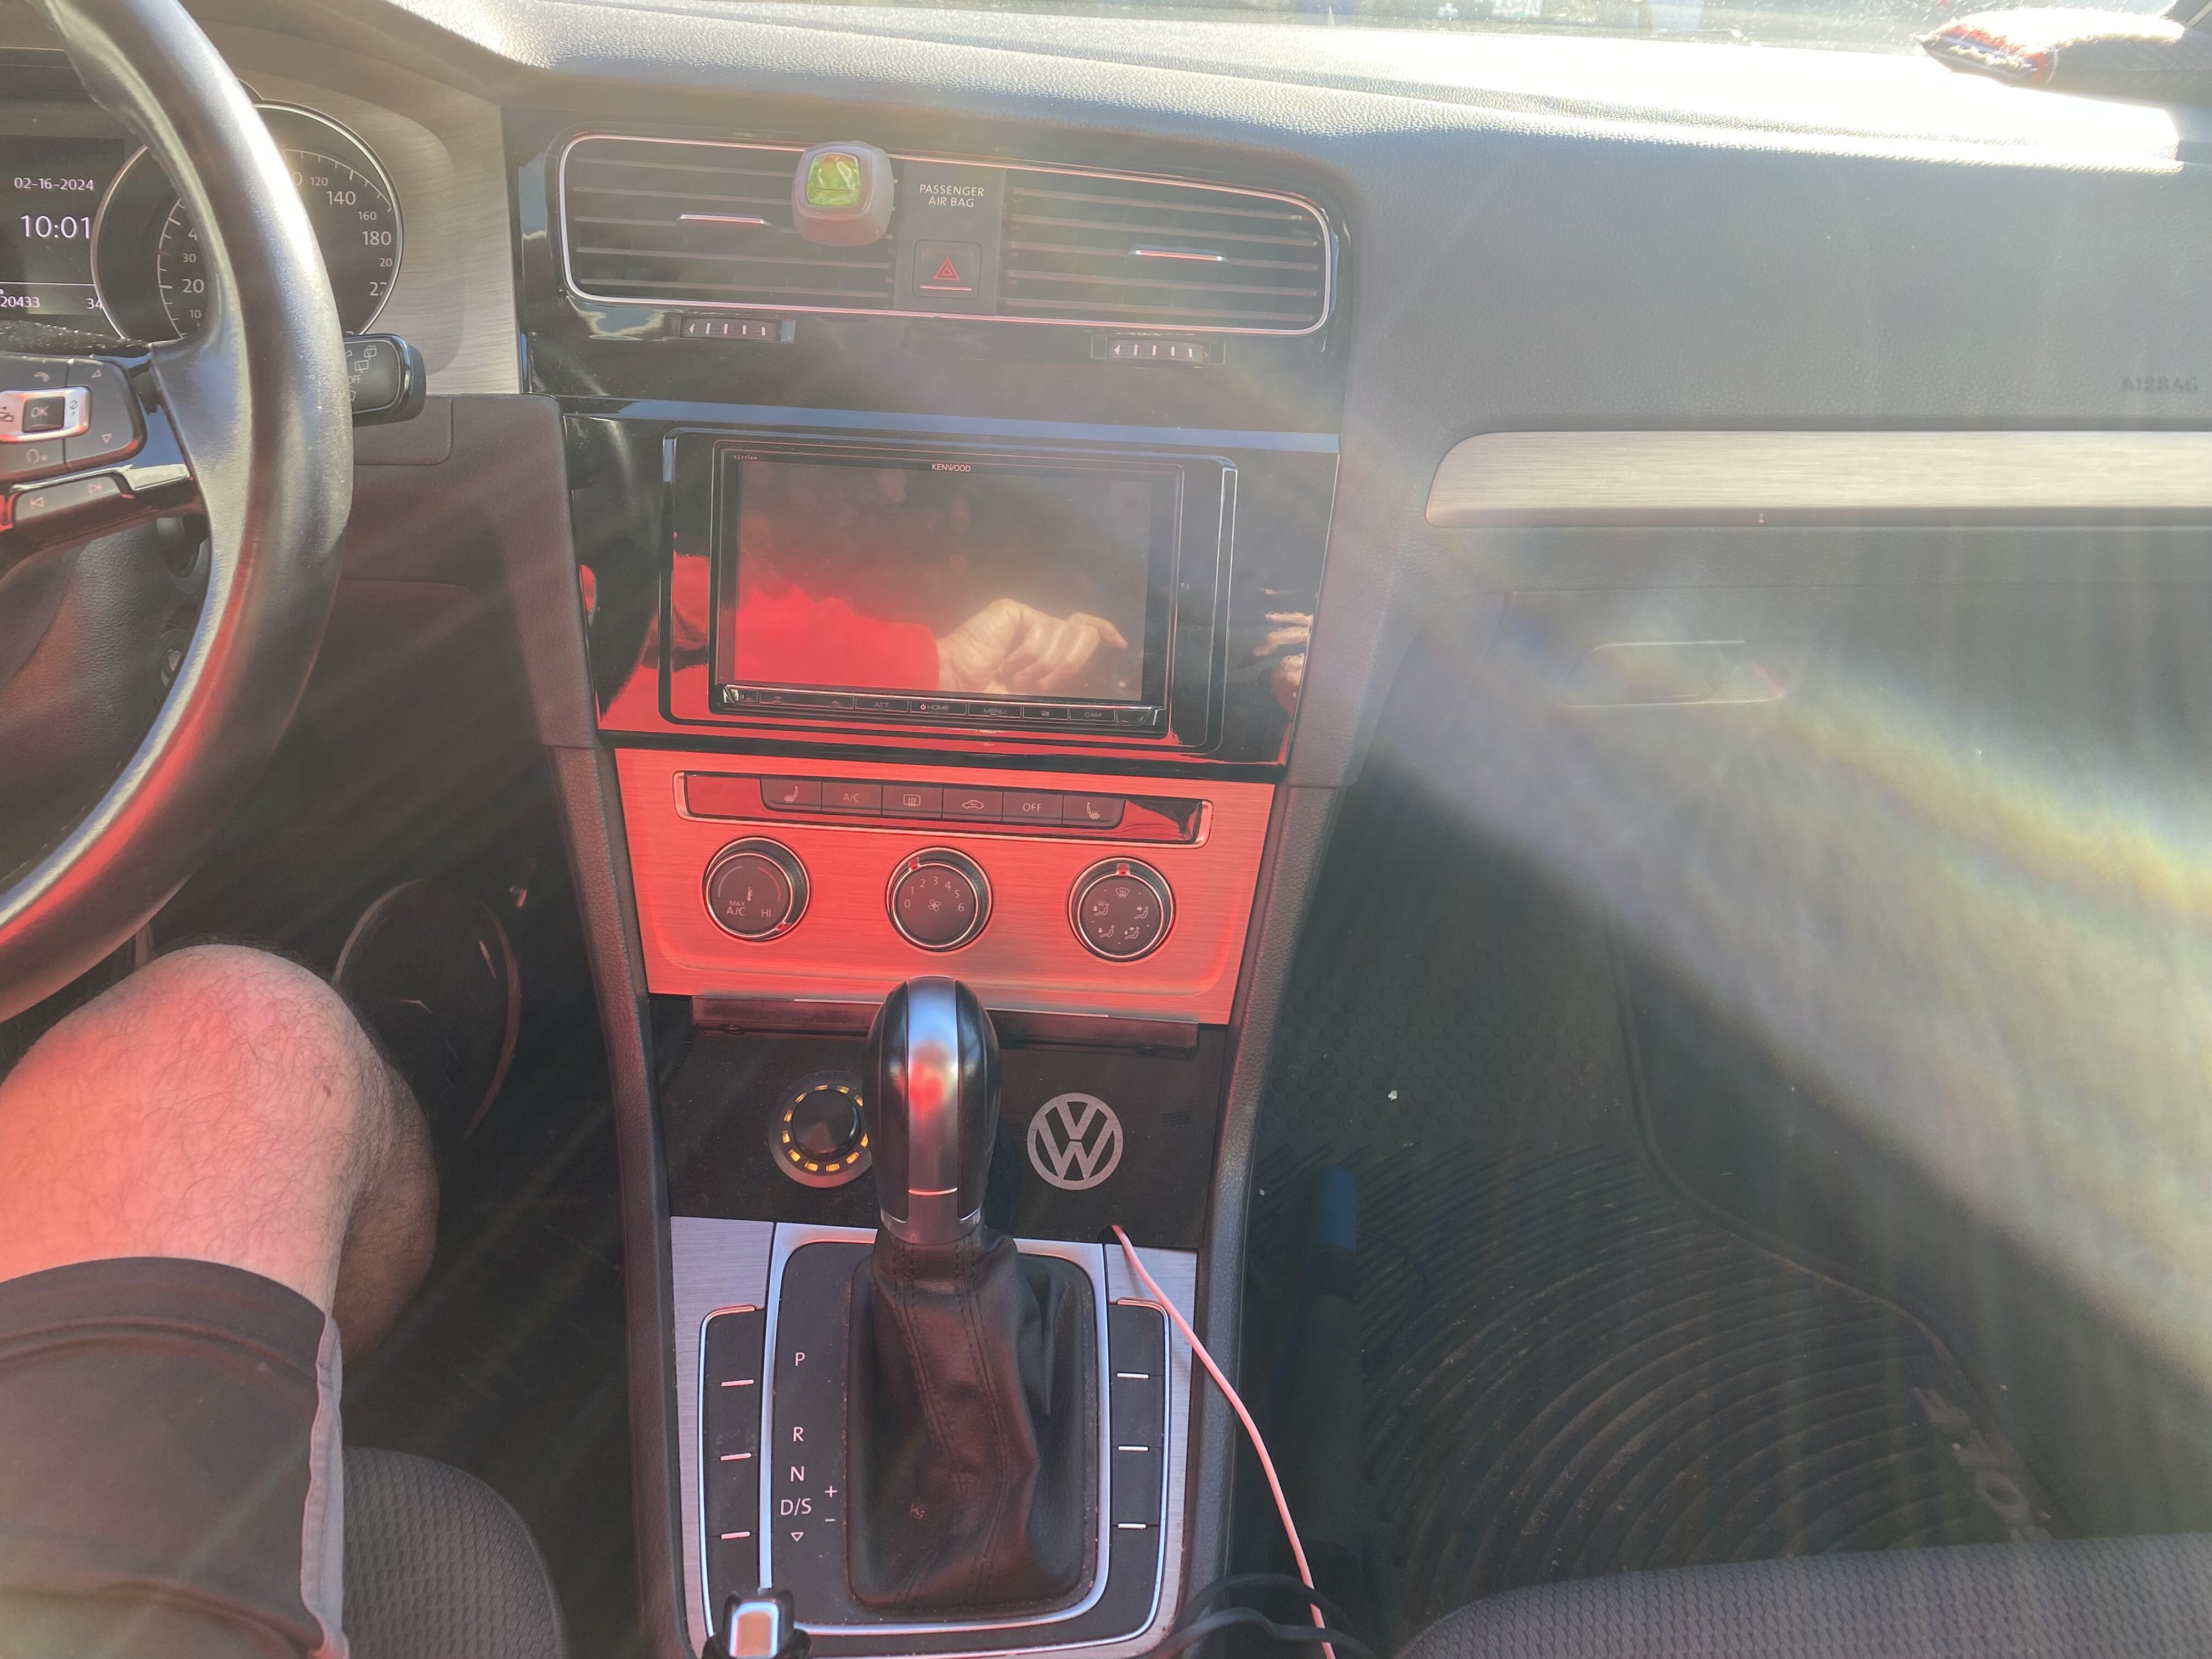
What is the vehicle?1 point
-
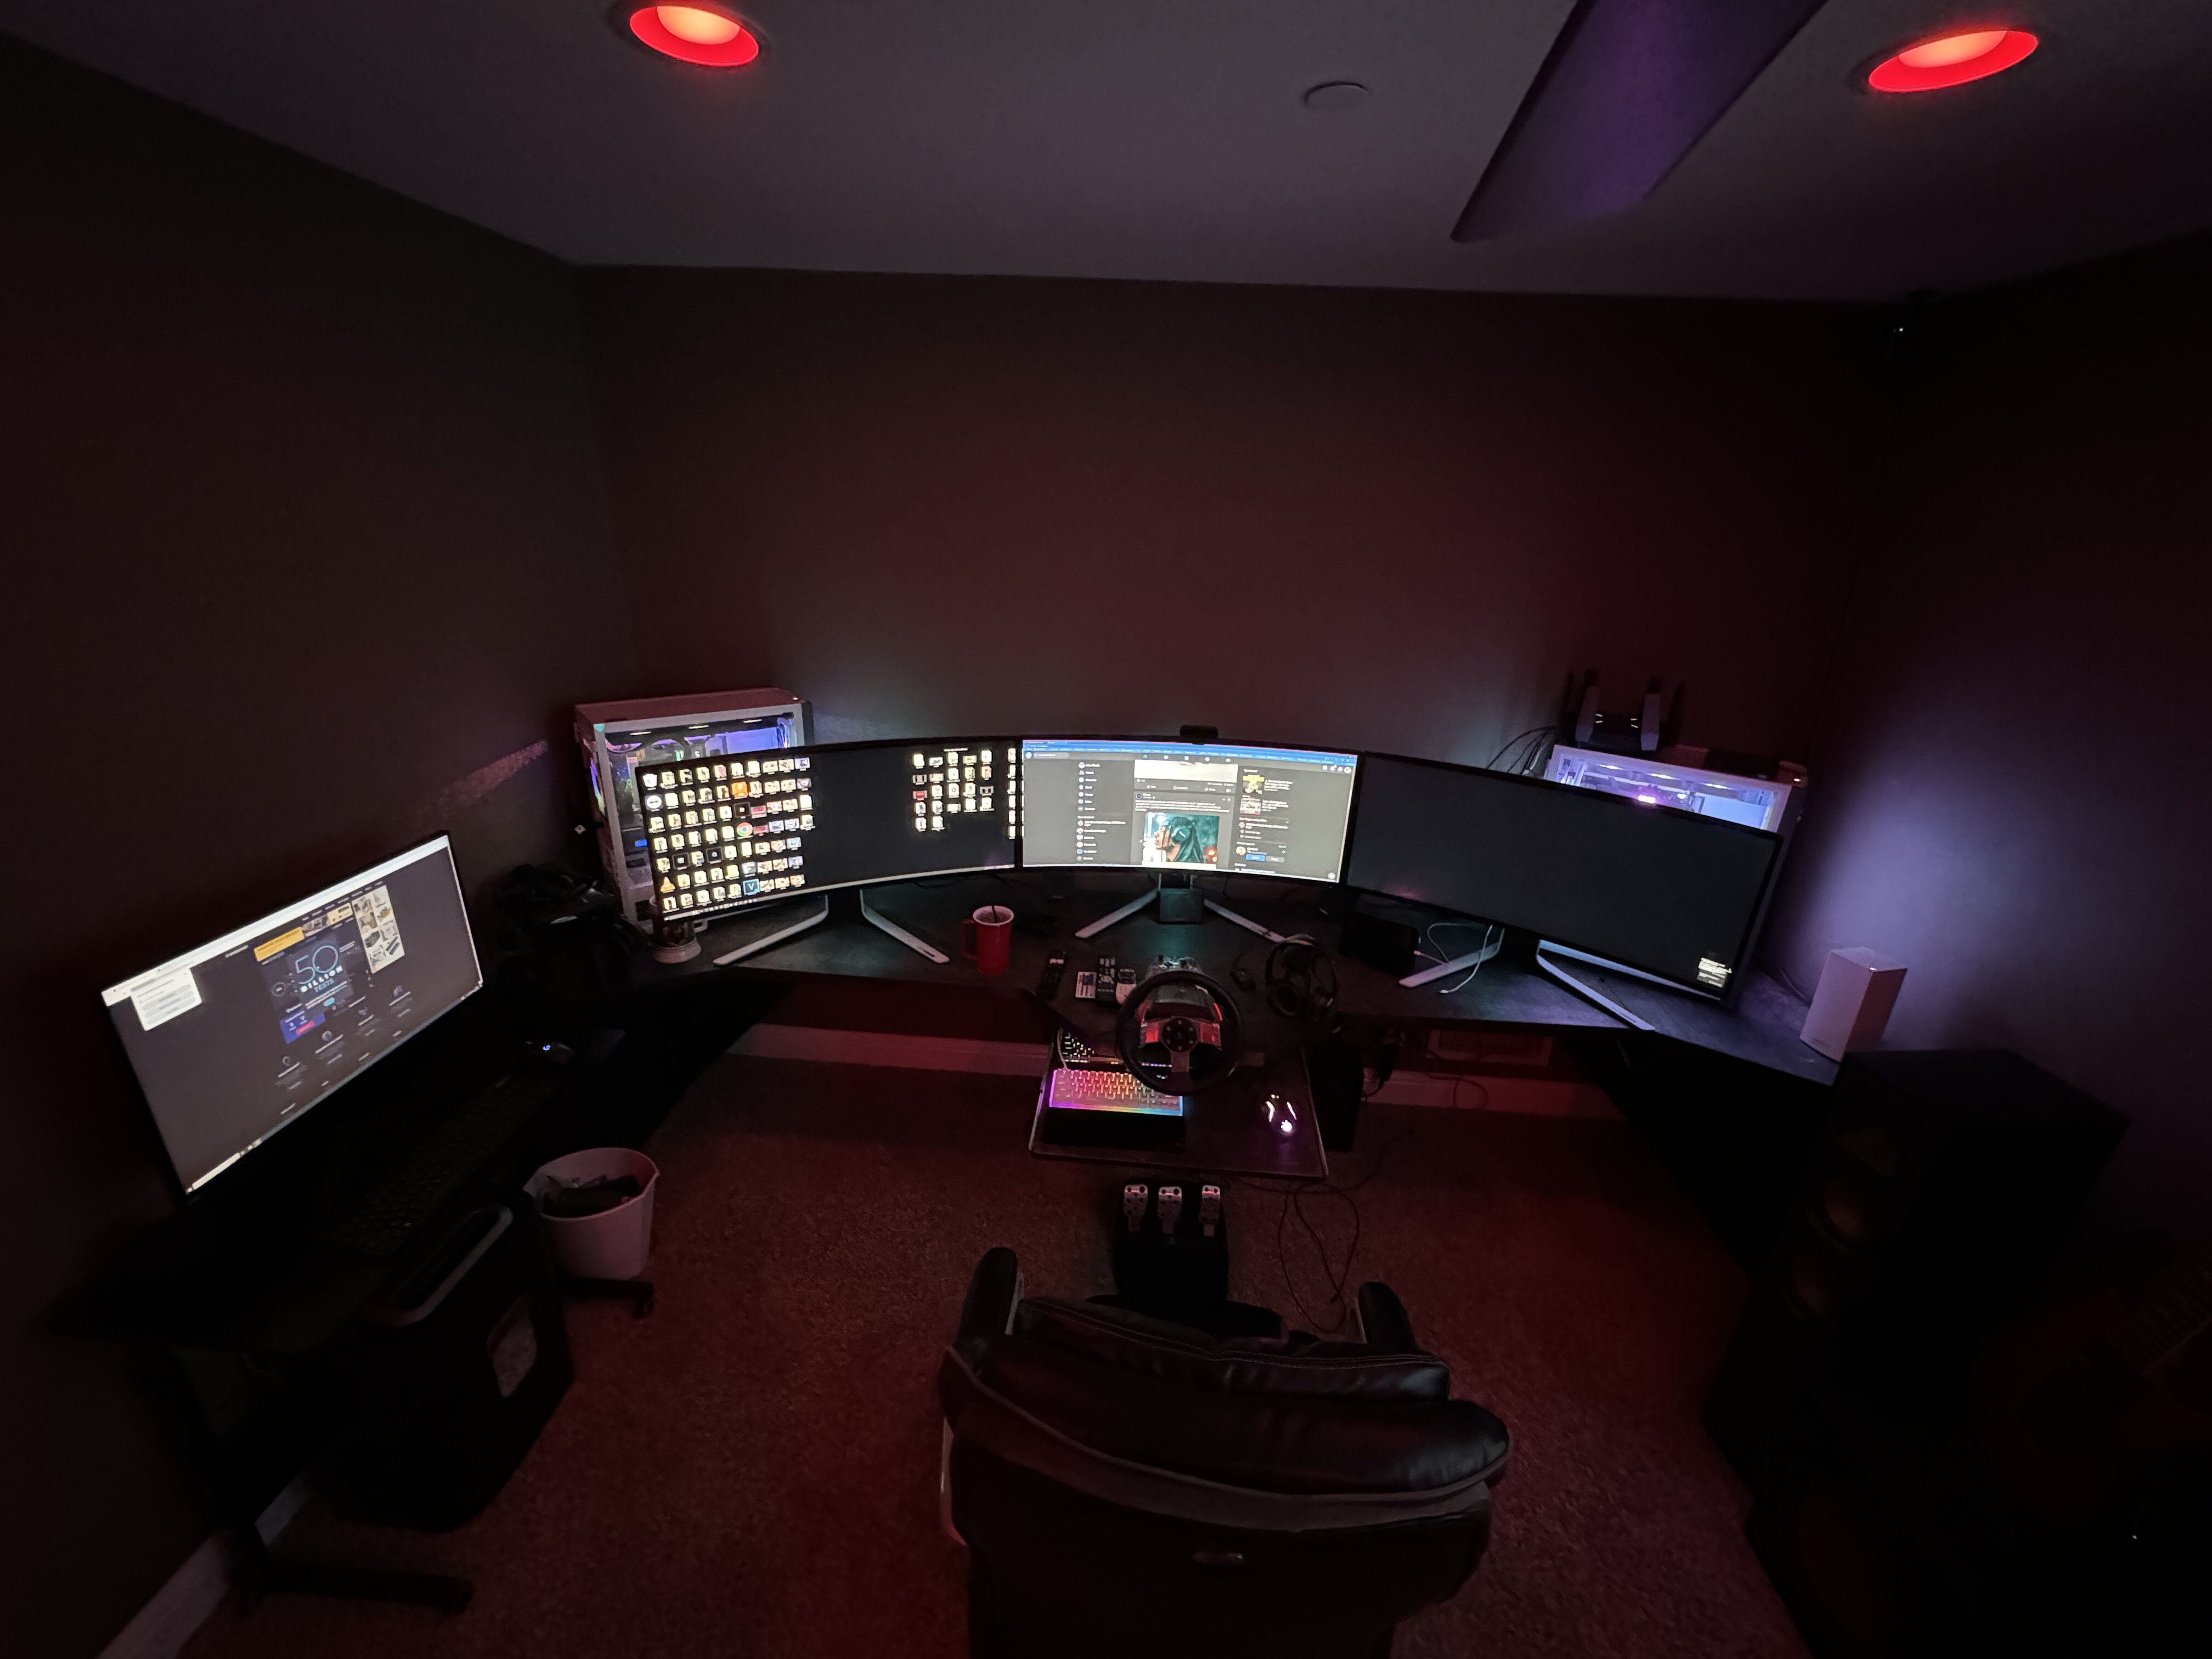
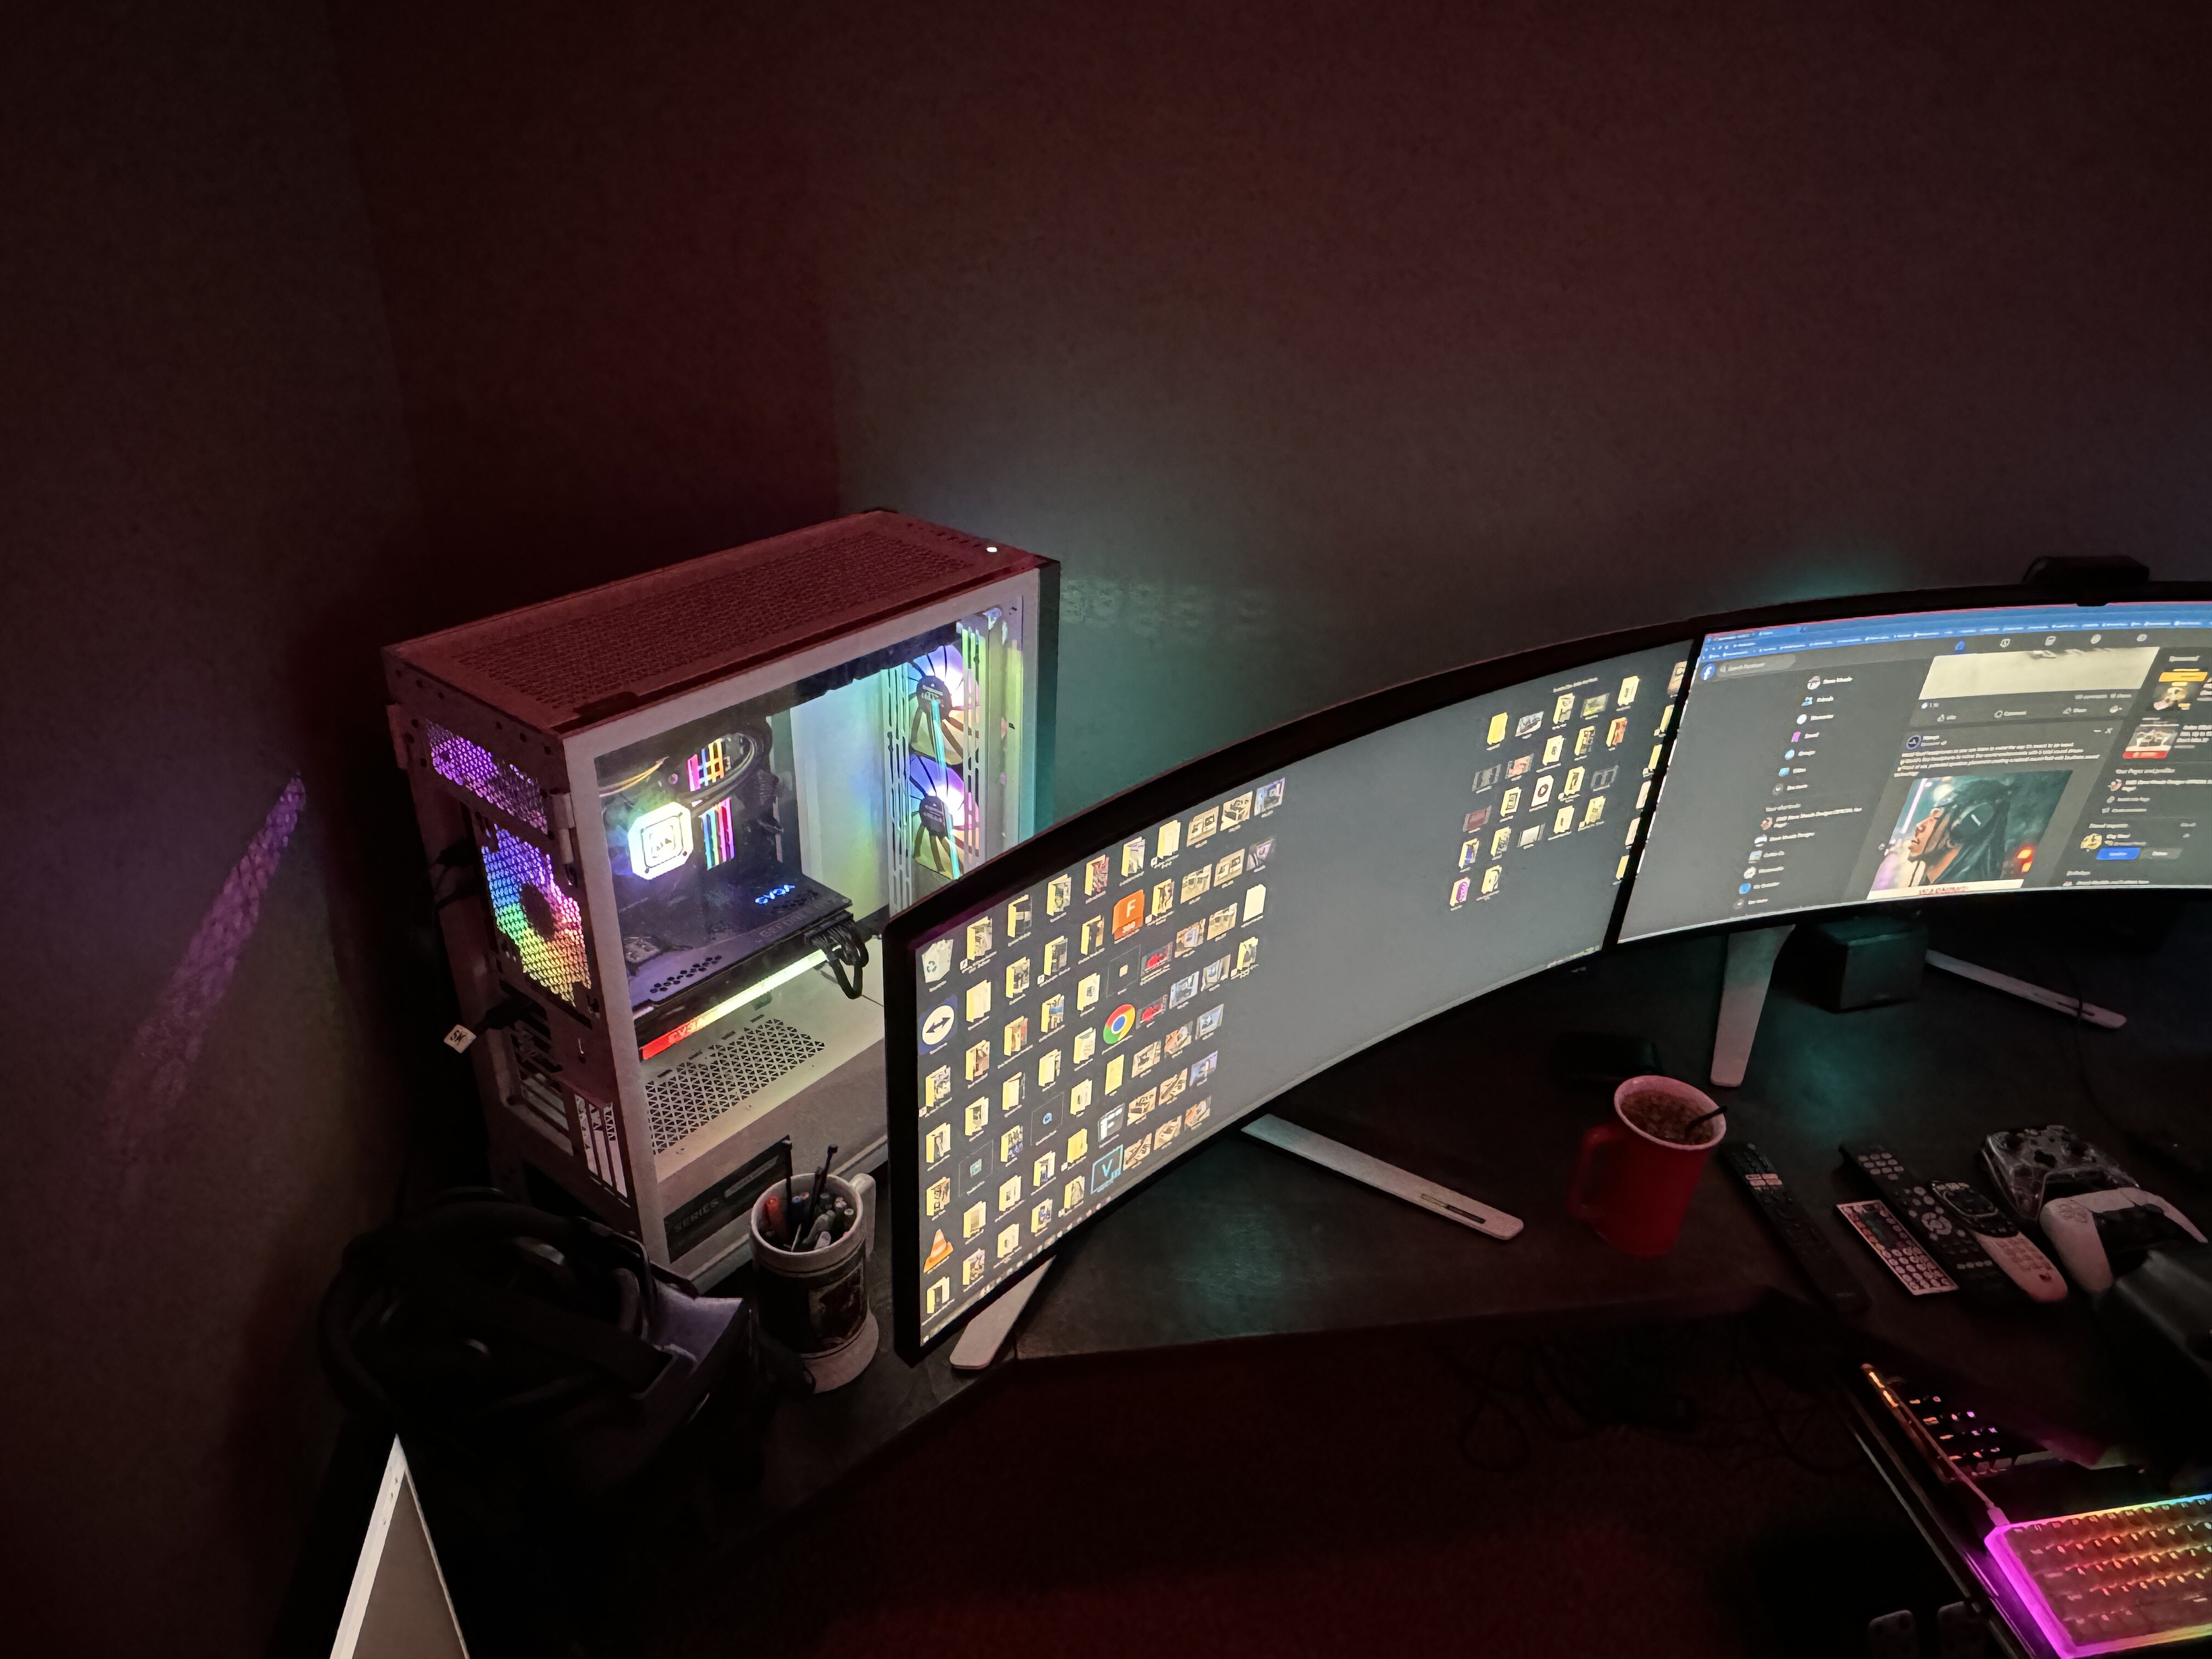
dueling gaming pc’s 😁 I networked the drives so I can use the “older” pc as a storage server also. Win! The one on the left is the previous PC but with an RTX 3090 in it. The 4090 was migrated over to the new tower.
1 point
-
Yes that was the one to get (didn't know about the V2) will be much better off than with a full bridge, except for the size, let us know how you got it done, don't know if a seat lift can help making room for all the stuff you want there and the amp. Also hopefully you don't get another D1 sub by itself and save yourself from some headaches.1 point
-
I haven't looked into their sub parameters to see if they are good. I can only suggest to get someone to design an enclosure for you (or go with a program that can give you data back on how the box will theoretically perform). I have a tough time when people go with general port areas and ratios. Just because it plays doesn't mean it's right or optimal.1 point
-
Wiring/batteries: Honestly, 1 run of 0ga +/- should be fine unless you're pushing absurd lengths. Can calculate voltage drop across wiring to get wherever ya need as far as Vdrop goes. Same goes for batteries. That's plenty for the power you're running. As always though, you can always adjust/upgrade if you find your electrical isn't performing how you want. I don't have any hands-on with those rigs, so I'll take your word on the ground loop shenanigans. --- Alternator: Again, prefacing this with I don't have any hands-on with these. So if you've already done the research on it, apologies. Just want to have a talking point on it. I'll also add that if you wanted to bypass ELM altogether, ask mechman for an external regulator. If you go that route, throw the wiring harness in the trash and wire the +/- on the regulator with 8ga tinned OFC. In my experience, the 14(?) gauge the kits come with creates a bit of a feedback loop of sorts and yields inconsistent voltage. the tl;dr is voltage drop across the sense wires causes the regulator to read low voltage, increasing power, increasing voltage drop, and so on until it sees an equilibrium. At which point, the regulator eases up, eliminating the voltage drop, then reading a higher voltage, and so on until that sees an equilibrium. Then the whole process repeats cyclically. See it more with larger battery banks or capacitors than with smaller stuff, ironically. Would this one work? https://www.mechman.com/alternators/acura/ilx/2-4l/2013-2015/240-amp-alternator-for-select-2-4l-honda-acura/ If so, honestly, you could probably ditch the rear battery and replace w/ capacitors to save some weight, or throw a smaller one in there. Idle output might be challenge though, IIRC these hondas have a smallish crank pulley. That's something you'll have to weigh the pros/cons of on your end. --- Trunk coating: Be careful with any sort of painted on material, especially in low spots like the trunk, and absolutely don't use it on exterior. It likes to trap water between the coating and base material and can cause some corrosion issues. Nice idea on the off-label use though. Always like to see those sorts of experiments. --- Rear speakers: depends how stiff they are. Rear stage usually isn't a huge consideration on builds like this. But there are 2 trains of thought on it: 1. Remove them altogether so you have a gaping hole to let pressure through to the cab. Test and check to see if your system performs better with them in or out. It's not always better because of resonances. That turns your box+trunk into a psuedo series-tuned-6th-order. 2. Install the rear speakers and leave the buckets in place to protect them. The pressure from the sub will shred the things otherwise. Depending on how it goes together and how stiff it is, you could use sound deadener to firm up the area and bolster your efforts to seal off those drivers.1 point
-
For the port size and length you should model the enclosure in a program like winisd that will show you the port air velocity and excursion so you can see how different sizes of port will effect how it all performs. You don't need anything to direct the airflow to the ports except for a flared end piece. Keep the end of the port away from the back wall by at least the diameter of the port. I.E. a 4 inch diameter port should have at least 4 inches clearance at the end of the port.1 point
-
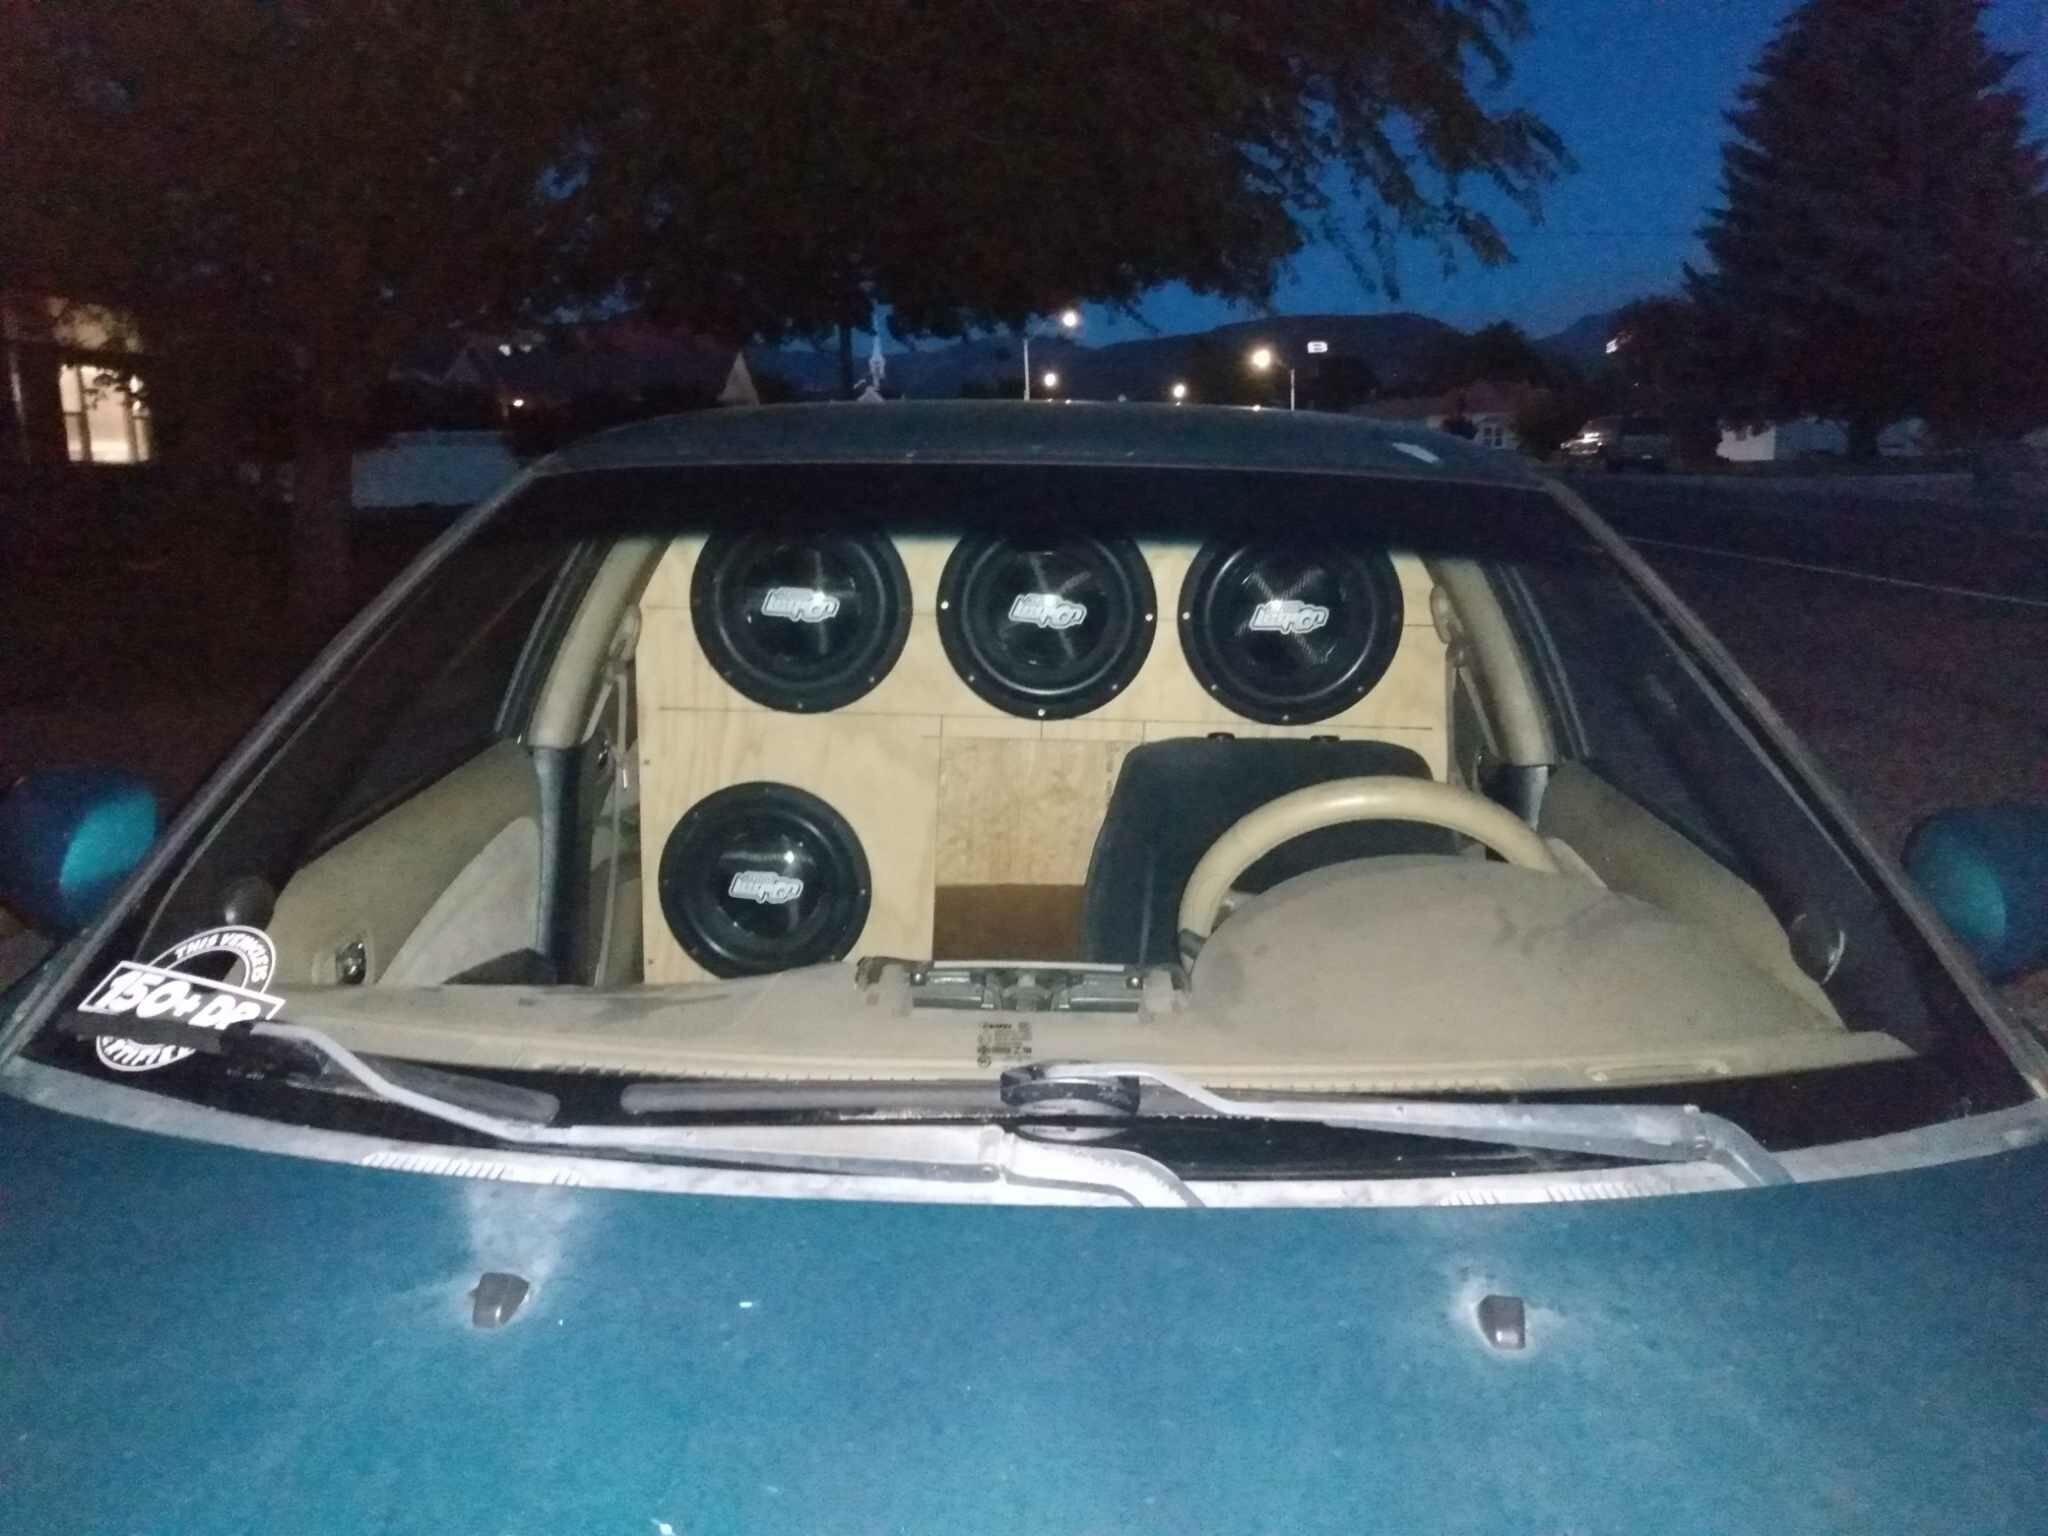
getting really close now1 point
-
Sure you can do that for some moderate improvement, larger improvements involve greater cone area like for example doing 2 15s, if doing a larger than recommended box and tuning higher requires you setting up your subsonic filter higher to prevent sub bottoming out.1 point
-
Depens on what you mean by "together" but if I imagine right you would have a parallel tuned 6th order bandpass, still that would be useless because in such enclosures the chamber sizes are of different sizes, port area and port tuning of each port are vastly different, in other words that wouldn't work at all.1 point
-
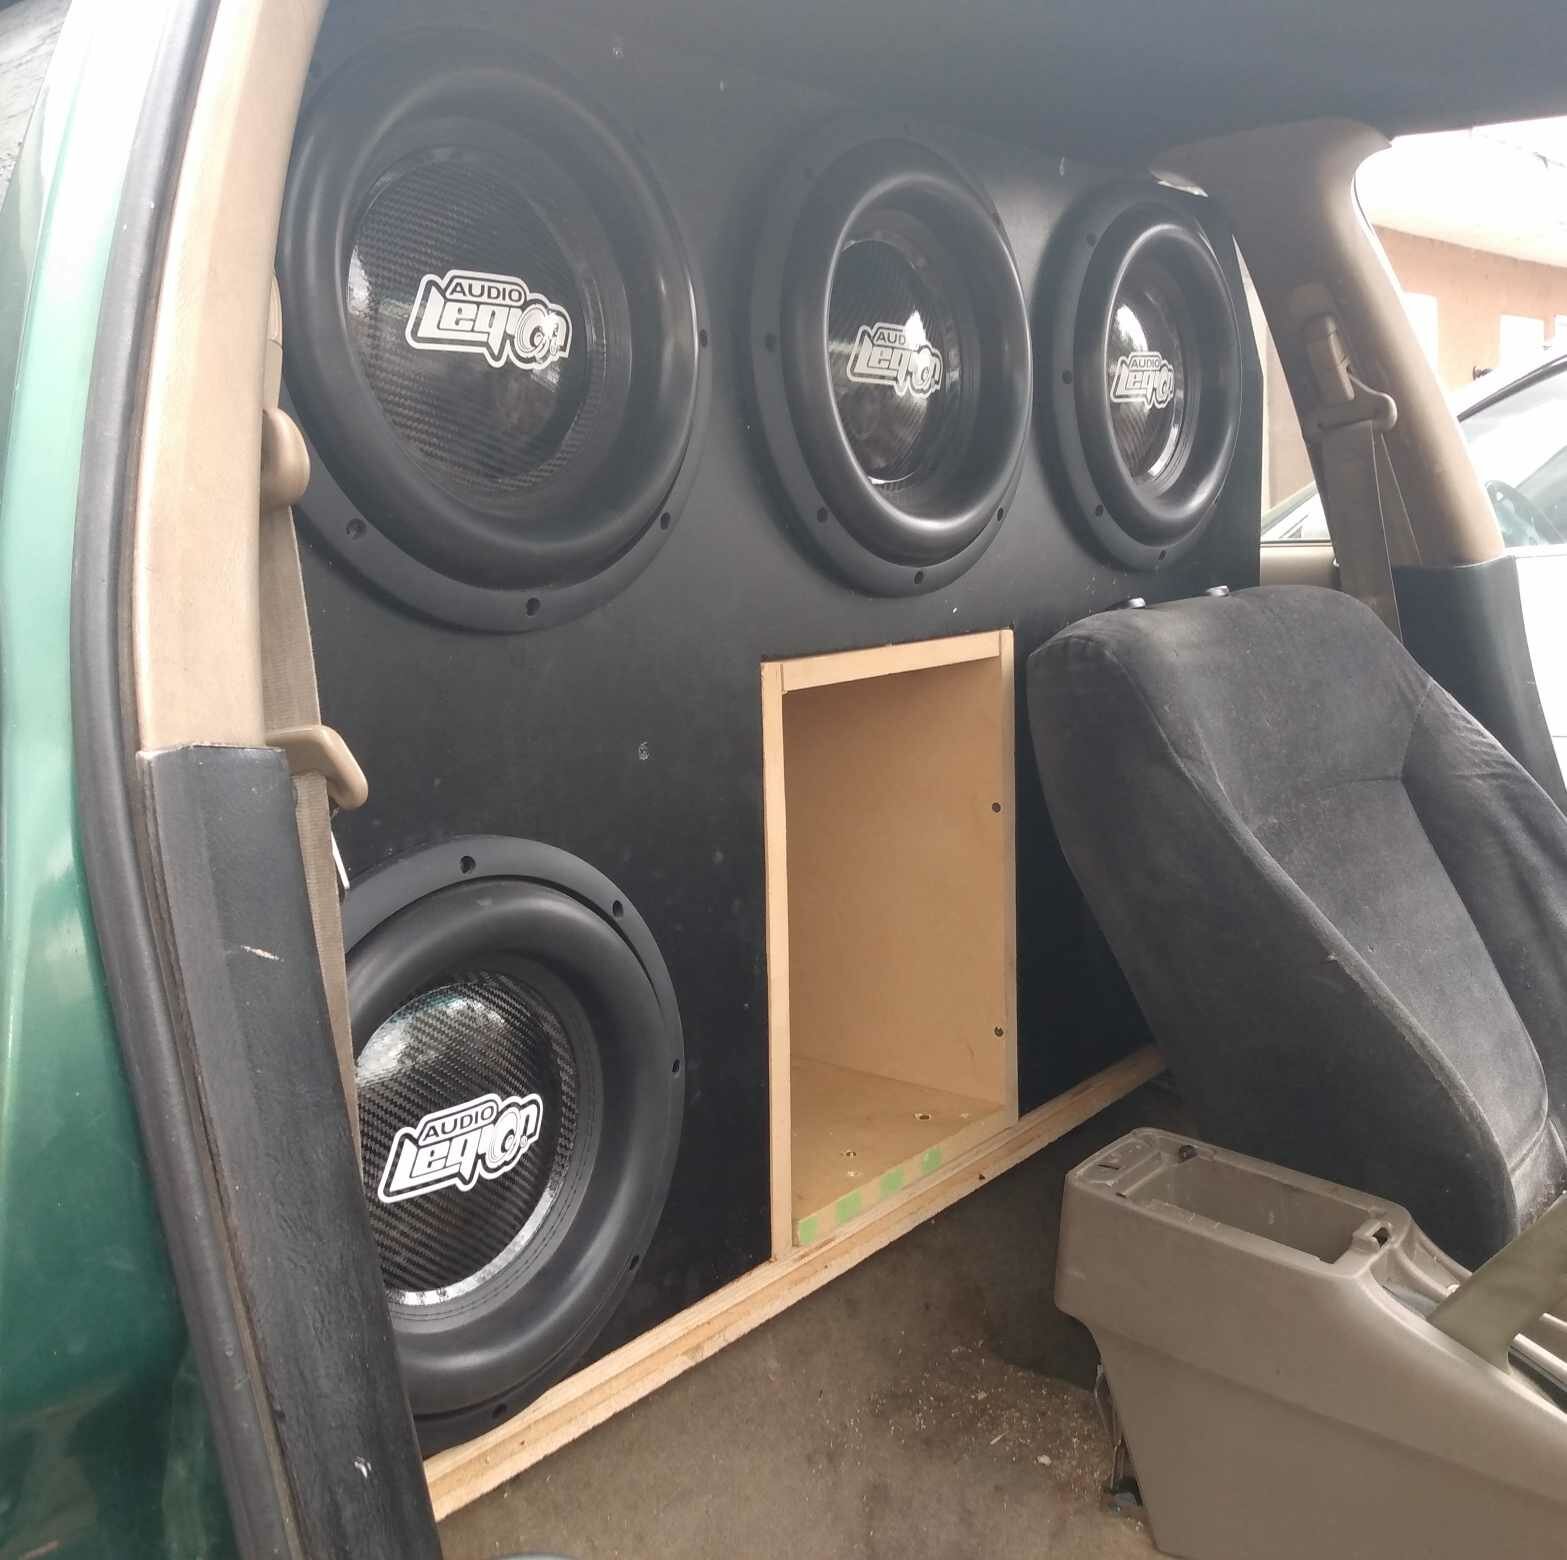
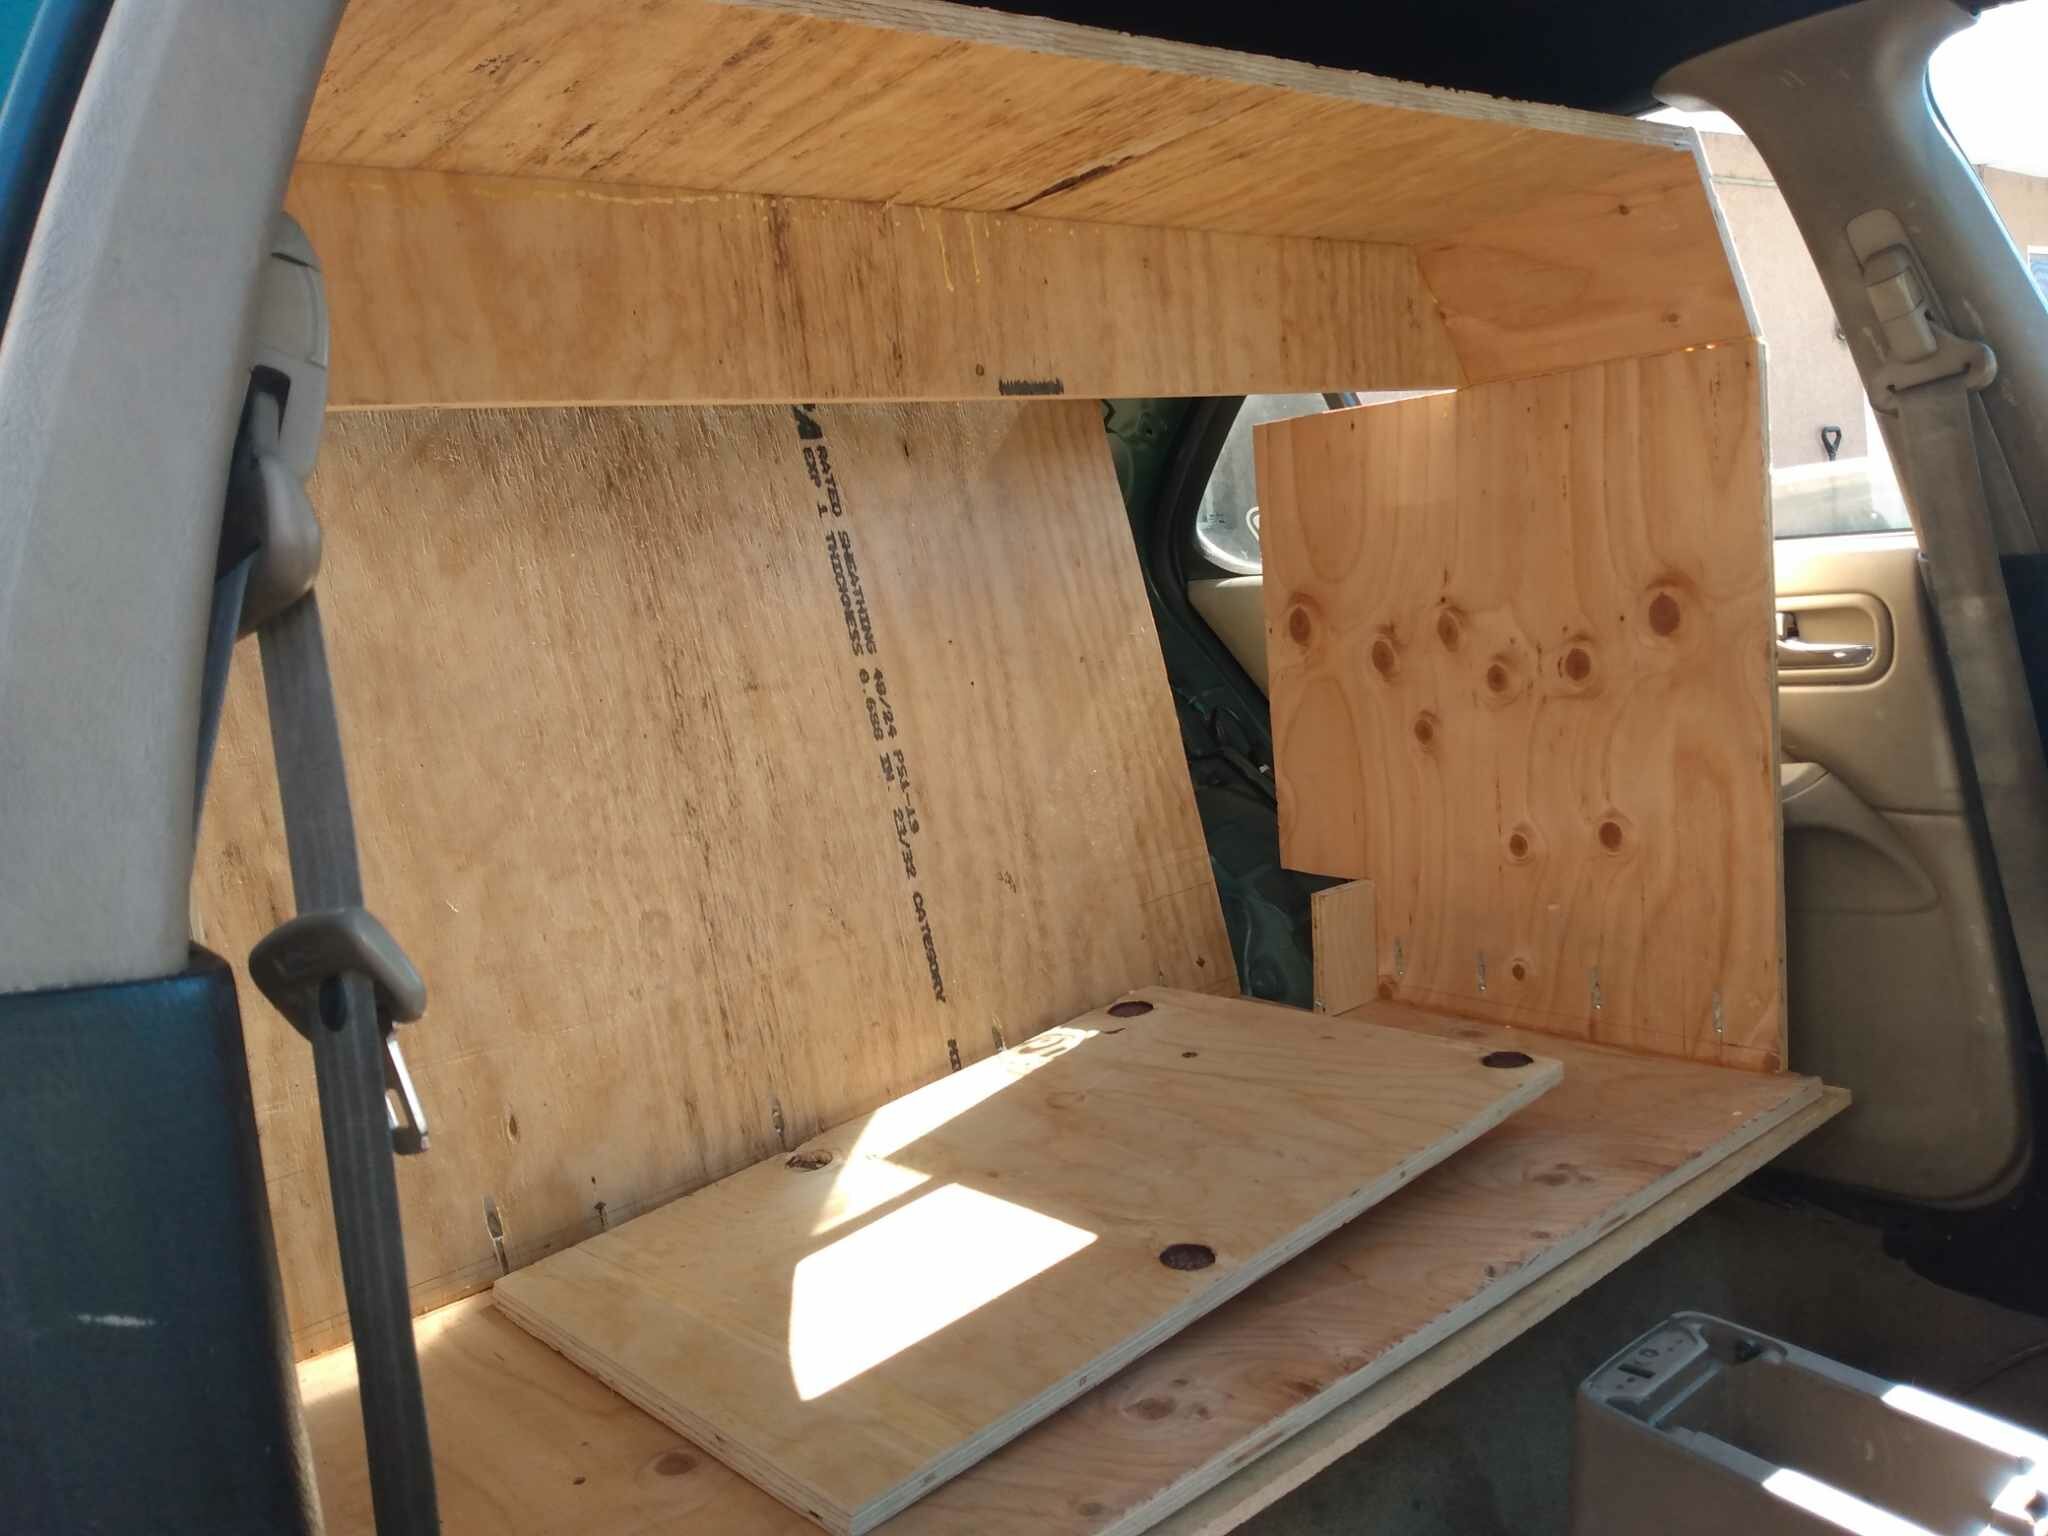
got the excess cut fromt he corners and had to call it a night ran out of daylight , i have 2 panels to install in the top of the box tommorow morning and then i can work on fiberglassing and sealing the inside before i put the outser layers on
1 point
-
Usually the negative speaker wire output is fine to use, however on some amps if it don't work then the negative battery terminal will work as well. Most amps the negative speaker terminal and the negative battery terminal are tied together, but thats not always the case and thats really the only time you need to use the negative terminal or vice versa.1 point
-
There is a thread, though it maybe buried now that has a bunch of radios that people tested with the dd-1 for max undistorted volume. you will probably have to search for it though. If the radio is not showing distortion direct through the rca's or while attached to an amp with the gain at 0 when you use a 0db tone for 40hz and 1000hz then it is safe to say the radio is distortion free at max volume through the rca preouts. In that case then set your amp(s) using your desired overlap -5, -10, etc db level at the maximum headunit volume. You could use a lower volume if you really wanted but it won't change much except the fact that the radios preout voltages (5 volts as you said in your case) typically wont be achieved unless the volume is all the way up. So if your volume goes to 40 and its clean at 40 you will get 5 volts preout voltage, but say if it goes to 40 but you set it to 20 to tune your amps then your rca preout voltage will only be 2.5volts or there abouts which will require you to increase the gain on the amp to compensate for that lower signal due to having lesser preout voltage. So you should just use the max cleanest volume.1 point
-
i have a Alpine 9887 and a scope, the RCA outs dont clip at full volume. the internal amp clips at volume 21 out of 351 point
-
You need to specify what's your vehicle, what is the sub model the box specs and some pictures if possible. Looks like a box issue, installing a DSP could help flatten your response but not the other issues, in some situations inverting the phase of the signal to the subs can help some cancellation issues, other times box location / sub, port firing direction etc can help. try what is suggested and if you still not get results then provide the details I asked about above.1 point
-
Not sure the chambers are of different sizes but even if they were with sealed there is no much difference in performance for normal to larger than normal internal volumes, say 1 cubic feet and 1.2 cubic feet will sound largely the same. If those subs are the lanzar st max12s those may play better in ported box rather than sealed. To answer your question it's better to cut a circle in the dividers rather than take them out to preserve the box strength.1 point
-
I can't believe I remembered my old logins! I haven't done audio in YEARS! But I just grabbed me my first (fixer upper) SUV and was like, "Back in the day, I always said I'd do something crazy if I got me an SUV." This is the only audio forum I've ever been a part of so... Here I am, checking you guys out lol. Coincidentally, I asked this same question as I was typing the website in 😂. To answer your question though, I got away from audio and started building me some "fast" stuff. I got this SUV with a blown head gasket for the winter just to have a 4wd beater so I didn't have to drive my fun cars in the crappy weather. Once I did the gasket, that itch came back like crazy, VERY QUICKLY lol. So Im now actively installing some old stuff that I had in plastic from the last car I did audio in, God knows how long ago, just hoping it'll hold me over and not make me wanna spend some money 😂 But, Hi all! Good to see y'all AND the site are still kicking!1 point
-
Those subs indeed need their space 4 to 6 cubic feet per driver is what they usually are given for ported use, if will use those in your room rather than a car tuning should be in the mid 20s not in the mid 30 which is what is given for car use. It all depends on the application, you will need to be more specific on your dimensions, music you play, or movies or whatever you are doing with them, how are you powering the subs, etc.1 point
-
If you have a subpar electrical you can go with this: Rockford Fosgate Power T1500-1BDCP It will give you like 1200W at 4 ohm and close to 2K at 2 ohm, it is expensive unfortunately but it can work on bad electrical also fits 4AWG cable. There are cheaper alternatives, Taramps smart 3 bass and the SIA series from sundown BUT full bridge amps need costly perfect electrical, 12.5 V minimum under max load or these amps can get damaged. These type of amps better leave alone in entry level systems.1 point
-
Not sure if I am OG but life has been rough. Glad to be glancing around once again though.1 point
-
next step is paint1 point
-
got the 3rd sub amp in and have the subs firing back into the cabin , am going to a compition this saturday so need to pick up another sono tube to cut down for a higher tuned port , lil scared i might loose the windshield , video below is very low power1 point
-
I agree with you1 point
-
Yes, you can and should use the DD-1 on your DSP as well. Treat your DSP as a headunit, use the 0db tone and the appropriate tone for the appropriate channel outputs (IE, 1khz for front/rear dedicated dsp outputs, and 40hz for dedicated sub outputs on your dsp), this way you have the maximum clean a/c voltage output from your DSP. Also make sure all EQs on the DSP are flat when doing this as well! Now the one thing to be careful of is the a/c voltage output, you don't want to set it higher than your amps inputs can handle, so after tuning with the DD-1 you may want to check the rca a/c voltage output of the DSP because the DSP can and will take your 4v rca signal and turn it into 6-9+ volts output. So if your amps can only handle a 5volt input then you will want to back the voltage down some on the DSP, and then go and match voltage for each output. Then use the DD-1 on your amplifiers using the appropriate tones with your desired gain overlap setting (-5db, -10db, etc). I think my Audison Bitone DSP was putting out 11.7 volts clean when tuned with my DD-1 but I backed all the levels down to 4.5volts that I verified with my multimeter and then I have my amp gains up about 1/8, its very very little.1 point


.thumb.jpeg.ea1098a3d79242024885c0220d6c7c67.jpeg)


.thumb.jpg.4043adc314d5bac18bb7000ad64bcbbb.jpg)