bcbrassard Posted March 22, 2019 Author Report Share Posted March 22, 2019 Yep, headliner is still a bitch by yourself. Especially since i had all the wiring finalized on the back pillar and all that has to be loose for the headliner to go into the trunk that far. I I got a start on it. I will finish it later tonight and start on the trunk. Link to comment Share on other sites More sharing options...
bcbrassard Posted March 22, 2019 Author Report Share Posted March 22, 2019 Turned out good. I found it more manageable to use 24x20 inch pieces. Seems turned out good, i will add smaller cut pieces in the pillars and above the jams for a more finished look tomorrow. Link to comment Share on other sites More sharing options...
bcbrassard Posted March 23, 2019 Author Report Share Posted March 23, 2019 UPDATE: This is taking some time and a bit over kill but i don't think i will have to go back later to fix anything. That's my hope anyway. Progress is slow, i can only stay in a fucked up position for so long, Working in the rear is the hardest because i have to lean over the headliner but not touch it. A-pillars turned out good. I worked around the Air Bag system so it functions and can be replaced. A-pillar look. I had to undo a bunch of the wiring harness job that was finalized and then put it all back. Part of the slow progress, but really i am just having fun and getting a little done. The wife would like it done soon, but she is catching on that they are really never done. lol I have the rear pillars left before the headliner can go back up. But i only have to cover where the headliner stops right now. Once its up working in the back corner will be easier. Again, really glad i spent the time and money to lay the SoundSkins down now. It's that fuck ya feeling!!! Knowing you killed from the start, Plus learning the hard way about having to keep addressing issue's instead of putting the effort in from the start. Time to finish this interior, tired of crawling in and out this bitch all careful like to not fuck up the wiring, carpet, ect. Link to comment Share on other sites More sharing options...
bcbrassard Posted March 25, 2019 Author Report Share Posted March 25, 2019 UPDATES: Finished the roof and Pillars. Antenna wiring secured. All wiring secured and treated. Deadening the channel for possible wiring runs. Used Tesa tape on the seams for a cleaner look. Rear Jam Headliner up next after i prep it. I know, boring stuff but it needs done. Builds probably not going to get exciting for a while. Link to comment Share on other sites More sharing options...
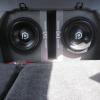
bcbrassard Posted March 26, 2019 Author Report Share Posted March 26, 2019 UPDATES: Headliner fixed & Prepped but not up yet. Trunk 85% SoundSkins installed. Metal plate that supports map lights that i soundskined to reduce rattles against headliner. I repaired these foam rail supports. I would say from uninstalling & installing by myself which caused headliner flex, loosened the foam up, so i hot glued both sides. Now they are solid and headliner is rigid. My OCD wouldn't let the dynamat on the fender well stay, i removed it to prep for Sounddkins. Much Better! Other side needed the same treatment. Again Better. Prep trunk for Soundskins. Shape tool came in handy. I got it from SoundMan Products. Happy with it, I need to do the very back behind the tail light area of the trunk. Looks so much better having that Stinger Road Kill cover up and all the same pattern. I hope to get the headliner up and trunk finished by tonight. Link to comment Share on other sites More sharing options...
bcbrassard Posted March 27, 2019 Author Report Share Posted March 27, 2019 Prepped and ready for Soundskins. Damn... got the pattern slanted. Oh well Deadening around vent. Filter/ noise reducer. Thinking about taking front door panels off and finishing all the deadening now. ? Link to comment Share on other sites More sharing options...
bsneon98 Posted March 27, 2019 Report Share Posted March 27, 2019 dude this thing is gonna be solid and quiet, youve put a ton of work into the process. It will pay off! Build Log: http://www.stevemeadedesigns.com/board/topic/152954-1998-plymouth-neon-updates/ Link to comment Share on other sites More sharing options...
bcbrassard Posted March 27, 2019 Author Report Share Posted March 27, 2019 5 hours ago, bsneon98 said: dude this thing is gonna be solid and quiet, youve put a ton of work into the process. It will pay off! Thanks man, it's been interesting. Get this sound deadening done so i can move on to more interesting and fun audio stuff. Link to comment Share on other sites More sharing options...
bcbrassard Posted March 28, 2019 Author Report Share Posted March 28, 2019 UPDATE: I had been procrastinating putting the Headliner on because i din't want to fuck it up and last time i had issue which was why it wasn't on all the way. I spent this morning getting everything ready, thought about calling my son to come help me. Na i just needed one extra hand. So i invented the adjustable third hand. It worked really well. I had a new car wash scrubber that i slipped over the end of the ice scrapper to keep carpet clean. Held perfectly so i could get the 4 quick fasteners in. Feels real good to have that back in with no issue's. Thickness of deadening didn't seem to affect anything on the roof. And i can sleep at night knowing i over killed that roof! Rear deck panel back in and no issues there, Fast rings married up to the panels perfectly. Really happy i redid the rear deck, 6x9 will sound better and sub won't rattle it, vibrate it ,yes. I will start on the doors tonight. Nice to be close to the end of deadening. Once i stop taking shit apart it should go back together quickly. Been thinking it over and as of now i think i will run a temp set up of front components and rear fill for the summer mainly for tuning purposes. See how all this work does in the testing. Link to comment Share on other sites More sharing options...
bcbrassard Posted March 28, 2019 Author Report Share Posted March 28, 2019 Passenger door... I had some pin stripe masking tape i used around the panel to help the template shape. I forgot i put acoustic foam on the backside. I will add soundskins to area's i think will benefit. Around the speaker grill and couple small spots. Nothing to special but the doors sounded the best i had ever heard. I can only image them after these upgrades. Door's outer skin is like 93% sound deadened with Stinger Road Kill & Dynamat Acoustic foam. There is nothing i need to do in there! Super clean in there like i did it a couple months ago. 3 yrs now i believe. These T3's are in great shape, tiny bit of rest on the + terminal. It was raining that September Sunday when i put the passenger side in and must have been damp. Car audio in the rain, glad those days are gone. Fast ring adhesive on the edge here and really bad on the other ring that goes with the driver. My bad, i will try something different after making a mess of these drivers! Bummer. Honestly i didn't think i would be back into the doors, surely not pulling the speakers. I will be running these on a T400-2 seeing about 150 rms to each channel. They sounded good before on 100 watts but the doors will be even better now which will help. Added some deadening and market out holes to cut out for the template i will make tomorrow. Ok, here's the speaker adapter and i don't like it at all. Feels cheap, choking the driver down and i still need the RF mounting plate to get clearance. These doors are shallow as hell. See.... Looks like ass. I don't gain anything so my son now has 4 for his Truck that i will do next winter. At least a new HU, Speakers, deaden the doors. My gift to him. Nope... still looks gay. If i had no other choice maybe. That is what i came up with when i installed them and it seemed to work well. So we will be going back to this mounting option. You can see how bad the adhesive is in this pic. Makes me want to cry, glad i got a smoking deal on them years ago. Template tomorrow. Link to comment Share on other sites More sharing options...


Recommended Posts
Archived
This topic is now archived and is closed to further replies.