

79 cutty
-
Posts
2005 -
Joined
-
Last visited
Content Type
Profiles
Forums
Events
Media Demo
Store
Collections
Videos
Posts posted by 79 cutty
-
-
-
-
-
Some more random photobucket pics

-
 2
2
-
-
Sifting through my old photobucket account! Lol
-
2
-
-
There are worse ways to spend your time. At least its not a tea party like mine likes
Lmao, my buddy was just asking me if I wanted to trade for tea parties! They are pretty cool the first time or two, but not the 36th time in a night.
But anytime with the kids is better than most anything else
-
My life is consumed with "daddy will you transform this?" My fingers hurt by nights end and "Santa" is bringing at least 6 more! FML lmao
-
4
-
-
if you look at the video, you will see the initial filling of the cooling system. The hose i am holding comes out when i am done. I suppose i could make a custom fill-hole on top of the case but honestly i prob wont even touch this for 2-3 years and even then it will be a top off at best. So no need for all the extra work on something i will (almost) never touch.
Yeah, I watched that vid, I thought that hose was the one that circulated down, but that makes sense! I have seen it done once now so I would consider myself an expert! Time to go water cool my Atari!!! Lol
-
there is an inlet at the top of the reservoir. I have a fitting, a hose and a funnel...just pour it in very carefully and that is it. Close the inlet when done....and done! Already did it. No more turbulence, no more micro bubbles, it is perfect now. My CPU and my GPU's idle between 23c and 25c. On full load during gaming, with my GPUs overclocked i can reach mid 40c tops. On benchmarking tests (even heavier load) my temps reach between 47-52c TOPS. When i had 2 GTX 780's on air, they both reached mid 70's creeping on 80c. So 30 degree's difference is NICE! When the game (or benchmark) stops, the temps drop like a rock. It's a really good setup, i love it!
Interesting. Was wondering how you would unhook one of those tubes and not spill shit everywhere! LMAO
-
I only ask this because I know NOTHING about computers and water cooling....so all the captain know it all's can tone it down and take it easy. But now that you have the enclose water cooling system and you mentioned you are going to be adding more water to the resevoir to top it off, how do you add the fluid without getting the water everywhere since all the tubing is full already. Is there just a port on the top of the resevoir to add fluid or how do you go about that??? Just curious as I am assuming now that it is an enclosed system it has to be harder to add fluid as opposed to when you didn't have the fluid in the tubes already and could just use that length to add it outside of the computer. (If that makes sense.)
-
Things are going to get crazy when I post up my Apple GII gaming rig! Might go play some Oregon Trail or Number Munchers right now. I know if I put some braided wiring or more thermal paste in the disk drive it will probably work faster!
-
1
-
-
I don't do anything with computers, and don't know crap about building them, so I think the simple solution would just be to use EVERY thermal paste out there, and slather it all over every surface possible! Problem solved!
-
3
-
-
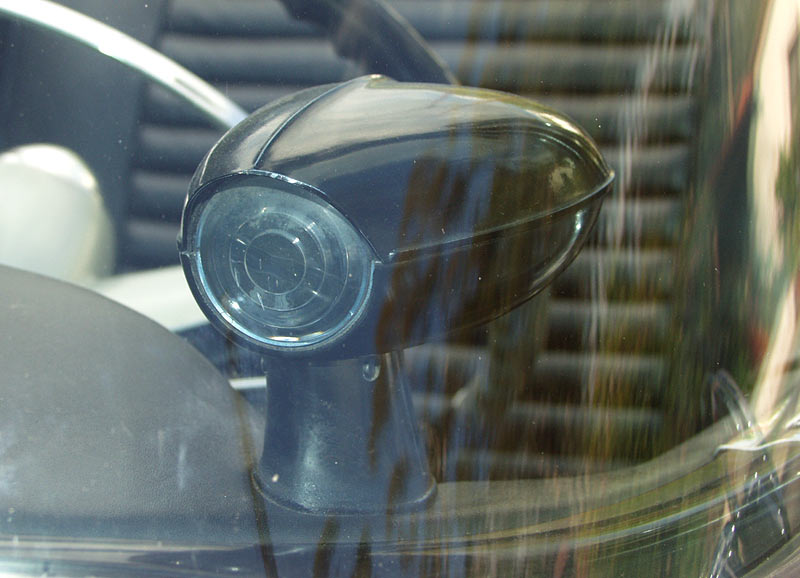
Is this for those adaptive headlights they had on early 60s Cadillacs?
Autronic eye!
-
Lmao, well allow me to step in and give you my opinion. I don't know jack about computers, or any of the giberish that has been discussed on this thread! Me and technology rarely get along well!
With that being said....the box with all the crazy computer crap you are cramming in it looks damn sexy! Who cares how it functions!
-
I think you are not telling the full truth..I just ran 6 miles in 16:30 slacker
I have no reason to lie! I just posted it just because, I don't need your approval!
-
I did it in 17 mins...
I have no reason to lie...
I just ran 6 miles in 16:30 slacker
-
Just finally got around to ripping this beauty out of my facia. Shot it with wasp killer about a month ago, but waited for a deep freeze before climbing my 30 ft extension ladder to mess with it!!
-
Pales in comparison to what we have paid to overnight pallets of frozen product to other countries for work! LolThey must of really needed it
90lb box from cali to Texas, ups red
-
-
It is confirmed.....that is a beast!
-
Little before and after as I finally finished up the retaining wall I have been working on.
Before (crappy rotting rail road ties)
And after (I am far from a professional landscapper, but I am pretty happy with how it turned out.)
And now that the wall is completed and the pine tree that was in the corner where all the dirt is in the picture is gone I am thinking about building some sort of fire pit in that corner.....can't decide if I should do built in, or just a nice paved level surface and put a moveable fire pit there.....choices, choices! Lol
-
1
-
-
-
LMAO....helper bags $150......couple sleeves of tennis balls $20!!
-
1
-
-
Been working on this for about a week now....almost done, just need to finish a few of the pavers on each end, and start cutting the top pieces.
A before pic of the horrible rail road tie retaining wall that was there:
Removing the old rotten garbage:
Laying the 3" of base, and 3" of leveling sand:
And the pretty much finished up wall. Still have to put the top stones on, and cut back the landscaping in the corner a little:
That only looks about a billion times less trailor park! Lol.
-
3
-
-
Would definitely deal with again! Fast shipping, packaged excellent, great communication! How it should always go!!


Random Picture Post V2
in Off Topic - Random, Misc posts - the forum "Junk Drawer"
Posted