
goodvibez
-
Posts
1290 -
Joined
-
Last visited
-
Days Won
1
Content Type
Profiles
Forums
Events
Media Demo
Store
Collections
Videos
Posts posted by goodvibez
-
-
wrap is definitely going to make it look that much more awesome...now back to the tercel!
-
I think you and Steve and Brent should get together and do something like this

because with the three pro's like you guys...you could make something really cool....just saying!
-
 1
1
-
-
The dash piece came out Awesome! Great work getting to look like it belongs there! Is the paint glossy or more matte black? Guy looks like he does a great job...I probably would have cheated and just used bedliner on them like you did the kicks...but thats because I haz no painting skills....................................yet!
Again nice work...lets see more of the Tercel lol! -
opinions are like ass holes everyone has them, don't care if you don't like edm or electronic music of any kind. I love the way it sounds playing through my speakers, that's what got me listening to it...some of the cleanest beats I've listened to.
I love going to those type of concerts because of the experience not because I'm looking to be impressed by talented musicians, I go because its on big party, who cares if they sit up there and do nothing more than the average dj does( line up tracks and press play) Those guys know how to get the crowd goin! that's pretty much their job description.
btw if someone payed me millions to press play in front of thousands of people..um' yeah I'd do that!
-
Damn thats clean man...curious to see how it gets fastened because you made that look really clean! Great work! Is this the last piece of the puzzle?
-
Damn that came out amazing! The fit is unreal how it looks like it belongs there! All the trim work, plexi, bedliner, and the lift handles make it look amazing man! Great work!
-
/\/\/\ agreed cartoons are supposed to make people laugh...that one did lol! what a joke! Guns dont kill people..if you want to get technical its the bullets that kill people, only because certain people want to kill people...would go on but I don't want to turn this into a retarded debate about gun control! Carry on!
-
Nice vid man! That's allot of work that looks like its paying off! Looks awesome, bet some people wish that was something you can buy as a prefab haha!
btw I've never noticed how you lay tape then plastic before fiberglass...that looks like the plastic comes off allot easier
I always just fiber glassed right off the tape and that shit doesn't usually come off easy at all..PITA..will be stealing this for my c-pillars I gotta make...thanks for the tutorial! Like I said I'm sure you've shown it before I just didn't notice haha!
-
the trim work is looking siiiick! Keep it up man!
-
damn dude 6th order...wasnt expecting that! sick work fitting it in there so clean! as always work is classy not half assey!
-
rly
are you pointing out how the stock duramax exhaust looks tacky? I agree but serves a purpose for emissions bs
helps pull the exhaust gas through...I understand the function...but I hate everything they did to make those trucks meet emissions...total bs!
-
1
-
-
BTW forgot to post this up in the log but here's a demo of the fans kicking on and off, not the best quality but I wanted to test it before I put it in just to make sure it was wired and set properly...figured showing it in action wasn't a bad idea
iirc the instructions state if you run more than 4 fans to use a relay and I'm running 6 with out one...these are very thin profile small 40mm fans that should be just fine to run off the TM-1..at least in testing they did just fine.
-
Thanks bro! Yeah i know people make amp back covers which look sweet, but nice know its kind of original
But this idea catches on, Im cool with that there are some very talented artists out there who definitely do better work than i so would not apprise me if more were to show up!
-
/\/\/\/\ I agree from underneath the feet arent that attractive, and yes will also have plenty of fans throughout so theres also will be a tm-1 in my dash that controls fans on the amp rack's got limited space in my crew cab so I'll have amps under the box along the back wall and possibly mounted behind the back seat close to the port we will see
Nice work turned out well
Thank you sir, I think it looks pretty swell myself!
-
1
-
-
Very nice! Have these mods interfered with the sound output of the amp at all?
I doubt they will I mean you would tap into these inputs anyway from the outside of the amp sooooI doubt they should mess things up...I stated earlier that this will have an external fuse that I can change out incase of a short, so the guages and amp are protected individually, as far as power consumtion...these meters draw probably less than 5 amps..havent hooked them up and checked for sure but I'm using dual inputs so there should be no problem...should but someone more educated could chime in and back me up.
This is very nice work man. I thought I was doing well when I put a simple plexi back on my 5.0k lol.
Edit: Nevermind, didn't read that far.
Thank you thank you! dude just showing the amps guts is a project in and of it's self!! mounting it upside down makes everything challengin!
Soo props to you and everyone else who loves to show amp porn like this lol...mine is slightly R rated..i put some lingerie on mine lol!
How are you mounting it upside down? Here's how I did mine:
Some semi-flexi water pipe and brass tube from Lowe's. Bolts and then T-nuts on the underside.
Also, did you wire a switch in there? Or a relay? I could see a relay with the signal from the remote turn-on from the HU, but I didn't see a switch or relay at all in there.
umm no each guage has power ground and remote turn on...so all three ground tied to gether run to ground from amp all three positives tied together ran to positive block and all three remote wires tied together ran and soldered to the remote turn on to the amp...if you are refering to the fans they are completely controlled by the TM-1 to kick on at 100 degrees f...if any one doesn't know about the TM-1...definatly do some research...its a bad ass tool
As for mounting the amps..if you notice all the allen head bolts the three middle and three top only srew into the holes I drilled and tapped into the heat heatsink the 4 corner allens go all the way through them amp and will be what hold the amp to the amprack..follow..it will be slightly spaced so it isnt contacting the rack.
But damn dude great looking install! Honestly love the wire organization and obviously love the green SHCA wire....wish I could have done that
because I love green! The way you spaced it is what most people do and looks fantastic! This is just how I decided..I may shave off the mounting feet entirely for a cleaner look and so its easier to see my gains and such when installing.DAMN! (O_O)
haha trust me I was drooling slightly when I finished the wrap and started screwing it to the amp...I'll admit kinda excited to have something original
-
1
-
-
ok I've been asked a few times how this will be internally wired so here's an idea
Dont know about all amps like this but this ones comes with holes drilled and tapped into the amp so all you need is some screws
to get the remote turn on I'll solder to the internal side of that...same as speaker lead for the OM-1 here's what I mean
closer look
only wires that will come out of the amp are the rgb led's only because I am doing two amps and will use one controller for both...maybe if this was a 10k I could fit the controller into a bigger amp...this set up..wouldnt be woth that much modifying.
also now you can see I've got some progress done on the other 5.0k
still allot left but its a start! -
This is very nice work man. I thought I was doing well when I put a simple plexi back on my 5.0k lol.
Edit: Nevermind, didn't read that far.
Thank you thank you! dude just showing the amps guts is a project in and of it's self!! mounting it upside down makes everything challengin!
Soo props to you and everyone else who loves to show amp porn like this lol...mine is slightly R rated..i put some lingerie on mine lol!
-
BADASS WORK!
Thanks for them compliments and thanks for checking it out!
-
Also here is some unfinished pics of the rest of said "puzzle" LOL
please check the rest of the build here, its worth the read I think
http://www.stevemeadedesigns.com/board/topic/169404-goodvibez-04-dmax-10k-center-console-rebuild-4-dc-xl-10s/page-20 -
too bad you aren't as good at posting pics as you are at modding an amp...hint: when posting build pics you start at the beginning of the build and work your way to the finished product. Just a friendly tip. LMAO
Haha I know how build logs work...but I figured most people just scroll really fast and dont read anything they just want pretty pictures lol! Figured I would just save them scolling...this is just another piece of the puzzle for my current build I figured it would get more attention here an figured it did deserve its own page so thats why I posted and hey if someones wants to make their own...hey can see how I did it and make it even better! Would be cool if something like this catches on
Also thanks for the share on facebook...made my day lol!
-
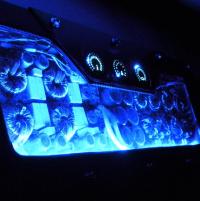
Thanks man..just used a can of "night shades" But I made sure to paint the backside because if you put almost any paint on the front of plexi it just makes it look like there was dust under the paint because the paint doesnt settle into pores like it would with most matereials...at lest that's what I foundawesome project. really like the smoked plexi
Well I just showed you how to build it...get to it man hahaAmazing. I want one.
Haha, some day when I am on a big boy level I'll run big boy amps, lol. Some day.....Holy hell, that is cherry man, love it. Showing off the guts, color changing LED's and SMD meters...
Haha thanks man! You missing these amps yet?
Thanks again for the sweet deal!
Yeah because running two Rockford Fosgate T2500.1-bdcp's isn't big...is in my opinion..obviously that was what I was going to run before these...not to mention you have three of those amps lol!
-
LOVE IT LOVE IT!! very nice!!!
Well thank you sir! To get a compliment from you is very humbling! Means allot glad you like it! Thanks for taking care of me when it came to getting these guages!
Now all I need are my smd stickers for the plexi and it will be that much closer! I think its going to really finish it off
here's a few more pics of the state it's in
That's all for now, still need to finish up getting the wiring all internal(all except the led's) some decals and then sync it up with the DD-1 so it will beam red when it's clipping...that will be a challenge getting the gains set and having to get to the guage to adjust it....but not impossible...Should be back the middle of next month to finish this and the other amp up stay tuned
-
Did some 45 action on the plexi
a little flame polish
still a little rough..but it works
Now I hot glued all the fans in which imho should be just fine
Then started soldering all the wires to the tm-1
then I just cut a window out and decided to use a smoked plexi cover
little bondo to touch up some areas, was debating on wrapping or painting so wanted a smooth finish
Then drilled and tapped holes in the amp for the bolts to hold it down the outside 4 bolts go all the way though no theads to bolt the amp down to my amp rack btw...was very uncomfortable drilling holes in the external heatsinks.
here's how I smoked the plexi
basically used some night shades pain to black out the outsides then pulled the tape and didi a few light coats to make the guages less noticeable but still very visible when lit up
-
1
-
-
dude those ones are beast compared to the h1 bulbs I just got..also high intensity led


Amp Test Tuesday - MTX 1501D (Plus AMP GUTS) (GUESS the Wattage! WIN STUFF!) RESULTS PAGE 7! *video
in Amp Test Tuesday - Results from the SMD AD-1 Amp Dyno
Posted
3872watts
Excited to see this one! Used to have this series amp, would love to know how it performs! Yeah AMP TEST TUESDAY!!