Purplehaze Posted July 7, 2012 Author Report Share Posted July 7, 2012 Next up is wiring. I decided to completely start with fresh new everything. Not that it was done wrong the first time, it was just getting too busy under the dash, and it was hard to tell what was going on. Heaven forbid I would have ever had to track down a problem, it w/ have been fun. So, like everything else, it's out with the old, and in with the new. This has got to go... I'm embarrassed to have done this, must have been in a hurry and out of connectors And this... "Little helper" is back for more fun! Fun fun fun! No seriously, I love me some wiring! He's hard at it... And last but not least, more sanding and priming Just after they were sprayed Then I went ahead and painted inside. Again, it just looks better... And I bought some of this... SQ FTW!!! Then I started wiring the door panels. The wire will just fit through the hole, then I glued the hell out of it with gorilla glue. And glued to the backside. (Tape is temp) And that is where I am now. I need to finish wiring the door panels, install polly-fil, plexi window, and vinyl. I ordered 4 yards of the good stuff, and a gallon of glue, so as soon as that comes in, I plan on attempting to wrap these myself. I also have an upholstery guy on standby, so if this doesn't work, they will be wrapped by him. Thing is, he will use seams, and I'm hoping to go seamless, so we will see. Either way, they will be getting wrapped soon, I promise! Thanks for looking, stay tuned for much more to come! Ans please leave comments here http://www.stevemeadedesigns.com/board/topic/132828-kickin-cruiser-stage-3-door-panels/page__st__160 Kickin' Cruiser Seller Feedback Stage 3 Dash, Door Panels,4th Order wall 4 - 15'son a DC 5.0K 2 DC 5.0K'sSolo X 15 (v.2) Sub Build Link to comment Share on other sites More sharing options...
Purplehaze Posted July 24, 2012 Author Report Share Posted July 24, 2012 Well, I have some updates for ya. It's been hard to get any work in for the past 2 weeks, between my job, and the weather. But I managed to fit in a few projects, nothing too exciting, buy hey it's all part of the build. Plus, I've been waiting to drop the dp's to the upholstery shop. I was going to attempt to wrap them myself however, I want perfect or close to perfect results, so my better judgement told me not to waste my time and money. So I've just been waiting until he is ready for them, and I guess now he is, so I gotta drop them off today. I'll try to get some pics of the place. Anyway, here are the pics from the past couple of weeks. I've been jumping from project to the next, trying to get something done. One of the things I've been working on is painting. Two words: Not Fun! But necessary, so on we go! Everything in the car is getting "blacked out", except certain things which will be a dark metallic grey. Here goes the factory outer door panels. But after getting the trim ring painted, I realized that this metallic color isn't the one I want. It looked good against the two tone tan, but it doesn't flow right with the black. So there's only one thing left to do: Change it! The old vs the new. Dark one is the old one, lighter one will match better! But before sanding them down to be painted again, I did snap a few pics. I just didn't think the darker color went well with it. So after sanding them down, I decided to do the trim part first, then I'll do the black after it has plenty of time to cure. Check out how I held the handle open Other pieces Okay, so another project I wanted to get done was the b pillar. Plans are to put a set of 4" and a set of 5.25" co-axles in and run them off the HU. So here we go! Noticed a problem right away. The 4" needs more room, what to do... Well, I marked it, used my jig saw to cut groves diagonally up to the line, then took a hammer and bent the "tabs" back. Worked out perfect! And I think it looks much better than if I had just cut right through it. So then I broke out the poly-fil, and stuffed a bunch in. I then cut out little strips of batting to use to help hold it all in. So it turns out like this Then after craming as much as possible, the top I used this whole bag between the two b-pillars. Should help some, I think a nice upgrade for less than $4 So now that is done, it's time to start running some new electric! Please leave comments here http://www.stevemeadedesigns.com/board/topic/132828-kickin-cruiser-stage-3-door-panels/ Kickin' Cruiser Seller Feedback Stage 3 Dash, Door Panels,4th Order wall 4 - 15'son a DC 5.0K 2 DC 5.0K'sSolo X 15 (v.2) Sub Build Link to comment Share on other sites More sharing options...
Purplehaze Posted July 24, 2012 Author Report Share Posted July 24, 2012 Okay, so here's the plan. To accommodate all of the electrical upgrades, I am building two distribution boxes, one for hot, ground, remote, fuses, and relays, and another for the led control and distribution. But instead of hiding them, the plan is to mount the directly behind the seats, and show them off with some plexi and leds of their own. Then the amps will go right in front of them, directly under the seats. So here we go! I broke out the trusty ol jig saw again. Man, I really need to buy me a circular saw! Got the led box all cut, now the fuse/ relay box Bam! So now I just gotta get them glued and screwed together. Would have been much easier with a nail gun, and straight cuts... Next thing I did was to drill holes in both boxes, for wires to go in and out easily Also, I tried to make everything I could for this, but some parts I couldn't make. So for that, I hit up Mr. Tony C. at CE Auto Electric Supply. SUPER fast shipping! Making my own busbars Of course I broke the tap on the vrey last one! FML! Oh well, I came up with a temp fix, till I cut out a whole new one. This is the led control box. After looking at it, I decided it could be better. So here we go, lets do it! First, I picked up a couple of these guys, then took them apart and added some colored 18g Once that was done, I hard wired them into the box. Out with the old, in with the new. Or in this case, out with the new, in with the better new! Finished... But it just doesn't look right... Now that's much better So now that stuff is done, time to get the boxes finished up! Please leave comments here http://www.stevemeadedesigns.com/board/topic/132828-kickin-cruiser-stage-3-door-panels/ Kickin' Cruiser Seller Feedback Stage 3 Dash, Door Panels,4th Order wall 4 - 15'son a DC 5.0K 2 DC 5.0K'sSolo X 15 (v.2) Sub Build Link to comment Share on other sites More sharing options...
Purplehaze Posted July 24, 2012 Author Report Share Posted July 24, 2012 First up, some body filler. This would not have been necessary had I used a table saw, and had nice straight cuts. But it is what it is, lets just get it done. Then some primer after sanding Then final sanding, then tape them all up for the outside coating: Bed Liner Bed liner is on! Then I pulled off the tape, and gave the inside a nice coat of satin black. Should go well with the flat black bed liner Here is a little preview of what they are gonna look like. Remember, they will have plexi tops, and led lights inside. Most of it is just setting there, so pay no attention if it's crooked. It will be straight. Also, the windows are now "blacked out" And that's pretty much where I am now. I gotta drop the dp's off to the upholstery shop today, and start getting all the wiring and these new dist. boxes installed, so that when they are finished, the car will be ready for them! I can't wait to see how they come out! Stay tuned for more to come! And thanks for lookin'!!!! Please leave comments here http://www.stevemeadedesigns.com/board/topic/132828-kickin-cruiser-stage-3-door-panels/ Kickin' Cruiser Seller Feedback Stage 3 Dash, Door Panels,4th Order wall 4 - 15'son a DC 5.0K 2 DC 5.0K'sSolo X 15 (v.2) Sub Build Link to comment Share on other sites More sharing options...
Purplehaze Posted August 14, 2012 Author Report Share Posted August 14, 2012 Anyway, I know this is a lot of boring pics, but it is all part of the build, and I don't wanna get too far behind with the pics, so they will be shown. Plus, I think it's good to show people just how much time and work this build really is. I definitely underestimated the amount of work there was, and how long it was gonna take. It takes much longer with no garage too, and I didn't account for that. But hopefully I will be moving into a house with a garage in the next few months, so then I can really get going! But enough of that, lets get on with the pics! First up was the amp racks. The plan is to mount both the ZX350.2 and the ZX350.4 under the front seats, but I did that last time, and found out the floor is not very level. So, this time, they will be mounted to boards that will be bolted to the floor, so they will set up, and level. Here are the making of those. Adding a small edge so they will set level, they they get sprayed with bed liner. Once they were dried, I had to drill some holes in the floorboard for mounting. They got t nuts in the top side, and are then bolted thru the bottom with grade 8 bolts, nuts, and lock washers. Then, I took advantage of a pretty day, and pulled the steering column so I could paint it. This is just a temporary fix, it will eventually get a cool aftermarket steering wheel. But for now, this will work, so we can try to get this baby back on the road! Here is what I used to paint it. It's a flat black, so it will stand out a little against the satin black everywhere else. And here it is painted. Not bad, it will work for now. And I had to take this shot while she was gutted Then, I made a little trip to the junkyard, to get a few much needed parts. First up, the center console. This one (on the right) is out of a 2006 model. I need it for the armrest in the center, since the doors no longer has them. Beside it is the original one that I painted last fall. Paint did not stick. It will get painted with bed liner, to match the doors. I also picked up another dash piece. The old one fell victim to the bass And I got some door seals in black as well. Now almost all of the brown/ tan is gone 4 good!!! Oh, and since I mentioned the doors, how about an update on them too? Well, I tried to get them wrapped up, but couldn't find someone to do it, and I got tired of waiting. So I figured I would attempt to spray them in bed liner, and if it looked like crap, then I'd just find someone to wrap them. Well, I didn't get any pics of the spraying process, but here they are. I think they look okay, good enough for the time being. My girl Jess says she thinks I should leave them like this permanently, but I still want to have them wrapped eventually. So here they are. A little close-up, to show the texture More pics coming, I can only fit 20 per post Please leave comments here http://www.stevemeadedesigns.com/board/topic/132828-kickin-cruiser-stage-3-door-panels/ Kickin' Cruiser Seller Feedback Stage 3 Dash, Door Panels,4th Order wall 4 - 15'son a DC 5.0K 2 DC 5.0K'sSolo X 15 (v.2) Sub Build Link to comment Share on other sites More sharing options...
Purplehaze Posted August 14, 2012 Author Report Share Posted August 14, 2012 Okay, so then it was back inside the car, to get everything setup and ready. After getting the amp racks mounted, I did the same thing for the dist. boxes. Here is the fuse box, ready to go in for good! Mounted And the LED box... Mounted Then, to have a place to run the wires safely, I decided to use the ducts from the rear heat/ air. These will no longer be needed, as there is no longer a back seat. So, time to cut them up! And now that is done and ready! So let's start the wiring fun! First, the fuse/ distribution box. Got the power and ground in (1/0) and the fuse block and breakers wired. Grounds Used the dremmel to get it cleaned and ready So then I needed some 4 gauge ring terminals, for the breakers and amps. So, instead of waiting, I went down to my local shop and bought these. Only to find this. I didn't know copper or gold would rust.... Brand new rusty terminals FTMFW! So anyway, I just sanded them down and used them, until I get some good ones. Then it will all get re-done. Everything getting hooked up. Here I am a little farther along But wait, there's more... Please leave comments here http://www.stevemeadedesigns.com/board/topic/132828-kickin-cruiser-stage-3-door-panels/ Kickin' Cruiser Seller Feedback Stage 3 Dash, Door Panels,4th Order wall 4 - 15'son a DC 5.0K 2 DC 5.0K'sSolo X 15 (v.2) Sub Build Link to comment Share on other sites More sharing options...
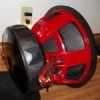
Purplehaze Posted August 14, 2012 Author Report Share Posted August 14, 2012 So then I started hooking up the LED box. Red Green Blue Then, I jumped back to the doors. Time to solder some wires! 12 pin molex plugs are first: Drivers side Passenger side wires marked before heat-shrink is added Pins soldered, first row inserted And to make sure they are all done right, a little home-made diagram Passenger side done! Then, I started running wires thru the doors. First, I ran the harness for the 8" subs. Here is how I did that. First, I cut the 2 wires needed to length, leaving a little extra just in case. Then, I remove the casing where it will enter the door, and install heat-shrink. So now, only the wires themselves will go through the factory grommet. Then I hooked them up to the 350.2, and now that part is all done. Now for the fun part: the 4 channel. The ZX350.4 will be used with crossovers, to run 4 component sets total. Each set will be ran parallel @ 2ohms. So, first up, I needed to make new crossover racks, one for each side. I will put 4 crossovers on each side, and wire them accordingly. So here they are. Then I noticed something on one of the crossovers. I hope it's still good! This is the only one like this And so that's where I am at the moment. VERY CLOSE! All that's left to do is wire up the crossovers, run the rest of the wires thru the doors, and install the tweeters and kick panels. Then we will finally get to hear what it all sounds like! I can't wait! So, barring any major setbacks, the next update will be a good one! Please leave comments here http://www.stevemeadedesigns.com/board/topic/132828-kickin-cruiser-stage-3-door-panels/ Kickin' Cruiser Seller Feedback Stage 3 Dash, Door Panels,4th Order wall 4 - 15'son a DC 5.0K 2 DC 5.0K'sSolo X 15 (v.2) Sub Build Link to comment Share on other sites More sharing options...


Recommended Posts
Archived
This topic is now archived and is closed to further replies.