

meade916
-
Posts
27672 -
Joined
-
Last visited
-
Days Won
378
Content Type
Profiles
Forums
Events
Media Demo
Store
Collections
Videos
Posts posted by meade916
-
-
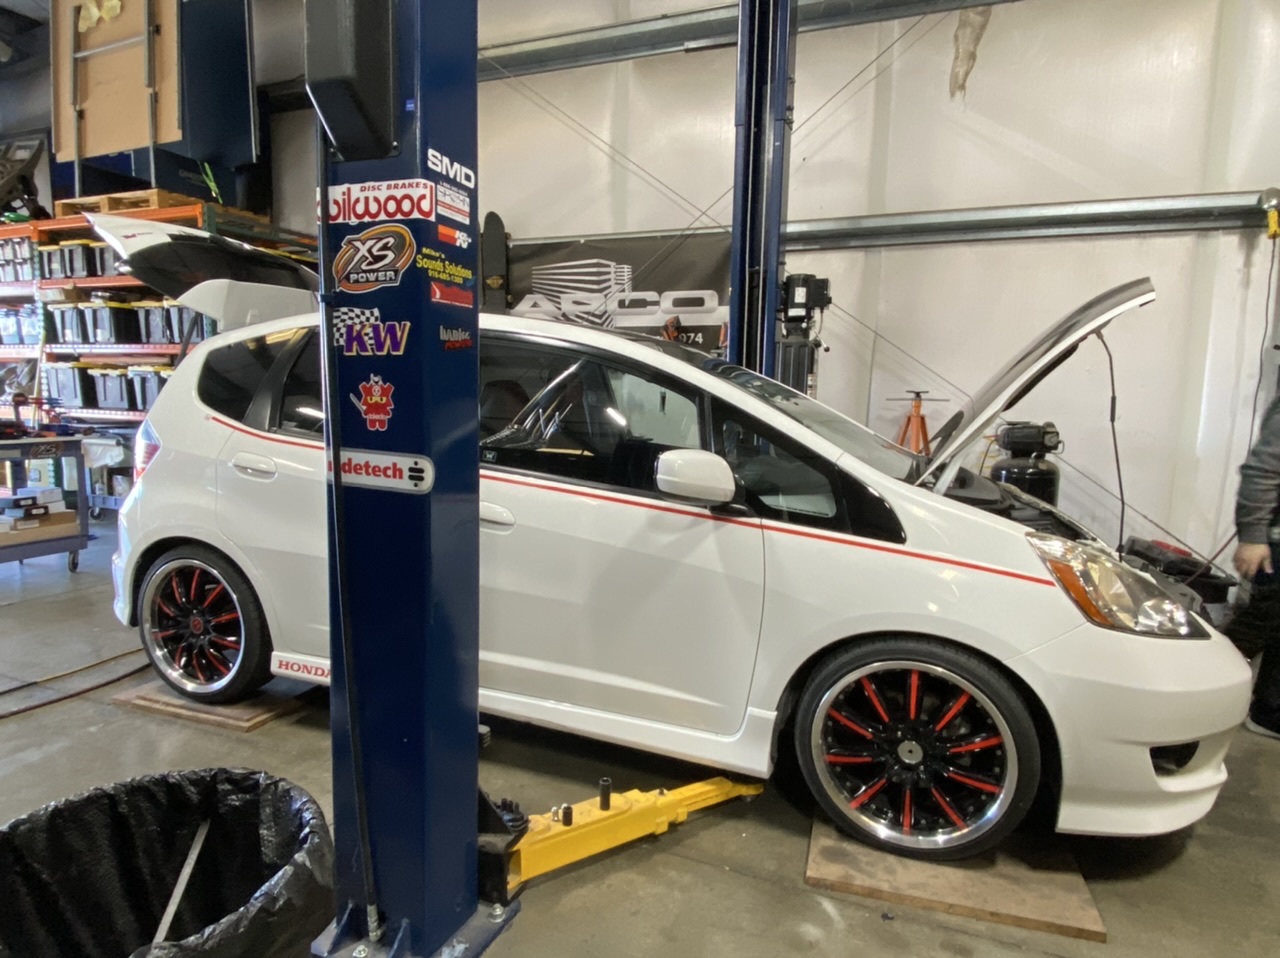
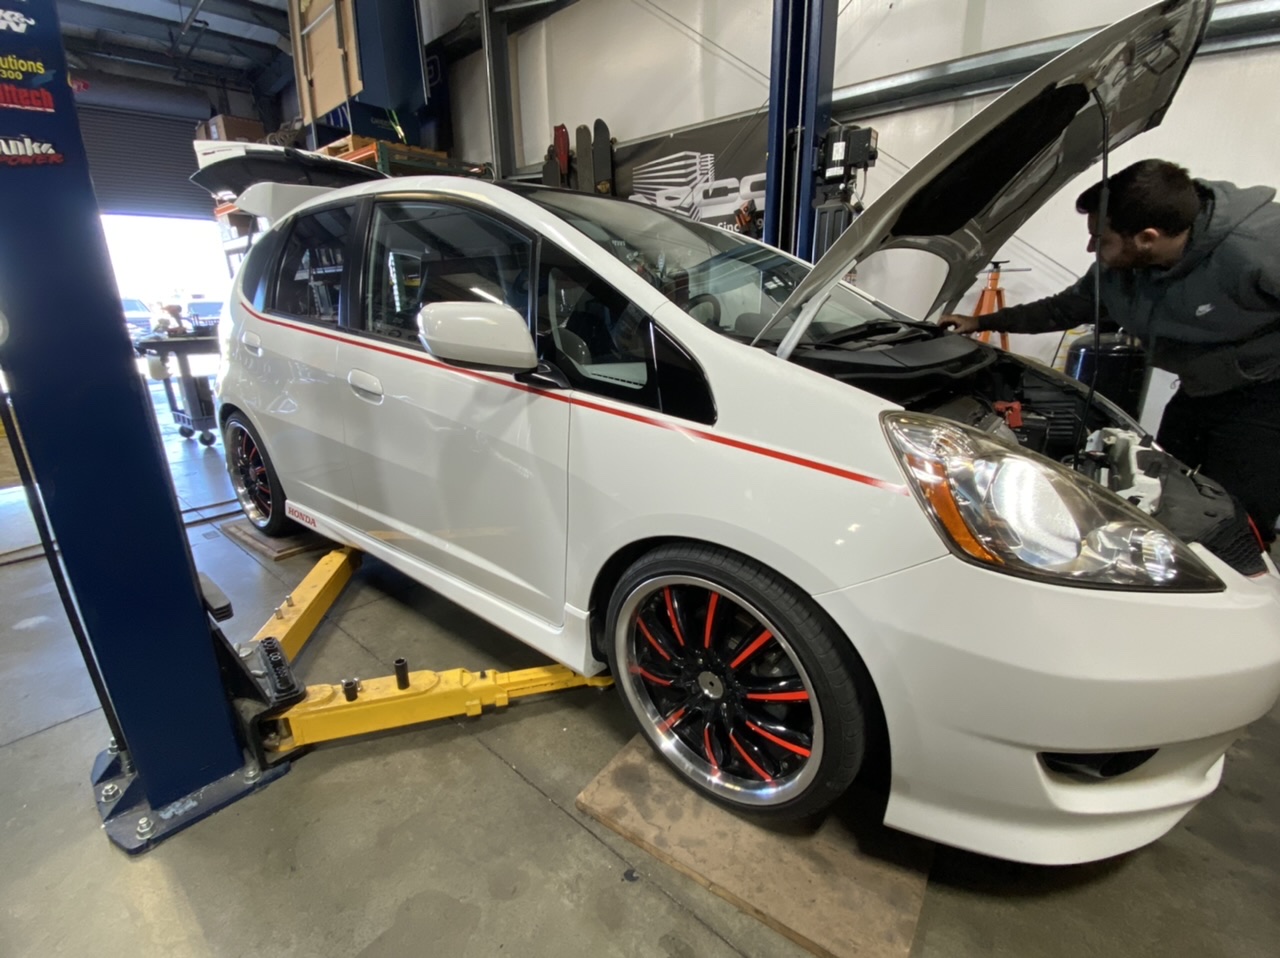
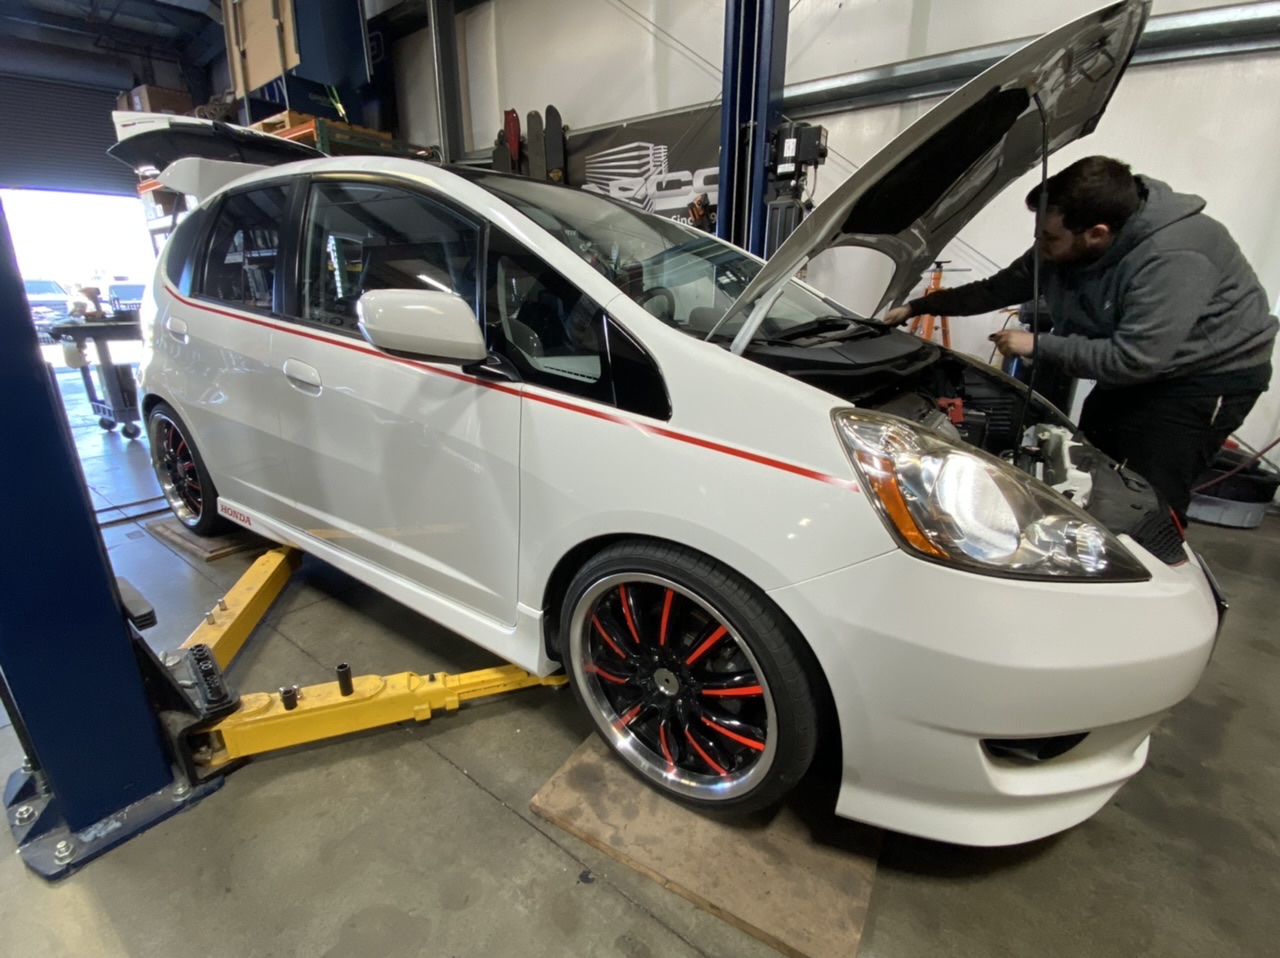
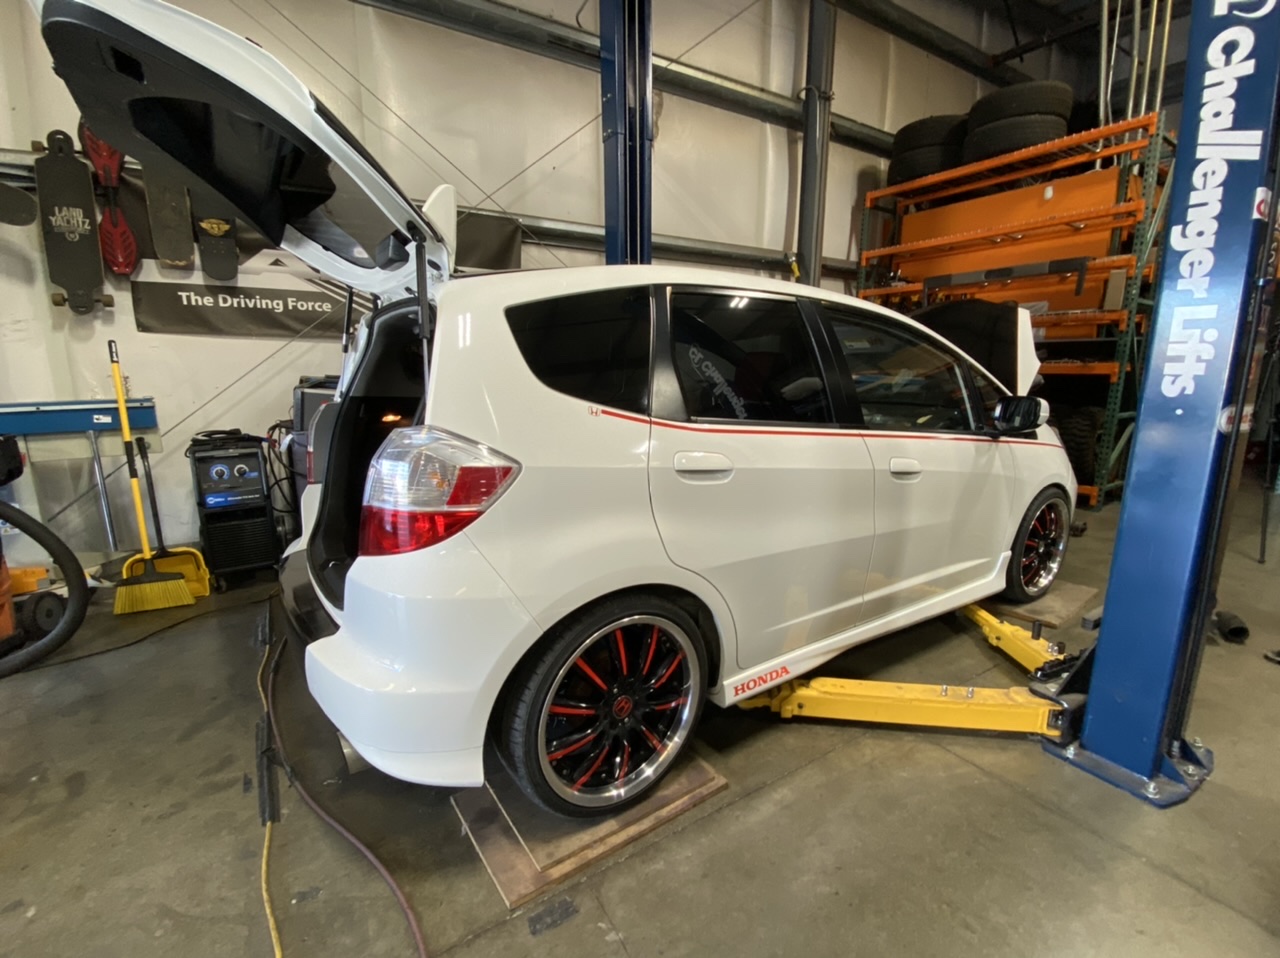
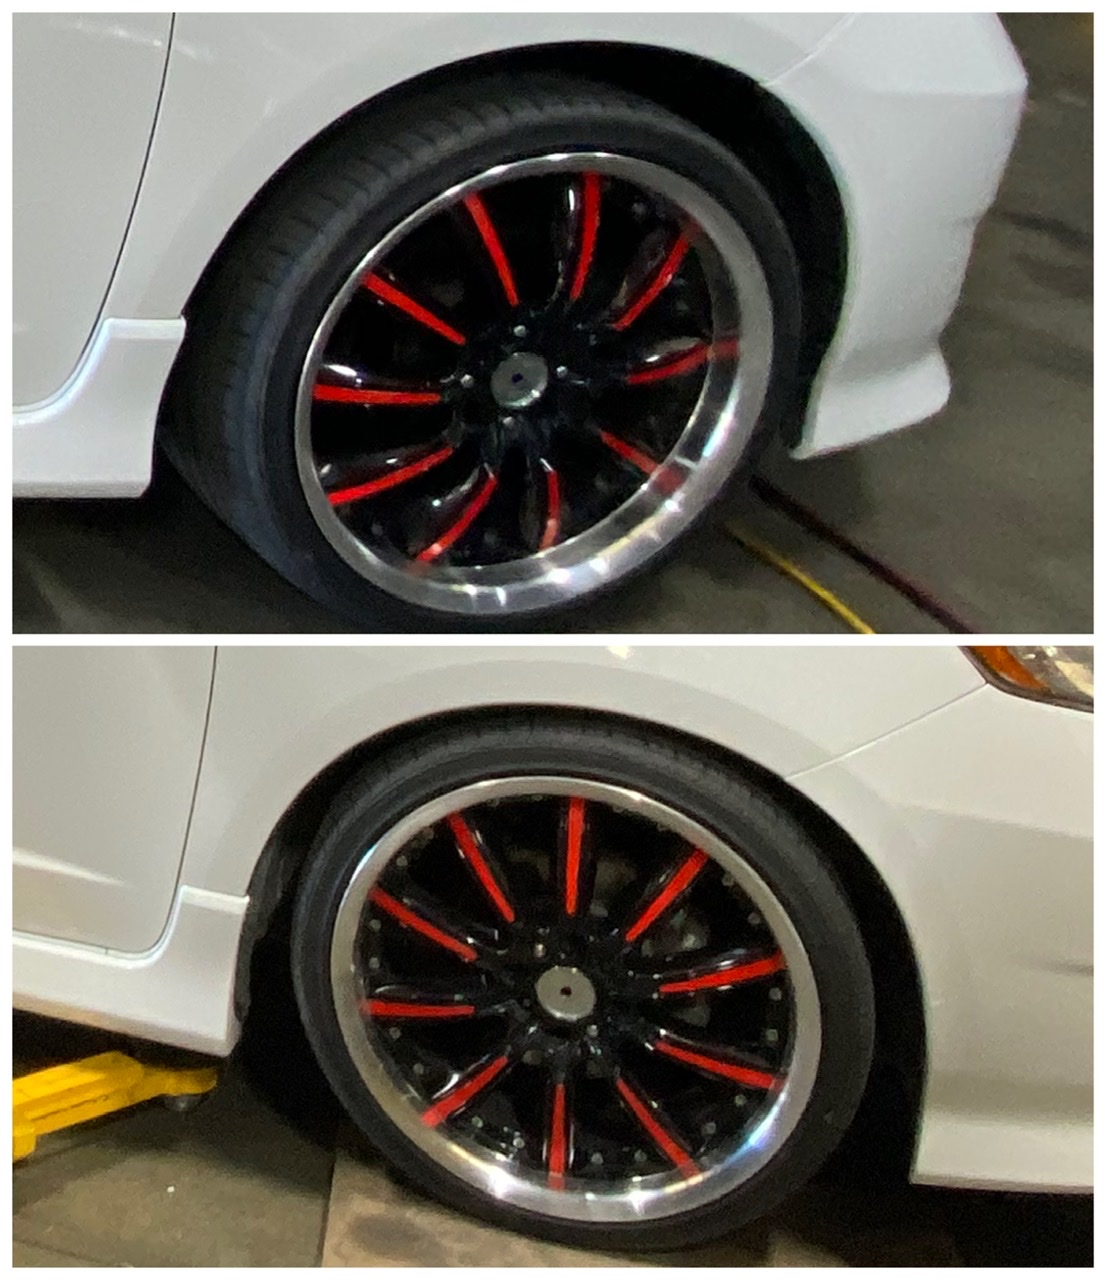
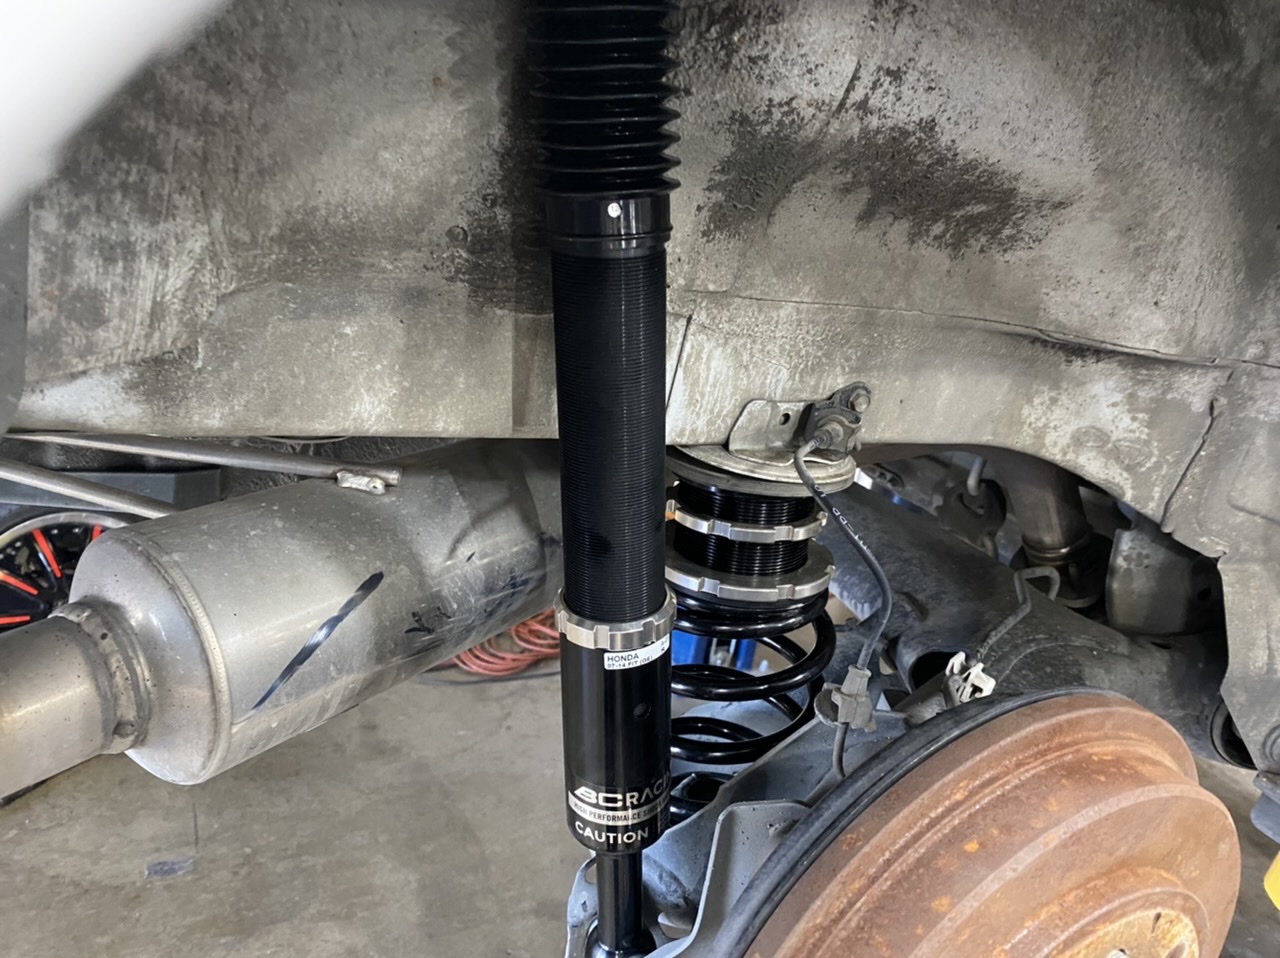
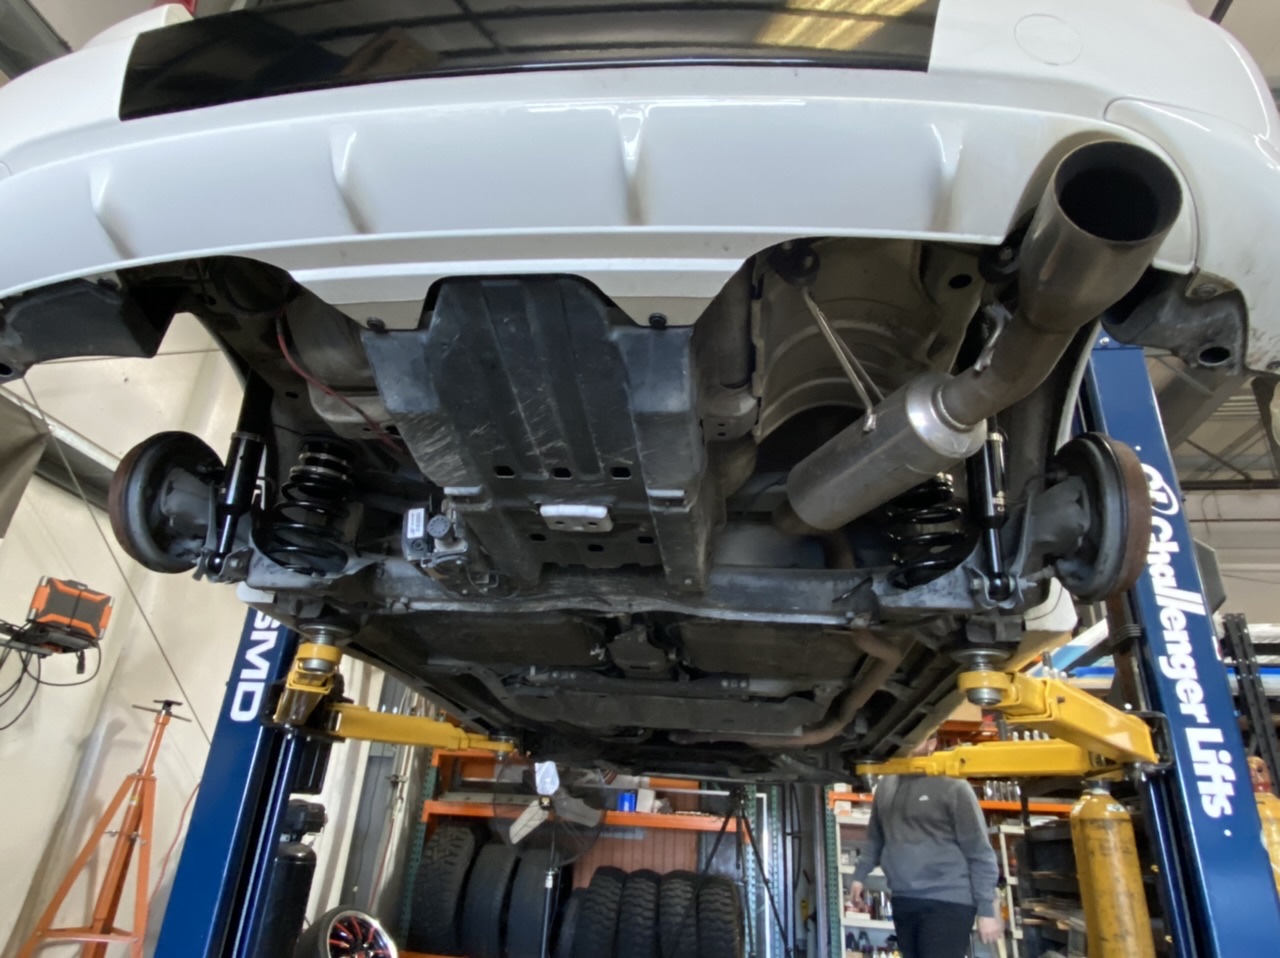
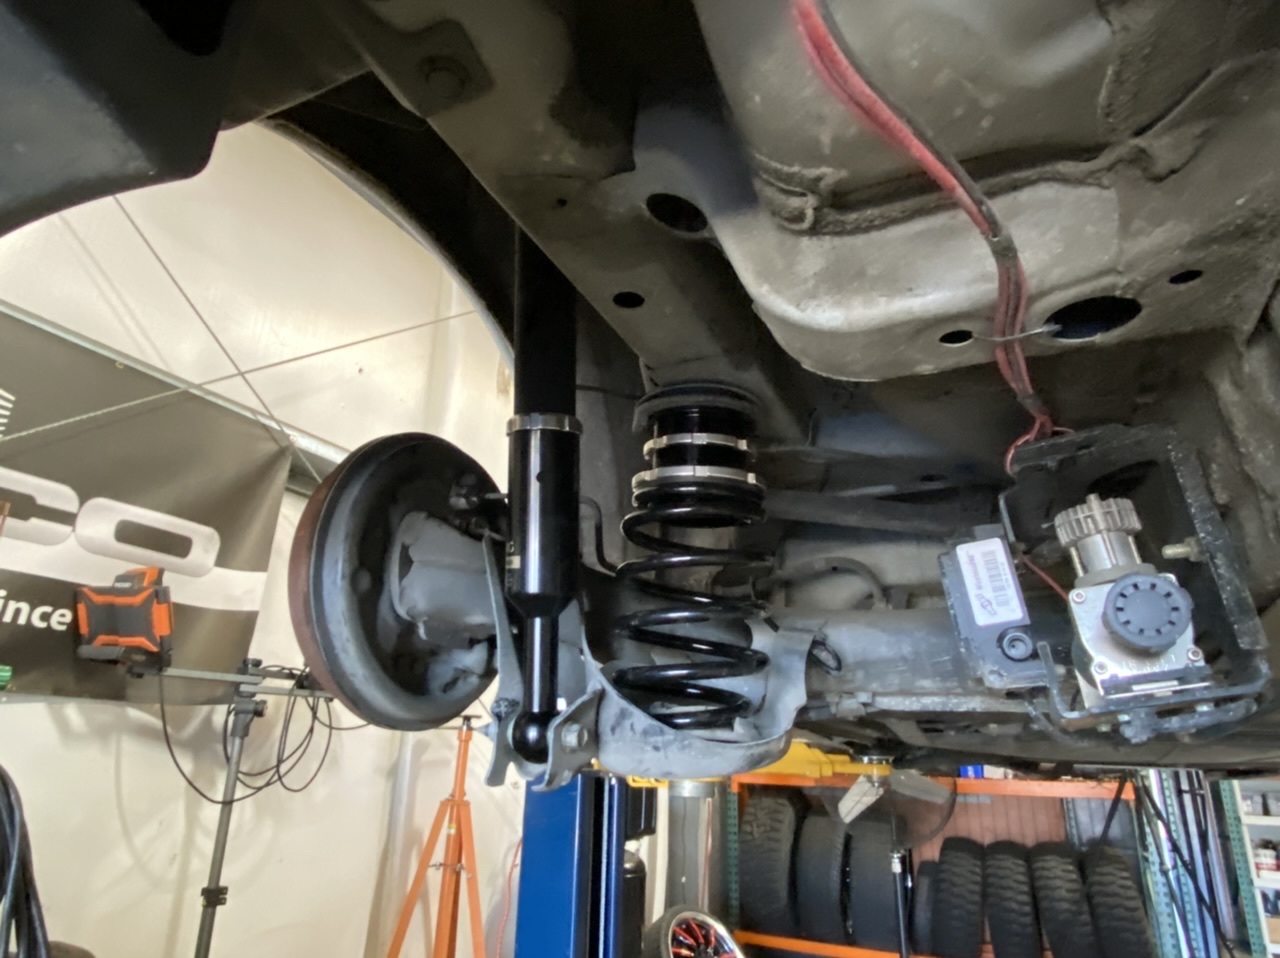
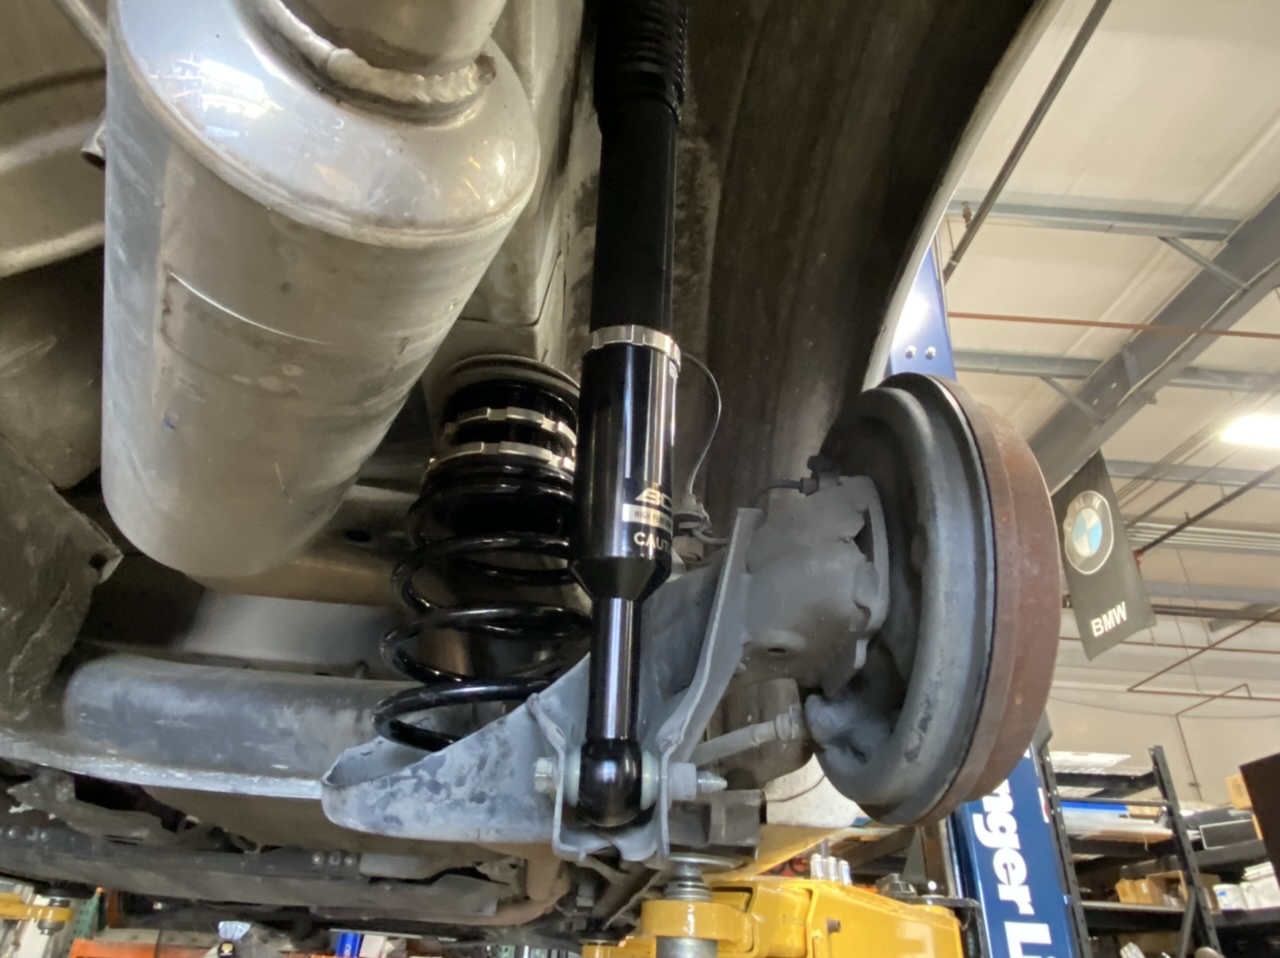
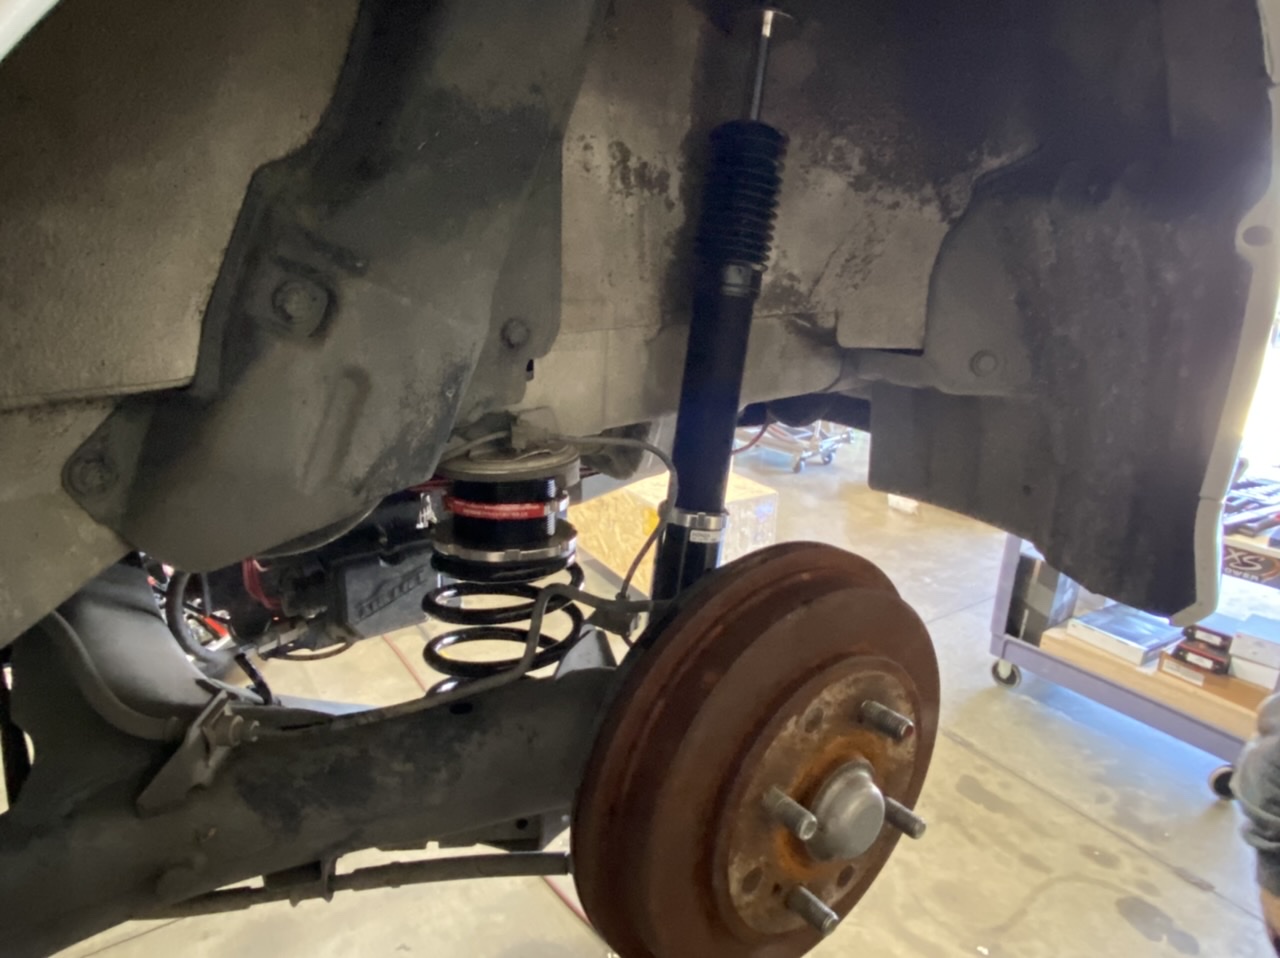
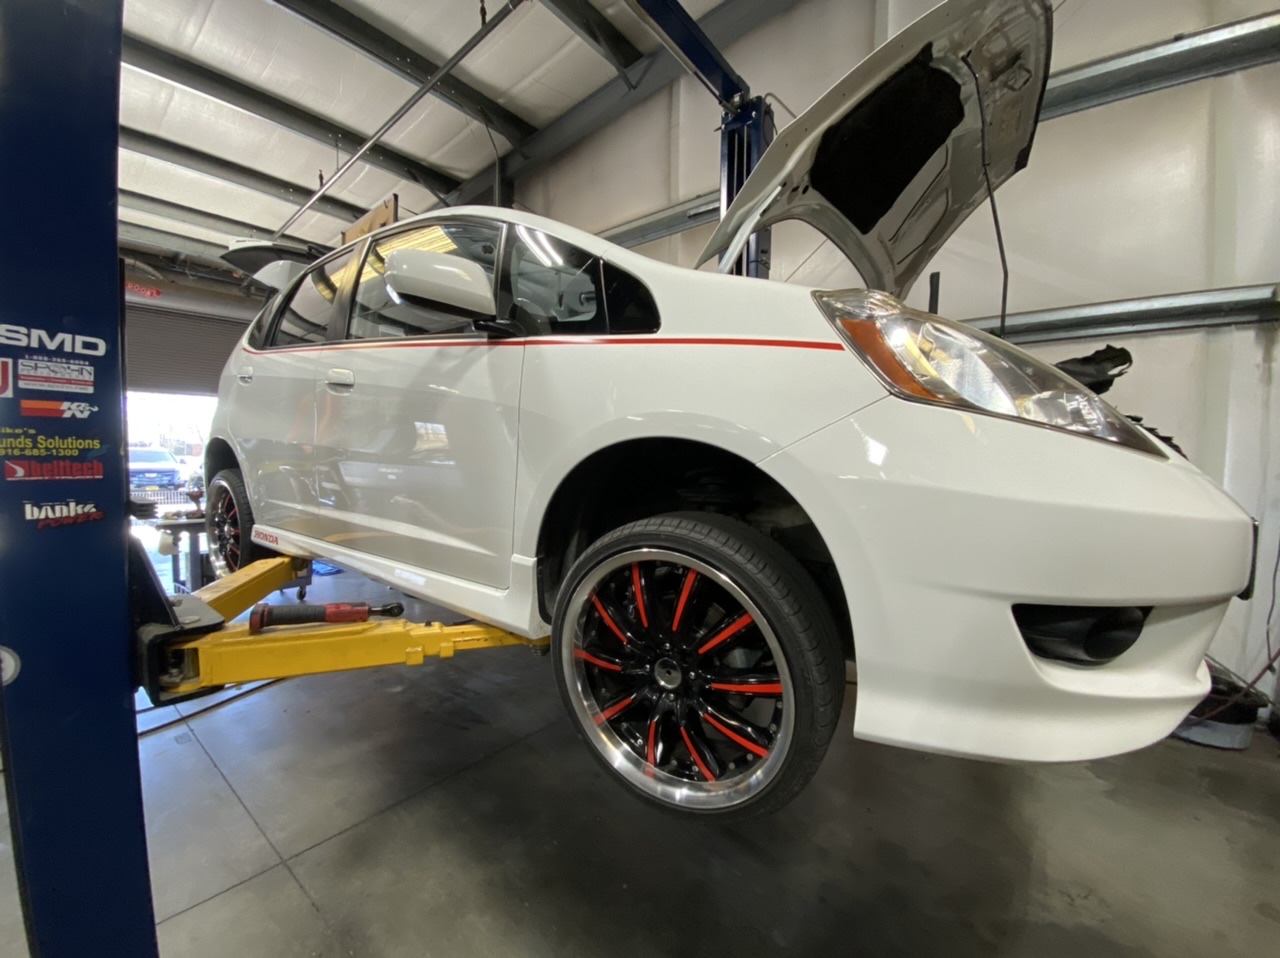
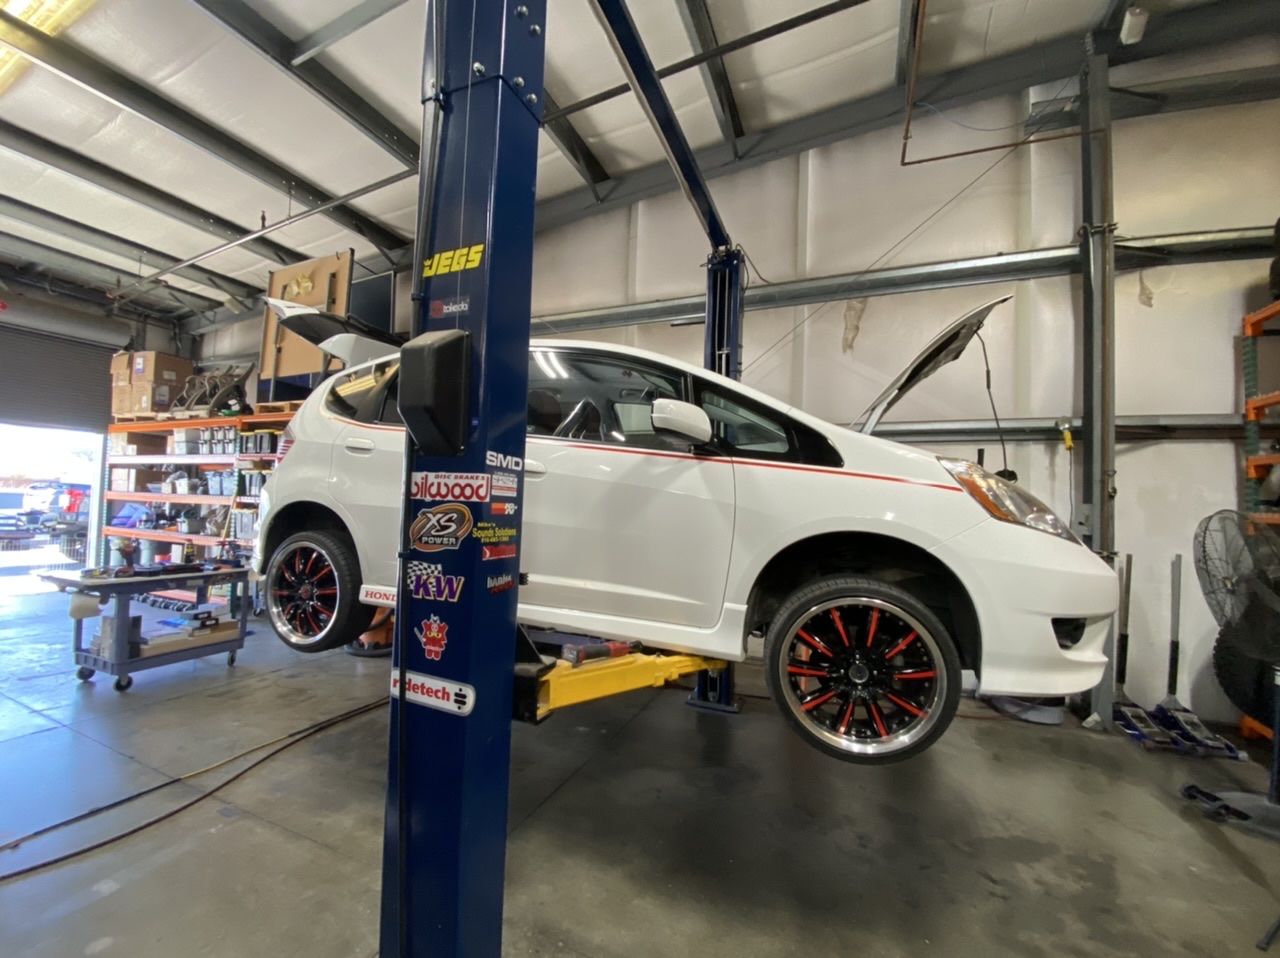
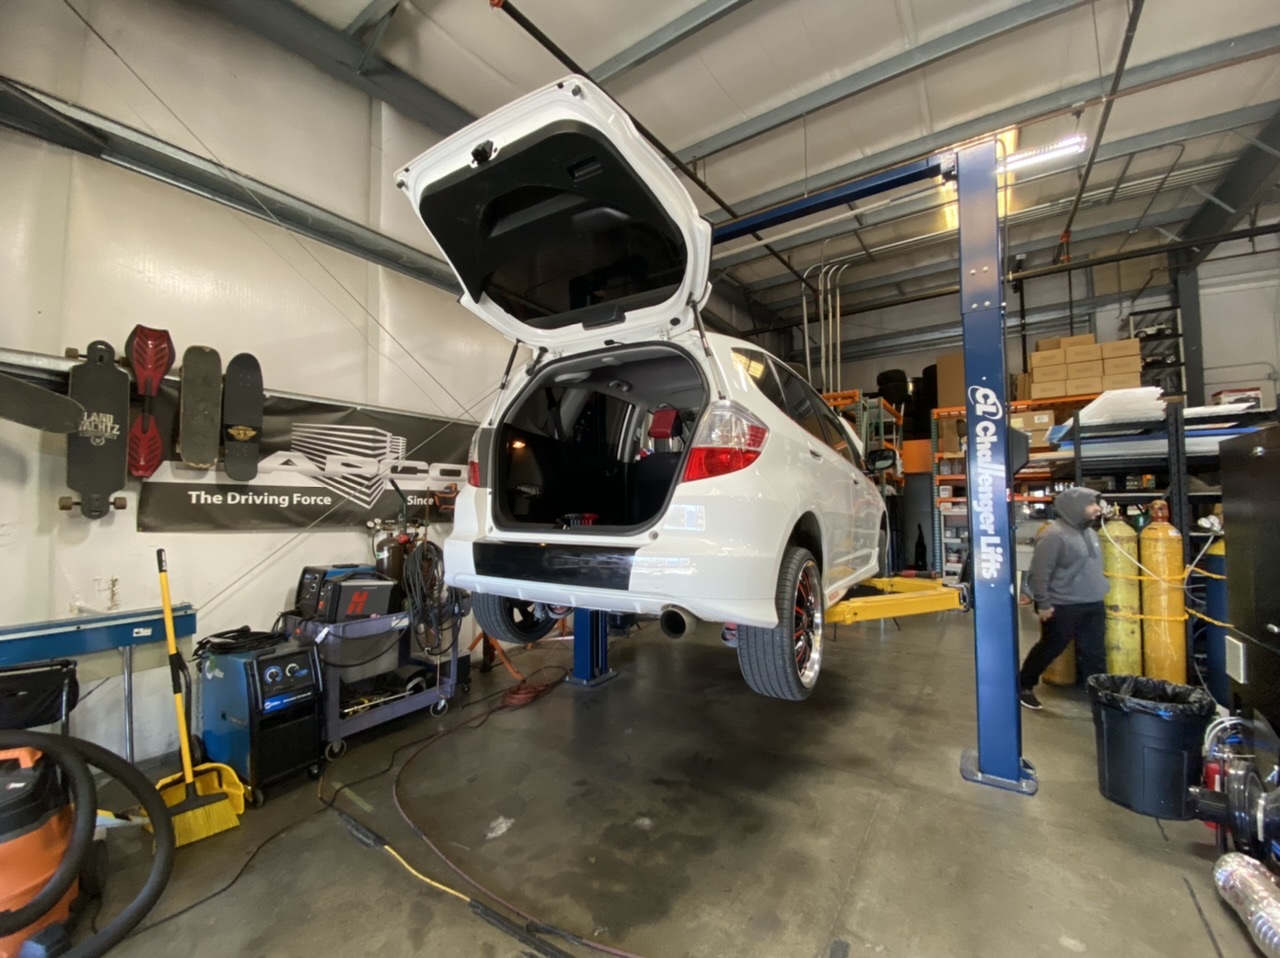
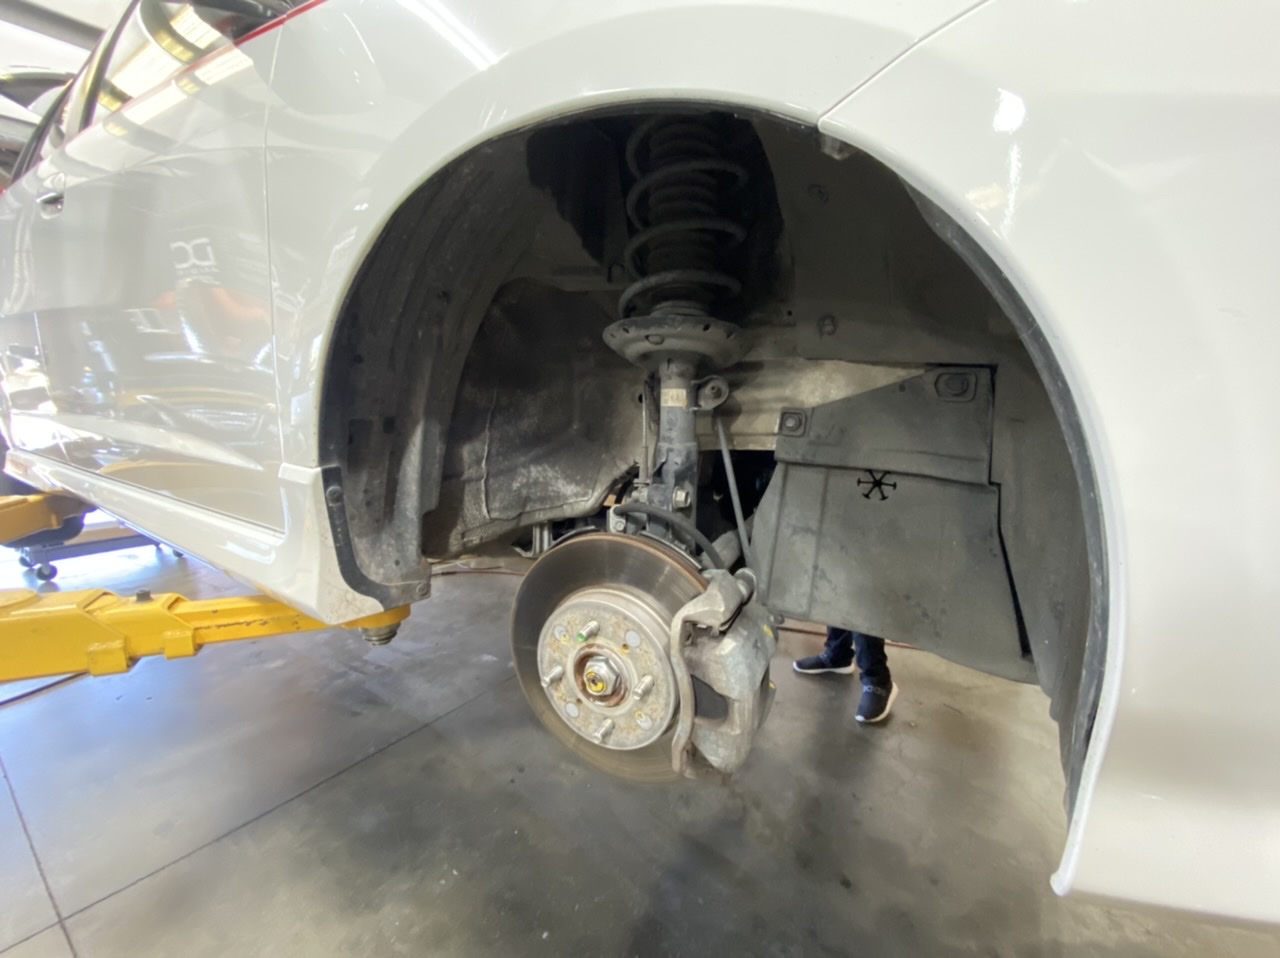
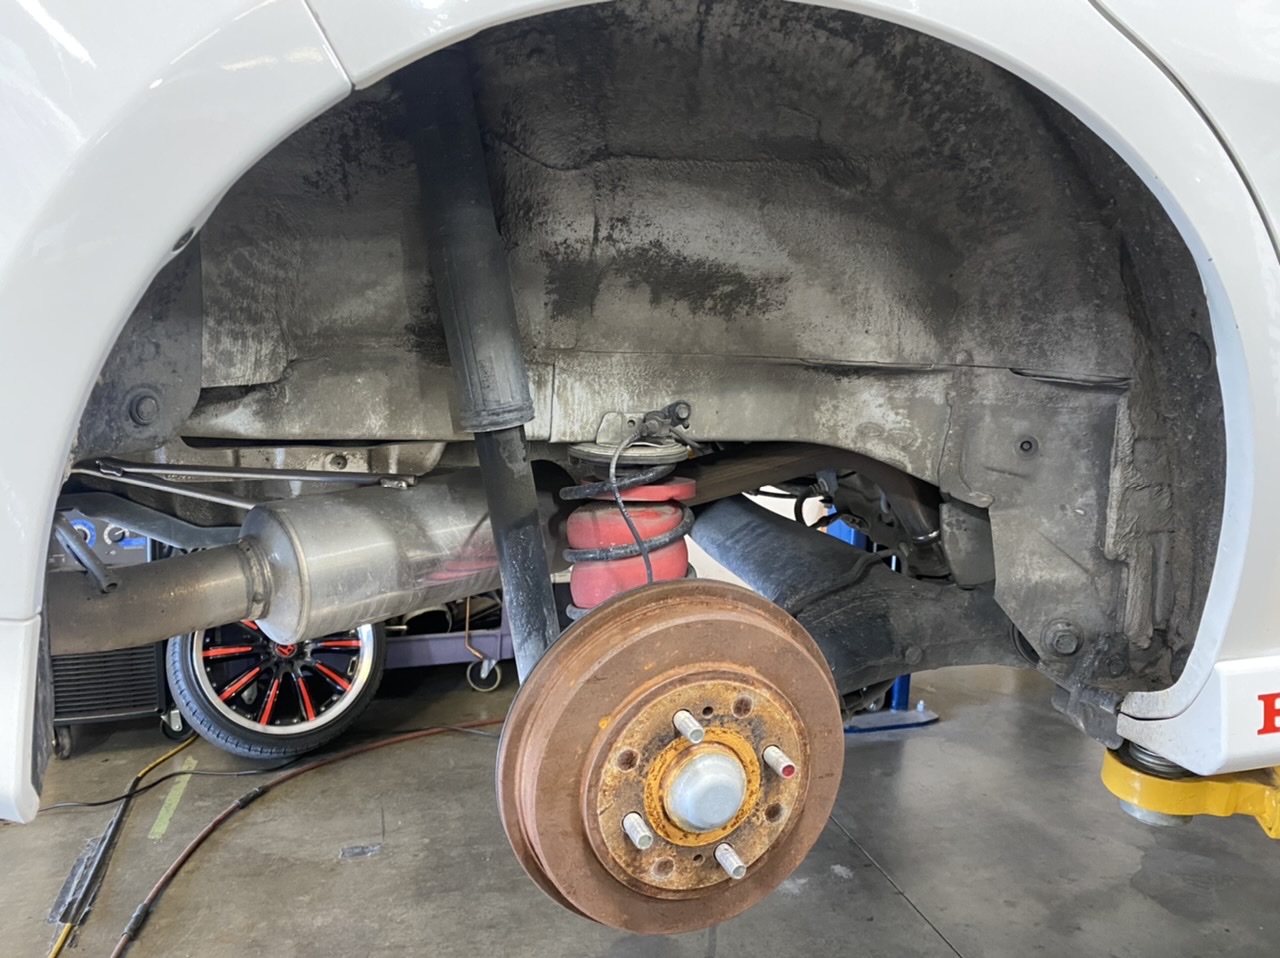
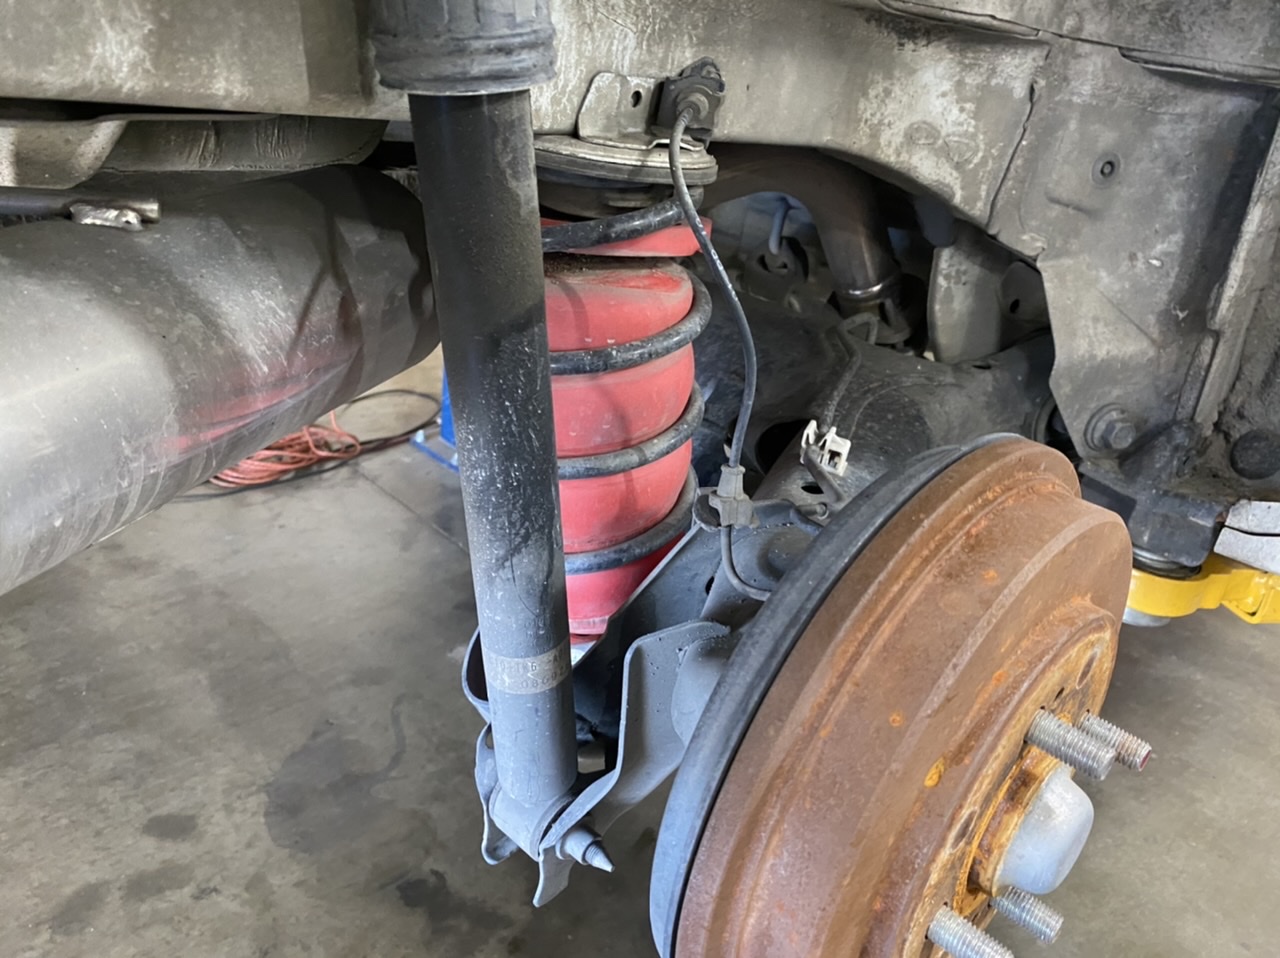
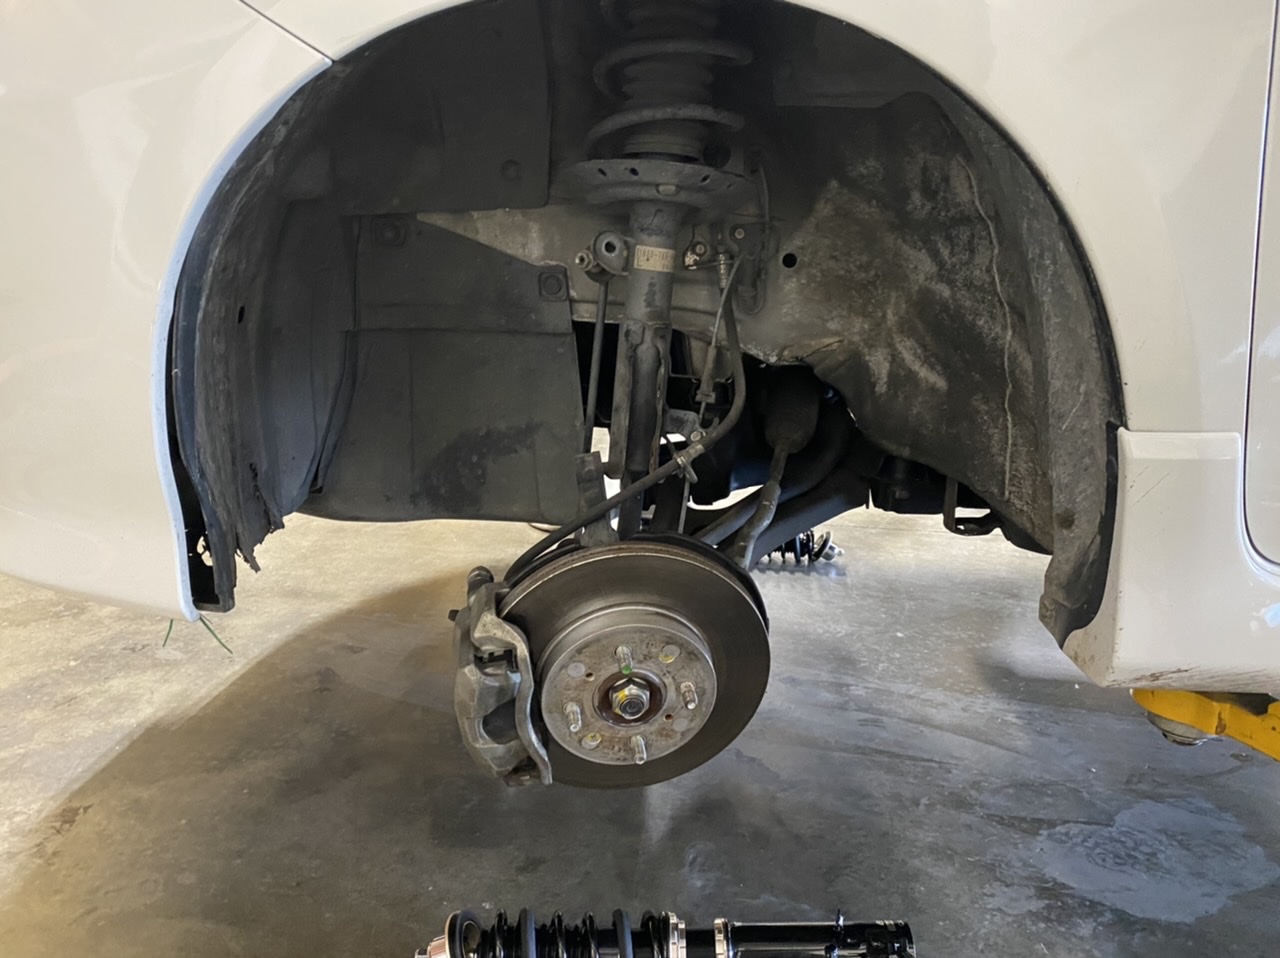
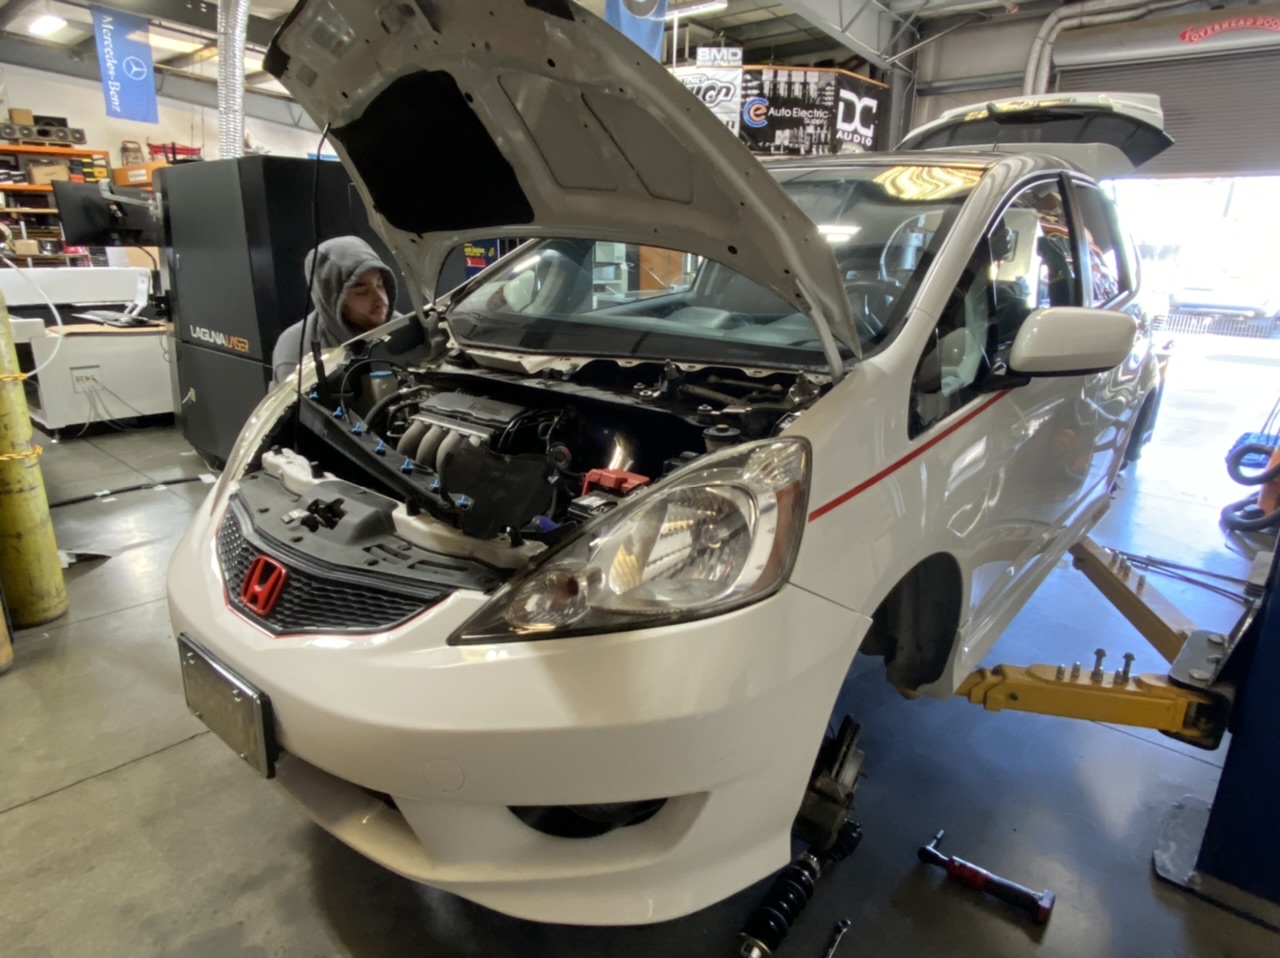
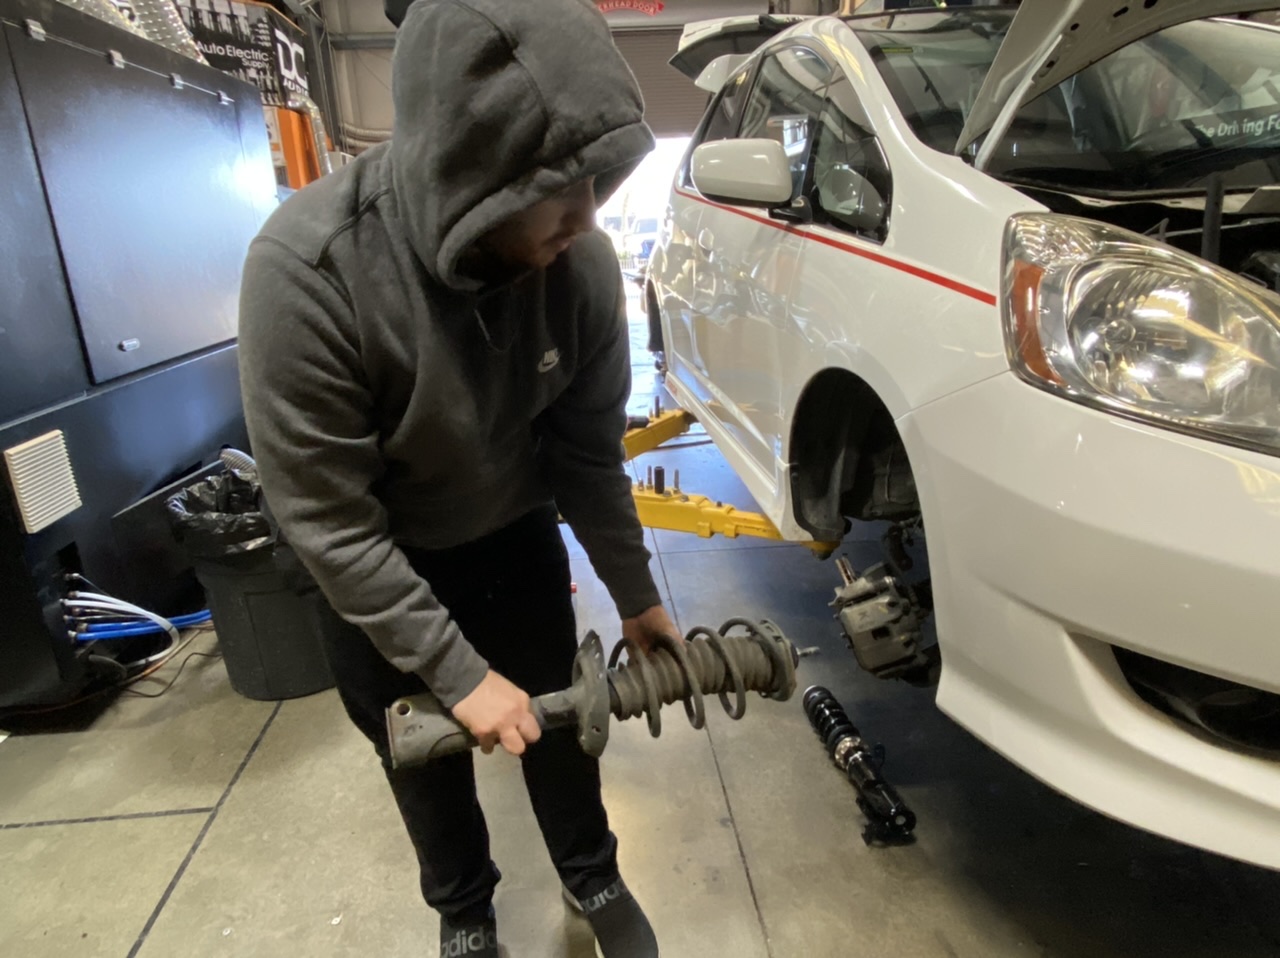
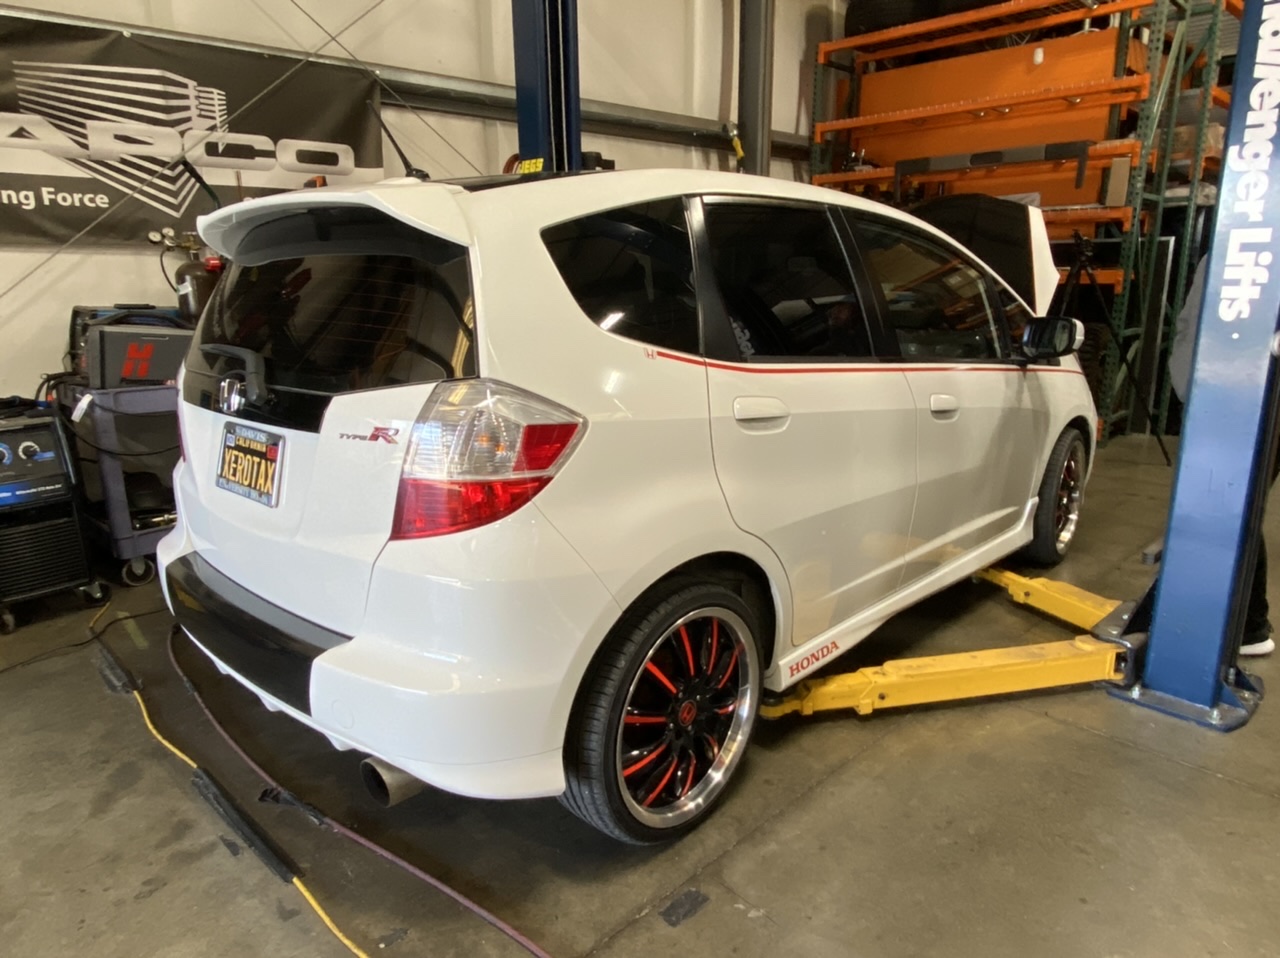
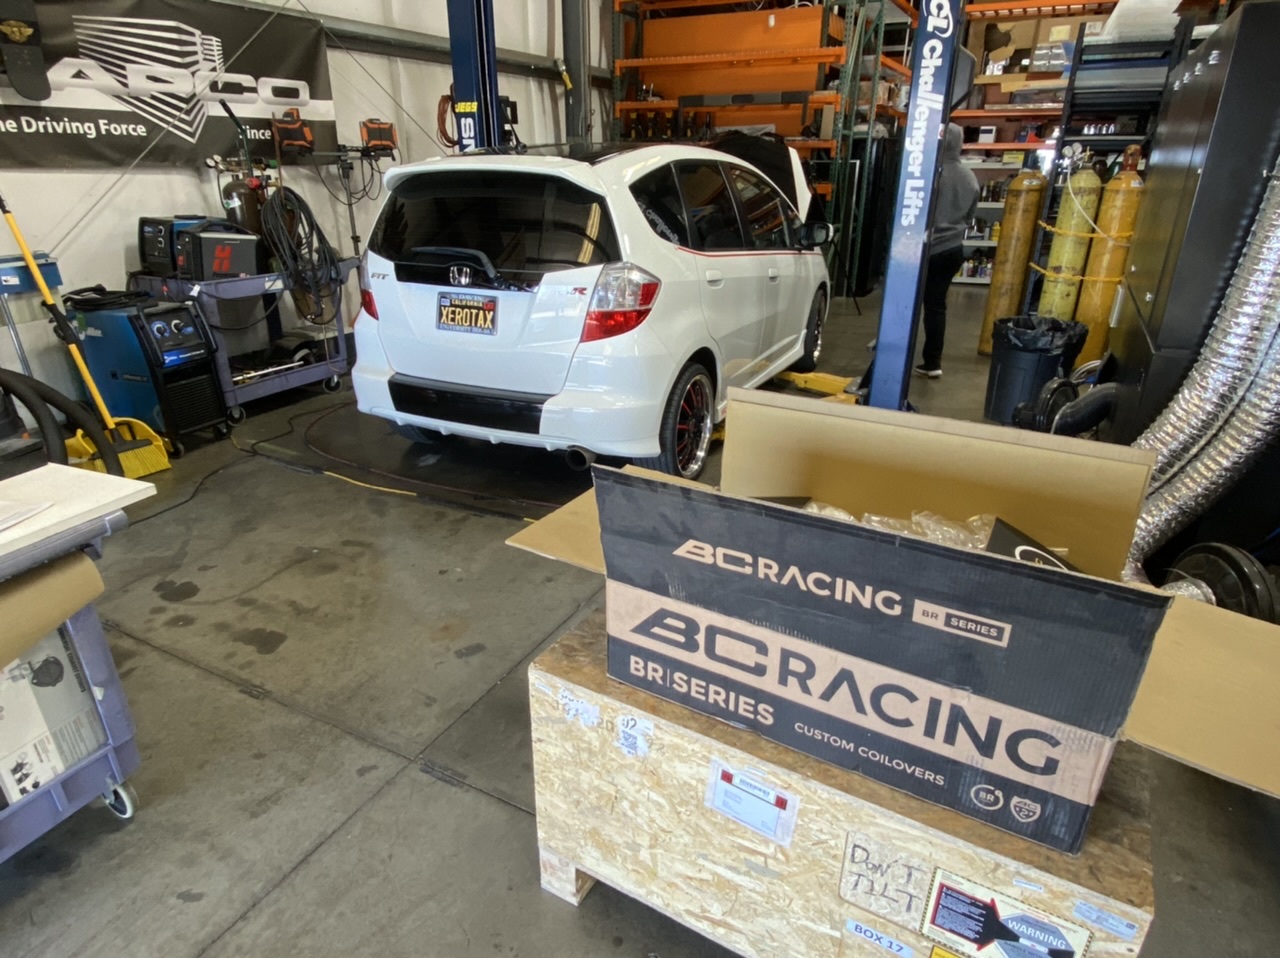
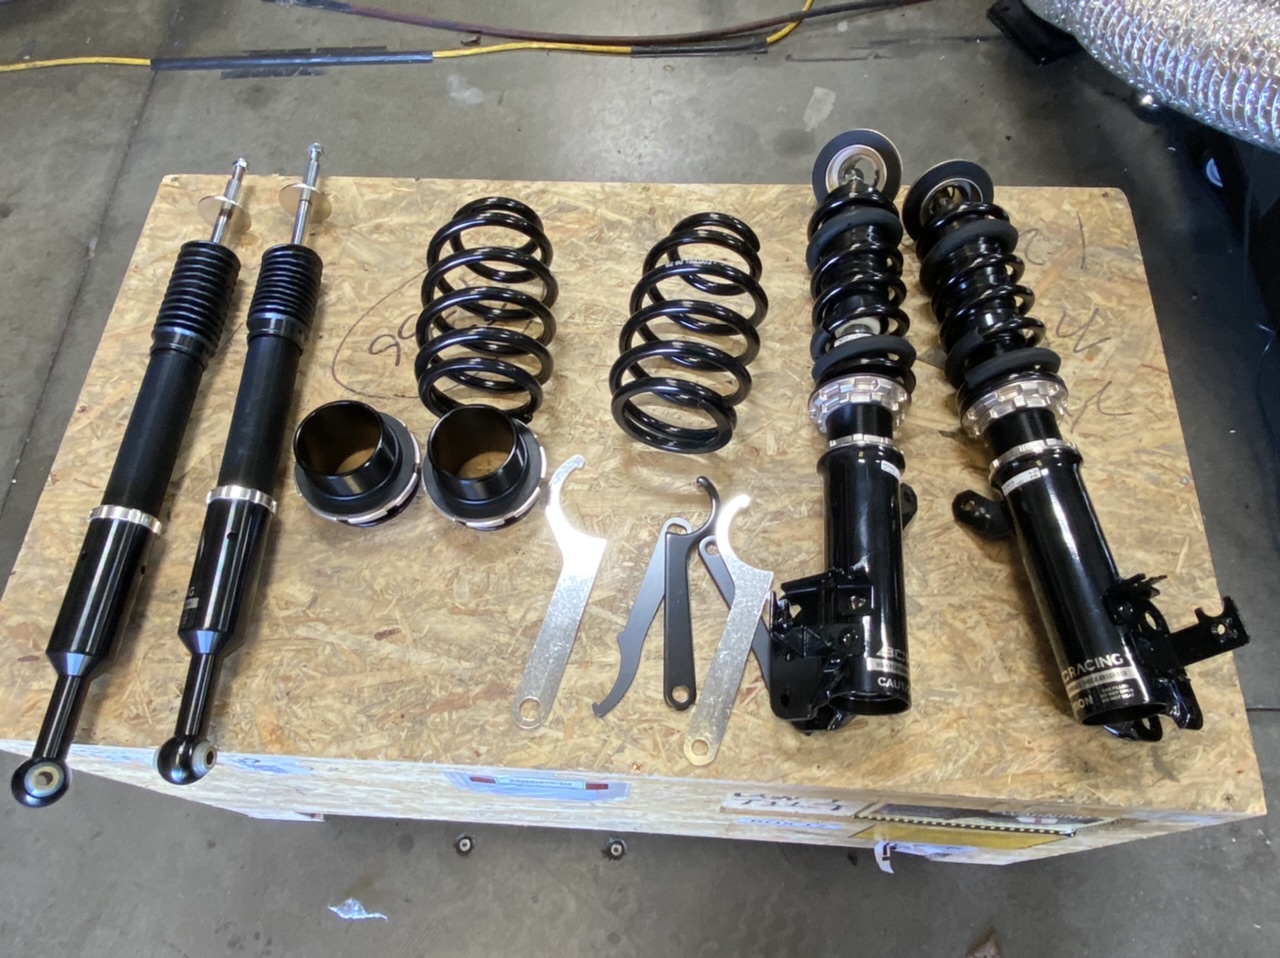
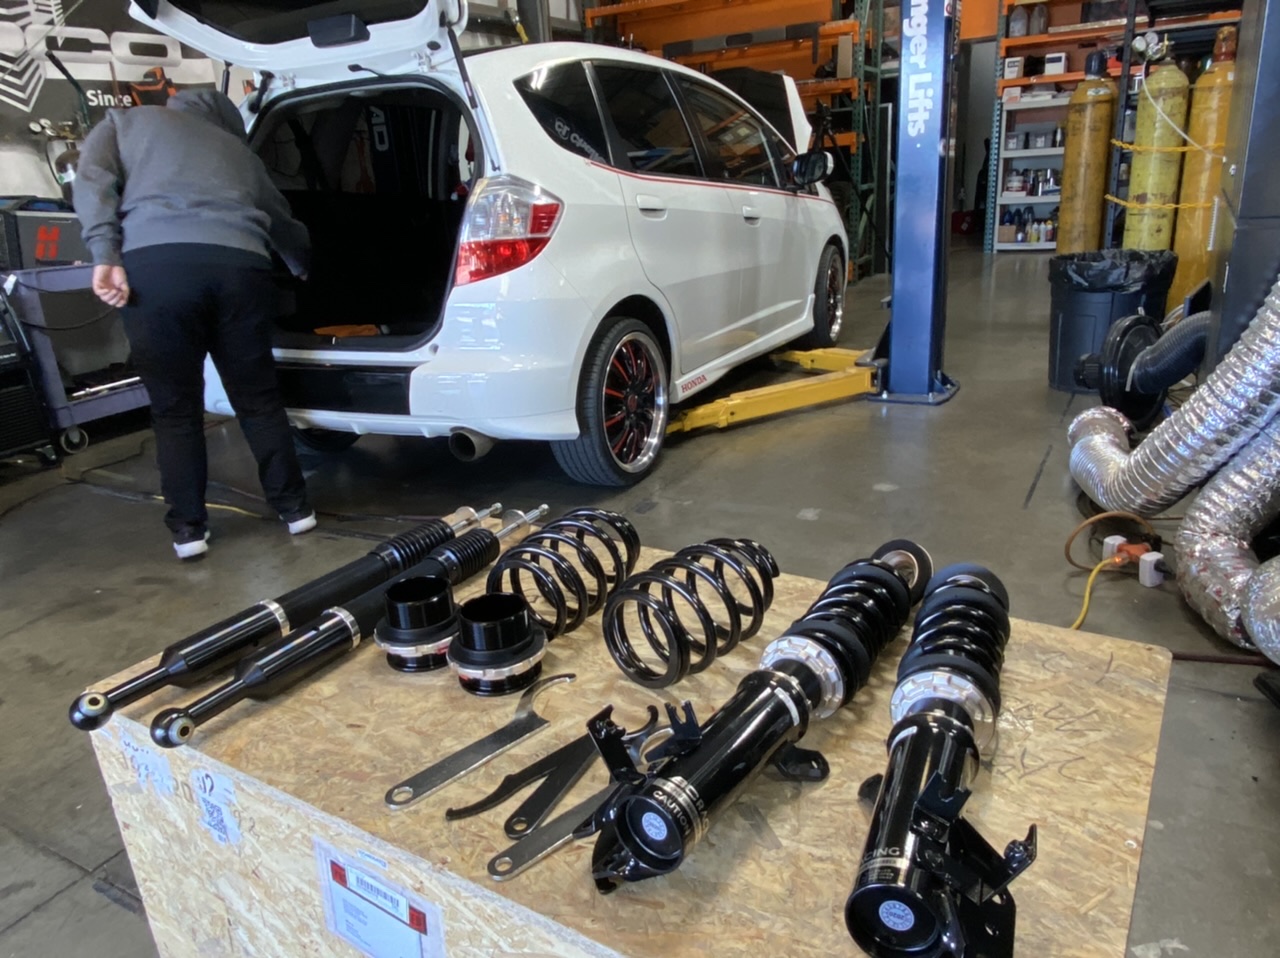
The front was dropped about 1 - 3/8" and the rear just about 2". Tomorrow i will take it outside and drive it up and down the street. Make sure nothing is rubbing. Do more adjustments and then lock them in place.

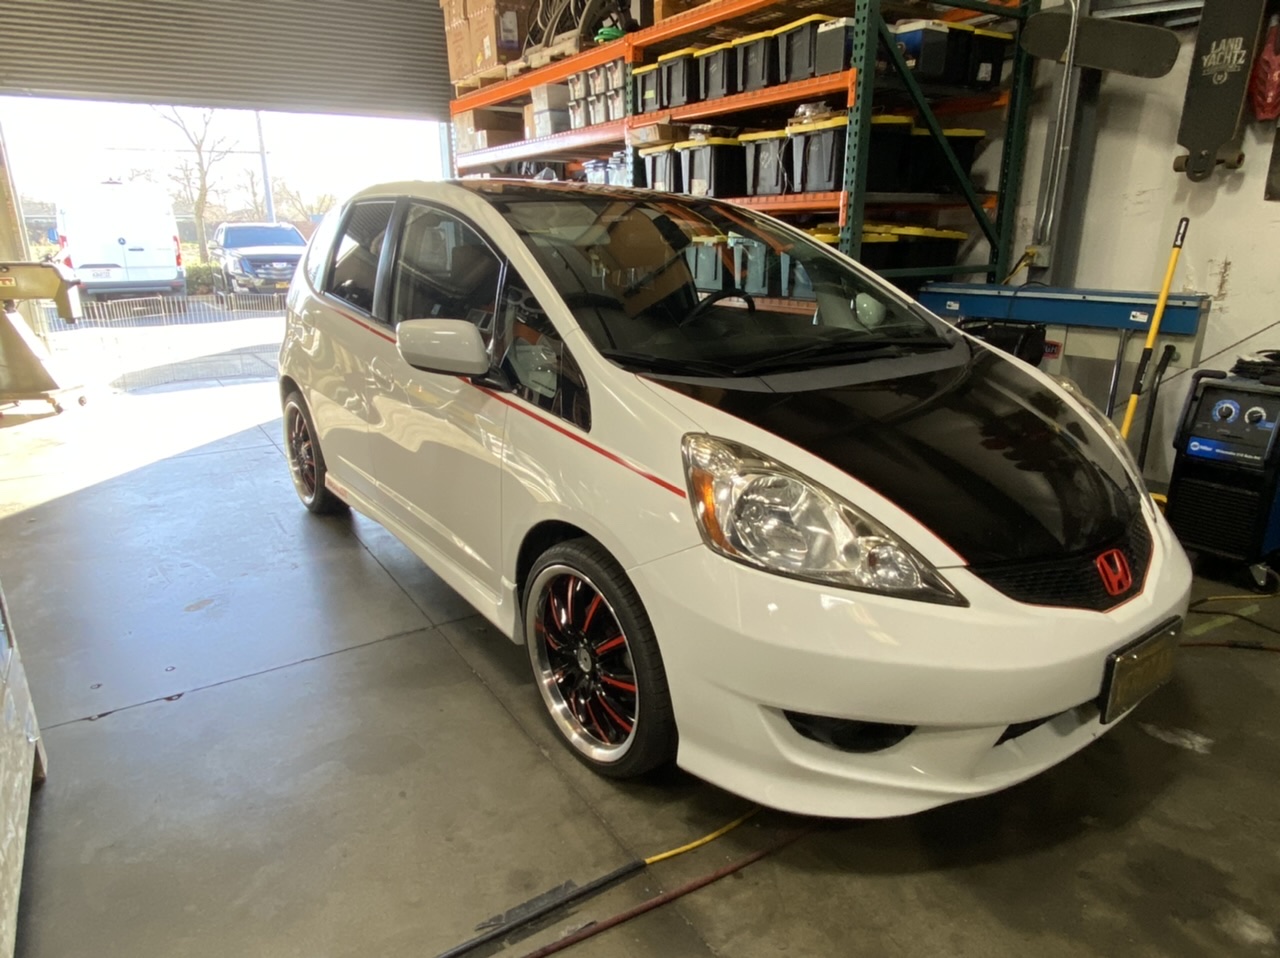
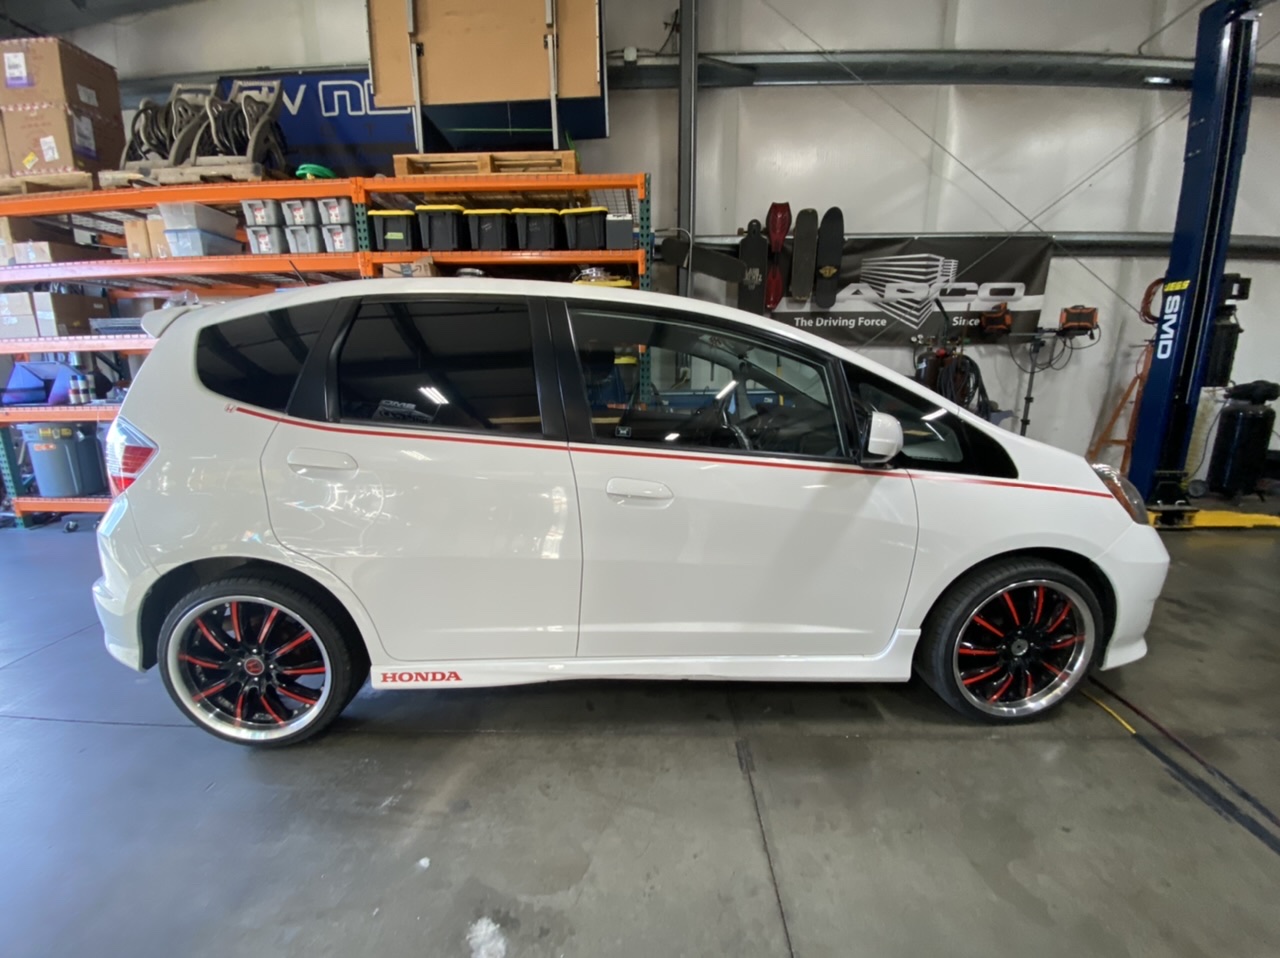
you know she dropped when you have to use the planks to get it off the lift

a nice clean respectable, functional drop. Tomorrow ill post more pics of it posted up in the parking lot.
-
 1
1
-
-
-
-
-
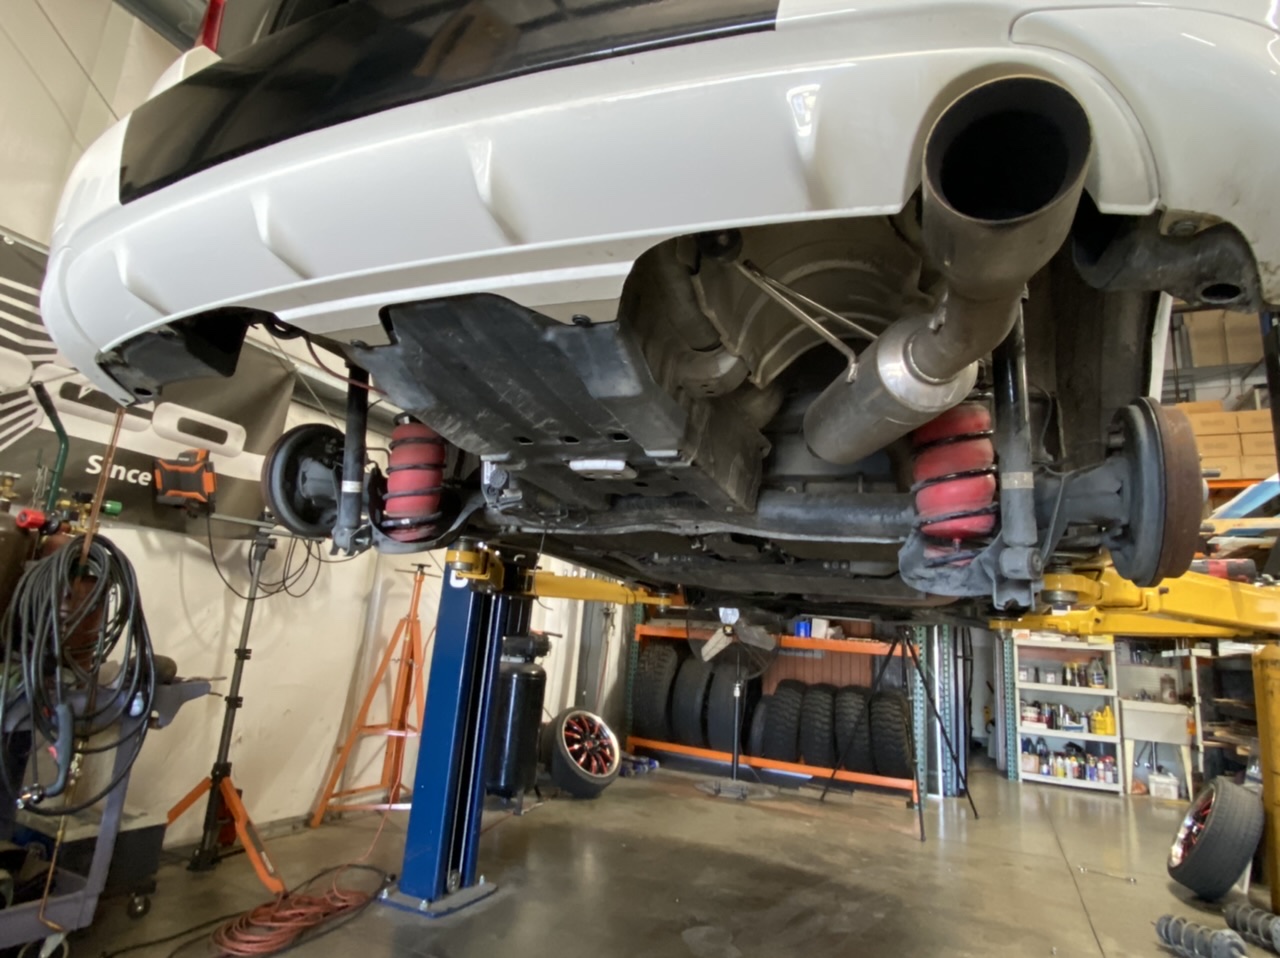
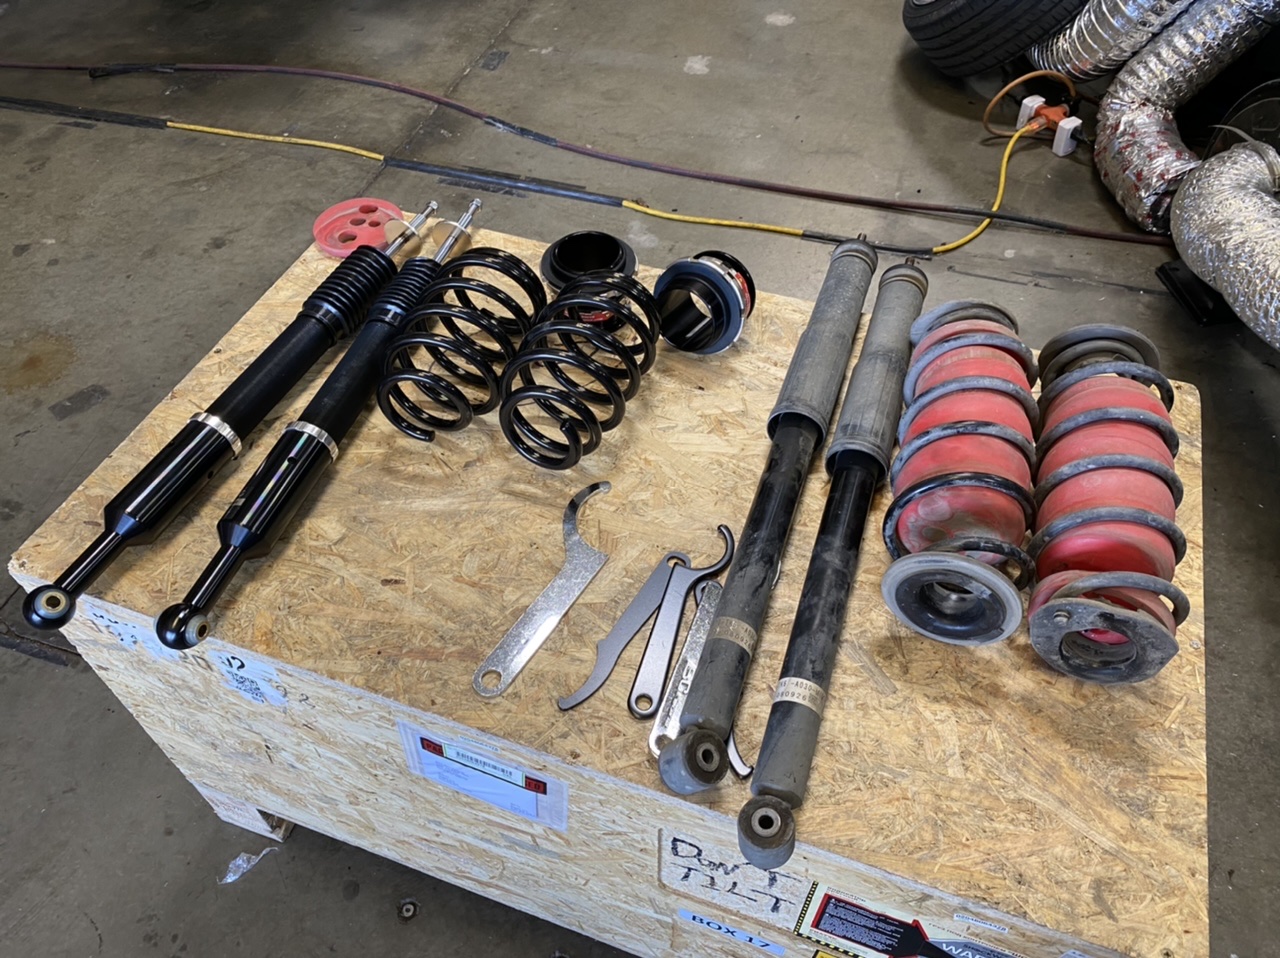
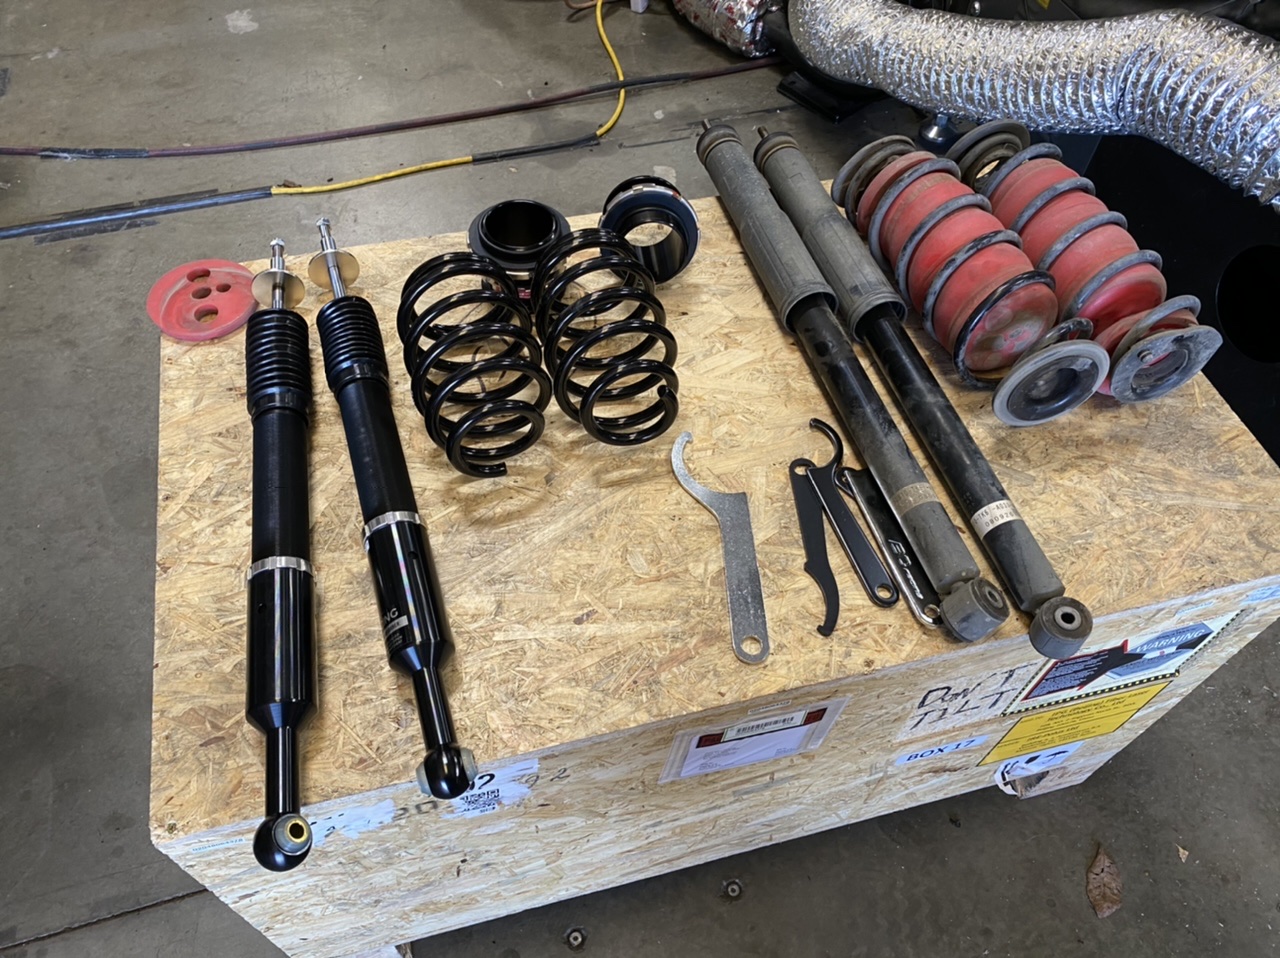
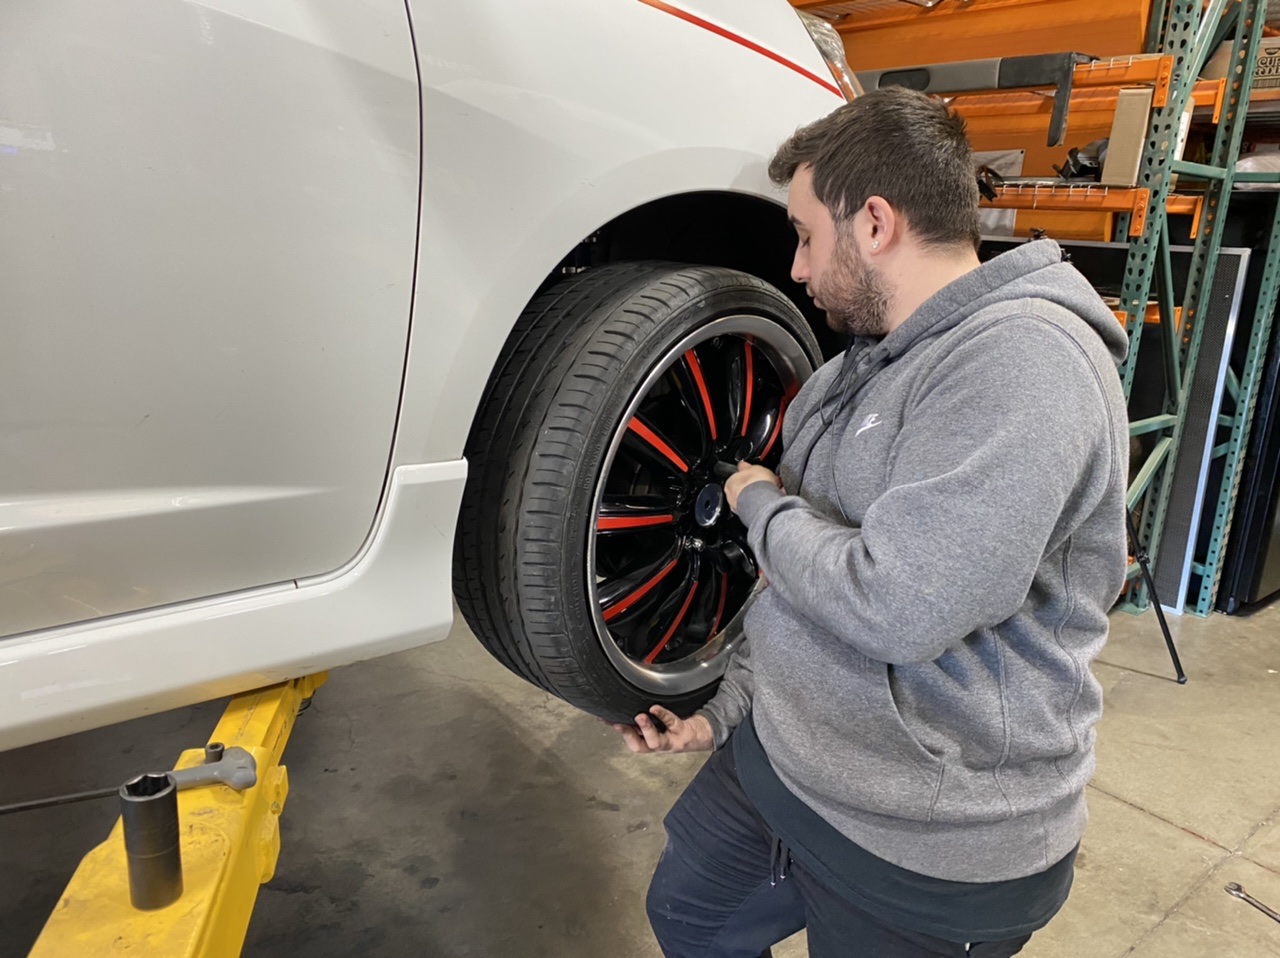
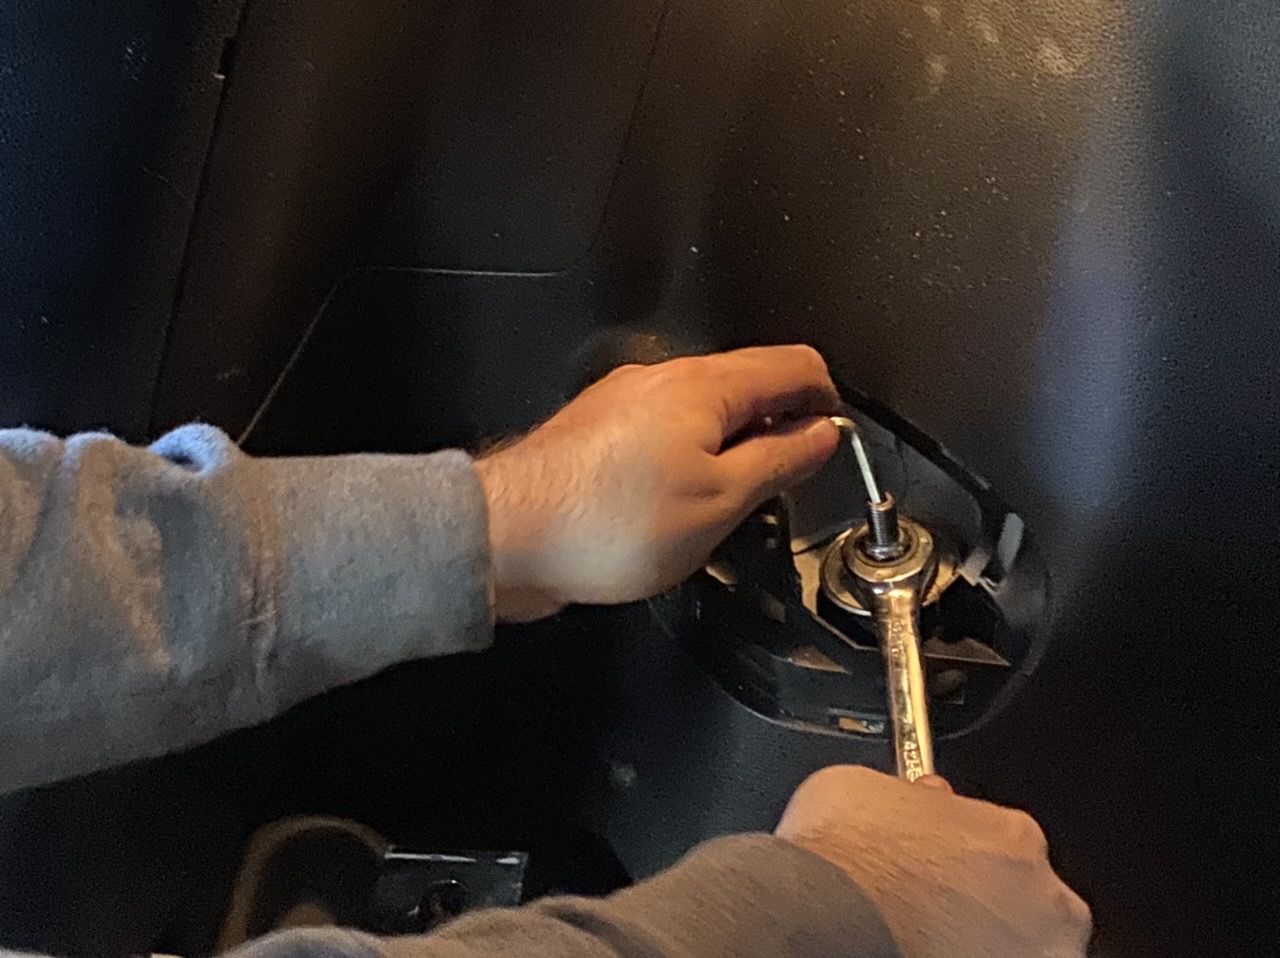
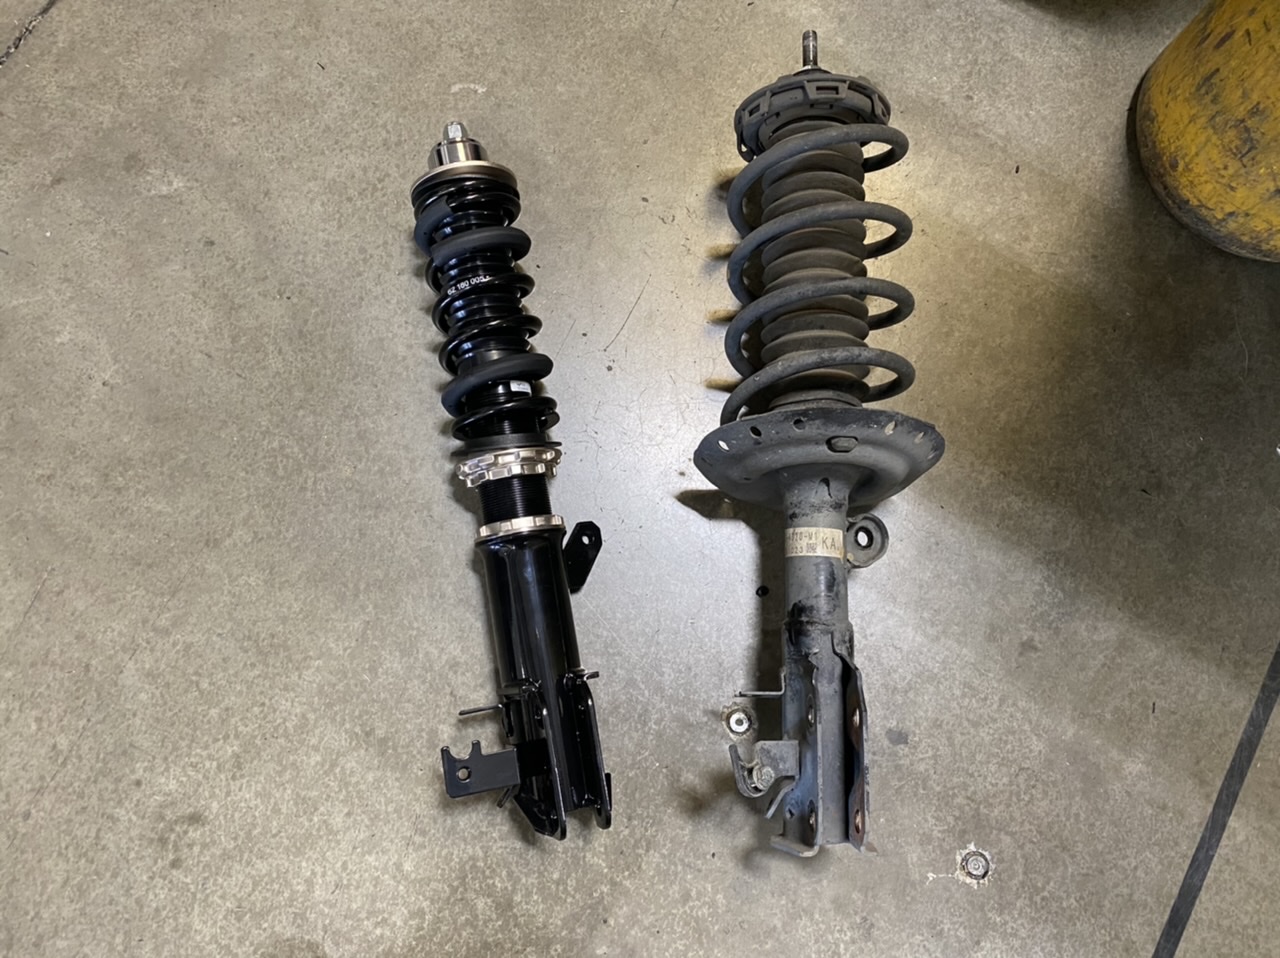
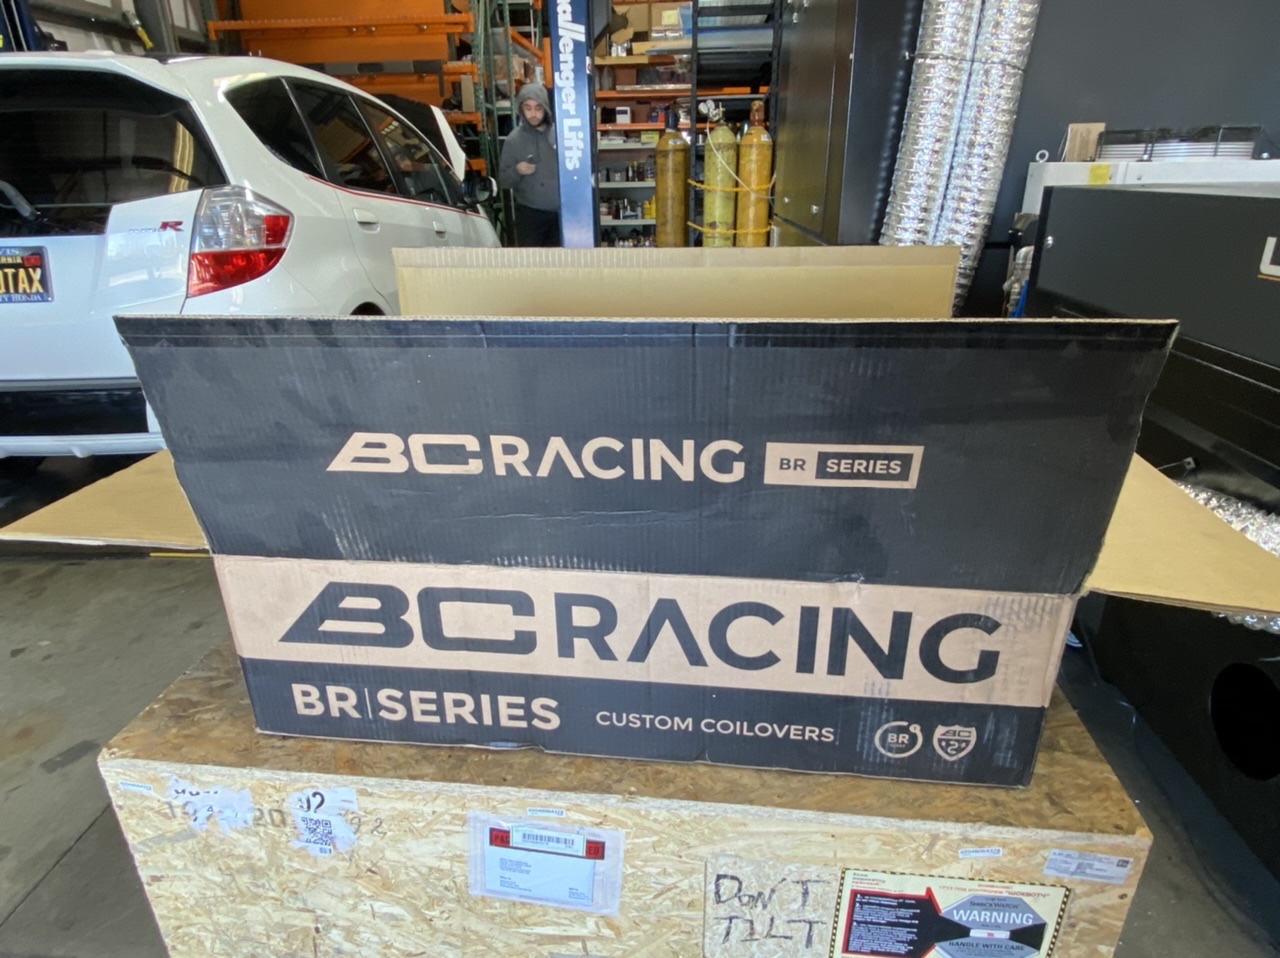
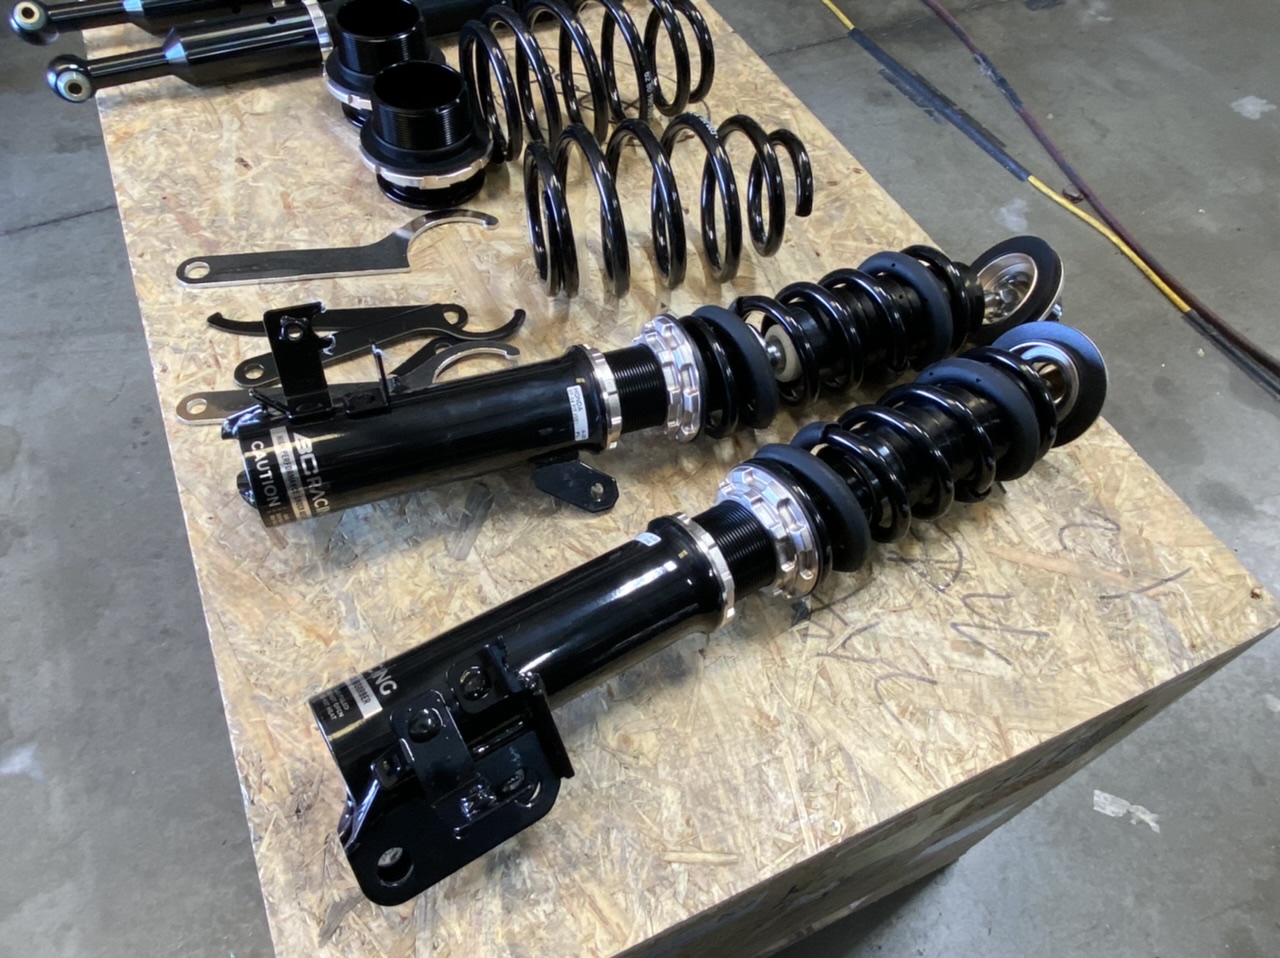
A friend of mine has been asking me to help him upgrade the suspension on his beloved Turbo Honda Fit (yes it has a 🐌💨 on it) for over a year now. Actually he is my CPA. Since he has gone above and beyond for me over the years, almost 15 to be exact, and also helped me through a few tricky tax situations at no extra charge, I decided to do him a couple of solids. First, i bought these coilovers for him a few months ago. Surprised him with a set of BC Racing. Today, i finally got him up on the lift and did it (no charge of course).
-
1
-
-
1 minute ago, J-bonez said:
So just thinking about how you tiered the amp rack, maybe it’s too late but you could do 2 tiers of subs and have them at an angle and slightly overlapped like the amps are so it would all tie together style-wise and keep all the subs firing the same direction. Think about it.
not looking for any advice at the moment but thanks for offering.
-
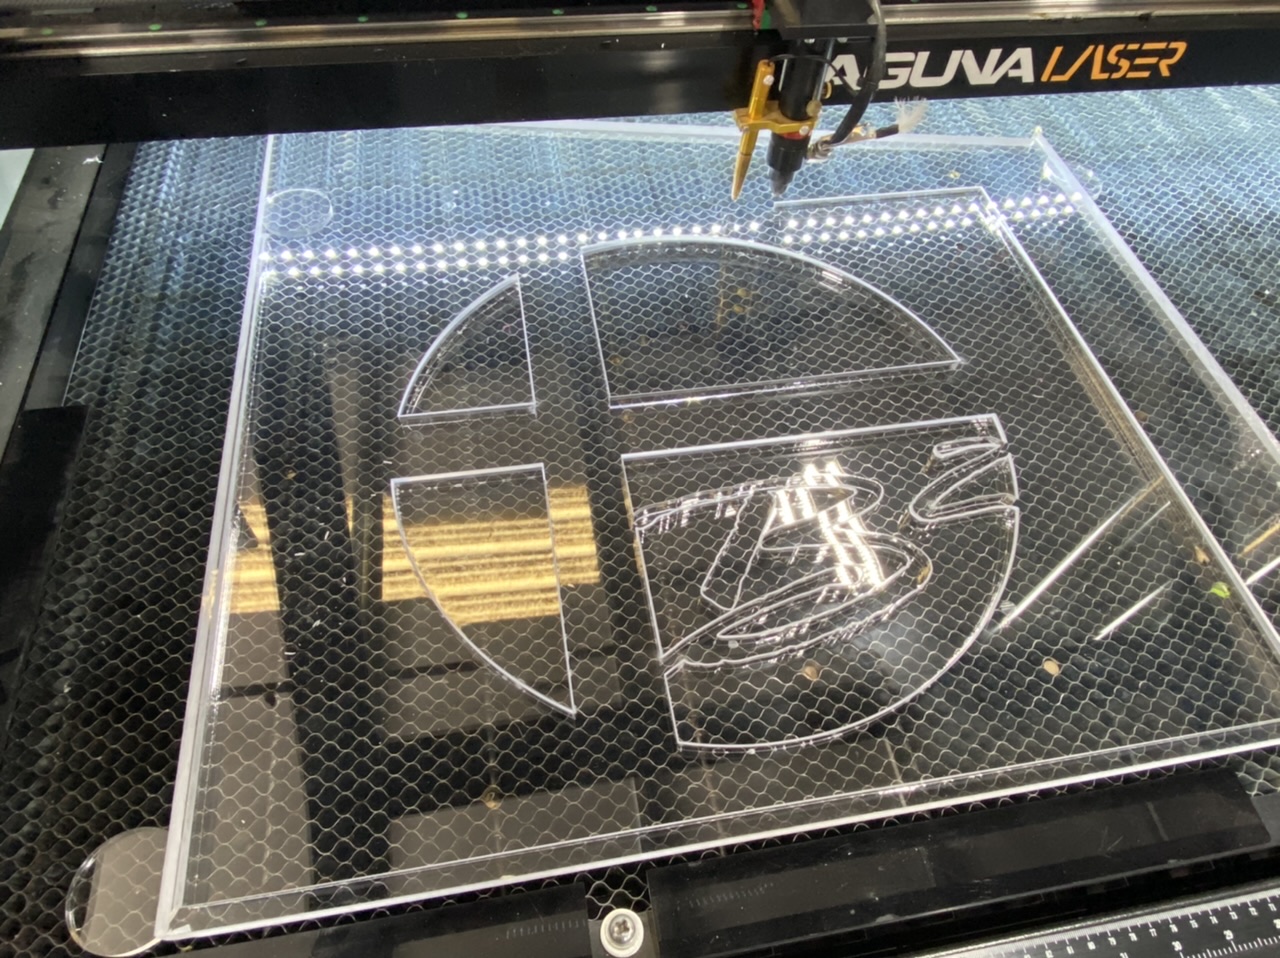
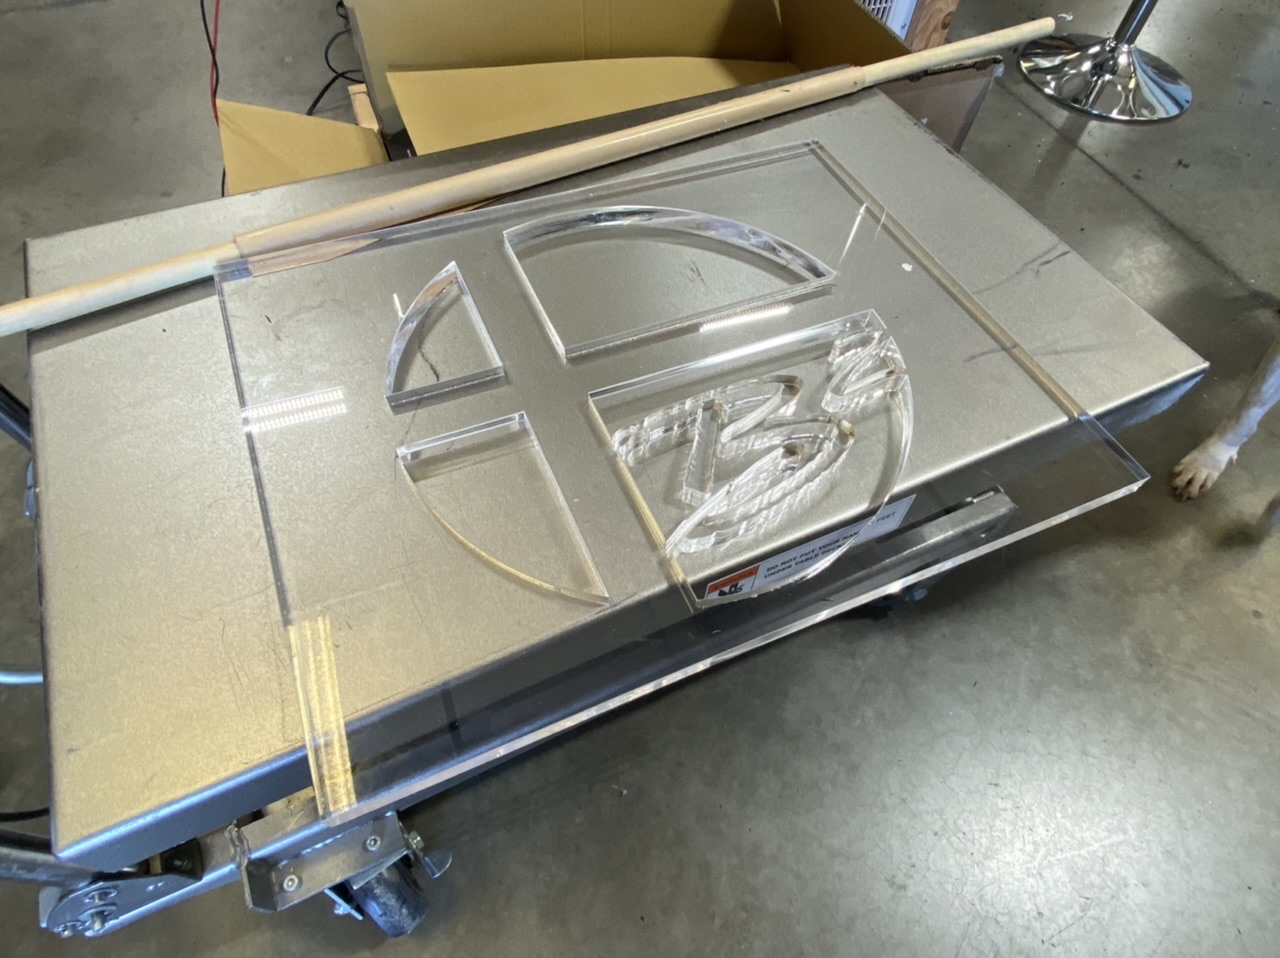
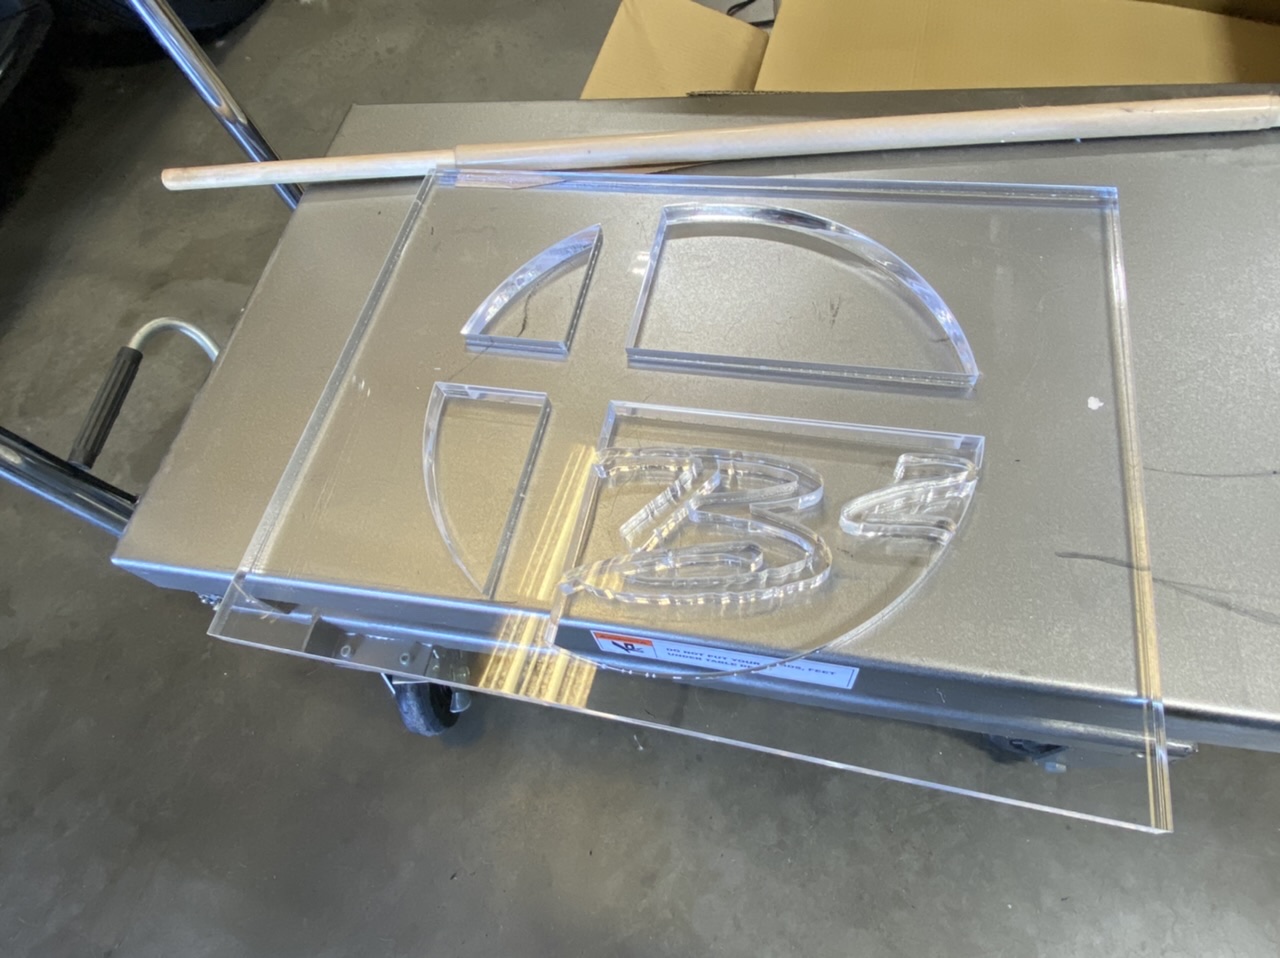
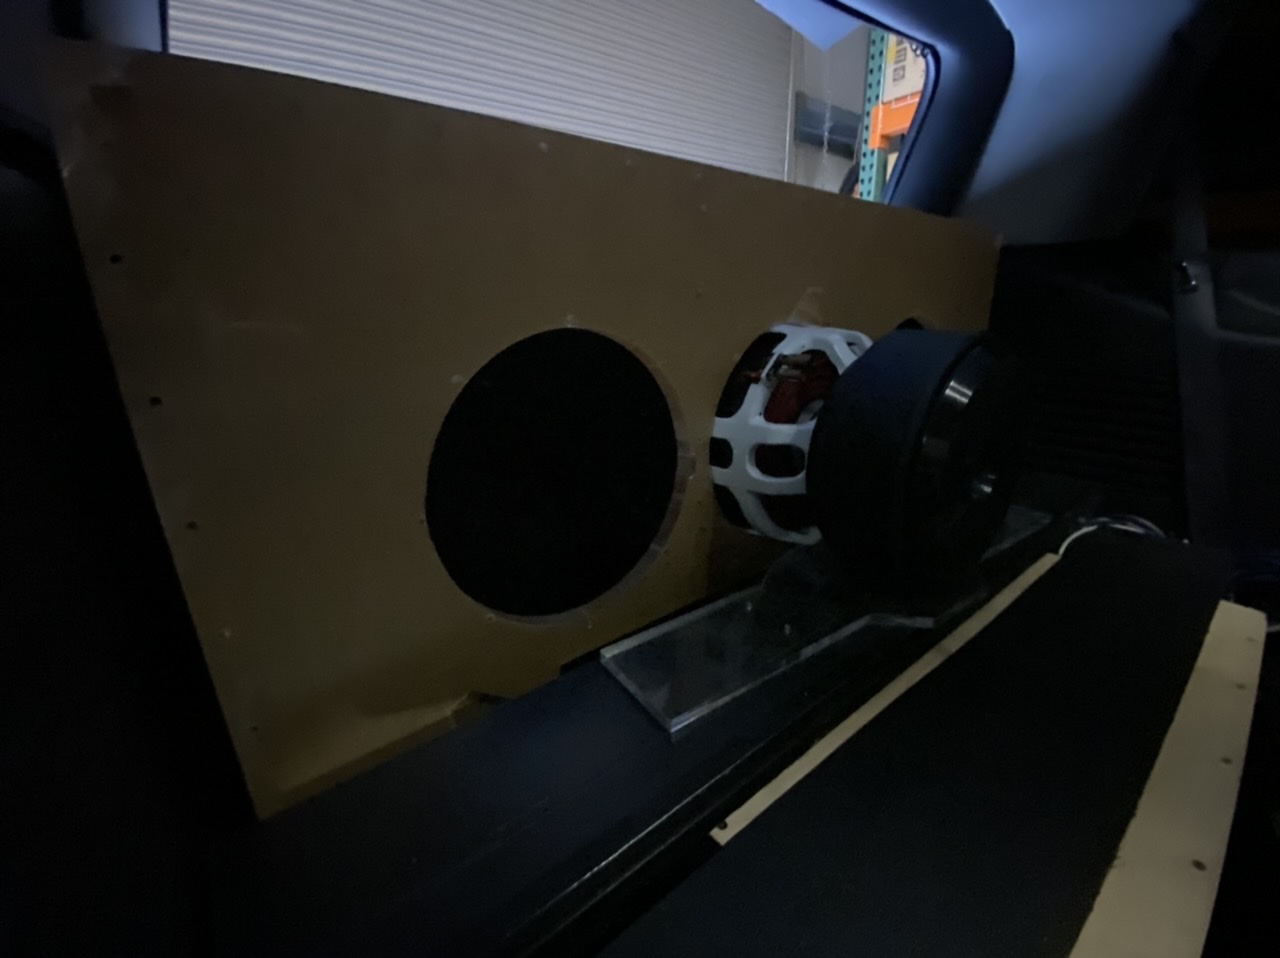
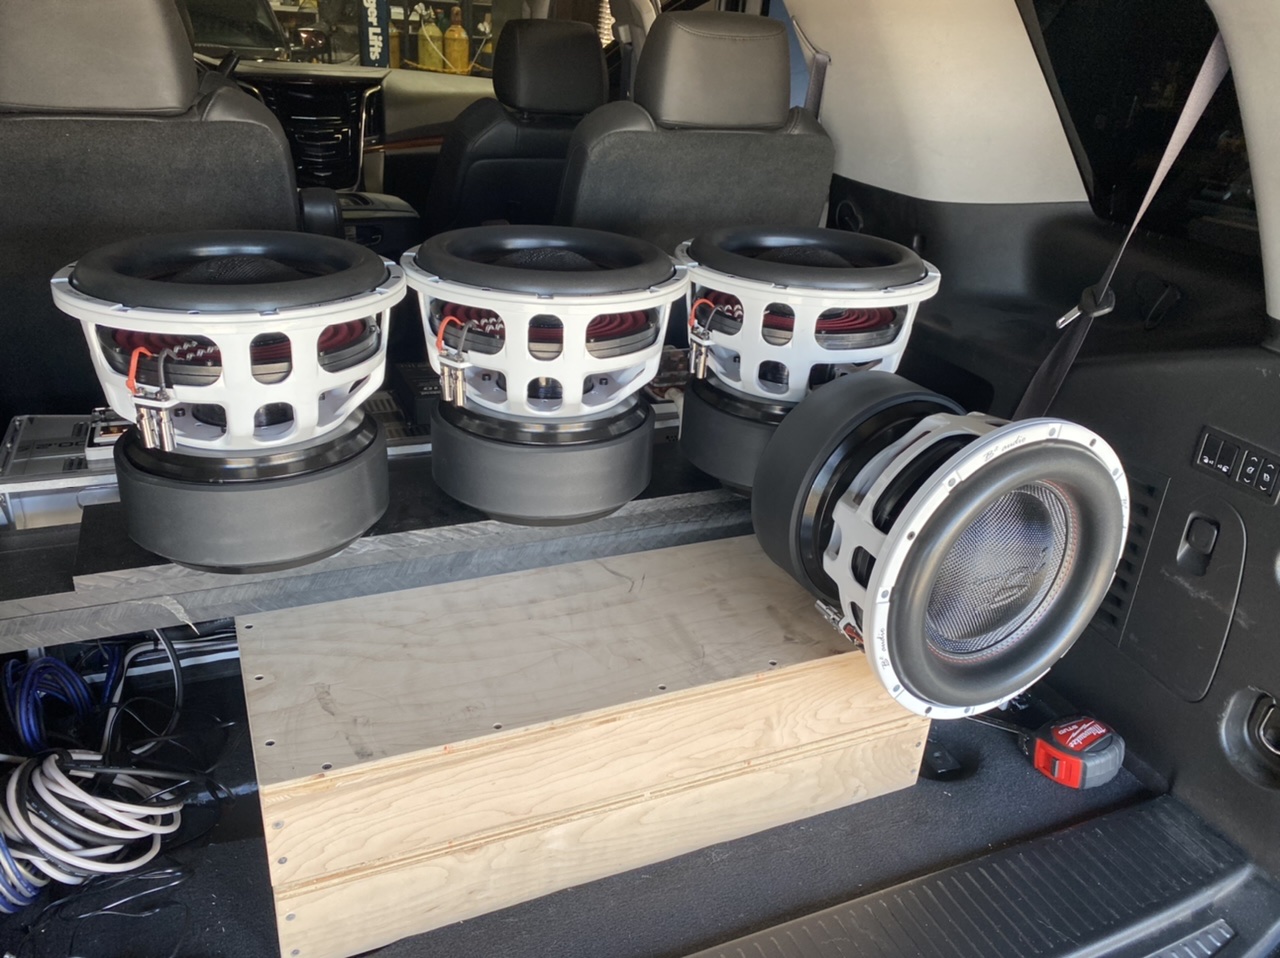
Almost forgot about the 2 braces that will go in between the 12's. Some B2 logo's i just had to put in them. This is just a tester on some scrap but if it works i will make the 2nd one and drop it in when the time comes.
-
1
-
-
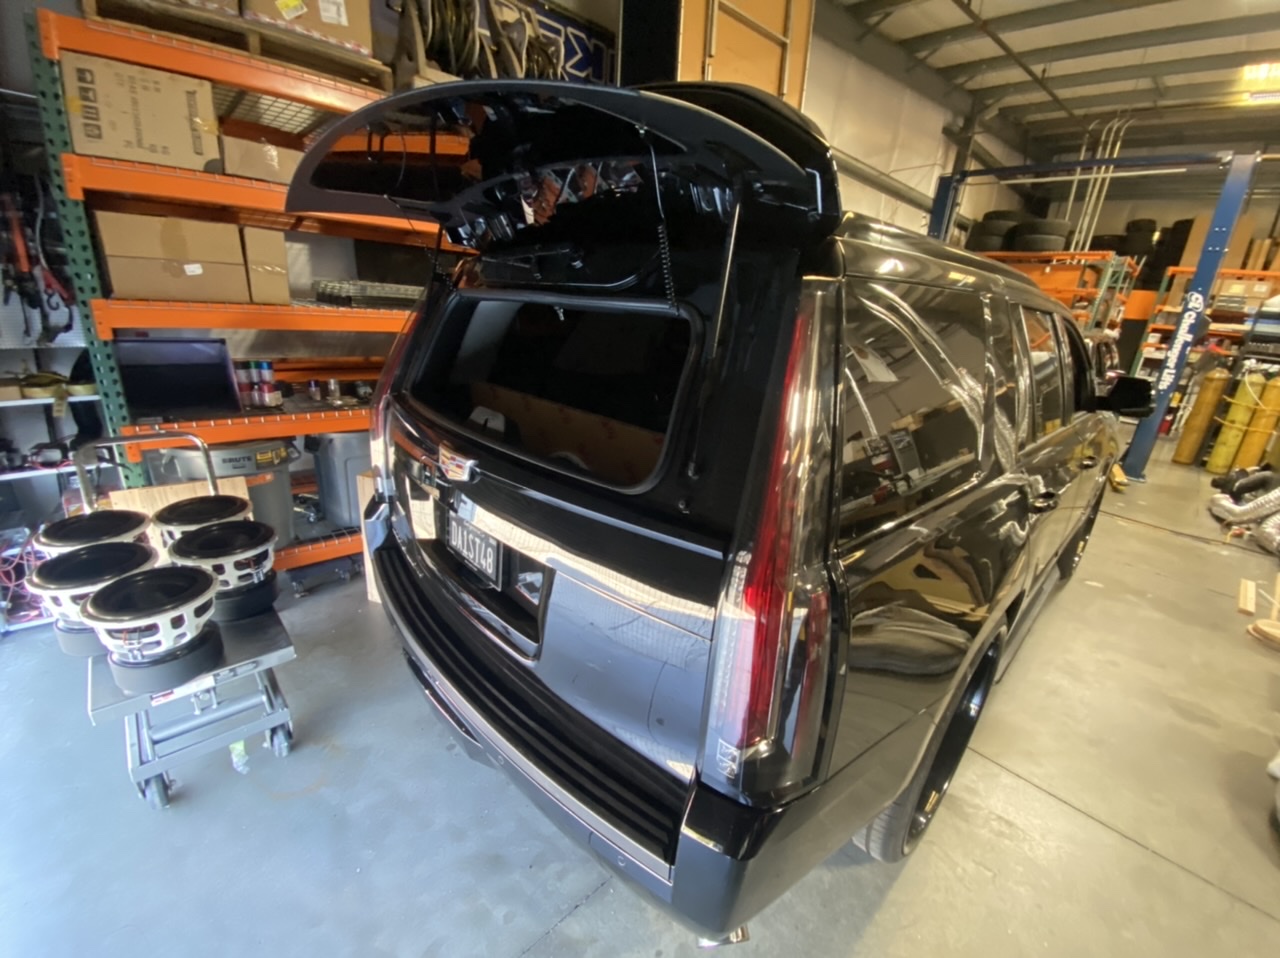
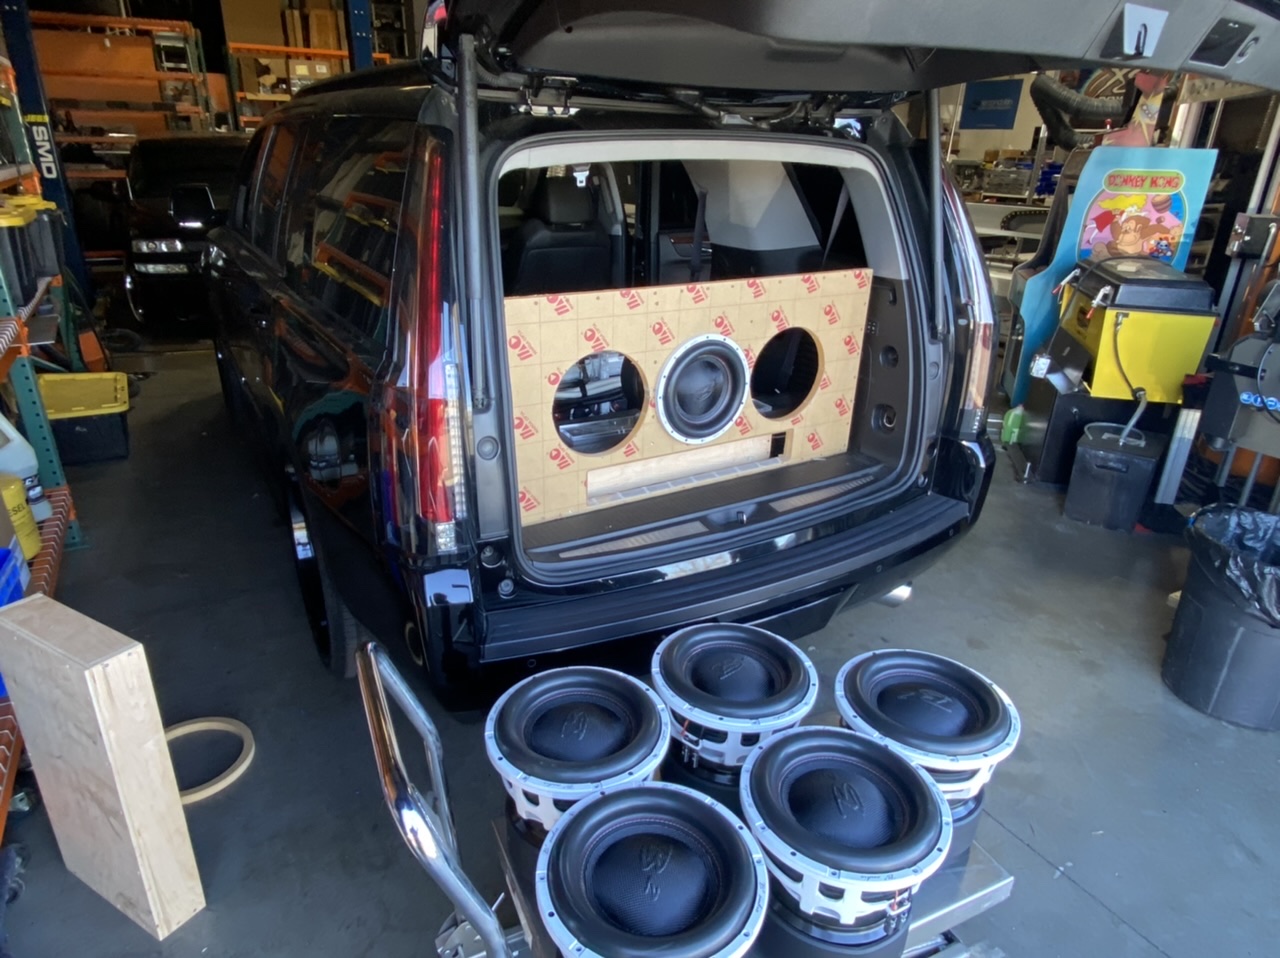
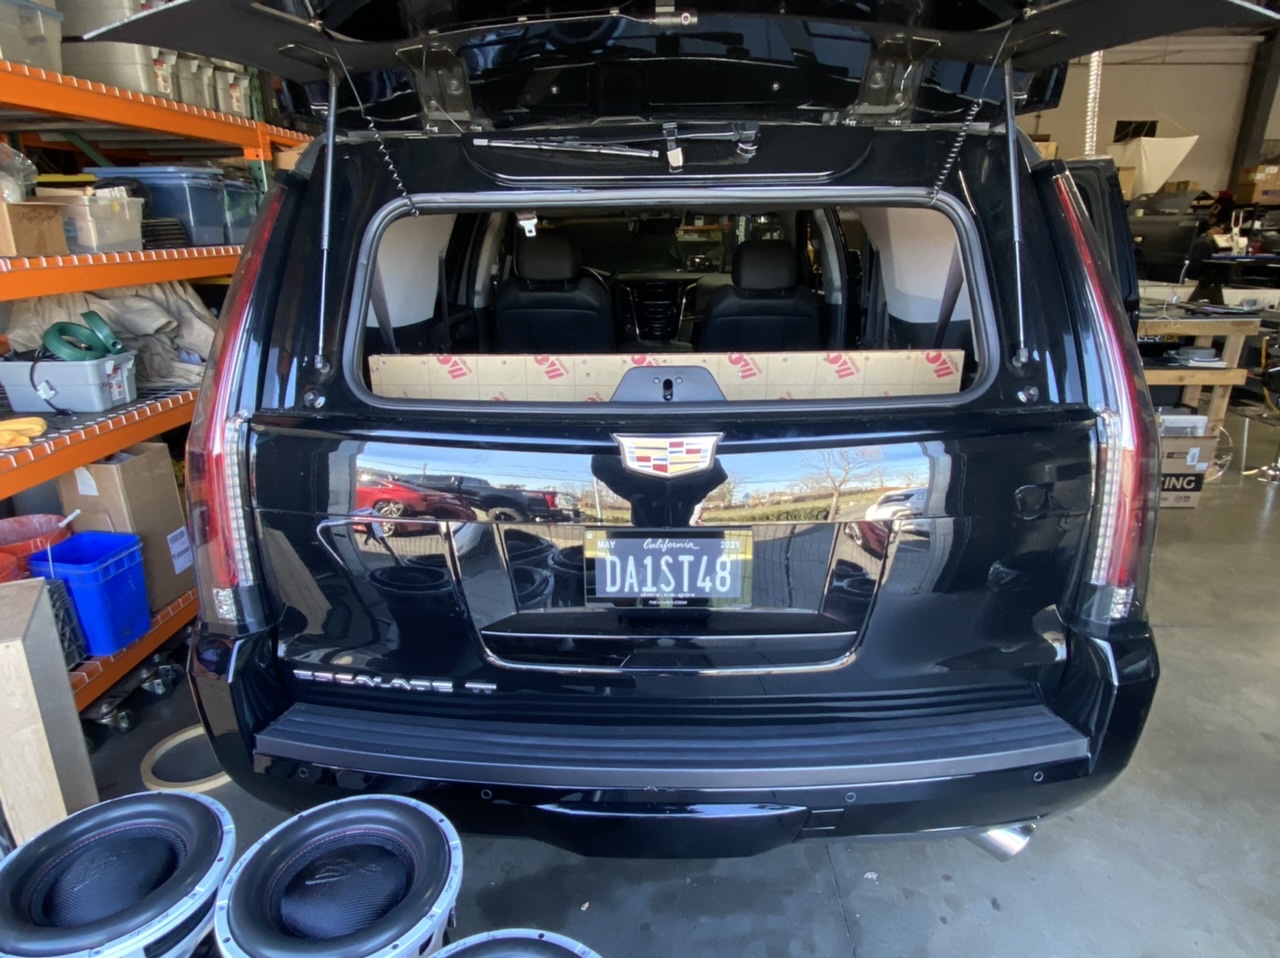
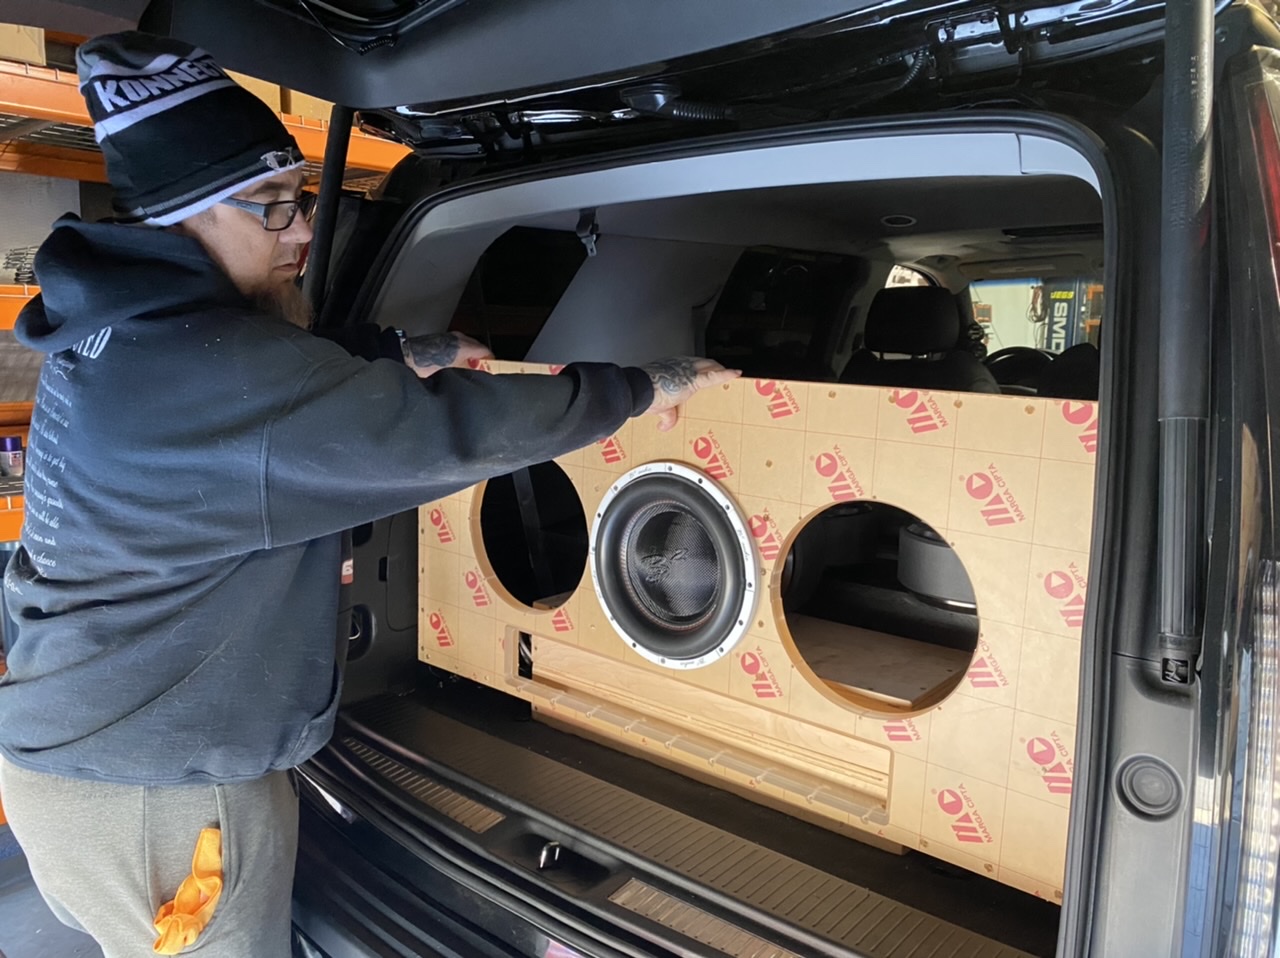
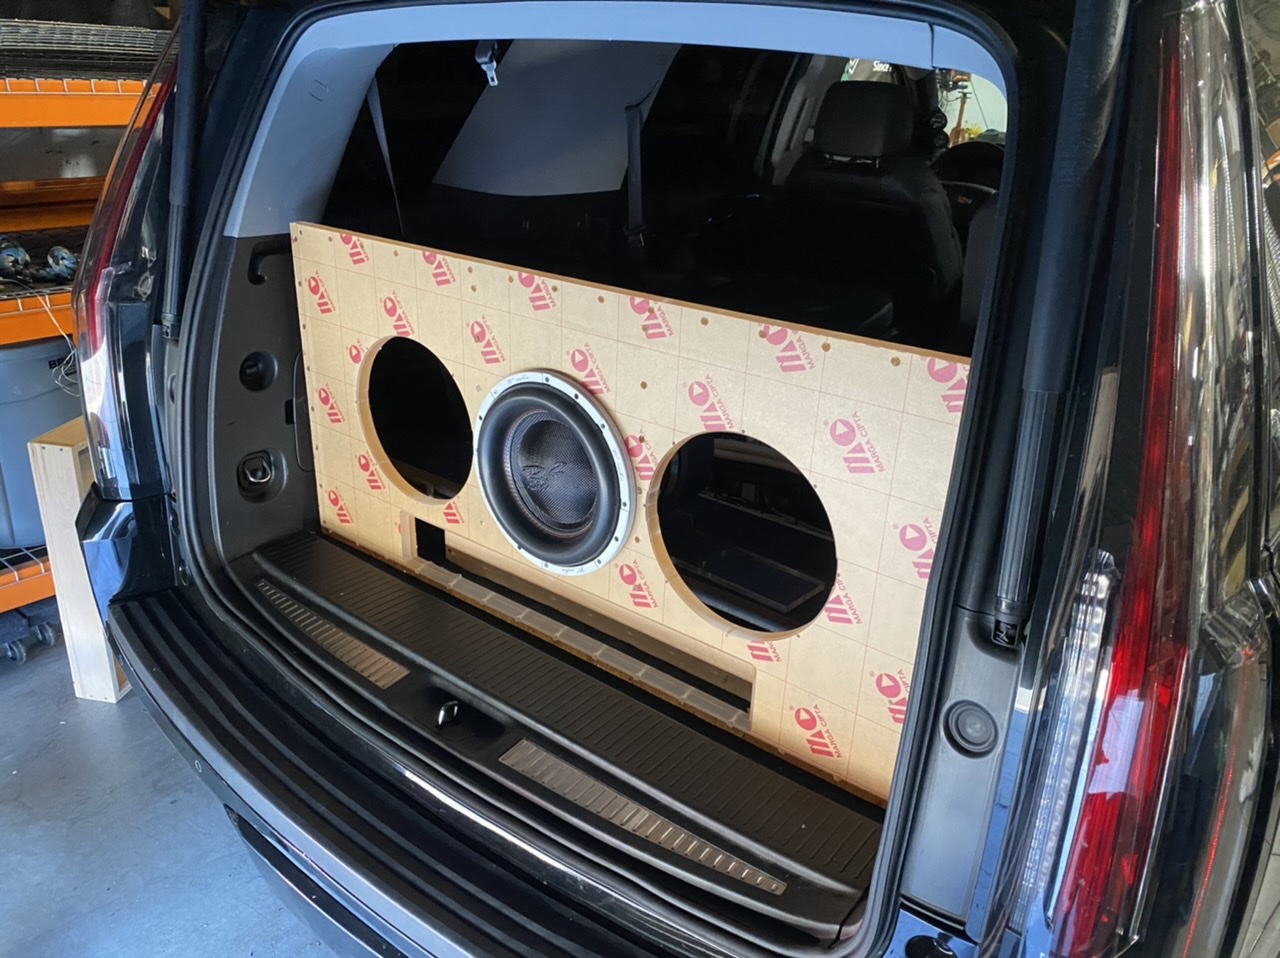
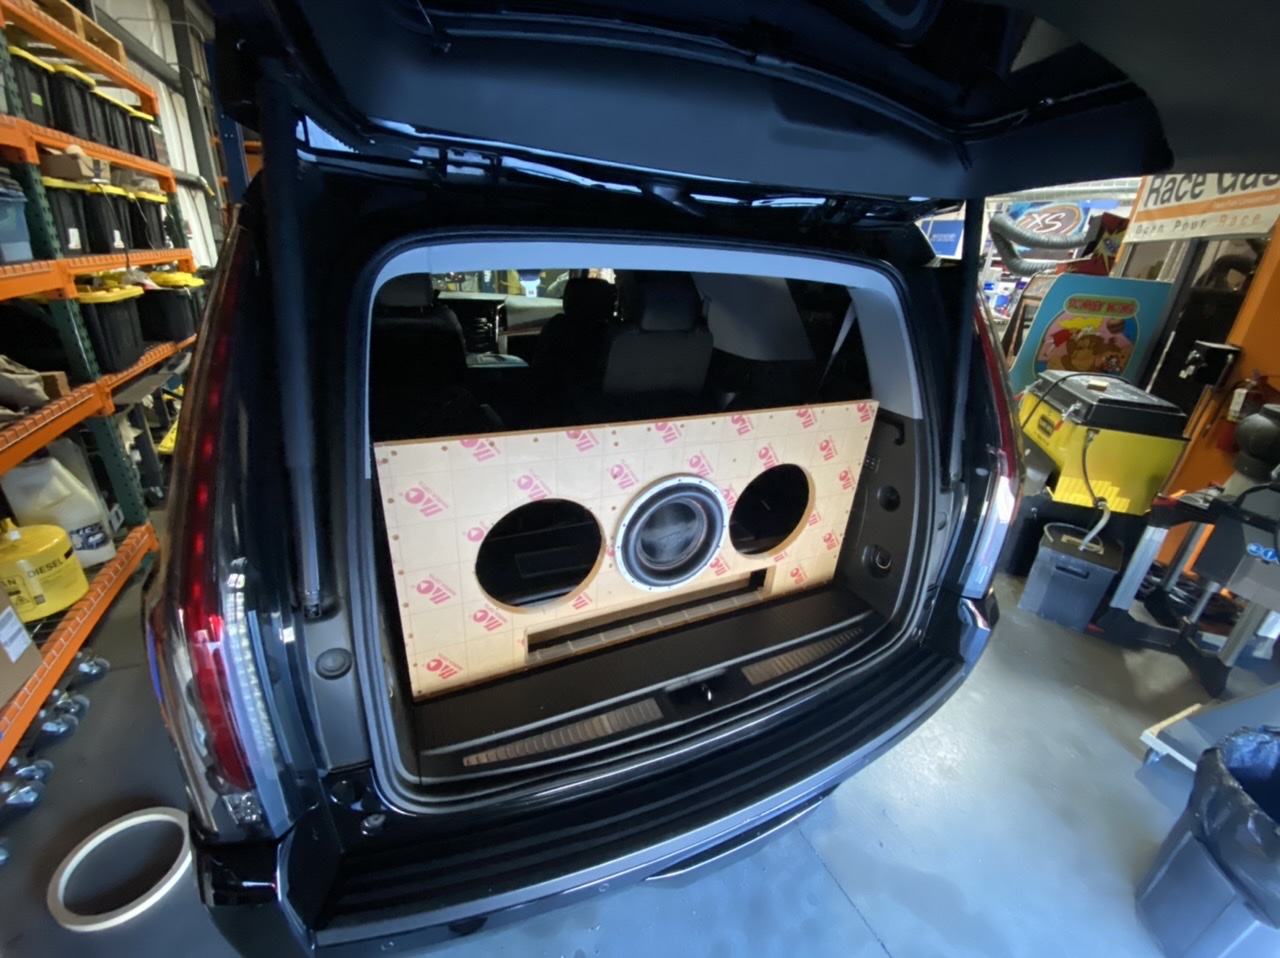
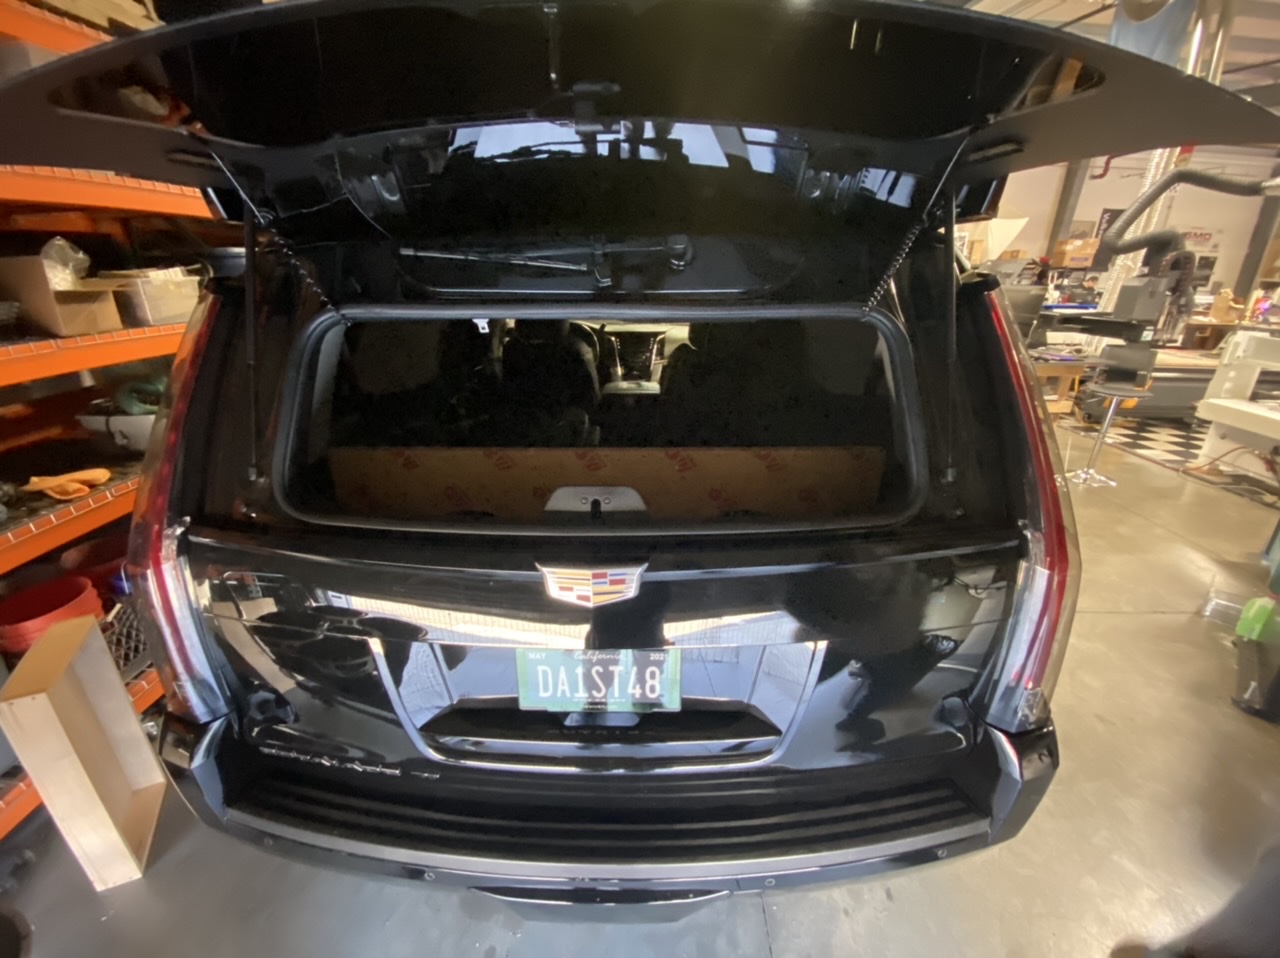
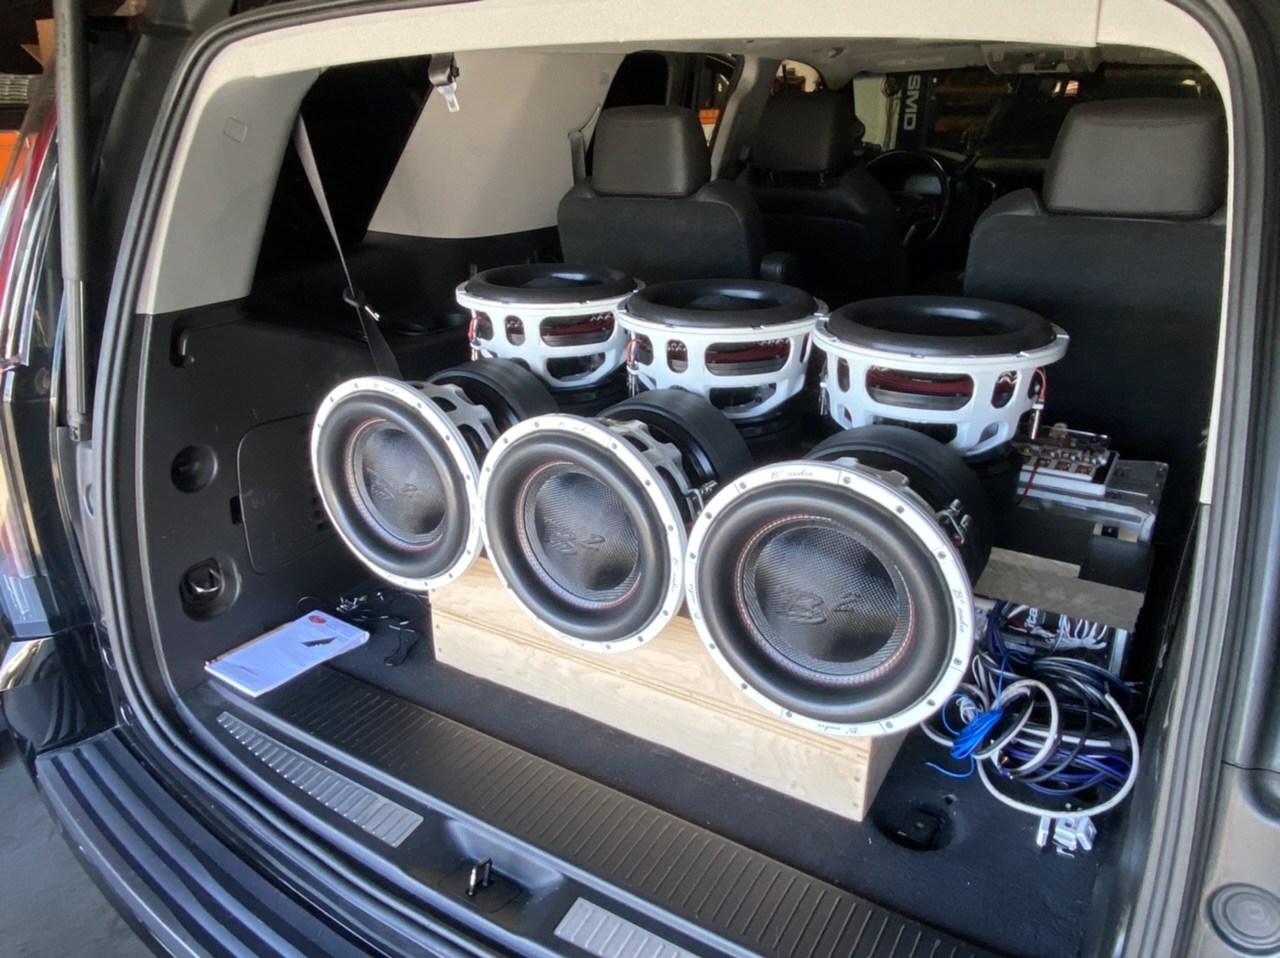
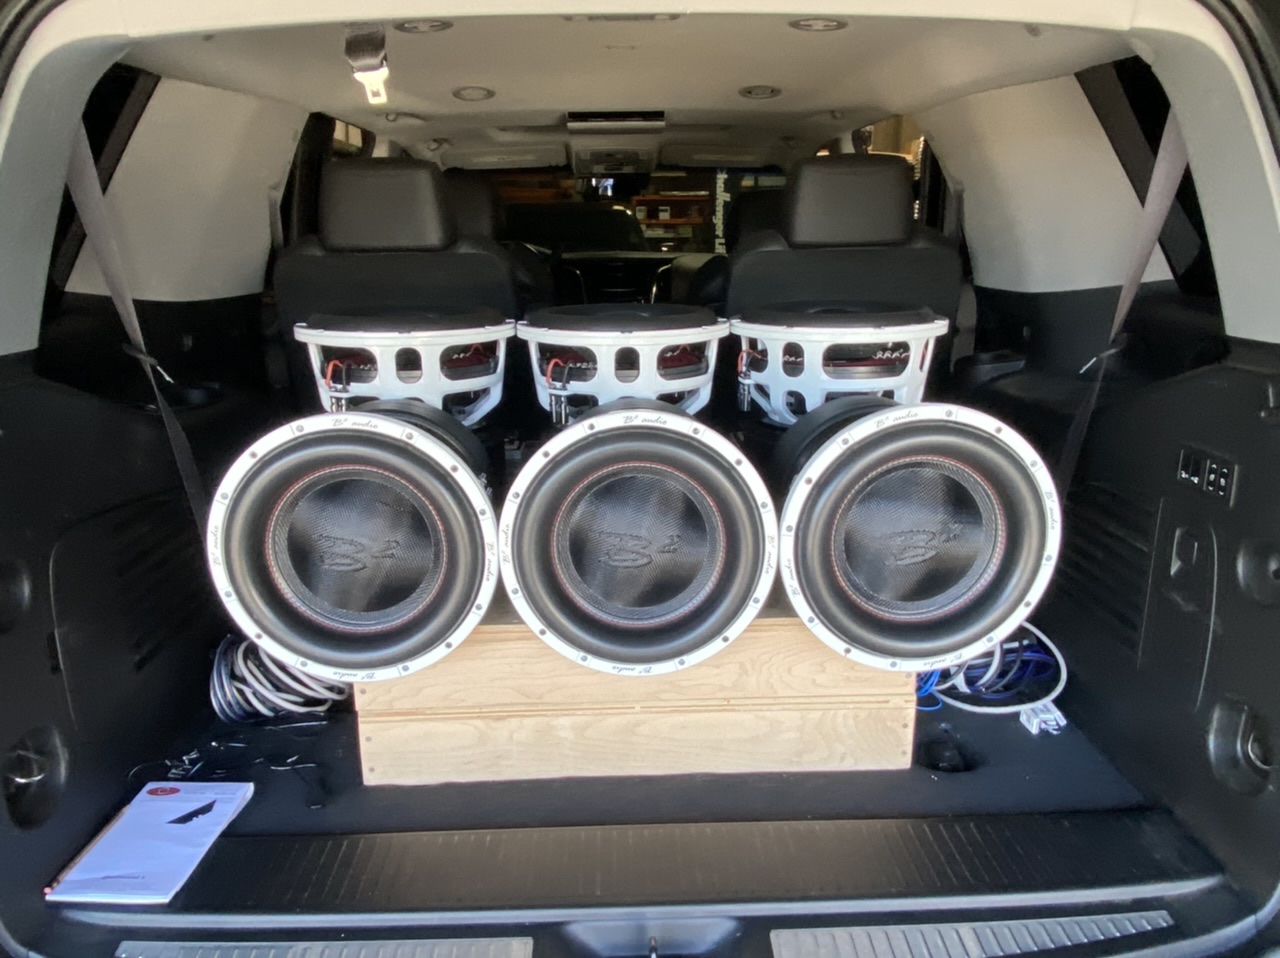
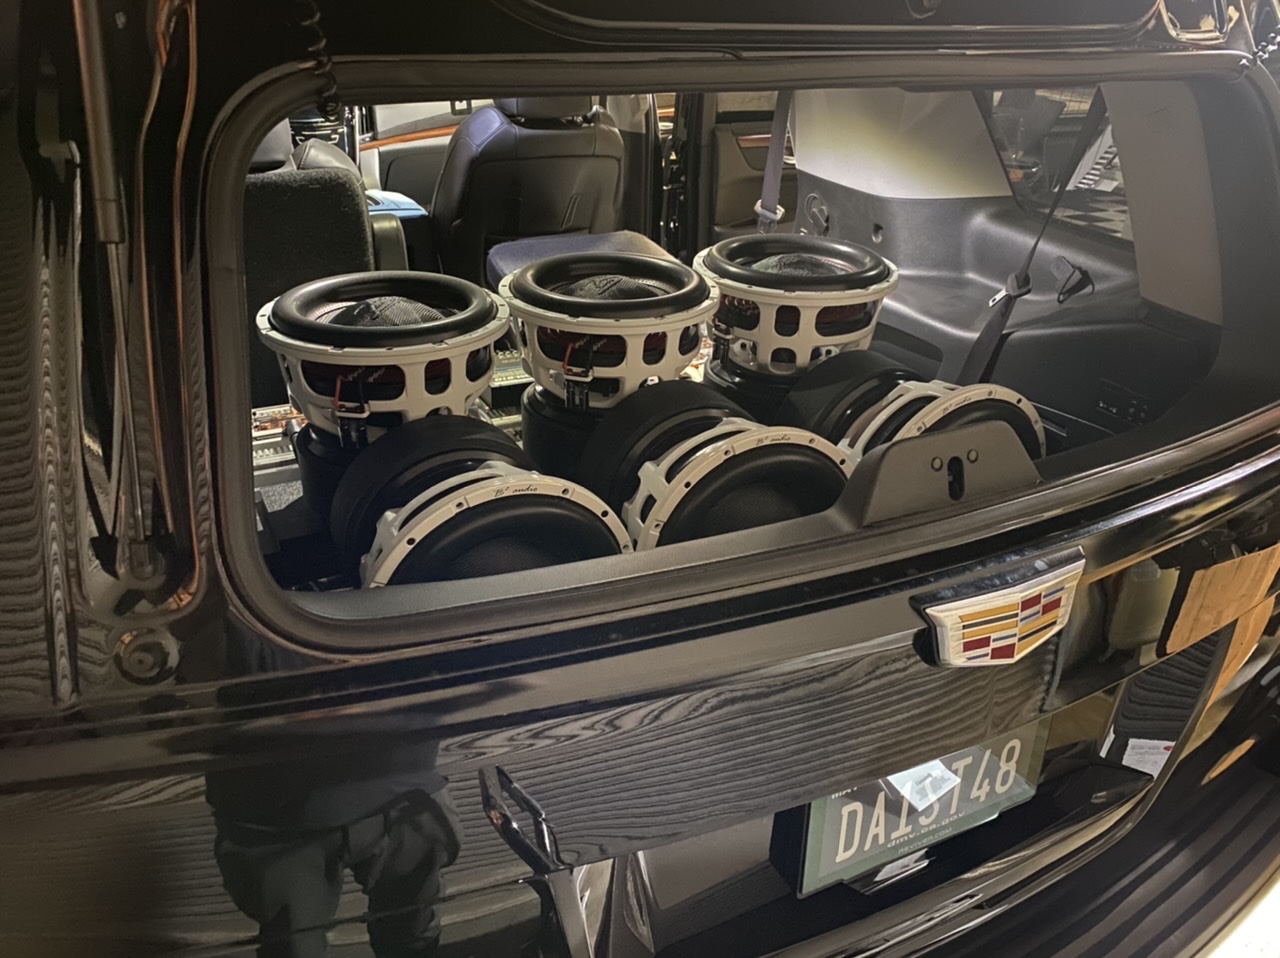
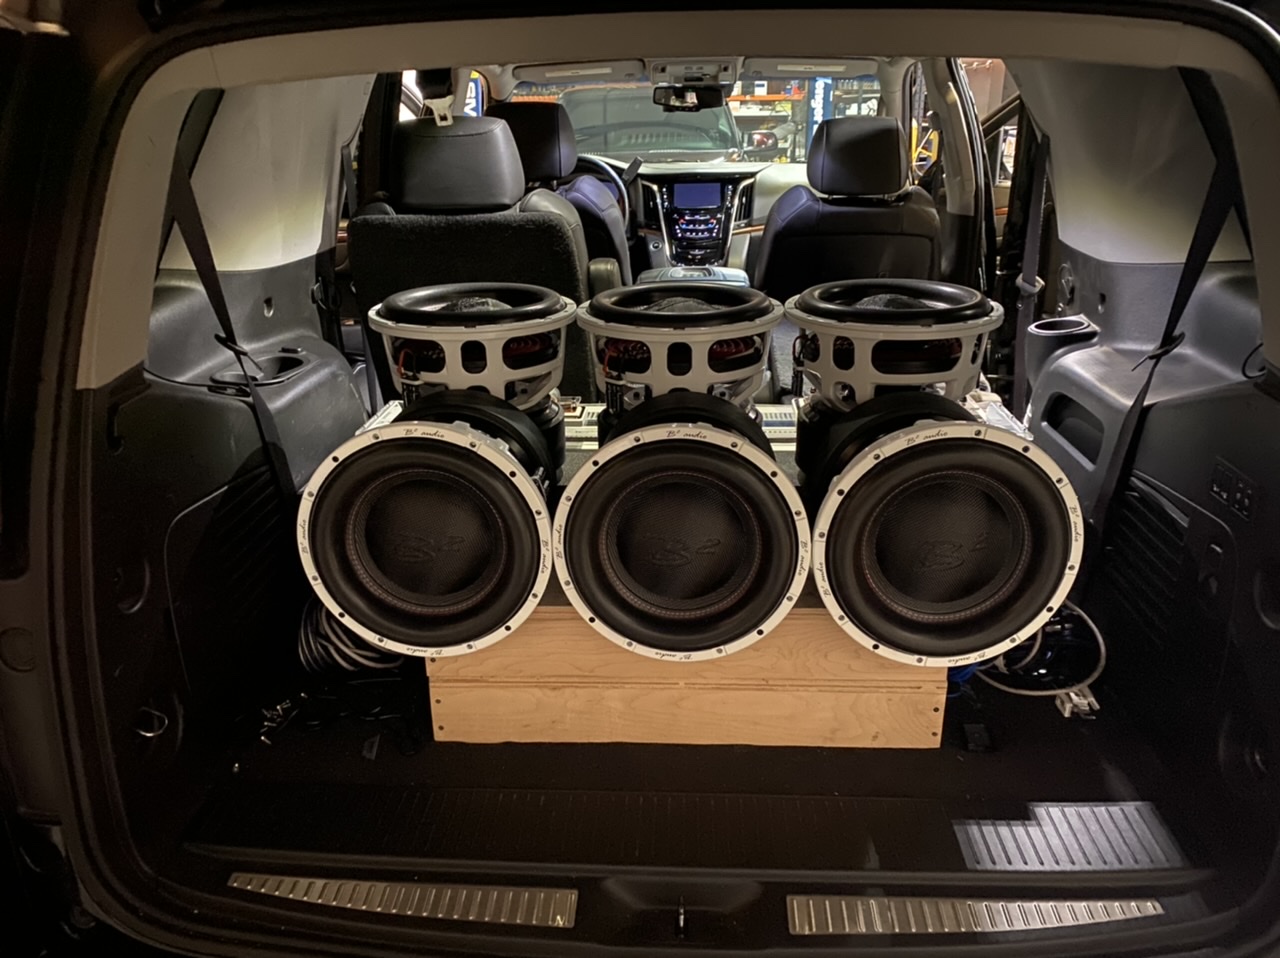
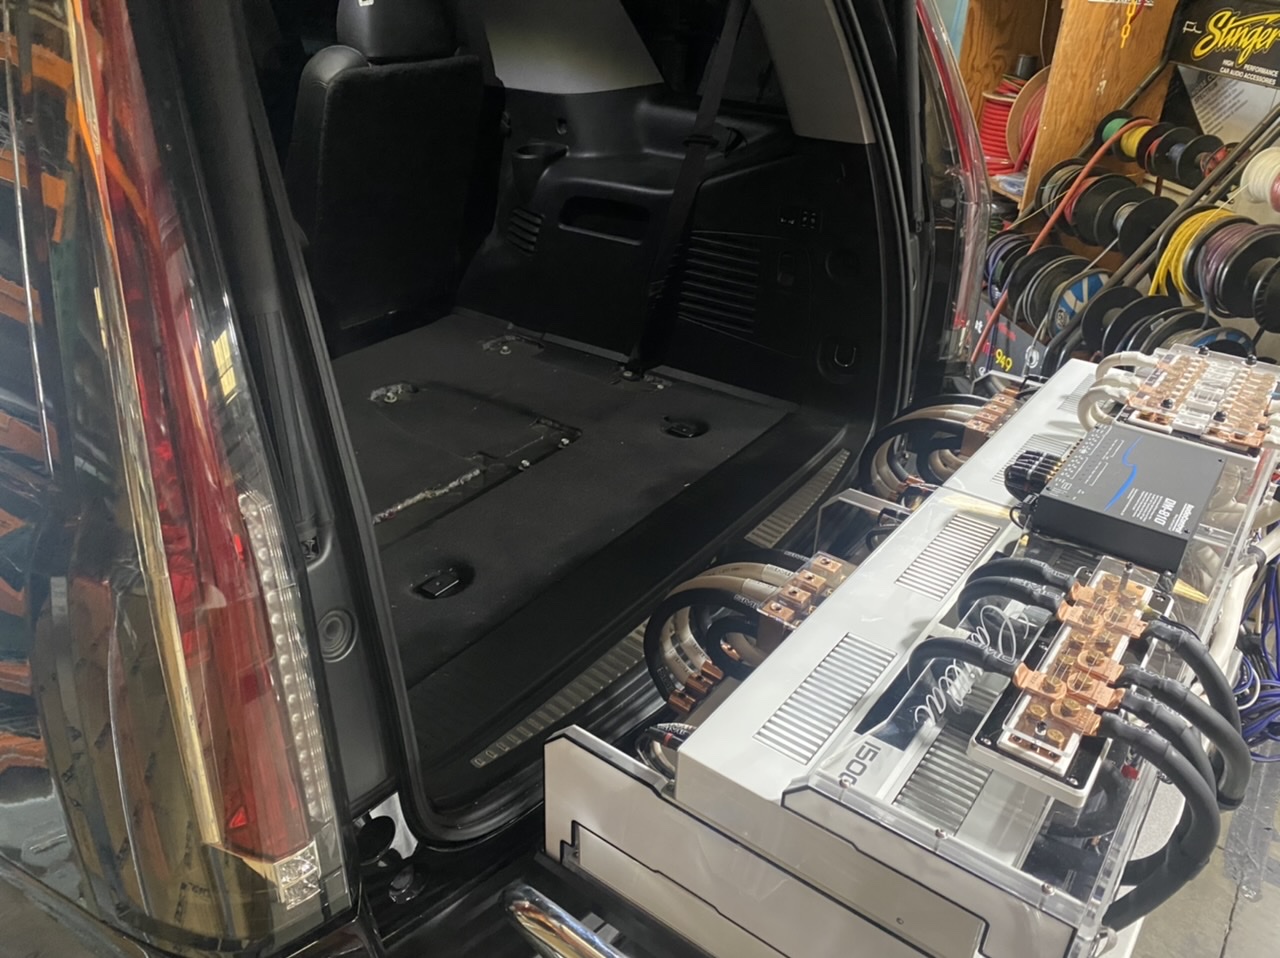
Looks kinda tall with hatch open, but that is mainly because the paper on it looks like a big slab of wood. When i pull that paper off and reveal what it looks like it should be much nicer. With the hatch closed and the glass open you can see it isn't super tall at all. It's just right.
-
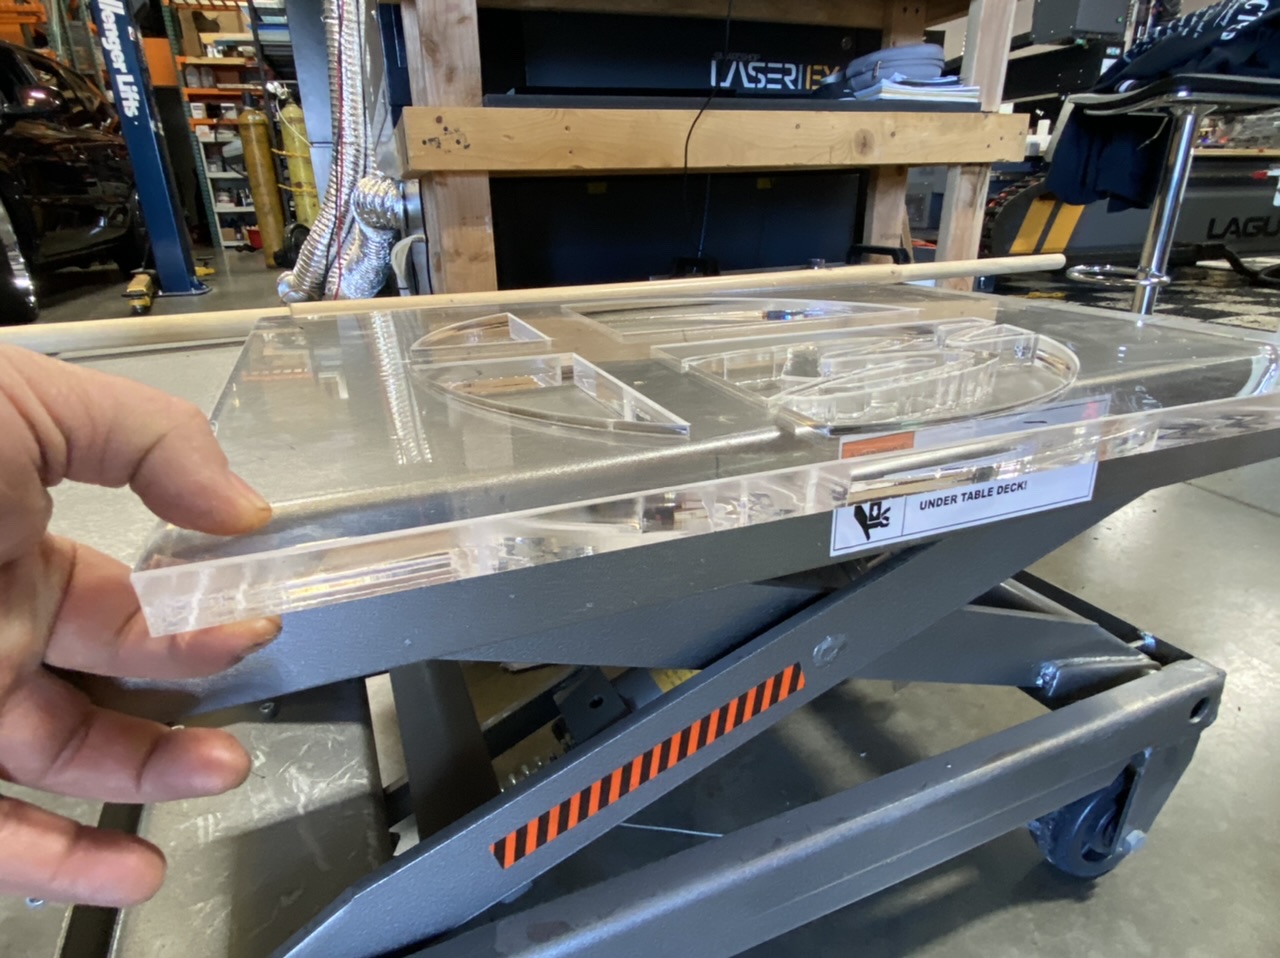
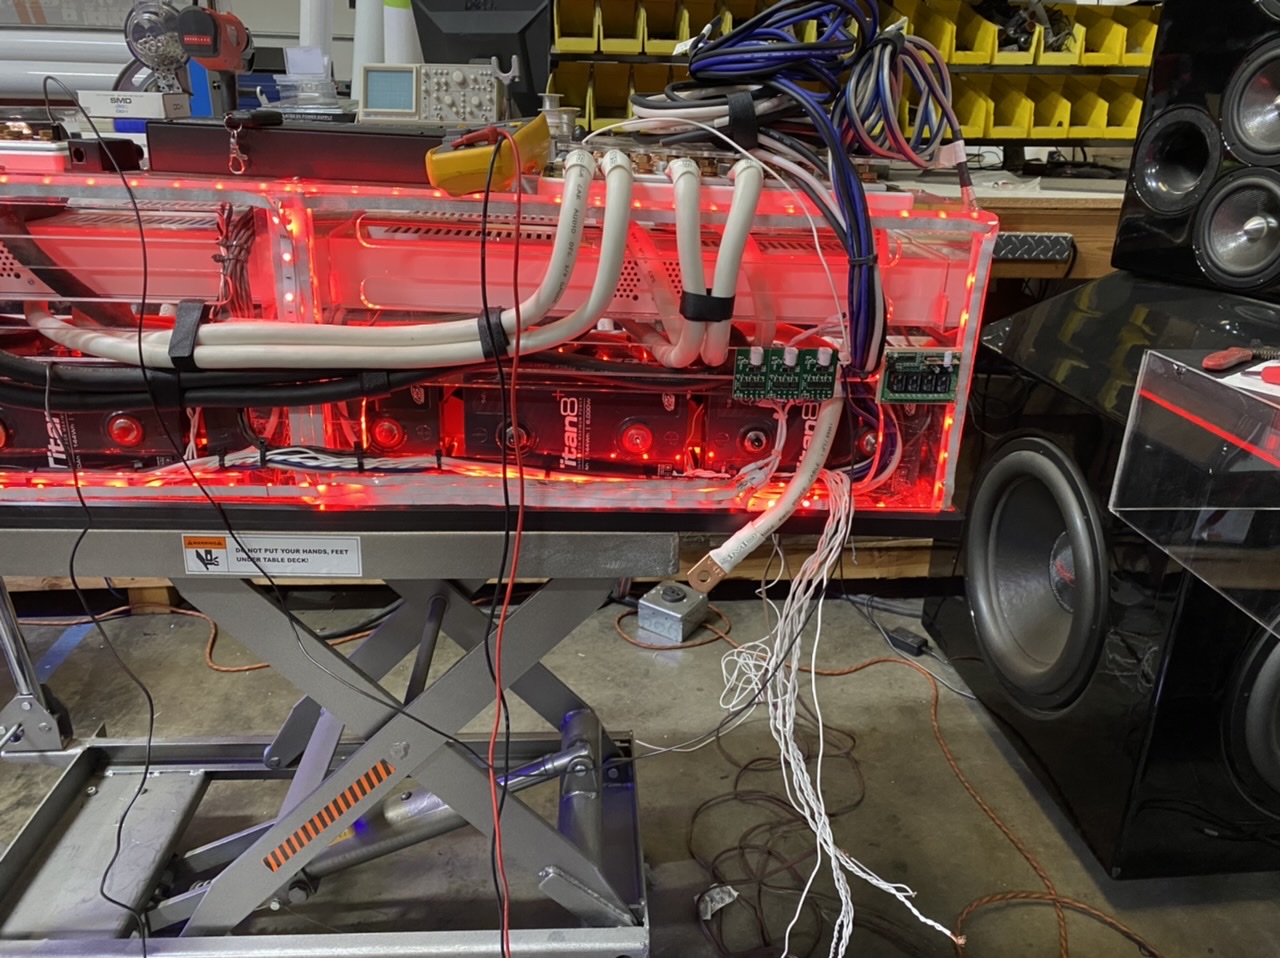
The rear facing subs shown in the above pictures will actually come down a little bit revealing even more of the baskets and suspensions of the upward facing subs. An all clear (and some mirrors) 1" acrylic box should make this thing look like a nuclear bomb of some sort once built. I totally plan on trimming it out and making it NOT look like a big box just sitting in the back. First thing is first, build it, THEN make it pretty.
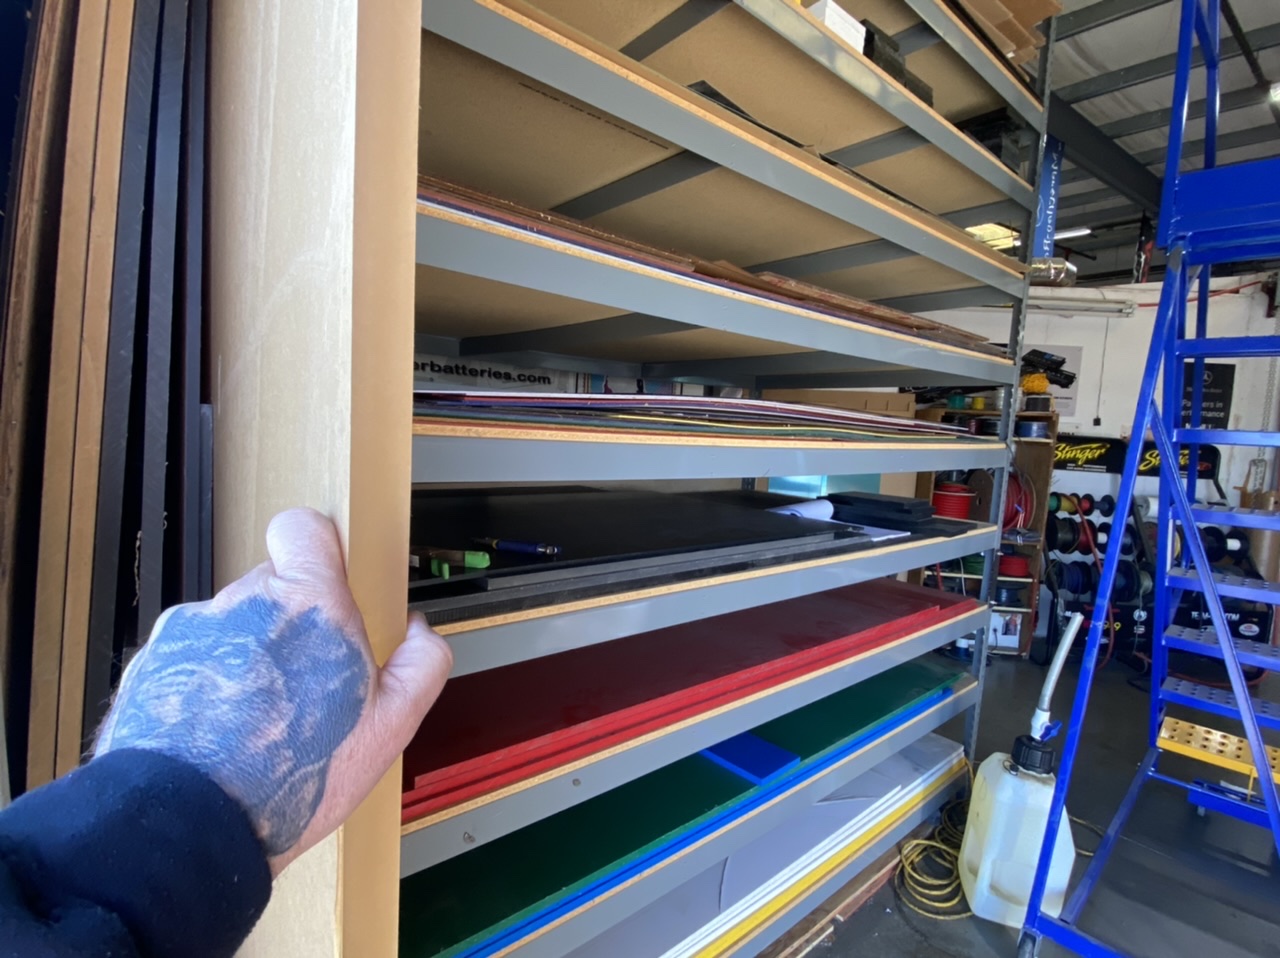
Some 1" Acrylic hiding behind this shelf ready to go
this stuff is no joke.
As you can see, it seems tall...but it isn't really too bad. Just barely peeps at glass/hatch level. The clear acrylic will show those subs like no other and should be a site to see if i can pull this off.
-
1
-
-
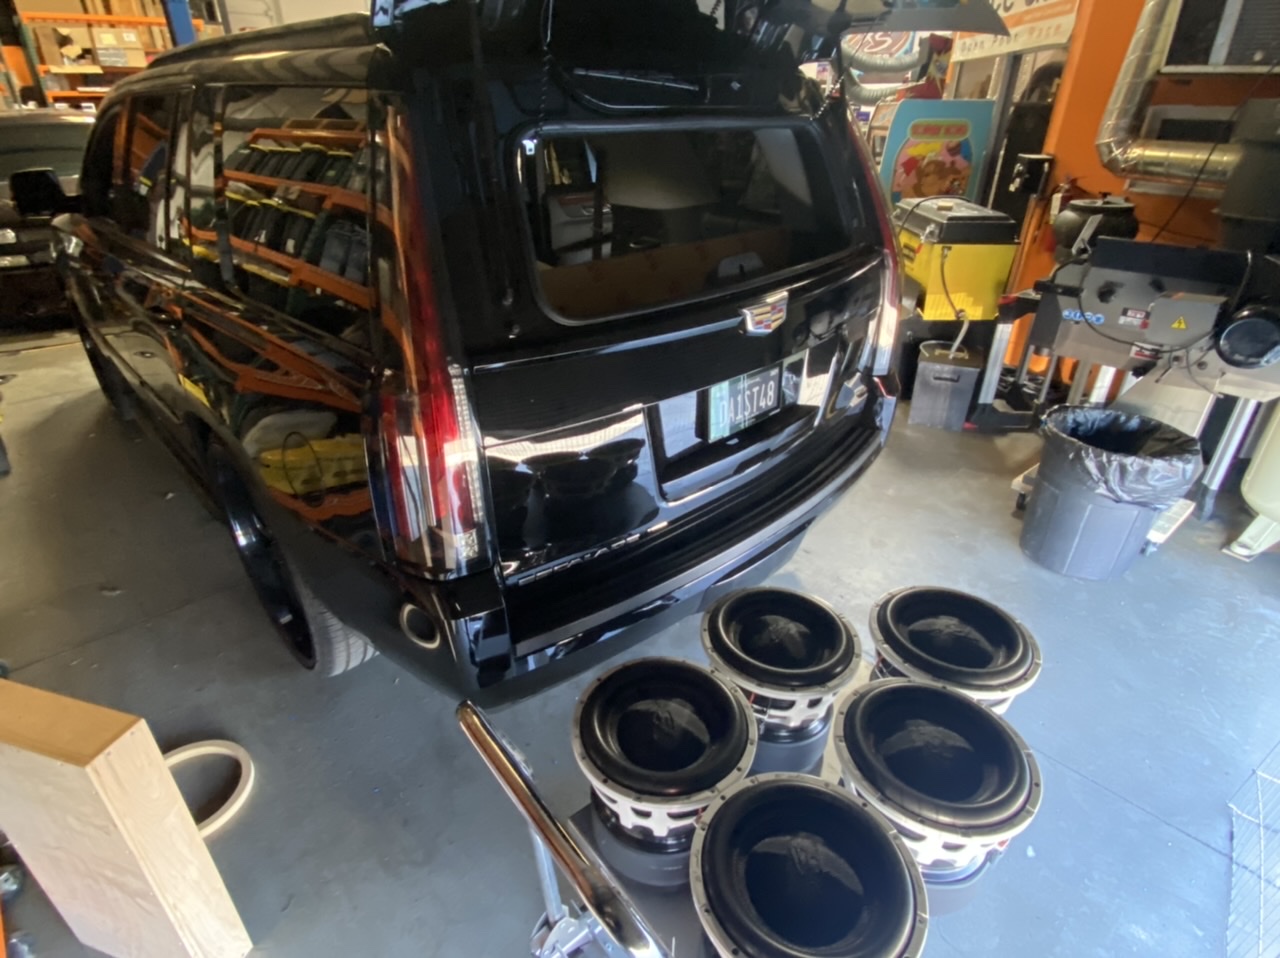
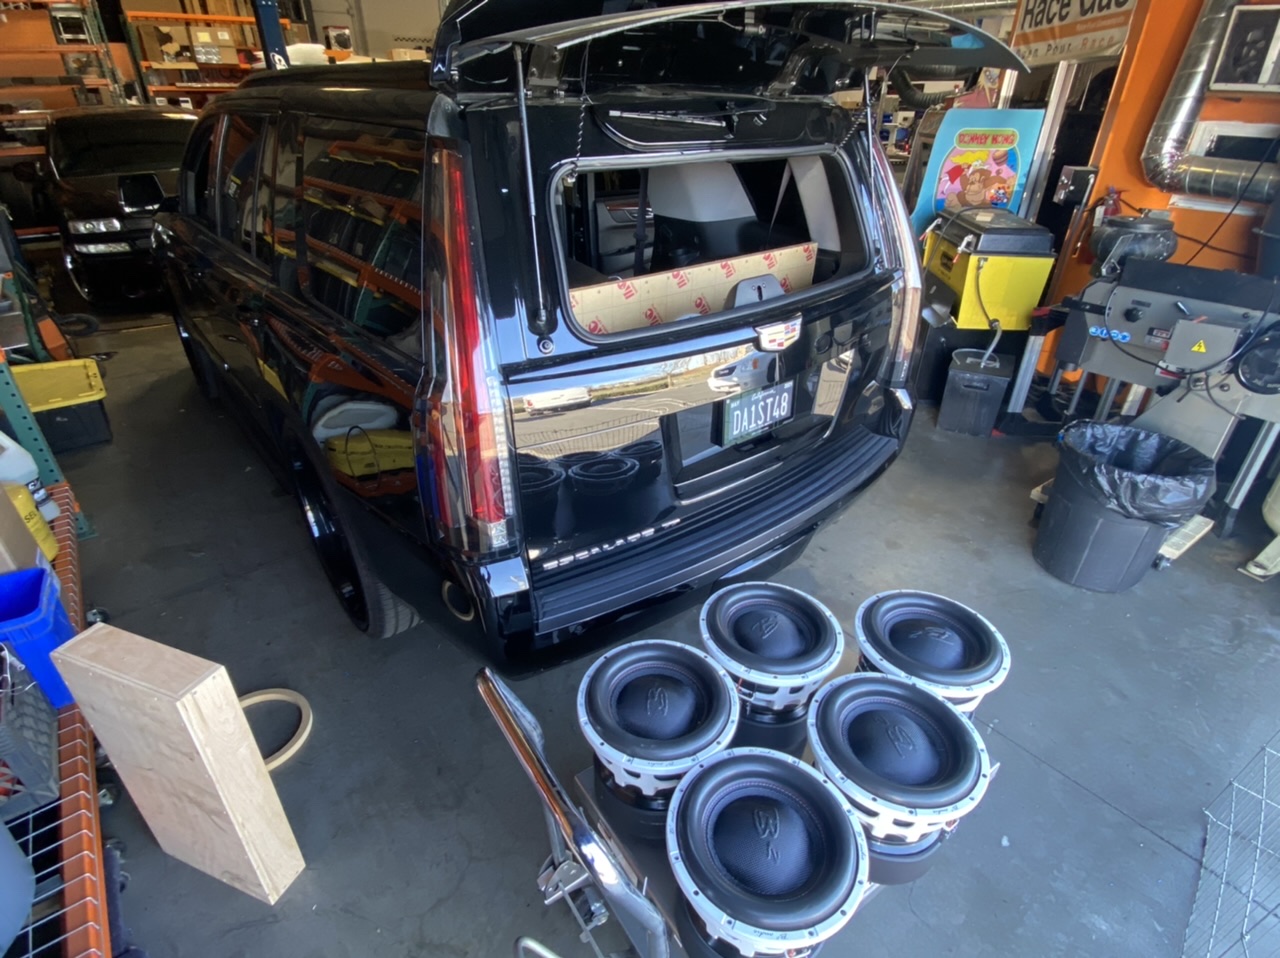
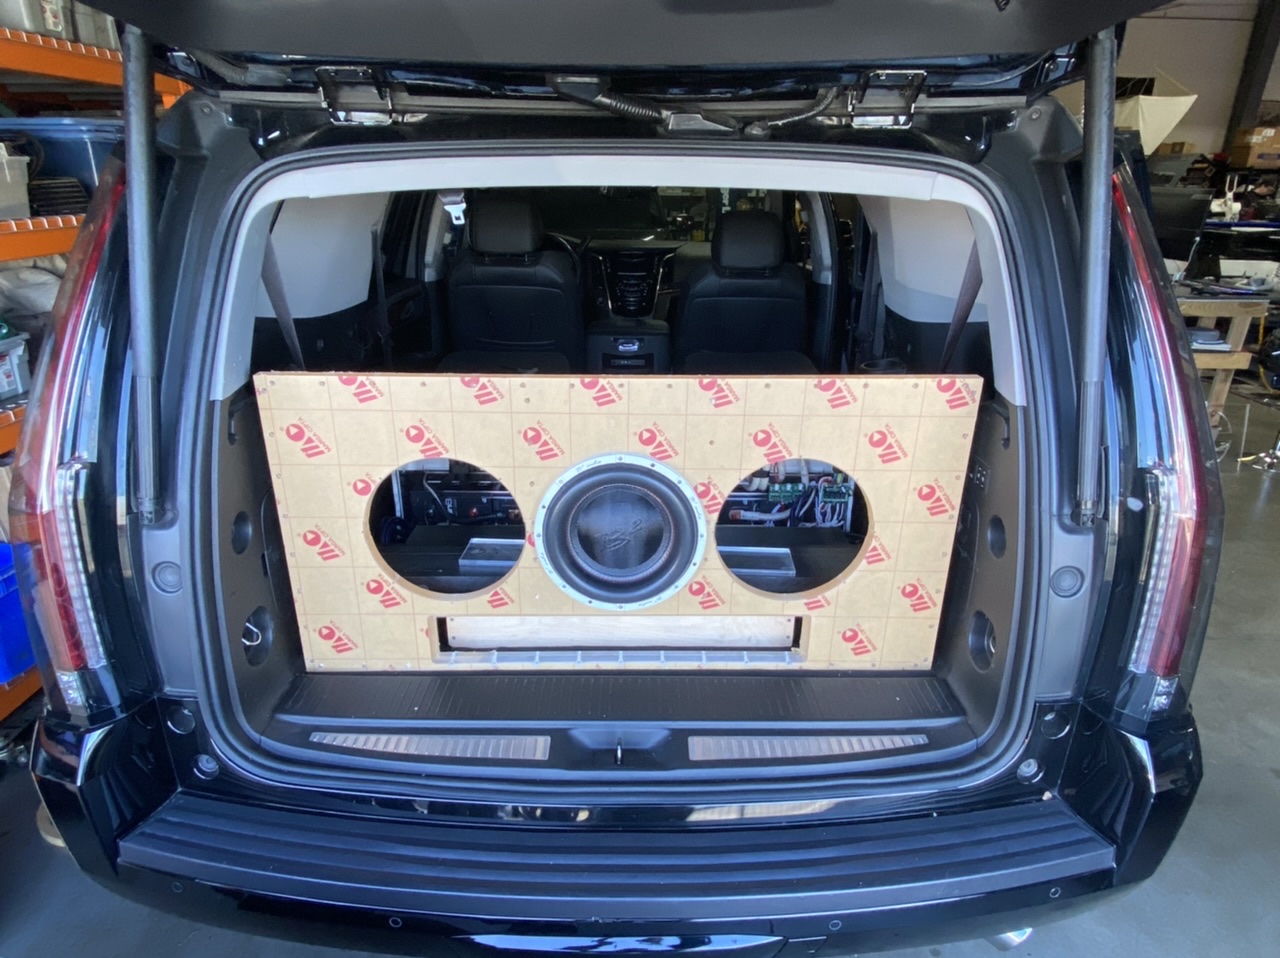
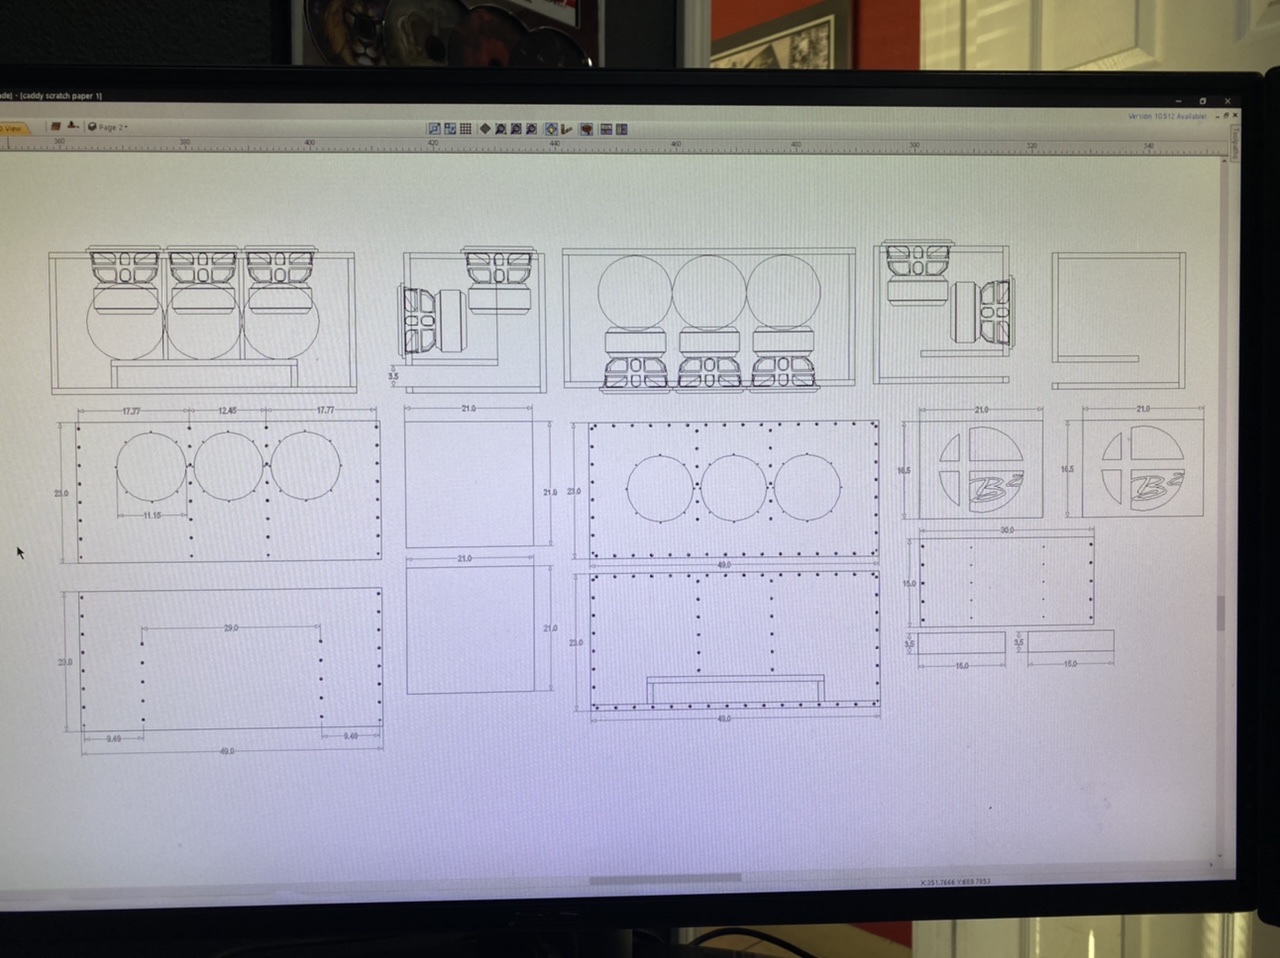
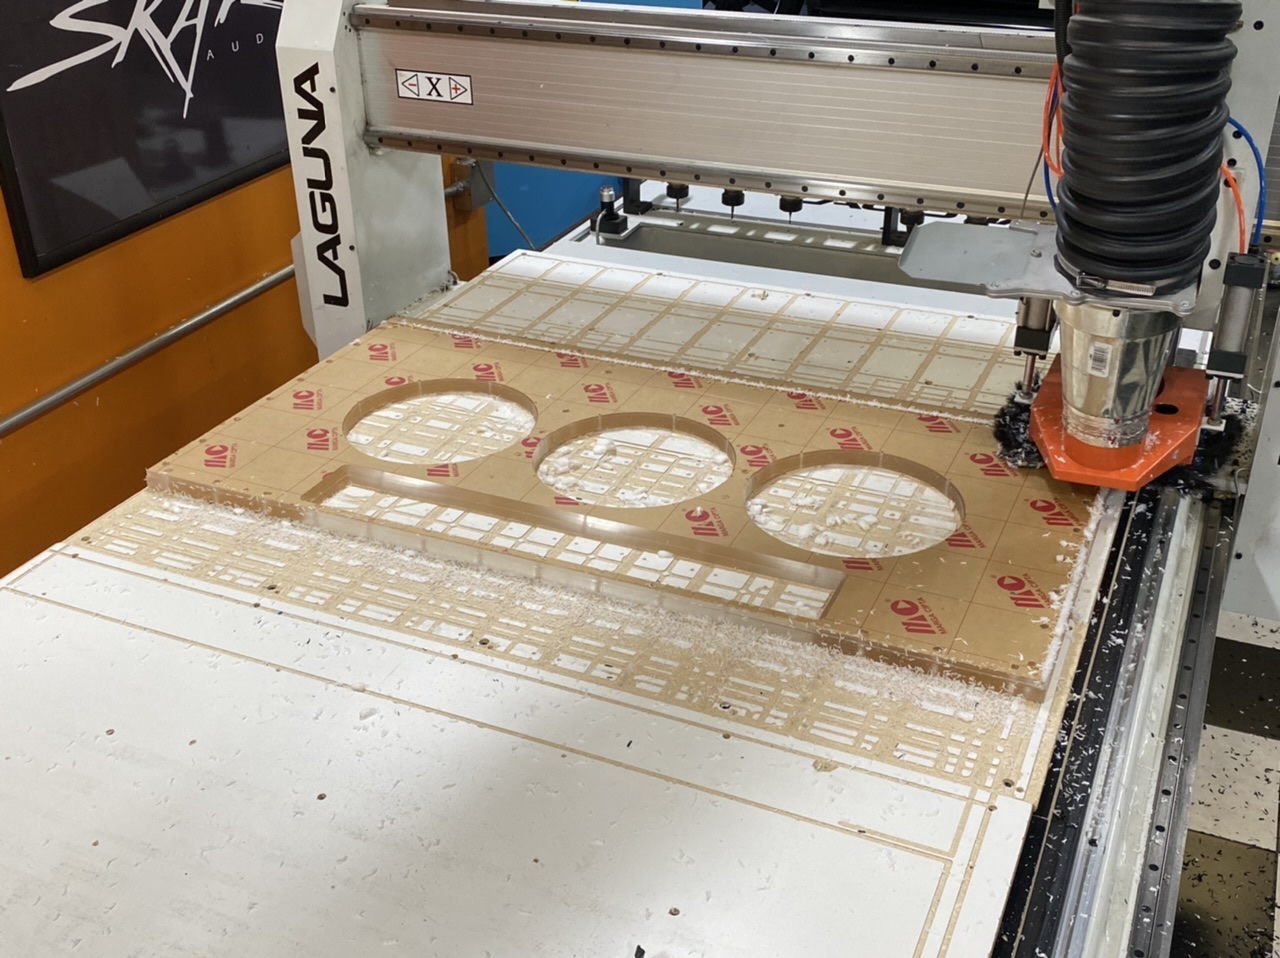
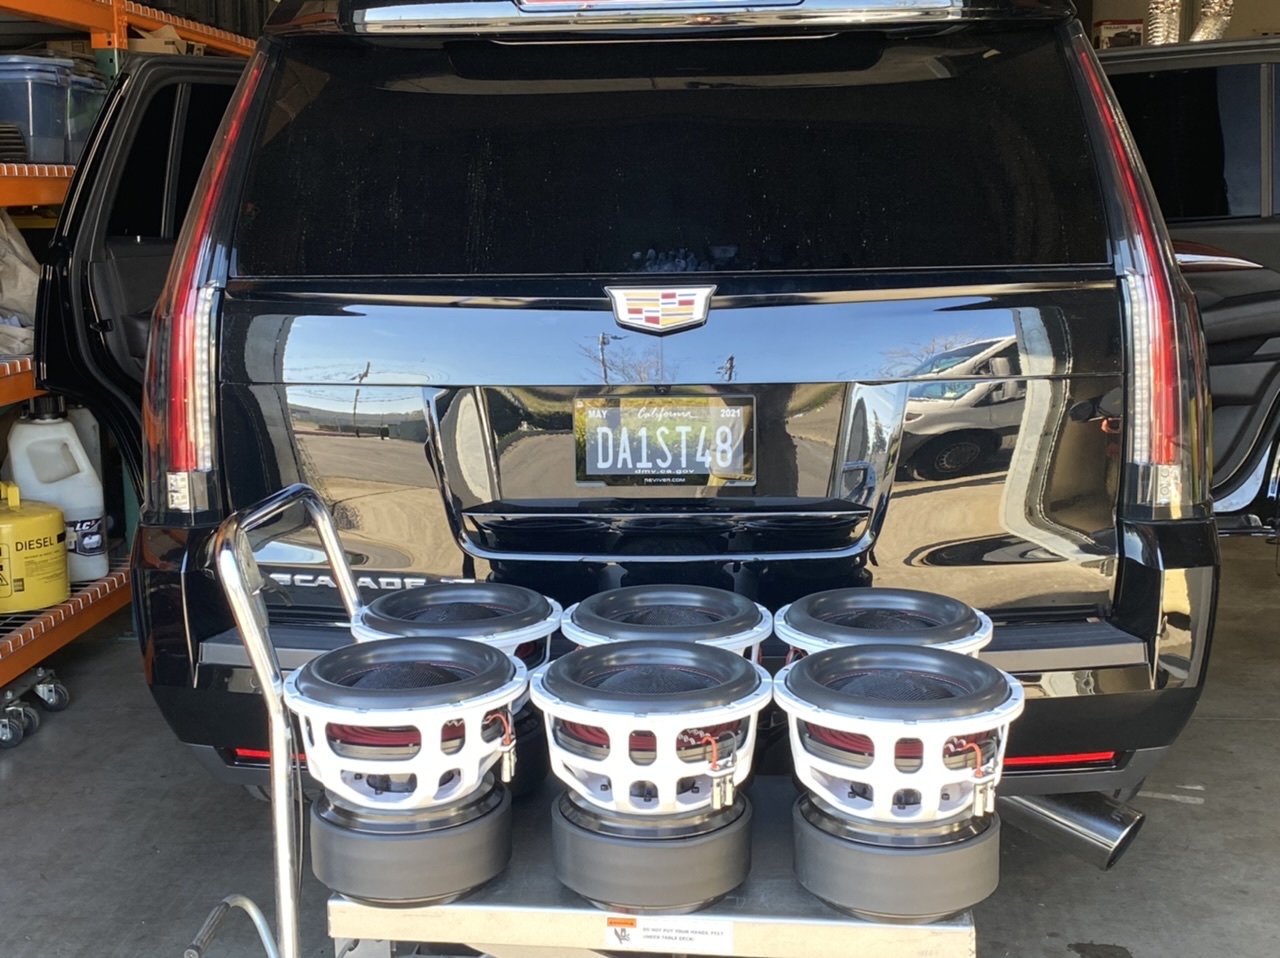
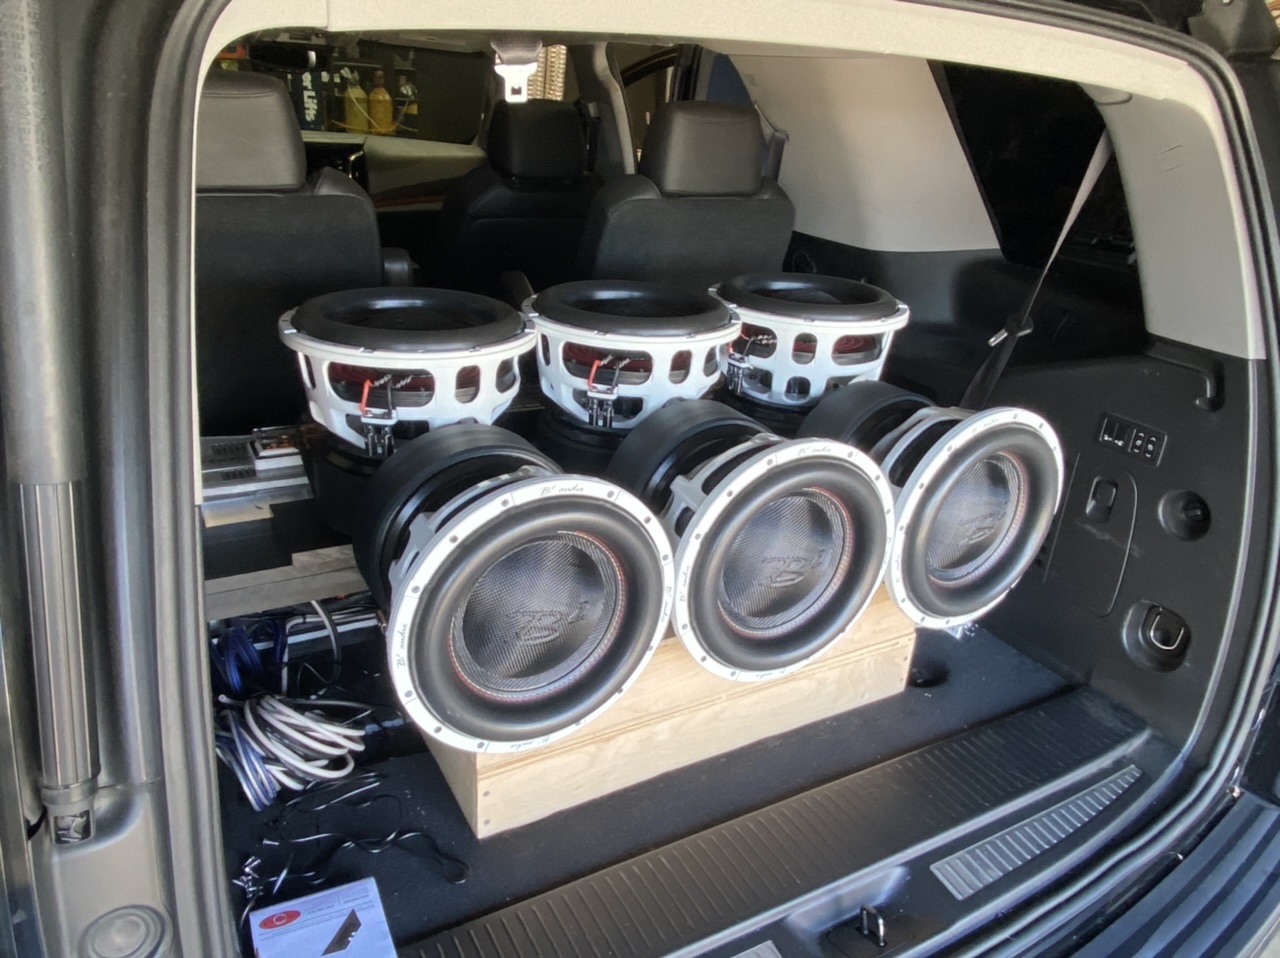
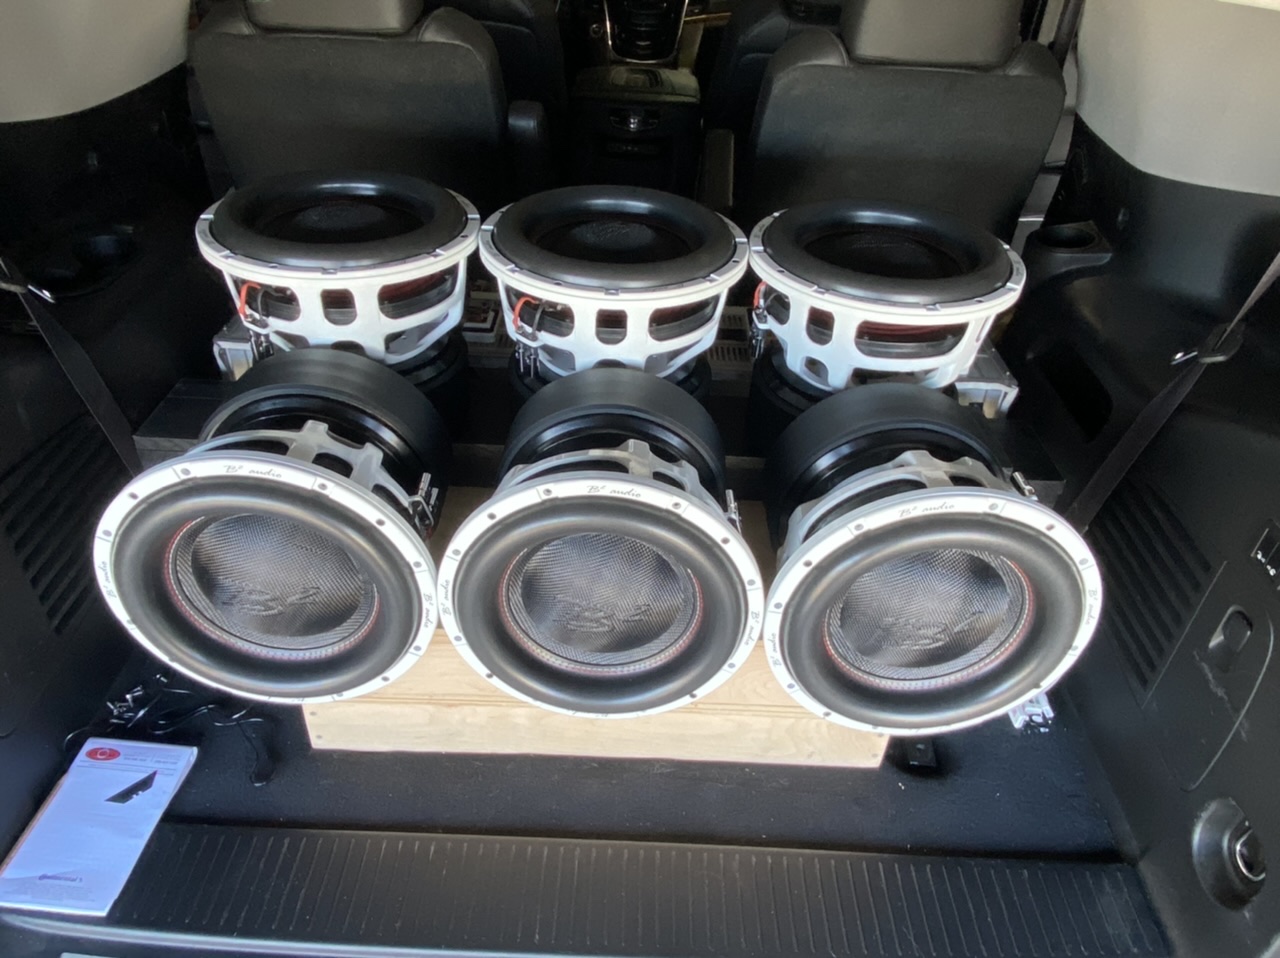
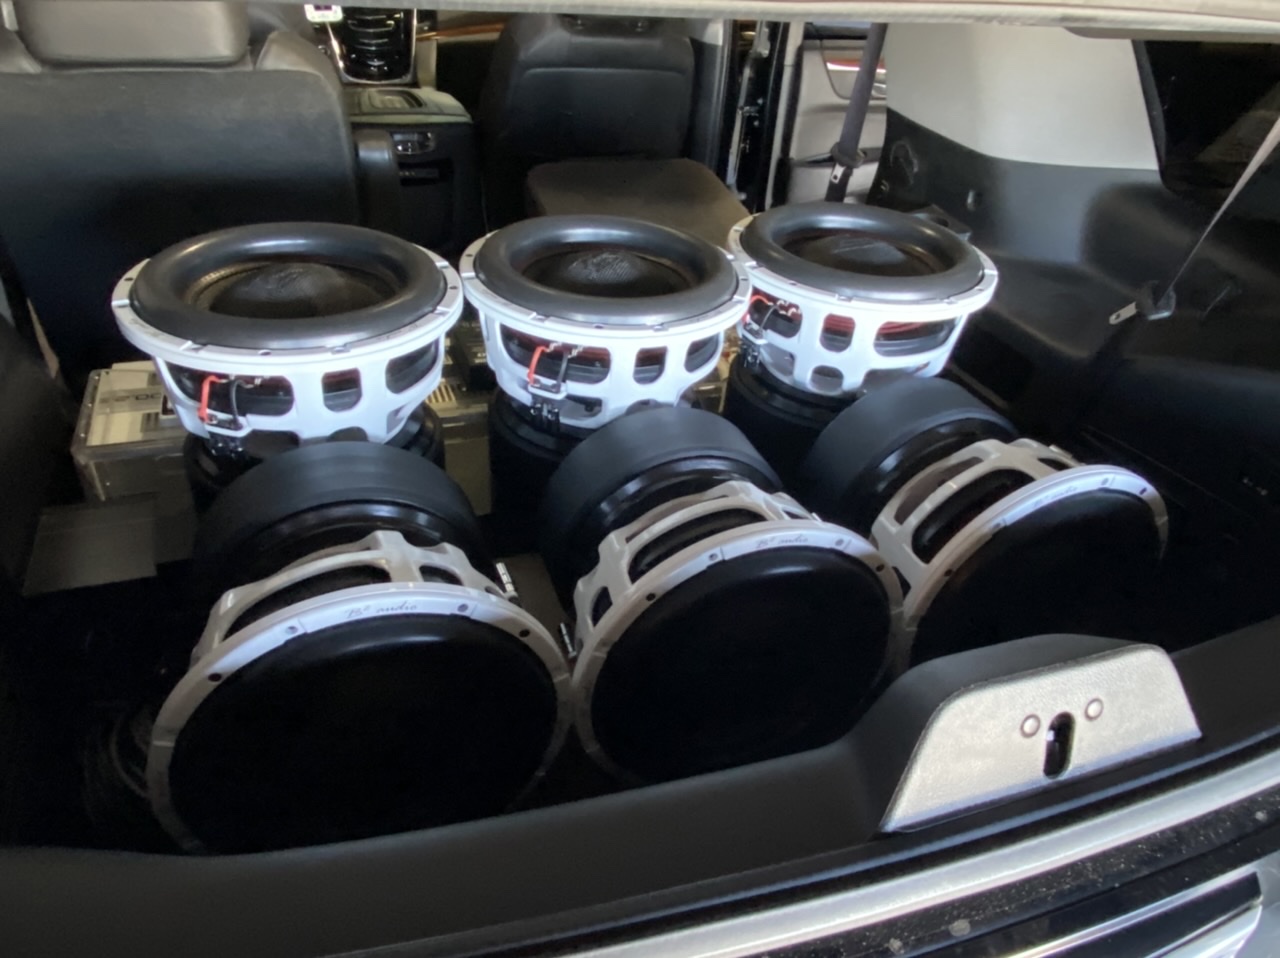
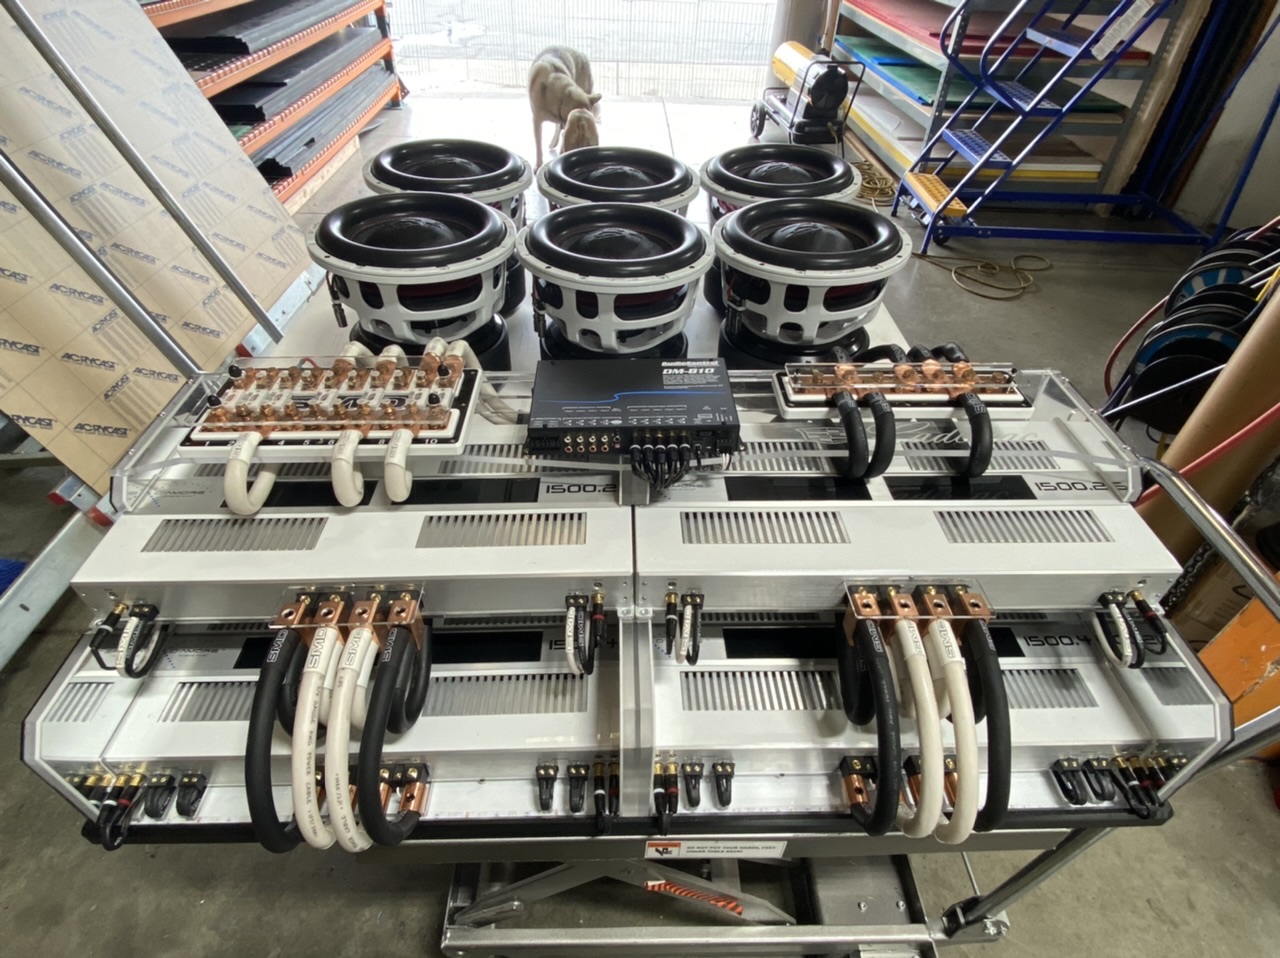
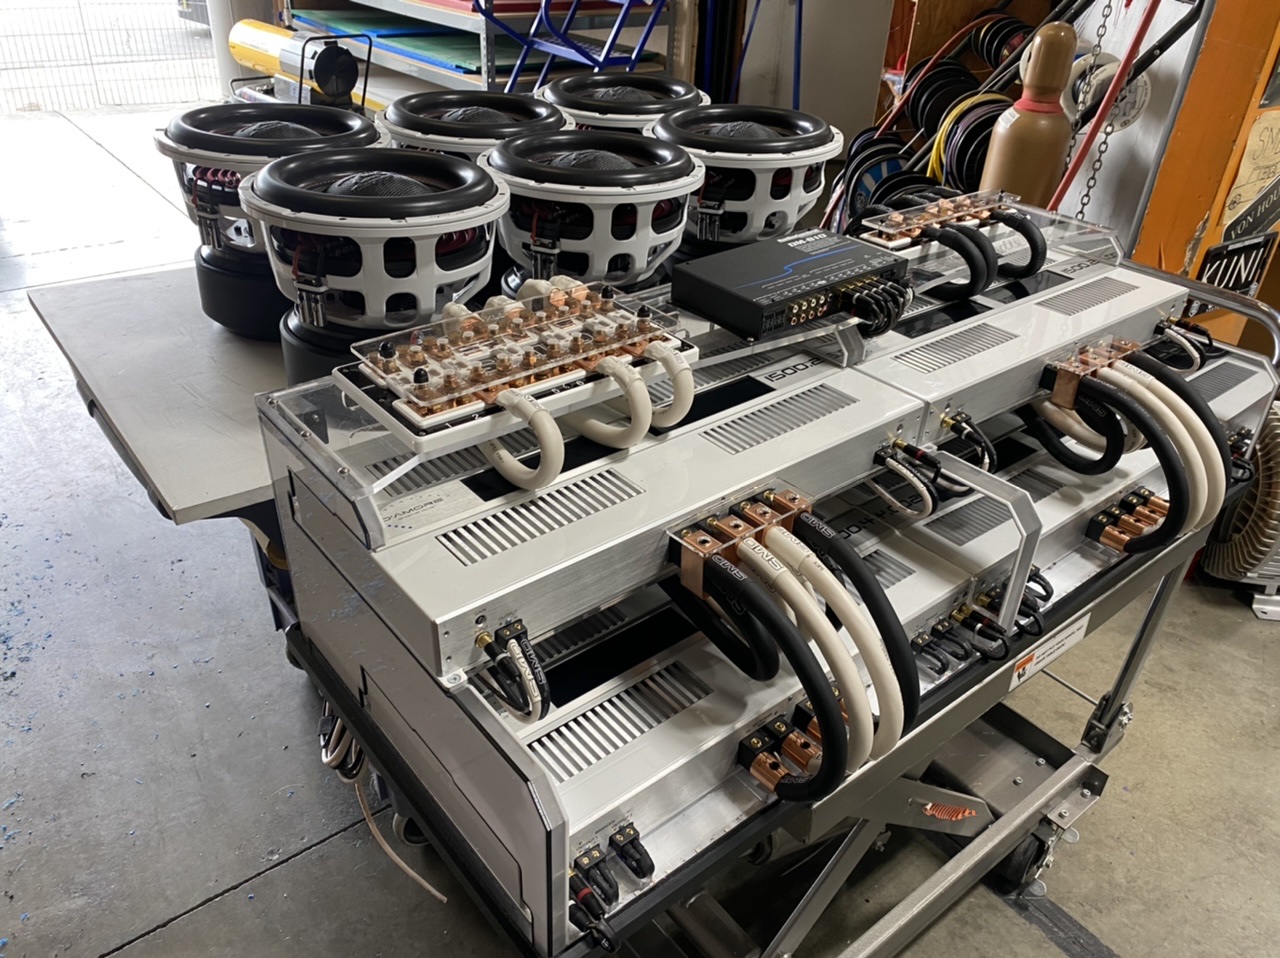
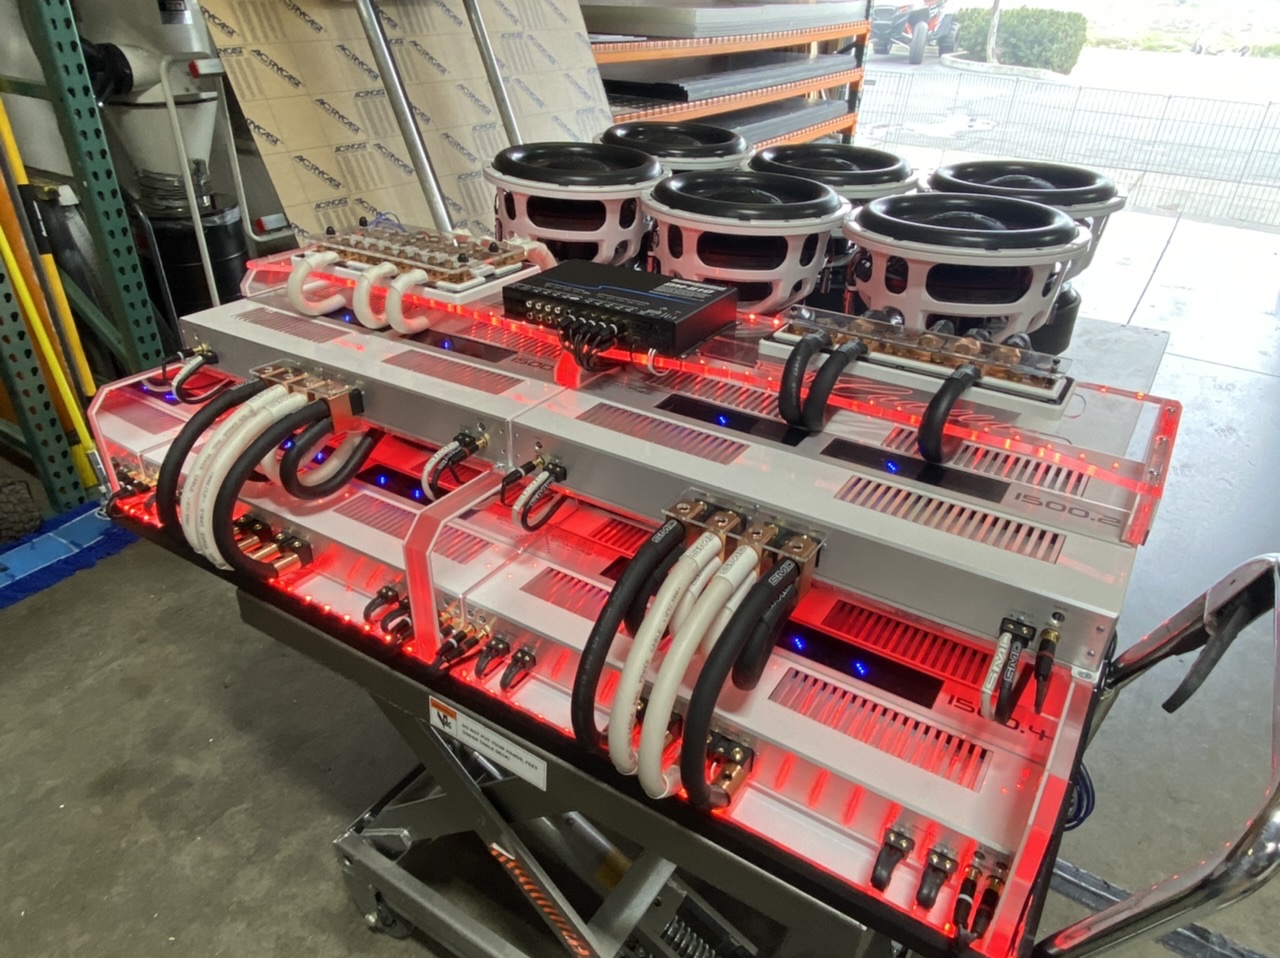
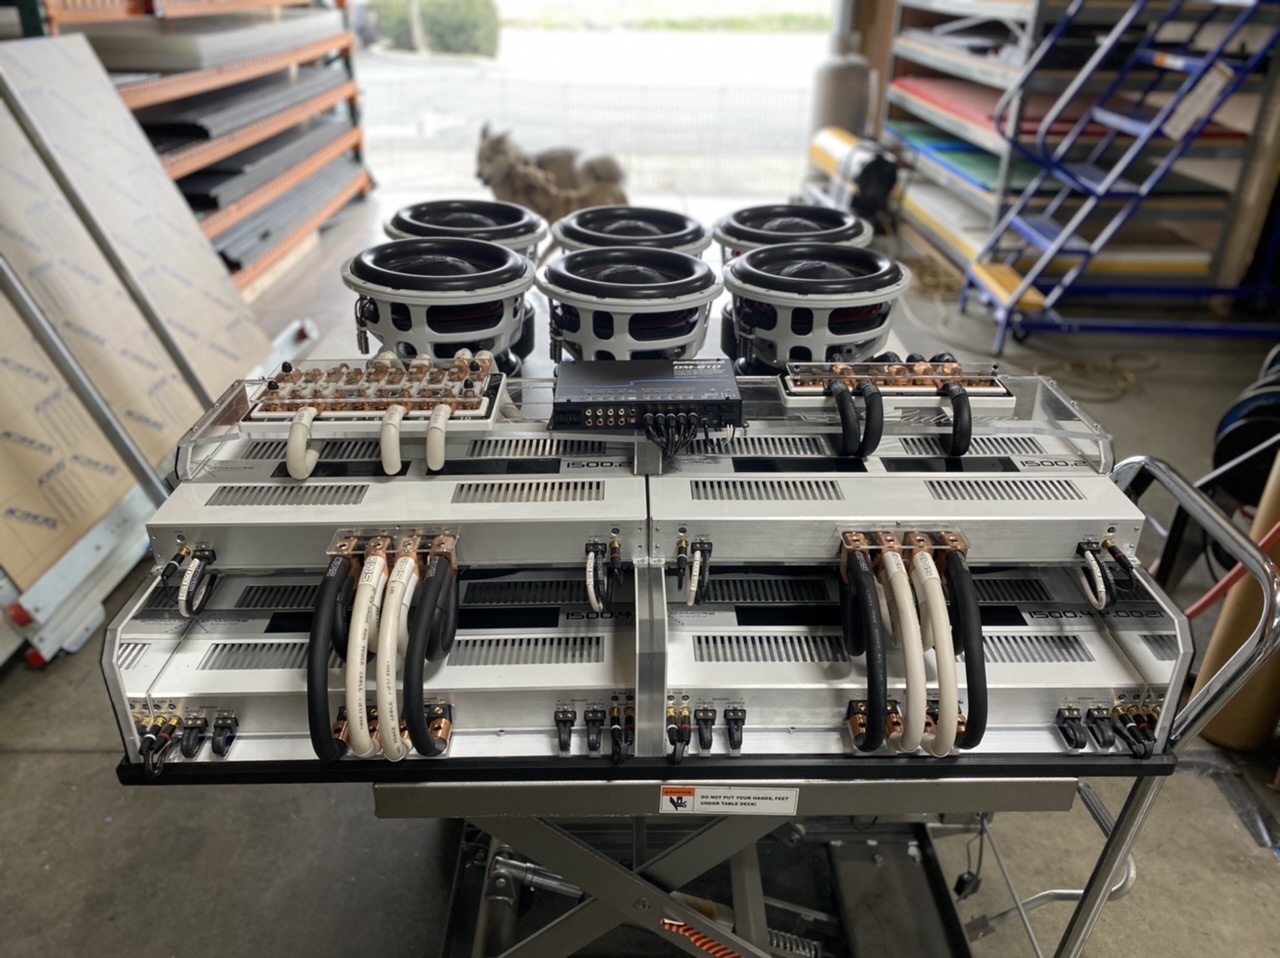
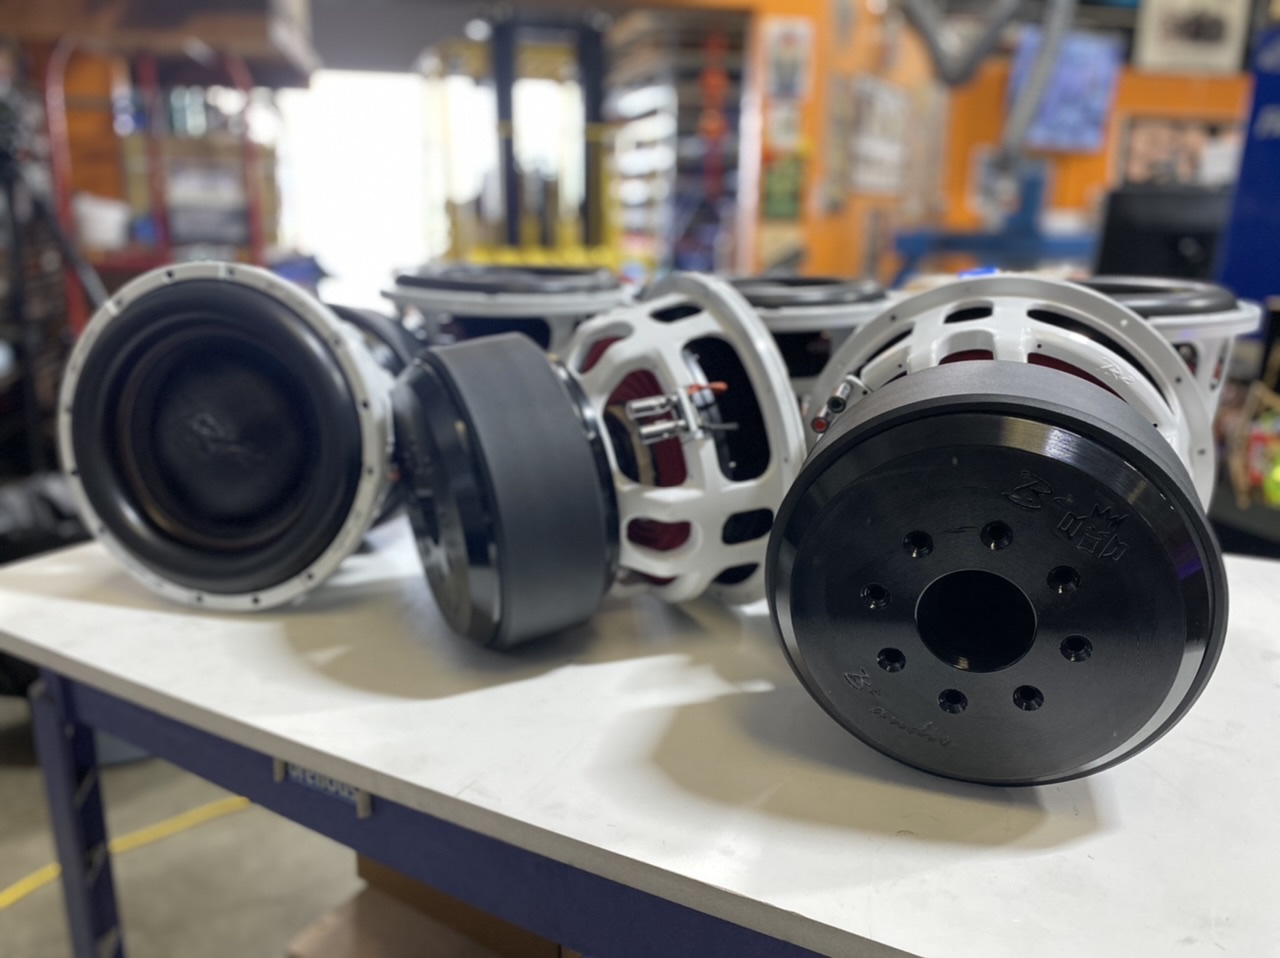
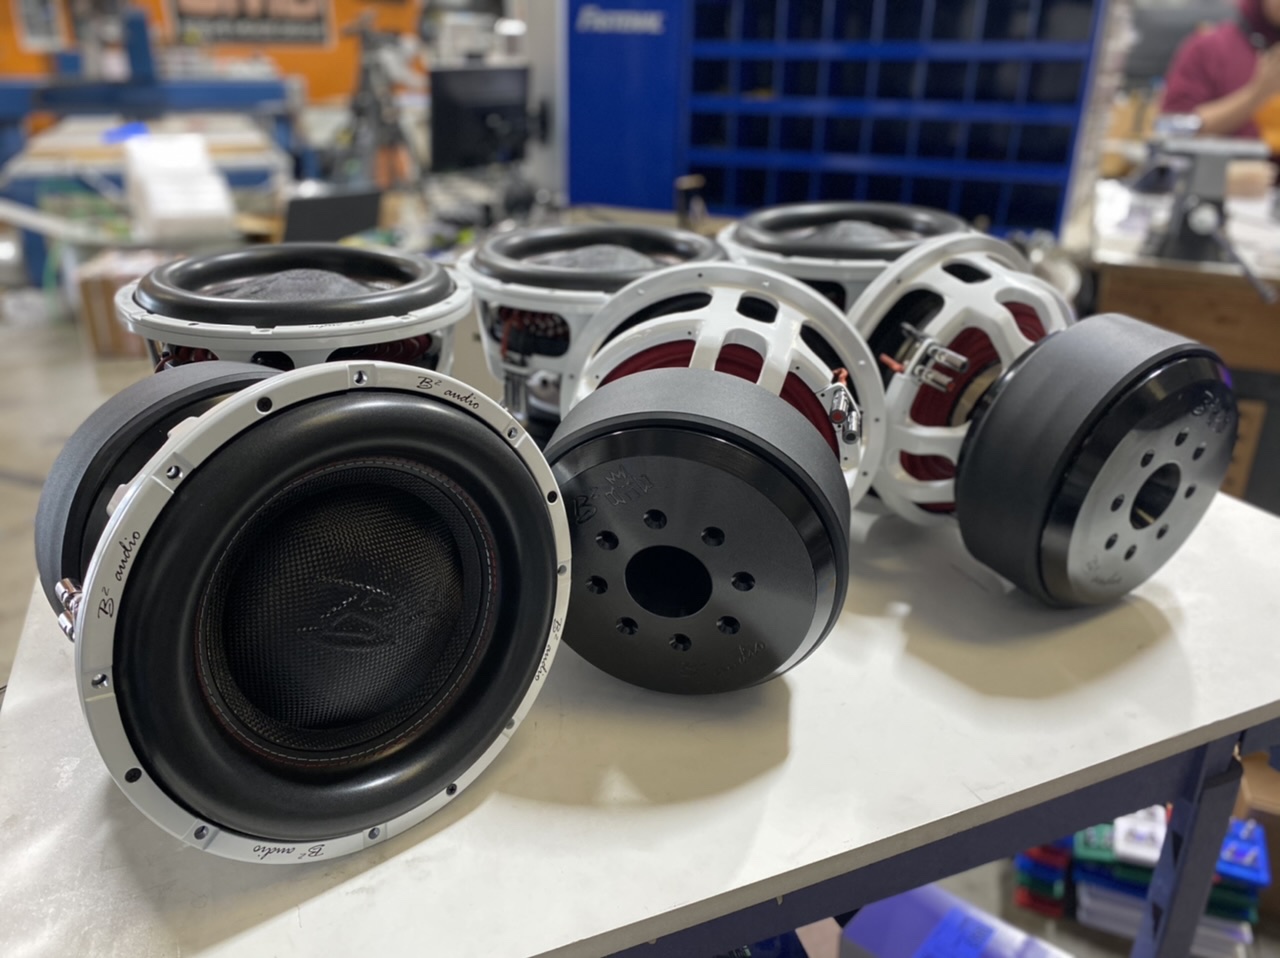
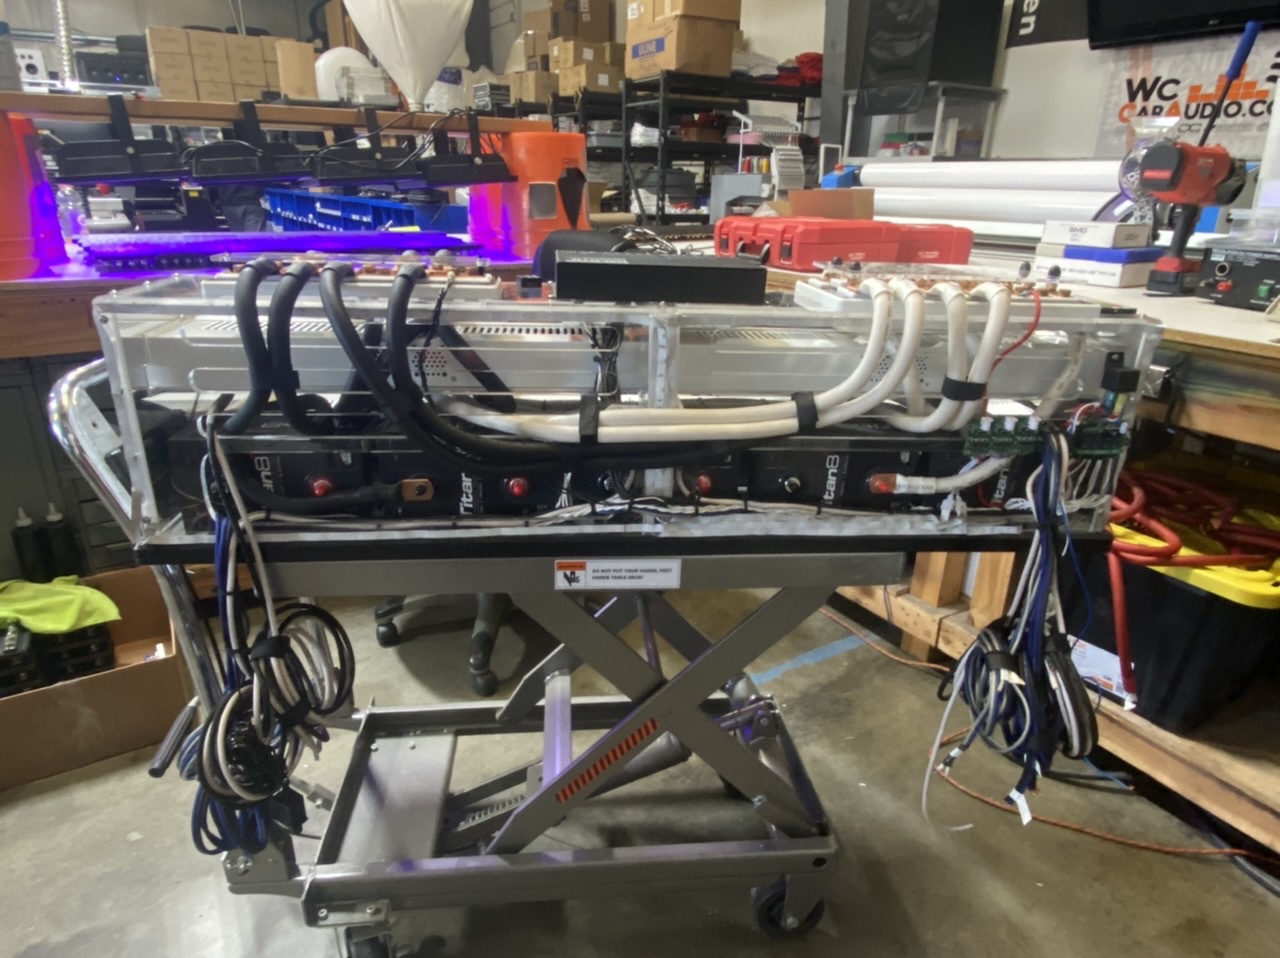
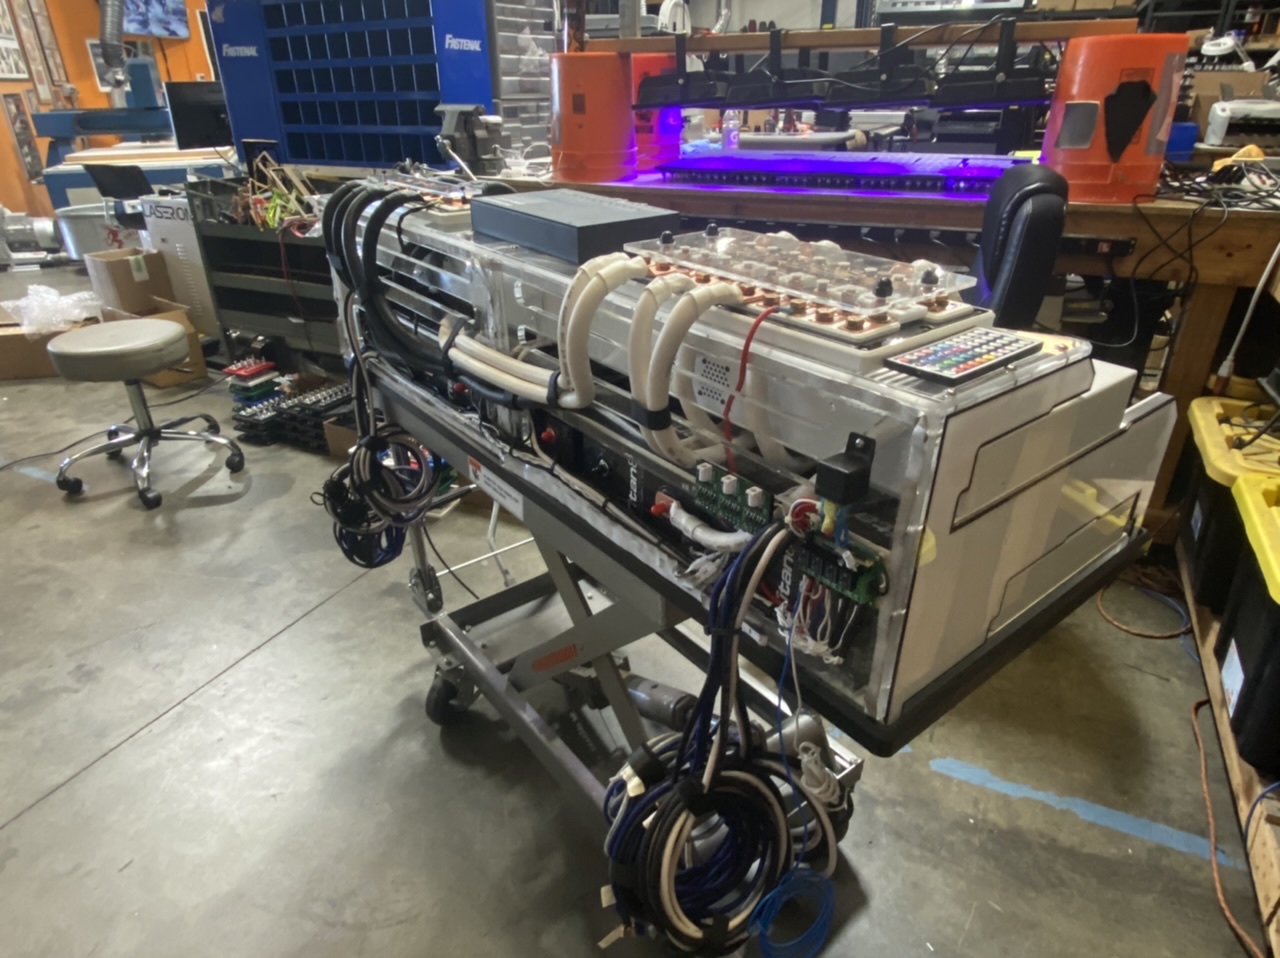
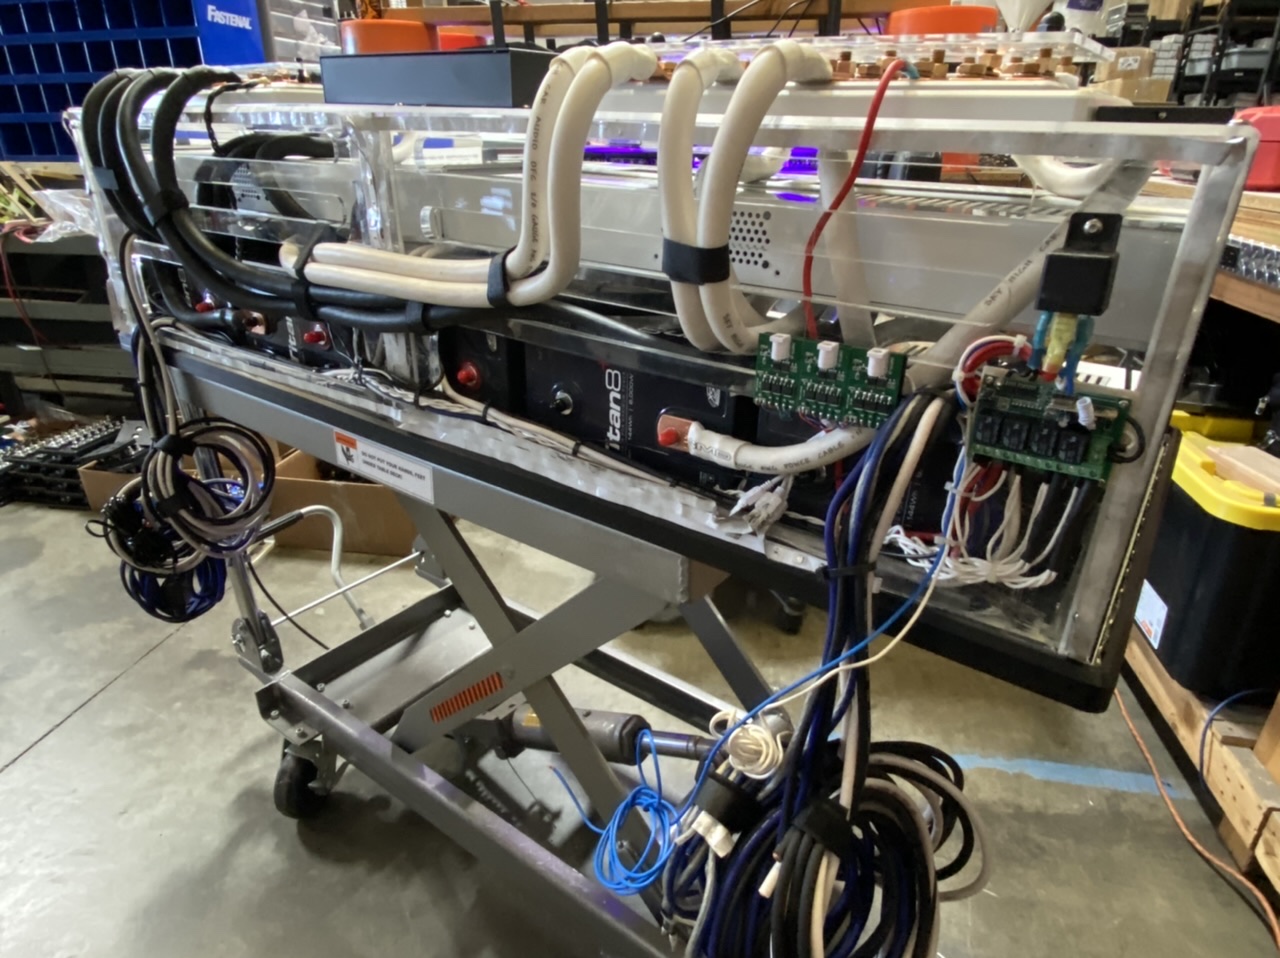
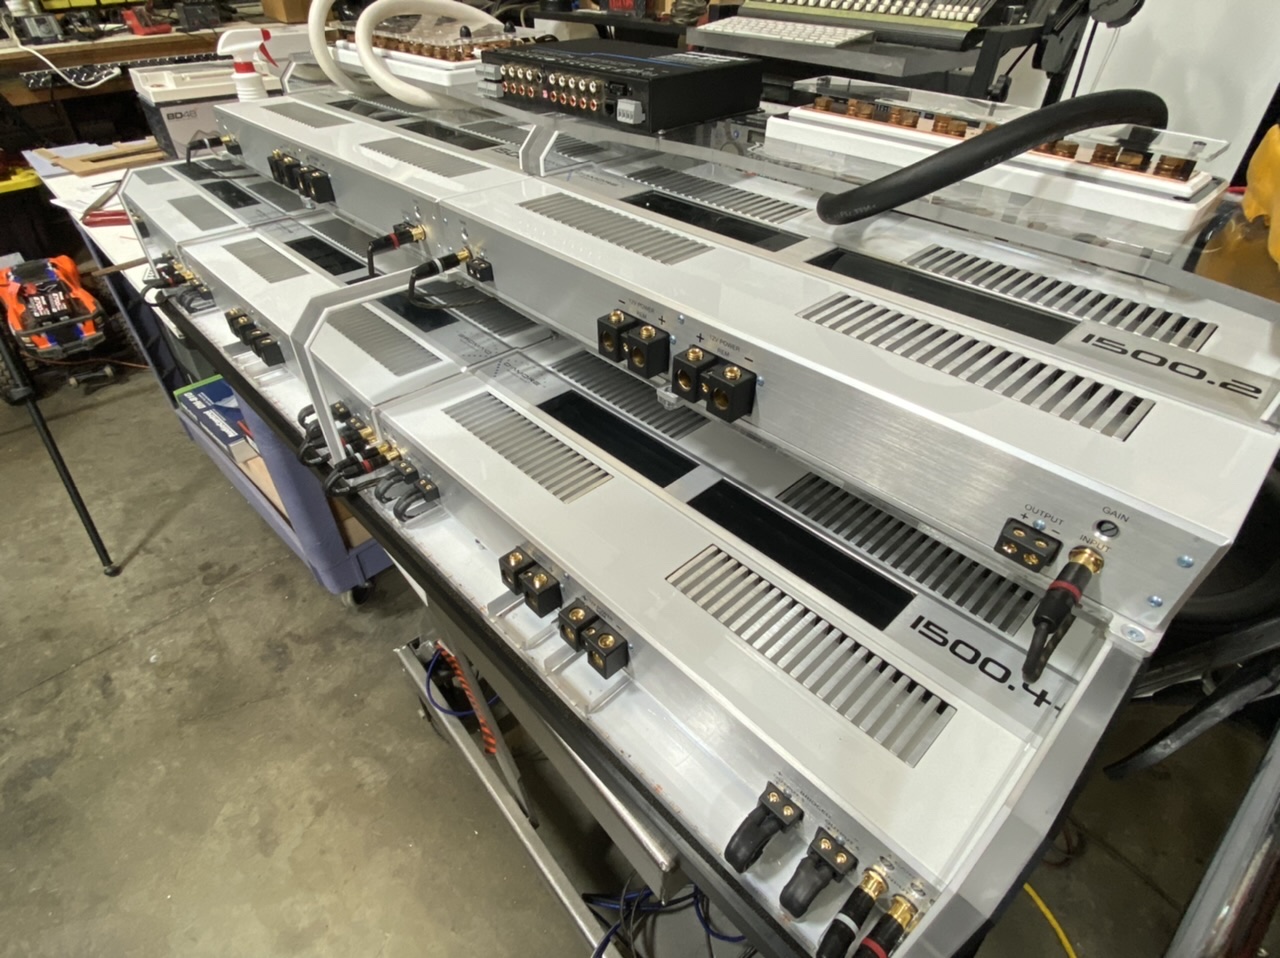
First i started out wanting 2 15's...then i wanted 4. Then i was short on space...actual surface area NOT ft3. Plenty of ft3 just couldn't get the configuration the way i wanted it. So i decided on 6 12's instead. After building the amp rack and chewing up a little more space than i anticipated, this has been a challenge to fit as well. Below are some photo's of what i THINK i am going to try. I REALLY needed the extra 2.5" or so that this provided me so i could port backwards the way i want to.
Long story short, if i hate the way it sounds, which i don't think i will...but if i do. I will say F it and just do 2 15's and call it done. For sure 2 15" subs is completely ideal. I just wanted to do something badass and fun.
-
1
-
-
52 minutes ago, Frankiebonez said:
ooooooooooooo weeeee! Those 2 pics are HOT! Those 12s look so good. If shit was mine i'd do half inverted. The baskets match so good but so do the cones for the build scheme. Its like either way you cant go wrong so why not do both LOL! Big dawg shit @meade916
Can't do inverted subs in the caddy. Trying to keep it classy. Ill be able to see them through some acrylic i'm sure though. Thanks man!!
")
-
2
-
-
-
-
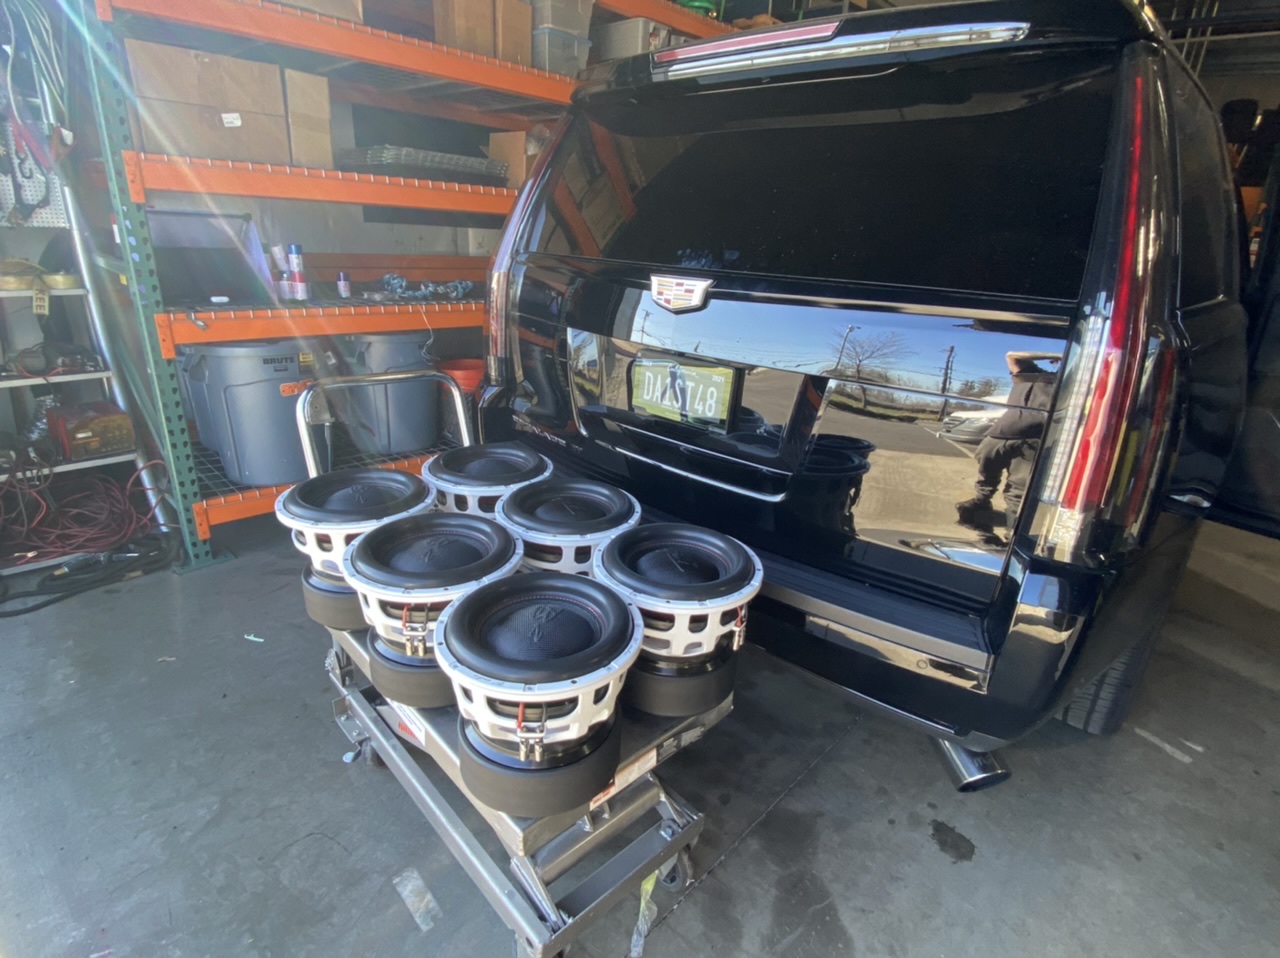
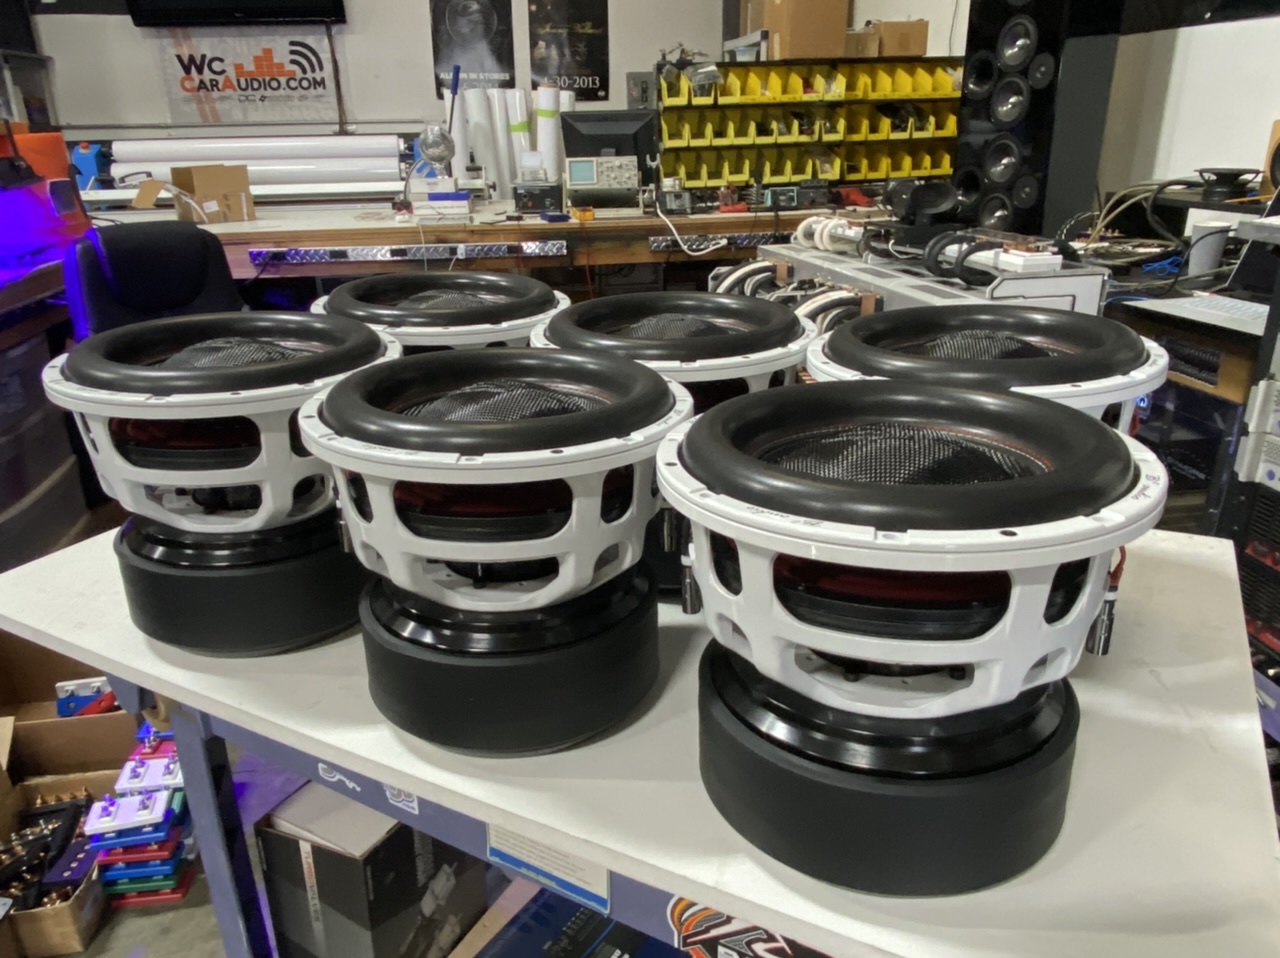
six b2 audio rampage 12’s ready to be unboxed!
-
1
-
-
-
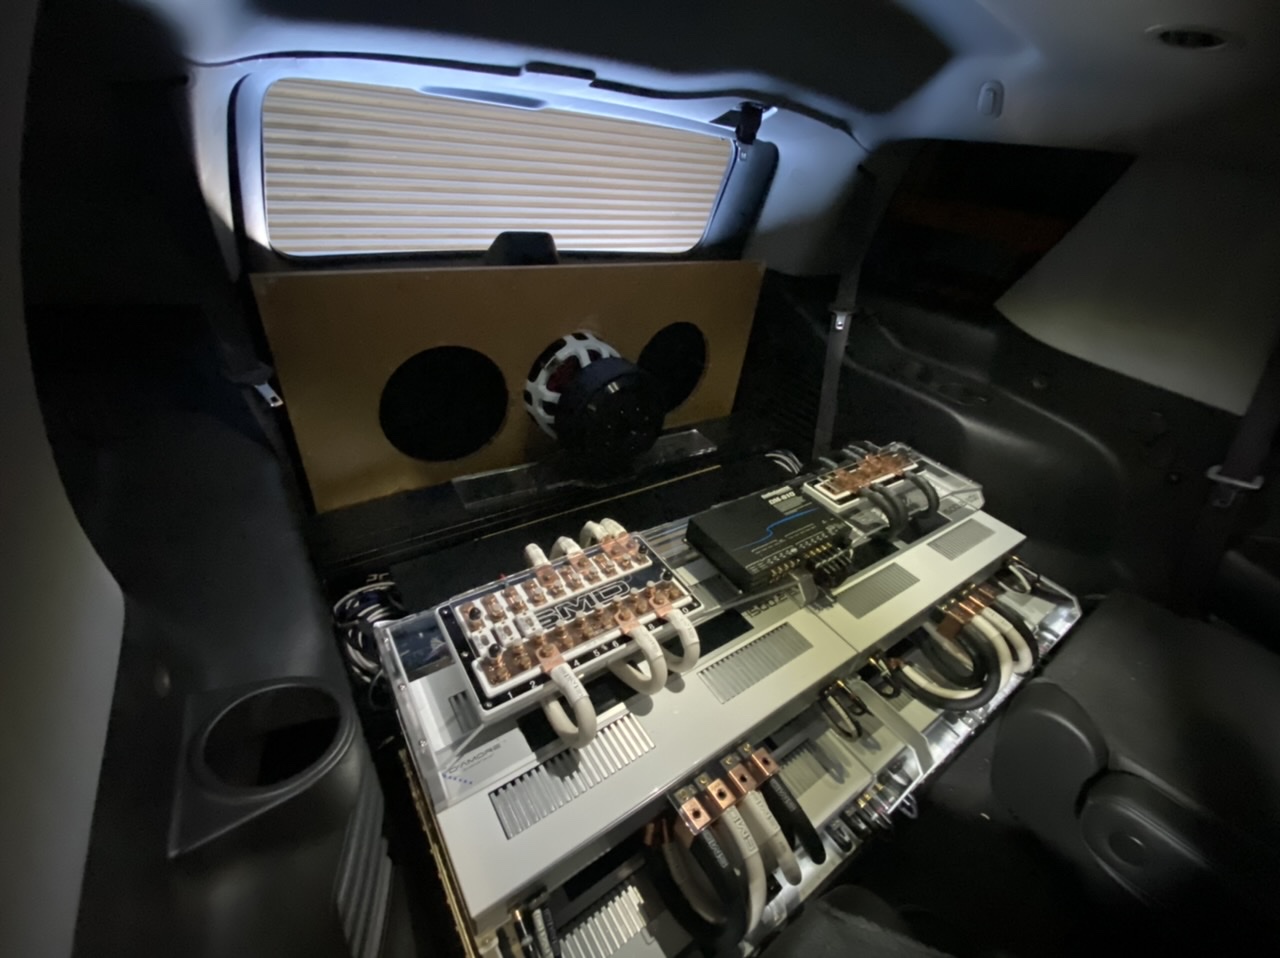
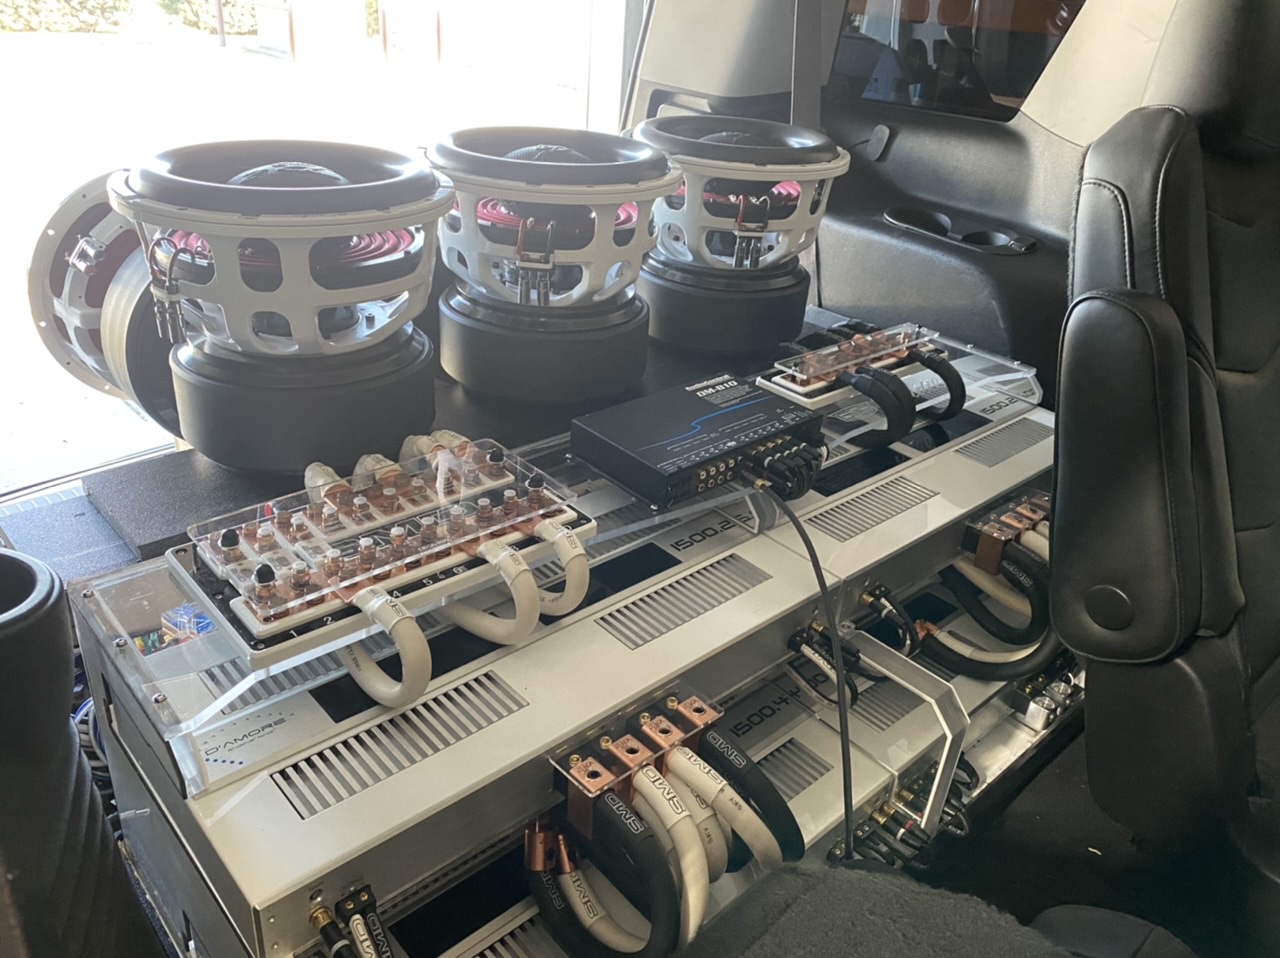
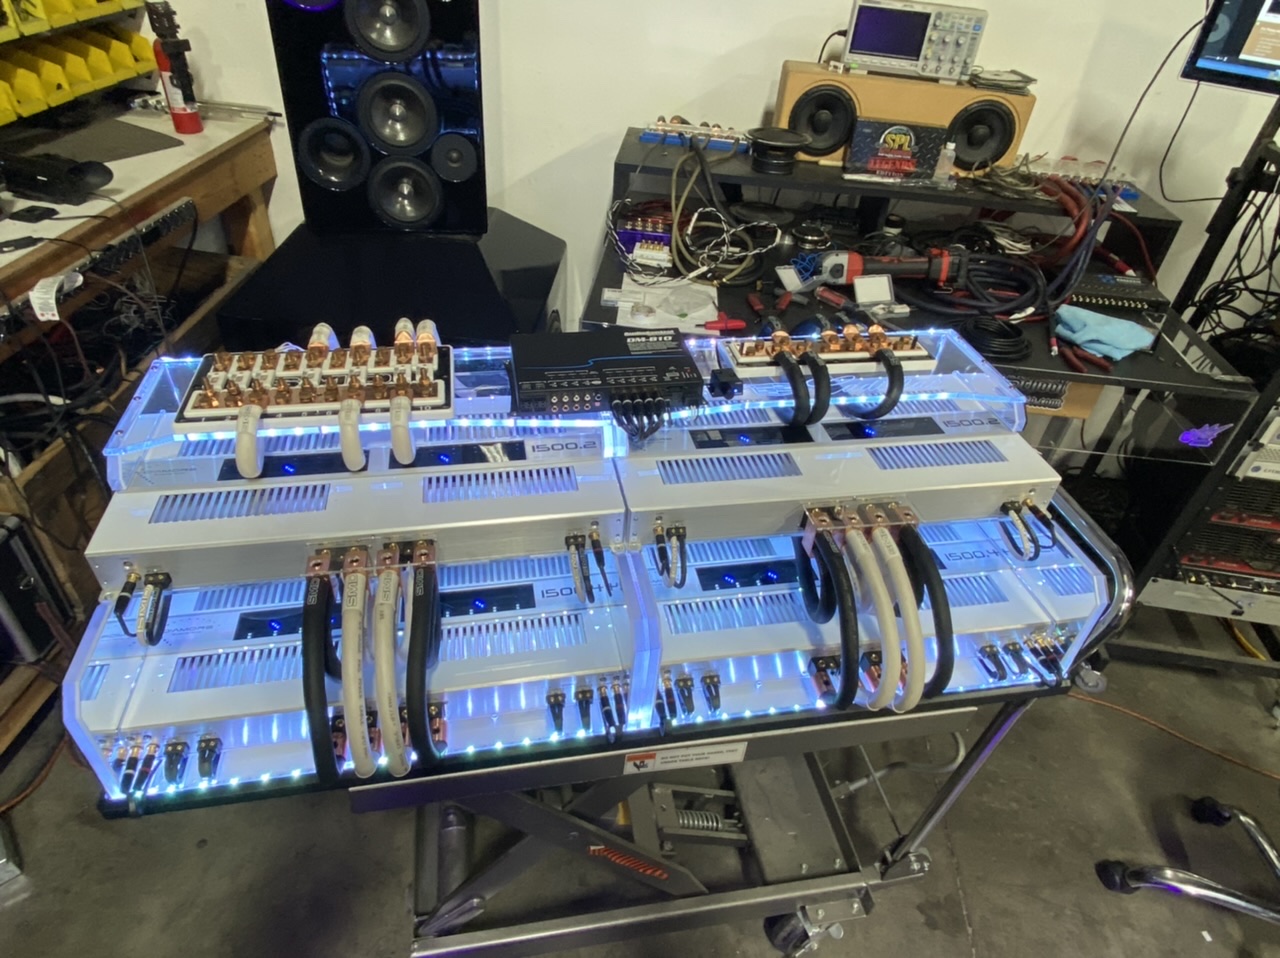
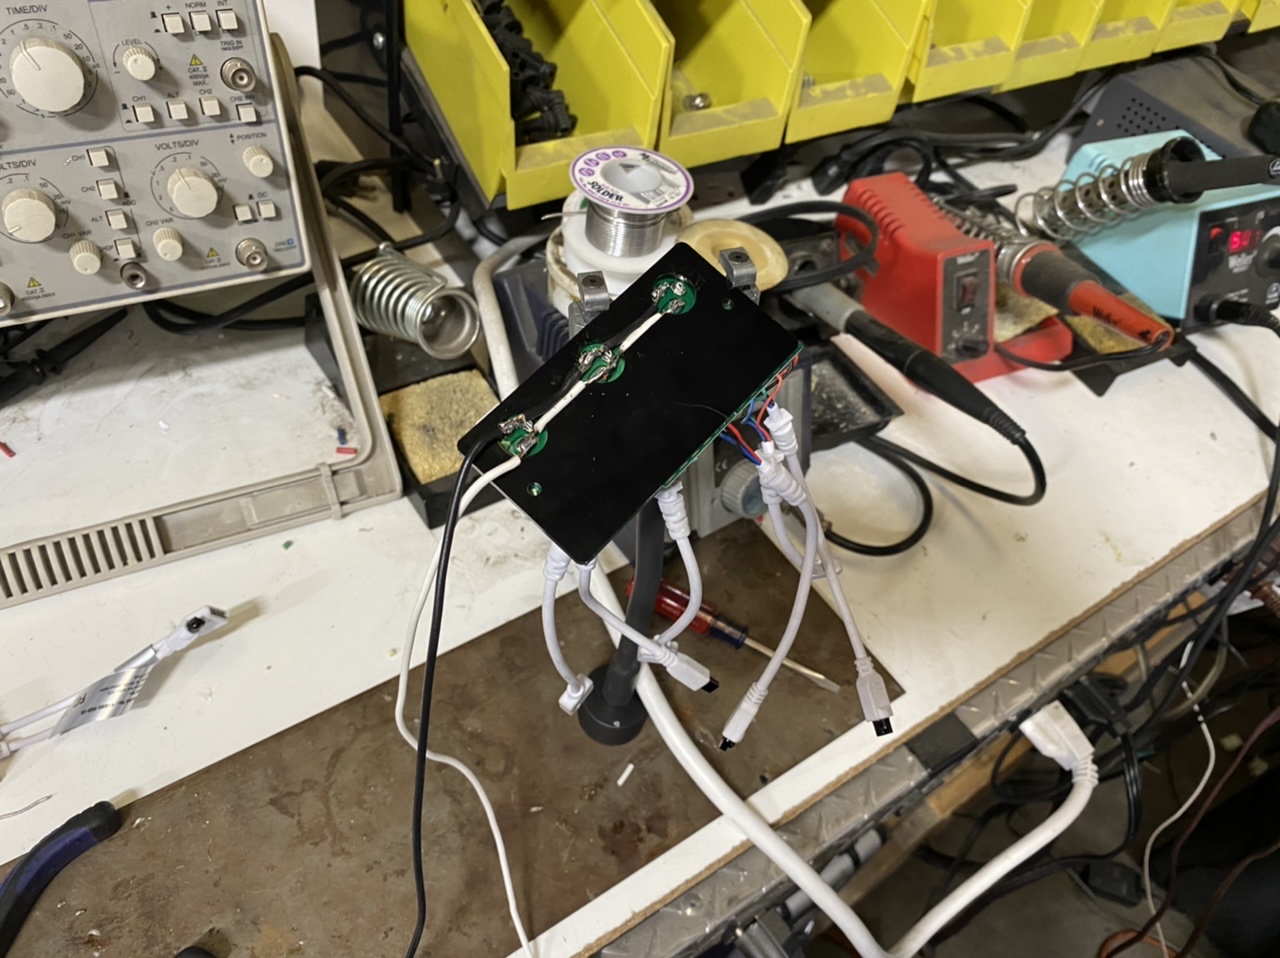
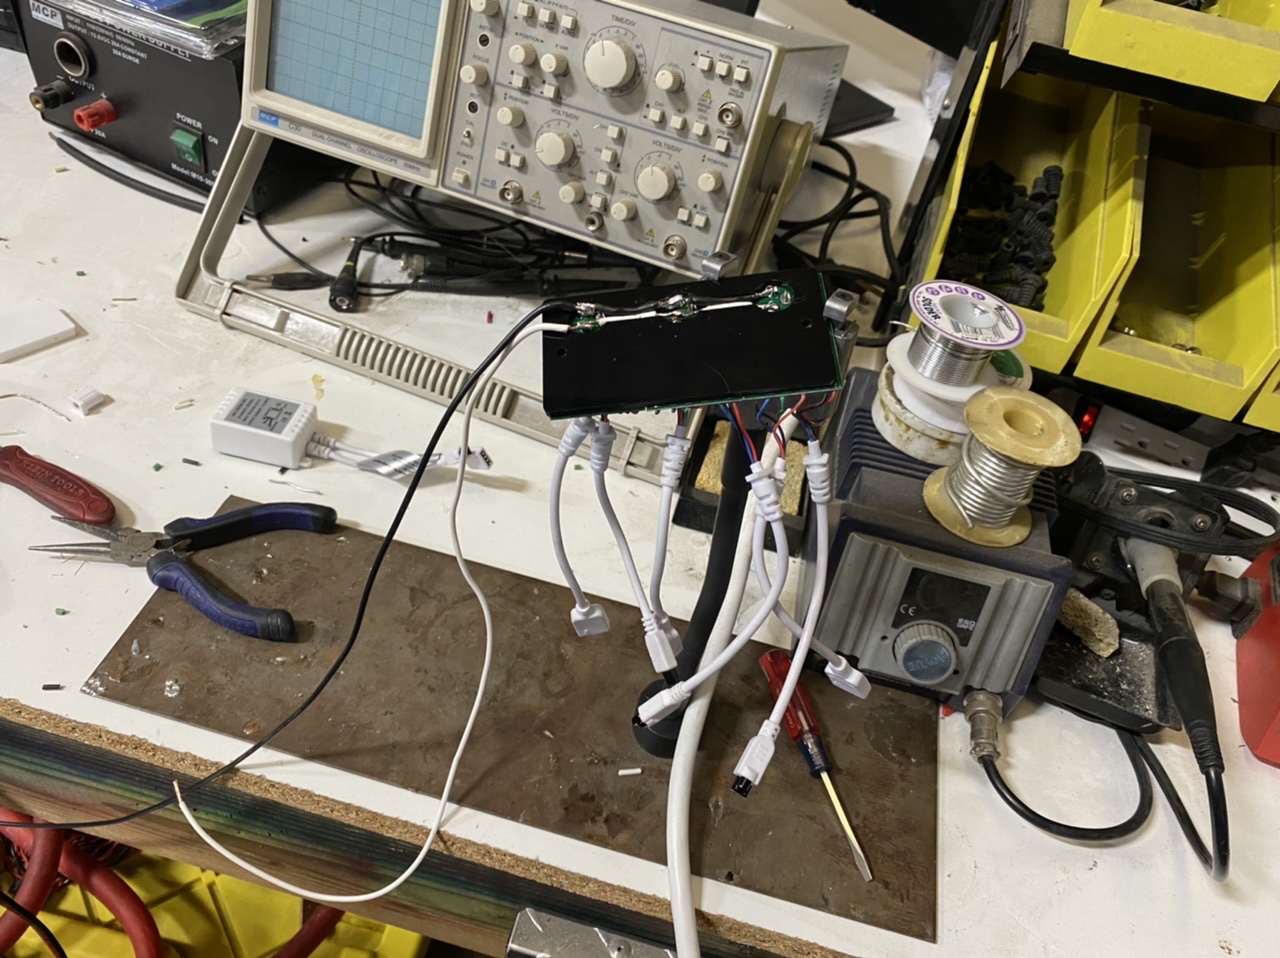
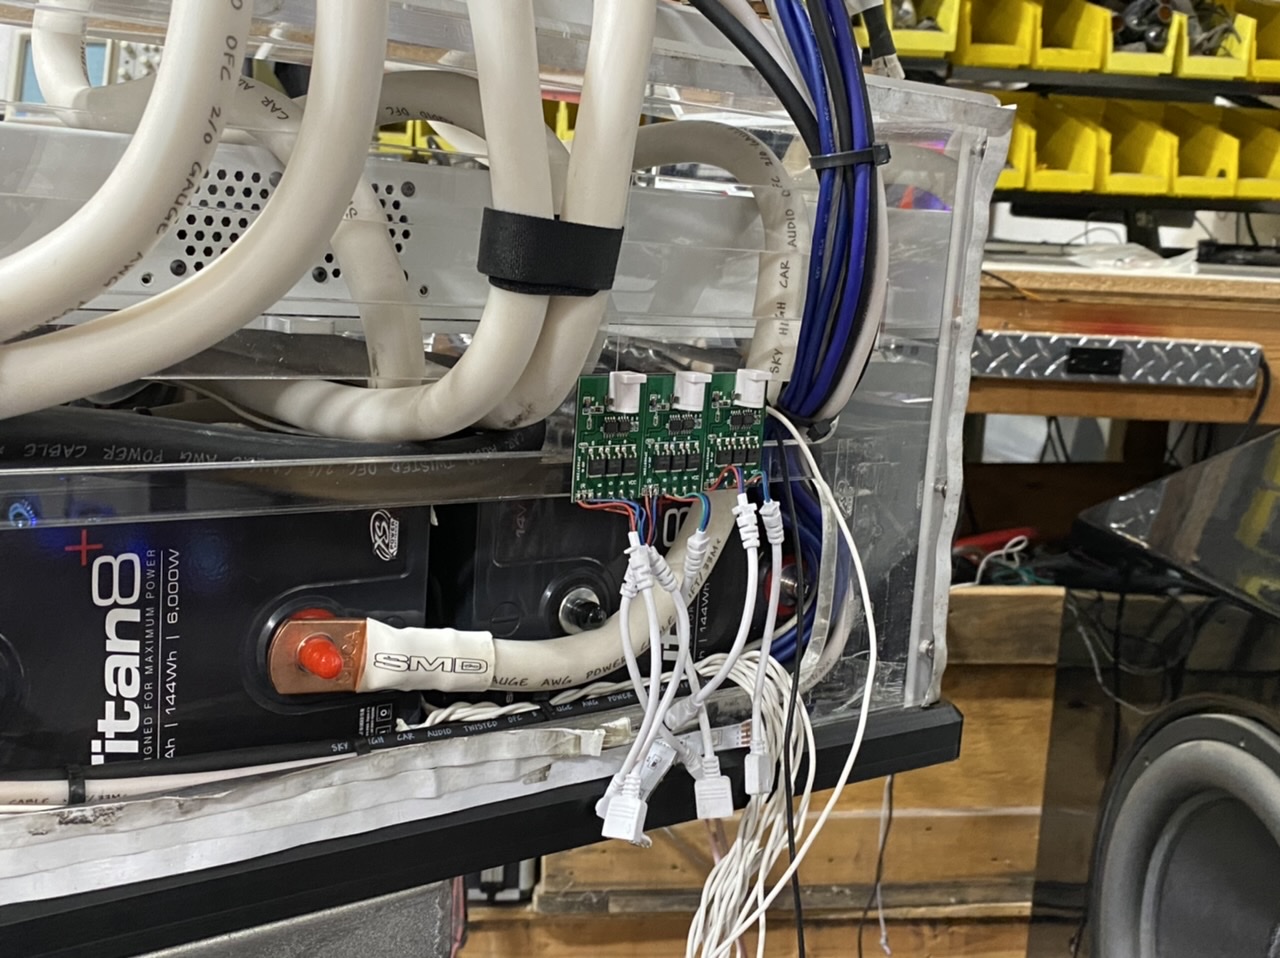
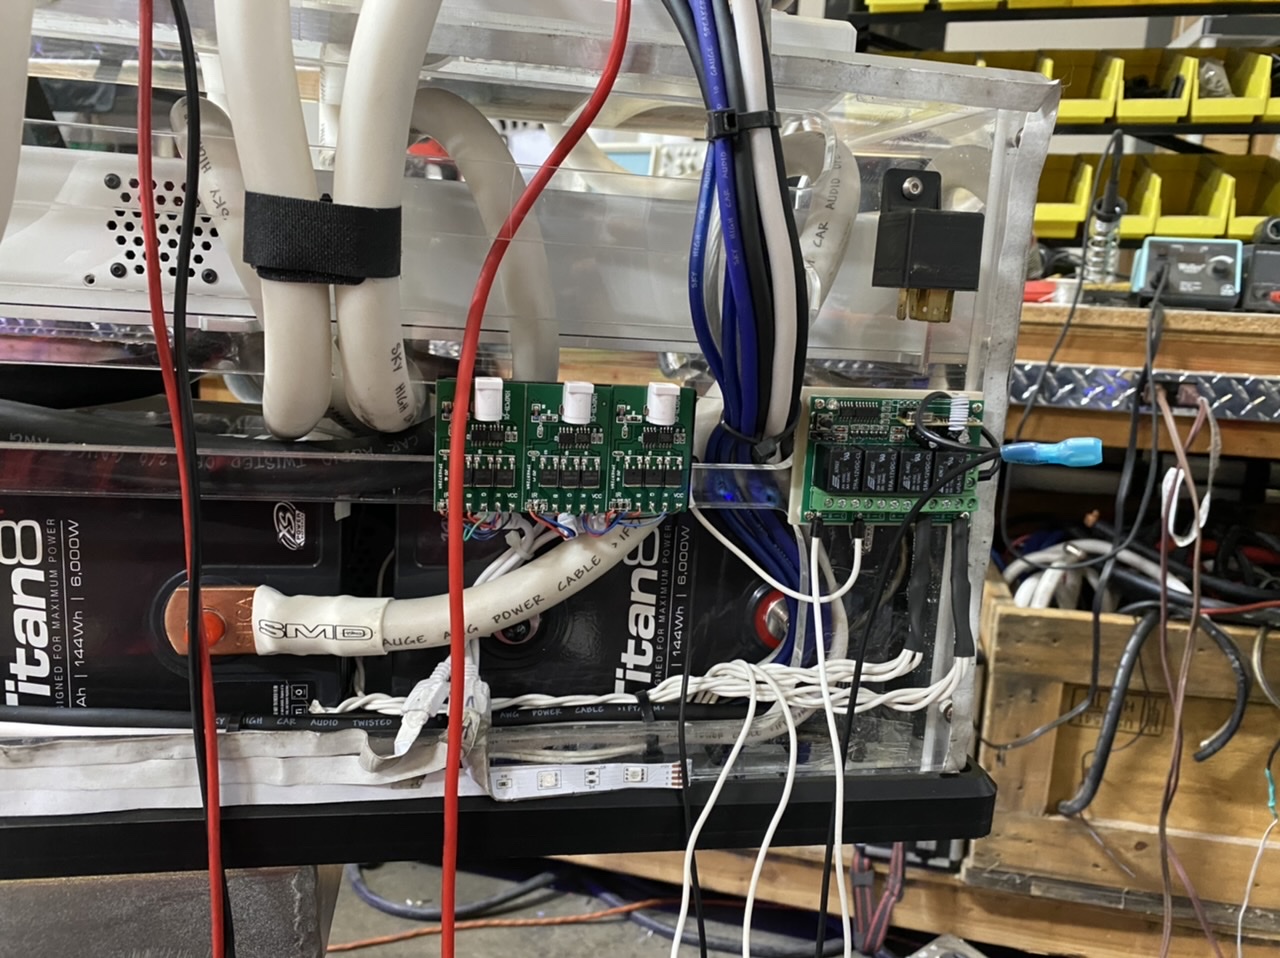
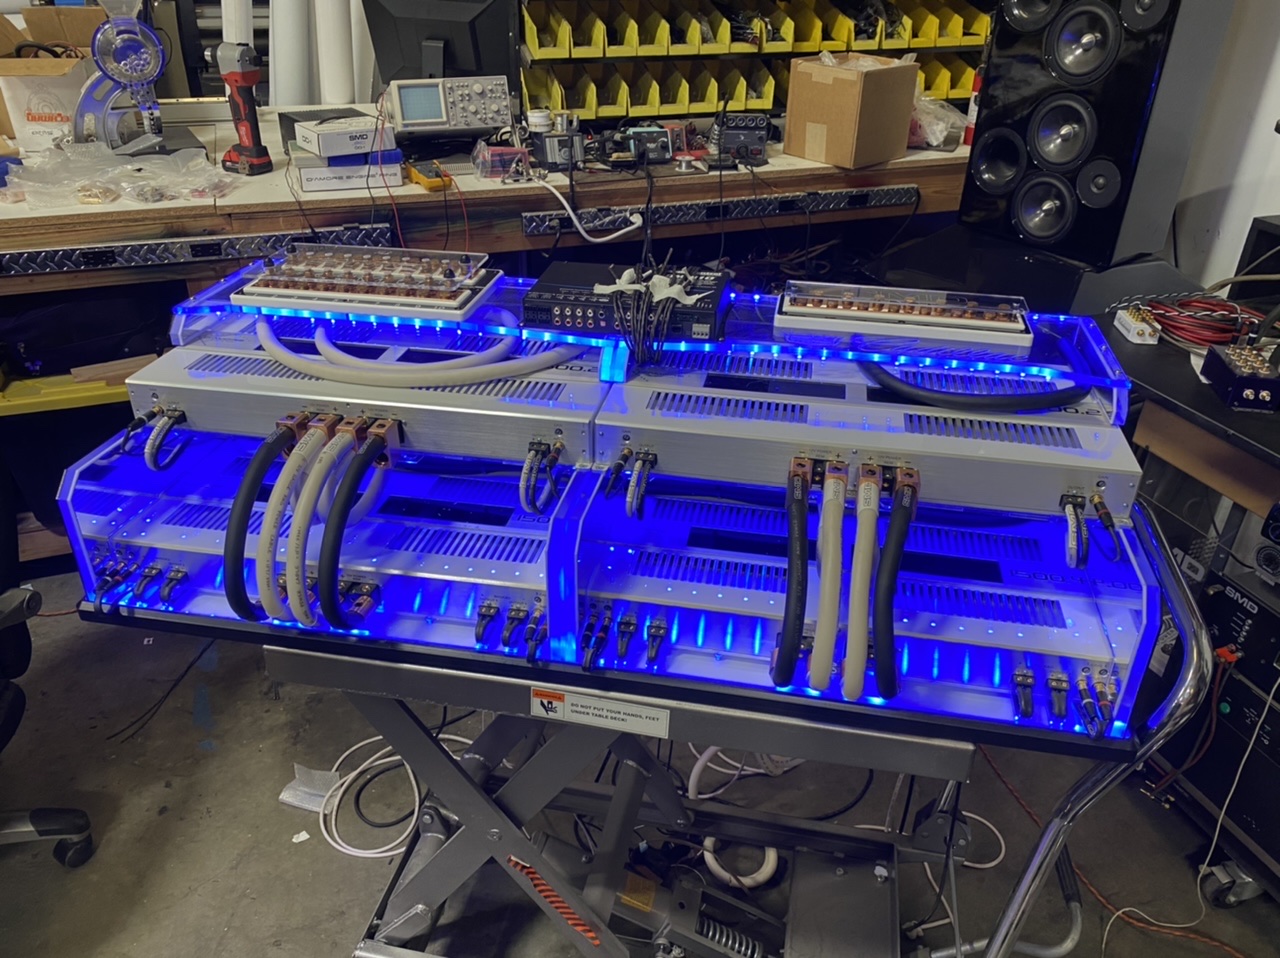
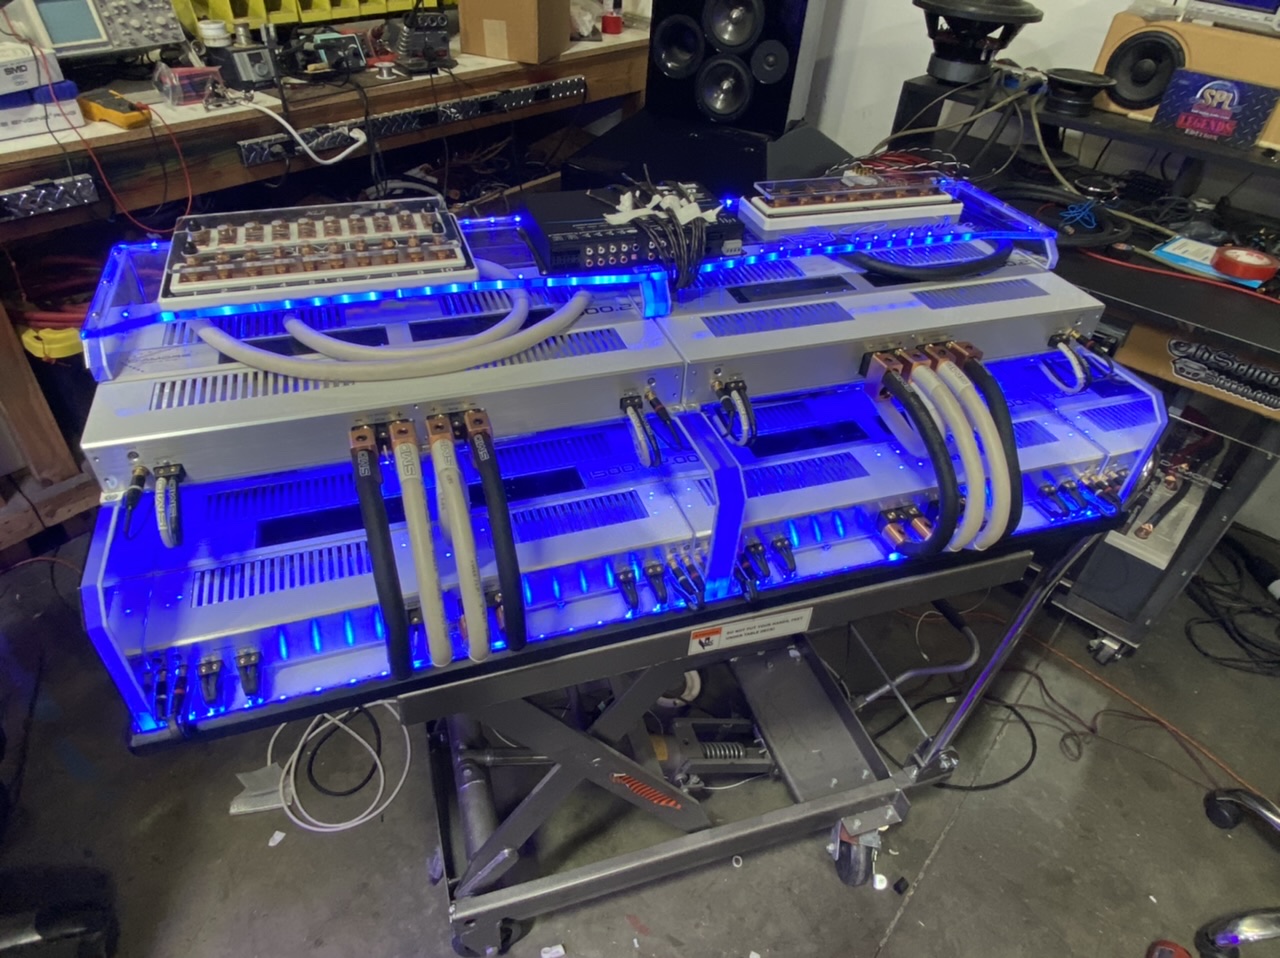
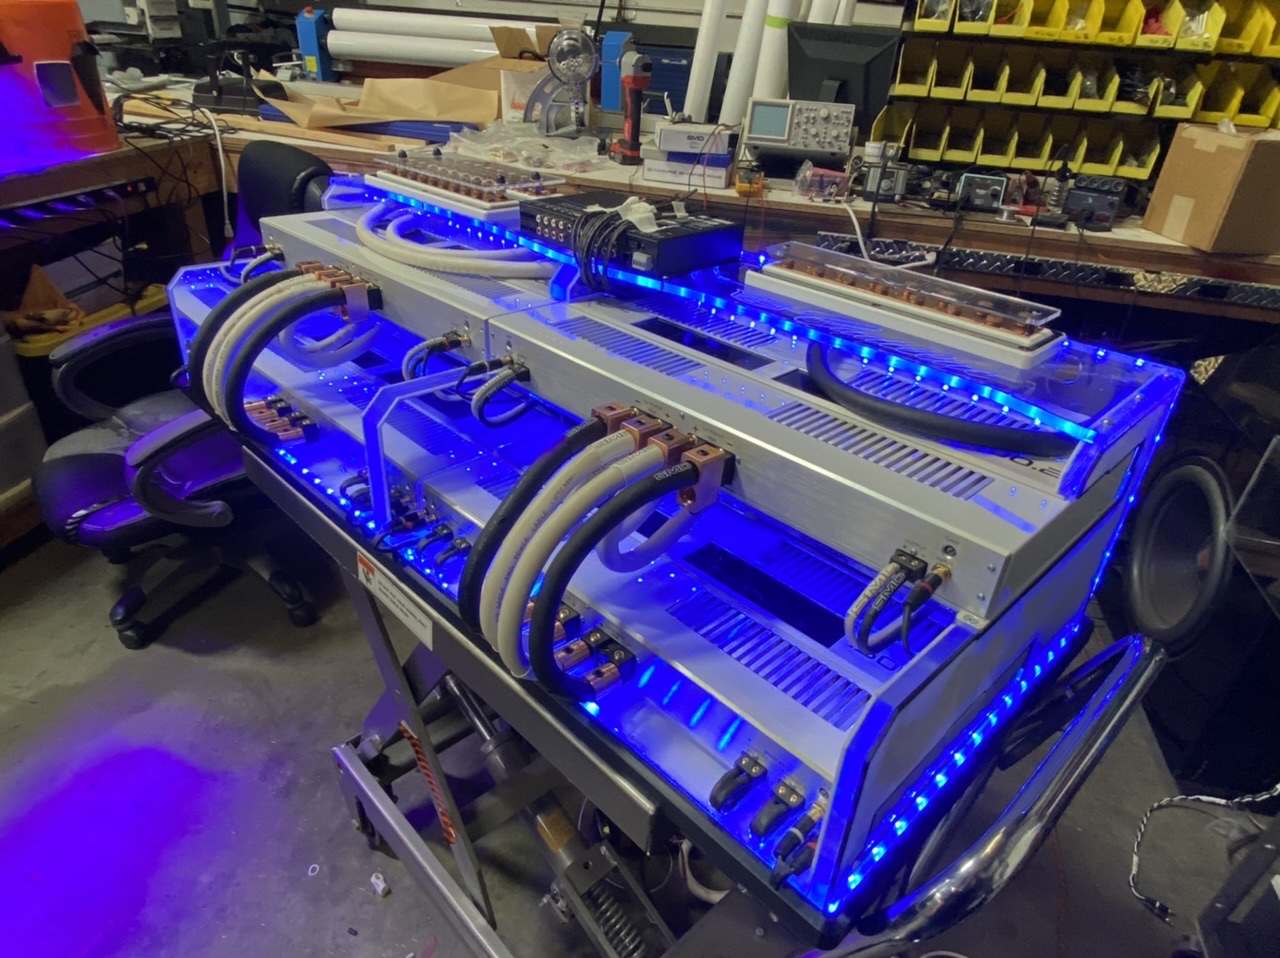
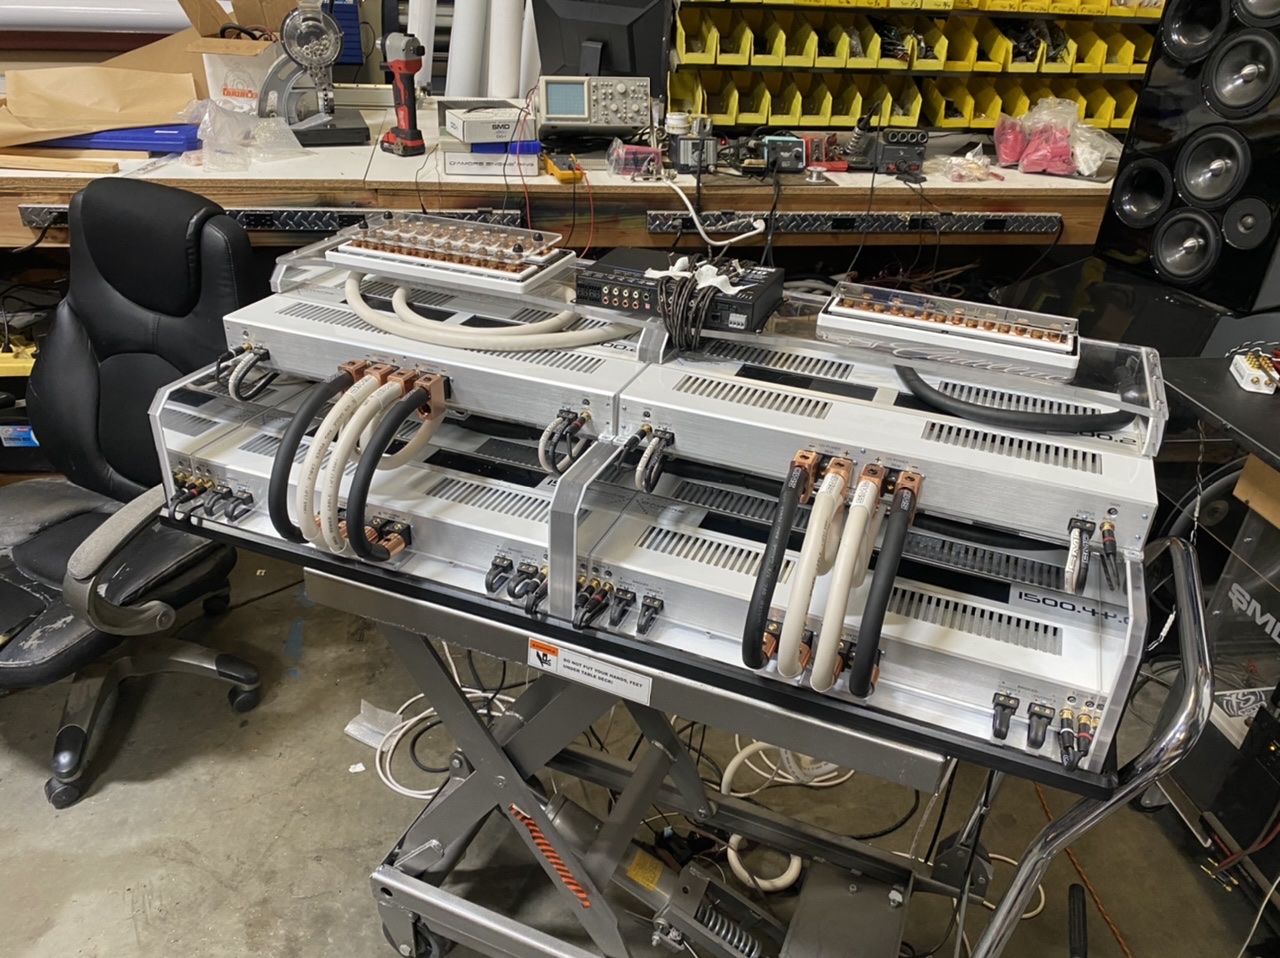
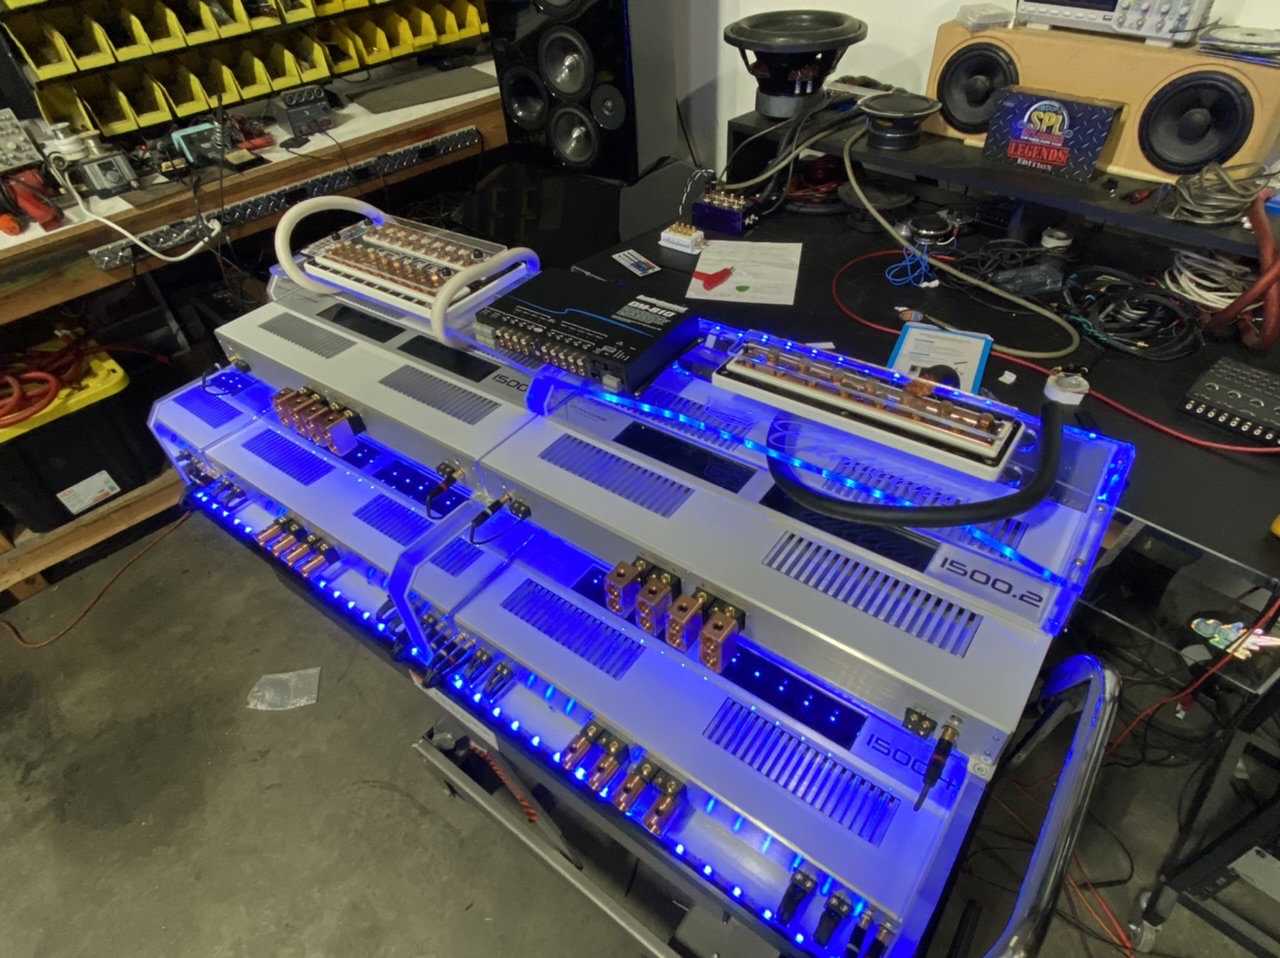
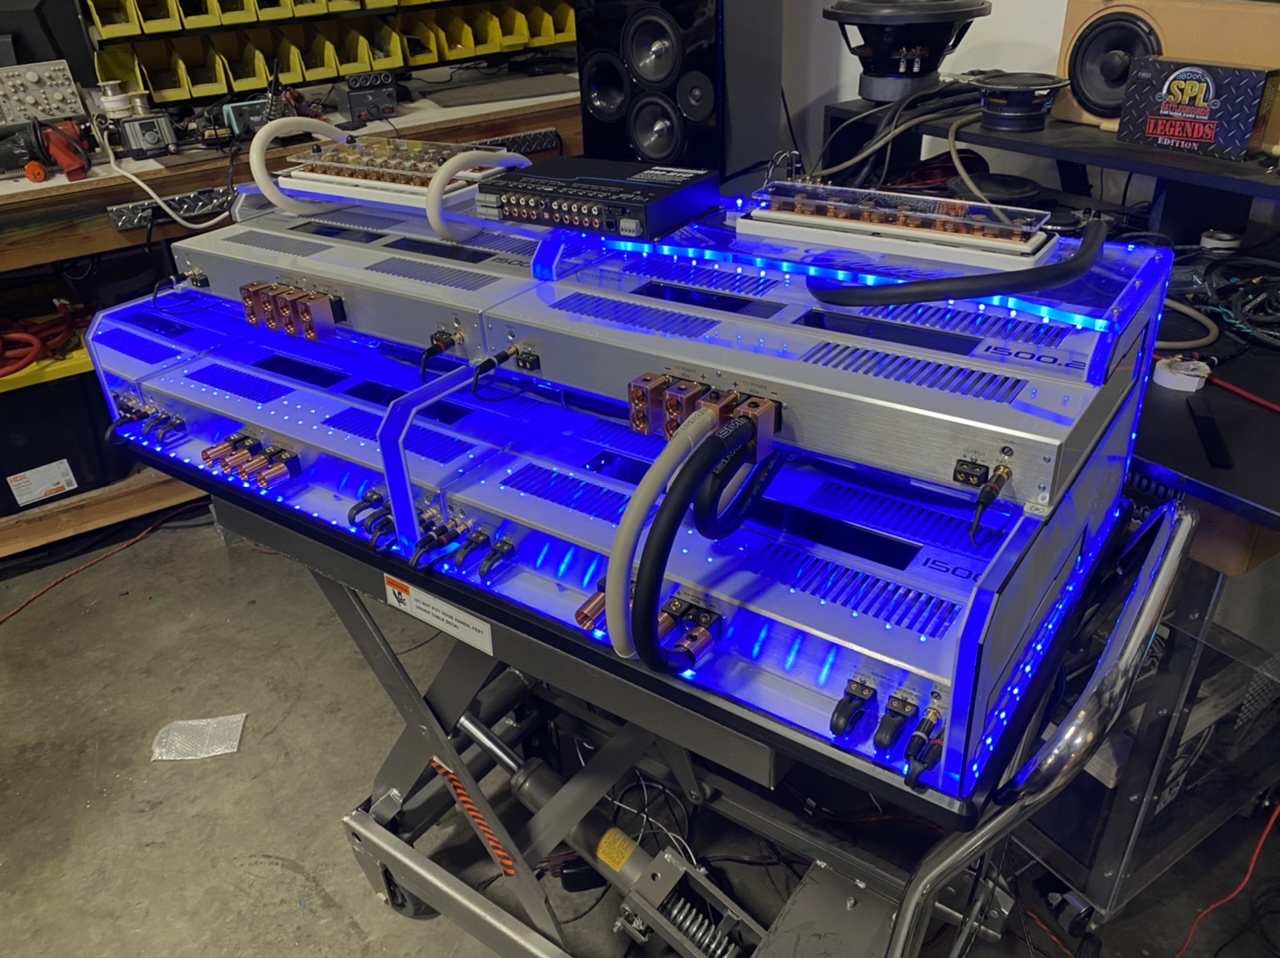
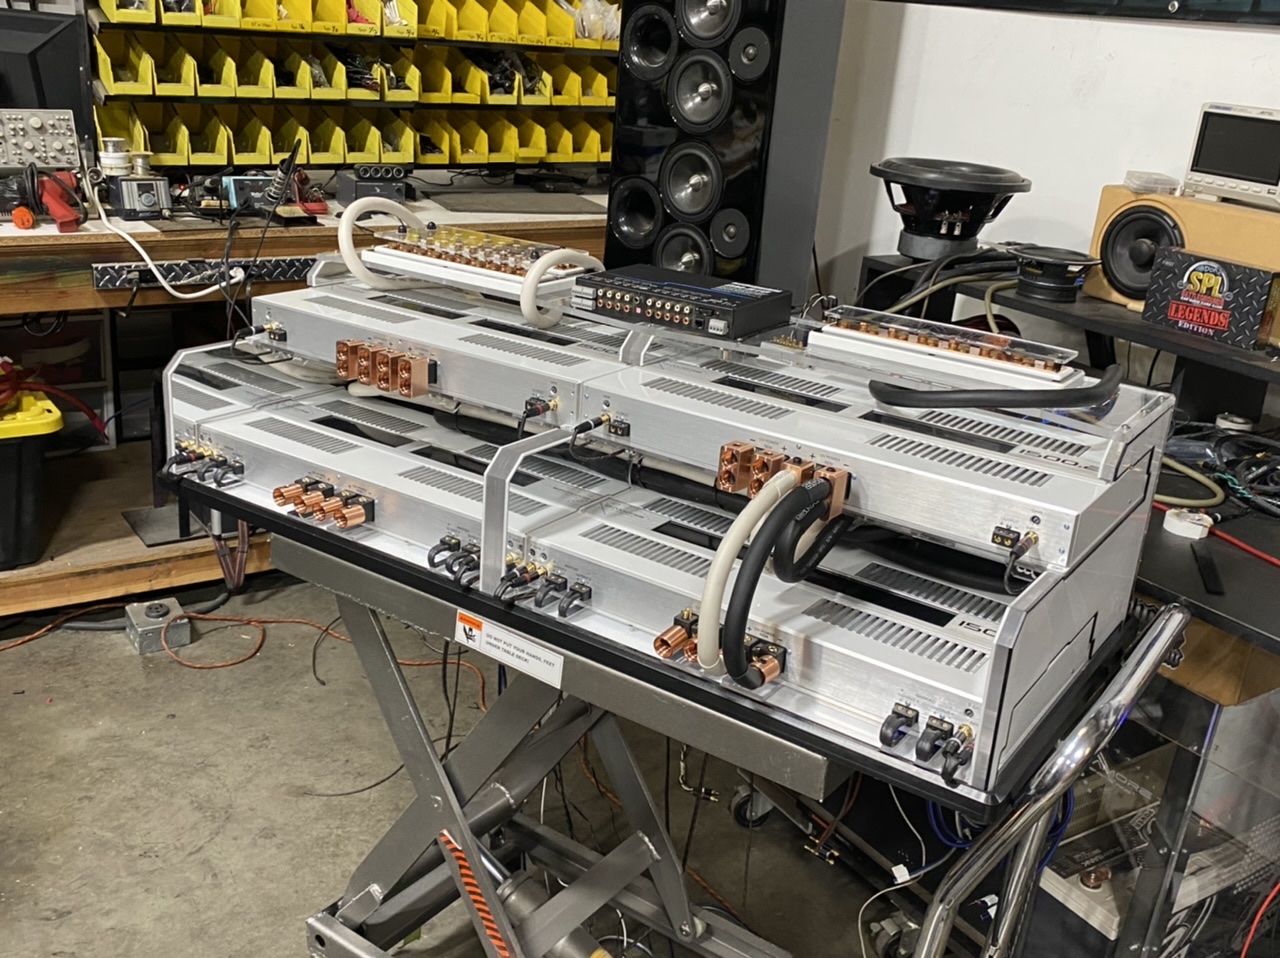
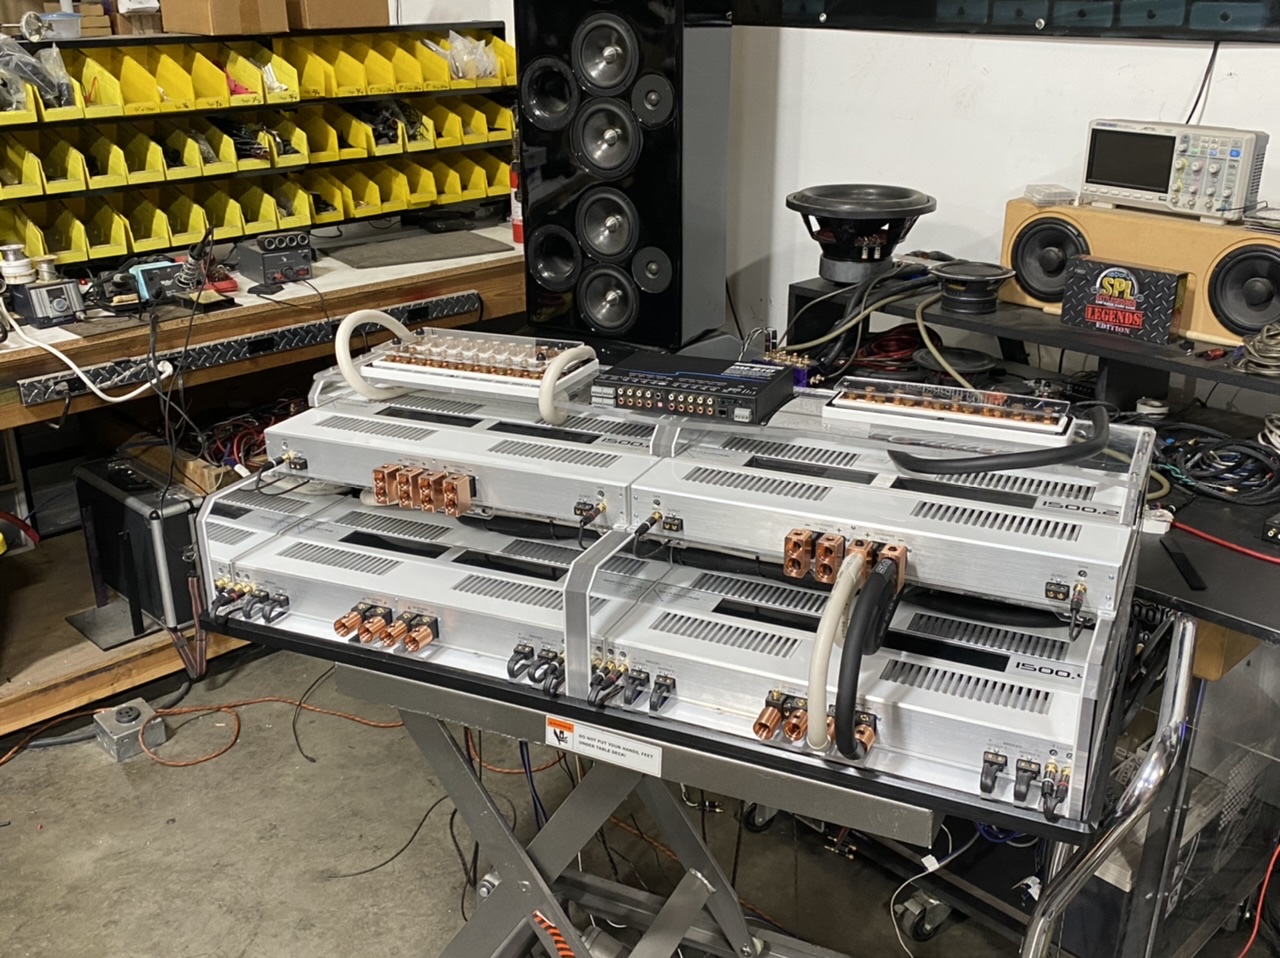
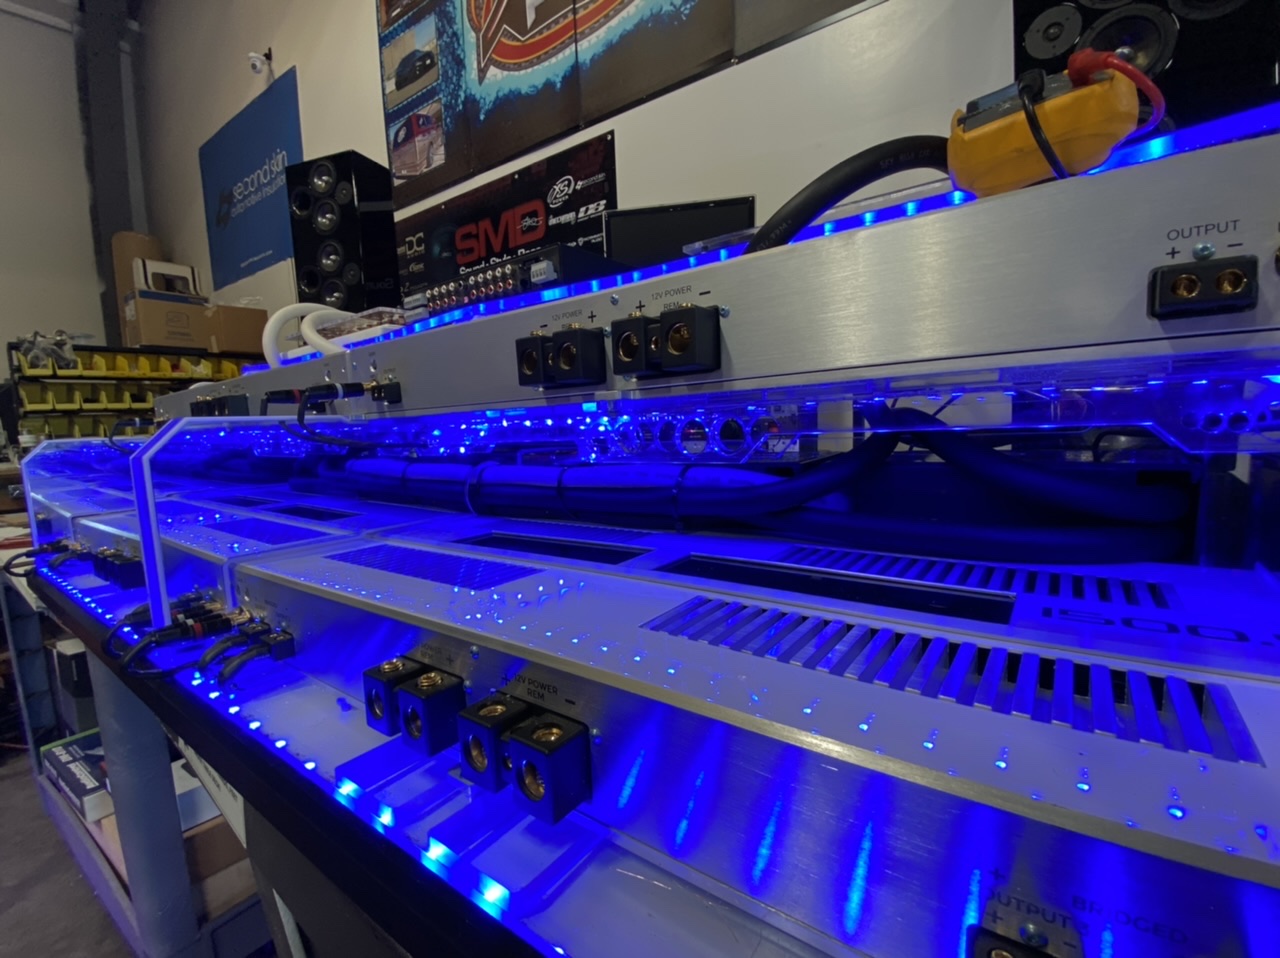
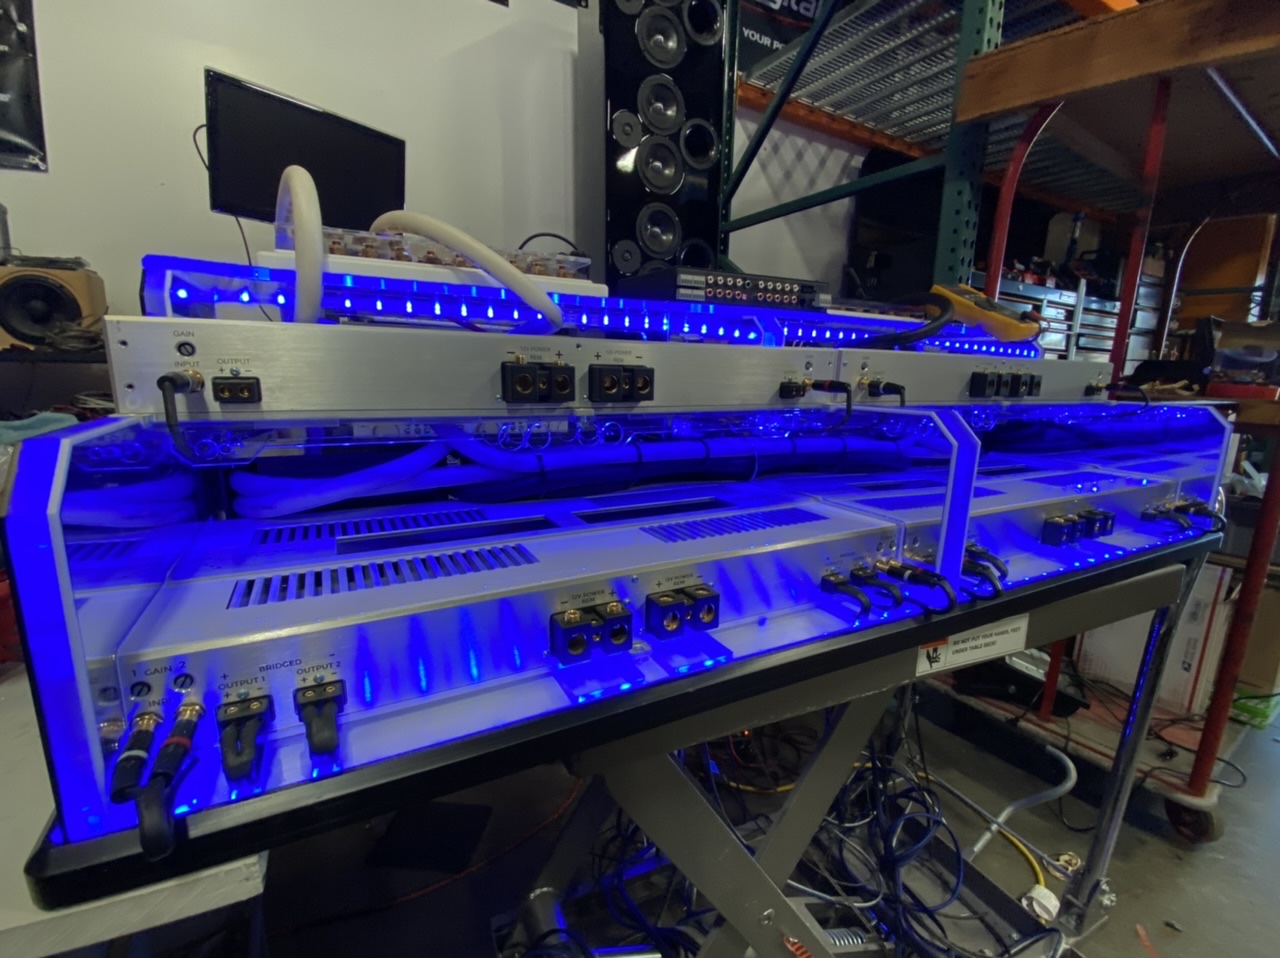
All the speaker wires etc are ready to be ran to their spots once i drop this into the caddy. A LOT of the work will already be done by the time i do that and that was the plan!
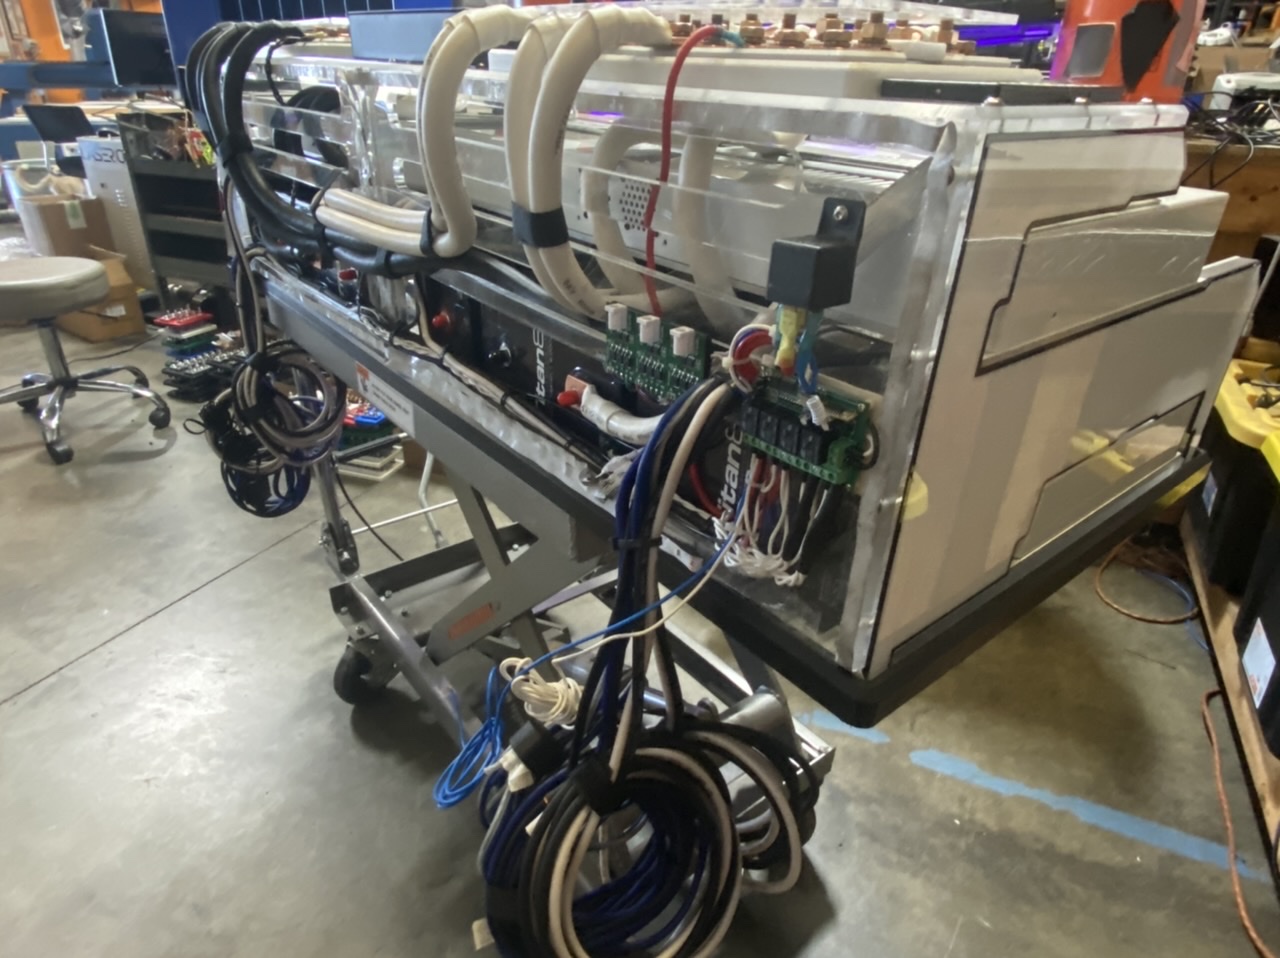
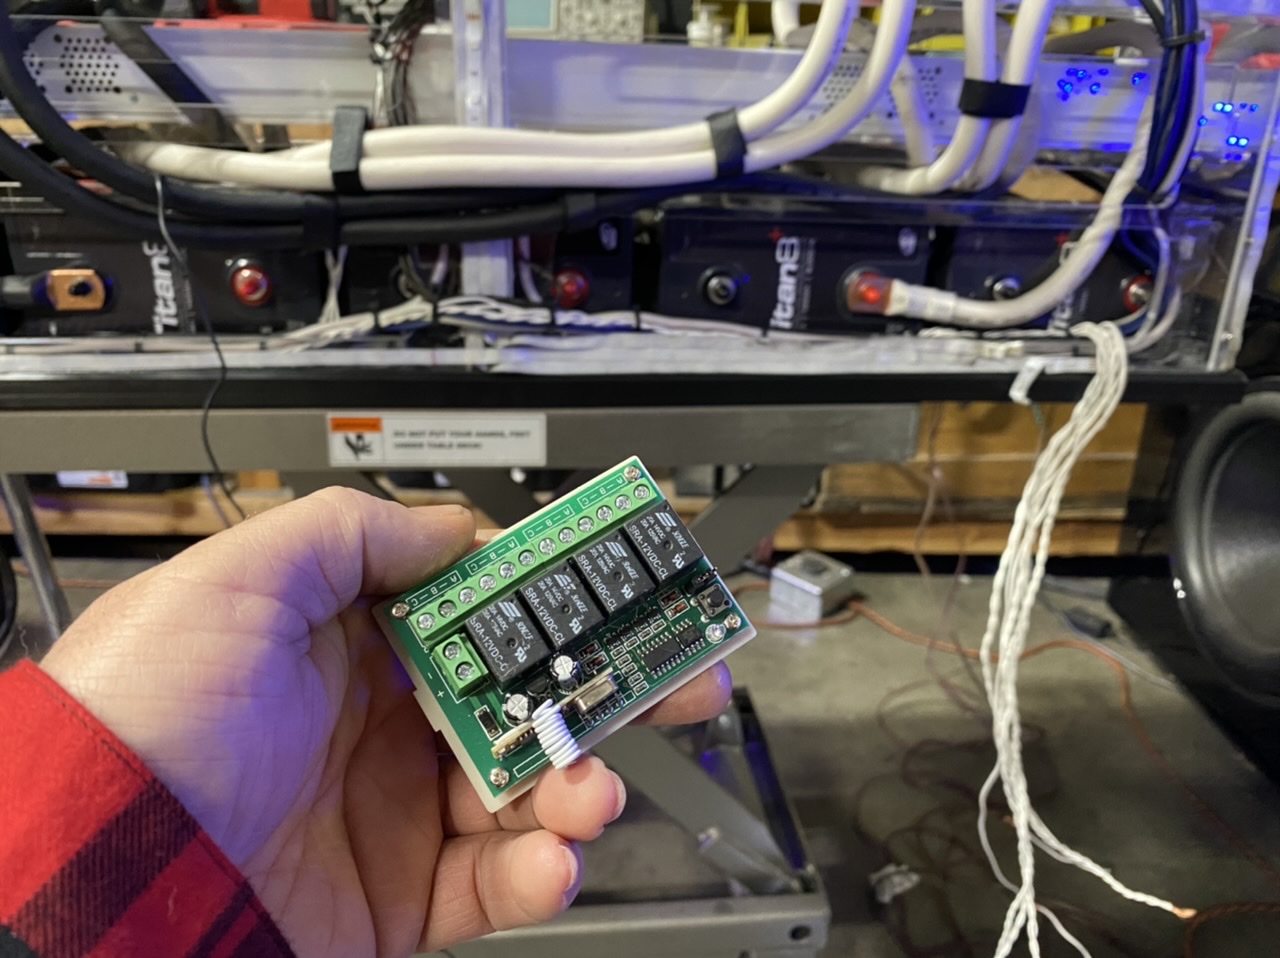
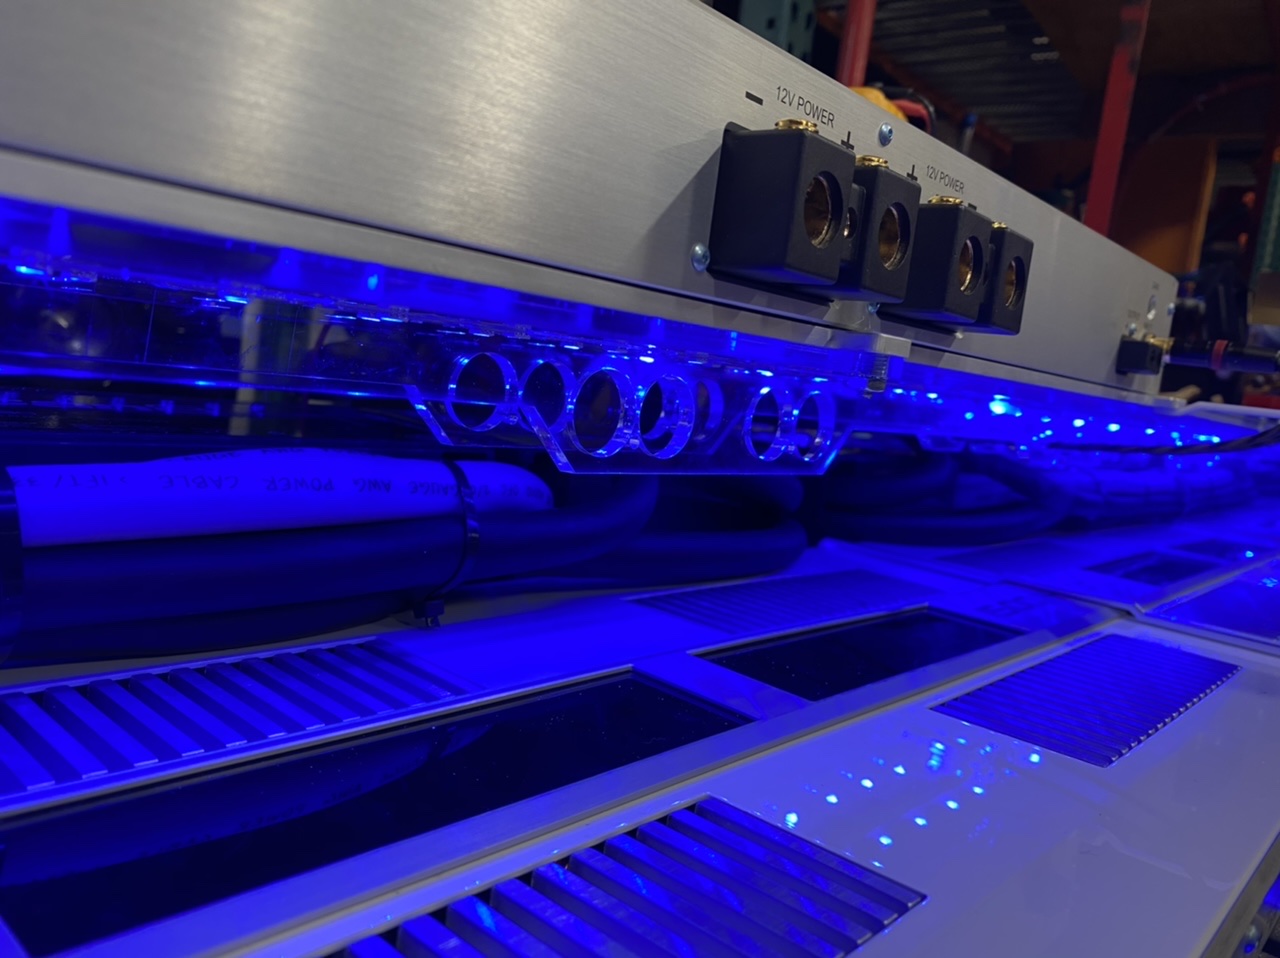
Of course i had to use a relay because i have so many remote wires. I also used that relay to feed the remote box below it and everything that is hooked up to the remote box. It works great! Oh the relay was attached with a drilled/taped 8x32 button head stainless fastener.
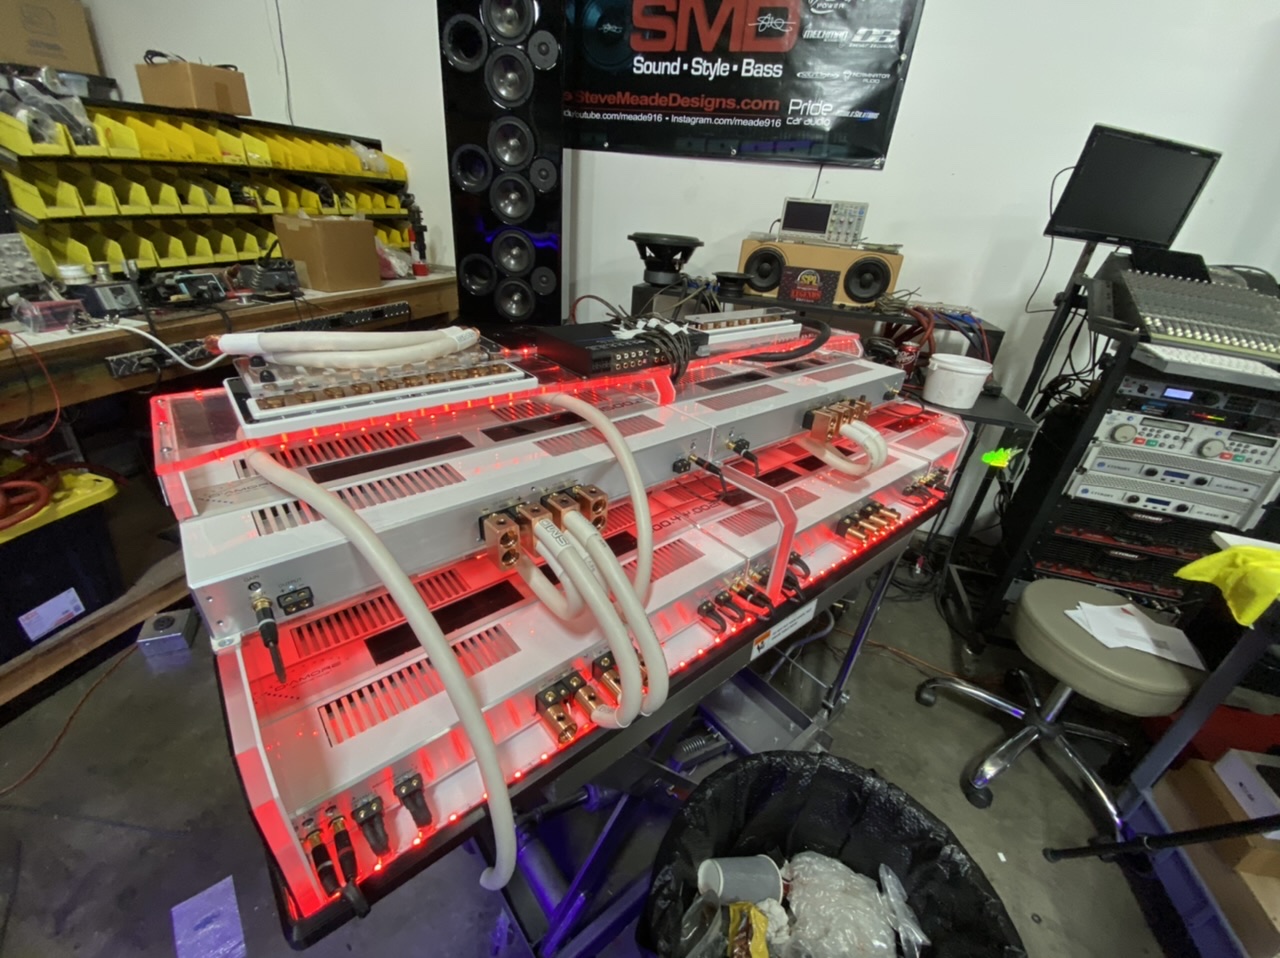
Getting close!
-
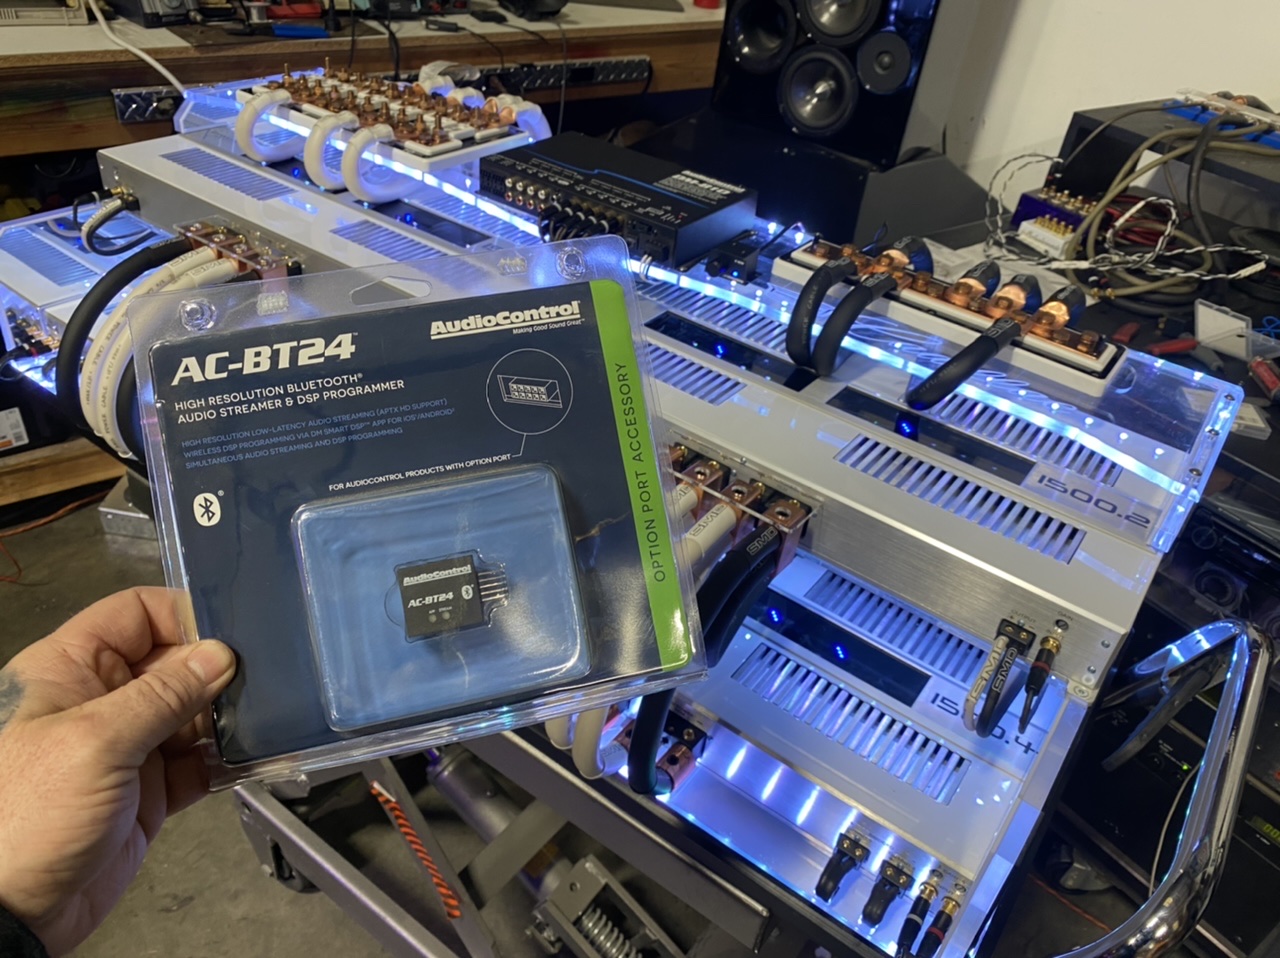
Today i spent some time wiring up the remotes, the led boxes, the Audiocontrol processor and a 4 way remote control.
This 4 way remote box will allow me to shut off the bass amps or the 4 channel amps if i choose to do so for some reason. They are class A AB so they will draw power and get warm just being on. So on days i don't have the system playing i can just shut them down. The remote also will control 2 different LED banks.
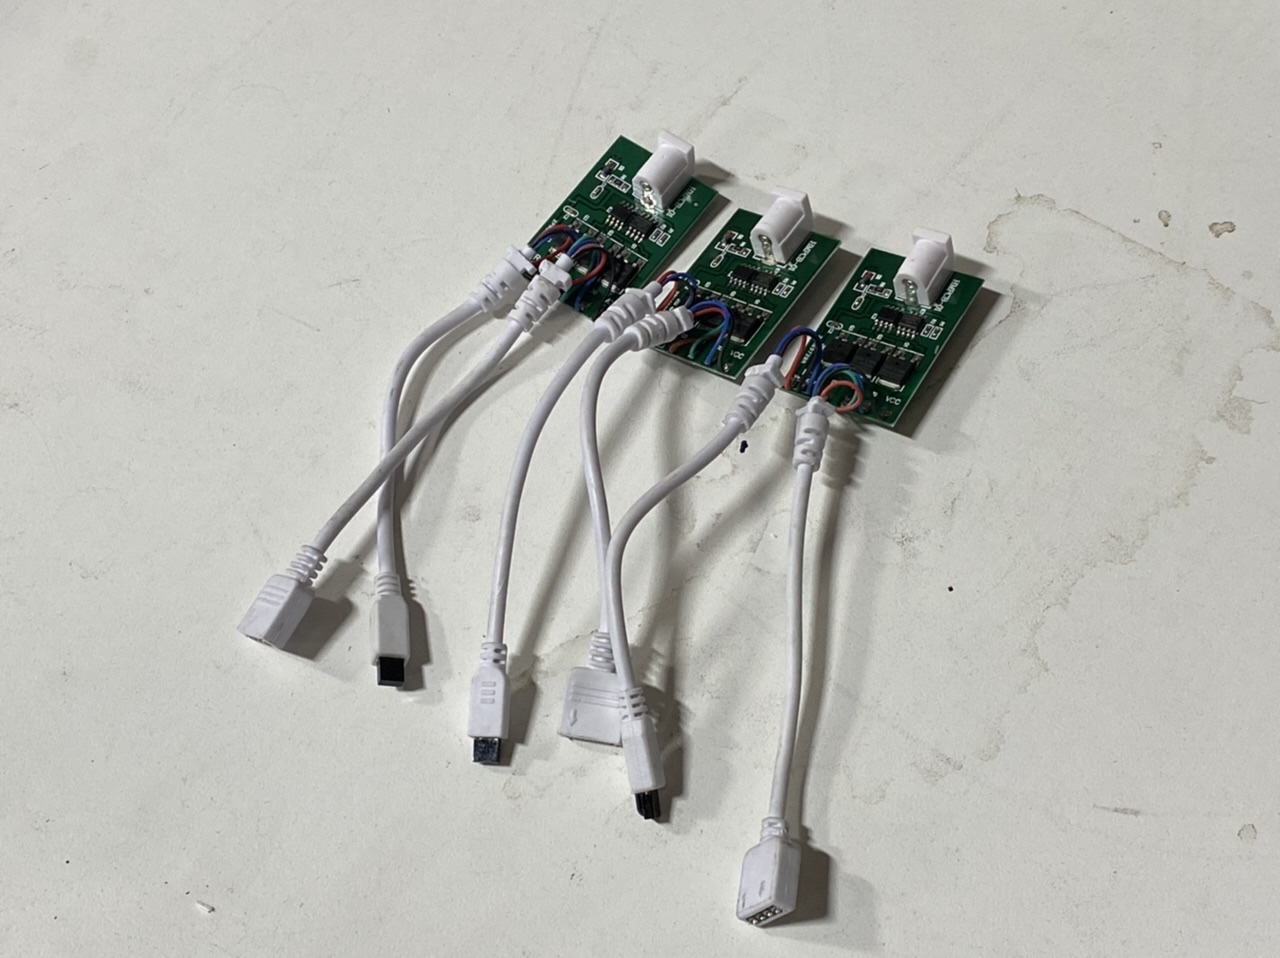
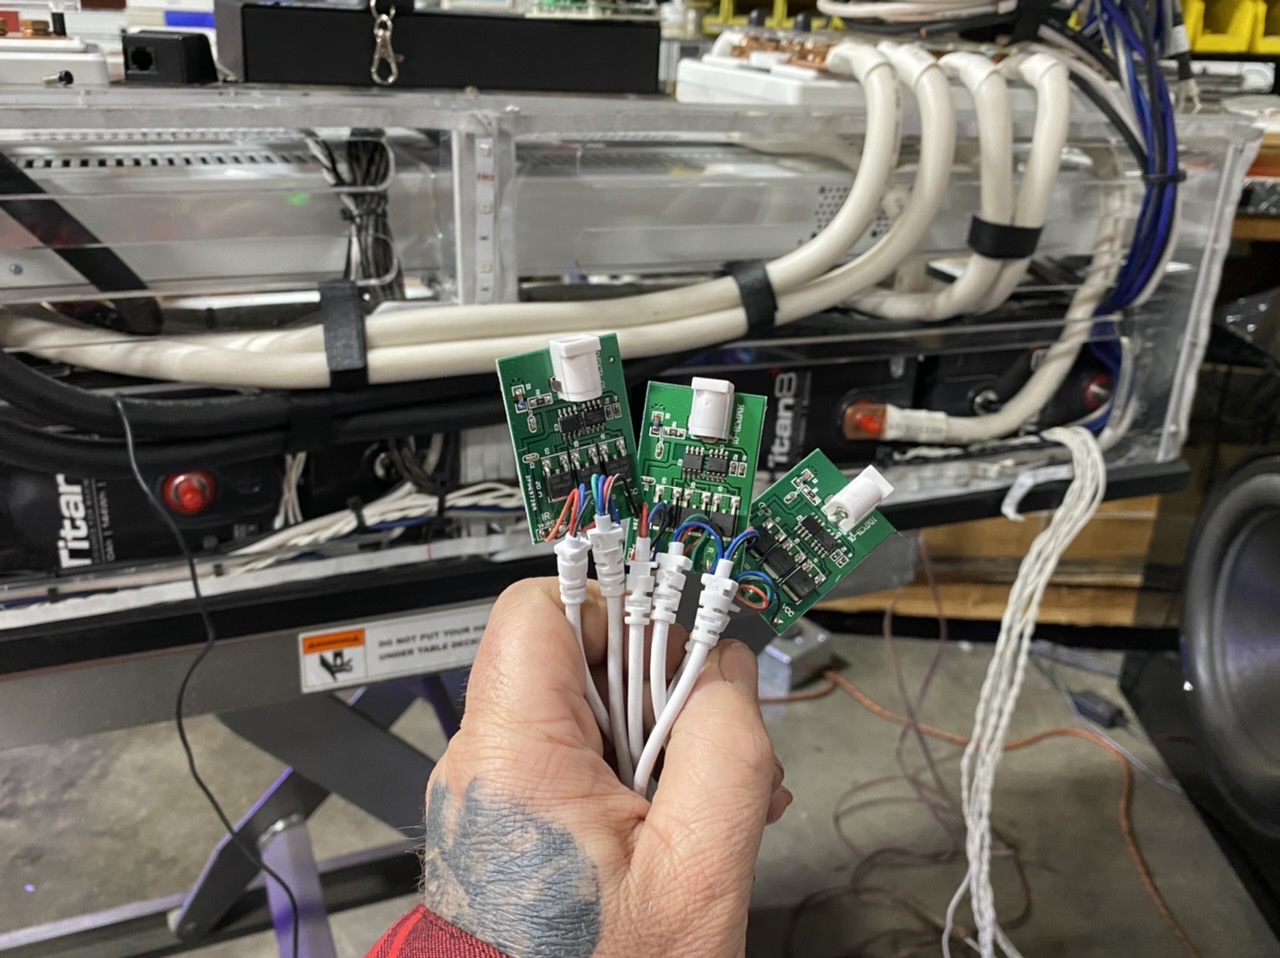
I decided to strip these down and hard wire them...so i don't have to have those ugly power packs.
Laser cut custom mount with holes in just the right spot. I should have made the slot wider but it was too late by the time i started. Works good though.
-
-
-
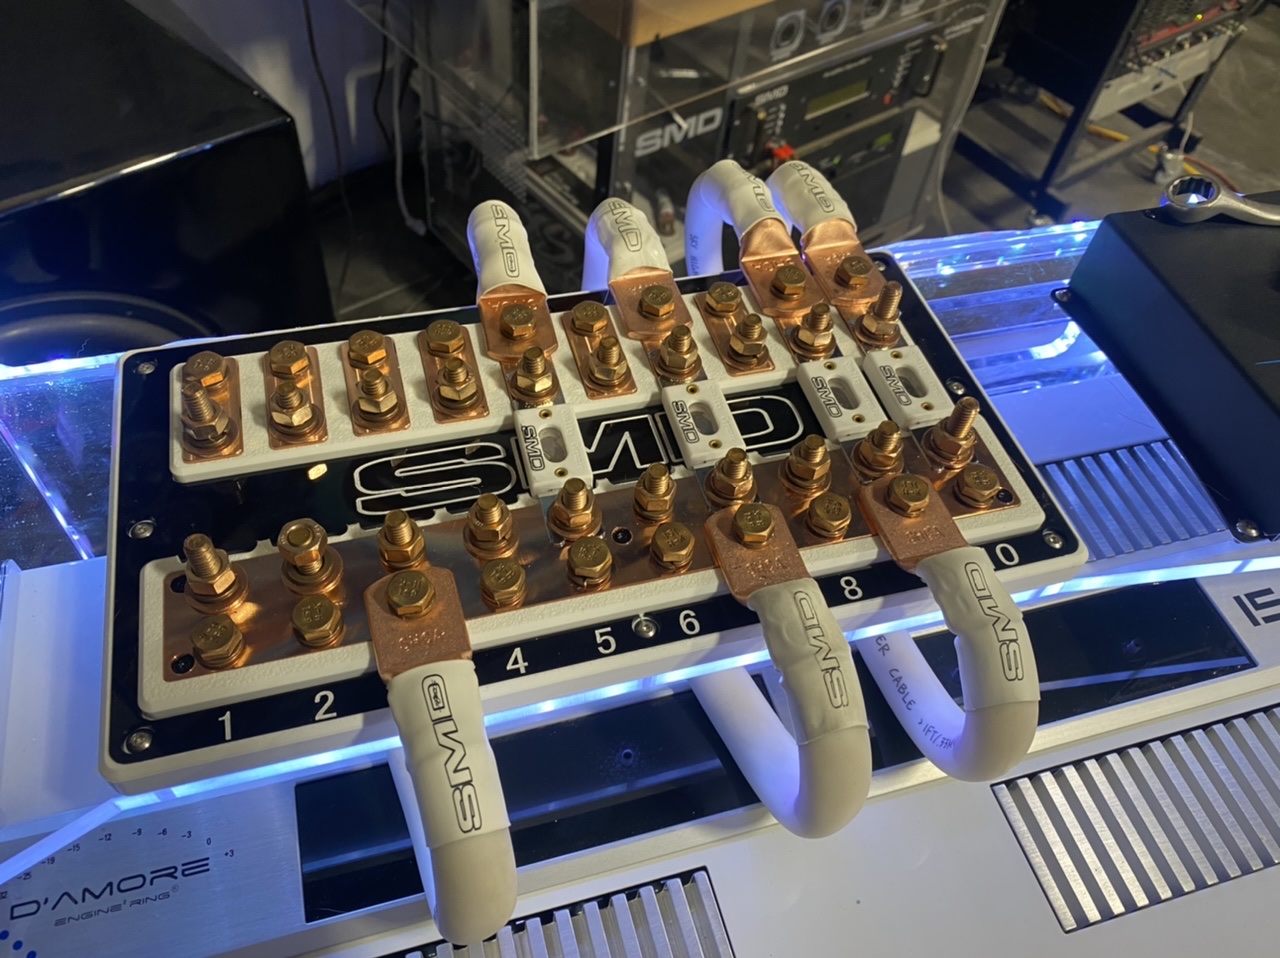
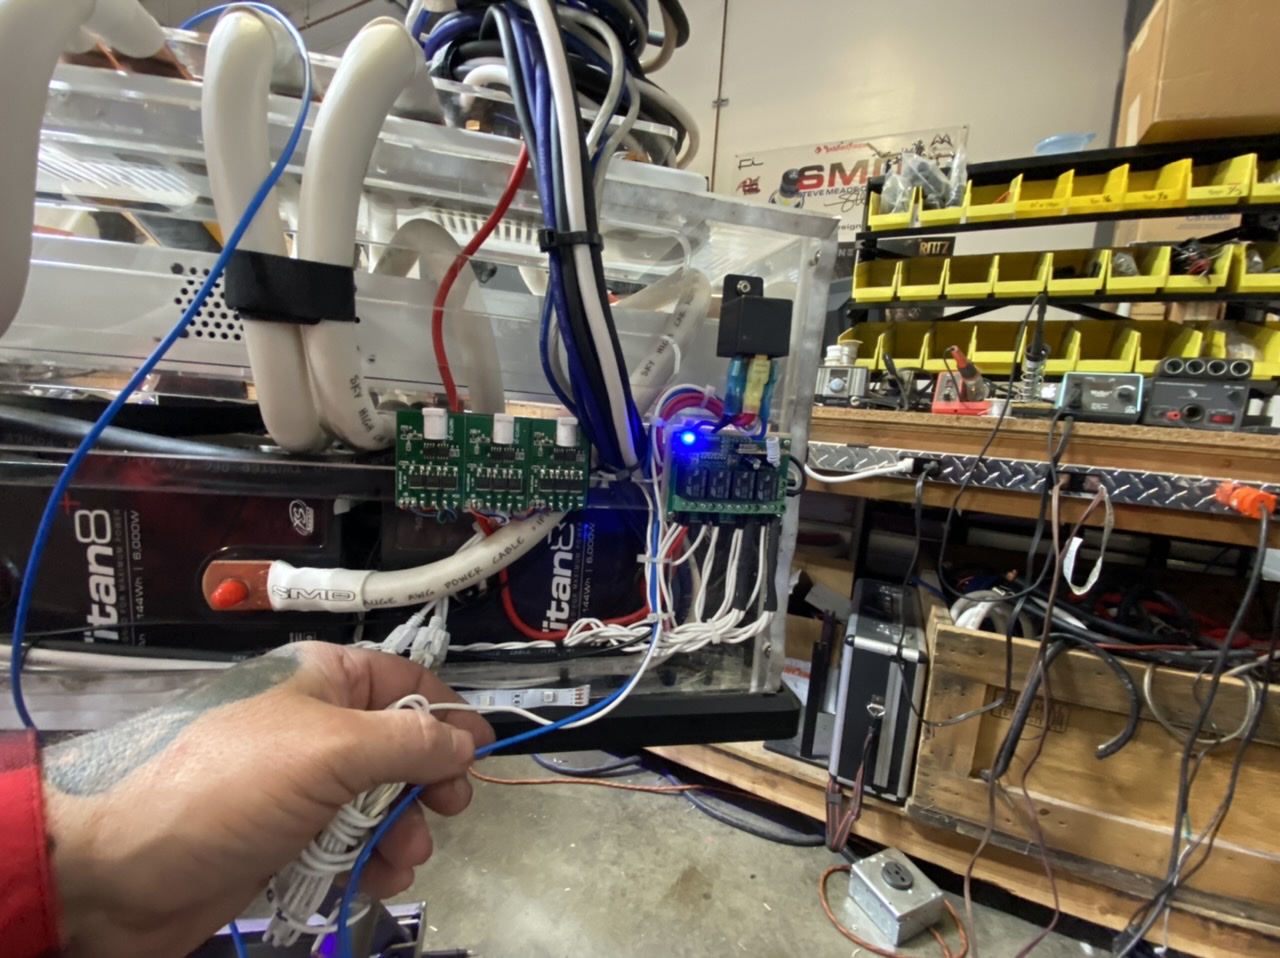
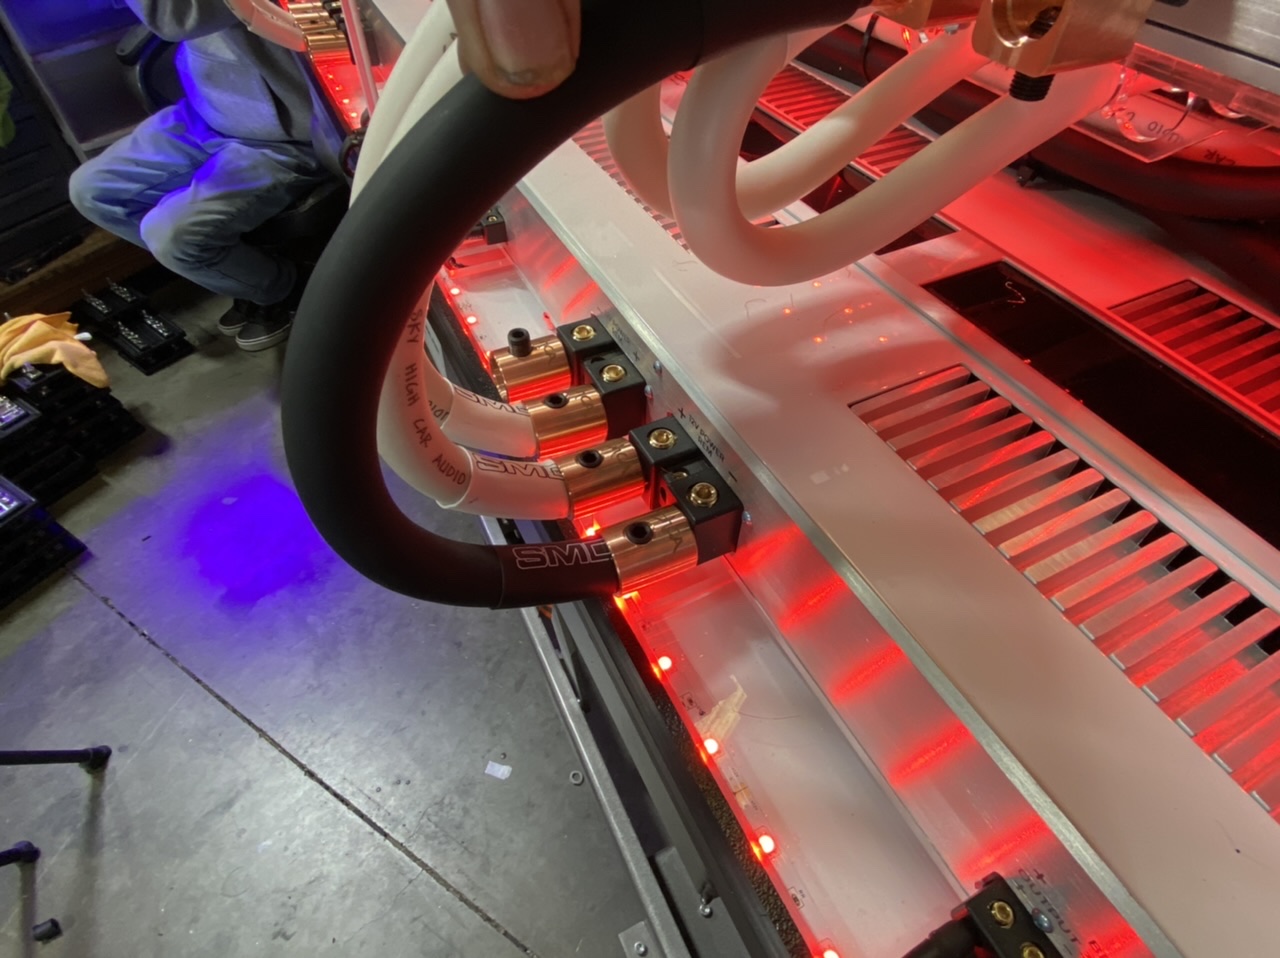
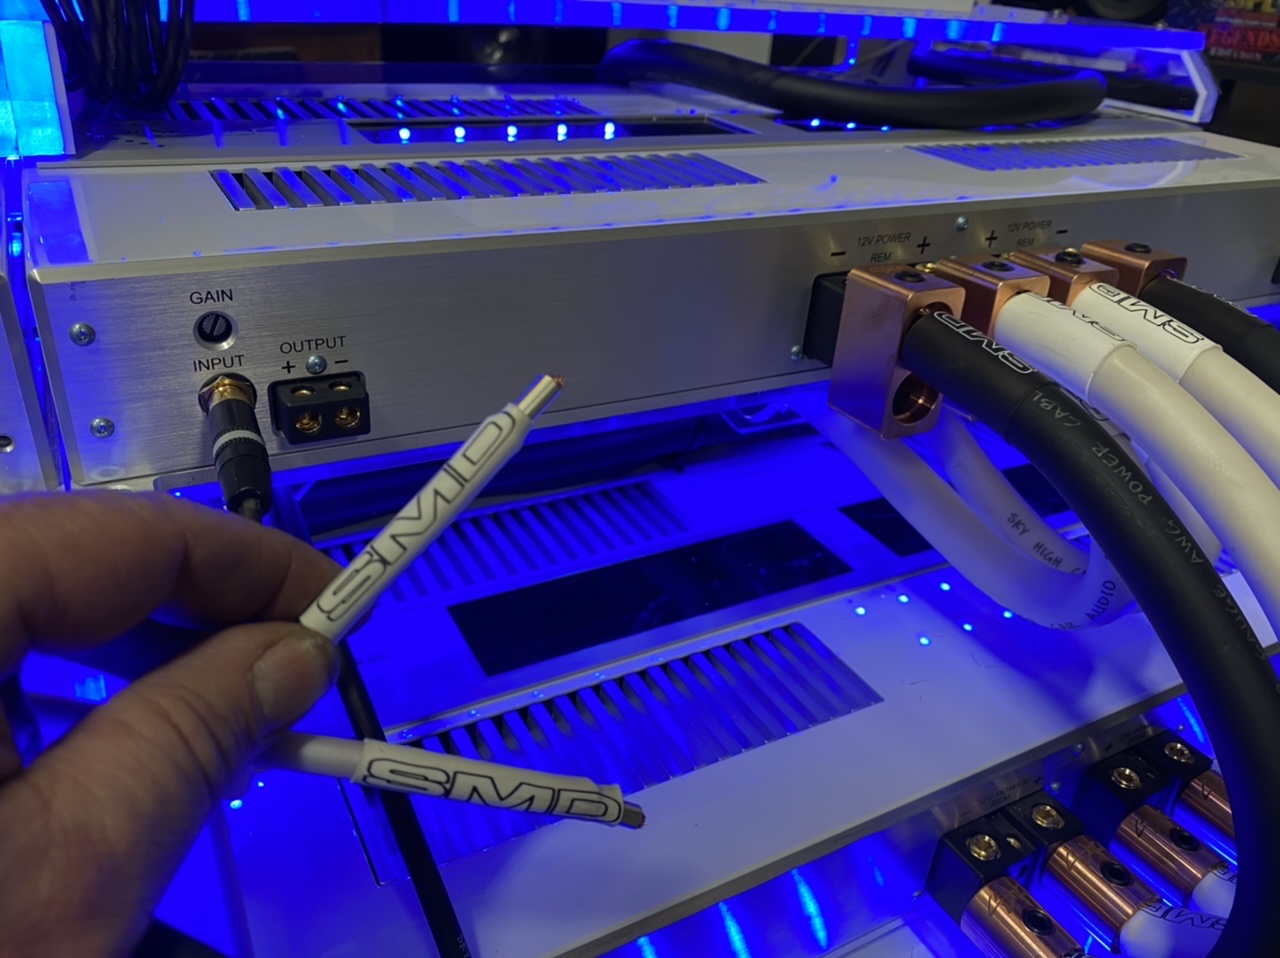
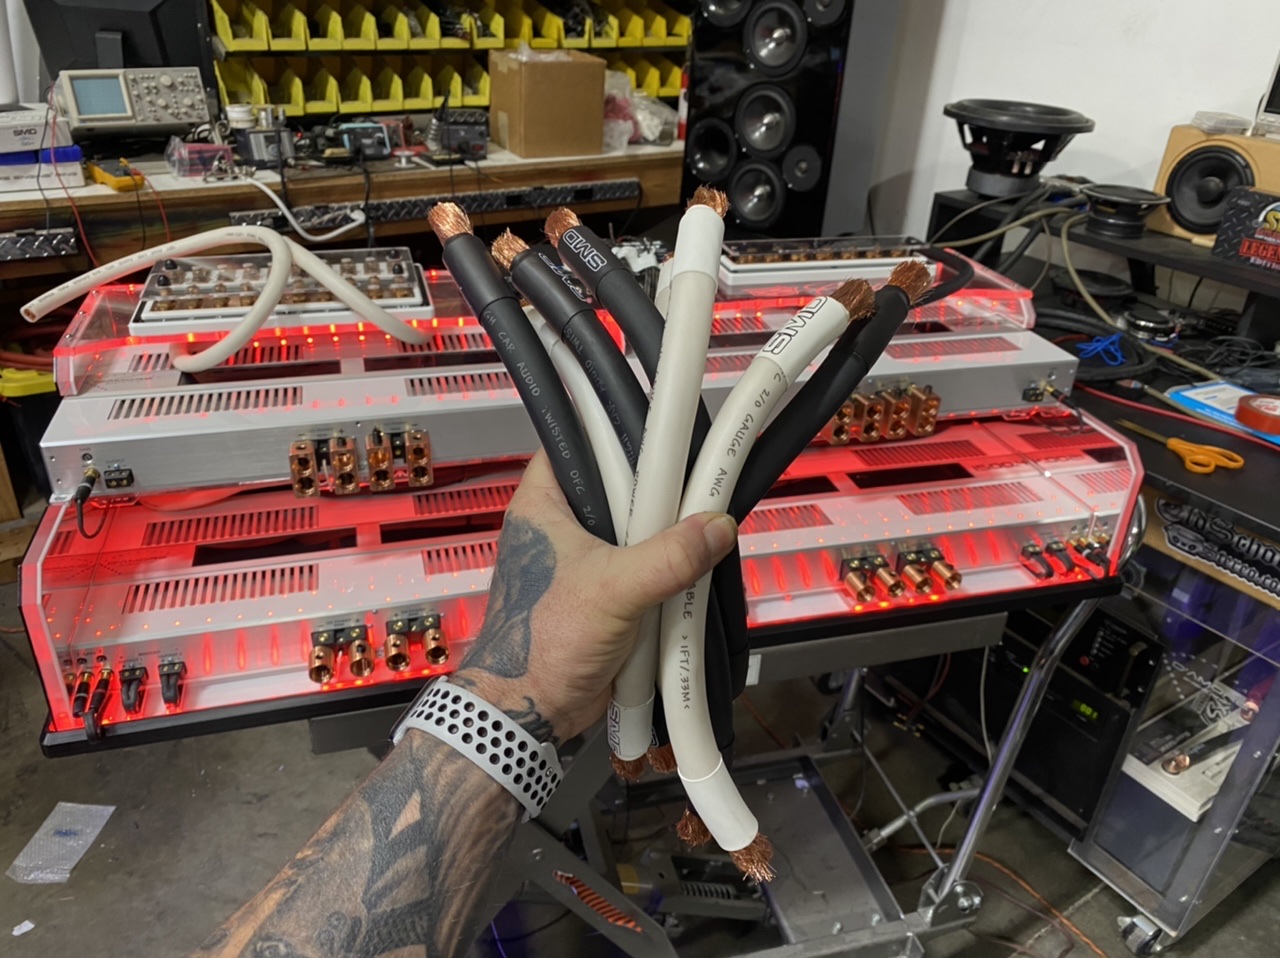
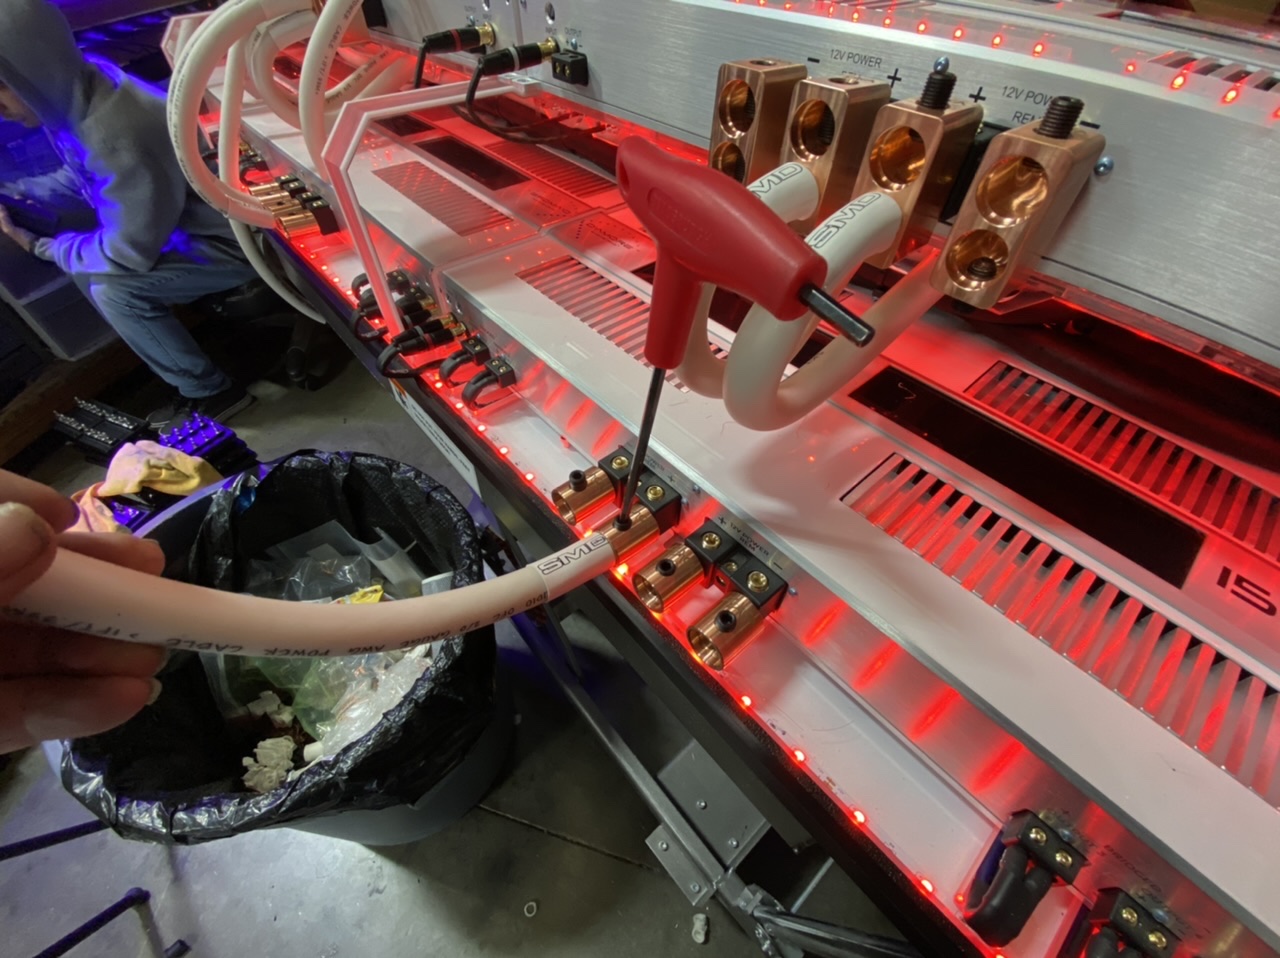
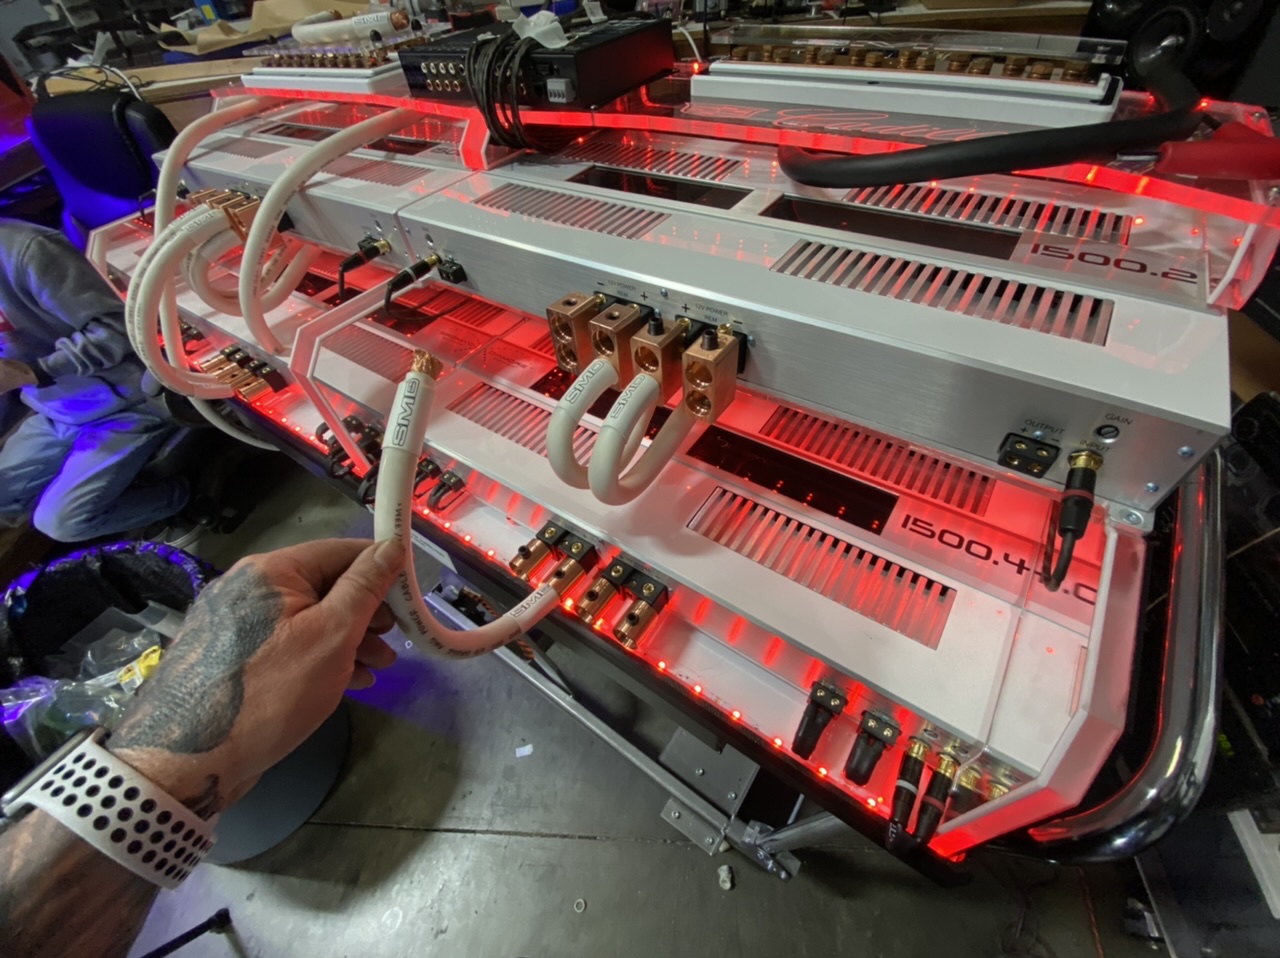
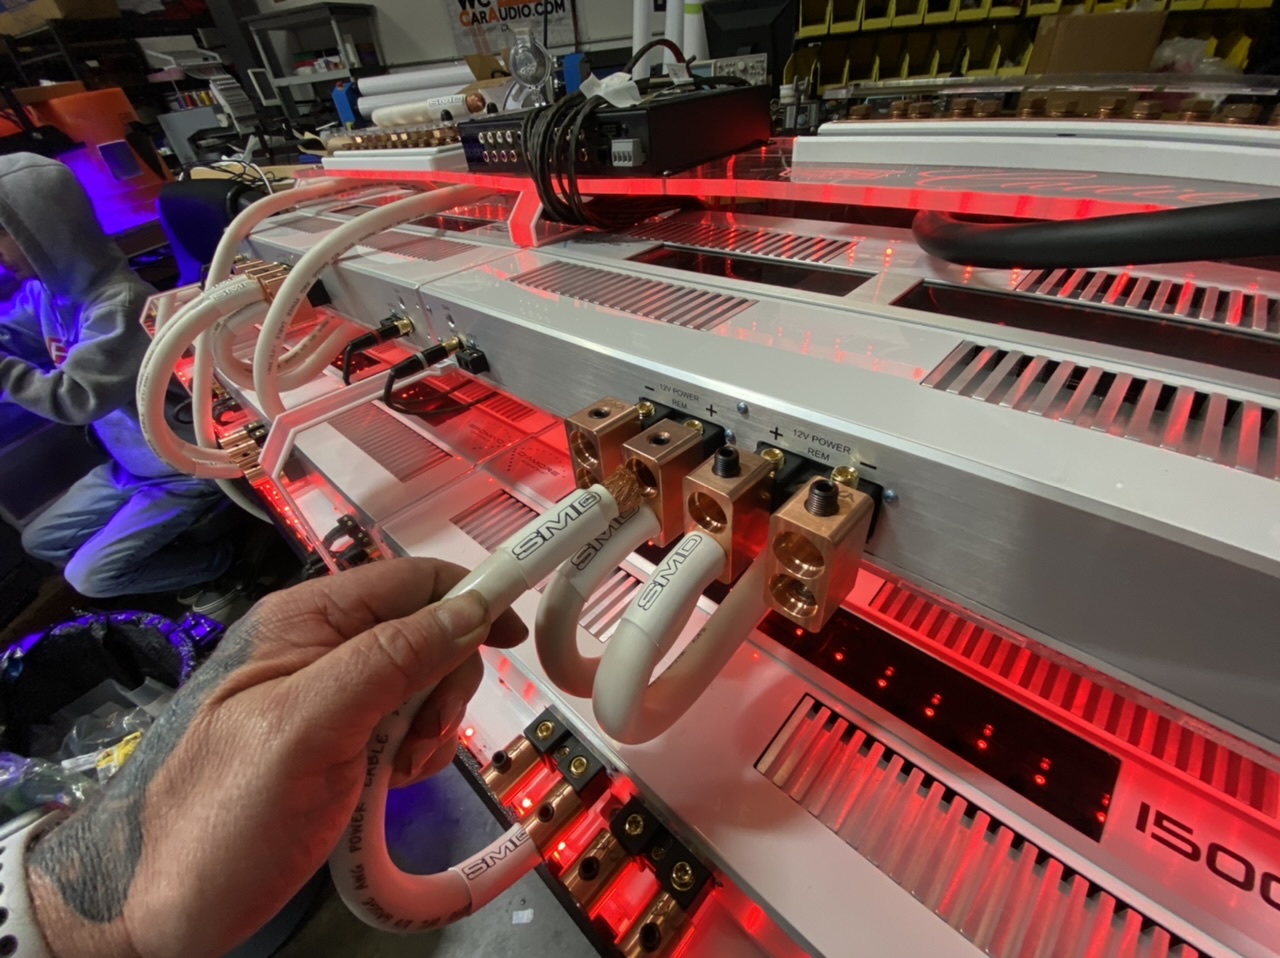
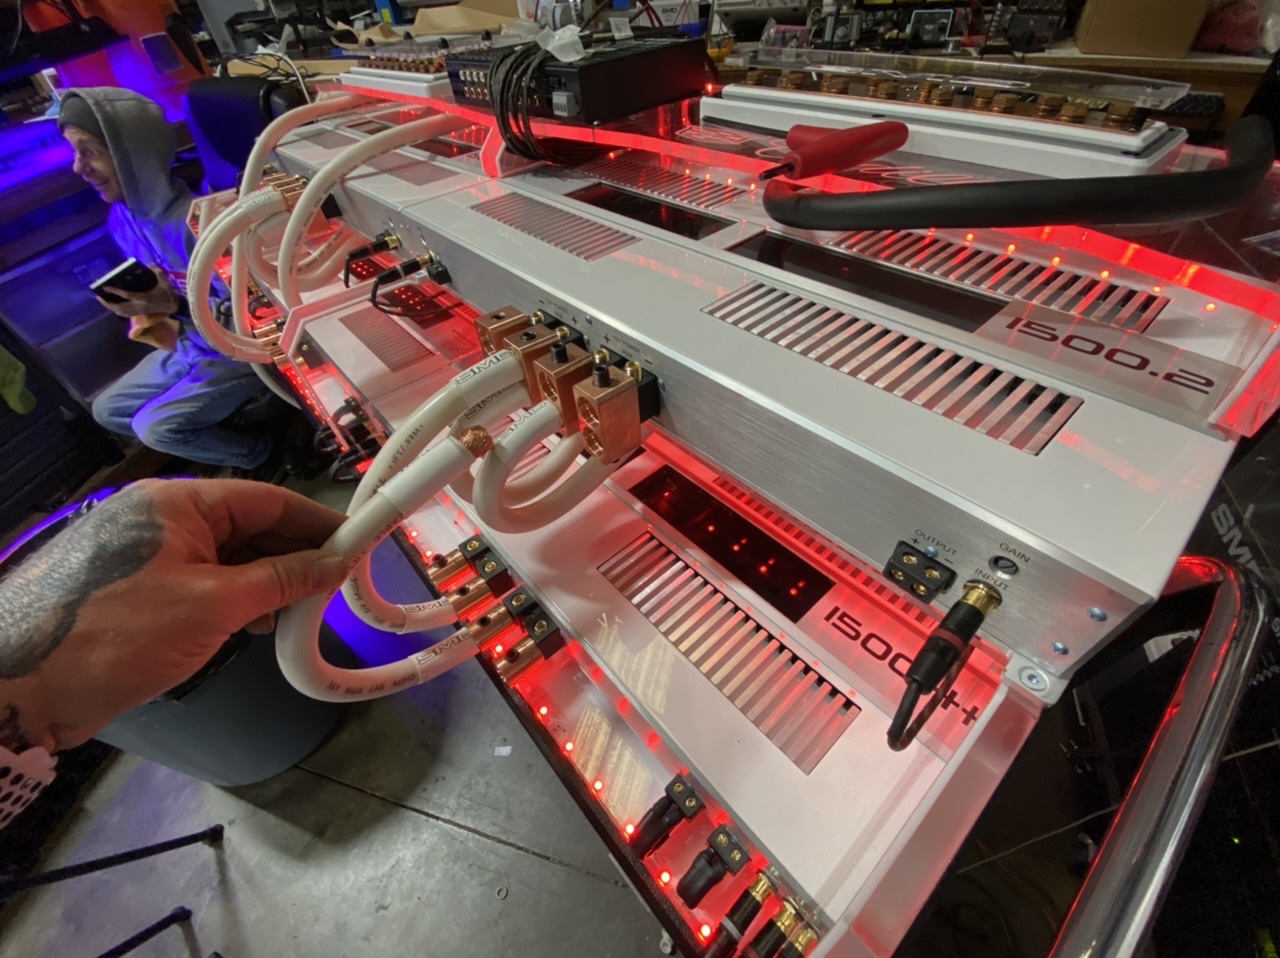
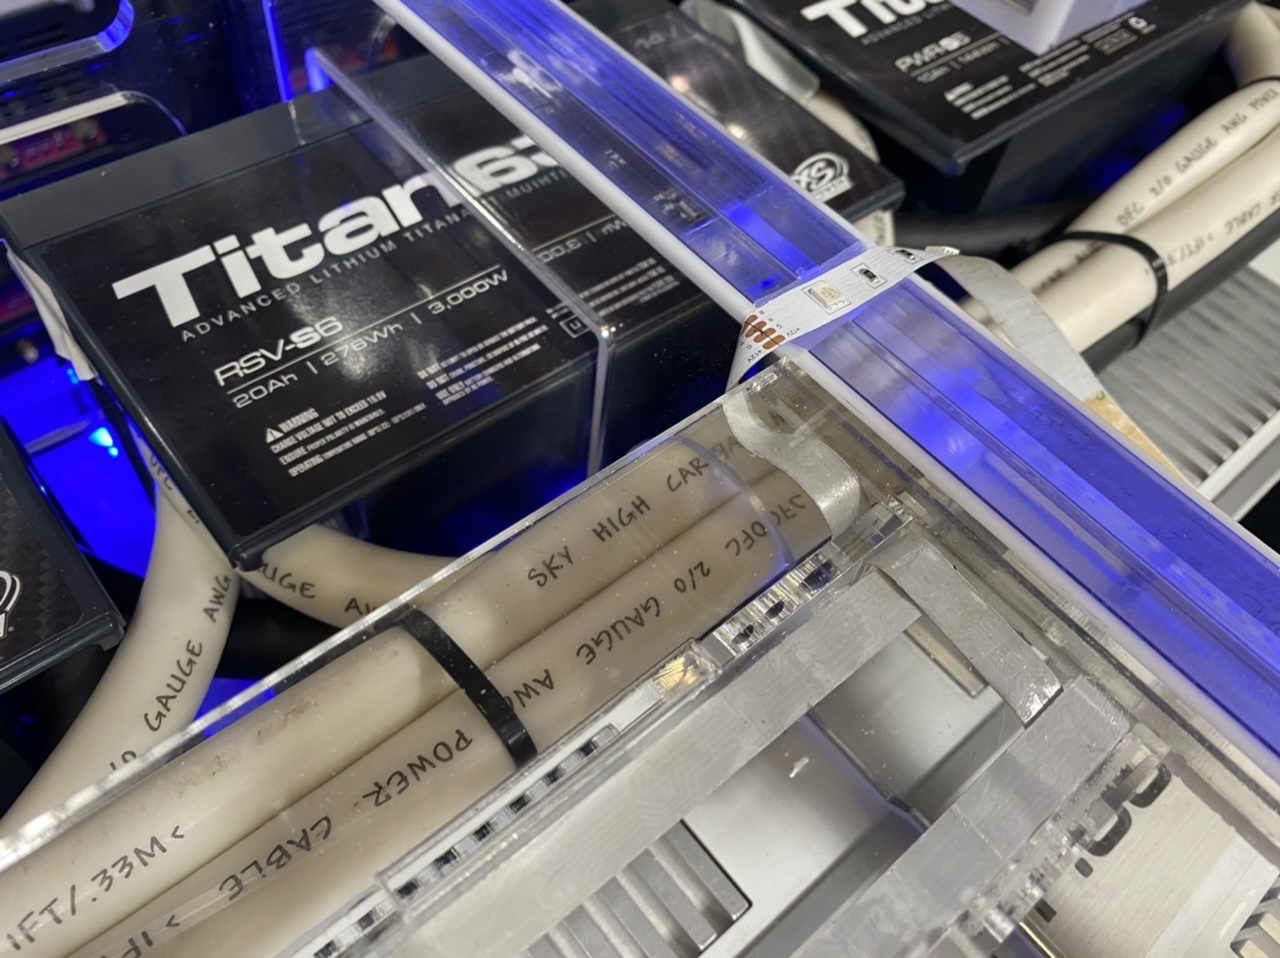
Time for some power wire. (ground too). Of course it's all about that Skyhigh Car Audio 2/0 OFC! Also got some matching black/white 8ga for the subwoofers speaker wire.
-
these copper 1/0 to 2/0 adapters from Skyhigh Car Audio are the shit! Tomorrow i start running all the power cable. White Skyhigh 2/0 Positive and black 2/0 on the negative. It should really be something to see when i populate all the blocks.
-
7 hours ago, Frankiebonez said:
Yea you're right. I should have been more specific not the ones @meade916has, the 14v are alot more like you said. I forgot the 14v is alot more.
The 12v you can get for $599. I got mine on a black friday sale for 10% off. Showtime Electronics has the 12v for $599 currently. Wait for a sale you can scoop up a 12v model for about what I paid.i don't need a 12v model and i don't need to wait for a sale
") Thanks though! lol
Thanks though! lol
-
1
-
-
-
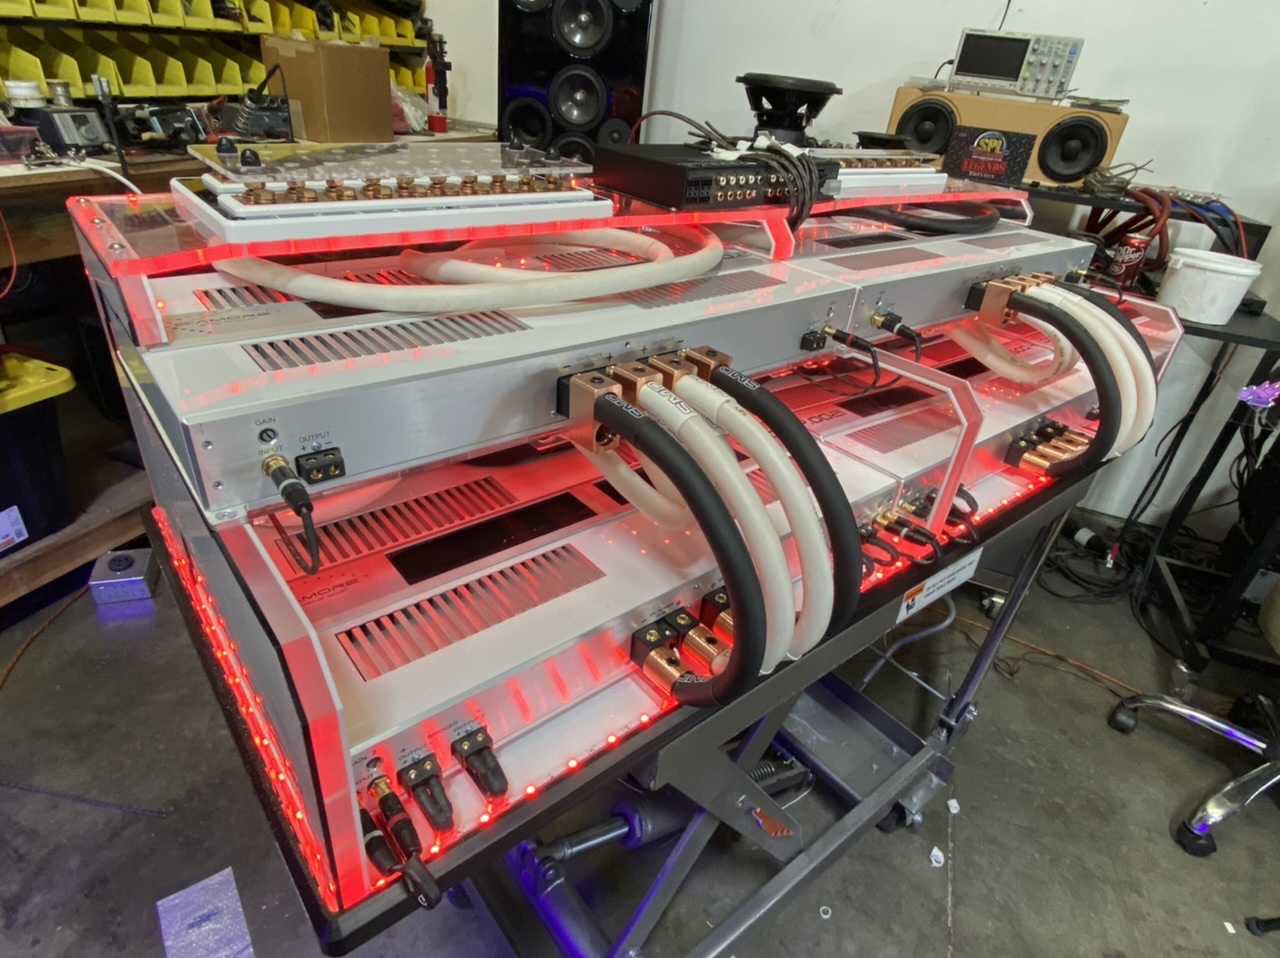
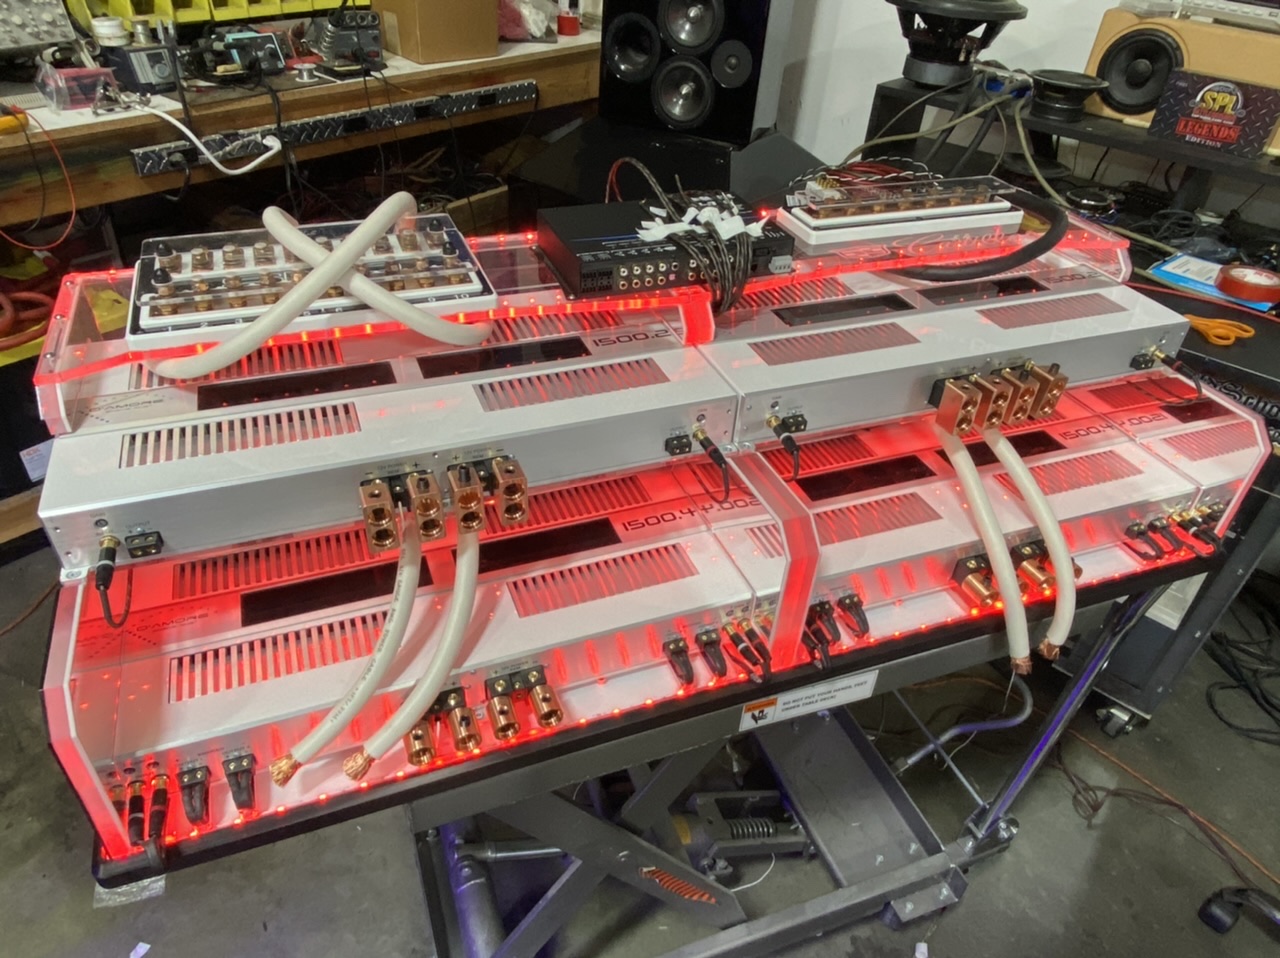
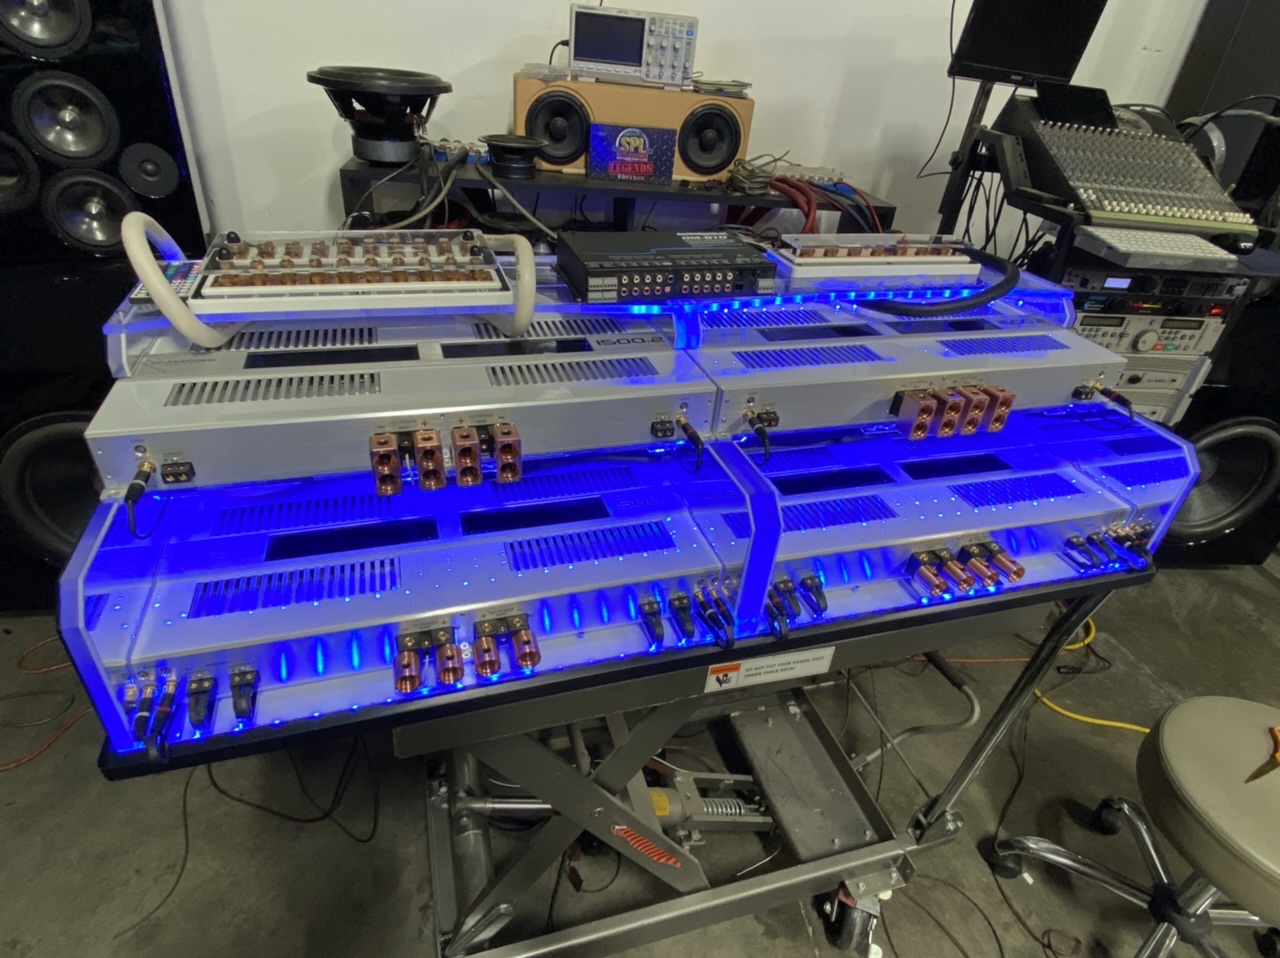
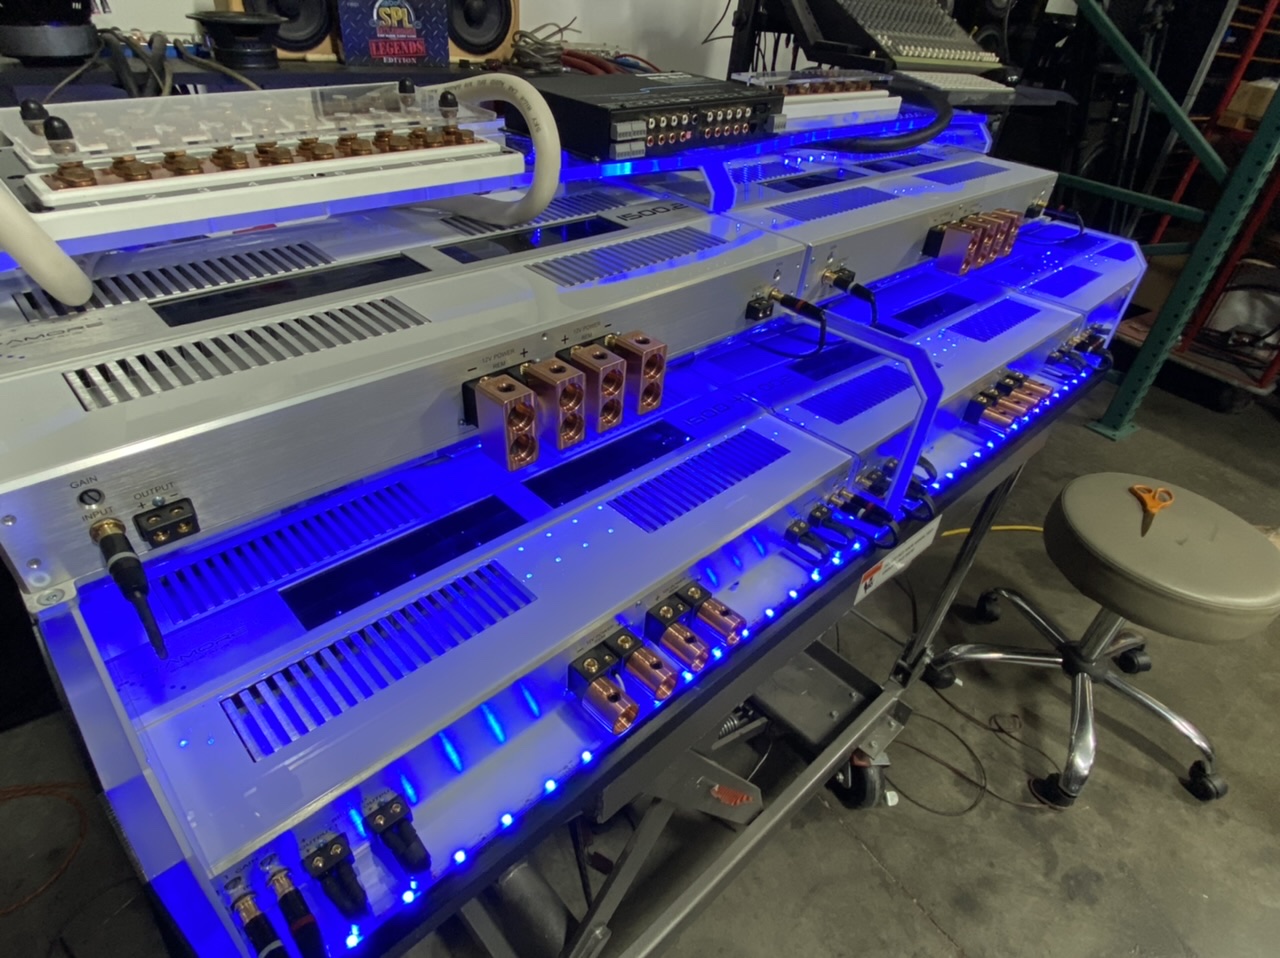
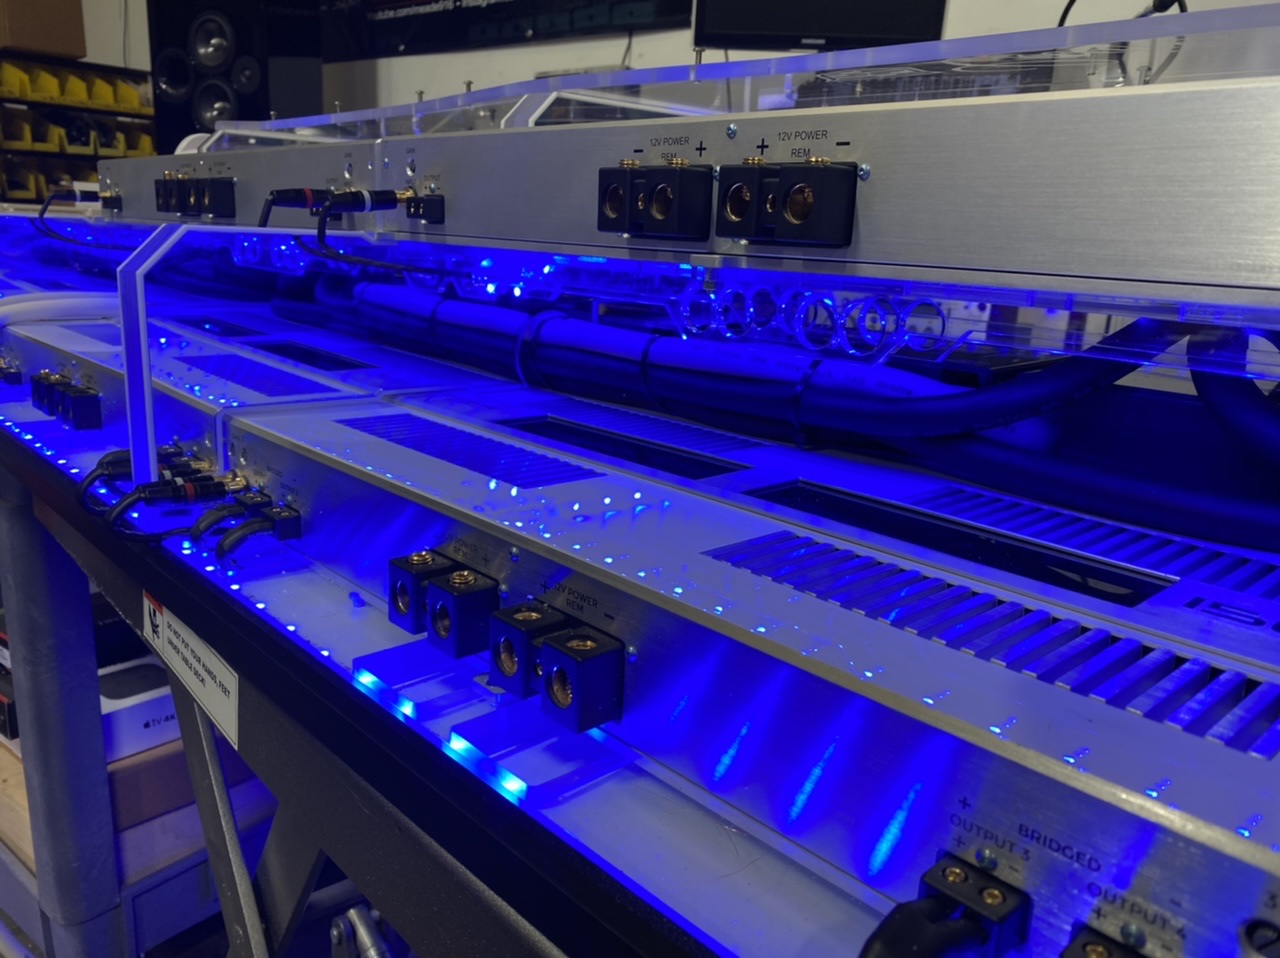
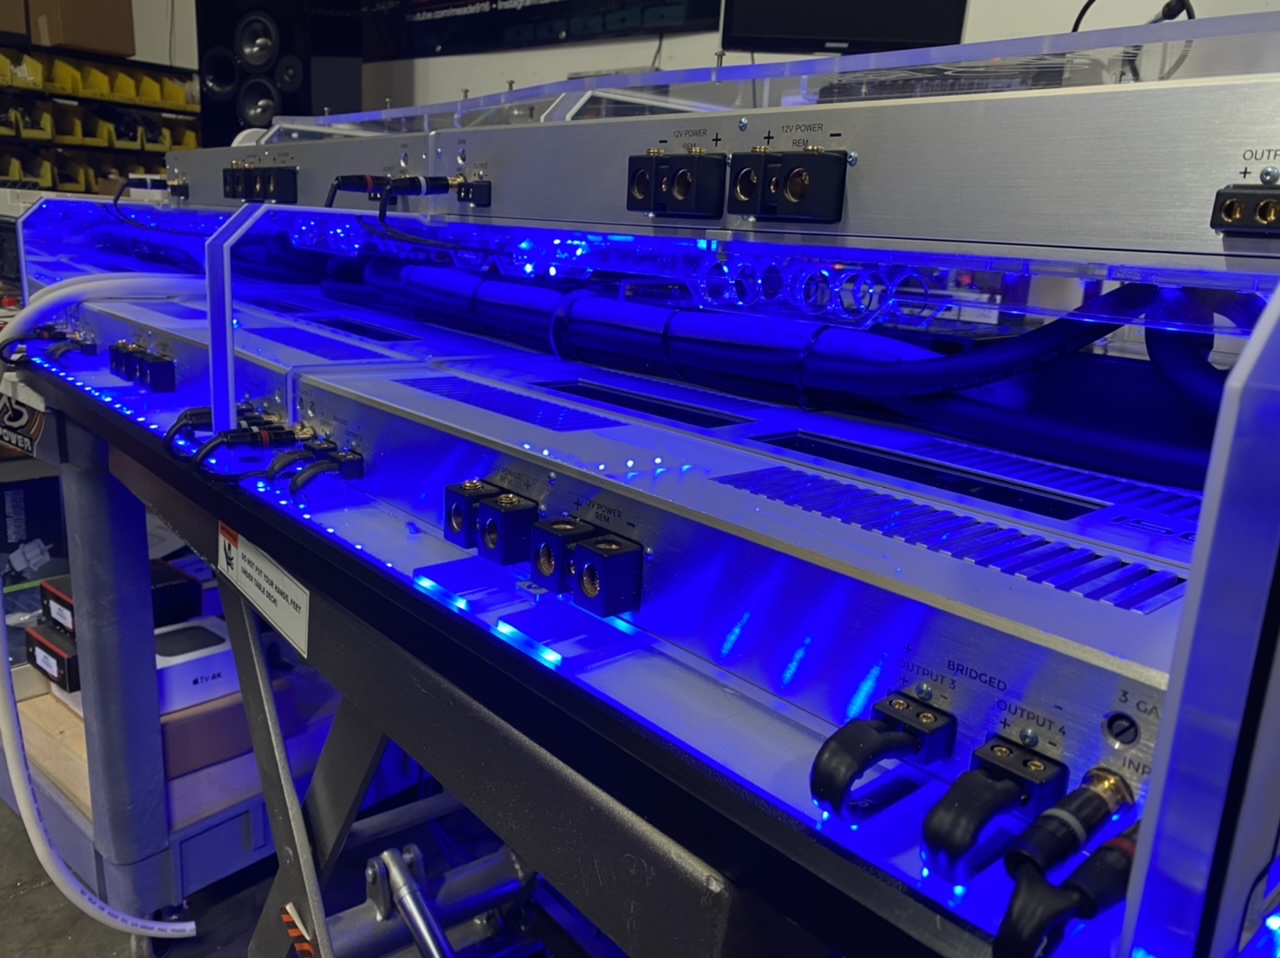
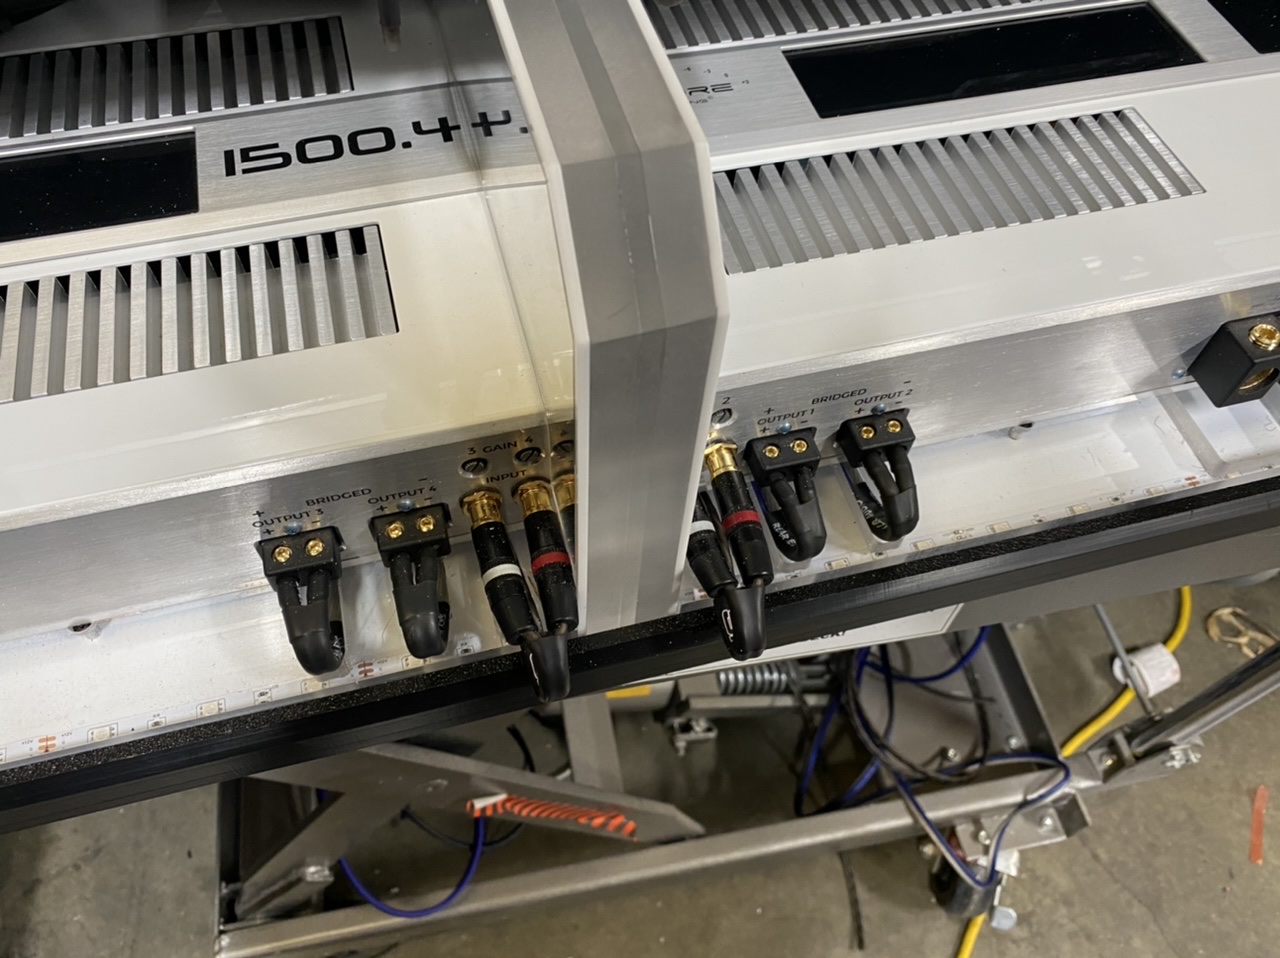
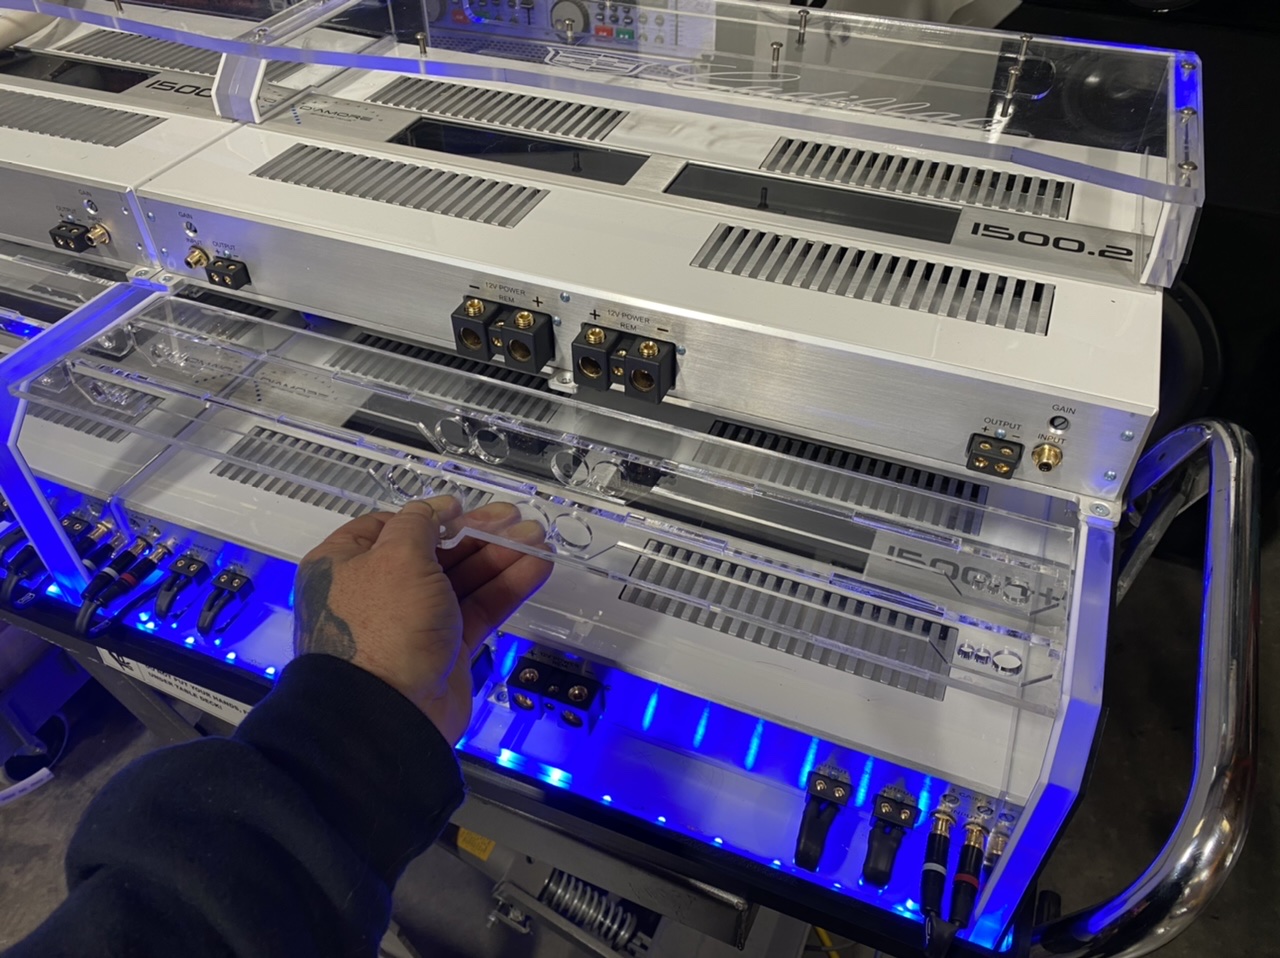
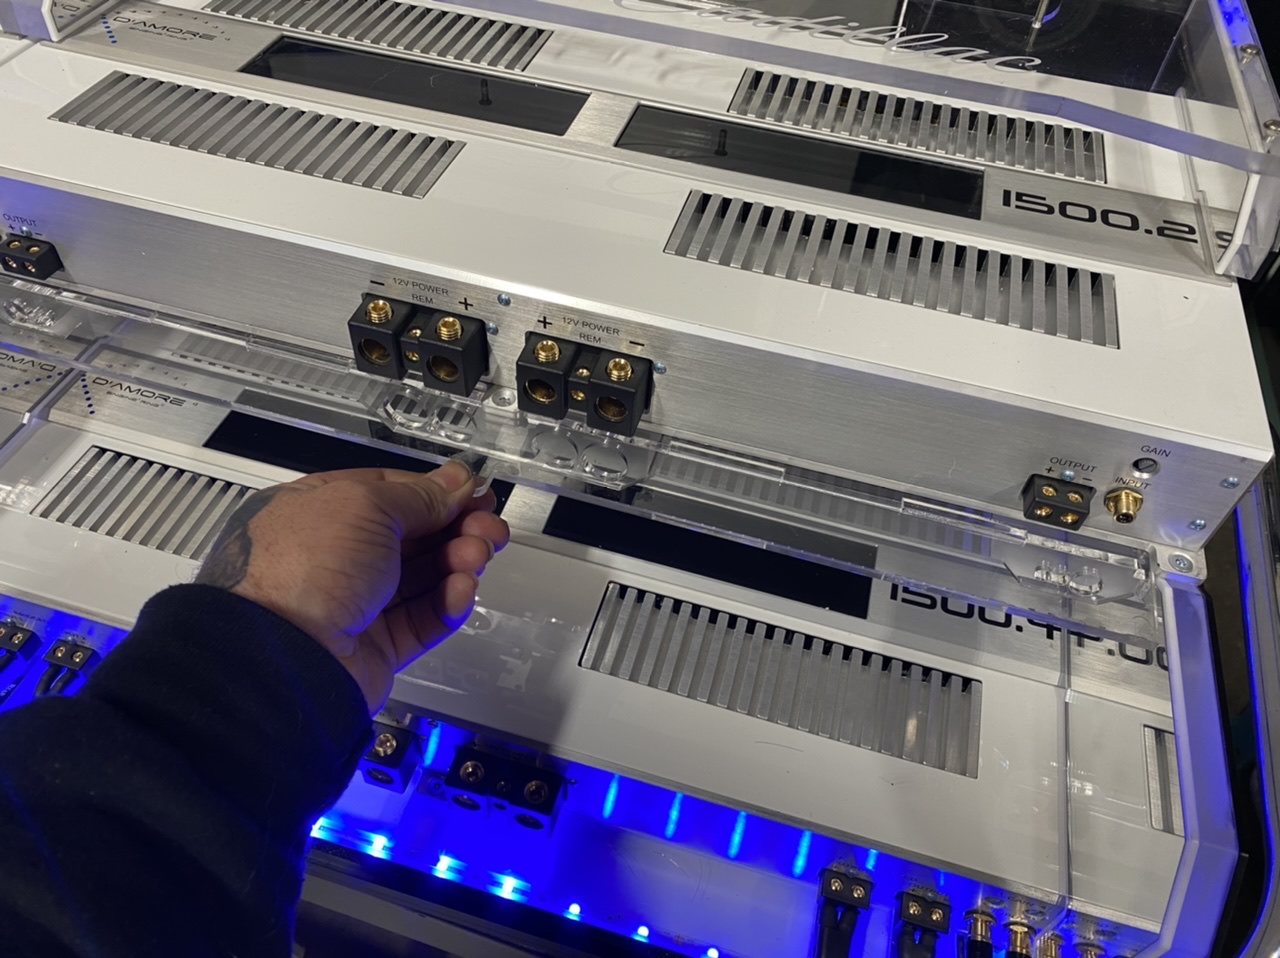
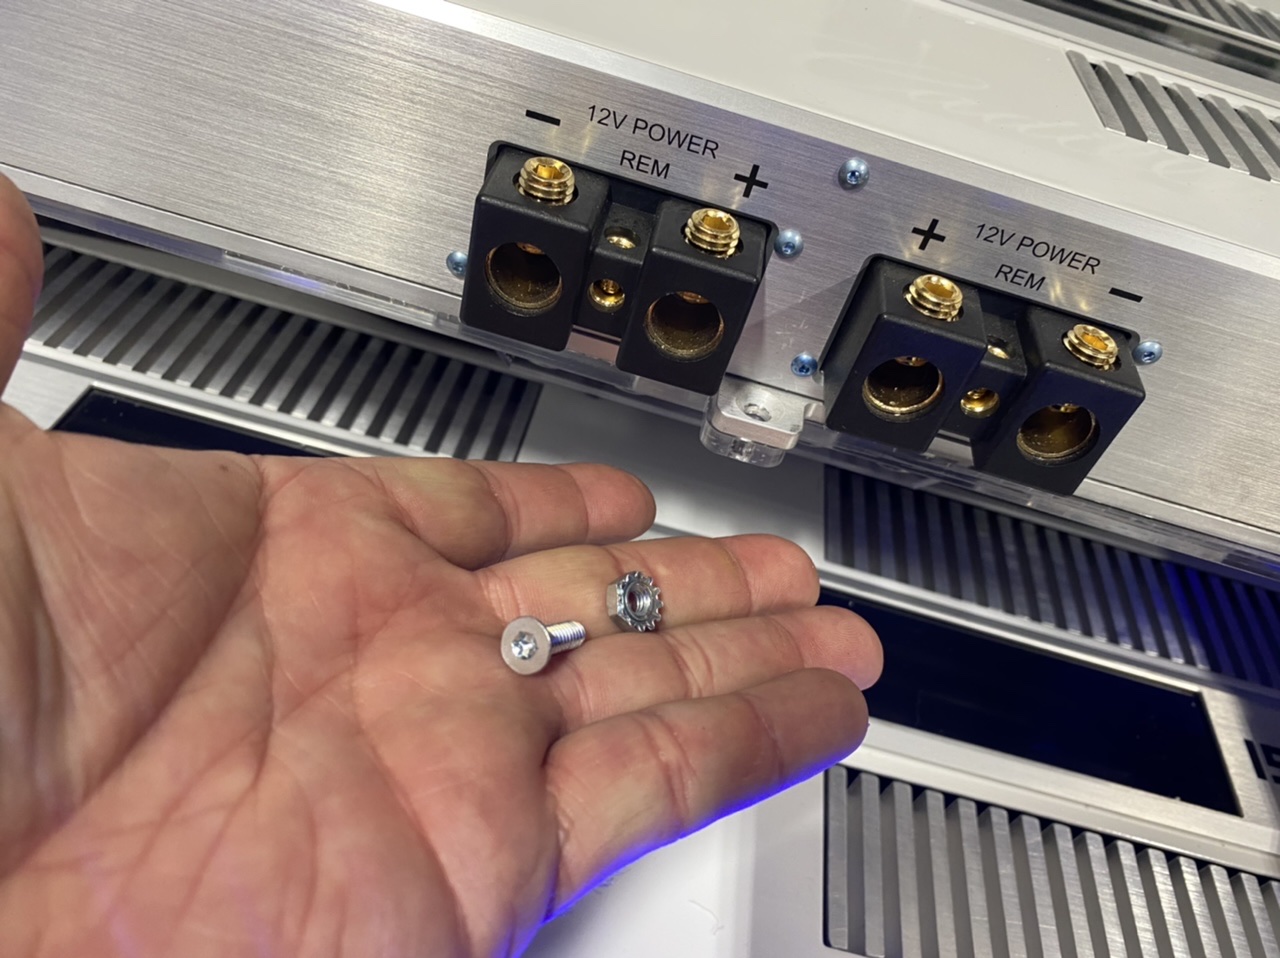
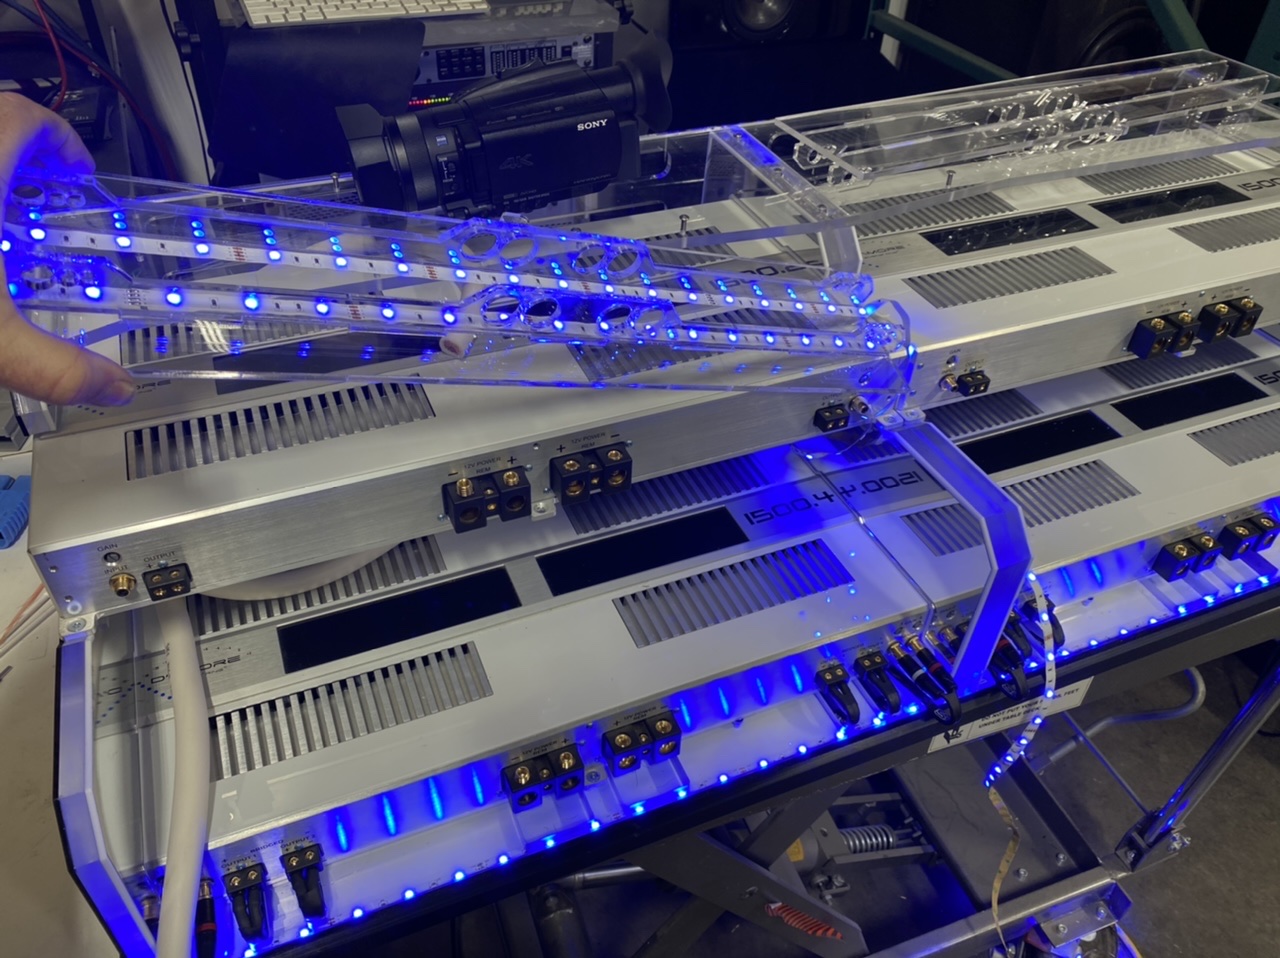
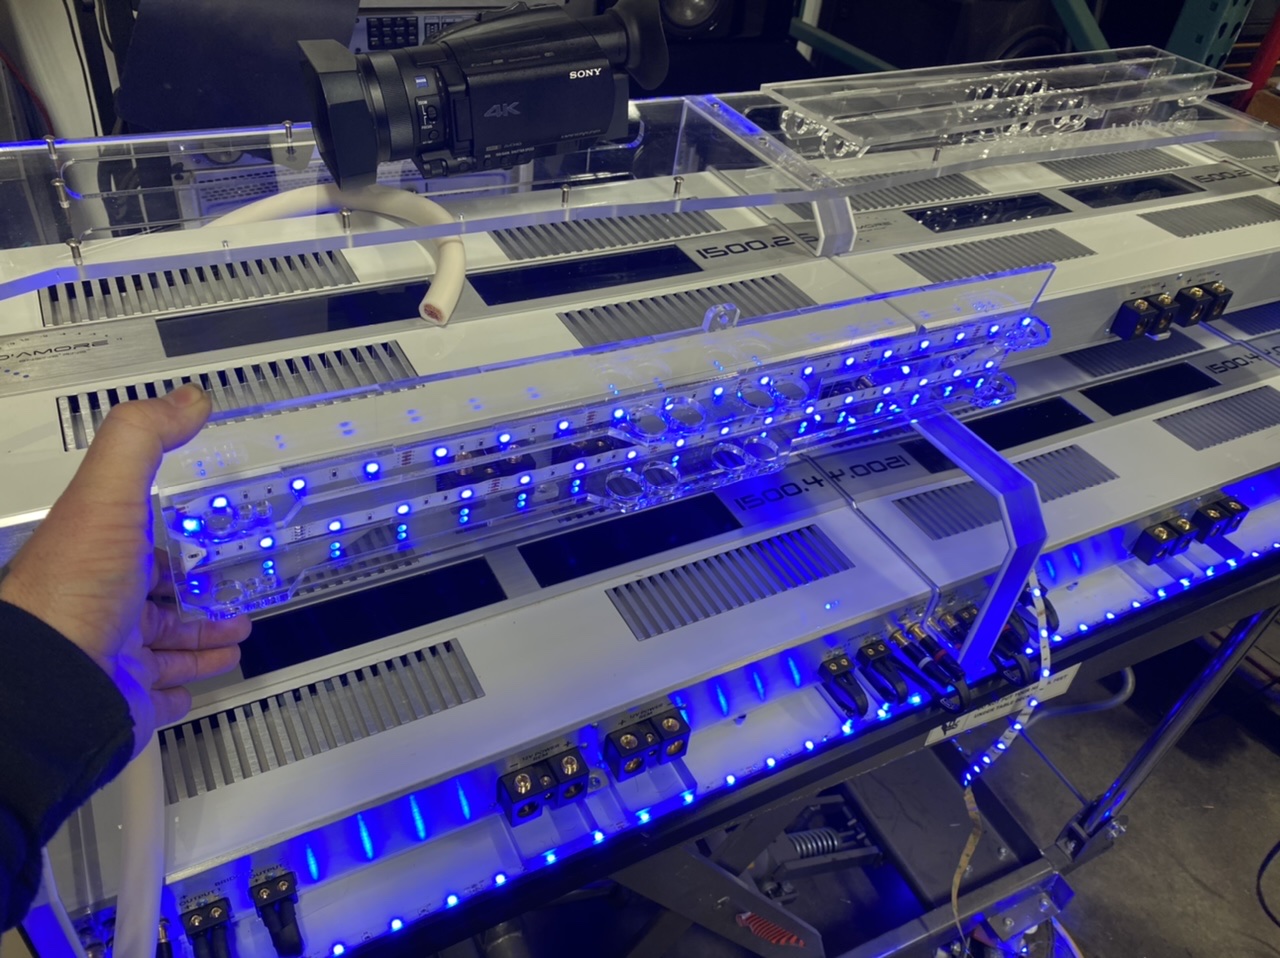
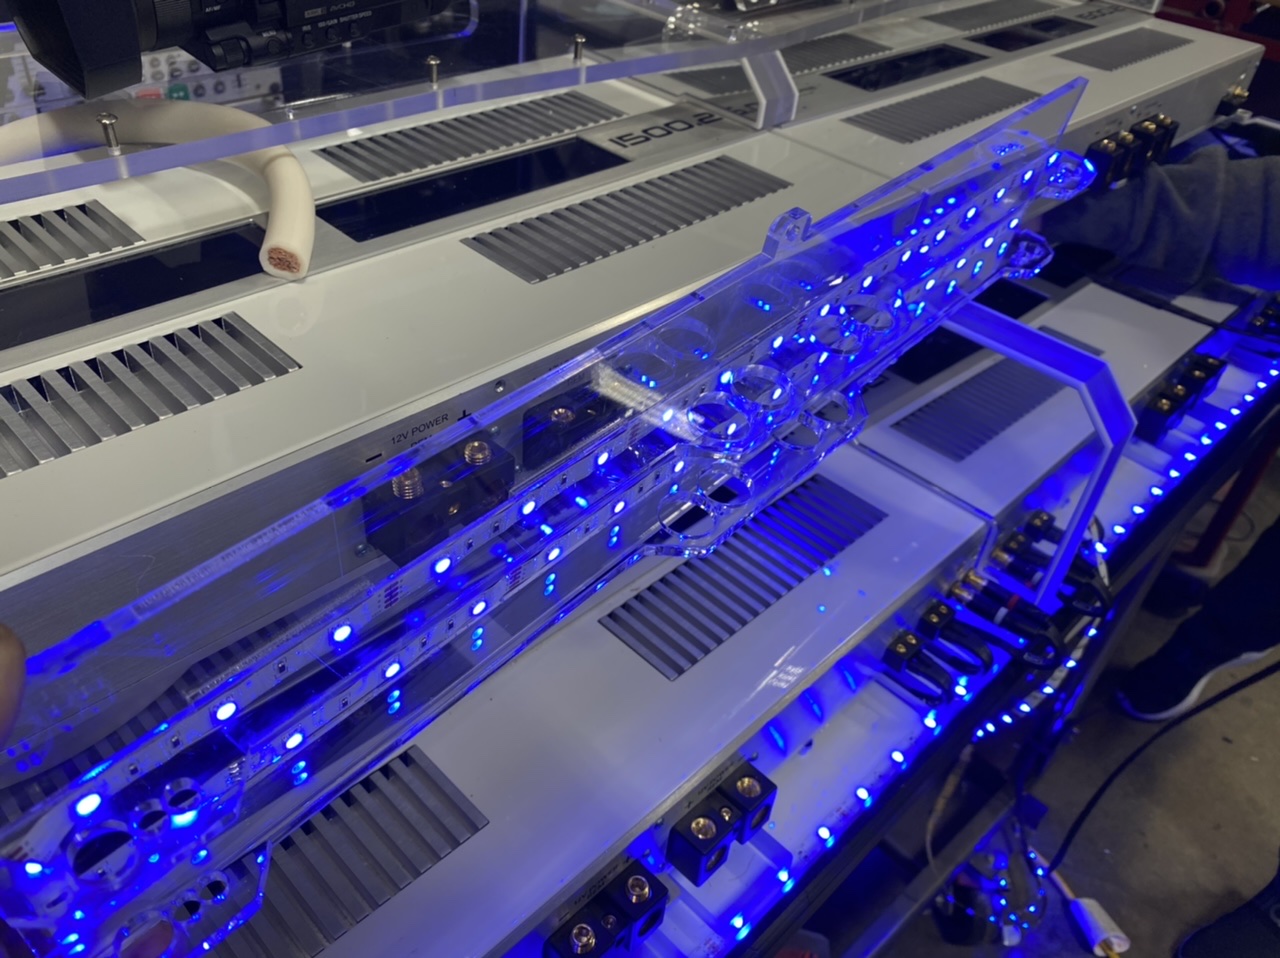
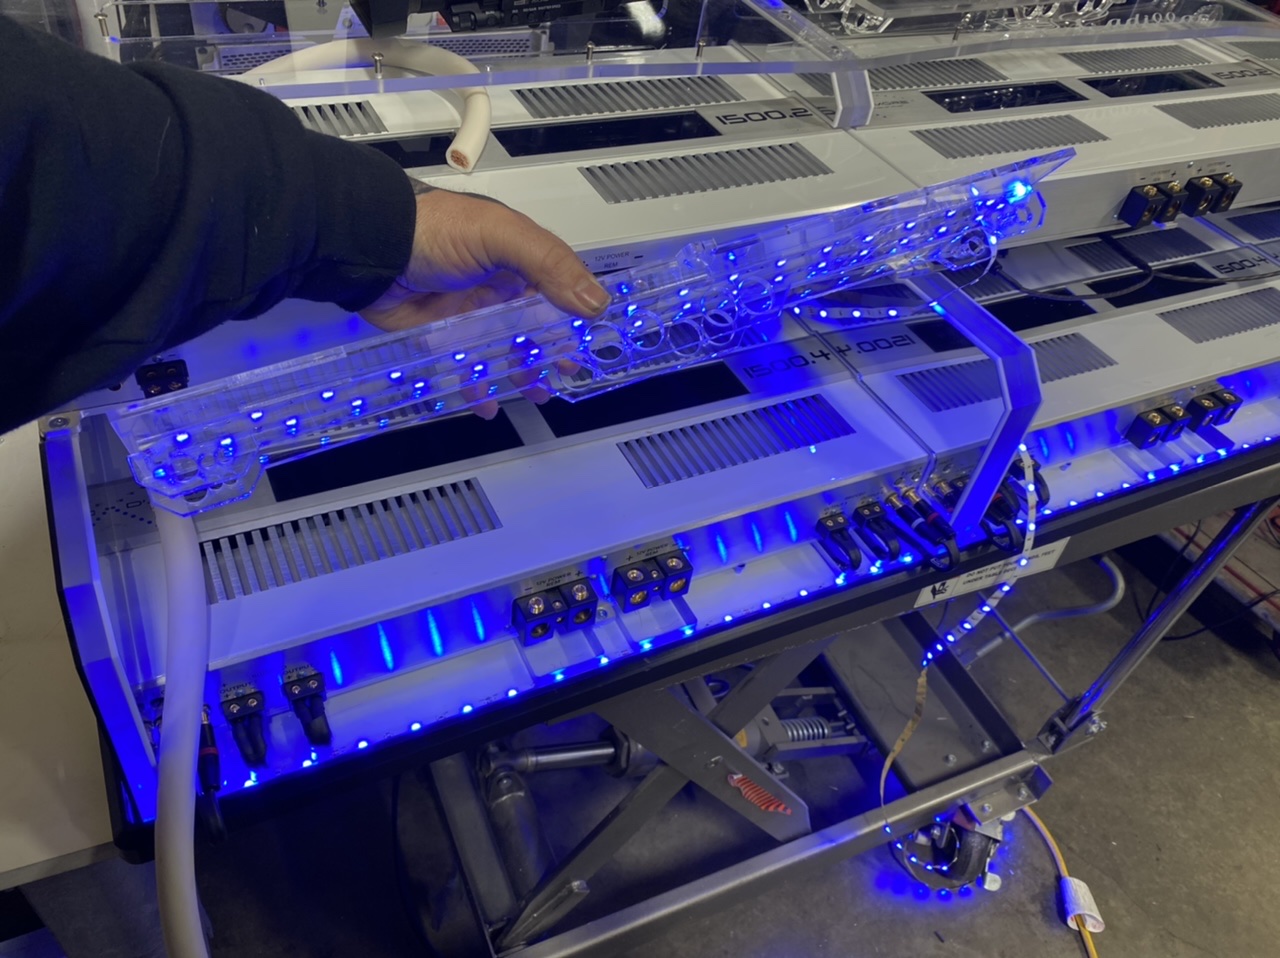
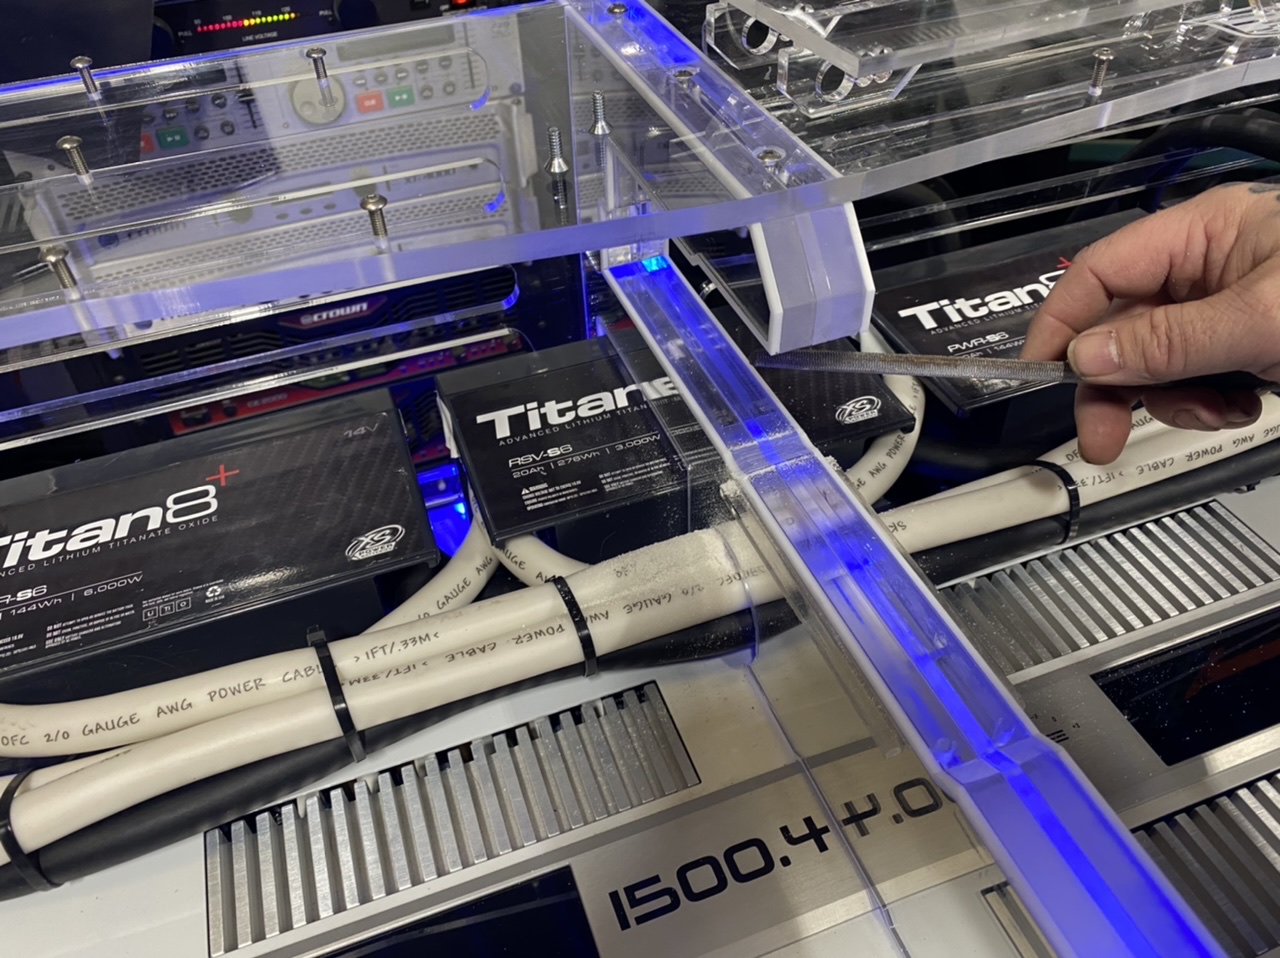
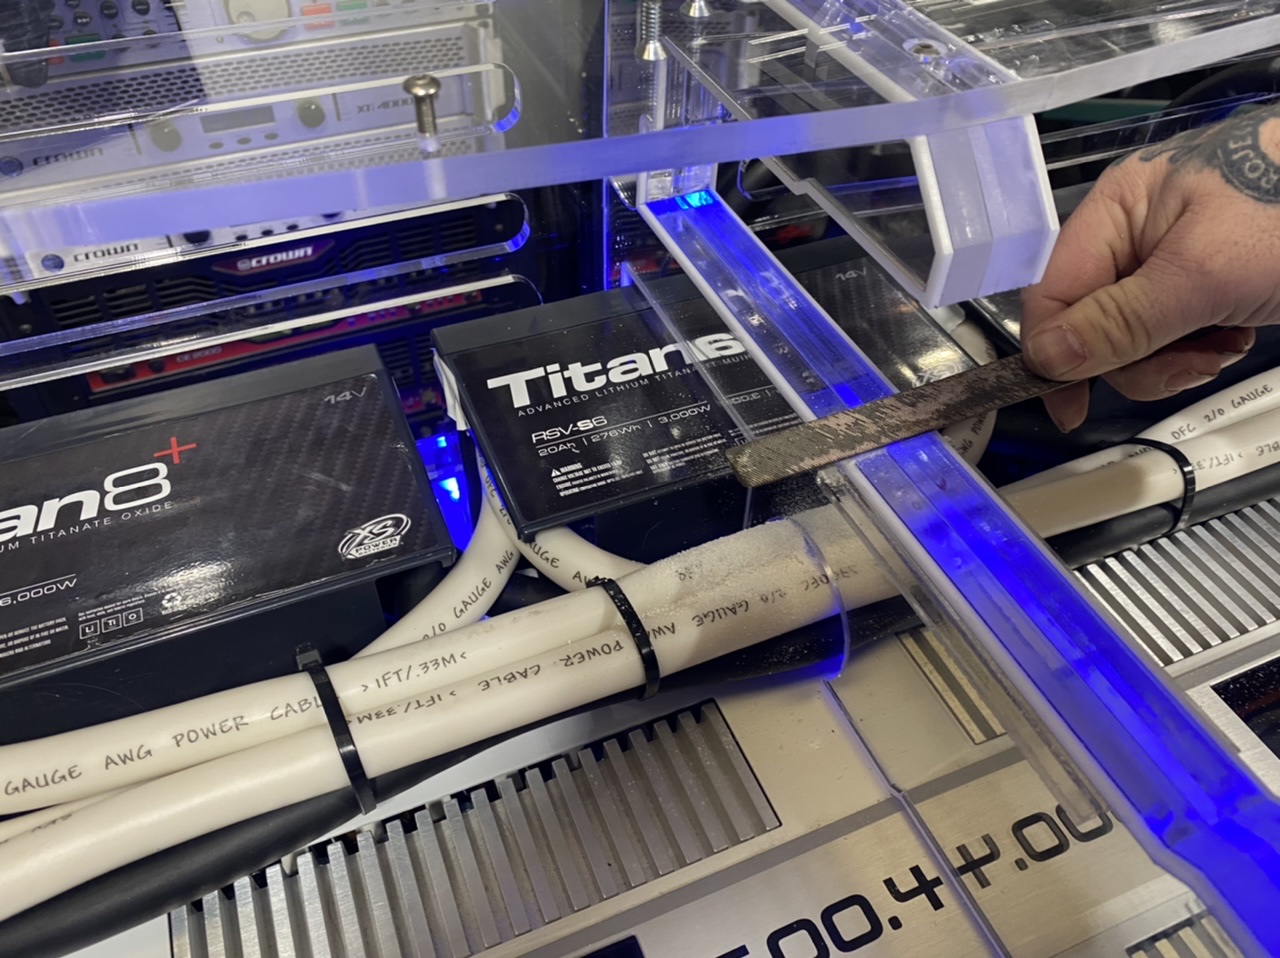
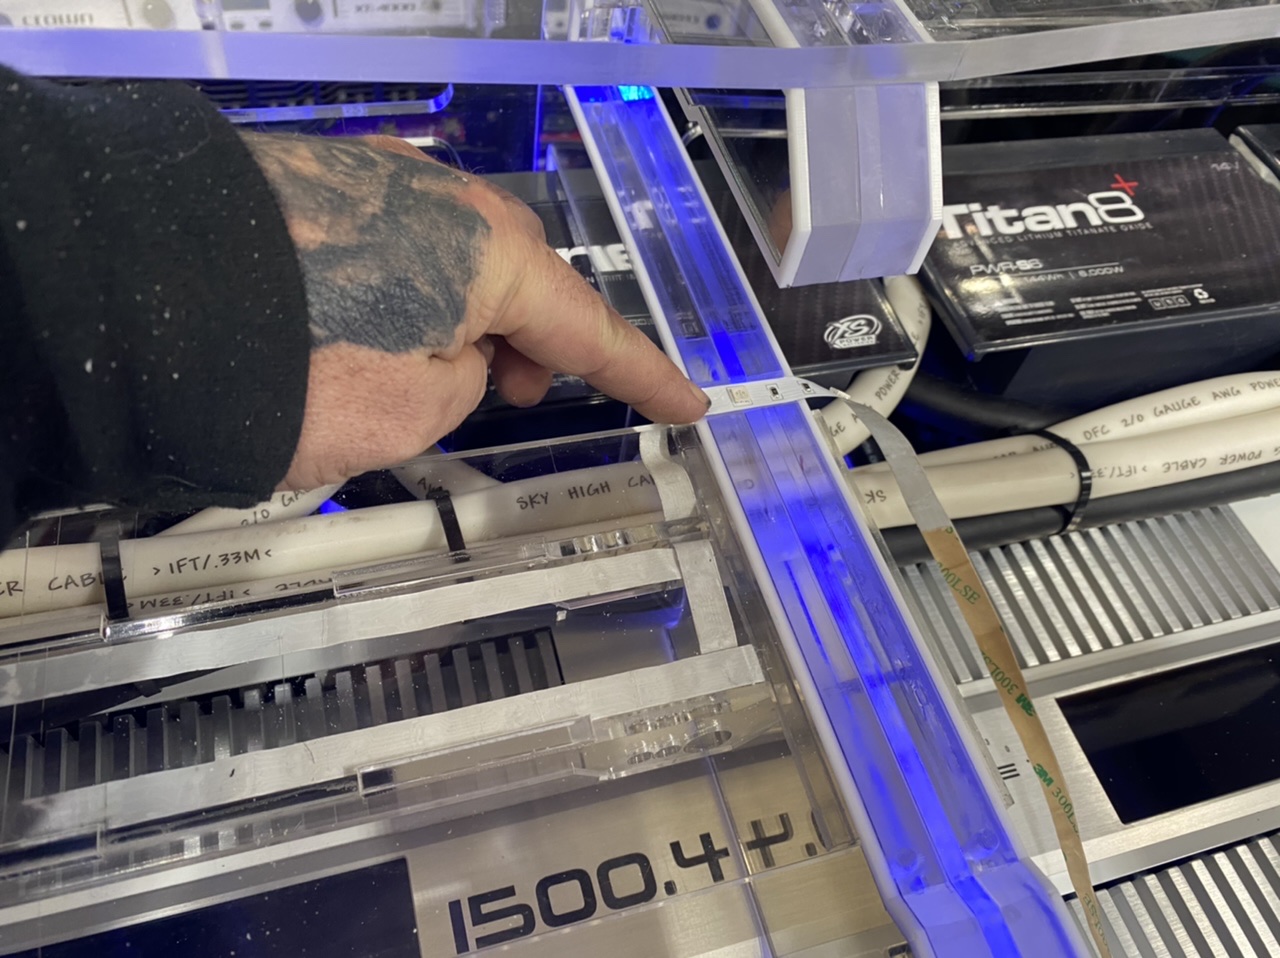
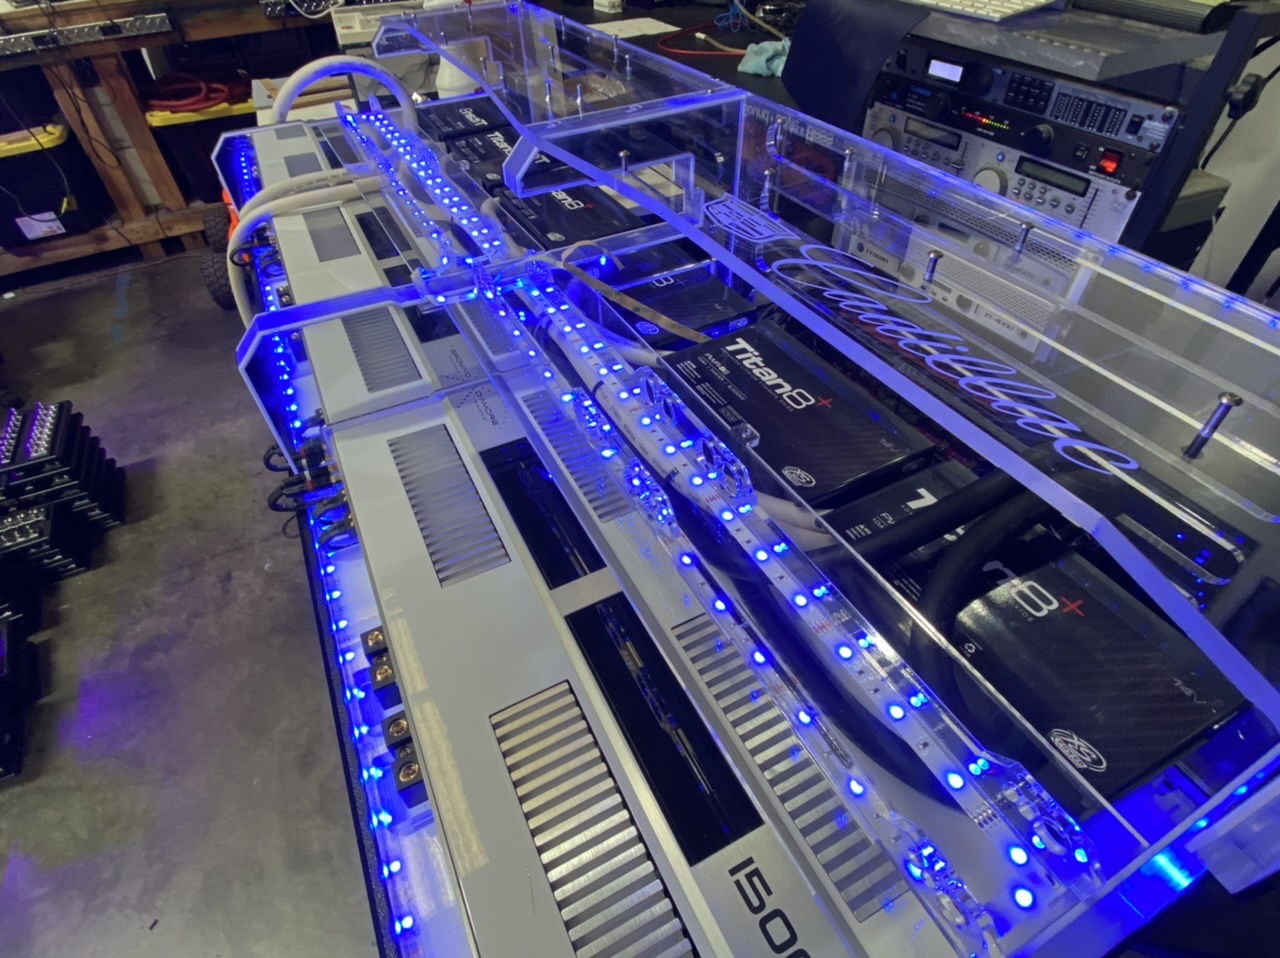
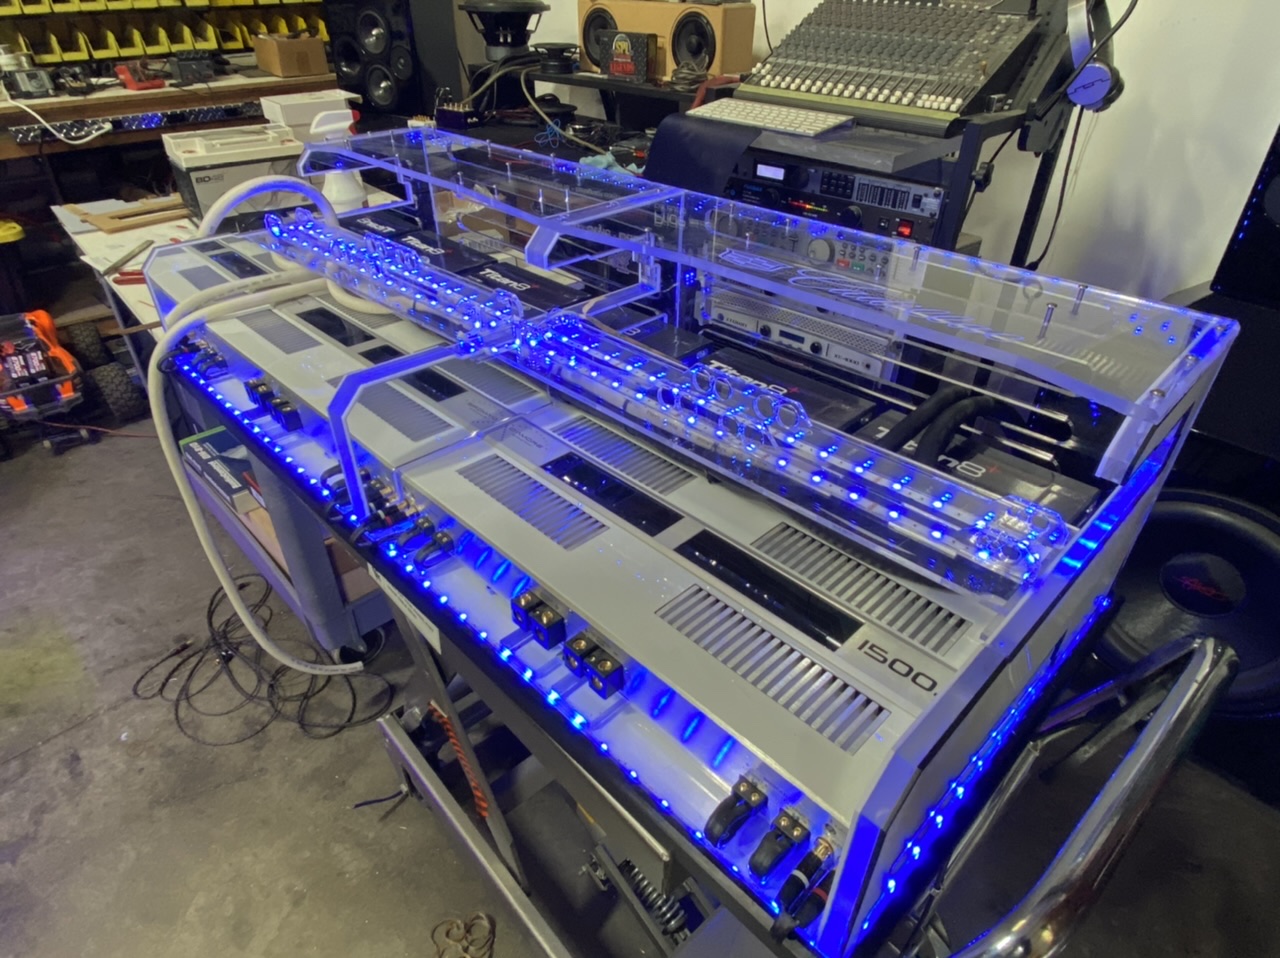
You can't really see them here, but in my next video i show it more. There is two 1/4" "sliders" on each side. They give this thing something to rest on on each side. The middle is held in place with a matching fastener (on that center foot of the top amp). It came out perfect!
Two rows of LED's on each set of wire guides and aimed downward to illuminate the amps very nicely while hiding most of the actual light source.
If you look close there is two spots that had to be modded. That big ass 3" hole to allow the power wires to pass through and also i had to grind this down just enough for the LED's to pass by and not be touched by the amp.
-
1
-

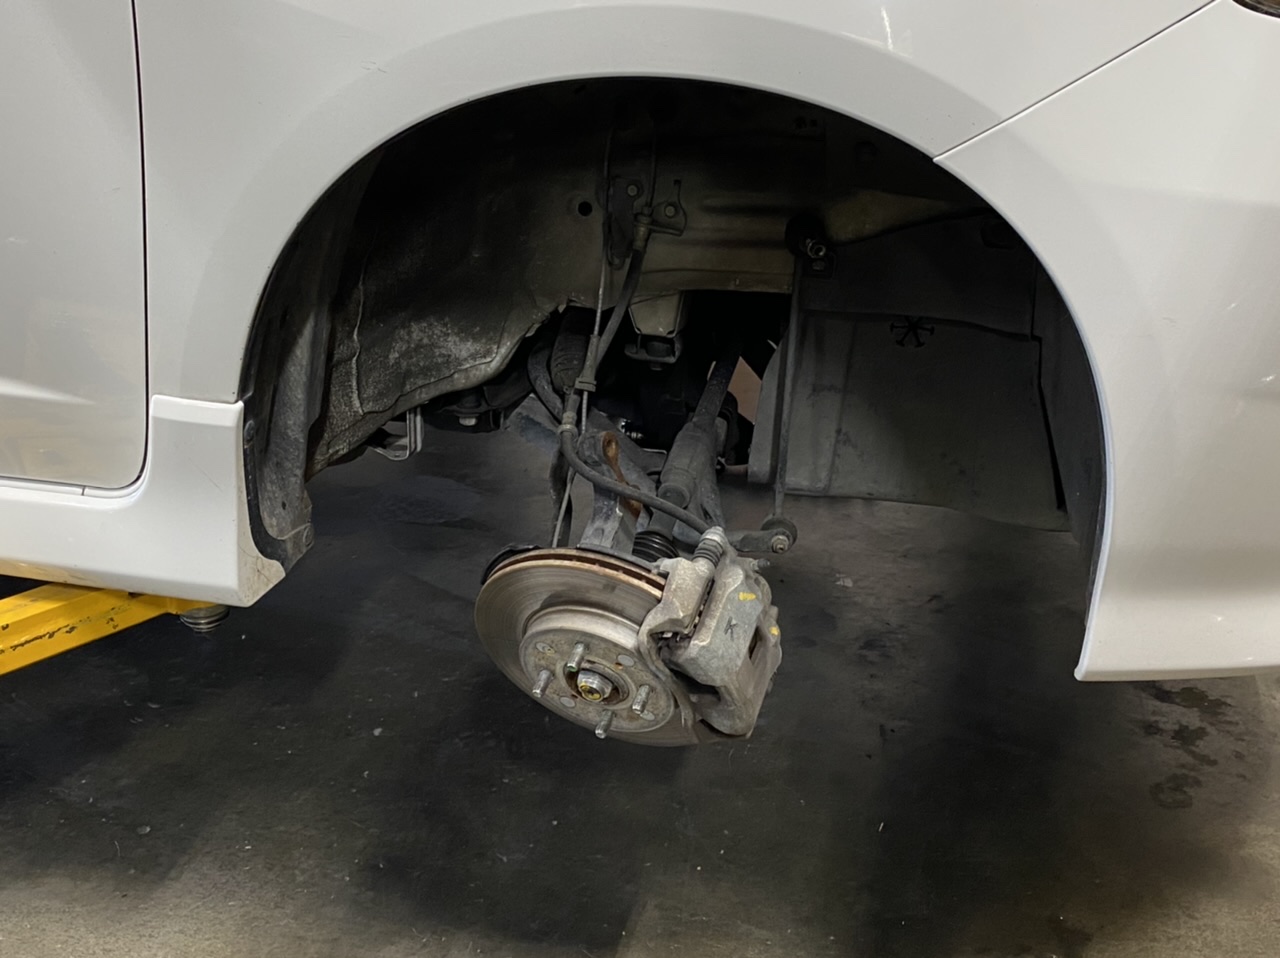

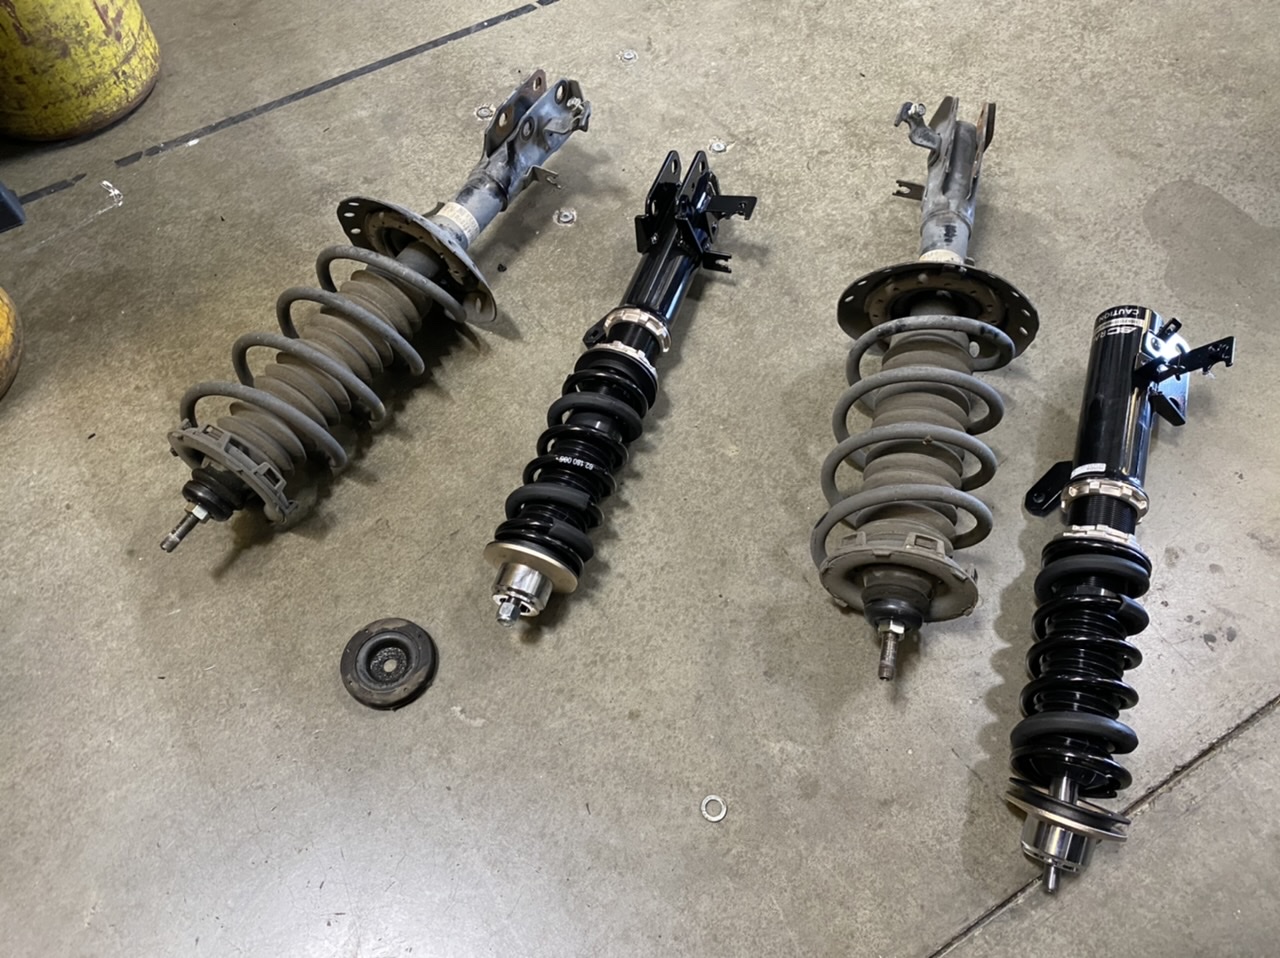
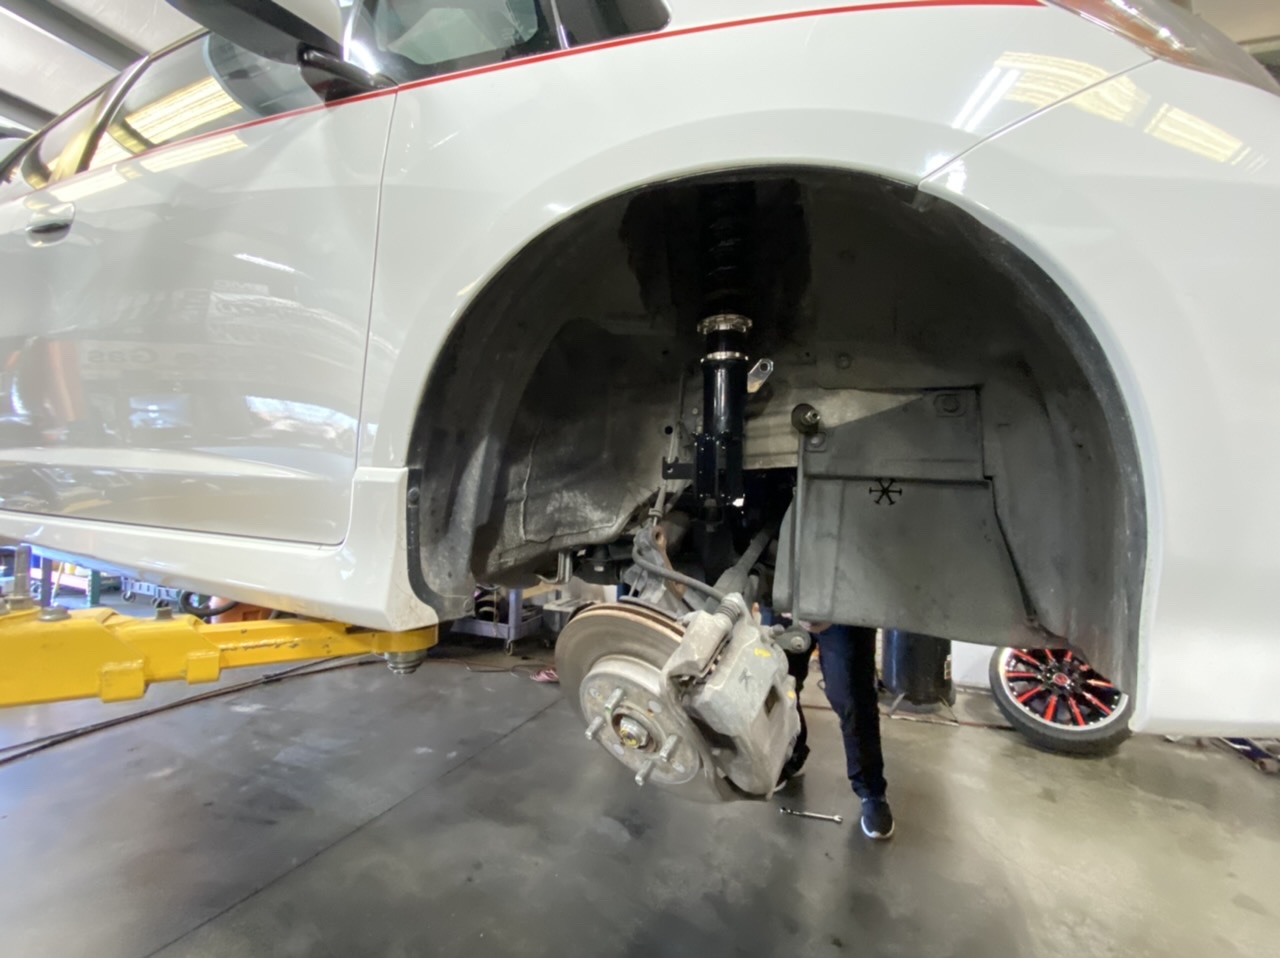
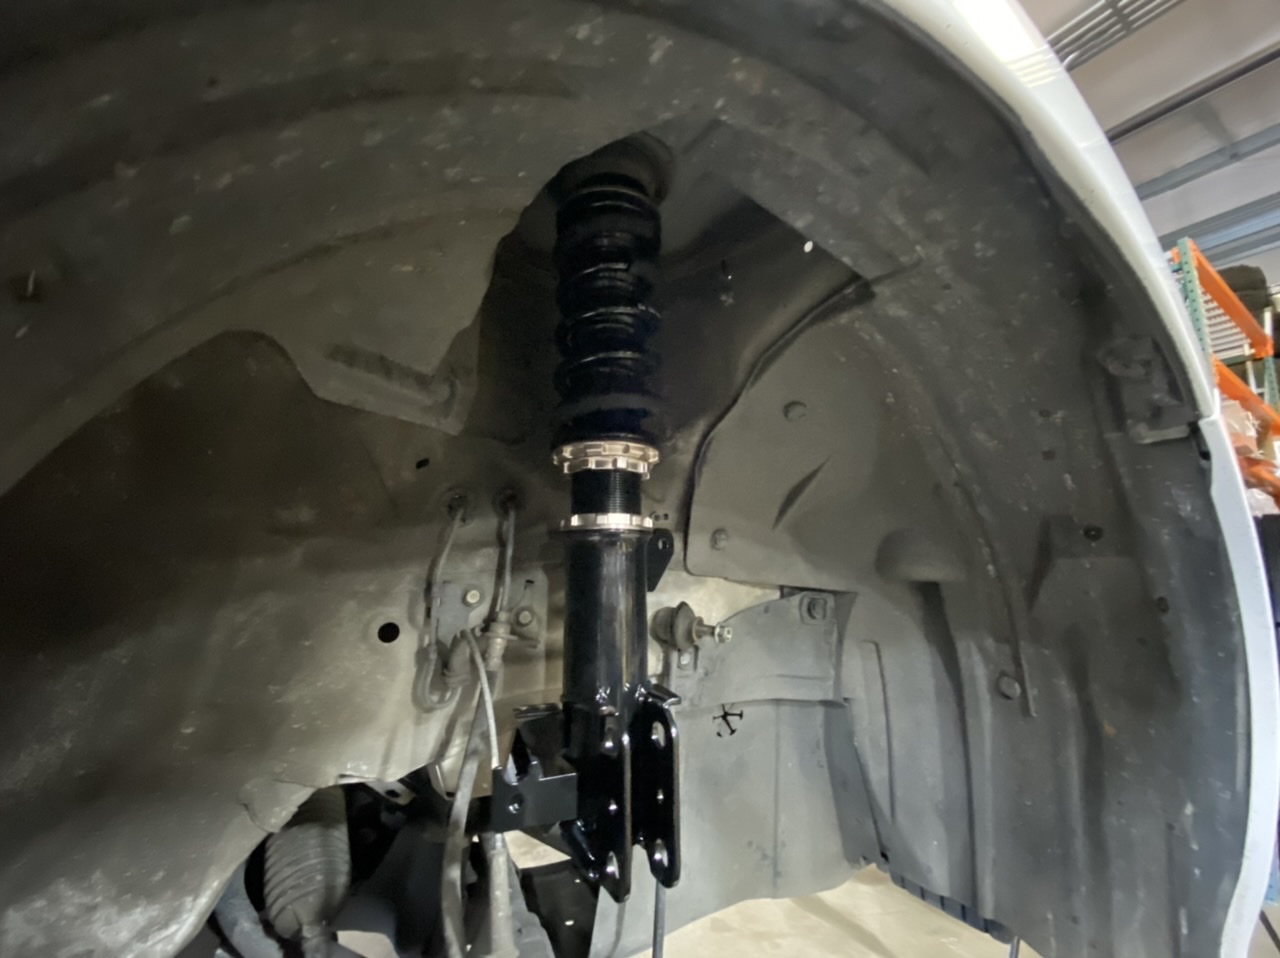
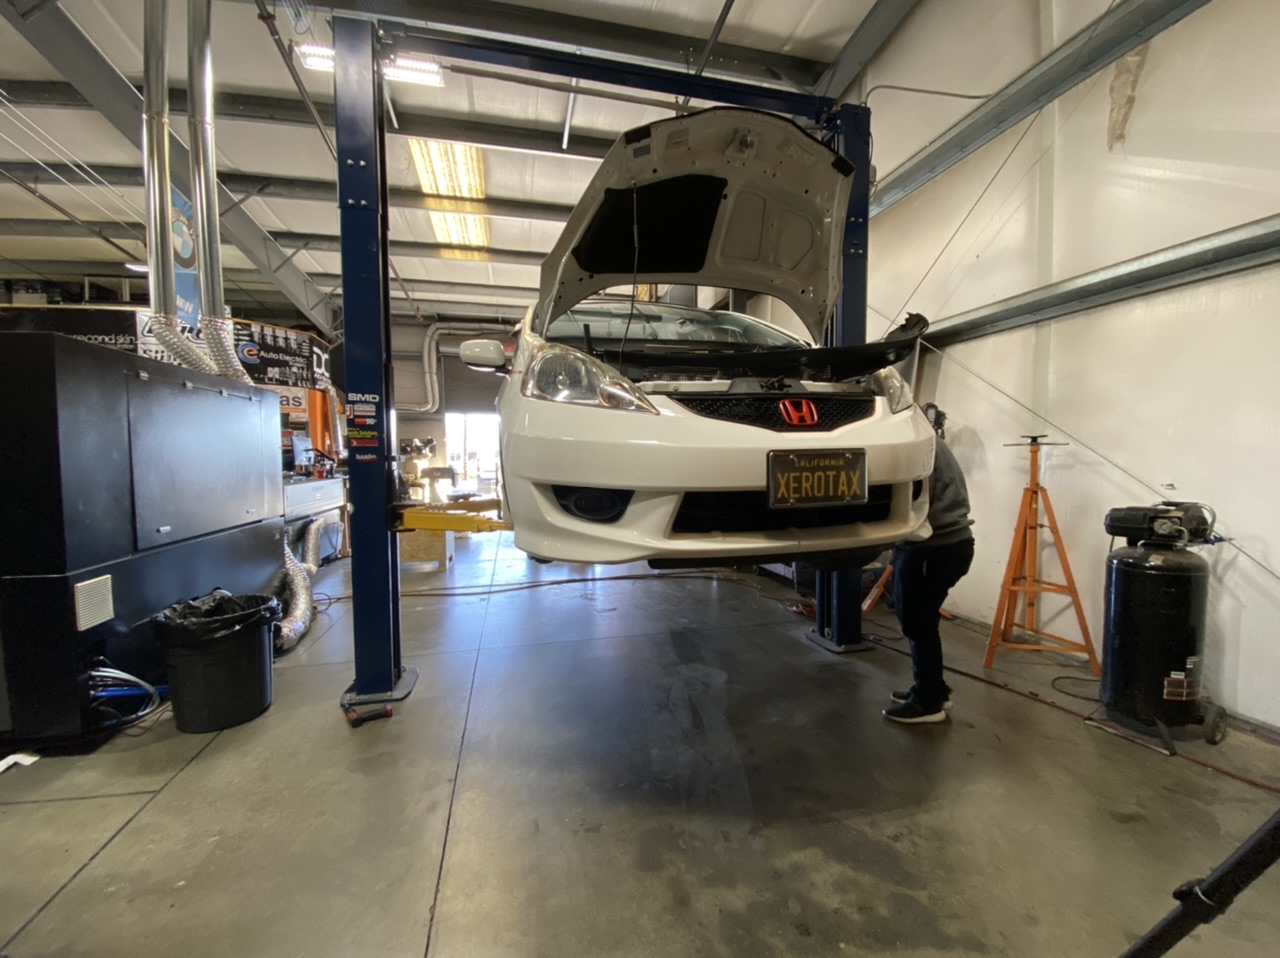


lowering a 2009 Turbo Honda Fit - BC Racing Coilovers
in Just Meade....my projects - Tons of SMD Builds here!
Posted
dude is in his mid 50's. He don't need to tuck tire to be cool. lol