
bsneon98
-
Posts
1103 -
Joined
-
Last visited
-
Days Won
2
Content Type
Profiles
Forums
Events
Media Demo
Store
Collections
Videos
Posts posted by bsneon98
-
-
Those lights add such a nice touch!
-
Im so jelly of the CNC'd rabbets. Looks killer steve!
-
Since Jan '12. Very glad I joined!
-
Wanted to re wire my 4 channel wireless switch, time to put all that sky high wire to good use!

All wired and labeled
I found this cool spiral wrap at home depot for like 3 bucks. And you get 2 lengths around 4 ft long or so. Figured if I ever wanted to change the length of one harness I can T off almost anywhere.
Everything in place, Plenty of areas to hook stuff up now!
-
Finally some audio related updates.
Wanted to downsize the 6x9 box now that I have huge front fill from the door panels.
Did the entire countersink with a 1/4 chisel and hammer lol-
 2
2
-
-
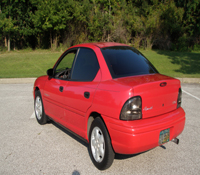
Back home finally. Still have to wetsand and buff the clear for a mirror like shine.
Only home for a week and she got snowed on
Fuck you Ohio weather, glad they didnt use salt though! Was honestly surprised they didnt
-
Great paint and body work!!!
thanks man. its not bad for my first time.
-
Another coat of primer:
Wetsanded that primer stage with 600 grit
No more roof rails!
Finally the moment you all (and myself) have been waiting for
Then the whole basecoat was wetsanded also with 600
You can see the blue spot on the fender where it rubbed through. Thats ok because im doing another layer of color before clear anyway.
This was friday night, more color and clear finally!
better without the tire covers!
And this is how she was Saturday night. Got 3 of the 4 new tires mounted and balanced. 2 lugs on the last wheel fucked me so i had to make a run home for more tools.
Sunday was cleanup day and monday night I drove her home!
-
1
-
-
lookin good man lot of work
Thanks man its a ton of work lol
man thats a ton of body work! makes me miss my neon! looks good
thank you sir thats why Im holding onto this one as long as possible!
-
Peeled all tape and plastic. Getting ready to retape with paper for Primer and Color!
Love this tape! Used over a whole roll to re mask lol
Primer stage one!
Stage 2!
Dont mind the zebra stripes it will be corrected!
After blocking the filler primer its all ugly again!
Also picked up my basecoat and clearcoat! Almost time!
I will post the rest of the pictures tonight. Sorry for the picture dump, didnt have any time to spare during this process to update. Lots of very long nights
-
1
-
-
Time for a whole shit ton of RAGE and blocking!
Rocker patch:
Roof is basically complete!
Bumper repair
Picked up my supply of primer! Getting closer and closer!
-
The passenger side got it the worse as far as cancer metal goes. Had to go all the way into my doors but was able to just patch the rocker on this side. Very weird the way the rust was, I got very lucky!
POR 15 treatment on the front door. Ive youve never used the stuff before its awesome!
Primed that quarter and it looks damn good!
-
Back to that quarter, decided f it and blended the whole thing. Had a couple tiny dent that it took care of also
Spoiler holes:
This got blended way more eventually, just getting mud on it to work with!
After another skim coat and a block these were pretty much done!
Quarter was 95% done at this point too:
Primed the trunk just to make it one color again:
-
Rocker action:
This area will never been seen, but I will see it every time I open my door:Both panels fabbed and welded:
Bit of duraglass
Before I show you guys how much sanding had to be done to get this to blend correctly Ill show the aftermath of the first few batches lolSo much blocking, getting close!
While that primer cured I moved on to shaving the holes from my spoiler. I dont like the look plus they rattle lol
Was really happy how that bottom one ground down.
Little patch work on the passenger wheel well. This side usually rots the worst in my area, somehow this car got it backwards.
5" of snow in April, Thank you cleveland weather lol
-
Sorry for the long delay, had a ton of ship pop up that I wasnt expecting and my time frame wasnt getting longer lol.
Onto the pictures!
First furnace filter is quite colorfulPrimed the rockers to prep for body work
HUGE issue. This panel cannot be bought, has to be custom fabricated, 2 different layers. This was a big holy fuck moment.
(That slight silver where the vent hole goes isnt metal, thats gorilla tape I put there years ago for water leaks, It held wayyy better than I ever thought lol)What its supposed to look like:
Anyways, had to take the rear reinforcement off and found this nice clump of shit lolAll naked!
Quick wire wheel and rattle can
Step one for the rockers. Duraglass!
Step 2 Rage Gold. I love this filler so much.
Cut of layer off. See how it goes towards the inside of the trunk. Yeah big problem without proper tools lol
-
looks amazing steve! Is it specific for dark colored cars or pretty universal?
-
Wow, just caught up from summer of 2015. a LOT of work going into that car, can't wait to see it painted...
Inside is looking good too, sound deadener etc.
Thank you. Yessir tons of work. Couple more weeks hopefully!
Had the compressor take a shit on me last night unexpectedly, had to cut work early and go home to rebuild the head.
-
Primer this week! Have a ton of pictures to dump on you guys later tonight. Have a ton of sanding to do. I shall return!
-
I think I know what clean is trying to explain, a rabbeting bit perhaps? Build looks great man! I love seeing how the more experienced do things
maybe. im not sure. i don't have any issues with the straight bit though. especially not when i have the circle jig attached as well. my freehand circles on the MDF were definitely rough.
Thank you for checking it out. i don't feel as if i'm one of the more experienced though, as this is the first vehicle that ive done any fabrication and staging in. it's been a learning experience each time i try it. practice is making it better though. this will be the fourth time i think i've done my door pods, first time on the pillars
3 more times than I did my doors so far lol I just love the approach you have to your build, simple but committed until you get what you want, not to mention the attention to detail
-
1
-
-
I think I know what clean is trying to explain, a rabbeting bit perhaps? Build looks great man! I love seeing how the more experienced do things
-
Actually I take that back. Things arent working like they should in the metal department, thats a very optimistic time frame.
Maybe set back a couple weeks-
1
-
-
Looking good, when you gonna be ready for paint?
Im running out of time lol. Hopefully by the beginning of April I will be ready for color!
-
1
-
-
Some small updates, most of the major metal work is done, have some small patch panels to make for my inner door skins still.
Bye bye cancer!
started to prep the bumpers, need to get some SEM surfacer and adhesion promoter for other pieces too
New rocker tacked in place
The back bumper cover just didnt want to come off. Theres a nasty rust spot on the drivers side (opposite for common rust spot on this car) that will need cut out and replaced.
Reinforcement and paint back there looks good still!
Rocker panel in place
Now I know these arent the prettiest welds, and since this is my first time doing body metal work, I think its coming out just fine lol
On top of that I dont have our good 220 50 amp welder out here, just a little 110 gas welder . Cant get 220V service from a mobile home lolThen cleaned them up getting ready for body filler!
Stupid photobucket wont let me rotate this picture for whatever reason-
1
-
-
the more I look at these the more I think I can utilize one, or a couple. thanks for the great products steve!


1998 Plymouth Neon - Updates
in Member Rides & Builds -- Show off your whip, Show off your System!
Posted
So I havent posted much just from being busy with life stuff, havent done as much as Id like to but we all know how that is>
Doing a seat swap from a 2nd gen neon to my 1st gen, along with the center console and shifter to gain an extra cupholder and sportier shifter.
Few custom brackets later and it dropped right in, now all those hours spent sanding the factory one are out the window lol up into the attic it goes for storage!
Repping my SMD hoodie on the 10 year anniversary

Also made a purchase or two..
Re doing my kick panels so i can have some front fill while my door panels sit ready to be finished. Only finished this side, started more projects in the mean time lol

Some random RE grill (also temporary)
The cherry bomb I had was on its way out, and I was kinda getting tired of it rattling my brains. Thats why I have a stereo!
Sounds good and sounds almost stock now!
Another thing that has bugged me is my beige headliner. Nothing else in my car is beige everything is charcoal grey so time to make it match!
Several coats later

While that was out decided to cover the rest of my roof, would have been nice to keep the metal from washboarding during paint process. Maybe will be better next time!