Purplehaze Posted November 10, 2011 Author Report Share Posted November 10, 2011 Okay, so I was at it bright and early this morning ready to get my box and base all coated with resin. First was to line them up and drill out the holes for joining them together. Then I got a good first coat on the base and the bottom of the box Then the clouds started to roll in, and fast! FML!!! So I said effit and put it all away, and made another trip to Lows and Wal-Mart And here I am, waiting out the rain. I have talked my Dad into letting me clean out his building and use it this winter to do my door panels, but I think he may let me clean it tomorrow instead so I can get this box finished! Oh and btw, the materials I bought tonight to finish were 1 - gallon 3M fiberglass resin (already used the first gal) 7 - cans of paint (Black Night Metallic) 6 - cans of flat black cheap paint 2 - cans of primer 2 - cans of gloss clear paint rollers sandpaper gloves extra hardener for resin (I like to use a lot) Acetone (for clean-up) I spent $100 tonight, and when it's all said and done, I will have around $200 in my box, not including labor. Which IMO is WELL worth it! Anyway, stay tuned for some finished pics in the next few days. And thanks for checking this out! Kickin' Cruiser Seller Feedback Stage 3 Dash, Door Panels,4th Order wall 4 - 15'son a DC 5.0K 2 DC 5.0K'sSolo X 15 (v.2) Sub Build Link to comment Share on other sites More sharing options...
Purplehaze Posted November 11, 2011 Author Report Share Posted November 11, 2011 Okay, so yesterday I started out setting up plastic and cardboard so I could resin up the box inside the building, where it's warm! Then I filled in the holes where I had placed the terminals temporarily Then I laid down the first coat Then, after it dried real good, I laid down a second coat Then, while it was drying, I took the router w 3/4" round-over bit to the base. Should look good when finished And made it look like this. After this pic, I coated it w resin, then the whole board got another coat. Then, after she dried, I sanded all the flat parts w 120 and smoothed it pretty good, to prep it for the final coat of resin. Then I added the third coat. Here I am actually in the process And there she sets, 3 full coats of resin! And here is a little video update Next is sanding, filler, sanding, more filler, more sanding, primer, more sanding, and then hopefully, she will be ready for some color! Stay tuned for more! Kickin' Cruiser Seller Feedback Stage 3 Dash, Door Panels,4th Order wall 4 - 15'son a DC 5.0K 2 DC 5.0K'sSolo X 15 (v.2) Sub Build Link to comment Share on other sites More sharing options...
Purplehaze Posted November 12, 2011 Author Report Share Posted November 12, 2011 Damn I wish I was done sanding! This right here is exactly how I feel about sanding Hopefully after tomorrow, Ill be done sanding. For the moment... Kickin' Cruiser Seller Feedback Stage 3 Dash, Door Panels,4th Order wall 4 - 15'son a DC 5.0K 2 DC 5.0K'sSolo X 15 (v.2) Sub Build Link to comment Share on other sites More sharing options...
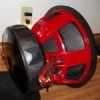
TRTC360 Posted November 12, 2011 Report Share Posted November 12, 2011 that's a nice as box man, I bet it gets down, that air-bag panel did u paint it with the spray cans in the picture u posted? if so u have skill in painting with that, i've never seen such a nice finish without using a professional spray gun. '93 Firebird Formula V8 H/U- Kenwood eXcelon KDC-X395 Mids/Highs Amp- Hifonics ZXI80.4 Wiring-KNU RCA's, Speaker Wire, And Two Runs Of Trystar 1/0 G34 Red Top and a 180amp Ford Alternator www.youtube.com/TRTC360 Link to comment Share on other sites More sharing options...
Purplehaze Posted November 12, 2011 Author Report Share Posted November 12, 2011 that's a nice as box man, I bet it gets down, that air-bag panel did u paint it with the spray cans in the picture u posted? if so u have skill in painting with that, i've never seen such a nice finish without using a professional spray gun. Yes sir, spray can paint. The key is the clear And thanks for the kind words! Kickin' Cruiser Seller Feedback Stage 3 Dash, Door Panels,4th Order wall 4 - 15'son a DC 5.0K 2 DC 5.0K'sSolo X 15 (v.2) Sub Build Link to comment Share on other sites More sharing options...
TRTC360 Posted November 12, 2011 Report Share Posted November 12, 2011 i'm assuming multiple coats of clear? do you cut and polish the clear in between each coat to get that mirror look? that's how my dad does every show car he paints, clear then fine grit wet sand, another coat more sanding, repeat process 3 to 4 times but in the end there's not a single pore in the paint. '93 Firebird Formula V8 H/U- Kenwood eXcelon KDC-X395 Mids/Highs Amp- Hifonics ZXI80.4 Wiring-KNU RCA's, Speaker Wire, And Two Runs Of Trystar 1/0 G34 Red Top and a 180amp Ford Alternator www.youtube.com/TRTC360 Link to comment Share on other sites More sharing options...
Purplehaze Posted November 12, 2011 Author Report Share Posted November 12, 2011 i'm assuming multiple coats of clear? do you cut and polish the clear in between each coat to get that mirror look? that's how my dad does every show car he paints, clear then fine grit wet sand, another coat more sanding, repeat process 3 to 4 times but in the end there's not a single pore in the paint. If I'm painting a car, then yes I do it just like your dad. But when painting smaller stuff, I have better luck just doing about 3 medium coats, and a light wet sand w/ 1000 grit and a lil polish. So far, so good. But like I say, that's only good for the smaller stuff. Thanks again, and stay tuned. I hope to be painting this box soon! Kickin' Cruiser Seller Feedback Stage 3 Dash, Door Panels,4th Order wall 4 - 15'son a DC 5.0K 2 DC 5.0K'sSolo X 15 (v.2) Sub Build Link to comment Share on other sites More sharing options...
Purplehaze Posted November 15, 2011 Author Report Share Posted November 15, 2011 What's up guys and girls? I got more done, here are some pics! First, on Saturday I got my son to help me sand Then as you can see here, I sanded too much, and had to go back for a lil more resin And here is a little progress update video And check out these curves... SEXY! So then, after more sanding, I finally got them both in primer And here is an important part. I changed my mind on the paint and color choice. There was just no way I was gonna get the finish I wanted with the other paint, so I followed some good advice, and went with fleckstone Base done Me in action! And here is how she looks at this moment. Here is another video update, but for some reason, the sound quits??? So tomorrow I should get it all back in and playing. Stay tuned for more coming soon! Kickin' Cruiser Seller Feedback Stage 3 Dash, Door Panels,4th Order wall 4 - 15'son a DC 5.0K 2 DC 5.0K'sSolo X 15 (v.2) Sub Build Link to comment Share on other sites More sharing options...
NorthsouthproductionsNC Posted November 15, 2011 Report Share Posted November 15, 2011 Have you decided yet. Looks like a beast of a box. Link to comment Share on other sites More sharing options...
Purplehaze Posted November 15, 2011 Author Report Share Posted November 15, 2011 Have you decided yet. Looks like a beast of a box. Yep, box is painted and drying as I type Kickin' Cruiser Seller Feedback Stage 3 Dash, Door Panels,4th Order wall 4 - 15'son a DC 5.0K 2 DC 5.0K'sSolo X 15 (v.2) Sub Build Link to comment Share on other sites More sharing options...

Recommended Posts
Archived
This topic is now archived and is closed to further replies.