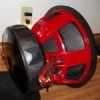
Purplehaze Posted October 21, 2011 Report Share Posted October 21, 2011 Hey guys, this is the uninterrupted build log for my 2002 Chrysler PT Cruiser, which I named "Kickin' Cruiser". This was my first complete build, and I am VERY happy with the results. I had chosen to go with Kicker at the time because to be honest, I just didn't really know what all was out there. But I took my time, and got a lot of help from members on this site. And I think she turned out quite well for the circumstances. So here we go. I bought the car in April 2010 and it looked like this. Here was the first little system I threw in it. Everything was less than $100.00! Anyways, It didn't take long before things had to change! The first thing I bought was a new 12"Kicker L5, in the Kicker enclosure. I picked up a Kicker ZX250.2 that I THOUGHT would push it, but it wasn't quite enough! So I traded around for a Soundstream PIC 2.600 that did MUCH better! Then I added some Soundstream 6x9's to run off the ZX250.2. It really jammed, for a min! Here are some pics: And here is a little video of that setup bumpin! www.youtube.com/watch?v=SKA81bmIIDY But that just wasn't enough, actually it just made me want more... BAD!!! So I saved my nickels and I saved my dimes... and I got this And this And this And a few others I forgot to take pics of when I got them, cause I was so excited to get it! Like the Clarion VZ300 HU, which is where the REAL install begins! The first thing I did was to disable the passenger airbag and install a 7" LCD monitor, and a reverse/ back-up camera. And change the gold to "Black Midnight Metallic" Kickin' Cruiser Seller Feedback Stage 3 Dash, Door Panels,4th Order wall 4 - 15'son a DC 5.0K 2 DC 5.0K'sSolo X 15 (v.2) Sub Build Link to comment Share on other sites More sharing options...
Purplehaze Posted October 21, 2011 Author Report Share Posted October 21, 2011 So then I did a little wiper up-grade, and added the rear wing. Total cost, less than $100 I also added the rain guards and chrome panel covers. Another $100 Then some headlight covers and euro tails And then I started to install the rear battery. It turned out exactly as I hoped and imagined. I'll let the pics tell the story! Kickin' Cruiser Seller Feedback Stage 3 Dash, Door Panels,4th Order wall 4 - 15'son a DC 5.0K 2 DC 5.0K'sSolo X 15 (v.2) Sub Build Link to comment Share on other sites More sharing options...
Purplehaze Posted October 21, 2011 Author Report Share Posted October 21, 2011 And finally I had the rear battery installed! Just as I had imagined! Kickin' Cruiser Seller Feedback Stage 3 Dash, Door Panels,4th Order wall 4 - 15'son a DC 5.0K 2 DC 5.0K'sSolo X 15 (v.2) Sub Build Link to comment Share on other sites More sharing options...
Purplehaze Posted October 21, 2011 Author Report Share Posted October 21, 2011 So after the rear battery was the front battery. For whatever reason, I thought I had to have a batt isolator. I learned. Anyway, here is the front battery install. Okay so I under estimated how much it was gonna take to get this battery in. Had to build a new battery trey, so I also made it to bolt on to the fuse box, and give me a spot for my breakers. It's drying now, and will be installed tomorrow. The trey may be made from plywood, but its covered w/ 1/8" bondo, then sanded, primed, painted, and cleared. It should last. Once I got all the old junk out, I could figure out how to do this. After more test fitting, time to form it up Kickin' Cruiser Seller Feedback Stage 3 Dash, Door Panels,4th Order wall 4 - 15'son a DC 5.0K 2 DC 5.0K'sSolo X 15 (v.2) Sub Build Link to comment Share on other sites More sharing options...
Purplehaze Posted October 21, 2011 Author Report Share Posted October 21, 2011 So next up was the alt It was running when I took this one Alright, so now that that is finished, it's on to the next step, Hushmat! Kickin' Cruiser Seller Feedback Stage 3 Dash, Door Panels,4th Order wall 4 - 15'son a DC 5.0K 2 DC 5.0K'sSolo X 15 (v.2) Sub Build Link to comment Share on other sites More sharing options...
Purplehaze Posted October 21, 2011 Author Report Share Posted October 21, 2011 www.youtube.com/watch?v=hzQsjrHAvaQ Kickin' Cruiser Seller Feedback Stage 3 Dash, Door Panels,4th Order wall 4 - 15'son a DC 5.0K 2 DC 5.0K'sSolo X 15 (v.2) Sub Build Link to comment Share on other sites More sharing options...
MarioB Posted October 21, 2011 Report Share Posted October 21, 2011 looking good 12- DC Audio m2Lvl3 12's1- Hertz HSK3 way2- DC5K's2- ZX350.42- Stinger SP1500D batteries in rear3- runs of 1/0ga. to the rearTeam DC Audiodcsoundlab.com Quality is all in how you take pictures I have plenty of projects that look WAY better on camera then in person crazy to fit so many in so little. Reminds me of some of the porns I've seen? Link to comment Share on other sites More sharing options...
Purplehaze Posted October 21, 2011 Author Report Share Posted October 21, 2011 Here are a few pics of the wiring and little stuff all going back together. Next I will build my breaker box and run some 0 gauge. And now the breaker box Now some 0 gauge Kickin' Cruiser Seller Feedback Stage 3 Dash, Door Panels,4th Order wall 4 - 15'son a DC 5.0K 2 DC 5.0K'sSolo X 15 (v.2) Sub Build Link to comment Share on other sites More sharing options...
Purplehaze Posted October 21, 2011 Author Report Share Posted October 21, 2011 Ground RCA's and bass remote So next up, components! Kickin' Cruiser Seller Feedback Stage 3 Dash, Door Panels,4th Order wall 4 - 15'son a DC 5.0K 2 DC 5.0K'sSolo X 15 (v.2) Sub Build Link to comment Share on other sites More sharing options...
Purplehaze Posted October 21, 2011 Author Report Share Posted October 21, 2011 Got the crossovers mounted up, then I started on tweeters and woofers. I did the back first. After finishing both rear tweets, I mounted the 6.5's in the factory locations (for now, till fiberglass!) using 6x8 adapters, since it had 6x8's as factory speakers. It will work for the time being. Got the front ones done too, and broke out the rear view monitor to run the wires while stuff is out. Kickin' Cruiser Seller Feedback Stage 3 Dash, Door Panels,4th Order wall 4 - 15'son a DC 5.0K 2 DC 5.0K'sSolo X 15 (v.2) Sub Build Link to comment Share on other sites More sharing options...


Recommended Posts
Archived
This topic is now archived and is closed to further replies.