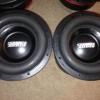
MrSkippyJ Posted November 25, 2011 Author Report Share Posted November 25, 2011 New 3sixty location, under T400-4, never got a pic of final wiring, but anyway: T1500 new location, under front seat. You can see both amps here. Bottom amp is T1500: Better pics of box and amp: I do plan to upgrade to more power (possibly a T2500-1bdcp) so I am leaving the trim behind the box unfinished for right now. That is why you can see the foam and wires in one of the pics. I will either have to make a trim panel with an amp back there, or without. I don't want to make it twice so I am just waiting till then. F150: Stock 2019 Harley Road Glide: Amp: TM400Xad - 4 channel 400 watt Processor: DSR1 Fairing (Front) 6.5s -MMats PA601cx Lid (Rear) 6x9s - TMS69 Link to comment Share on other sites More sharing options...
MrSkippyJ Posted November 25, 2011 Author Report Share Posted November 25, 2011 Vids with the level 4s. And of course, my youtube link is in my sig, as is all the other build logs. Thanks for looking! F150: Stock 2019 Harley Road Glide: Amp: TM400Xad - 4 channel 400 watt Processor: DSR1 Fairing (Front) 6.5s -MMats PA601cx Lid (Rear) 6x9s - TMS69 Link to comment Share on other sites More sharing options...
MrSkippyJ Posted December 4, 2011 Author Report Share Posted December 4, 2011 Bought a new H/U, my factory H/U didn't have a D/A convertor (I think that is what you call it) for the iPod. Even though it controlled the iPod, the signal coming in was already converted. I bought a new H/U, just a simple din sized Pioneer that has USB and AUX inputs to replace the factory unit. Sounds great, no more significant sound loss with the iPod I need to redo my settings since I used the DD-1 to tune to my factory unit. And a cool new shifter F150: Stock 2019 Harley Road Glide: Amp: TM400Xad - 4 channel 400 watt Processor: DSR1 Fairing (Front) 6.5s -MMats PA601cx Lid (Rear) 6x9s - TMS69 Link to comment Share on other sites More sharing options...
MrSkippyJ Posted June 13, 2012 Author Report Share Posted June 13, 2012 Got my big 3 done finally. Coming off the alt: Engine block ground and fuse between alt and battery: + wire tied up nicely near the firewall: + to the battery Battery ground: Overall of the battery: F150: Stock 2019 Harley Road Glide: Amp: TM400Xad - 4 channel 400 watt Processor: DSR1 Fairing (Front) 6.5s -MMats PA601cx Lid (Rear) 6x9s - TMS69 Link to comment Share on other sites More sharing options...
MrSkippyJ Posted August 1, 2012 Author Report Share Posted August 1, 2012 Then I decided to finally do up my doors. I learned a couple things about how to do it better next time. For now, I will cover up the rough edges with some furry material Here is my first attempt at fiberglassing door panels! Door cut out, stretchy cloth on and resined: Test fit before I got too far: After the layers were on, test fit for speakers Everything trimmed up, smoothed up and with the furry material covering up the transitions from fiberglass to door: On the door with speakers! F150: Stock 2019 Harley Road Glide: Amp: TM400Xad - 4 channel 400 watt Processor: DSR1 Fairing (Front) 6.5s -MMats PA601cx Lid (Rear) 6x9s - TMS69 Link to comment Share on other sites More sharing options...
MrSkippyJ Posted September 1, 2012 Author Report Share Posted September 1, 2012 Better pic of the fuse panel in the center console. Above the fuse holder with the panel on. higher res pic of the door. F150: Stock 2019 Harley Road Glide: Amp: TM400Xad - 4 channel 400 watt Processor: DSR1 Fairing (Front) 6.5s -MMats PA601cx Lid (Rear) 6x9s - TMS69 Link to comment Share on other sites More sharing options...
MrSkippyJ Posted December 8, 2012 Author Report Share Posted December 8, 2012 Who got bored and slightly increased the net volume of their box? Me. Also upgraded from 2 runs of 12g wire to a single run of 8g wire. Overkill I know but 8g looks cool F150: Stock 2019 Harley Road Glide: Amp: TM400Xad - 4 channel 400 watt Processor: DSR1 Fairing (Front) 6.5s -MMats PA601cx Lid (Rear) 6x9s - TMS69 Link to comment Share on other sites More sharing options...
MrSkippyJ Posted February 12, 2013 Author Report Share Posted February 12, 2013 Not done yet, but here is my SMD VM-1 in it's temporary location. Actually, the location won't change, I will just make it look better one day (we all know how that goes) plus a nice little disconnect I put on the end to make it easier to get that panel off. That panel covers my distribution block and may need to come off from time to time. and that panel covers this spot. F150: Stock 2019 Harley Road Glide: Amp: TM400Xad - 4 channel 400 watt Processor: DSR1 Fairing (Front) 6.5s -MMats PA601cx Lid (Rear) 6x9s - TMS69 Link to comment Share on other sites More sharing options...
MrSkippyJ Posted February 12, 2013 Author Report Share Posted February 12, 2013 unhooked, but here it is F150: Stock 2019 Harley Road Glide: Amp: TM400Xad - 4 channel 400 watt Processor: DSR1 Fairing (Front) 6.5s -MMats PA601cx Lid (Rear) 6x9s - TMS69 Link to comment Share on other sites More sharing options...
MrSkippyJ Posted March 12, 2013 Author Report Share Posted March 12, 2013 More work on the SMD VM-1. Totally stole this idea from AMI and his VM-1 install. started with this piece, cutting it out to an approximate size and shape. Once I was happy enough with that shape, I roughed in a piece of clear Lexan. Used a flexible silicone and also some plastic tabs and CA glue to hold the Lexan in place. Used CA glue to hold the VM-1. Added some tint to the Lexan. This is where it sits now, waiting for the tint to dry so I can finish the edges and paint the area around the VM-1 so only the meter can be seen through the Lexan. F150: Stock 2019 Harley Road Glide: Amp: TM400Xad - 4 channel 400 watt Processor: DSR1 Fairing (Front) 6.5s -MMats PA601cx Lid (Rear) 6x9s - TMS69 Link to comment Share on other sites More sharing options...


Recommended Posts
Archived
This topic is now archived and is closed to further replies.