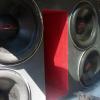
OBI Posted April 1, 2012 Report Share Posted April 1, 2012 Whats up guys this build is going to be VERY VERY slow. First wall I'm doing by my self and don't have to much time to work on it.Heres some pics of my old wall.Got pretty loud was touch over 54's on music. With this last wall all the available space was not used at wall, didn't follow in for my car's contours or angles, was just a square shaped box that was build in the vehicle.New wall is going to use every bit of space available, looking to squeeze about 24-26 cubes with the shell, from there I'll most likely do a 4th order with the 4 15's. Goal is to be doing the same numbers but about 10-15hz lower and a little personal goal is to break a 150 at 20hz outlaw mic on dash. I could only hope though.Here's some small progress I've made so far. I AM OPEN TO IN SUGGESTIONS.Floor pieces mocked up. Those 2 holes are for the access ports for my fuel pumps. SCREWSFloor in permanently and back piece mocked upTried using my router to get a copy for the back angled piece. Router was acting on crack. So I scraped it and just used the circular saw.Angle to follow the angle of my seatsWith this piece. I didn't just want fiberglass holding the angles piece to the floor, or just screwing it in at an angle. Didn't feel like I would get enough contact surface, so I made this little piece to mount to the angled piece. Then that gave me a ton more surface area for glue to wood contact and screws. Plus I'll end up going over it with a few layers of glass anyways.Floor and back piece mounted together.Well thats all I have for now. Gonna be working on it a little here and there. Im in no rush, plus all the down time inbetween lets me have time to think on how im going to do the next stages. I wan't this thing to be solid. Link to comment Share on other sites More sharing options...
OBI Posted April 1, 2012 Author Report Share Posted April 1, 2012 Got a bit more done lately. Using that for a mounting point for my top back piece that I'll be mounting Secured to seat belt mounting points. 2x4s and great stuff on the roof. Using this as a platform to mount my roof to. Added small sheet of MDF to get it lower than sunroof rails. Thats what my actual roof will be screwed and glued into. All lower side pieces cutout. 1 side mounted up Thats all for now. Will keep posting as I get more done. Link to comment Share on other sites More sharing options...
OBI Posted April 1, 2012 Author Report Share Posted April 1, 2012 Got alot done since last update. Still lots of work to do though. Sorry didn't take enough pics got in work mode. Shell is done though. On to the pics. About 31 cubes where it sits. Thinking of adding 1 more layer to the sides making them 3 layers of mdf and 2x4 on the outside. Still need to do the 2x4's on one side and 2x4's for the angled sides. Link to comment Share on other sites More sharing options...
OBI Posted April 1, 2012 Author Report Share Posted April 1, 2012 Sorry for the text being all funky. I just copied from another forum I had this up on. And I've been working on this since about February. Link to comment Share on other sites More sharing options...
Trey_Dog650 Posted April 1, 2012 Report Share Posted April 1, 2012 damn getting busy! 13 Kia Forte Build! 07 Hyundai Accent Build ***Super Seller*** N8ball2013 And then he gets to say ok all you guys were right. im sorry for being a dummy poo poo head. Link to comment Share on other sites More sharing options...
OBI Posted April 1, 2012 Author Report Share Posted April 1, 2012 Yep got a 15 gallon trash bin full of MDF dust too lol. Edit for 1000th post. Link to comment Share on other sites More sharing options...
cc_audio Posted April 2, 2012 Report Share Posted April 2, 2012 Damn, first wall was sexy as is. Keep the pics flowin, I need to see this finished. It's all gone! The Celica Build Feedback If I buy something from you, DO NOT USE FEDEX! Link to comment Share on other sites More sharing options...
FieroGrande Posted April 2, 2012 Report Share Posted April 2, 2012 Nice job bro, that's going to be awesome. Are u going to be changing subs or amps? Link to comment Share on other sites More sharing options...
OBI Posted April 2, 2012 Author Report Share Posted April 2, 2012 Damn, first wall was sexy as is. Keep the pics flowin, I need to see this finished. Thanks man. This new one is almost twice the size of the old one. Old one performed very very good. Just want a little better low end extension with this new build. Nice job bro, that's going to be awesome. Are u going to be changing subs or amps? Thanks bro. And yes equipment will stay the same for now Link to comment Share on other sites More sharing options...
OBI Posted April 20, 2012 Author Report Share Posted April 20, 2012 Here's what I have recently have done. All the sides are completely layered in 2x4's. Shell is extremely solid. Its barely fits in the car. In some areas you can't even squeeze a sheet of paper in-between the car and shelf itself. All that is left is glassing all the inner seams, a baffle, and some internal braces. Also changing up my sub setup this time around, going with 4 Crossfire XS V2 15's. So the DC's are up for sale. Here are some pics. Shell barely fits Tight fit Link to comment Share on other sites More sharing options...


Recommended Posts
Archived
This topic is now archived and is closed to further replies.