Jump to content

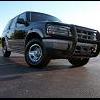
1996 Ford Explorer Build, Full Alpine, 2 12" Type E's, 1/0 gauge big 3 soon!


Recommended Posts

Finally an update. I did install the Bluetooth Microphone 2 weeks ago, and the charging system upgrade kit about 3 weeks ago. I have no pictures of the Bluetooth mic, but I will, it looks nice where I put it, and it was easy to install. which was nice. As for the charging system upgrade kit I took lots of pictures. :D I really want to thank Tony for the kit, everything was easily explained, I only ran into problems when I would not read things closely. I only ran into 3 problems, for starters I ran out of zip ties, lol, but it was because of my own paranoia about getting wires caught on something. The second was finding a place to mount the fuse holder, and third, which was not Tonys fault at all, but the JL fuse holder was missing a screw that held it to the plastic mount.

The whole thing took me about 2 days, mainly because I was very picky and made everything perfect. But I was also lazy and woke up at 10:30 both mornings, and only could work on it until 2 when I had to get ready for work.

Time for pictures!!!!

I started with measurements.

Resting voltage

vnyxec.jpg

Voltage with the truck at idle

k1e1s.jpg

Voltage drop between the alt positive and battery positive.

i4l1ch.jpg

345is89.jpg

Voltage drop between alt mount and the negative of the battery.

mww48n.jpg

2gwriq9.jpg

Started by disconnecting the battery, didn't need that anymore.

2a59hi.jpg

2guljic.jpg

idf0nc.jpg

Had to cut off the batter clamps, there was no other way. :(

t5qil0.jpg

i24vmr.jpg

Out with the old stock clamps.

23r91d0.jpg

My ground location for the alternator. the spot I picked was the the alt right to the mount.

2lmot1i.jpg

2i24g2p.jpg

14udh4z.jpg

Positive charge cable, I doubled up with the old one, just to be safe.

2n712q1.jpg

Fuse holder, It was actually a part of an Explorer part I grabbed from the junk yard. I love recycling. Soon to be painted, no more rust.

33ym2hi.jpg

Nice and clean, how I like it! :D

16iy1s5.jpg

For me personally having brightly colored picture wires running about looks cheap and tacky. I decided to wrap all the 4 gauge wire with 3/8 split loom, and then wrapping it electrical tape. Not only does it look better, it also prevents chafing, and resists heat.

14v5zf9.jpg

1996 Ford Explorer Eddie Bauer V8 AWD

So far with the Ford/JBL Stock Stereo system, Alpine System coming soon.

Link to comment
Share on other sites

My splash guard bolt holes is what I used for the chassis ground. Yes I know it was rusty.

o0ctpd.jpg

All better

160dlrn.jpg

Voltage with the engine running after upgrade.

wt600m.jpg

New Interstate Megatron Plus Battery, and JL Audio battery clamps :D

xpdnh4.jpg

Spot I used for the core support ground.

4j5h6q.jpg

2crxax1.jpg

Spot I used for the body ground, hard to tell, but it is right next to the ABS unit, and a pre existing ground spot.

2vakv7r.jpg

1996 Ford Explorer Eddie Bauer V8 AWD

So far with the Ford/JBL Stock Stereo system, Alpine System coming soon.

Link to comment
Share on other sites

Hey man, great attention to detail! You did a super awesome install and I'll want to feature this on my web site. And, look at you with those voltage drop measurements - nice! Bein' all scientific and all. Now . . . let's see how much you improved those with the kit.

Thanks for the compliments on the kit!

Tony Candela - SMD Sales & Marketing
Email me at [email protected] to learn about becoming an SMD Partner!

CEAES_468.gif

Link to comment
Share on other sites

Voltage drops, and readings I got today AFTER I installed the charging system upgrade kit. WITH PICTURES!!!!!! :D

Resting voltage

2mmuyq9.jpg

Voltage with the truck at idle.

8xpugz.jpg

Voltage drop between the Alt Braket, and the Battery negative.

2qvbds6.jpg

b5hzrb.jpg

Voltage drop between the positive post on the alt, and the positive on the battery.

2i7liyc.jpg

icvfpk.jpg

Voltage drop between the fuse holder, and the battery positive post.

34o6810.jpg

Voltage Drop between the fuse holder, and battery post, with the fuse inline.

2r47oqw.jpg

Voltage drop across the fuse itself.

o9465y.jpg

mmpoub.jpg

Voltage drop from core support ground, to battery negative.

ei2yc2.jpg

Voltage Drop from body ground to negative battery post.

9zozo5.jpg

33z4nr7.jpg

Next is Voltage drop from chassis ground to negative battery post.

15rmoi0.jpg

120rme8.jpg

dxllj4.jpg

More pictures to come later about how I ran all the wires. But for now I am taking a break.

1996 Ford Explorer Eddie Bauer V8 AWD

So far with the Ford/JBL Stock Stereo system, Alpine System coming soon.

Link to comment
Share on other sites

Harold, thank you for taking the effort to do this. I think it's important to note that Harold's measurements are in millivolts - 1 millivolt (mV) = 1 thousandth of a volt.

Taking before and after voltage drop measurements is an excellent way to validate if you've actually gained anything when upgrading your electrical system. Every serious car audio guy or gal should have a quality DMM (digital multi-meter) in their tool box and know exactly how to use it. If you're intimidated by the DMM, then my first book will walk you through the steps in using one.

Tony Candela - SMD Sales & Marketing
Email me at [email protected] to learn about becoming an SMD Partner!

CEAES_468.gif

Link to comment
Share on other sites

Not sure if these pictures are any better then the previous ones, but this shows how I ran the wires.

Starting with the ground for the Alternator it's self. The alternator has triangle shaped mounting, so I went with the easiest one to get at.

351gx9v.jpg

The positive lead off of the Alternator, otherwise known as the charge lead. I doubled up it, which I stated before, by putting the stock one, under the new 4 gauge lead.

a3x1l.jpg

how I tied it away from any unwanted heat, or rubbing.

15efu6w.jpg

33ykr61.jpg

Routed the Charge lead to a clip for the throttle cable, and then along and over the brake booster.

2ynjip1.jpg

Kept it from the hinges, and other parts.

35mh9as.jpg

Into the JL Audio Fuse block, on my custom mount from a seat cushion. :D

j77rdw.jpg

Snaking around the ABS unit into the final destination the battery.

ohpu79.jpg

All the ground leads, going to various places, the one pictured here is the core support ground.

14sodqa.jpg

Here you can see where the ground lead splits off to go past the battery tray, and finally down to the frame.

2nio420.jpg

All the ground leads off the JL Audio Battery clamp. You may be able to see the 4 gauge going down to the frame.

2u5baxe.jpg

A thumbs up for a Job done well! :D

2sam9ab.jpg

1996 Ford Explorer Eddie Bauer V8 AWD

So far with the Ford/JBL Stock Stereo system, Alpine System coming soon.

Link to comment
Share on other sites

Thanks Tony for the compliments, It really means a lot. I put a lot of hard work into what I do, and It really means a lot to me for people to notice it. For me take measurements like this is standard practice, how are you suppose to know if you fixed anything if you don't measure?

Also for everybody who likes videos, here you go. a little run down of my system, and a quick demo, no hair tricks, I was never going for that, I wanted something that is loud reliable, and sounded good, so far so good for me.

Also, after seeing the ninja pic of the voltmeter from SMD today, I for sure will be getting that one instead of the Stinger one.

1996 Ford Explorer Eddie Bauer V8 AWD

So far with the Ford/JBL Stock Stereo system, Alpine System coming soon.

Link to comment
Share on other sites

So a slight update for today, I shined up my rims real nice, and bought a few things. Considering this was my first day off of work in 14 days, I was a little bit lazy. But I did finally order a waterproof firewall grommet, along with a SWR (Standing Wave Ratio) Meter, for the CB setup Link for the Meter --->(http://www.rightchannelradios.com/10-watt-swr-meter.html). The grommet is for the ground cable, which I have to drill through the floor for, and I wanted to make sure it was water tight, so I got this --->(http://www.sonicelectronix.com/item_15905_StreetWires-FB4.html).

Hopefully this will work out good for me. I will most likely be ordering some of the cheaper rubber ones for when I do my amp setup against the boards that rest against the rear seats.

Sort of like this, but not Sony Explode 2048705_138_full.jpg

But for now I just want to temporarily set up everything so I can grab more 4 gauge ground wire, because I have no idea where I am drilling the hole, all I know is that I need to. Hopefully I will get the grommet, and SWR Meter before next Friday so I can do some work on my truck.

1996 Ford Explorer Eddie Bauer V8 AWD

So far with the Ford/JBL Stock Stereo system, Alpine System coming soon.

Link to comment
Share on other sites

Well not much updates on my Stereo install, but since this forum does not have to be strictly about car audio I figure I would let everybody know that I installed, and mounted everything for my CB radio. :D I was down in Dekalb IL with my friends for some fun, and we decided to stop at Goodwill, and my friends pointed out a CB radio, in the box. It was an older compact Radioshack one. Everything came in the box, it was a bit dirty, but it cleaned up nice, and most importantly it woks!!! for the $5 I spent, I saved myself $45, so that makes me real happy.

Today when I got back I installed everything, and tuned the antenna with the SWR meter, which came in the mail on Thursday. But to be honest I didn't even need to tune the antenna, It was tuned nearly perfect for the radio, and all the channels. I will have to post some pictures of the setup tomorrow, I would have when I was done, but it was dark, and the flash on my camera makes everything look like crap. Pretty happy with it though, and glad I finally am done with the CB install, now I can concentrate on my Stereo install.

As for the stereo, I got the grommet in the mail on Thursday so possibly some time this week I will be installing the ground cable, and run the positive from the front. I am really close, but I still don't want to cut corners, so I am taking my time and doing everything right. I also took some photos of amp placement, and where they will be. I will be posting those tomorrow, and I would love some suggestions. I pretty much have everything I need, just a few screws, a few pieces of wire, and some misc stuff, and I am good to go. :D

I would love some suggestions, ideas, or questions about what I did, feel free to post.

1996 Ford Explorer Eddie Bauer V8 AWD

So far with the Ford/JBL Stock Stereo system, Alpine System coming soon.

Link to comment
Share on other sites

I'll start with some more pictures. First I have my rims I shined up. I don't have $10,000, 26' rims, what I do have is factory chrome skinned rims that still look pretty decent. All the scratches where not done by me, but when I got them they had brake dust caked on them, and the outer lip was covered in rust. I know who ever has chrome rims on here would never use steel wool to clean them, but I do, because it does not make the already bad looking rims any worse.

Here is what I did for the rims.

What they look like after about 2 months of no real cleaning. I go through the auto wash every week, but it does not do anything for the rims.

fdzm0m.jpg

xmioe8.jpg

359fltv.jpg

What I used to get them clean, yes I used very fine steel wool, and Eagle One Wadding Polish.

4joqrk.jpg

1zqc0hd.jpg

2hx2795.jpg

First I cleaned them with steel wool. I got steel wool wet with some soapy water, and lightly cleaned the whole rim.

1zwz2p3.jpg

350ut1d.jpg

I then cleaned off the soapy, and now very dirty water.

24c76om.jpg

eas7zq.jpg

Not bad so far, but it can always get better.

I then grabbed a small piece of wadding polish and went to work, the good thing about wadding polish is that it also cleans where ever you missed with the steel wool. I really do like this stuff, a lot more then that messy crap that Mothers sells.

2s6m0yp.jpg

2z688rm.jpg

I made sure to get in every nook and cranny. It looks pretty hazy until you clean it off with a microfiber towel.

219cuae.jpg

33vnozb.jpg

Not bad if I do say so my self. :D

I do this about every 3-4 weeks, with the exception of this time when it feel to the bottom of the list.

2qtcz01.jpg

I also did my moms boyfriends F-150, which he has never done, this was some caked on brake dust. they are aluminum rims which are chrome plated.

Before:

2jesrph.jpg

After: He was pretty damn happy with the results. He cares about his truck, be he never has the time to take care of it.

2enqdr5.jpg

1996 Ford Explorer Eddie Bauer V8 AWD

So far with the Ford/JBL Stock Stereo system, Alpine System coming soon.

Link to comment
Share on other sites

Archived

This topic is now archived and is closed to further replies.

  • Recently Browsing   0 members

    • No registered users viewing this page.
  • Who's Online   0 Members, 0 Anonymous, 366 Guests (See full list)

    • There are no registered users currently online
×
×
  • Create New...