hertz hurts Posted August 1, 2009 Report Posted August 1, 2009 Just read this log from start to now. I like it. I have an 86 f150 long bed with a topper on it and was wondering how you where going to aproach the build with one. I want to do a blow through but my truck is all original (even the topper was installed by Ford) and have the same feelings about cutting the bed and cab as you did about cutting up your door panels. I may do something like this instead. How is it to drive with the speakers right there by your head? Loud all the time no matter what? The door panels are coming along nice. Get some body filler on there and sand it down it'll look tits.
95_1500 Posted August 1, 2009 Author Report Posted August 1, 2009 Just read this log from start to now. I like it. I have an 86 f150 long bed with a topper on it and was wondering how you where going to aproach the build with one. I want to do a blow through but my truck is all original (even the topper was installed by Ford) and have the same feelings about cutting the bed and cab as you did about cutting up your door panels. I may do something like this instead. How is it to drive with the speakers right there by your head? Loud all the time no matter what? The door panels are coming along nice. Get some body filler on there and sand it down it'll look tits. Thanks bro.. Nah man not at all its just like having a system in any other car.. If i didnt have a bass knob then yeah im sure it would be pretty loud all the time lol. Well being lazy seeing as its cloudy outside so instead of pulling the panels out i may start off with running wire here in about a half hour and give the sun a chance to pop up before i try to fiberglass Original Build http://www.stevemeadedesigns.com/board/index.php?showtopic=24095
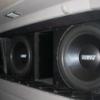
95_1500 Posted August 1, 2009 Author Report Posted August 1, 2009 Well i was running wires and the whole time it was cloudy then began to rain and now its sunny, humid and hot as fuckkk. Im gonna wait about an hour or so before i start with the doors, give it time to cool off some more. I know wiring pics are boring but its still pics right.. Did this so i wouldnt have to run 3 wires to each door and so i dont have to jam 2 wires in each terminal Finally found the carpet for the back wall and put it back in Also took the time to clean up the wiring All hooked up and ready to go. The 5.25s are each 4 ohm on the top row channels 1 and 2, the 6.5s are paralleled to 2 ohm each on channels 3 and 4. More updates later after i get off my ass and start sanding and layin more glass Original Build http://www.stevemeadedesigns.com/board/index.php?showtopic=24095
95_1500 Posted August 1, 2009 Author Report Posted August 1, 2009 Well finally got out there and all i can say is thank god for 60 grit sandpaper and grinder dremel attachments Decided to start with passenger door because it was the worse of the two. Finally cut the back out, im only doing 2 layers on the front and ill do all the ugly strength glassing on the back Where she is now... And to top it all off.. My gallon of resin is nearly empty so i think im going to glass the back of this one once it cures then ill concentrate on sanding the driver door until i can go get another gallon tomorrow afternoon.. All 6 speakers wired and ready to go, still have to do the tweets. I only found 5 of the 6 flush mount tweeter pods i need so unless i find it soon ill just be running 4 tweets until i figure something out.. Original Build http://www.stevemeadedesigns.com/board/index.php?showtopic=24095
95_1500 Posted August 1, 2009 Author Report Posted August 1, 2009 About to head to lowes and finish off my gift card with a gallon of resin. Put a layer on the backside and ill see how strong it is when i get back. Im thinking passenger door might be ready for final touchup glass on the front and then bondo tomorrow morning!!! Hoping to get the sanding and 2nd layer done on the driver door tonight, well see how that works out. Original Build http://www.stevemeadedesigns.com/board/index.php?showtopic=24095
95_1500 Posted August 2, 2009 Author Report Posted August 2, 2009 Well it looks like 2 layers on the outside and one on the underside is perfect! It is plenty strong enough. Got more resin, got some more body filler spreaders and the fork terminals for the tweeter wires.. Didnt get to lay anymore glass because it was dark and i realized all i have left on the passenger door is touch up glassing. IE making the edges smoother and filling some areas a little better and i have some more grinding to do but i got it sanded more tonight.. Just for you guys I decided to cut out the holes finally and do a test fit.. I know blah blah blah onto the pics right... Enjoy They fit on the first try! The only thing is where the 5.25 and the bottom 6.5 meet i gotta grind out a little more but damn not bad for a test fit! I think im going to like these doors!! Tomorrow ill get the driver door to this stage and hopefully be gettin them smooooth. Got shit to do monday night but i plan to have them filled, sanded and lookin good by tuesday night if not wednesday. Then they go in the truck and ill put up vids of how it sounds! Original Build http://www.stevemeadedesigns.com/board/index.php?showtopic=24095
98crewcab Posted August 2, 2009 Report Posted August 2, 2009 this is the most beautiful, sniff, thing I have eva seen... dude, this is bitchin! for such a busy guy, you sure seem to be getting alot done. pretty efficient with your time..... 06 2500hd, 6.0L, 4l80e, 4wd, (muah work truck) 7" BDS HC lift kit (5) 37x13.5R18 Toyo Open Country M/Ts (5) 18x10 Moto Metal MO962 tablet in lieu of deck blue tooth interconnect to soundstream eq (for volume control and bass control) 4 Alpine type r 10's 6 cubes net, 80sqin's port, tuned to 33hz 2 brutus brx5000.5's 2 pairs 3" polk audio for a pillars 4 pairs polk audio 6.5 comps 1 pair 8" polk audio for mids 2 xspower d3400 batteries.....learning alot from meade and his circle of some of the baddest installers ive seen- thanks guys, for not being so cocky and posting the way it should be done!P.S. Thanks Steve....for the demo!!!! loud as fauk!
kfx450r Posted August 2, 2009 Report Posted August 2, 2009 Looks good. Nice work, would you still be able to successfully do like 6 15s in there without a full walk thru. Is that window enuff?
95_1500 Posted August 2, 2009 Author Report Posted August 2, 2009 this is the most beautiful, sniff, thing I have eva seen... dude, this is bitchin! for such a busy guy, you sure seem to be getting alot done. pretty efficient with your time..... Haha thanks man im lovin the way its commin out!! Yeah i try to use every second available to do at least a little work.. Soldering the wires and terminals to the tweeters right now! lmao Looks good. Nice work, would you still be able to successfully do like 6 15s in there without a full walk thru. Is that window enuff? Im not sure where you got 6 15s from? I wont be changing my box/sub setup for a while, the only upgrade im making is changing to LV5s so i can throw a shit ton more power to them Maybe once i move out on my own i will do a full walk through or something but just 2 15's for a long time. Original Build http://www.stevemeadedesigns.com/board/index.php?showtopic=24095
95_1500 Posted August 2, 2009 Author Report Posted August 2, 2009 Just soldered the rockford wire to the tweets (yes 12ga is overkill especially when they come wired with like 20 but i wanted all the wires on the crossovers to match, kind of an OCD thing ) Well its 1:36 so im gettin to bed, fishin in the morning then sanding and glassin the driver door!! Original Build http://www.stevemeadedesigns.com/board/index.php?showtopic=24095
















Recommended Posts
Archived
This topic is now archived and is closed to further replies.