Kyle Farley Posted November 12, 2013 Report Posted November 12, 2013 Ive been working on and off for quite awhile now and decided it was time to get serious with the GTO's stereo. Ive always been into Car Audio/Cars since I was a Kid. My first setup back in 1996-1997 was the Big three then.MB Quart, PPI, and JL Audio. No Pic'sI did another big build back in 2002 when I was stationed in HI.I then got bit by the HorsePower Bug for a couple years and now I'm trying to do both. I started on this awhile back so there will be quite a few update posts to catch me up were im currently at in this build. CAR: 2005 Pontiac GTO GEARHeadunit: Pioneer 80PRSFront Stage: Focal Utopia 165W'sRear Stage: NoneAmplifier: Zuki Class D 5 ChannelSubwoofer: Two JL 10W7'sStill debating ported or sealed.False floor for Sub enclosure Mechman Alt XS Power D3400 Im not sure if this is going to be loud enough for my taste, but we will see. I started on the front door's with CLD Tiles from AlphaDamp.I did about 50% coverage on the inside of the door after wiping it down with alcohol.Then I went on to cover below as you see it now.I might of used a little to much, but I think that was the Coor's Lights fault With Just the CDL Tiles the doors have a much better solid "THUD" when they shut now.I moved onto the MLV next.I ordered 18 sqft of Luxury Liner Pro from Second Skin Audio.This stuff has got some weight to it.Im hanging it with some industrial Velcro and so far it's working awesome.I haven't had time to complete the drivers side door or even start on the Passenger side. I like to Multi Task so I had multiple things going on at once.While working on the doors I removed the rear seats and side panels and added more AlphaDamp to those area's My Little Buddy Helping me out I Also started on the Trunk. Theres not a lot of room in the trunk of the GTO with the gas tank moved into to meet US crash standards.
Kyle Farley Posted November 12, 2013 Author Report Posted November 12, 2013 The Big brown truck brought me a whole bunch of stuff. #1 of 2 My Order from Mechman Time to get the Big 3 done and install my new Mechman 240amp Alternator.I started off by soldering each terminal and tech flexing each run of 0/1 gauge wire I fused the new positive wire from the Alt to the Battery redid the positive to the fuse block under the hood. Redid the stock grounds off the battery and the wire to the starter. Soldered and heat shrinked.Wire loom will go over them. All the 0/1 finished and ready to go in Out with the Old, in with the new Mechman 240amp Alternator. Now with the Alternator I'm using the standard 2 pin connector and in that lies the problem..... It's PCM controlled.....No more then 13.6V So out it came and back to mechman for a 4 pin conversion
Kyle Farley Posted November 12, 2013 Author Report Posted November 12, 2013 Well I started on the sub box. Cut the spare tire support brace out and taped it up. Built the frame and centered it. Started on my first layer. Installed some T-nuts on the amp rack board Went to my buddy's shop to gun some aluminum round stock to make the legs for my Amp rack. Using some custom washers a Fellow GTO owner makes for under the Hood of the GTO's The plan is to curve my power and groundAnd everything else 180 degrees and to go thru the amp rack from behind the center of the amp Started getting everything ready to attach the amp rack to the gas tank frame....
twisted1 Posted November 12, 2013 Report Posted November 12, 2013 Pretty sweet work bro! Should sound very nice in there 09 mustang gt
Kyle Farley Posted November 12, 2013 Author Report Posted November 12, 2013 Testing the Sub after cutting the holes with the jasper jig I decided to go sealed at this time because I couldnt get more then 3 cuft out of the current box All the T-nuts installed ( I hate them by the way) All my washers and amp mounting posts in the polishing process Test mounting amp rack to the trunk fuel tank brace. Mounting Bolts for the rack all polished up Amp rack mounted Tested in the car Started back under the Hood again Getting the Amps ground all tech flexed and ready to go in Wiring holes measured out and cut getting ready to mount the amp Trimming the cable pants for the Zuki. Amp test mounted and cleaning up the wiring Cleaning up the wiring. Zip ties and zip tie hold down blocks. .
Brandon15zzz Posted November 12, 2013 Report Posted November 12, 2013 I hate you with such a passion. Jk but before I bought my impala I wanted the exact car you have. And those wheels look so good on that car. Vehicle: 1995 Impala SSHead Unit: Pioneer AVH-P4400BHMids And Highs: (still deciding)Batteries: 1 Deka Group 34 Time to make a race car.My Build Log: Solo X 12"http://www.stevemead...don15zzz-build/My Build Log: DC lvl 4 xl 15"http://www.stevemead...don15zzz-build-My Wall Build Log: 4 Lanzar 15's/ 3k+ RMShttp://www.stevemead...t-by-techforce/My Feedback:http://www.stevemead...1
stevog Posted November 12, 2013 Report Posted November 12, 2013 Very nice build i also have a gto but my build doesnt have as much nice equipment as yours. Post some more pics and a list of your performance mods.
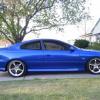
Kyle Farley Posted November 13, 2013 Author Report Posted November 13, 2013 Very nice build i also have a gto but my build doesnt have as much nice equipment as yours. Post some more pics and a list of your performance mods. Thanks man I have quite a few more pic's to post up now that I'm at home and not on my work computer. My latest Mods to the car was a built Trans and upped the stall from a 2800 to a FTI 4000 stall. Right before that I did these bad boys... Wilwood 14" 6 piston fronts and 12.19" 4 piston rear brakes Mods to the car. LS3 Heads milled .004 Fly-cut pistons for piston to valve clearance LS3 intake and Injectors Kooks 1 7/8 Long tube headers w/ cats Corsa Sport Catback K&N Intake Made 462rwhp and 409rwtq thru the 2800 stall before. Video of it on the dyne before the heads and cam Start up and idle video of the heads and cam BRC Coilovers CCW SP500 Wheels in 19X8.5 up front and 19X10 out back Tons of Maverick Man Carbon Fiber parts on the outside and inside. My newest CF part I received from him last month The man makes awesome products for our GTO's Here is the new rear Pontiac Arrowhead he makes. Color matched to the IBM paint of the car Ill post up more pic's of the build tomorrow. Early day tomorrow.
Ryan Brawley Posted November 13, 2013 Report Posted November 13, 2013 All these goats popping up in the forums. Love the car!
Kyle Farley Posted November 17, 2013 Author Report Posted November 17, 2013 Applied a couple CDL tiles to the inside of the box The 2nd 10W7 Mounted. I started working on the dash after the subs were mounted. I mocked up the 80PRS and then the AVBM II from Mechman. I also Mocked up the sub controller in the same spot. Finished product. I need to take a better pic in better light with the deck completely seated and dash back together. The above pic was with the ignition on ACC, and not running. I now just need to finish the trim pieces and cover over the subs, but I've been really busy helping my father in-law. This is what we did weekend before last. I really want one of these, my garage ceiling isn't tall enough though Last weekend I replaced the 10 yr old door speakers in my Truck. Went from 5 1/4" to a 6' Eminence 6C. I had to find an efficient mid to keep up with the Horns under the dash of the truck. My Truck I have some old school RF 10's behind the rear seats now and planning on doing a single SQ HDC315 ported running a Q1-2200D to it. I'll probably start a build thread of its own for that though. Kyle















Recommended Posts
Archived
This topic is now archived and is closed to further replies.