kryptonite Posted April 19, 2014 Report Share Posted April 19, 2014 Got me some ideas for my explorer now, lookin forward to this build DC SOUND LAB NUT HUGGERCurrently Own 4 - 18" lvl 6s (m3) w/full Carbon Fiber option 2 - DC 5k lvl 4 motor lvl 2 motor On 8/2/2013 at 8:13 PM, n8ball2013 said: this is much worse. Its old n8 without the time or patience to hold fucking hands. I'm supposed to be doing school work but yet here i am making sure jr fuck fuck isn't trying to poke the other kids with a stick. Link to comment Share on other sites More sharing options...
Swampy Posted April 25, 2014 Author Report Share Posted April 25, 2014 Just finished installing my sub floor that the wall will sit on. (i know, it looks kind of skewed, but its the angle of the street im parked on. i was so scared i used a level to check it all the way around.) ill be finishing up the layouts on the MDF for the cut lines tonight and cutting everything tomorrow morning. wall building starts Tuesday I don't claim to know how to solve anything, I just practice the basics. There is nothing worse than wasting hours over a problem that should have taken 5 mins. Anything I post and claim to know, I know simply because of a lesson learned from a mistake on my part. Link to comment Share on other sites More sharing options...
Swampy Posted April 26, 2014 Author Report Share Posted April 26, 2014 i know i said the wall construction started tues, but i couldnt stand to wait, especially since the wood cutting didnt take nearly as long as i thought. my next step is to attach the side faces to the top piece and put them all in as one piece, then the port, then the front and back faces. (after that comes the fiberglass layer on the inside.) I don't claim to know how to solve anything, I just practice the basics. There is nothing worse than wasting hours over a problem that should have taken 5 mins. Anything I post and claim to know, I know simply because of a lesson learned from a mistake on my part. Link to comment Share on other sites More sharing options...
Swampy Posted June 20, 2014 Author Report Share Posted June 20, 2014 sorry guys, i know its been a long time since i posted...after i got out of school for the summer, work kicked into overdrive and i started working 70 hr weeks. everything is put together, but not finished. i have plenty of pictures from start to finish that i will be posting later tonight when i get off work, and the rest of the build should be finished by early this week or next since i choose to find a bigger amp the push them together and i still have some minor fiberglass work and lots of painting to do. i will be much more diligent about posting my progress haha. I don't claim to know how to solve anything, I just practice the basics. There is nothing worse than wasting hours over a problem that should have taken 5 mins. Anything I post and claim to know, I know simply because of a lesson learned from a mistake on my part. Link to comment Share on other sites More sharing options...
Swampy Posted July 19, 2014 Author Report Share Posted July 19, 2014 so this is when the wall started to really come together. i screwed and glued the top and sides together BEFORE putting it into the vehicle and putting it with the rest of the wall. this is when i put the front baffles of the wall in and attached the front face to the rest of the box. you can see that the back of the wall isnt on yet, this was because i still had a lot of fiberglassing to do on the inside yet. this one shows the wall just after the back face went up and a lot of the internal bracing was done. i used 2 2x2s on top and bottom running from the side of the port to the side of the box, idk if you can tell that or not...its not a very good picture. this is when the fiberglassing really started. not only did i fiberglass from the edge of the box to the plastic interior panels of my vehicle, but i also fiberglassed all of my seams where the box came together, both inside and outside of the box before the subs were mounted in. this is when i got a good base coat of paint down...not too much different from the previous picture. this is just after the subs were mounted and this is still what it currently looks like...keep in mind that all of the paint is not nearly done yet, but so far everything is hooked up and working quite nicely. most of the pics arent that good, but i figured i owed everyone at least a little something for all the patience. if anyone has any questions, please feel free to ask away. more detailed pics and explanations will be coming asap. I don't claim to know how to solve anything, I just practice the basics. There is nothing worse than wasting hours over a problem that should have taken 5 mins. Anything I post and claim to know, I know simply because of a lesson learned from a mistake on my part. Link to comment Share on other sites More sharing options...
Swampy Posted July 19, 2014 Author Report Share Posted July 19, 2014 the only other updates that i have are, in addition to what i had before: the addition of a second AQ 2200 a new shuriken SK-BT45 to go along with my XS D6500 and my shuriken SK-bt80 a second run of 1/0 OFC SkyHigh power cable i also placed an order with mike singer about 4 weeks ago for a 270A H/O alt...too bad the overdrive pulleys are on back order until who knows when. :/ I don't claim to know how to solve anything, I just practice the basics. There is nothing worse than wasting hours over a problem that should have taken 5 mins. Anything I post and claim to know, I know simply because of a lesson learned from a mistake on my part. Link to comment Share on other sites More sharing options...
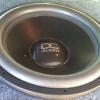
Swampy Posted July 19, 2014 Author Report Share Posted July 19, 2014 this is the last minute door speaker modification i made, im hoping itll look better after some paint. I don't claim to know how to solve anything, I just practice the basics. There is nothing worse than wasting hours over a problem that should have taken 5 mins. Anything I post and claim to know, I know simply because of a lesson learned from a mistake on my part. Link to comment Share on other sites More sharing options...
zack_e89 Posted July 20, 2014 Report Share Posted July 20, 2014 this shit is fuckin loud on only 2200 watts!!! 97 Suburban 8 custom PSI Platform 3 18's Link to comment Share on other sites More sharing options...
Swampy Posted July 20, 2014 Author Report Share Posted July 20, 2014 this shit is fuckin loud on only 2200 watts!!! youre the only person pretty much to have heard it as it stands now...sure its loud, but its only HALF way done. but still...thanks all the same man. I don't claim to know how to solve anything, I just practice the basics. There is nothing worse than wasting hours over a problem that should have taken 5 mins. Anything I post and claim to know, I know simply because of a lesson learned from a mistake on my part. Link to comment Share on other sites More sharing options...


Recommended Posts
Archived
This topic is now archived and is closed to further replies.