Btrash Posted December 30, 2008 Report Share Posted December 30, 2008 Looks great so far. You are a man of many talents it seems. With everything pulled out right now, looks like a prime time to add some deadening ;-) Link to comment Share on other sites More sharing options...
The Performer Posted December 30, 2008 Author Report Share Posted December 30, 2008 did u have to take off the orange pointer things from the cluster? and if so how do u do that and make sure they go back on the same spot u took them off? i was reading some other forums and they took them off and sanded them down with nail polish remover. to give them a clear look or paint them white to see better at night. http://www.gmfullsize.com/forum/showthread.php?t=24726 i hope this link works. its for the 99- 02 gmc trucks It's a scary feeling taking the needles off for me after the first time that I did it, but there's a secret that makes it a bit easier.This is a link to how to replace the stepper motors, but he gives the secret to getting the needles off first. You gotta give it a twist to break the bond. http://www.fullsizechevy.com/forums/genera...eplacement.html Then here's a full on thread on all LED replacement for 03+ GM. However in my gauges there are almost 20 LED's, so I didn't do mine exactly the same. I wanted them BRIGHT. http://www.fullsizechevy.com/forums/genera...d-write-up.html CERTIFIED BITCHES!!! Not being new at something doesn't mean anything. Just because a prostitute isn't new at what she does, doesn't change the fact that she still 'sucks' Click to see my build! Proud DC owner Link to comment Share on other sites More sharing options...
la negra Posted December 31, 2008 Report Share Posted December 31, 2008 It's a scary feeling taking the needles off for me after the first time that I did it, but there's a secret that makes it a bit easier. This is a link to how to replace the stepper motors, but he gives the secret to getting the needles off first. You gotta give it a twist to break the bond. http://www.fullsizechevy.com/forums/genera...eplacement.html Then here's a full on thread on all LED replacement for 03+ GM. However in my gauges there are almost 20 LED's, so I didn't do mine exactly the same. I wanted them BRIGHT. http://www.fullsizechevy.com/forums/genera...d-write-up.html my needles came off very easy with a fork and a lil bit of pressure Link to comment Share on other sites More sharing options...
The Performer Posted December 31, 2008 Author Report Share Posted December 31, 2008 Ok, so for today's work... Fixed the rattle bullshit with the amp! Finished some more sanding. Now on to primer! ^Grease and wax remover is a must. Did a coat of black primer to see what I was working with. After it, I've come to realize I have pinhole mania... Calls for a midnight trip to walmart for filler primer. Now one thing you must know about painting with spray cans is that they are just as unforgiving as not wearing a rubber... ALWAYS take your time and do spray paint right. A little something for the haters. Calling it a night. I've got a load more larger pinholes I need to work with, but they will have to wait until tomorrow. Till then ladies and gentlemen... CERTIFIED BITCHES!!! Not being new at something doesn't mean anything. Just because a prostitute isn't new at what she does, doesn't change the fact that she still 'sucks' Click to see my build! Proud DC owner Link to comment Share on other sites More sharing options...
The Performer Posted January 6, 2009 Author Report Share Posted January 6, 2009 Alright, so it's been a rough couple of build days since my last post and a surprise coming in terms of the paint job. Anyway, got alot done, but still have ALOT to go. I've been tracking my packages and my speakers and foam baffles should be here wed. Now on for some build pics... First off I'll say I had some serious trouble getting a flat finish from the paint I was using as I would hope. It would NOT cover well at all and the primer coat underneath was making it worse to say the least. But anyways, had an idea for the amp back plate since there's the LED strip behind it. So it had to come back off. Back on with some flat white paint. ^LED strip next to the flat white... You guys following? LOTS of glow. Not sure why I never did this before, but I removed all the bracing crap from the inside of the box, That outta give me a TAD more air space huh? Drilled out the inside cavities a lil bit more as well. In my frustration I missed some pics between here, but I'll sum it up as I decided I just cant do flat paint jobs apparently so I picked a can of semi gloss black off of dad's paint shelf and got to it. ^However, now it's getting wet sanded...? http://www.stevemeadedesigns.com/board/public/style_emoticons/default/01nocomment8so.gif And waxed...? http://www.stevemeadedesigns.com/board/public/style_emoticons/default/01nocomment8so.gif Either way, I've decided if I cant do flat paint jobs worth a damn, I know I can do gloss now. The first time around I didn't know what the hell I was doing and the paint job was crap, but this time around... ^LOL the product of choice. Surprising isn't it??? http://www.stevemeadedesigns.com/board/public/style_emoticons/default/hairtrick.gif The pictures from my cell don't do NEARLY enough justice, but I promise I'll have better ones from my dads camera once it's all back in the truck. In the end I've also thought on it and figured I put WAY too much work into this box to not show it in the paint job, so even though I started out going for a flat paint, I'm MUCH more happier with this. CERTIFIED BITCHES!!! Not being new at something doesn't mean anything. Just because a prostitute isn't new at what she does, doesn't change the fact that she still 'sucks' Click to see my build! Proud DC owner Link to comment Share on other sites More sharing options...
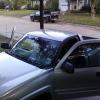
The Performer Posted January 6, 2009 Author Report Share Posted January 6, 2009 Aligning the LED strip. And speaker wires going to the amp. Starting to look familiar... Working on some washers that will be inside the box on the bolts, but need some more rubber gasket to seal the bolt. BTW, anyone know where I can get some of these clips in a hurry? I broke a few getting the plastic sides out of the truck. Oh and check out the new mounting bolts that are going to be holding the DC's in ^Testing out to see if vinegar in the box over night will help cure the paint smell out. I read before somewhere vinegar removes odors... I guess we'll see tomorrow... Taped closed. Couple more money shots of the paint results... (I never want to hear ANYONE make an excuse about having a shitty paint job from a spray can. If I just made mine turn out like heaven... well I guess I'm good...) Now I've gotta make some brackets for the top of the box to bolt to the cab of the truck. 1/4 inch band iron doesn't sound like overkill huh? I'll use this heavy ass wire to get my bend shape from the truck. Worked like a charm. DAMN I'm good... CERTIFIED BITCHES!!! Not being new at something doesn't mean anything. Just because a prostitute isn't new at what she does, doesn't change the fact that she still 'sucks' Click to see my build! Proud DC owner Link to comment Share on other sites More sharing options...
The Performer Posted January 6, 2009 Author Report Share Posted January 6, 2009 (Having to make this into 3 separate post's because of all the pics) An idea of what I'm going for. The drywall screws will mount to the back of the box and the bracket will go up and follow the curve underneath the trim piece where the TEK screws will go into the metal ridge. I guess tomorrow I'll try and get a coat of paint on the brackets even though they wont be seen, I'll feel better knowing they aren't just bare metal. Well that's it for today, tomorrow I've got a few more things to do and hopefully then Wed. I'll be putting the new 4x6's in and starting to reassemble my truck. CERTIFIED BITCHES!!! Not being new at something doesn't mean anything. Just because a prostitute isn't new at what she does, doesn't change the fact that she still 'sucks' Click to see my build! Proud DC owner Link to comment Share on other sites More sharing options...
qu1cks1lver56 Posted January 7, 2009 Report Share Posted January 7, 2009 holy shit thanks for the led mod link. when i get my '05 in about 6 months im gonna do the gauges, headlight switch, door switches, and the HVAC controls, shit looks tight as hell in blue. makes you wonder why gm even put the white ones in it. First Gen Xterra: Always changing DNX 690HD RF 360.3RF T3002RF T4004RF T10001bdSilver Flute 6.5"s Tang Band 1" TweetersSundown X18 in 7cubes net tuned to 32hz Trust me .25 Blows your Load. Link to comment Share on other sites More sharing options...
The Performer Posted January 7, 2009 Author Report Share Posted January 7, 2009 holy shit thanks for the led mod link. when i get my '05 in about 6 months im gonna do the gauges, headlight switch, door switches, and the HVAC controls, shit looks tight as hell in blue. makes you wonder why gm even put the white ones in it. No I'm curious as to why they still use bulbs... It would make more sense to just use LED's so that they wouldn't burn out. CERTIFIED BITCHES!!! Not being new at something doesn't mean anything. Just because a prostitute isn't new at what she does, doesn't change the fact that she still 'sucks' Click to see my build! Proud DC owner Link to comment Share on other sites More sharing options...
The Performer Posted January 7, 2009 Author Report Share Posted January 7, 2009 Got some more pics. Not much today, more polishing and amp installed to box. Brackets got a coat of black primer. Outta be good enough for what they're doing. Tomorrow speakers should get put in the truck and I'll start putting everything else back in. Might not be until thursday for final install pics. CERTIFIED BITCHES!!! Not being new at something doesn't mean anything. Just because a prostitute isn't new at what she does, doesn't change the fact that she still 'sucks' Click to see my build! Proud DC owner Link to comment Share on other sites More sharing options...


Recommended Posts
Archived
This topic is now archived and is closed to further replies.