Tyler_Krupa Posted May 3, 2012 Author Report Posted May 3, 2012 Yay, a fellow Volvo driver I'm definitely tuned in Gotta love the volvos. Things are build like tanks. So Friday I plan to order a LVL4 12", RF T1000-1bdCP, XS power D975 and some assorted wire and ring terminals. for a box I was thinking subs back port up ported though the back deck. How do you guys feel about that. Would/should cancelation be a problem set up like this? YouTube
Tyler_Krupa Posted May 7, 2012 Author Report Posted May 7, 2012 Got a little more work done today. I ordered up a DC audio LVL4 12", a Rockford Fosgate T1000-1bdCP, and a D975. I also have Ryan at ram designs designing me a box. So today I got my back speakers mounted and I was able to get though the firewall and run my 0 gauge up to my back seat before I had to call it quits. Hears a picture of the speakers in their mount. the mounts were made out of scrap wood and their looks don't matter to me at all because everything will be covered by the back deck. Here is where I drilled though for my power wire. this comes out right where your feet rest well sitting in the passenger seat. I have one layer of calk on the hole now and plan to add another when its cured. Tomorrow I plan to run the rest of the wires all the way into the trunk and put the back seat back together. Then it will just be a waiting game for my stuff to come in and me to get a break from school and work to install it all. YouTube
Tyler_Krupa Posted May 9, 2012 Author Report Posted May 9, 2012 Time for MOR updates! Last night I got all my wire to the trunk, back seat put together, and I took apart my factory dash speakers so I could mount the front tweeters inside of them. Everything going in to the trunk. Drilled some holes that were already there a little bit bigger to get the wire as close as I could to the floor. Inside of the trunk. Nothing cool yet. Backseat put back together for good......or at least for now. The left speaker is the type that came in the car. The one on the right is a tweeter only version I picked up at a salvage yard for 8 bucks. The grills on the salvaged ones are mint where the ones already in my car were a little beat. The one on the left is the ones I already had where the one on the right is from the salvage yard. I was able to just unscrew the tweeter in the salvaged speakers and drill the hole in the middle just a little bigger so i could put the RF flush tweeter mounts in the factory speaker. This is with the RF mounts already in them Mounted in the dash before the grill was put on And with the grill you cant even tell that there is a aftermarket speaker in the factory location. I'm big about making things look factory and not out of place, well unless you have a huge build going on with a wall or something else big doinzz. My RF T1000-1bdCP is scheduled to arrive tomorrow and my sonic Electronix packages which is a XS Power D975 and some assorted wire and terminals are suppost to arrive Thursday. My lvl 4 12" wont be here for a few weeks but i can finish everything else up as I wait. More install pics to be posted as they happen! YouTube
Tyler_Krupa Posted May 12, 2012 Author Report Posted May 12, 2012 Past few days I received my t1000-1bdCP, XS Power D975, stinger volt meter and some other random stuff. Currently I am waiting for my DC Audio LVL 4 12" to arrive and to have some free time to build my box. For now I have my P400.4 hooked up so I can finally listen to some music. The wiring is such a mess (as I don't want to cut the wires till I know where everything is definitely going) so I did not take any pictures of my trunk. If for some reason though if you want to see how a refurbished Rockford Fosgate T1000-1bdCP is packed you can check out this video. I also took some pics of the installation of my new volt meter so here you go. I pre-drilled the holes as you always should and mounted this to the trim piece above my headunit. I drilled a hole though the back for the wires to pop though with-out being seen. Wiring her up. Thankfully there is no wall between what the trim piece covers and the radio slot. All wired up, calibrated and put together. I have found many reviews online complaining that this volt meter is way too bright but I didn't find it blinding like many say. This little guy is very bright but not so much so that it effects my night driving. Ryan at RAM Designs also finished up my enclosure design last night so here's a peek at how it looks. The box is 1.6ft^3 (before sub displacement) and it is tuned to 33hz. When everything is all done I have no plans on leaving the box in there like this. Most likely I will cut trim to go around it so is fits snug all the way around. More to come as I have time. I would like to paint some interior trim and the volt meter white sometime soon. YouTube
HatersGonnaHate Posted May 12, 2012 Report Posted May 12, 2012 Ok, besides that fact that I'm really liking the progress so far... What type of camera are you using? The quality is amazing man! My name is AdamThis is my Civic Build.7" Samsung Tab 2Kenwood KDC-X896Clarion EQS746Sundown X-15DC 3.5k @2ohmHatersGonnaHate's 02 Civic UBLELD Bypass for Honda Civic/Accord/FitDon's Jeep Grand Cherokee Rebuild N8ball2013 - i think you'd stick your dick in a blender if it told you it was 40 wtih two kids your age. lol srp365 - If posting were picking up bitches, I'd be going home single tonight looks like tony montana sneezed in your car.
Tyler_Krupa Posted May 12, 2012 Author Report Posted May 12, 2012 Ok, besides that fact that I'm really liking the progress so far... What type of camera are you using? The quality is amazing man! A Canon T3i which is what I use for photo and video. Computers, Car Audio and Video/photography are my big three things in life so that's where all my money tends to go. lol. The camera costs a bit more then most want to spend but for the money it can't be beat (or i can't find anything that beats it) YouTube
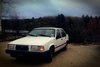
TheBetterMethod Posted May 13, 2012 Report Posted May 13, 2012 Dang dude, that car is awesome! Keep up the good work. 2005 Subaru Outback Wagon Pioneer 9400BH Fi Q 15, SAZ1500dV3 The first build>>> http://www.stevemead...-outback-build/ 140.9 @ 36hz Sealed on dash! REBUILT!!! 2 Fi Q 15s, 2 SAZ1500dv3 146.9 @ 39hz dBDRA certified
Tyler_Krupa Posted May 13, 2012 Author Report Posted May 13, 2012 I currently building a skateboard rack (because i skate) that will be under the trunk lid. it will hold the board so when the trunk is opened up the board will be centered on the underside of the lid with the graphic (underside of board) facing you. board will be secured with nylon straps or something. this way I dont have to keep it in that back seat but i dont also have to worry about it punching a hold in my sub. it will also look sick when the trunk is open. tomorrow i plan to also paint some dash trim and my volt meter white to match the body of the car. YouTube
Tyler_Krupa Posted May 15, 2012 Author Report Posted May 15, 2012 Well here is another little update for you guys. Today I finished painting all the two pieces of trim and volt meter and reinstalled them. This was easy enough to do and I think it looks pretty sweet. These are the parts that will be painted Here's all the pieces after being prepped with a light sanding and cleaning Here's the finished pieces waiting to finish drying. I ended up going about five light layers of rustoleum for plastic white primer and four normal coats of rustoleum for plastic white gloss paint. Here is everything put back in once the paint dried. I like how this looks a lot. I was thinking of painting some more trim but i think i might just leave it how it is. Today I also started building the box. The box is to be made out of 3/4" MDF to the design which i ordered from RAM designs. Cutting the wood took all (half after school) day because the man at home depot i had do the big cuts so i could fit it in the car was off by 1/8th" to 1/4th" on every piece. After fixing one piece the pulley on my table saw popped off. I managed to get everything done on the old table saw in my grandparents basement in a few hours. Here's a shot of all the wood cut. here is part of the port being glued and clamped together And here you can see i have 5 out of 6 sides of the box and the 45s put together and I'm just waiting to get the port finished so i can drop it in and put the top on the box. Hopefully I will have the box built tomorrow and I can start sanding and filling it tomorrow, maybe I can even give it a nice white finish. The skateboard rack is also still being build I just don't have any pictures right now. YouTube
Tyler_Krupa Posted May 16, 2012 Author Report Posted May 16, 2012 Yet another Update I have the box all built and have started priming. Also my LVL4 12" should, according to fedex, be here thursday. THAT MEANS I GET BASS IN MY LIFE AGAIN!!!!! Well I know everyone likes pictures so here you go. Cut the speaker hole out with a jig saw. Here is the port assembly all glued and nailed together waiting to dry. Port put in the box. Just needs the top and the port cut out. The box all assembled. First coat of primer. You can see the box I made for the stratus in the back there. For now I plan to just have the box in the car painted white but probably next weekend I will be building the baffle and trim for it which will be wrapped in the same black leather my door speaker mounts are covered in. I plan so still have some white showing though. I also want to do a false floor with the amps mounted under with plexiglass so you can still see them. I have some blue SMD LED strips left over from my computer build to I might throw some in the box port and with each amp. I would also like to do the big three just to get a little more current out of my charging system. Ill keep you guys updated as progress is made. YouTube
















Recommended Posts
Archived
This topic is now archived and is closed to further replies.