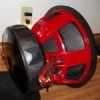
Purplehaze Posted April 11, 2013 Author Report Share Posted April 11, 2013 Okay, so I got a little more work in, nothing too exciting, but still work.Started sanding the fiberglass to prep for Kitty Hair.Then it was test fit time...So then I took it to the car and put it in. Thats when I realized I had a little problem. The 5 1/4" backplate was hitting the window motor, so it had to go. Plus I was thinking about it anyway, and it will be better if the 5 1/4 was to be free air, then it would better match the other set of them in the kick panels. So, I simply removed the backplate and problem solved. This chamber is sealed off from the others anyway, so this couldn't have worked out better!Then, more sanding...And so today I need to start Kitty Hair, and Rage. I am not a natural body man, so this will probably take me longer than usual. In other words, I suck at body work, but can do okay work if I take my time...Oh yeah, big props to my girl, she got me an early Fathers Day present. This will help for sure, I love my girl!She got me the compressor, bless her heart. I picked up the sander and stuff at Harbor Freight, along with a rt angle die grinder, some 2" and 3" disc, and a few other things I needed.I wanted a big nice compressor, but since I live in an apartment, and don't have a garage, this one is perfect! It's stronger than I thought it would be, it runs the sander and grinder just fine, as long as you give it a break once in a while. It should help out tremendously with all this body work ahead of me. Thanks babe, your the best!More updates as soon as they come, stay tuned! And thanks for lookin' Kickin' Cruiser Seller Feedback Stage 3 Dash, Door Panels,4th Order wall 4 - 15'son a DC 5.0K 2 DC 5.0K'sSolo X 15 (v.2) Sub Build Link to comment Share on other sites More sharing options...
Purplehaze Posted April 11, 2013 Author Report Share Posted April 11, 2013 Sorry for the bad picture quality. I'll get a new camera soon.Okay, so I ordered the stuff to for the doors and front stage, and I got most of it in. This is 500 ft of 16/2 speaker wire, 100ft of regular 14g speaker wire, for the door subs, 12-pin Molex connectors for the doors, heat shrink tubing, and braided wire loom.Then it was time for more sanding, and a test fit.I guess I had the camera on the wrong setting, cause all of these pics turned out blurry. But here is the test fit.And now I'm getting excited! Time to get these babies done!So first step was Kitty Hair. I decided not to use a lot of it, so I just put it where fill was needed.Then after sanding that down, I applied the first coat of Rage Gold. This was my first time using "quality" body filler, and I must say, it is better for sure!And that's where I am now. They are ready for coat #2 of the Rage. I'll have to say, that stuff sure is easy to sand! I love me some Rage now!I should get the wiring done this week, and hopefully have these suckers in and playing sometime before Christmas...Thanks for lookin', more to come! Kickin' Cruiser Seller Feedback Stage 3 Dash, Door Panels,4th Order wall 4 - 15'son a DC 5.0K 2 DC 5.0K'sSolo X 15 (v.2) Sub Build Link to comment Share on other sites More sharing options...
Purplehaze Posted April 11, 2013 Author Report Share Posted April 11, 2013 Okay, I have update pics. They aren't the super cool updates I was wanting to have today, but it's progress. TBH, these dp's are whipping my ass everyday that I work on them. But like a champ, I keep getting back up and back at it. This has been a lot more work than I expected, and I was expecting a lot. But we are getting there, slowly but surely! Anyway, here are the pics of my latest beat-downs... First up was the damage I mentioned a few days ago. I got really lucky that it wasn't worse. Guess these panels are pretty strong...The damage part 1Part 2Part 3The repair was simple. I glued the broken part back together, then installed one more piece of dowel rod. The other two spots just took a little filler.Next up: Rage coat #2Sanded #2Coat #3Coat 3 sanded.Coat #4 drying in the sun. Caught a shot of the Cruiser in the background But wait, there's more... Kickin' Cruiser Seller Feedback Stage 3 Dash, Door Panels,4th Order wall 4 - 15'son a DC 5.0K 2 DC 5.0K'sSolo X 15 (v.2) Sub Build Link to comment Share on other sites More sharing options...
Purplehaze Posted April 11, 2013 Author Report Share Posted April 11, 2013 So while working on the doors, I have also been trying to work on other little stuff for the interior. Prepping the panels for paint, and tweeters, and plexi ans such. So let's get caught up on what all is going on with that...First up, the tweeter mounting. On with the pics...Whoops, forgot to take a pic of these finished, before paint. My bad, you will have to see it painted.Speaking of paint...Then some plexi. I went ahead and cut it for the doors, and amps too.The back piece will be painted, and they will have RGB LED's, just like the door panels. Should be LED's all over! Speaking of which...B-pillars cut and paintedThen it was back to the doors. I sanded and sanded and sanded some more! My fingers are literally raw!So after sanding coat #4 of Rage, I decided to spray with filler primer, to help me see where I'm at with them.Remember, they are not finished. This is just to see what else is needed.And this is where I am at now. Still some more body work and sanding left, but they are getting there!Stay tuned for more, and thanks for looking! Kickin' Cruiser Seller Feedback Stage 3 Dash, Door Panels,4th Order wall 4 - 15'son a DC 5.0K 2 DC 5.0K'sSolo X 15 (v.2) Sub Build Link to comment Share on other sites More sharing options...
Purplehaze Posted April 11, 2013 Author Report Share Posted April 11, 2013 A few more pics of the doors in first primer And that's all I have at the moment.Thanks again for lookin' Kickin' Cruiser Seller Feedback Stage 3 Dash, Door Panels,4th Order wall 4 - 15'son a DC 5.0K 2 DC 5.0K'sSolo X 15 (v.2) Sub Build Link to comment Share on other sites More sharing options...
Purplehaze Posted April 11, 2013 Author Report Share Posted April 11, 2013 Okay, so I didn't get a lot done this week, it was hot everywhere, and for me, that means overtime! Which may mean less time to work on the ride, but also means more money! So who can say no to that? Especially @ +$25/hr!!!!But I did manage to get a little work in, so here it is. We are truly getting close now First up, some test fitting.After a little sanding, more test fits...A little spot putty actionAnd here are a few shots to show what I found when buying wire. Just cause it says it's 14g, doesn't mean it is. The smaller wire is supposed to be 14g, the larger is 16/2 audio cable. It's funny how 16g is bigger than 14g... So the next step was to cut groves into the backside of the panels, for the wires to lay in.DoneThen some paint, just cause it looks better to me...Then next up was to twist 4 wires together for the LED's. "Meade style" Worked great!I just used a clamp and a fence to hold the other end My "little helper" holding the drill while I tape and wire tie.Ended up with thisStay tuned, more to come! Kickin' Cruiser Seller Feedback Stage 3 Dash, Door Panels,4th Order wall 4 - 15'son a DC 5.0K 2 DC 5.0K'sSolo X 15 (v.2) Sub Build Link to comment Share on other sites More sharing options...
Purplehaze Posted April 11, 2013 Author Report Share Posted April 11, 2013 Next up is wiring. I decided to completely start with fresh new everything. Not that it was done wrong the first time, it was just getting too busy under the dash, and it was hard to tell what was going on. Heaven forbid I would have ever had to track down a problem, it w/ have been fun. So, like everything else, it's out with the old, and in with the new.This has got to go... I'm embarrassed to have done this, must have been in a hurry and out of connectors And this..."Little helper" is back for more fun!Fun fun fun! No seriously, I love me some wiring!He's hard at it...And last but not least, more sanding and primingJust after they were sprayedThen I went ahead and painted inside. Again, it just looks better...And I bought some of this... SQ FTW!!!Then I started wiring the door panels. The wire will just fit through the hole, then I glued the hell out of it with gorilla glue.And glued to the backside. (Tape is temp)And that is where I am now. I need to finish wiring the door panels, install polly-fil, plexi window, and vinyl. I ordered 4 yards of the good stuff, and a gallon of glue, so as soon as that comes in, I plan on attempting to wrap these myself. I also have an upholstery guy on standby, so if this doesn't work, they will be wrapped by him. Thing is, he will use seams, and I'm hoping to go seamless, so we will see. Either way, they will be getting wrapped soon, I promise!Thanks for looking, stay tuned for much more to come! Kickin' Cruiser Seller Feedback Stage 3 Dash, Door Panels,4th Order wall 4 - 15'son a DC 5.0K 2 DC 5.0K'sSolo X 15 (v.2) Sub Build Link to comment Share on other sites More sharing options...
Purplehaze Posted April 11, 2013 Author Report Share Posted April 11, 2013 Well, I have some updates for ya. It's been hard to get any work in for the past 2 weeks, between my job, and the weather. But I managed to fit in a few projects, nothing too exciting, buy hey it's all part of the build. Plus, I've been waiting to drop the dp's to the upholstery shop. I was going to attempt to wrap them myself however, I want perfect or close to perfect results, so my better judgement told me not to waste my time and money. So I've just been waiting until he is ready for them, and I guess now he is, so I gotta drop them off today. I'll try to get some pics of the place.Anyway, here are the pics from the past couple of weeks. I've been jumping from project to the next, trying to get something done.One of the things I've been working on is painting. Two words: Not Fun! But necessary, so on we go!Everything in the car is getting "blacked out", except certain things which will be a dark metallic grey. Here goes the factory outer door panels.But after getting the trim ring painted, I realized that this metallic color isn't the one I want. It looked good against the two tone tan, but it doesn't flow right with the black. So there's only one thing left to do: Change it!The old vs the new. Dark one is the old one, lighter one will match better!But before sanding them down to be painted again, I did snap a few pics. I just didn't think the darker color went well with it.So after sanding them down, I decided to do the trim part first, then I'll do the black after it has plenty of time to cure. Check out how I held the handle open Other piecesOkay, so another project I wanted to get done was the b pillar. Plans are to put a set of 4" and a set of 5.25" co-axles in and run them off the HU. So here we go!Noticed a problem right away. The 4" needs more room, what to do...Well, I marked it, used my jig saw to cut groves diagonally up to the line, then took a hammer and bent the "tabs" back. Worked out perfect! And I think it looks much better than if I had just cut right through it.So then I broke out the poly-fil, and stuffed a bunch in.I then cut out little strips of batting to use to help hold it all in.So it turns out like thisThen after craming as much as possible, the topI used this whole bag between the two b-pillars. Should help some, I think a nice upgrade for less than $4So now that is done, it's time to start running some new electric! Kickin' Cruiser Seller Feedback Stage 3 Dash, Door Panels,4th Order wall 4 - 15'son a DC 5.0K 2 DC 5.0K'sSolo X 15 (v.2) Sub Build Link to comment Share on other sites More sharing options...
Purplehaze Posted April 11, 2013 Author Report Share Posted April 11, 2013 Okay, so here's the plan. To accommodate all of the electrical upgrades, I am building two distribution boxes, one for hot, ground, remote, fuses, and relays, and another for the led control and distribution. But instead of hiding them, the plan is to mount the directly behind the seats, and show them off with some plexi and leds of their own. Then the amps will go right in front of them, directly under the seats. So here we go!I broke out the trusty ol jig saw again. Man, I really need to buy me a circular saw!Got the led box all cut, now the fuse/ relay boxBam!So now I just gotta get them glued and screwed together. Would have been much easier with a nail gun, and straight cuts...Next thing I did was to drill holes in both boxes, for wires to go in and out easilyAlso, I tried to make everything I could for this, but some parts I couldn't make. So for that, I hit up Mr. Tony C. at CE Auto Electric Supply. SUPER fast shipping!Making my own busbarsOf course I broke the tap on the vrey last one! FML! Oh well, I came up with a temp fix, till I cut out a whole new one.This is the led control box. After looking at it, I decided it could be better. So here we go, lets do it!First, I picked up a couple of these guys, then took them apart and added some colored 18gOnce that was done, I hard wired them into the box. Out with the old, in with the new. Or in this case, out with the new, in with the better new!Finished... But it just doesn't look right...Now that's much betterSo now that stuff is done, time to get the boxes finished up! Kickin' Cruiser Seller Feedback Stage 3 Dash, Door Panels,4th Order wall 4 - 15'son a DC 5.0K 2 DC 5.0K'sSolo X 15 (v.2) Sub Build Link to comment Share on other sites More sharing options...
Purplehaze Posted April 11, 2013 Author Report Share Posted April 11, 2013 First up, some body filler. This would not have been necessary had I used a table saw, and had nice straight cuts. But it is what it is, lets just get it done.Then some primer after sandingThen final sanding, then tape them all up for the outside coating: Bed LinerBed liner is on!Then I pulled off the tape, and gave the inside a nice coat of satin black. Should go well with the flat black bed linerHere is a little preview of what they are gonna look like. Remember, they will have plexi tops, and led lights inside.Most of it is just setting there, so pay no attention if it's crooked. It will be straight.Also, the windows are now "blacked out"And that's pretty much where I am now. I gotta drop the dp's off to the upholstery shop today, and start getting all the wiring and these new dist. boxes installed, so that when they are finished, the car will be ready for them! I can't wait to see how they come out!Stay tuned for more to come! And thanks for lookin'!!!! Kickin' Cruiser Seller Feedback Stage 3 Dash, Door Panels,4th Order wall 4 - 15'son a DC 5.0K 2 DC 5.0K'sSolo X 15 (v.2) Sub Build Link to comment Share on other sites More sharing options...


Recommended Posts
Archived
This topic is now archived and is closed to further replies.