alaskanzx5 Posted January 20, 2014 Report Share Posted January 20, 2014 Looking good. t1500bdcp 2 t2d4 15" 1 t600.4 1 t400.2 1 set p1 tweets singer alt, tons of wiring, smd vm-1, 80prs, back seat delete, still in the works, aiming for a 145-147 with the ability to play 25hz up to 50hz. Link to comment Share on other sites More sharing options...
Impalalpine Posted January 20, 2014 Report Share Posted January 20, 2014 Your wiring organization and layout is too legit to quit. Build's consist of: 2004 Chevy Impala : Pioneer--------------------- DEH-X8600bs Soundqubed/AQ------ Q4-120 Rockford Fosgate---- Punch-500.4 Soundqubed/AQ----- Q1-3500D.1 Alpine----------------- 6.5's & 6x9's Subs: TBA All Knukonceptz and SHCA wire and rca's Home Music Setup (4) Soundqubed HDS200 15's in two separate 15.5 cubic foot enclosures tuned to 31 hrz --- XM radio hardwire Updates coming all the time on both builds n8ball2013 "bullshit. Everything fits. If you cut enough." Link to comment Share on other sites More sharing options...
bcbrassard Posted January 20, 2014 Author Report Share Posted January 20, 2014 I was in sound deadener mode and spend at least a day covering the areas that needed it while trying to conserve it for other areas. Link to comment Share on other sites More sharing options...
bcbrassard Posted January 20, 2014 Author Report Share Posted January 20, 2014 The trunk lid is done and on here. I used 1/2" Dynomat acoustic deadener on it over some sound deader. Now i really wanted 1 piece over the whole trunk but by myself and with the conture of it i didnt think i could pull it off and i had only one chance with the material i had. I knew cutting it up was not going to look as good but the only way i could figure out how to do it. Keep in mind that the camera takes wayyyy to good of pics and looks much better to the eye. IMO anyway! Link to comment Share on other sites More sharing options...
bcbrassard Posted January 20, 2014 Author Report Share Posted January 20, 2014 Your wiring organization and layout is too legit to quit. Thanks, The final wiring turned out even better. You'll see, getting to that, but will be last of the pics. Link to comment Share on other sites More sharing options...
bcbrassard Posted January 20, 2014 Author Report Share Posted January 20, 2014 So now it was time to tackle installing the kicker panels, on pre install i noticed the stock wiring harness needed relocating to make fitting the kicker panels and speakers have room to perform well. Heres some of the pics of what i had to do... Seem like its little things like this it takes a couple hours to figure out and complete. Carpet had to be trimmed some and floor matts too. But it was all worth it in the end. Link to comment Share on other sites More sharing options...
bcbrassard Posted January 20, 2014 Author Report Share Posted January 20, 2014 The T2 comps where in the doors and after replacing the door speakers w/ T3s the kicker panels where the best location for the T2s. Here some pics of the T3 install. Beautiful pairing up if you ask me. The MDF ring on the T3s was bought and twice as thick, built with 2 seperate 1/2" pieces to make a 1" spacer. My goal was to get the speaker closer to the stock door grill. I would have loved to figure out a way to have it poke thru the stock grill with the RF speaker grill showing next to the T2s but couldnt and not enough time. Well the 1" spacer was to close to inside the door panel and mid would have hit it. So i split the ring in half which allowed it to be closer and a more secure fit to the door. Link to comment Share on other sites More sharing options...
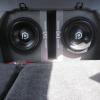
bcbrassard Posted January 20, 2014 Author Report Share Posted January 20, 2014 OK, now was the time to figure out how to mount the amps. Before, i had sub firing into trunk, with amps mounted behind the seats on the enclosure. Well the T1500 was to big to fit where the old RF 1000a1 was without dropping both amps all the way down with no access to the control knobs. This was my vision i had, was to keep it the way it was and when i figured out it wouldn't work, it changed everything i had going on in my head. I had to take a time out and rethink it. So this is what i ended up doing and now was time to power, Grounds, Batterys, Fuses ect. I think it took me like 20+ hrs to run everything. Here i have 2 runs of 0 gauge going to a distribution block to run all the mids & highs amp. 2 runs o 4 gauge to the amps under the front seats and another run that runs around the sub enclosure to amp mounted in back. All OFC RF Power & Grounds. Link to comment Share on other sites More sharing options...
bcbrassard Posted January 20, 2014 Author Report Share Posted January 20, 2014 I mounted both battery across from one another and then mounted the amps to start figuring out power and ground runs to the amps. Basicly left battery run T1500 and the right runs all the mids and highs... even though both batterys are hooked together. Very time consuming process to make look good. I think it should be like ART, right? I see the benefit of false floors and hiding your wiring. Link to comment Share on other sites More sharing options...
bcbrassard Posted January 20, 2014 Author Report Share Posted January 20, 2014 Now that the power was run, time to install Singer alt. It went pretty smooth until i went to tighten up the new stock #'d belt and ran out of adjustment before it got tight. So i call the GF to run and get me a new belt. I took the old one and cut it down for a length. I gave her the new one to take as well. Here the problem starts, auto parts stores have relied on part #s and are to lazy to do any leg work. I had to talk to 2 stores to explain what i wanted before she brought me back a belt that worked. Simple in my mind, find the same width belt and then start looking for one visually smaller. May take a minute but not rocket sceince right. Link to comment Share on other sites More sharing options...


Recommended Posts
Archived
This topic is now archived and is closed to further replies.