kam311 Posted July 14, 2011 Report Posted July 14, 2011 This is an awesome build man! I admire your patience and detail! Shit my subs come and I just slap shit together fast lol so far... HU- pioneer DEH-P59001B Amp- crescendo BC2000D Wire- 1/0 awg welding lead Electric- Big 3 ^same wire Subs- 2 Obsidian Audio 12 d4's Box 4ft^3 ported at 33hz. designed by Ram-Designs
Jd1102 Posted July 14, 2011 Report Posted July 14, 2011 how much did shop vac hose set you back thats a genius idea
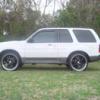
Ichigo Posted July 14, 2011 Author Report Posted July 14, 2011 Took forever to find a place to mount the fuses for the dual runs to the back but i made a little bracket to mount to between abs and fender. The D5100 fits nicely where the factory sub would have gone. Box put in. Thats was a pain to get in there. only 1/4" to 1/2" clearance on either side. Just to give you an idea how high it is.
Ichigo Posted July 14, 2011 Author Report Posted July 14, 2011 how much did shop vac hose set you back thats a genius idea I think it was 20 bucks.
Jd1102 Posted July 14, 2011 Report Posted July 14, 2011 how much did shop vac hose set you back thats a genius idea I think it was 20 bucks. not bad at all thats seems like a lot better route than pvc. and cleaner than several small looms
armykyle1 Posted July 14, 2011 Report Posted July 14, 2011 looks damn good man! Lots of cool neat Ideas you got in there. The shop vac hose idea is awesome cant wait to see the over all finished project. Keep up the good work man TEAM XS POWERTEAM HEAVY HERTZMy build- http://www.stevemeadedesigns.com/board/topic/194454-e46-bmw-build-pos/#entry2914134youtube- http://www.youtube.com/user/armykyle1big build starting
Ichigo Posted July 14, 2011 Author Report Posted July 14, 2011 Mids and high amp mounted to front of box behind rear seats and there are rubber washers under screws to help minimize vibration. Bass amp mounted and working on subs with 8 gauge speaker wire. End result with all wires cleaned up.
Ichigo Posted July 14, 2011 Author Report Posted July 14, 2011 Have not made any vids yet. I just finished installing everything on monday and been giving a few demos to friends. Been looking for a TL meter within 100 miles of my location but no one has one. I did find someone with a stiffen AC mic and it did a 153.1 on music playing decaf yesterday.
scooter99 Posted July 14, 2011 Report Posted July 14, 2011 This is a great build. I only have a couple of suggestions, since you're going through all this work, I'd hate to see something bad happen. Also a craftsman tip for ya. First here: Next time, instead of using the jig saw to cut these lines, use your circular saw all the way to the corner, then cut the last half inch with your jigsaw. This gives you a much straighter line and straighter lines = easier to work with and square things up. Just a suggestion from a carpenter / framer. Box build looks great though, honestly. Also next: Just a question, what is the epoxy for? I didn't see where you put that to use. Are you using that to secure the t-nuts to the wood? I mean I know the t-nuts dig into the wood but I'm wondering if you used that for added security. Just curious. Lastly and most importantly I think, instead of this: or this: I would've used something stronger like carlon or pvc. I used carlon on my civic install for my 1/0 gauge. I know it's a bit more expensive than pvc, but it's flexible so it will twist and turn over curves etc and it's super super durable. If you're driving down the freeway and a rock hits that tubing, it'll most likely slice it up. If a rock hits the carlon, you can roll your window down, and hear it laughing at the rock. LMAO. No seriously though this stuff is super strong and with you spending all this time and money on your set up, I'd hate for something bad to happen. It's only a suggestion, please don't take it wrong. The other thing is, with the carlon you can use weatherproof fittings to go through the floor. This way you don't get moisture in the cabin of your vehicle or rust or things like that. Here's a couple of pics of what I'm talking about: Here's the power and ground with the connectors going through the trunk floor: Like I said just some suggestions, take them how you want to. I love the build, can't wait to see the finished product. What are your plans for the amp rack? Facebook Page: S99Creations 2006 F250 Lariat Build















Recommended Posts
Archived
This topic is now archived and is closed to further replies.