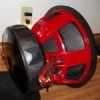
Purplehaze Posted August 14, 2012 Author Report Share Posted August 14, 2012 Aw man, no big deal at all. I shipped it through my work. It's a saw I had for back up, from when I was a contractor. Well now I have no use for it, and it's just laying around. Like I told you it needs a couple things, but works now so I figured I know you'd put it to good use so why not! Enjoy it! Don't cut anything off that you're not supposed to, cause then I'll feel like shit! My plans next, I have to wait till next week to get that 10" sub, cause I got home too late this week. Then I'll be building that Center console enclosure and get that all squared away! Lots and lots to do. But I'm also in OT fund replenishing mode too. Lots of house projects and no money to do them. Balancing act! Enjoy! Yeah man, I really appreciate that. Not many people would do that, and it really speaks highly of your character. I meant to snap a few pics of the saw, but I forgot. I'll post some up when I get the new trigger, along with pics of me changing it. But yeah that was super cool, I can't tell you enough how much I appreciate it! No one ever does stuff like that for me, well until now that is. Thanks man, you really are a good dude!!! I promise I will not lose any body parts with it! Lol! Can't wait to see the console build! And dude, I feel ya on the fund replenishing mode, story of my life right there! Especially now that I bought that Explorer for my girl... Oh well, I still think I did the right thing there, by avoiding the monthly payment. Anyway, I'm tuned in for the 10 in the center, and the new 15's build!!! every time i see your thread pop up...and there are no updates Lol! Sorry about that, I'll try to get more pics, and less talky! You should like this update, but the next one will be where it's at! Glad I could help man, I just can't see such a badass build and not have an amp on all the speakers haha looking forward to updates! Thanks again bro! Well, I decided to just add another amp for the co-axles. Probably gonna get this one: http://www.ebay.com/itm/KICKER-PX100-2-FULL-RANGE-AMPLIFIER-2-CH-COMPACT-100W-MOTORCYCLE-ATV-UTV-AMP-NEW-/230831365066?pt=Car_Amplifiers&hash=item35be9f1bca&vxp=mtr Anyway, I know this is a lot of boring pics, but it is all part of the build, and I don't wanna get too far behind with the pics, so they will be shown. Plus, I think it's good to show people just how much time and work this build really is. I definitely underestimated the amount of work there was, and how long it was gonna take. It takes much longer with no garage too, and I didn't account for that. But hopefully I will be moving into a house with a garage in the next few months, so then I can really get going! But enough of that, lets get on with the pics! First up was the amp racks. The plan is to mount both the ZX350.2 and the ZX350.4 under the front seats, but I did that last time, and found out the floor is not very level. So, this time, they will be mounted to boards that will be bolted to the floor, so they will set up, and level. Here are the making of those. Adding a small edge so they will set level, they they get sprayed with bed liner. Once they were dried, I had to drill some holes in the floorboard for mounting. They got t nuts in the top side, and are then bolted thru the bottom with grade 8 bolts, nuts, and lock washers. Then, I took advantage of a pretty day, and pulled the steering column so I could paint it. This is just a temporary fix, it will eventually get a cool aftermarket steering wheel. But for now, this will work, so we can try to get this baby back on the road! Here is what I used to paint it. It's a flat black, so it will stand out a little against the satin black everywhere else. And here it is painted. Not bad, it will work for now. And I had to take this shot while she was gutted Then, I made a little trip to the junkyard, to get a few much needed parts. First up, the center console. This one (on the right) is out of a 2006 model. I need it for the armrest in the center, since the doors no longer has them. Beside it is the original one that I painted last fall. Paint did not stick. It will get painted with bed liner, to match the doors. I also picked up another dash piece. The old one fell victim to the bass And I got some door seals in black as well. Now almost all of the brown/ tan is gone 4 good!!! Oh, and since I mentioned the doors, how about an update on them too? Well, I tried to get them wrapped up, but couldn't find someone to do it, and I got tired of waiting. So I figured I would attempt to spray them in bed liner, and if it looked like crap, then I'd just find someone to wrap them. Well, I didn't get any pics of the spraying process, but here they are. I think they look okay, good enough for the time being. My girl Jess says she thinks I should leave them like this permanently, but I still want to have them wrapped eventually. So here they are. A little close-up, to show the texture More pics coming, I can only fit 20 per post Kickin' Cruiser Seller Feedback Stage 3 Dash, Door Panels,4th Order wall 4 - 15'son a DC 5.0K 2 DC 5.0K'sSolo X 15 (v.2) Sub Build Link to comment Share on other sites More sharing options...
yUmadBro Posted August 14, 2012 Report Share Posted August 14, 2012 MOAR PICS! Link to comment Share on other sites More sharing options...
Purplehaze Posted August 14, 2012 Author Report Share Posted August 14, 2012 Okay, so then it was back inside the car, to get everything setup and ready. After getting the amp racks mounted, I did the same thing for the dist. boxes. Here is the fuse box, ready to go in for good! Mounted And the LED box... Mounted Then, to have a place to run the wires safely, I decided to use the ducts from the rear heat/ air. These will no longer be needed, as there is no longer a back seat. So, time to cut them up! And now that is done and ready! So let's start the wiring fun! First, the fuse/ distribution box. Got the power and ground in (1/0) and the fuse block and breakers wired. Grounds Used the dremmel to get it cleaned and ready So then I needed some 4 gauge ring terminals, for the breakers and amps. So, instead of waiting, I went down to my local shop and bought these. Only to find this. I didn't know copper or gold would rust.... Brand new rusty terminals FTMFW! So anyway, I just sanded them down and used them, until I get some good ones. Then it will all get re-done. Everything getting hooked up. Here I am a little farther along But wait, there's more... Kickin' Cruiser Seller Feedback Stage 3 Dash, Door Panels,4th Order wall 4 - 15'son a DC 5.0K 2 DC 5.0K'sSolo X 15 (v.2) Sub Build Link to comment Share on other sites More sharing options...
Purplehaze Posted August 14, 2012 Author Report Share Posted August 14, 2012 So then I started hooking up the LED box. Red Green Blue Then, I jumped back to the doors. Time to solder some wires! 12 pin molex plugs are first: Drivers side Passenger side wires marked before heat-shrink is added Pins soldered, first row inserted And to make sure they are all done right, a little home-made diagram Passenger side done! Then, I started running wires thru the doors. First, I ran the harness for the 8" subs. Here is how I did that. First, I cut the 2 wires needed to length, leaving a little extra just in case. Then, I remove the casing where it will enter the door, and install heat-shrink. So now, only the wires themselves will go through the factory grommet. Then I hooked them up to the 350.2, and now that part is all done. Now for the fun part: the 4 channel. The ZX350.4 will be used with crossovers, to run 4 component sets total. Each set will be ran parallel @ 2ohms. So, first up, I needed to make new crossover racks, one for each side. I will put 4 crossovers on each side, and wire them accordingly. So here they are. Then I noticed something on one of the crossovers. I hope it's still good! This is the only one like this And so that's where I am at the moment. VERY CLOSE! All that's left to do is wire up the crossovers, run the rest of the wires thru the doors, and install the tweeters and kick panels. Then we will finally get to hear what it all sounds like! I can't wait! So, barring any major setbacks, the next update will be a good one! Kickin' Cruiser Seller Feedback Stage 3 Dash, Door Panels,4th Order wall 4 - 15'son a DC 5.0K 2 DC 5.0K'sSolo X 15 (v.2) Sub Build Link to comment Share on other sites More sharing options...
Purplehaze Posted August 14, 2012 Author Report Share Posted August 14, 2012 MOAR PICS! I just put up 60 pics, that should buy me a few days anyway, right? Lol! Jk, hopefully the next update will be "The One" Kickin' Cruiser Seller Feedback Stage 3 Dash, Door Panels,4th Order wall 4 - 15'son a DC 5.0K 2 DC 5.0K'sSolo X 15 (v.2) Sub Build Link to comment Share on other sites More sharing options...
MrSkippyJ Posted August 14, 2012 Report Share Posted August 14, 2012 Looking nice man! I am no longer screaming FFFFUUUU when I see your thread now Really nice and clean work on the wiring! F150: Stock 2019 Harley Road Glide: Amp: TM400Xad - 4 channel 400 watt Processor: DSR1 Fairing (Front) 6.5s -MMats PA601cx Lid (Rear) 6x9s - TMS69 Link to comment Share on other sites More sharing options...
Purplehaze Posted August 14, 2012 Author Report Share Posted August 14, 2012 Looking nice man! I am no longer screaming FFFFUUUU when I see your thread now Really nice and clean work on the wiring! Thanks man, I appreciate it! Kickin' Cruiser Seller Feedback Stage 3 Dash, Door Panels,4th Order wall 4 - 15'son a DC 5.0K 2 DC 5.0K'sSolo X 15 (v.2) Sub Build Link to comment Share on other sites More sharing options...
scooter99 Posted August 14, 2012 Report Share Posted August 14, 2012 Wow, you've been busy! So I hate to do this cause it goes against the "man code" but, I agree with your soon to be wife. Leave the doors! They came out flawless, from what I can see, and I think they look GREAT!! I may try and do that myself instead of covering them now! For real, it looks great man! To the other stuff. I'm loving the wiring! Molex can be an absolute win! Little tedious to get together, but man the ability to quick disconnect them is a great thing to have. My only concern with your wiring, is the ground. If it were me, what I did in the civic and the truck, was drill through the floor, and ground straight to the frame. I did a tap and threaded it out and used a stainless steel screw and then used underbody paint to cover it. It's just a suggestion, but it might be worth a try if you have any issues with that spot. I'm guessing that was a seat belt bolt yea? Looks like it anyway. Should be ok, but I always get concerned with anything bolted inside the car. Had some issues in the past. As far as that crossover, if it's bothering you, you could just get a new (not electronically inclined that well so I don't know the exact term of that) resistor and de-solder that one and re-solder on the new one. Should be an easy fix. Provided that's a problem at all. Also, did you make those boxes, I can't remember, or did you get them somewhere! I like the idea. Did it in the civic, and it really goes a long way to tidying things up! Keep up the great work my friend! Getting excited for you buddy! Almost able to hear the doors! WOOT!! Facebook Page: S99Creations 2006 F250 Lariat Build Link to comment Share on other sites More sharing options...
Purplehaze Posted August 14, 2012 Author Report Share Posted August 14, 2012 Wow, you've been busy! So I hate to do this cause it goes against the "man code" but, I agree with your soon to be wife. Leave the doors! They came out flawless, from what I can see, and I think they look GREAT!! I may try and do that myself instead of covering them now! For real, it looks great man! To the other stuff. I'm loving the wiring! Molex can be an absolute win! Little tedious to get together, but man the ability to quick disconnect them is a great thing to have. My only concern with your wiring, is the ground. If it were me, what I did in the civic and the truck, was drill through the floor, and ground straight to the frame. I did a tap and threaded it out and used a stainless steel screw and then used underbody paint to cover it. It's just a suggestion, but it might be worth a try if you have any issues with that spot. I'm guessing that was a seat belt bolt yea? Looks like it anyway. Should be ok, but I always get concerned with anything bolted inside the car. Had some issues in the past. As far as that crossover, if it's bothering you, you could just get a new (not electronically inclined that well so I don't know the exact term of that) resistor and de-solder that one and re-solder on the new one. Should be an easy fix. Provided that's a problem at all. Also, did you make those boxes, I can't remember, or did you get them somewhere! I like the idea. Did it in the civic, and it really goes a long way to tidying things up! Keep up the great work my friend! Getting excited for you buddy! Almost able to hear the doors! WOOT!! Thanks man! Yeah the doors didn't turn out bad at all, and for $20 instead of $400! I'll see how well it holds up, but for now, it's all good! Yeah the ground is an old seat belt bolt. I don't have a frame to ground to, and since this is in the b-pillar, or the strongest part of the car, I figured it would be okay. Time will tell! If not, there is another spot I may go ahead and add another ground to, just in case. You can never have too many grounds! Yeah I built both the boxes, I though it was a much cleaner way to do it. The plan is to build a false floor to cover all the wiring, and plexi windows to show off the elecrtic. I hope it turns out cool! But yeah I'm getting close now, can't wait to turn it all on for the first time! Thanks for the comments! Kickin' Cruiser Seller Feedback Stage 3 Dash, Door Panels,4th Order wall 4 - 15'son a DC 5.0K 2 DC 5.0K'sSolo X 15 (v.2) Sub Build Link to comment Share on other sites More sharing options...
scooter99 Posted August 14, 2012 Report Share Posted August 14, 2012 Ok, all sounds great man! Keep it up buddy! Facebook Page: S99Creations 2006 F250 Lariat Build Link to comment Share on other sites More sharing options...


Recommended Posts
Archived
This topic is now archived and is closed to further replies.