







Jump to content

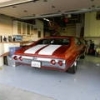
Homemade Super-Neo Woofer: THE CHEVELLE RESTORATION IS DONE, dampener recommendations??

Recommended Posts

Posted

Love the build. My first car was a '71 chevelle. Back in '94...

'94 was a great year too, heard it's one of the best to be born in :peepwall:

:D

Biomedical/Behavioral Science Major, The (Self-Proclaimed) Undisputed-Homemade-Woofer-King

Super-Neodymium-Woofer Build Log: The D4BA-V.2 http://www.stevemeadedesigns.com/board/topic/169236-diy-super-neodymium-woofer-build-log/?p=2475620

Fucking love Alan you goddamned fucking super nerd lol

When Alan uses big words I don't understand

It's warming up enough that the donut-punching cyclist douchenozzles are getting their two wheeled fagmobiles out.

Everytime I see a guy driving a mini cooper I cant help but think he loves cock & (2/29/16)-My wife just bitched at me about throwing out things we don't really use. My response of well we don't really use your vagina so should we throw that out was evidently not the right response. I had to leave the room.

I missed Alan.

RIP 5/29/15 - I love you son.

Posted

was busy doing the wood cabinet refinishing project for my moms bathroom for the most of the day. Raised panel design is the worst thing ever created.

Anyway, spent a few minutes on the sub, took me a minute to get the ghetto cone out, the hot glue was surprisingly resilient.

001_zps57bffdb3.jpg

003_zpsb2044680.jpg

This is the new Dual 2 coil so that I can run it @1ohm

004_zps487ead37.jpg

New coil on left, old on the right.

005_zps0fa43871.jpg

Tapped the cooling ring to 5/16" threads so that the basket won't slide around on it even when it's screwed down tight.

006_zps9ec66070.jpg

007_zps0c1b5d05.jpg

013_zps00254a16.jpg

Start getting the assembly going tomorrow. My arms and hands are numb from 6 hours of hand sanding.

Biomedical/Behavioral Science Major, The (Self-Proclaimed) Undisputed-Homemade-Woofer-King

Super-Neodymium-Woofer Build Log: The D4BA-V.2 http://www.stevemeadedesigns.com/board/topic/169236-diy-super-neodymium-woofer-build-log/?p=2475620

Fucking love Alan you goddamned fucking super nerd lol

When Alan uses big words I don't understand

It's warming up enough that the donut-punching cyclist douchenozzles are getting their two wheeled fagmobiles out.

Everytime I see a guy driving a mini cooper I cant help but think he loves cock & (2/29/16)-My wife just bitched at me about throwing out things we don't really use. My response of well we don't really use your vagina so should we throw that out was evidently not the right response. I had to leave the room.

I missed Alan.

RIP 5/29/15 - I love you son.

Posted

Please dont use gorilla glue and rubber cement for gluing the new parts up like said.

PM me your shipping address and Ill send you some proper CA glue and Accelerator.

Gorilla glue expands as it cures, and its bonding is not the best, let alone its shock resistance properties for something like a woofer.

Contact cement will stink really bad once the former gets hot, let alone how well they will hold up with heat.


Posted

Please dont use gorilla glue and rubber cement for gluing the new parts up like said.

PM me your shipping address and Ill send you some proper CA glue and Accelerator.

Gorilla glue expands as it cures, and its bonding is not the best, let alone its shock resistance properties for something like a woofer.

Contact cement will stink really bad once the former gets hot, let alone how well they will hold up with heat.

LOL. Appreciate it man, but the gorilla glue was only for the ghetto test, I have CA glue and spray I got from fixmyspeaker back when I started I just didn't want to use it since the old parts would not be permanent. The hot glue can be easily peeled from the basket so I didn't want any residue left behind when I put the real cone in. But thanks haha

Though, how would recommend surface prep? I was considering a good degrease and clean, and then maybe hit it with some light 220grit just enough to score the surface a tiny bit to give the glue something to really anchor to? Or is a good cleaning the only thing necessary?

Biomedical/Behavioral Science Major, The (Self-Proclaimed) Undisputed-Homemade-Woofer-King

Super-Neodymium-Woofer Build Log: The D4BA-V.2 http://www.stevemeadedesigns.com/board/topic/169236-diy-super-neodymium-woofer-build-log/?p=2475620

Fucking love Alan you goddamned fucking super nerd lol

When Alan uses big words I don't understand

It's warming up enough that the donut-punching cyclist douchenozzles are getting their two wheeled fagmobiles out.

Everytime I see a guy driving a mini cooper I cant help but think he loves cock & (2/29/16)-My wife just bitched at me about throwing out things we don't really use. My response of well we don't really use your vagina so should we throw that out was evidently not the right response. I had to leave the room.

I missed Alan.

RIP 5/29/15 - I love you son.

Posted

Personally.

If its a painted basket and not bare aluminum take the spider landing and surround landing down to bare metal. I use a 80grit flap disc on a right angle grinder to do this. Even if its a brand new painted basket!

Most manufactures dont, but lets be real, even tho I love sundown products they had issues with these cones and coming undone.

Be careful not to gouge the metal or make it uneven. You want a rough coarse surface for a better bond with the glue, not a smooth shinny surface.

For the surround, 91% or higher isopropyl rubbing alcohol or those little alcohol pads in the packages similar to wetnaps or whatever. Make sure to clean the part of the surround where the glue is going to be in content.

I dont leave nothing to chance when building little monsters, and never had a failure yet that was caused due to my assembly and Ive rebuilt a lot of woofers with oem, or other manufacture parts.

Maybe some ideas for you and the order things are done.

Its all about the glue joints!

Plus this thread is missing lots of woofer porn.

4to1.jpg
08jx.jpg
xn2u.jpg
udap.jpg
kfvu.jpg
9wlt.jpg
hl4r.jpg
7a2s.jpg
ahlo.jpg
chy3.jpg
d0js.jpg
ilqu.jpg
l8t5.jpg
raii.jpg
3ofl.jpg
8ioj.jpg
lg5u.jpg
v92u.jpg


Posted

Another pair of DD9500Fs I built up using the current style baskets they are using (different DDs that are in above pics).

Baskets are brand new, but since they had a coated surface I took them down to bare metal where the soft parts get attached.

gj6e.jpg

utkl.jpg


Posted

Good stuff man. Do you do anything to prep the spiders at all? And when you put the glue on the outer and inner lip that goes in-between spiders, do you let it sit at all to give it a chance to soak into the fibers? Or just apply, press, spray and clamp right after each other?

On the 5th pic of the first post, do you have a plastic ring around the coil that attaches to the spiders to help strengthen the bond joint? If so, did you order that somewhere or make it?

Biomedical/Behavioral Science Major, The (Self-Proclaimed) Undisputed-Homemade-Woofer-King

Super-Neodymium-Woofer Build Log: The D4BA-V.2 http://www.stevemeadedesigns.com/board/topic/169236-diy-super-neodymium-woofer-build-log/?p=2475620

Fucking love Alan you goddamned fucking super nerd lol

When Alan uses big words I don't understand

It's warming up enough that the donut-punching cyclist douchenozzles are getting their two wheeled fagmobiles out.

Everytime I see a guy driving a mini cooper I cant help but think he loves cock & (2/29/16)-My wife just bitched at me about throwing out things we don't really use. My response of well we don't really use your vagina so should we throw that out was evidently not the right response. I had to leave the room.

I missed Alan.

RIP 5/29/15 - I love you son.

Posted

On the spiders I do the the ring first and get it mocked up where it needs to be, apply the bead around the bottom, hit it with activator. Its more of a reinforcement ring for extra strength and more for your spider to bond too.

Once that ring is glued on the bottom, I apply a bead around the top of the ring, and put on the first spider. Sundown stocks them as well, not sure if PSI does or not.

Once that spider is on, I go around the former with a bead of glue again and a thin layer around the outside. I keep repeating this process for however many spiders Im doing in the spider pack.

Once my layers are complete, I clamp the outside edge of the spiders to hold them all against each other and so the glue oozes out the edges a bit, than hit it all with activator at the same time.

Once that sits for a couple minutes I than shim the coil out in the gap and get that all where it needs to go.

Once confident in the shimming, i pull it out of the gap with the shims, lay a bead of glue around the spider landing, and reinsert the coil/shim.

You can either hold this down with force and spray accelerator around the glue joint, or you can clamp it. I prefer clamps, to apply a more even and guaranteed pressure, but most manufacturers dont. Like I said, I dont leave anything for chance when it comes to glue beads.

Once that is glued and hit with activator, I than mock up the cone, tinsel leads, and lead out wires. If you got space, you can solder the tinsels to the former with the lead out wires and glue them down, or you can bring the tinsel wires into the cone under the dustcap by drilling a couple small holes for the tinsel wires and pushing them thru. But dont solder them yet, just mock it up so its where it needs to be.

Once the cone fits correct, and your method for connecting the leadout wires to the tinsels, you can than lay a bead of glue around the former on the top spider, start to set your cone on, put the tinsels through the cone, and push the cone down. Once its where it needs to be, spray that new bead of glue between the cone and spiders with accelerator. Than go back on the top side of the cone and do another beat around the former, and hit it with activator.

than go back and wrap your leadout wires around your tinsels, solder them, and glue them down to the cone. Might want to do 2 layers of glue here, and go back and do another bead around the former and hit it with activator as well.

Dont forget to remove your shims before gluing the dustcap down, and if the dustcap is not sanding on the bottom lip, hand sand it with some 80grit quick to give the glue something more to bond to instead of the flat smooth plastic.

The ca glue will not be 100% cured for 24hours at least after building the woofer. the activator only cures the top or outer layer of glue, but this is enough to keep building the woofer non stop, but just dont play it.

These subs are using Fi BTL N3 motors, TC Sounds Spiders, TI basket, Sundown zv4 cone/cap, Sundown 4gauge terminals and if I remember correct it was a ZV4 or a Nightshave v2 coil. cant recall.


Archived

This topic is now archived and is closed to further replies.

  • Recently Browsing   0 members

    • No registered users viewing this page.
  • Who's Online   0 Members, 0 Anonymous, 1115 Guests (See full list)

    • There are no registered users currently online
×
×
  • Create New...




