Ron36 Posted February 2, 2018 Report Share Posted February 2, 2018 Curious to see how that fender tool works out it’s very interesting 2022 Ford Maverick on 22’s Skar SK1500.1 on 4 Skar VD-8’s Mids Sundown Super tweeters, Skar TX 6.5 components on Skar SKM400.4 LC2 for audio control , XS Power D680 XS Series Extra Battery Link to comment Share on other sites More sharing options...
bcbrassard Posted February 2, 2018 Author Report Share Posted February 2, 2018 20 minutes ago, Ron36 said: Curious to see how that fender tool works out it’s very interesting Knowing its a slow process from watching the Youtube videos and not stressing the tool out it should work fine. The Metal is super thing so should be able to roll it easy and as much as i need for clearance. I would do anything extreme to make it look like shit. Link to comment Share on other sites More sharing options...
Ron36 Posted February 2, 2018 Report Share Posted February 2, 2018 I’ve heard people using a baseball bat before 2022 Ford Maverick on 22’s Skar SK1500.1 on 4 Skar VD-8’s Mids Sundown Super tweeters, Skar TX 6.5 components on Skar SKM400.4 LC2 for audio control , XS Power D680 XS Series Extra Battery Link to comment Share on other sites More sharing options...
bcbrassard Posted February 2, 2018 Author Report Share Posted February 2, 2018 Ya i watched all the videos with wooden batts, PVC, phone books, Socket & air gun. I would rather have the tool, you never know when you might use it again. There are pretty reasonable priced to get tools you only need every now and then. I have a DD-1, 10 ton lug crimp er, Coil compressor, Caliper piston compressor, so this will add to those tools that are nice to have when you need them. Link to comment Share on other sites More sharing options...
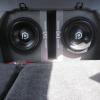
bcbrassard Posted February 3, 2018 Author Report Share Posted February 3, 2018 Spent the first part of the day getting belts off to get new ones. In order to get to the lower alt bolt you have to get under the car so while i had the tire off i threw the fender roller to make sure it fits the lugs Charged up all the battery's with my new charger, I like these smart charging units. T1500 & T400x4 are at the bottom of this 60 lbs box of amps, wiring & fuse blocks.Removed from trunk and engine bay. New set up will be better and simpler. Now more peel & stick. Worked on it until 2 am. I knew i had some Stinger Expert Road Kill left but 3/4 of a box was more than i was expecting. I must have know i needed it in the future. This was a complete detour from the goals of the project but it was driving me nuts and had to be fixed. Now i can get back on track. Link to comment Share on other sites More sharing options...
bcbrassard Posted February 5, 2018 Author Report Share Posted February 5, 2018 Not to many updates from yesterday. Fixed loose panel from rear deck and removed what i needed from under the hood. And today being the Super Bowl i didn't get anything done yet. Link to comment Share on other sites More sharing options...
bcbrassard Posted February 7, 2018 Author Report Share Posted February 7, 2018 Before rolling. Still working it some. Did ok, Machine failed before finish the first on. Spent an hour fixing. But it does work. Rear before... The stiffer the lip the easier it is to roll. Front was a bitch because fender is thin and only has a few mounting points. Not rolled. Rolled. My helper Coco... And Kona. Damn little dogs just want to hang out with me. lol Link to comment Share on other sites More sharing options...
bcbrassard Posted February 8, 2018 Author Report Share Posted February 8, 2018 Progress has been slow, not feeling good. But new rear shock & coils are in. Should help, now the front. Link to comment Share on other sites More sharing options...
bcbrassard Posted February 10, 2018 Author Report Share Posted February 10, 2018 Driver side ball joints, inner tie-rod shot. Passenger side not as bad. I had to rent a tie-rod wrench from O'Riellys Auto. Many tight spaces and took a great effort to remove lower control arms, even after soaking in PB penetrating fluid for 4 days. Stock Sway Bar Bushings where really shot. So they got replaced with some good ones. These took 1.5 hrs per side, tight on that back side. Now the sway bar stays where i tightened the bushing to. It was flopping around with the wore out ones in. And of course the linkage was shot, new ones going back in. Painting calipers and brackets now so they can dry over night. Put new lower control arms in the am. I need the bearings & hub pushed out of the knuckle and install new ones before it all go back together. Plus i need to find a push/pull bearing remover/install kit to rent. If any auto stores rent on for the rear spindles. New drums and shoes in the rear too. Chipping away at it... Link to comment Share on other sites More sharing options...
bcbrassard Posted February 13, 2018 Author Report Share Posted February 13, 2018 Next new bearings and hubs. All new front end should make for a better ride. Couldn't do it with the headers on... Trying to lower engine bay temperatures. But doing some research, engine builders state that wrapping headers keeps the heat in which moves the gases faster and tricks the engine into thinking the headers are longer. They have seen dyno testing results though gains are small. Down pipe. And now to put it back together. Link to comment Share on other sites More sharing options...


Recommended Posts
Archived
This topic is now archived and is closed to further replies.