bcbrassard Posted January 31, 2017 Author Report Share Posted January 31, 2017 4 hours ago, bsneon98 said: Updates look killer man! I love the time and effort put into this build, cant wait to see the final result! Thanks man, i am trying. Hopefully done by tomorrow night. Link to comment Share on other sites More sharing options...
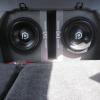
bcbrassard Posted January 31, 2017 Author Report Share Posted January 31, 2017 After 9 hrs of sleep in the last 2 days and it feels like i haven't got shit done. Daughter was hoping to have it back by tonight thats not happening, not even sure i can it done by tomorrow night but i will give her hell and try. Fabricating and fixing shit seems to be eating a lot of the time up. I know i can put it all back together in a couple hours. Passenger side kick panel fabricated and deadened. I had to make 3/4" spacers out of MDF for clearance, there are in hinge bolts that where hitting the back of the magnet and not letting the speaker sit all the way in the housing so the spacer will do the trick. Hard to see but its got a lot off coverage, and i did the back of the panel as well. Rings are paint to match CT sounds grilles so after running wiring these kick panels will come together nicely. Driver side is the same. A better look to see how tight it was. You know its a snug fit when you can barely fit a 5.25" speaker in there. Making these where a bitch just Like in the Lancer, Mark out where you think it works and start drilling a shit ton of hole, enlarge bit until hole meet up and the chisel the metal between, grind smooth and deaden. If i had to guess probably took 2 hours per side to make the hole, hour + on the panel, then another hour + to deaden, and make the MDF ring & paint. About 6 hrs per side. Oh so thats where yesterday went. Of course there was fixing the Heater motor switch and some time shopping for a new one. Shit just takes time, i refuse to just throw shit in to finish something to have it turn out like and sound like shit. So i have the glove box removed and deadened all the plastic on the dash that i could reach and put some foam in where the panels meet the metal for dampening and rattle reduction. I glued in the 1/2" pine where the speaker mounts to for a solid surface. Between the wood and & deadening its 100x better than it was. Its way dirty everywhere behind the dash so first order of business today is vacuum under & behind dash to finish driver side 4" speaker location. Wire management is a mess under/back in here. Suzuki had a security system in this model on this side & driver side has a old remote start so its a cluster fuck that needs cleaning up & fixing shit where others didn't care and left screws out & things broken. Things left to do: (More than whats been accomplished so far) -Clean under/behind dash of dirt & dust. -Finish driver side 4" speaker prep. -Clean up wiring under dash & start running new wiring. -Install HU & hookup. -Run power & ground for amps. -Mount amps and finish wiring. -Turn on and test system. Set HU and dd-1 system. -Install speakers and test. -Reinstall panels and interior. -Test & tune. Luckily most of this goes quickly just have to get thru the fabricating and clean up. Link to comment Share on other sites More sharing options...
oldsoundguy Posted January 31, 2017 Report Share Posted January 31, 2017 Wow that's a lot of work just to get too where you are now. You need more time for sure. 80prs Arc Audio Xdi 1200.6 (using active crossovers) Freaking awesome amplifier Incriminator IA 10.1 Focal PS 130v 5.25 (doors) 4" Faital pro Neo (kick panels) 3" Faital pro Neo and focal tweets( dash) DC Audio level 3 12" custom box designed by joex built by me AGM front, XS 750SE batteries rear DC 180 alt 99 Toyota Tacoma extra cab http://www.stevemeadedesigns.com/board/topic/179476-my-small-build-turned-into-the-ongoing-build/ Link to comment Share on other sites More sharing options...
bcbrassard Posted January 31, 2017 Author Report Share Posted January 31, 2017 1 hour ago, oldsoundguy said: Wow that's a lot of work just to get too where you are now. You need more time for sure. Ya at this rate i might have it until friday. Working under the dash now and its a mess. Trying to get the wiring out of the way to deaden driver side speaker location. Installed passenger side speaker and it is way solid. Mocked up kick panels and had to repaint the MDF ring back to flat back because semi was to off sheen from the the CT Sounds grill. But it looks pretty good, Also fond a nice spot to hide the crossover above the kick panel on the passenger side. Shits coming together just slow as fuck! Getting foggy too from lack of sleep. Link to comment Share on other sites More sharing options...
oldsoundguy Posted February 1, 2017 Report Share Posted February 1, 2017 Just got home and was able to look at the full size pics. Looks good and a ton of work. Keep it up your almost there man. At least its something you enjoy doing. 80prs Arc Audio Xdi 1200.6 (using active crossovers) Freaking awesome amplifier Incriminator IA 10.1 Focal PS 130v 5.25 (doors) 4" Faital pro Neo (kick panels) 3" Faital pro Neo and focal tweets( dash) DC Audio level 3 12" custom box designed by joex built by me AGM front, XS 750SE batteries rear DC 180 alt 99 Toyota Tacoma extra cab http://www.stevemeadedesigns.com/board/topic/179476-my-small-build-turned-into-the-ongoing-build/ Link to comment Share on other sites More sharing options...
bcbrassard Posted February 1, 2017 Author Report Share Posted February 1, 2017 3 minutes ago, oldsoundguy said: Just got home and was able to look at the full size pics. Looks good and a ton of work. Keep it up your almost there man. At least its something you enjoy doing. Thanks man. It beats working thats for sure. My hands are cut to hell from reaching in all these tight spaces to deaden, be nice when i can finish and put it away. Daughter seems fine with however long it takes. She is being pretty sweet about it to tell ya the truth. I really appreciate her understanding and gratitude, hopefully this will bring us closer in some way. My hope is every time she rocks out she will think of me and my gift i gave to her. I keep telling her i wont be around for ever, we have today so lets make the best of it. OK back to the build. Link to comment Share on other sites More sharing options...
bsneon98 Posted February 1, 2017 Report Share Posted February 1, 2017 That dash looks like a real pain! Good luck with everything man, your daughter will surely appreciate what your doing for her! Build Log: http://www.stevemeadedesigns.com/board/topic/152954-1998-plymouth-neon-updates/ Link to comment Share on other sites More sharing options...
bcbrassard Posted February 1, 2017 Author Report Share Posted February 1, 2017 2 hours ago, bsneon98 said: That dash looks like a real pain! Good luck with everything man, your daughter will surely appreciate what your doing for her! Thanks, it will sink in over time. Dash is a dash, these are pretty open and roomy under here. A few more screws and time and the whole thing could come out to deaden and work under. Like i said its basically a shell, there is a tubing skeleton for support under it. I finished up the mess of wiring under the dash. Deadened around the 4" speaker mount on passenger side and figured out how to put some foam in there to help with speaker performance, i also have a piece of FAST RINGS left over from the Malibu i can cut down to use. Really don't want to burn up the new sets i bought if i cant use at least 2 of the 3 parts. I got driver side mounting support glued in for the 4" last night so it will be ready to deaden this morning. I have to tell you the between the wood and deadening these location got solid as hell. Before i think you almost rip the plastic by hand, now it feels solid and sounds solid when tapped on. So i am very pleased with my efforts to sturdy and deaden these locations up. I know it will help the speakers perform better since there angle and location aren't ideal but this isn't a SQ competition build so i can live with it. I was able to mount the crossover's under the dash so those are ready for wiring up when i get to that point. Also played with tweeter location and it look like they will probably be in the CT Sounds adjustable pods on the dash tight against the A-pillars on axis unless something changes. It won't be the prettiest tweeter install but for imaging it will be spot on. So i hope that helps bring the stage higher up onto the dash. If not it will be what it is. Which is a hell of an improvement over the stock Clarion 10 watt speakers there before that didn't totally sound like ass after being there for 22 yrs. They where actually in OK shape for there age. I will take a pic for historical records later. ha ha only 1 pic of front speaker temp mounted, I will get more today to post for tomorrow. Almost done fabricated and deadening so the next steps should smoother and quicker. My heater switch i broke is broke! plugged it in to see if it worked....Nope! took it back apart to see if it was fixable...Nope! Time to pay what ever i have to get a working one here. I did make a jumper wire and labeled the plug so she will have heat and some control it will just be manual until i can get one here. Where there's a will, there is a way, Right? Pic of Faital Pro 4" 60 watt driver. Sounded good on the bench test, see how it does in a real application. Link to comment Share on other sites More sharing options...
bcbrassard Posted February 1, 2017 Author Report Share Posted February 1, 2017 Good news, After some searching on Ebay i found a brand new heater control assemble w/ heater switch for $80. Yesterday quick search was a used one from a junk yard for $75 SO I feel better knowing i am getting a brand new one for about the same cost. The parts probably only $20+ dollars but i can't find just the switch, you have to but the whole assemble which is where they make there $. Hell might just swap out assemble then when it gets here. Should only be an hour job.... Ha ha Well i feel better now so my motivation to press on is back. And my tires for my Lancer show up today followed by new axles after that so you always have to feel good about delivery day..... love have goodies show up! Link to comment Share on other sites More sharing options...
bsneon98 Posted February 1, 2017 Report Share Posted February 1, 2017 Is your lancer still your daily even prepping for paint? Build Log: http://www.stevemeadedesigns.com/board/topic/152954-1998-plymouth-neon-updates/ Link to comment Share on other sites More sharing options...


Recommended Posts
Archived
This topic is now archived and is closed to further replies.