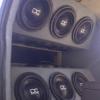
MarioB Posted February 24, 2012 Author Report Posted February 24, 2012 getting some progress done tonight. The speaker mounts all the way in the pillar No big ass tumor sticking out front view 12- DC Audio m2Lvl3 12's1- Hertz HSK3 way2- DC5K's2- ZX350.42- Stinger SP1500D batteries in rear3- runs of 1/0ga. to the rearTeam DC Audiodcsoundlab.com Quality is all in how you take pictures I have plenty of projects that look WAY better on camera then in person crazy to fit so many in so little. Reminds me of some of the porns I've seen?
Robert8252 Posted February 24, 2012 Report Posted February 24, 2012 I like it. Wish I could have done that but there is literally no room between metal and factory pillar in some areas along the middle. 2013 F150 Crew Cab Old Build Log Feedback 2013 F150 Equipment - Some Awesome Stereo Sound Making Stuff
MarioB Posted February 24, 2012 Author Report Posted February 24, 2012 I like it. Wish I could have done that but there is literally no room between metal and factory pillar in some areas along the middle. Yeah that sucks I got lucky with mine. Good stuff! Keep going. Glue is drying then I will remount them and make sure the angle is rite. I will wrap it either tomorrow night or Saturday. So far so good 12- DC Audio m2Lvl3 12's1- Hertz HSK3 way2- DC5K's2- ZX350.42- Stinger SP1500D batteries in rear3- runs of 1/0ga. to the rearTeam DC Audiodcsoundlab.com Quality is all in how you take pictures I have plenty of projects that look WAY better on camera then in person crazy to fit so many in so little. Reminds me of some of the porns I've seen?
MarioB Posted February 24, 2012 Author Report Posted February 24, 2012 Finally got the angle rite. took the speakers out and added more glue to hold then into place. 12- DC Audio m2Lvl3 12's1- Hertz HSK3 way2- DC5K's2- ZX350.42- Stinger SP1500D batteries in rear3- runs of 1/0ga. to the rearTeam DC Audiodcsoundlab.com Quality is all in how you take pictures I have plenty of projects that look WAY better on camera then in person crazy to fit so many in so little. Reminds me of some of the porns I've seen?
MarioB Posted February 24, 2012 Author Report Posted February 24, 2012 12- DC Audio m2Lvl3 12's1- Hertz HSK3 way2- DC5K's2- ZX350.42- Stinger SP1500D batteries in rear3- runs of 1/0ga. to the rearTeam DC Audiodcsoundlab.com Quality is all in how you take pictures I have plenty of projects that look WAY better on camera then in person crazy to fit so many in so little. Reminds me of some of the porns I've seen?
scooter99 Posted February 24, 2012 Report Posted February 24, 2012 I love these pillar builds. I gotta get mine finished! Turning out nice! Facebook Page: S99Creations 2006 F250 Lariat Build
MarioB Posted February 24, 2012 Author Report Posted February 24, 2012 I love these pillar builds. I gotta get mine finished! Turning out nice! Thanks bro this is a learning process for me so they may not come out the best 12- DC Audio m2Lvl3 12's1- Hertz HSK3 way2- DC5K's2- ZX350.42- Stinger SP1500D batteries in rear3- runs of 1/0ga. to the rearTeam DC Audiodcsoundlab.com Quality is all in how you take pictures I have plenty of projects that look WAY better on camera then in person crazy to fit so many in so little. Reminds me of some of the porns I've seen?
scooter99 Posted February 24, 2012 Report Posted February 24, 2012 First ones rarely do, unless you're Ray of course. But that's why we do it, to learn and do it better the next time. You're not seriously thinking this will be your first and last right? Never gonna happen. You'll drive with em for a while and be like, "I know I can do those better!" Off to the computer you go for new pillars at $15.00, and then begins the A-Pillar project version 2! It's what we do man! Keep at it! Looking great so far! Question, did you resin and basically glass the whole pillar first? Just wondering, by if so, why? Not criticizing, don't think that. I'm just curious of the different ways! I tried mine that way the first time, glassed the whole thing, then did the pod on top, and somehow the pillar warped and I had to do it over. Again, just curious. Keep up the good work sir! Facebook Page: S99Creations 2006 F250 Lariat Build
MarioB Posted February 24, 2012 Author Report Posted February 24, 2012 First ones rarely do, unless you're Ray of course. But that's why we do it, to learn and do it better the next time. You're not seriously thinking this will be your first and last right? Never gonna happen. You'll drive with em for a while and be like, "I know I can do those better!" Off to the computer you go for new pillars at $15.00, and then begins the A-Pillar project version 2! It's what we do man! Keep at it! Looking great so far! Question, did you resin and basically glass the whole pillar first? Just wondering, by if so, why? Not criticizing, don't think that. I'm just curious of the different ways! I tried mine that way the first time, glassed the whole thing, then did the pod on top, and somehow the pillar warped and I had to do it over. Again, just curious. Keep up the good work sir! Thanks bro, Ive glassed and done my share of Body work, I use to work in a body shop. So they shouldn't be to bad. I wrapped the whole pillar in cotton material and applied resin to it, but was light on the hardener so it wouldn't warp the pillar. Why resin the whole thing first hell I don't know LOL I'm just doing as Ray is telling me. I should be pretty close to having the driver side done by the end of this weekend 12- DC Audio m2Lvl3 12's1- Hertz HSK3 way2- DC5K's2- ZX350.42- Stinger SP1500D batteries in rear3- runs of 1/0ga. to the rearTeam DC Audiodcsoundlab.com Quality is all in how you take pictures I have plenty of projects that look WAY better on camera then in person crazy to fit so many in so little. Reminds me of some of the porns I've seen?















Recommended Posts
Archived
This topic is now archived and is closed to further replies.