TheAfterparty Posted March 25, 2013 Author Report Posted March 25, 2013 Here we go. Seats coming out. Another necessity is a wood stove to keep your workshop warm I measured and cut the back pieces and glued them together. Here Im cutting a hole for the plexiglass to fit. Next I cut an outer frame to hold the plexiglass in place and glued it on the back piece. Then I cut some side pieces and glued them together Adding a 2 by 2 to the bottom of each piece of the wall to make it easier to install Drilling holes and partially inserting screws to make the installation faster once in the vehicle Rear panel going in. I forgot to take pictures of the installation of the floor piece. Sides in Second bottom panel in, glued, and weighed down with some gas. Looking in from the hatch
TheAfterparty Posted March 27, 2013 Author Report Posted March 27, 2013 Sealing corners up with silicon even though I plan to fiberglass the inside. A while back I had some bottoming out issues due to an air leak. I guess you could say it left a lasting impression on me. I cut some wood for the port. Glueing it together Next I glued, clamped, and screwed the two pieces together. Crammed that bitch in there Using some L-brackets to hold it in there I'm cutting some short pieces of wire to wire my caps. Im not going to pay $10 bucks each for the "official" aluminum connectors. These cost me about $1.25 each. Here are a few cut, ringed, crimped, and wrapped up
TheAfterparty Posted March 27, 2013 Author Report Posted March 27, 2013 Here I've got a bank of 6 wired up and charging. Do NOT hook up discharged ultra-capacitors to your 12 volt system. Because they can suck in a huge amount of current very quickly, this would basically present a short circuit to your batteries. I've heard it looks, sounds and acts just like an arc welder in this situation. A bank of 6 can hold enough electrical energy to weld with. These caps are definitely not noob friendly. Also, don't charge them over their max operating voltage. A bank of six 2.5 Volt caps can handle a maximum of 15 volts. If I charged this bank with a current exceeding 15 volts it would explode. This is the only way to correct wire up a bank of six. I love my table saw. I prefer it over my circular saw any day. I used it to cut the baffles. Here I've got my dad drawing some circles with the ol' wire method. Getting ready to cut them out with my trusty jig. And we got a test fit.
CNF Kevosinn Posted March 27, 2013 Report Posted March 27, 2013 lookin good man!! *** SuperSeller Status Verified *** ( http://www.stevemeadedesigns.com/board/topic/25829-super-sellers-buyers/ ) "kevosinn's" astro van 8 custom Sundown Zv4 18's 4 Sundown scv 6000's CNF Distribution CNC parts Skyhigh wire some batteries SMD Meters and tools used on the installhttp://www.stevemeadedesigns.com/board/topic/172877-kevosinns-vanwest-coast-skyhigh-car-audio-vehicle/ 16,000 watt walled silverado build.http://www.stevemeadedesigns.com/board/topic/161965-walled-silverado-4-hdc4-15s-4-crescendo-3500s-and-much-more/ 8,000 watt 1999 Subaru legacy outback. Build log here: http://www.stevemead...ru/page__st__60TEAM CNF Distribution
b-eazy Posted March 27, 2013 Report Posted March 27, 2013 I'm tuned in for sure. .good progress so far
Leo1103 Posted March 27, 2013 Report Posted March 27, 2013 the holes in the baffle look awesome for just using a jigsaw! 2002 Honda CR-VAlpine 9887My BuildRebuilding... Second Skin Damp 4 DC XL 15's 2 DC 5ks Singer 320 amp 6 cap banksSky High wire 2 VM-1's OM-1 all under window line Team DC Audio Obama has a law he's trying to pass right now, trying to ban Leo for being a threat to children everywhere.EDIT: Not in a JP kind of way. I thought I was going to die from all the jizz filling my ears.
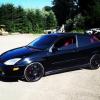
tdsa23 Posted March 27, 2013 Report Posted March 27, 2013 Looks good so far, and I like the car with the red. XS Power D5100, 2 D2700s, & 2 D975s MechMan 220a Alt DC 5K Kicker 650.4 2 12 Ascendant Audio Mayhem's Pioneer DEH-P7200HD Rockford Fosgate 3sity.1 Build log: https://www.stevemeadedesigns.com/board/topic/166792-88-nissan-maxima-trunk-build/#entry2430899 https://www.stevemeadedesigns.com/board/topic/191439-lexus-is300-fi-crescendo-shca-rf-pics/
Kevin M Posted March 27, 2013 Report Posted March 27, 2013 2005 Ford Focus zx4 AMT's and Planars 18" Infinite baffle
Brandon15zzz Posted March 27, 2013 Report Posted March 27, 2013 I made aluminum bars for connectors on my caps. They are as close together as they can be. I have mine set up like a 6 pack. Vehicle: 1995 Impala SSHead Unit: Pioneer AVH-P4400BHMids And Highs: (still deciding)Batteries: 1 Deka Group 34 Time to make a race car.My Build Log: Solo X 12"http://www.stevemead...don15zzz-build/My Build Log: DC lvl 4 xl 15"http://www.stevemead...don15zzz-build-My Wall Build Log: 4 Lanzar 15's/ 3k+ RMShttp://www.stevemead...t-by-techforce/My Feedback:http://www.stevemead...1
TheAfterparty Posted March 28, 2013 Author Report Posted March 28, 2013 lookin good man!! I'm tuned in for sure. .good progress so far the holes in the baffle look awesome for just using a jigsaw! Looks good so far, and I like the car with the red. Thank you for the encouragement guys. I made aluminum bars for connectors on my caps. They are as close together as they can be. I have mine set up like a 6 pack. Hmmm that would save a good amount of space, where did you purchase the aluminum? Update ETA 20 minutes.















Recommended Posts
Archived
This topic is now archived and is closed to further replies.