Lbox88 Posted June 26, 2012 Author Report Share Posted June 26, 2012 In the front door.... not the back. There is no tweet stock in the back of my LS model, IDK if there is one in the higher LT classes. Front door I will be using that though. UBL | Build Log Link to comment Share on other sites More sharing options...
Lbox88 Posted June 28, 2012 Author Report Share Posted June 28, 2012 First of all, I grossly overestimated the depth of these tweets as well as the deep available that I had. The tweeters in this kit are just a couple cunt hairs thicker than .75" I had about 1"~1.5" of depth to work with So I measured it out several times, marked it, and took a leap Set the tweeter in to see how it looked and fit Put the panel on to see how my depth was before I ground it out to make the tweeter fit Got about 1 1/8" Put the flush cup in to test fit, nice and snug without warping the panel Put the door back on to see fit and placement Now, here's my thing: how to keep the tweeter in? I noticed that the kit came with this black bird shit lookin' stuff, I assume it's for the tweeter. Now does it go on the lip on the inside of the tweeter? So that is mashes against the lip on the inside of the cup? Does it go on the underside of the lip on the front side of the flush cup? Or do I put the cup in its hole and then hot glue the cup in place from the back side so it holds on tight but can be ripped out if it needs to be replaced? UBL | Build Log Link to comment Share on other sites More sharing options...
Lbox88 Posted June 28, 2012 Author Report Share Posted June 28, 2012 I took the bird shit stuff and stuck it around the backside of the tweeter and mounted it in the cup, then mounted the cup in the door. Went to wire it up and decided to secure the wire near the tweet to have a pull relief spot just in case. Also, the crossovers were a little bit loose in their casing, so I went ahead and took the time now to secure the boards before they come loose Put the door back together, doesn't seem to have any clearance or fit issues. The fact that I put it together may kick me in the ass when I go to power them up, but I'll cross that bridge when I get there. EDIT: Trying to get a UBL so I can consolidate this whole thing, would be a small project, but man it would be nice. UBL | Build Log Link to comment Share on other sites More sharing options...
Lbox88 Posted June 28, 2012 Author Report Share Posted June 28, 2012 New fuses, fuse holders, and pry tools should come in today. New 4 AWG will be here Saturday, so I better get the other 2 doors done quick :drink40: UBL | Build Log Link to comment Share on other sites More sharing options...
HatersGonnaHate Posted June 28, 2012 Report Share Posted June 28, 2012 I like 'em. Makes them look stock sitting up there! Did a good job keeping it clean too! My name is AdamThis is my Civic Build.7" Samsung Tab 2Kenwood KDC-X896Clarion EQS746Sundown X-15DC 3.5k @2ohmHatersGonnaHate's 02 Civic UBLELD Bypass for Honda Civic/Accord/FitDon's Jeep Grand Cherokee Rebuild N8ball2013 - i think you'd stick your dick in a blender if it told you it was 40 wtih two kids your age. lol srp365 - If posting were picking up bitches, I'd be going home single tonight looks like tony montana sneezed in your car. Link to comment Share on other sites More sharing options...
Lbox88 Posted June 29, 2012 Author Report Share Posted June 29, 2012 Finished the driver's side rear door. Fit like a glove. Pretty sure my alignment from one door to the other is pretty damn close if not spot on too. UBL | Build Log Link to comment Share on other sites More sharing options...
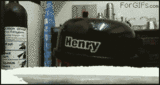
Lbox88 Posted June 30, 2012 Author Report Share Posted June 30, 2012 Did a little work on the car. Put these on Also looked underneath the car to try to figure out my turn signal problem. Here's what I found: Took apart the connectors one by one and cleaned them up with a screwdriver and some sand paper. Then put this on to protect the connection Took it for a drive and it turns out I didn't fix it. So, idk where to go on that. It's not like it's a lot of wire or hard to replace, so I could rewire it if it's a problem with that harness. Gonna take off the light up hitch cover I have just to try to rule that out as a possible problem and go from there I guess. UBL | Build Log Link to comment Share on other sites More sharing options...
Quiet Posted June 30, 2012 Report Share Posted June 30, 2012 Previous owner try to wire in a towing harness? First off, I'd look at those taps over your wires to see if they cut through the wire too much. May have to remove them then strip-n-solder the wire back together. If that's not the issue I'd look at the lamp sockets to see if they're corroded or just loose. 2007 Pacifica Rebuild. Less quiet. Still not loud. Link to comment Share on other sites More sharing options...
Lbox88 Posted June 30, 2012 Author Report Share Posted June 30, 2012 I already replaced the bulb and made sure the connection there was nice and clean, I think I am going to have to rip out the POS splice crimps though. Just wish I had a good way of testing at the trailer connector to see if it would work there before I solder it in. UBL | Build Log Link to comment Share on other sites More sharing options...
Quiet Posted June 30, 2012 Report Share Posted June 30, 2012 hazards and a multimeter. btw those wire taps are well known for cutting too deep on your source wire. Can cause issues with your flasher because of the extra resistance. Red taps should be for 18-22 gauge, which is too small for the turn signal wire. If it were me I'd remove them and solder it solely on principle. Tweets look too good btw, def looks stock. Nice. 2007 Pacifica Rebuild. Less quiet. Still not loud. Link to comment Share on other sites More sharing options...


Recommended Posts
Archived
This topic is now archived and is closed to further replies.