COLTON94 Posted May 28, 2013 Report Posted May 28, 2013 The solox 15 idea has me wanting to do it. I wonder if they can do anything with a L7 motor i do have a possibly blown L7 15" in my garage.... Hmmmm
Purplehaze Posted May 30, 2013 Author Report Posted May 30, 2013 Hmm whats this....Update coming, photobucket is just damn slow! Kickin' Cruiser Seller Feedback Stage 3 Dash, Door Panels,4th Order wall 4 - 15'son a DC 5.0K 2 DC 5.0K'sSolo X 15 (v.2) Sub Build
slc123 Posted May 30, 2013 Report Posted May 30, 2013 mmmmmm nice ass! My 03' sierra crew cab Here build in progress
b-eazy Posted May 30, 2013 Report Posted May 30, 2013 Custom subs.....niiiiceee choice....im tuned in for sure on that. .
DroppedSdime Posted May 30, 2013 Report Posted May 30, 2013 Man this is one of the best builds i've seen, Ready to see it finished, liking all the pics btw! SPL Audio 18, 5.5cb ft tuned to 34 hzAB 150.1 @1400 rms wired to 1OhmPPI A26.5'sKenwood HU
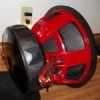
Purplehaze Posted May 30, 2013 Author Report Posted May 30, 2013 mmmmmm nice ass! Yeah, and cameras make these motors look small. They are huge in person! Big Fat Asses!!! I love it! Custom subs.....niiiiceee choice....im tuned in for sure on that. . Yes sir, thanks. Should be pretty cool if nothing else. Man this is one of the best builds i've seen, Ready to see it finished, liking all the pics btw! Thanks for the kind words! I am dying to finish it, just wish I had more time to put in work on it. Oh and I do have a small update, I'll get that up now. Kickin' Cruiser Seller Feedback Stage 3 Dash, Door Panels,4th Order wall 4 - 15'son a DC 5.0K 2 DC 5.0K'sSolo X 15 (v.2) Sub Build
Purplehaze Posted May 30, 2013 Author Report Posted May 30, 2013 Okay, so now that the wall is ready to go up, I needed to run the last of the wires. It's just easier to do it now. Plus, I wanted to keep the positive runs inside the car. For now I will only be doing three runs each front to back. (6 total) One of the positive runs will stop on the way back to power the breaker/ fuse box, then continue to the rear bank. Pics will help explain it all better. Front bank removed, time to replace the shitty big 3 from the previous build.Here is what I mean. was my neg. to chassis ground, I think I may have used acid core solder. Plus, those cheap ass terminals just don't like to be soldered. I was a noob, what can I say. We live and learn! New ground to chassis cableSo after hours of looking, and I mean hours, this is what I came up with.Here is the ONLY place I can possibly bring the wire thru. I have always had one run here thru the clutch cable plate. (Mine is auto.) But I noticed the small cable going thru the large hole, which is the hood latch cable. So I thought if I could move it, I could use that space, and the space beside it, and have my three positive taken care of. So first thing I did was completely remove it. Then I made a place for it, where it will still be safe, but now out of the way.Now to make some holesThen I covered the bare metal to avoid rustAnd a little paint here and thereThen I installed the grommetsThen I started pulling the cable thru to measure the length. SHCA OFC FTW!!! This is the best stuff out there for the money IMO...On the rt. is cheap Bullz Audio CCA cable, on the left is "the good stuff". (I was just using it to get the size, there will be no crap wire in my car from this point forward.)More on the way... Kickin' Cruiser Seller Feedback Stage 3 Dash, Door Panels,4th Order wall 4 - 15'son a DC 5.0K 2 DC 5.0K'sSolo X 15 (v.2) Sub Build
Kyblack76 Posted May 30, 2013 Report Posted May 30, 2013 nice job bro..... go get it... SMD SUPER SELLER The Burban Build Blazer Build sold Acura trunk build sold
Purplehaze Posted May 30, 2013 Author Report Posted May 30, 2013 So I had to lay it out, then take it back out, cut it, then re install both runs.I am using the rear air ducts as wire loom! It just works out better, I don't have room for three runs to all go along the side.Here are the two straight runs cut to lengthTime to solder some ring terminals. These terminals from Crimp Supply are the best I have ever used, period. The solder just wants to stick to it, and you don't even have to use flux. I then added tech-flex, for extra protection, and cause it just looks so damn good!One down, one to go!So next is to get them in the car. Also, notice the hood latch cable.. reinstalled and working perfectly!One goes straight to the fuse box, while these two branch off this way.Go thru hereUp to hereAnd end up hereMore pics on the way... Kickin' Cruiser Seller Feedback Stage 3 Dash, Door Panels,4th Order wall 4 - 15'son a DC 5.0K 2 DC 5.0K'sSolo X 15 (v.2) Sub Build














Recommended Posts
Archived
This topic is now archived and is closed to further replies.