bcbrassard Posted November 24, 2014 Author Report Share Posted November 24, 2014 16 hr tear down of interior for deadening. Wish i would have done this first and ran power on the outside. Would have been easier. Cleaned up. I put expanding foam in the roof and floor cross braces. Seemed to work well. Factory deadener on the floor helps but where its not yikes.. a tin can. Factory deadener on the roof. LOL Took awhile but roof is done. I will put headliner back in tonight and do the floor. Both the roof & floor where very tinny sounding before, this should help a lot. Road noise was really bad. Link to comment Share on other sites More sharing options...
hoit Posted November 24, 2014 Report Share Posted November 24, 2014 ive deadened my floor and trunk...but wasn't up for the task of deadening the roof ....at least not yet. once I again, bc, I am hats off to all your first class work. your work is seriously motivating me. 2007 Chevy Aveo Ls sedan 2 Sundown Xv2 on scv4k @ .5 ohm 2 pair RE XXX 6.5 components on sax200.4 @ 2 ohm Big Three, Three runs 1/0 power from front to back, 1 ground front to back Two runs ground from rear bank to chassis XS power d3100 upfront, 3 Odyssey 2150s in bank Singer 220 amp alt Link to comment Share on other sites More sharing options...
bcbrassard Posted November 24, 2014 Author Report Share Posted November 24, 2014 ive deadened my floor and trunk...but wasn't up for the task of deadening the roof ....at least not yet. once I again, bc, I am hats off to all your first class work. your work is seriously motivating me. Thanks, Just trying to get the best i can. first time removing carpet & headliner... piece of cake! Link to comment Share on other sites More sharing options...
JNells Posted November 26, 2014 Report Share Posted November 26, 2014 What kind of expanding foam did you use? Malibu Build Log Link to comment Share on other sites More sharing options...
milburyl Posted November 26, 2014 Report Share Posted November 26, 2014 Looks good. That's a big task you've accomplished. Kudos to you. I have a t-top roof, I'm glad I dont have to do that. But I do plan on doing my floor after I've fiberglassed the whole floor to reinforce it. Car kinda "bows" when it's jacked up because there isn't a full roof to add rigidity. Noticed that when I jacked it up to change the wheels, I needed something out of the car, and the door was harder to open and close when it was jacked up. So, I figure I'll put 2 or 3 coats of fibreglass cloth and resin on the floor to stiffen it up some. Plus that will probably help with road noise too. But back to your car, EXCELLENT JOB. The expanding foam "Great Stuff" works really well. Stay away from the cheap Walmart brand "Dap". Shit don't even dry up. Stays soft and crumbly. I know because I just foamed my shed and had 2 kinds. Wish I woulda bought all "Great Stuff". Link to comment Share on other sites More sharing options...
bcbrassard Posted November 27, 2014 Author Report Share Posted November 27, 2014 What kind of expanding foam did you use? Great stuff 1"+ gap filler. Link to comment Share on other sites More sharing options...
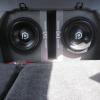
bcbrassard Posted November 27, 2014 Author Report Share Posted November 27, 2014 After 3 days of pretty much none stop work with 4 hr naps nightly i got it back together..... and FML! The HU dies! Re-installed everything, set gains with DD-1 & play couple songs with one set of speakers in. Install the rest of the speakers and went to test it out and HU wouldn't turn on. Pulled it out to check fuse it was good. Tested power on harness and it was good. I Did notice when i was setting gains the HU was acting up a bit. ? Too tired right now to give a fuck. Figure it out at a later date. Happy Turkey day. Progress pics: Like 2 days of deadening. The black is Dynamat Seam tape. Its foil tape wit a super sticky backing. Keeps the rubber on the seams from sticking to your carpet & panels. The red floor up front is the factory deadener, it need any added to it since it was double layered. I tried to get every inch! lol It was bright inside the car to work in. Reran wiring for an idea i had. So before the amps where mounted right on the carpet and i wanted to get them up off it for cooling reasons but it also worked out to run the wires under it for a cleaner look. I took 3/4" square aluminum tubing to mount under the amps, cut the shape & size of the amps. Painted black and clear coated. Worked out well. T3's look mean in the kick panels. Wish i could have heard them in there. Oh well. Link to comment Share on other sites More sharing options...
milburyl Posted November 28, 2014 Report Share Posted November 28, 2014 Nice job. Not sure if 100% coverage is necessary. I read conflicting things about deadener. Some say 25% is enough, some say that just one tile per panel is enough. It's equated to say, ringing a bell. If you ring a bell, it doesn't require you to cover the entire bell to get it to stop ringing, all you need to do is touch one spot and the resonating stops. 100% coverage can't hurt though. Just thinking for those on a budget. Link to comment Share on other sites More sharing options...
bcbrassard Posted November 28, 2014 Author Report Share Posted November 28, 2014 Nice job. Not sure if 100% coverage is necessary. I read conflicting things about deadener. Some say 25% is enough, some say that just one tile per panel is enough. It's equated to say, ringing a bell. If you ring a bell, it doesn't require you to cover the entire bell to get it to stop ringing, all you need to do is touch one spot and the resonating stops. 100% coverage can't hurt though. Just thinking for those on a budget. Thanks, i have seen more 100% coverage builds than 25%. Its how i do shit. Guess what, i am not going back in to touch up any area's. Done is Done in my book. I read the same info you mentioned and decided to do it this way because i had the material. I used about $160 worth of the $200 i bought. Seems budget friendly to me but i do work with a bit higher budget at time. Link to comment Share on other sites More sharing options...
alaskanzx5 Posted November 28, 2014 Report Share Posted November 28, 2014 Nice on the amp install under the seats. Sucks about the 80prs. If you end up needing to replace it can I buy the volume knob off you? Need it since mine was stolen. t1500bdcp 2 t2d4 15" 1 t600.4 1 t400.2 1 set p1 tweets singer alt, tons of wiring, smd vm-1, 80prs, back seat delete, still in the works, aiming for a 145-147 with the ability to play 25hz up to 50hz. Link to comment Share on other sites More sharing options...


Recommended Posts
Archived
This topic is now archived and is closed to further replies.