Wood Posted November 22, 2014 Report Posted November 22, 2014 Man that looks way better than stock...cmon Wood you can do it...just stock up on some grease for that elbow....man if only I wasn't LAZY I'll probably be done with mine...lol Lol thanks bro!! I'm going to give it a shot, if it comes out looking like ass, upholstery it is lol 2011 Nissan Altima aka Red Ruby HEADUNIT: Pioneer AVH X2700BS ELECTRICAL: -Singer 230a -Northstar gr34 -(2) Northstar SMS220 w/ Custom Terminals from 12V Metalworkz -100% Welding Cable FRONT STAGE:-(2 Sets) Hertz HSK165 -Hertz HSK130 -Ampere Audio 125.4 SUB STAGE: -(3) Sundown Audio SA REV2 12's -Ampere Audio 3800.1 V2 MISC (NON AUDIO RELATED): -Interior & Exterior Lights LED -Gloss Black Roof (PAINTED) -15% Front, 5% Rear Tint -Roof Spoiler -20" TSW Snettertons (20x8.5 front, 20x10 rear) -Custom Projector Retrofit (FX-R 3.0, 6.5k HID, Morimoto Mini H1 (faux projector), Quad Starry Night Halos) ----- COMING SOON!! -Aftermarket Fog Lights -Custom Painted Engine Covers My Build Log: http://www.stevemeadedesigns.com/board/topic/169869-woods-2011-altima-aka-red-ruby-new-video-more-updates/page-109 Retrofit Build Log: http://www.stevemeadedesigns.com/board/topic/185787-hid-projector-retrofitting-diy-by-wood/#entry2765346
milburyl Posted November 22, 2014 Report Posted November 22, 2014 You REALLY have me considering this but I'm scared mine wont be baby smooth like that lol Whats that? Your filler work on pods in the doors? I have done body work before, biggest thing in all this stuff is Patients... Right. And what flaws you can live with. Have a pic later with all panels i have painted in the last couple days. Yes! since I'm glassing them to the doors I would like for everything to be nice an smooth like yours... I guess I will take a month to fill and sand lmao I used to do bodywork too. Went to college for it and worked for 7 or 8 years doing it. Here's a tip to make sanding a little easier, buy yourself one of the metal bodyfill "cheese - grater" files. Use it to get your general shape before the bodyfill completely hardens, use a really coarse grit sandpaper(40grit) to sand after your first coat of fill, and on your final coat of fill, use a rag that has been dampened with thinner and wipe your fill smooth witj that rag. The thinner will spread the fill out smoother. Also, if your not the greatest or fastest at applying fill, use about half the amount of hardener as normal to increase your working time. The fill will still harden properly, it will just take longer(which is the whole purpose of using less hardener). Get at it. Lol. It's not as daunting as it seems. I can say that now that I have done it. And now I want to do so much more....lol. Been thinking of all kinds of little things that I can glass to improve my plans.
bcbrassard Posted November 22, 2014 Author Report Posted November 22, 2014 Man that looks way better than stock...cmon Wood you can do it...just stock up on some grease for that elbow....man if only I wasn't LAZY I'll probably be done with mine...lol Lol thanks bro!! I'm going to give it a shot, if it comes out looking like ass, upholstery it is lol Just get that negativity out of your head! And ass looking shaping job covered in material still = ass looking job. Think Smooth...... And stay at a Holiday Inn and you'll be a pro.
bcbrassard Posted November 22, 2014 Author Report Posted November 22, 2014 You REALLY have me considering this but I'm scared mine wont be baby smooth like that lol Whats that? Your filler work on pods in the doors? I have done body work before, biggest thing in all this stuff is Patients... Right. And what flaws you can live with. Have a pic later with all panels i have painted in the last couple days. Yes! since I'm glassing them to the doors I would like for everything to be nice an smooth like yours... I guess I will take a month to fill and sand lmao I used to do bodywork too. Went to college for it and worked for 7 or 8 years doing it. Here's a tip to make sanding a little easier, buy yourself one of the metal bodyfill "cheese - grater" files. Use it to get your general shape before the bodyfill completely hardens, use a really coarse grit sandpaper(40grit) to sand after your first coat of fill, and on your final coat of fill, use a rag that has been dampened with thinner and wipe your fill smooth witj that rag. The thinner will spread the fill out smoother. Also, if your not the greatest or fastest at applying fill, use about half the amount of hardener as normal to increase your working time. The fill will still harden properly, it will just take longer(which is the whole purpose of using less hardener). Get at it. Lol. It's not as daunting as it seems. I can say that now that I have done it. And now I want to do so much more....lol. Been thinking of all kinds of little things that I can glass to improve my plans. All good tips sir. I almost went to college for it too but thought partying was more important. I had half days in high school for 3 years. Loved the painting part or was it the dope smoking in the paint booth to get baked before painting? Cant remember, long term memory gone too. ha ha
islandpride684 Posted November 22, 2014 Report Posted November 22, 2014 Man that looks way better than stock...cmon Wood you can do it...just stock up on some grease for that elbow....man if only I wasn't LAZY I'll probably be done with mine...lol Ya the whole interior will look better IMO. Where are you at on your build? ummmm...bout 60% give or take...lol...i still gotta build my center console, finish the driver side door, do my A-pillars, rear doors, dual-alt, alt...blah blah...you know all the boring stuff.... Build Log http://www.stevemeadedesigns.com/board/topic/186921-blk9te-07-yukon-slo-mo-build/page-3?hl=%2Bblk9te#entry2881410
Wood Posted November 22, 2014 Report Posted November 22, 2014 You REALLY have me considering this but I'm scared mine wont be baby smooth like that lol Whats that? Your filler work on pods in the doors? I have done body work before, biggest thing in all this stuff is Patients... Right. And what flaws you can live with. Have a pic later with all panels i have painted in the last couple days. Yes! since I'm glassing them to the doors I would like for everything to be nice an smooth like yours... I guess I will take a month to fill and sand lmao I used to do bodywork too. Went to college for it and worked for 7 or 8 years doing it. Here's a tip to make sanding a little easier, buy yourself one of the metal bodyfill "cheese - grater" files. Use it to get your general shape before the bodyfill completely hardens, use a really coarse grit sandpaper(40grit) to sand after your first coat of fill, and on your final coat of fill, use a rag that has been dampened with thinner and wipe your fill smooth witj that rag. The thinner will spread the fill out smoother. Also, if your not the greatest or fastest at applying fill, use about half the amount of hardener as normal to increase your working time. The fill will still harden properly, it will just take longer(which is the whole purpose of using less hardener). Get at it. Lol. It's not as daunting as it seems. I can say that now that I have done it. And now I want to do so much more....lol. Been thinking of all kinds of little things that I can glass to improve my plans. Man that looks way better than stock...cmon Wood you can do it...just stock up on some grease for that elbow....man if only I wasn't LAZY I'll probably be done with mine...lol Lol thanks bro!! I'm going to give it a shot, if it comes out looking like ass, upholstery it is lol Just get that negativity out of your head! And ass looking shaping job covered in material still = ass looking job. Think Smooth...... And stay at a Holiday Inn and you'll be a pro. Thank you guys for the tips and motivation!! I'm definitely going to try it out!! 2011 Nissan Altima aka Red Ruby HEADUNIT: Pioneer AVH X2700BS ELECTRICAL: -Singer 230a -Northstar gr34 -(2) Northstar SMS220 w/ Custom Terminals from 12V Metalworkz -100% Welding Cable FRONT STAGE:-(2 Sets) Hertz HSK165 -Hertz HSK130 -Ampere Audio 125.4 SUB STAGE: -(3) Sundown Audio SA REV2 12's -Ampere Audio 3800.1 V2 MISC (NON AUDIO RELATED): -Interior & Exterior Lights LED -Gloss Black Roof (PAINTED) -15% Front, 5% Rear Tint -Roof Spoiler -20" TSW Snettertons (20x8.5 front, 20x10 rear) -Custom Projector Retrofit (FX-R 3.0, 6.5k HID, Morimoto Mini H1 (faux projector), Quad Starry Night Halos) ----- COMING SOON!! -Aftermarket Fog Lights -Custom Painted Engine Covers My Build Log: http://www.stevemeadedesigns.com/board/topic/169869-woods-2011-altima-aka-red-ruby-new-video-more-updates/page-109 Retrofit Build Log: http://www.stevemeadedesigns.com/board/topic/185787-hid-projector-retrofitting-diy-by-wood/#entry2765346
bcbrassard Posted November 22, 2014 Author Report Posted November 22, 2014 You REALLY have me considering this but I'm scared mine wont be baby smooth like that lol Whats that? Your filler work on pods in the doors? I have done body work before, biggest thing in all this stuff is Patients... Right. And what flaws you can live with. Have a pic later with all panels i have painted in the last couple days. Yes! since I'm glassing them to the doors I would like for everything to be nice an smooth like yours... I guess I will take a month to fill and sand lmao I used to do bodywork too. Went to college for it and worked for 7 or 8 years doing it. Here's a tip to make sanding a little easier, buy yourself one of the metal bodyfill "cheese - grater" files. Use it to get your general shape before the bodyfill completely hardens, use a really coarse grit sandpaper(40grit) to sand after your first coat of fill, and on your final coat of fill, use a rag that has been dampened with thinner and wipe your fill smooth witj that rag. The thinner will spread the fill out smoother. Also, if your not the greatest or fastest at applying fill, use about half the amount of hardener as normal to increase your working time. The fill will still harden properly, it will just take longer(which is the whole purpose of using less hardener). Get at it. Lol. It's not as daunting as it seems. I can say that now that I have done it. And now I want to do so much more....lol. Been thinking of all kinds of little things that I can glass to improve my plans. Man that looks way better than stock...cmon Wood you can do it...just stock up on some grease for that elbow....man if only I wasn't LAZY I'll probably be done with mine...lol Lol thanks bro!! I'm going to give it a shot, if it comes out looking like ass, upholstery it is lol Just get that negativity out of your head! And ass looking shaping job covered in material still = ass looking job. Think Smooth...... And stay at a Holiday Inn and you'll be a pro. Thank you guys for the tips and motivation!! I'm definitely going to try it out!! Thats what we are here for.... Motivation.
alaskanzx5 Posted November 22, 2014 Report Posted November 22, 2014 Those panels are coming out fantastic! t1500bdcp 2 t2d4 15" 1 t600.4 1 t400.2 1 set p1 tweets singer alt, tons of wiring, smd vm-1, 80prs, back seat delete, still in the works, aiming for a 145-147 with the ability to play 25hz up to 50hz.
bcbrassard Posted November 22, 2014 Author Report Posted November 22, 2014 Those panels are coming out fantastic! Thanks man, i am pretty happy with them.
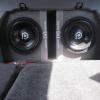
milburyl Posted November 22, 2014 Report Posted November 22, 2014 Wood, I looked at your build log. Nice work. You definitely have the skills and knowledge to do your doors using fill and paint. It's not that hard. Lol. You can do it. Oh, btw, love that sub box. But I agree with others, lose the carpet. Paint the whole box. Skim a light coat of bodyfill over the whole box and sand that smooth, then put a couple coats of "high-build" primer on it, then wet sand the primer using 1000 grit. Then take the box to a body shop and have them paint the box to match the car. That would be cheaper than trying to use spray cans and give a WAY better finish. It will look like the hood of the car. Flat, smooth, and shiny as hell.














Recommended Posts
Archived
This topic is now archived and is closed to further replies.