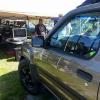
SMZ2 Posted March 22, 2014 Report Share Posted March 22, 2014 How do I fix this? Do I need to cut out spots? Thanks guys. My Build Log!http://www.stevemead...nissan-xterror/ Check the Youtube Channel for Updates!http://www.youtube....ser/Xterror2002And Seller Feedbackhttp://www.stevemeadedesigns.com/board/topic/163179-bought-from-smz2/#entry2363713 Link to comment Share on other sites More sharing options...
SMZ2 Posted March 22, 2014 Author Report Share Posted March 22, 2014 I was thinking a "relief" cutout on the part that is warped. Is this correct? My Build Log!http://www.stevemead...nissan-xterror/ Check the Youtube Channel for Updates!http://www.youtube....ser/Xterror2002And Seller Feedbackhttp://www.stevemeadedesigns.com/board/topic/163179-bought-from-smz2/#entry2363713 Link to comment Share on other sites More sharing options...
JNells Posted March 22, 2014 Report Share Posted March 22, 2014 I would say cut out and sand down the warped spots and the pockets they created and then reapply more resin and fiberglass. You might have to go thru that process a couple times just to make sure there isn't anything noticeable in the finished product. Yours doesn't look half as bad as some of them I've seen, so pretty sure you'll be able to fix it rather than starting over... Most of the time if it warps or has significant air pockets, it's easier and quicker to just start over.. But I don't think that's the case here. Also an FYI for future reference, if you staple closer together and in a straight line for the fabric (staples almost overlapping in a line) it will hold it's shape and position better and is less likely to warp once you apply resin and is curing. Malibu Build Log Link to comment Share on other sites More sharing options...
SMZ2 Posted April 12, 2014 Author Report Share Posted April 12, 2014 I'm closing the gap. This is the only problem area. I am going to sand down the inside some more and see if that helps. I have plenty of material to patch it back up as well. My Build Log!http://www.stevemead...nissan-xterror/ Check the Youtube Channel for Updates!http://www.youtube....ser/Xterror2002And Seller Feedbackhttp://www.stevemeadedesigns.com/board/topic/163179-bought-from-smz2/#entry2363713 Link to comment Share on other sites More sharing options...
SMZ2 Posted April 12, 2014 Author Report Share Posted April 12, 2014 Is there a type of screw I could use to better secure the panels along the the bottom? I don't think just the clips will work with all the added weight. My Build Log!http://www.stevemead...nissan-xterror/ Check the Youtube Channel for Updates!http://www.youtube....ser/Xterror2002And Seller Feedbackhttp://www.stevemeadedesigns.com/board/topic/163179-bought-from-smz2/#entry2363713 Link to comment Share on other sites More sharing options...
tacomaguy1 Posted April 12, 2014 Report Share Posted April 12, 2014 I found some bigger/fatter door clips at Ace I think....had to be forced in and held the panel on pretty good Team Flex Issues Link to comment Share on other sites More sharing options...
EpicenterDesigns Posted April 18, 2014 Report Share Posted April 18, 2014 At the risk of coming off bad, I think you should know for future reference, that panel is done wrong and should be scrapped. The rings should have had rabbet grooves in them to staple the material into and ithe material should have been pulled tighter all around. The staple the material just short of the curve down the panel to bodywork could blend better. The only way that panel could have warped would be from the resins being mixed too hot. The material was not pulled tight enough to warp the panel. Building The Best.....Repairing The Rest The bitter after-taste of a poor quality job will last far longer than the sweetness of that cheap price! Link to comment Share on other sites More sharing options...
Deeznutz Posted April 19, 2014 Report Share Posted April 19, 2014 Some of these guys are right. The same thing happened to me to a lesser extent. When I made my door pods, I placed the door panels on the floor and applied the fiberglass and resin to make the back of the pod. Well the panel was not 100% flat as it should have been. When I finally made the pods and bolted them onto the panel, sure as shit, the pods disfigured the panel and you could only tell when I attempted to re-install the panel with new clips. One kept popping out. You're going to have to redo the panel again. I suggest doing the backing while the panels are still in the car. I'm not an expert, but this may solve the problem, unless someone has a better idea. The home depot FG cures in 2 hours. I am going to redo my pods because they stick out ALOT. lol. -Frank Link to comment Share on other sites More sharing options...
n8ball2013 Posted April 19, 2014 Report Share Posted April 19, 2014 if you are a rookie to glassing nothing beats sunflash. no warping. THERE IS NO BUILD LOG! 1998 Chevy Silverado ext cab Alpine CDA-9887 4 Team Fi 15s 2 Ampere Audio TFE 8.0 2 Ampere Audio 150.4 3 Digital Designs CS6.5 component sets Dual Mechman 370XP Elite alternators inbound! 8 XS Power d3400 6 XS power d680 Second Skin Stinger Tsunami Wiring Sky High A Real Voltmeter not a piece of shit stinger. Link to comment Share on other sites More sharing options...
Deeznutz Posted April 19, 2014 Report Share Posted April 19, 2014 This is where I went wrong with my pods. They sound great, but man do they stick out. I can rest my left knee on it as I drive. lol. -Frank Link to comment Share on other sites More sharing options...


Recommended Posts
Archived
This topic is now archived and is closed to further replies.