The Performer Posted May 26, 2009 Report Share Posted May 26, 2009 Hey guys, I never saw any cool threads on the subject, so along my journey of learning how to do all this stuff I decided that all these recent projects I've been doing I would share some pics of my process and give some insight as to how you do this stuff. Firstly, I personally have a viper 791xv installed in my truck, which gives me about 4 auxillary channels I can work with. Channel 4 is a pulsed output that activates the horns (stock/factory), and channel 5 is latched/reset with ignition that activates the radio. This means when I activate channel 5 with the remote the H/U is given an ignition signal that turns it on, and pressing the channel 5 buttons again will kill the radio. The idea for that came from having the stereo playing in the truck at a party and having a cop drive by and hearing the stereo. This way if we see a cop I can kill the stereo remotely. Now, also in this thread I'll be updating along with a friend of mine's truck that I am adding the same stereo turn on to so I will have pictures from both trucks. As I keep adding accessories I'll be sure to take more pictures and update the thread so be sure to keep checking back from time to time. ________________ First project is the horn trigger. These first pictures are from today I added the "horn" output from the alarm to the factory horn wire. This allows the siren AND the factory horn to sound when the alarm is triggered. In my case I have the factory horn and my air horns connected together since I'm trying to get my horns as loud as I can get them until I can find money and a decently priced train horn. First thing's first, run your aux. harness leads to where they need to go. In this picture the three sets of wires on the left side are all of my auxillary leads tied and wrapped and leading towards under the dash. In this image I have the leads labeled appropriately. Now each of these outputs work as so. When the channel is activated, that lead presents a (-) voltage, or almost acts as a switch to the battery's ground. With that being said you must also know that the circuitry that controls that output is rated to work with ONLY 200 milliamps max. Just enough to activate a relay and that's about it. Here's a generic 12v relay. You would use the alarm channel output lead to one side of the relay coil, and present a 12v constant to the other side of the coil, and the switch leads would complete the circuit of the accessory you are activating. The good thing about that is most of the accessories that your vehicle works on uses a relay to trigger, and even better, the trigger for the relay needs a (-) output. This makes a horn trigger a piece of cake. Just tap into the lead running from the horn switch in the steering column, to the BCM. Many of times you will be unsure of what type of circuit you're dealing with and in that case that is when a DMM will come in handy. I checked the current of the horn lead prior to installing everything with my fluke. Just open the circuit you're going to test and put your meter in series with it. Turn it on to the DC milliamp setting. Perfect, just under 200ma. Making it suitable for both the factory horn relay and the air horn relay. In this picture I have the horn trigger wire with a section of insulation stripped off in the background, and I will be soldering the "HORN" output from the alarm (green wire/ (-) 200ma), the channel 4 aux. output (small black wire/ (-) 200ma), and finally the air horn relay trigger (large black wire/ (-) 200ma). So depending on what I do, the horns can be activated in 3 different ways. I can press the steering wheel button, I can hit channel 4 on my remote, or the horns will sound along side the siren in the event that the alarm is triggered. Now, on to the the soldering. Use some super33+ to tape it up and add a small cable tie around the wires to act as a strain relief. Unfortunately I never thought to take pics of the airhorn install when I did it. But here's some for example. The air horn trigger lead from the previous pictures (large black wire) runs through the firewall and routes along side the main power lead from the battery to the air horn assembly. Call me ghetto, but I only have one of the horns hooked up because the short one has a wimpy honk to it. (I'm not going to lie the long one does too, but it's not that bad) This is the relay for the horn compressor. Ok, so that's it for the horns. Hopefully tomorrow I can catch a video of the features of the horns. Now on to the H/U turn on. _______________ Firstly, your headunit must be wired to turn on with the ignition of the vehicle for it to function right. First off you're going to need two 1N4004 rectifier diodes. A diode is a nifty little component that allows current to flow one direction, but not the other. You need this because we will be adding a relay that once triggered by an aux. channel from the alarm, will present the H/U with a 12v+ to the ignition lead. That being said, if you were to simply "tap" into the ignition lead of the H/U you have a chance of that 12v running back into the rest of the vehicle. This could potentially do damage to computers, however mainly it could cause more things to draw power all the while when you JUST want the H/U on. So, this is how it goes, ignition wire to the H/U is cut and the diode is inserted inline with the anode on the truck side, and the cathode on the H/U side. This allows the current to flow into the H/U when you turn on the key. You will also add a line from the cathode side that will present the aux. 12v+ that you don't want leaking into the rest of the truck. See where I'm going with this? The red wires are the ignition leads for the H/U and the blue wire is the aux. 12v+ that I want the diode to isolate, see how it's on the cathode side? Now you're going to add the relay. This is a picture of the relay harness I built for my friends truck for this same application. Here you can see the two blue wires are the signal/coil wires, and the two red wires are the main switched leads. Here's how the leads are connected to the relay: 30, 85 - +12v input from constant source 87 - +12v output to blue wire connected at cathode side of diode in ignition harness at H/U 86 - (-) 200ma output channel 5 from alarm module Now, you might be wondering what happened to the other diode? It is used in reverse across the coil leads of the relay. You can see in this picture it is tapped between the blue coil wires. When I say it's in reverse, I mean that the cathode connects to terminal 85 and the anode connects to terminal 86. I wont go into details, but I will say that the diode acts as a protection for the relay's coil. When the coil is disconnected sometimes a voltage spike occurs at the coil so the diode lets that pass through it so that the coil does not get damaged. Ok, so now that's all done so go ahead and mount your relay. I chose to put mine under the dash panel. It's mounted right there on that rusty piece of frame on the left. So now that's all done, get in your install manual and program your channel 5 validity to "latched with reset on ignition". This means that the channel 5 output wire going to your relay will STAY on when you activate that channel, and will cut back off whenever you re activate that channel or start the vehicle. At that point the ignition coming from the vehicle will take over the 12v+ going into the H/U ignition and the relay will cut off. Done deal. A quick video of mine. So there you have it, that's 2 ways of making your alarm work for you OTHER than security. I've got a few more things on the way that will be using the rest of my channels, and depending on what my friend wants to do, she might have me install a window module that allows you to roll your windows up or down with the remote. If we do that I'll definitely snap some shots of the install. I know I will also be adding aux. spotlights to my truck in the future that I'll put on one of my channels, so that will be a fun one as well. So thanks for checking it out, be sure to check the thread for updates EDIT: New video of these three features on post #3 CERTIFIED BITCHES!!! Not being new at something doesn't mean anything. Just because a prostitute isn't new at what she does, doesn't change the fact that she still 'sucks' Click to see my build! Proud DC owner Link to comment Share on other sites More sharing options...
Herrie_V Posted May 26, 2009 Report Share Posted May 26, 2009 Great tutorial! Keep up the good work Link to comment Share on other sites More sharing options...
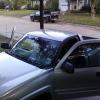
The Performer Posted May 28, 2009 Author Report Share Posted May 28, 2009 Alright got a video of the three features I was demonstrating in the tutorial. First is the remote H/U turn on, then off using channel 5. Then I demonstrate the horn honk on channel 4. Realize I have my stock horn and air horns wired together. And finally is the result of the alarm arming and disarming with only the siren chirp, however when triggered both the siren, and the horns are triggered. The advantage of this is 1. it's much louder and obnoxious, and 2. it's possible for a thief to rip the siren out immediately, however two other separate horns would keep sounding. You bastards need to comment, I feel like I did this whole thread and no one is appreciating it. CERTIFIED BITCHES!!! Not being new at something doesn't mean anything. Just because a prostitute isn't new at what she does, doesn't change the fact that she still 'sucks' Click to see my build! Proud DC owner Link to comment Share on other sites More sharing options...
Noobtastic14 Posted May 28, 2009 Report Share Posted May 28, 2009 I just wish i had a nicer alarm! i want to use the "open hatch" on my fob to do something cool so i'm going to re-read this thread a couple more times -Drew I am a United States Military Arts and Crafts Professional. Sand it off, Paint it on. uhoh_45 said: dont be a pussy P give the jeep to drew Link to comment Share on other sites More sharing options...
The Performer Posted May 28, 2009 Author Report Share Posted May 28, 2009 I just wish i had a nicer alarm! i want to use the "open hatch" on my fob to do something cool so i'm going to re-read this thread a couple more times -Drew I've been considering an inflatable sex doll in my passenger seat. I would assume that would definitely keep thieves out. You can copy my idea if you like. CERTIFIED BITCHES!!! Not being new at something doesn't mean anything. Just because a prostitute isn't new at what she does, doesn't change the fact that she still 'sucks' Click to see my build! Proud DC owner Link to comment Share on other sites More sharing options...
Noobtastic14 Posted May 28, 2009 Report Share Posted May 28, 2009 your trying to scare them away with sex? how bout a sex doll catapult that has them chasing the doll down the street?!? -Drew I am a United States Military Arts and Crafts Professional. Sand it off, Paint it on. uhoh_45 said: dont be a pussy P give the jeep to drew Link to comment Share on other sites More sharing options...
BrownRice Posted May 28, 2009 Report Share Posted May 28, 2009 good thread man, never thought of using the alarm to control the headunit, but now i might. so far the only thing i used it for was to ...turn on my.. neons Link to comment Share on other sites More sharing options...
The Performer Posted June 1, 2009 Author Report Share Posted June 1, 2009 good thread man, never thought of using the alarm to control the headunit, but now i might. so far the only thing i used it for was to ...turn on my.. neons The neons are through a relay correct? Depending on how that's wired you could even tap into that feed off of the relay to give the headunit remote a feed. Be sure to give to fuse it for safety. CERTIFIED BITCHES!!! Not being new at something doesn't mean anything. Just because a prostitute isn't new at what she does, doesn't change the fact that she still 'sucks' Click to see my build! Proud DC owner Link to comment Share on other sites More sharing options...
overlord584 Posted November 24, 2009 Report Share Posted November 24, 2009 thank you for adding this tutorial i really appreciate it, i have been wondering how people put their H/U in their trunk Link to comment Share on other sites More sharing options...
KyleRhone Posted June 23, 2015 Report Share Posted June 23, 2015 I have a viper 3305V alarm. i'm trying to attempt this same set-up with the stereo. my alarm only has a channel 2 aux and channel 3 aux. the 3 aux is changeable to latched with reset. I can get all the way through the menu to the channel 3 setting, but then once i'm there I can't figure out what setting i'm putting it on. is there a special way to do it or do i have to keep testing each setting with a volt meter til I get it right? As I lay rubber down the street, I pray for traction I can keep, but if I spin and begin to slide, please dear God protect my ride. Link to comment Share on other sites More sharing options...


Recommended Posts
Archived
This topic is now archived and is closed to further replies.