gckless Posted July 12, 2013 Author Report Share Posted July 12, 2013 So, bought a T47 torx bit, and tried to take my seatbelt bolts out. Here is what happened: This POS just crumbled after a couple turns. Had an interview and open house with Guide Dogs of Texas tonight too. Going to volunteer with them, work at the kennel and run a couple booths, and board a dog at my place on the weekends. They mentioned a couple things about their network and getting that set up, so might be getting involved in that too. They have a pretty good program down there. Anyway, stopped at Sears on the way home, here's the replacement: Worked my seatbelt bolts out, popped off a couple panels, and got the headliner out: Deadener and foam will hopefully happen tomorrow. Bought Great Stuff to put under those braces so the roof doesn't slap against it. This is gonna be a bitch to put back in by myself. Also, don't flock anything! Or atleast, use real good materials. Here's what mine now look like: Apparently the oils on my fingers from putting it in (and I mean the natural oils, my hands weren't dirty) made the flock material and/or glue discolor. Might just spray over them with something. "Clipping" is the biggest forum boner now. It's like witchcraft... it automatically explains just about everything people don't understand. My build log: http://www.stevemeadedesigns.com/board/topic/200295-gckless-2011-chevrolet-impala/ High resolution photos: Gilbert Kless Photography Link to comment Share on other sites More sharing options...
gckless Posted July 13, 2013 Author Report Share Posted July 13, 2013 Got out of work early today, got some work done on the roof. Got two sheets of deadener on each section, a little more on the front section. Also added foam (Great Stuff) in between the roof braces and the roof, so that they didn't smack against each other. Worked really well, I would highly suggest that for anyone have a problem with their roof. Put the headliner and all panels back on, was actually much easier than I expected. Was actually easier than taking it out, which makes no sense. Got some goodies in the mail too: Went to Sears as well, need some terminals if anyone has any: These will be used for all my wiring. Love these things: "Clipping" is the biggest forum boner now. It's like witchcraft... it automatically explains just about everything people don't understand. My build log: http://www.stevemeadedesigns.com/board/topic/200295-gckless-2011-chevrolet-impala/ High resolution photos: Gilbert Kless Photography Link to comment Share on other sites More sharing options...
TRTC360 Posted July 13, 2013 Report Share Posted July 13, 2013 damn I love builds like these, very detailed and high quality pictures, keep up the great work man! '93 Firebird Formula V8 H/U- Kenwood eXcelon KDC-X395 Mids/Highs Amp- Hifonics ZXI80.4 Wiring-KNU RCA's, Speaker Wire, And Two Runs Of Trystar 1/0 G34 Red Top and a 180amp Ford Alternator www.youtube.com/TRTC360 Link to comment Share on other sites More sharing options...
Kyblack76 Posted July 13, 2013 Report Share Posted July 13, 2013 Looks tits man.. well done... SMD SUPER SELLER The Burban Build Blazer Build sold Acura trunk build sold Link to comment Share on other sites More sharing options...
gckless Posted July 14, 2013 Author Report Share Posted July 14, 2013 damn I love builds like these, very detailed and high quality pictures, keep up the great work man! Looks tits man.. well done... Thanks! It's slower than I would have liked, but the advantage of being slower is I can take more time on each piece. "Clipping" is the biggest forum boner now. It's like witchcraft... it automatically explains just about everything people don't understand. My build log: http://www.stevemeadedesigns.com/board/topic/200295-gckless-2011-chevrolet-impala/ High resolution photos: Gilbert Kless Photography Link to comment Share on other sites More sharing options...
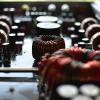
gckless Posted July 14, 2013 Author Report Share Posted July 14, 2013 Wrapped! Got some wiring done: Dem switches: And just a peek at what it will look like in the vehicle: "Clipping" is the biggest forum boner now. It's like witchcraft... it automatically explains just about everything people don't understand. My build log: http://www.stevemeadedesigns.com/board/topic/200295-gckless-2011-chevrolet-impala/ High resolution photos: Gilbert Kless Photography Link to comment Share on other sites More sharing options...
gckless Posted July 16, 2013 Author Report Share Posted July 16, 2013 Got this piece done. This will go where the stock tape player was: Two USB ports for my 80PRS, a PAC LC-1 for the sub amp, and a voltage meter/ammeter. The dremel slipped when I was cutting the lower USB port, so I had to shift the whole block over, pisses me off. But, I think it still turned out ok. This is where it will go, once I remove the tape player: "Clipping" is the biggest forum boner now. It's like witchcraft... it automatically explains just about everything people don't understand. My build log: http://www.stevemeadedesigns.com/board/topic/200295-gckless-2011-chevrolet-impala/ High resolution photos: Gilbert Kless Photography Link to comment Share on other sites More sharing options...
b-eazy Posted July 16, 2013 Report Share Posted July 16, 2013 Sweet. ..looking great Link to comment Share on other sites More sharing options...
gckless Posted July 21, 2013 Author Report Share Posted July 21, 2013 Couple quick things. Haven't done much because of this girl: I'm volunteering with Guide Dogs of Texas, and I'm boarding (a.k.a. dogsitting) her on weekends. Anyway, got SHCA wire from Jim this week, 50ft. of OFC. Also got this loom: Gave in and bought a torch and vice so I can solder everything: Actually, this was my first time soldering these big lugs. I won't not solder again. Fuck that crimper! Lol. Cut my front to rear runs of wire. I measured with rope and gave myself extra, so I'm just praying I have enough once I actually get it in the car. Shouldn't have done it this way, but I am bored. Put the loom on, soldered on one side of terminals: Also found the best spot ever for my ground: Aaaaaaand just a picture for fun: "Clipping" is the biggest forum boner now. It's like witchcraft... it automatically explains just about everything people don't understand. My build log: http://www.stevemeadedesigns.com/board/topic/200295-gckless-2011-chevrolet-impala/ High resolution photos: Gilbert Kless Photography Link to comment Share on other sites More sharing options...
Amart88 Posted July 21, 2013 Report Share Posted July 21, 2013 Nice progress man. Looking good so far. Did you end up getting those seat bolts out? I still have the one floor torx on the drivers seat. I soaked that bitch in penetrating fluid for a week.Still so tight that it twisted a snap on torx bit. Needless to say I gave up and worked around it lol. My 2005 s10 blazer build. 4 zcon 18's walled. Link to comment Share on other sites More sharing options...


Recommended Posts
Archived
This topic is now archived and is closed to further replies.