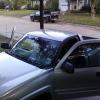
The Performer Posted May 19, 2009 Report Share Posted May 19, 2009 Hey, I figured we could use a decent guide on how to use spray cans effectively around here and since no one else seemed to really do a thread geared for it that I saw I'll share some of my work. First of all never try to do what I'm doing in these pics, I'm trying to fill in the weather stress cracks and nonsense on my third brake light simply because I'm too poor of a bastard to buy a new one, however the main point is I wouldn't bet on the odds that this will last me very long. However since I was doing it I figured it would be a good one to snap some pictures for a tutorial. This is all the same techniques I use on all my painted works, including my sub box, and chevy emblem. Some examples: ^To be honest this has no clear coat, the same process was used just on the paint, however unless you clean your work very often I would not recommend doing this. You will be safer with a clear coat. Now on to the brake light. I started off by wetsanding the whole thing with 600 grit to smooth out the surface, and to give the clear a rough surface to adhere to. Then I did about 4-5 light coats of clear. You're going to want to let the coat dry between coats correctly. Making spray paint work for you is an art that you really just have to get experience with. Notice the awesome orange peel. If you're not familiar with doing alot of spray painting in a hurry then you're going to want to let your coat dry for atleast a full day in the sun, if not 2 days. I've been doing this so much I've developed a way to cut my curing time to less than an hour. So if you were wondering, yes all of this project I did in about 2 and a half hours. Maybe if I got enough guys ask I could make a tutorial on a full spray paint job. The tools. Do some wetsanding to the clearcoat. Start with 600 and knock down all the orange peel and level out the layer. Once you've got it leveled STOP there and don't dig down further into the coat. Here's a diagram I used in another thread on the subject of orange peel. In my case I don't have the primer and paint, but the same principle still applies. An idea of what the result of 600 grit wetsand will look like. Now move on to 800 grit and knockdown the grooves that you made with the 600 grit. After 800 you can jump to 1000 grit, however I just had 2000 on hand. It will take a little longer but will get the same result in the end. If you can get your hands on 4000 grit wetsand paper, I would highly recommend it, however I never have luck keeping it on hand when I need it. If you do have some do it after 2000, and it will save you time on the polishing step. Now you're going to start polishing the clearcoat which is basically just using an abrasive compound to smooth out the roughness from the fine sanding. It will smooth it so to a point that will give it a shine. I used turtle wax brand polishing compound to do the trick. Take a blue shop towel and fold it up to make a pad and use one side to apply and you're going to buff the compound into the surface and rub in circular motions steadily to "work out" all the roughness. Usually you're going to want to do this many of times as each time you do so you refine the surface more and more. When it's getting almost about completely polished you will then put the polishing compound away. Thought you were done? Not a chance, next step is waxing. The wax I use is a cleaner wax by meguires. It's the bomb basically put. I've found in my time using it that the cleaner in the wax helps polish a little better than other waxes I've used in the past. Same process as with the polishing compound except you want to use the buffing pad that comes with the wax to apply and work into the clearcoat, then after letting the wax dry you will buff it out with a blue shop towel. (Btw, I didn't mention this earlier but I highly recommend the blue towels. I read that tint shops use them over the standard white paper towel because they have a less lint get everywhere) CERTIFIED BITCHES!!! Not being new at something doesn't mean anything. Just because a prostitute isn't new at what she does, doesn't change the fact that she still 'sucks' Click to see my build! Proud DC owner Link to comment Share on other sites More sharing options...
The Performer Posted May 19, 2009 Author Report Share Posted May 19, 2009 A few glory shots during waxing. Yes that is the reflection of my spray can clearcoat. http://www.stevemeadedesigns.com/board/public/style_emoticons/default/dirol.gif Go ahead and print it out for your wall. Now to install the light back on to my truck. I'll update this thread with new pics as I get more projects done. I'll be doing a friends mini KLX110 dirtbike just for shits and giggles pretty soon so I might get that posted up as well with spray can techniques and ideas. Thanks for reading, if you got any help from all this leave a reply and I'll see about doing more threads. CERTIFIED BITCHES!!! Not being new at something doesn't mean anything. Just because a prostitute isn't new at what she does, doesn't change the fact that she still 'sucks' Click to see my build! Proud DC owner Link to comment Share on other sites More sharing options...
Hypnotik DesignZ Posted May 19, 2009 Report Share Posted May 19, 2009 Nice tutorial man Jensen 9511TS~For Sale JL Audio 300/4~For Sale JL Audio1000/1~For Sale Mephis 6.5 componet sets front and rear 4 15" Fi Q's in a 16 cuft box tuned to 29hrz Link to comment Share on other sites More sharing options...
Stephen Posted May 19, 2009 Report Share Posted May 19, 2009 looks nice you can cook bacon shirtless if you're not a pussy...lol not hatin, but am i wrong here it looks as if the amp is not grounded its hooked directly to the battery. it that the way it should be. DC POWER Link to comment Share on other sites More sharing options...
Bumpindemlowzz Posted May 19, 2009 Report Share Posted May 19, 2009 Could the same method be used on oxidized headlights? Its not on the inside... 2010 Silverado 18" DC XL 18 DC 2k XS Power Batts Link to comment Share on other sites More sharing options...
white4d96 Posted May 19, 2009 Report Share Posted May 19, 2009 Could the same method be used on oxidized headlights? Its not on the inside... I did something similar for the clouding on my headlamps, minus the clearcoat. Putting a clear on it would probably be helpful though. I just used 3-4 coats of wax instead and have no problems. Too many projects, too little time... Link to comment Share on other sites More sharing options...
Joeskey Posted May 19, 2009 Report Share Posted May 19, 2009 I use the exact same wax its awesome "never drive faster then your guardian angel flies... good think my guardian angel drives a twin turbo ed beast" "its time has come for those who are different to stand united" Link to comment Share on other sites More sharing options...
The Performer Posted May 19, 2009 Author Report Share Posted May 19, 2009 Could the same method be used on oxidized headlights? Its not on the inside...Well to go along with what I was talking about in the beginning about how I would really not recommend using this on light housings, it's really just a chance that the bulbs will heat the plastic and in turn the paint/clearcoat and cause it to break away from the housing. In the case of the VHT nightshade spray for lights, I believe that it has a more plastic friendly formula, therefore I would trust it as a primer between the housing and clearcoat. From what I understand, nightshade works decently well for tailights, and it makes sense. Your tailights don't produce AS much heat from the bulbs usually as your headlights do, which is why I understand any types of paint to last longer on tailights vs. headlights.Now say in the situation of using HID's, I would say yes, I can see something like this working well with or without a nightshade coat. One thing I always tell people who ask me about blacking out their headlights is if they plan on running HID's. For one, an HID will produce more light to get through the tint, and more importantly they are not as hot as a standard bulb. In which case a type of tint or paint on the headlights would most likely do a decent job. So to answer your question I would say it could be worth a shot, because nightshade is a popular product with good reviews so I can't see why a clear coat wouldn't be too much different. Now just for clear coating a headlight, most of the time it's not neccessary to put a clear coat. I just did so in my situation because I had UV stress cracks and such on my light housing. On my moms car I did the exact same process on her headlights, MINUS putting any kind of clear coat, only cleaning and refinishing the plastic. When you do this however you've gone past the outter layer of the plastic and yellowing is just more prone to happen again. You need to stay on top of the lights atleast check on them once a month and if they start looking questionable, just hit them one more shot with the polish compound followed by waxing again. You should never need to wetsand if you keep on top of them. Just make sure you clean the plastic really well and wetsand all of the yellow out when you do. Also, I believe meguires makes a product called plast-x for this specific purpose. I use it as the step between polishing compound and waxing. CERTIFIED BITCHES!!! Not being new at something doesn't mean anything. Just because a prostitute isn't new at what she does, doesn't change the fact that she still 'sucks' Click to see my build! Proud DC owner Link to comment Share on other sites More sharing options...
Bumpindemlowzz Posted May 19, 2009 Report Share Posted May 19, 2009 Well to go along with what I was talking about in the beginning about how I would really not recommend using this on light housings, it's really just a chance that the bulbs will heat the plastic and in turn the paint/clearcoat and cause it to break away from the housing. In the case of the VHT nightshade spray for lights, I believe that it has a more plastic friendly formula, therefore I would trust it as a primer between the housing and clearcoat. From what I understand, nightshade works decently well for tailights, and it makes sense. Your tailights don't produce AS much heat from the bulbs usually as your headlights do, which is why I understand any types of paint to last longer on tailights vs. headlights. Now say in the situation of using HID's, I would say yes, I can see something like this working well with or without a nightshade coat. One thing I always tell people who ask me about blacking out their headlights is if they plan on running HID's. For one, an HID will produce more light to get through the tint, and more importantly they are not as hot as a standard bulb. In which case a type of tint or paint on the headlights would most likely do a decent job. So to answer your question I would say it could be worth a shot, because nightshade is a popular product with good reviews so I can't see why a clear coat wouldn't be too much different. Now just for clear coating a headlight, most of the time it's not neccessary to put a clear coat. I just did so in my situation because I had UV stress cracks and such on my light housing. On my moms car I did the exact same process on her headlights, MINUS putting any kind of clear coat, only cleaning and refinishing the plastic. When you do this however you've gone past the outter layer of the plastic and yellowing is just more prone to happen again. You need to stay on top of the lights atleast check on them once a month and if they start looking questionable, just hit them one more shot with the polish compound followed by waxing again. You should never need to wetsand if you keep on top of them. Just make sure you clean the plastic really well and wetsand all of the yellow out when you do. Also, I believe meguires makes a product called plast-x for this specific purpose. I use it as the step between polishing compound and waxing. I actually used the plast-x a few times and it helped but not anywhere nears enough. Would cleaning the headlights, wetsanding with 2000 grit, then buffing work and when done plast-x it? I think your correct on the bulbs heating the plastic too much for a clearcoat. 2010 Silverado 18" DC XL 18 DC 2k XS Power Batts Link to comment Share on other sites More sharing options...
BanginOnABudget Posted May 19, 2009 Report Share Posted May 19, 2009 wow thanks for the thread, it helped me alot. ima be clearcoating the breather cover in ma 71 buick riviera now and maybe my 92 chevy. and maybe my mercury. and maybe my atv. and maybe my lawnmower. ok i went a lil too far there... im taking out my passenger seat, battery is disconnected, going to unwire and take out the three amps, take out the 70+ lb box, then the platform so i can crimp 1 wire. Almost as bad as those fegs that put those horns in their grills and roll down the street distorting the block.... 1990 Jeep Cherokee 2 Dr. Big-3 in 0g on Stock Alt. Pioneer 6.5" and 5.25"s temp. until i can afford the new crescendos. Pioneer 6000ub Reciever NO amps at the moment. SA-15 on 1kw coming soon. MSG Me for a free enclosure design!! Flared port kits coming soon!! Link to comment Share on other sites More sharing options...


Recommended Posts
Archived
This topic is now archived and is closed to further replies.