Leaderboard


.thumb.png.f735f4bf293030b5aad4d67e65a35e67.png)

Popular Content
Showing content with the highest reputation since 04/26/23 in all areas
-
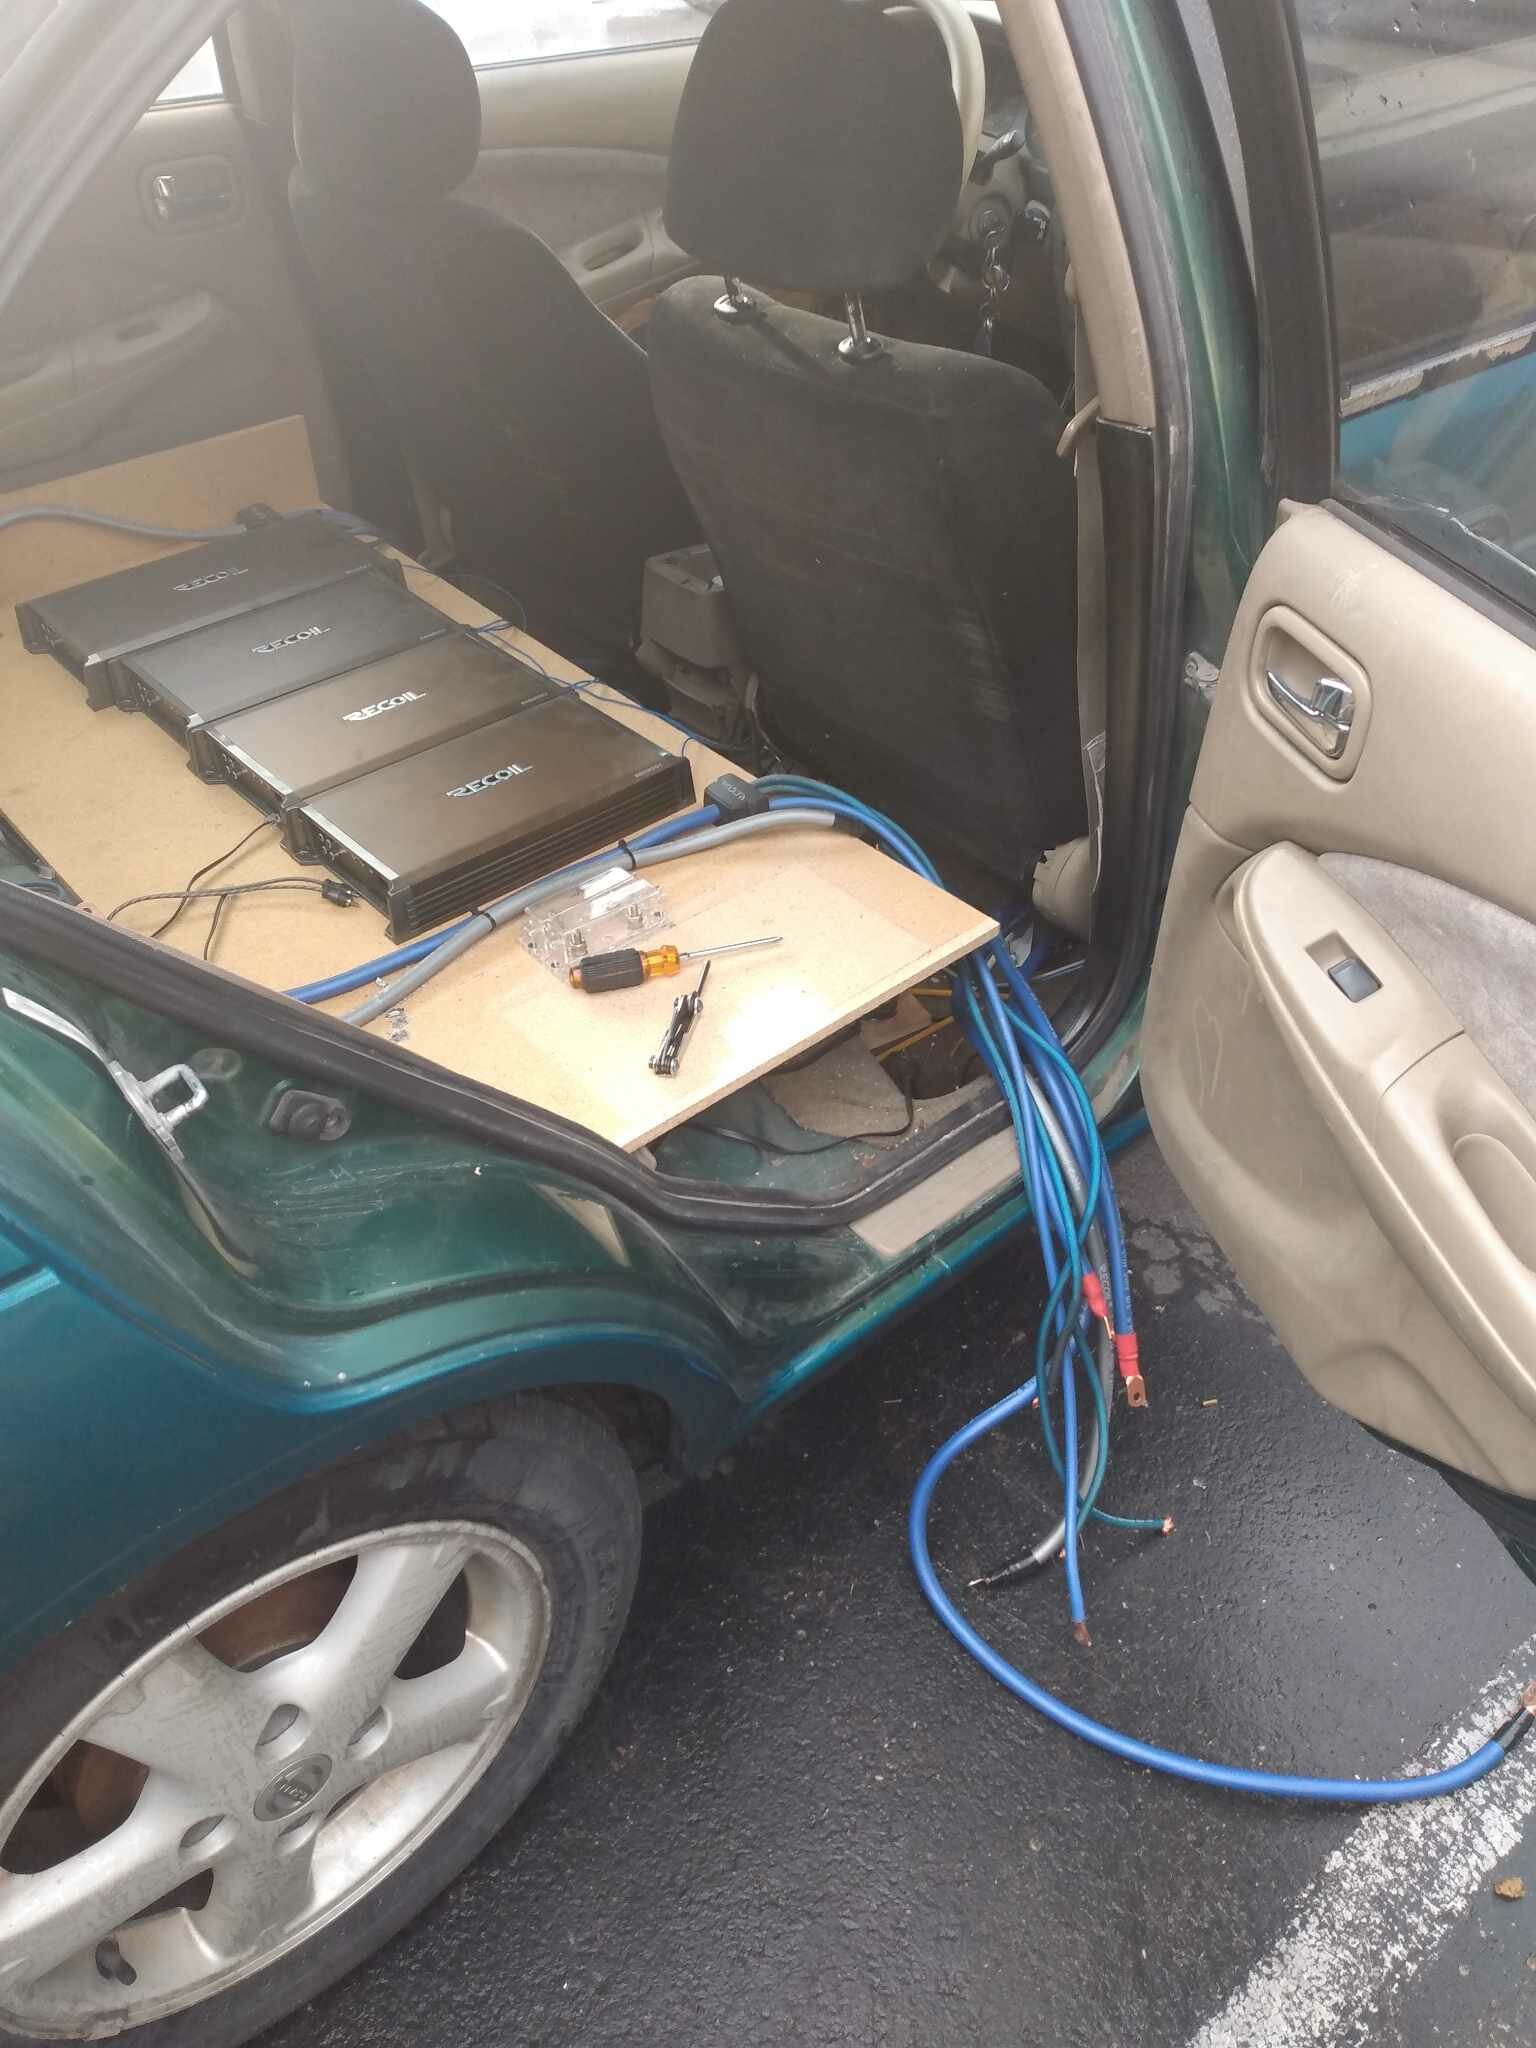
getting close to having the wall done and wired up on 5 of the small amps( swaping to 5x 2500w rms amps in the near future , still need to seal it to the b pillars and other work but i got plenty of time before the next comp
 3 points
 -
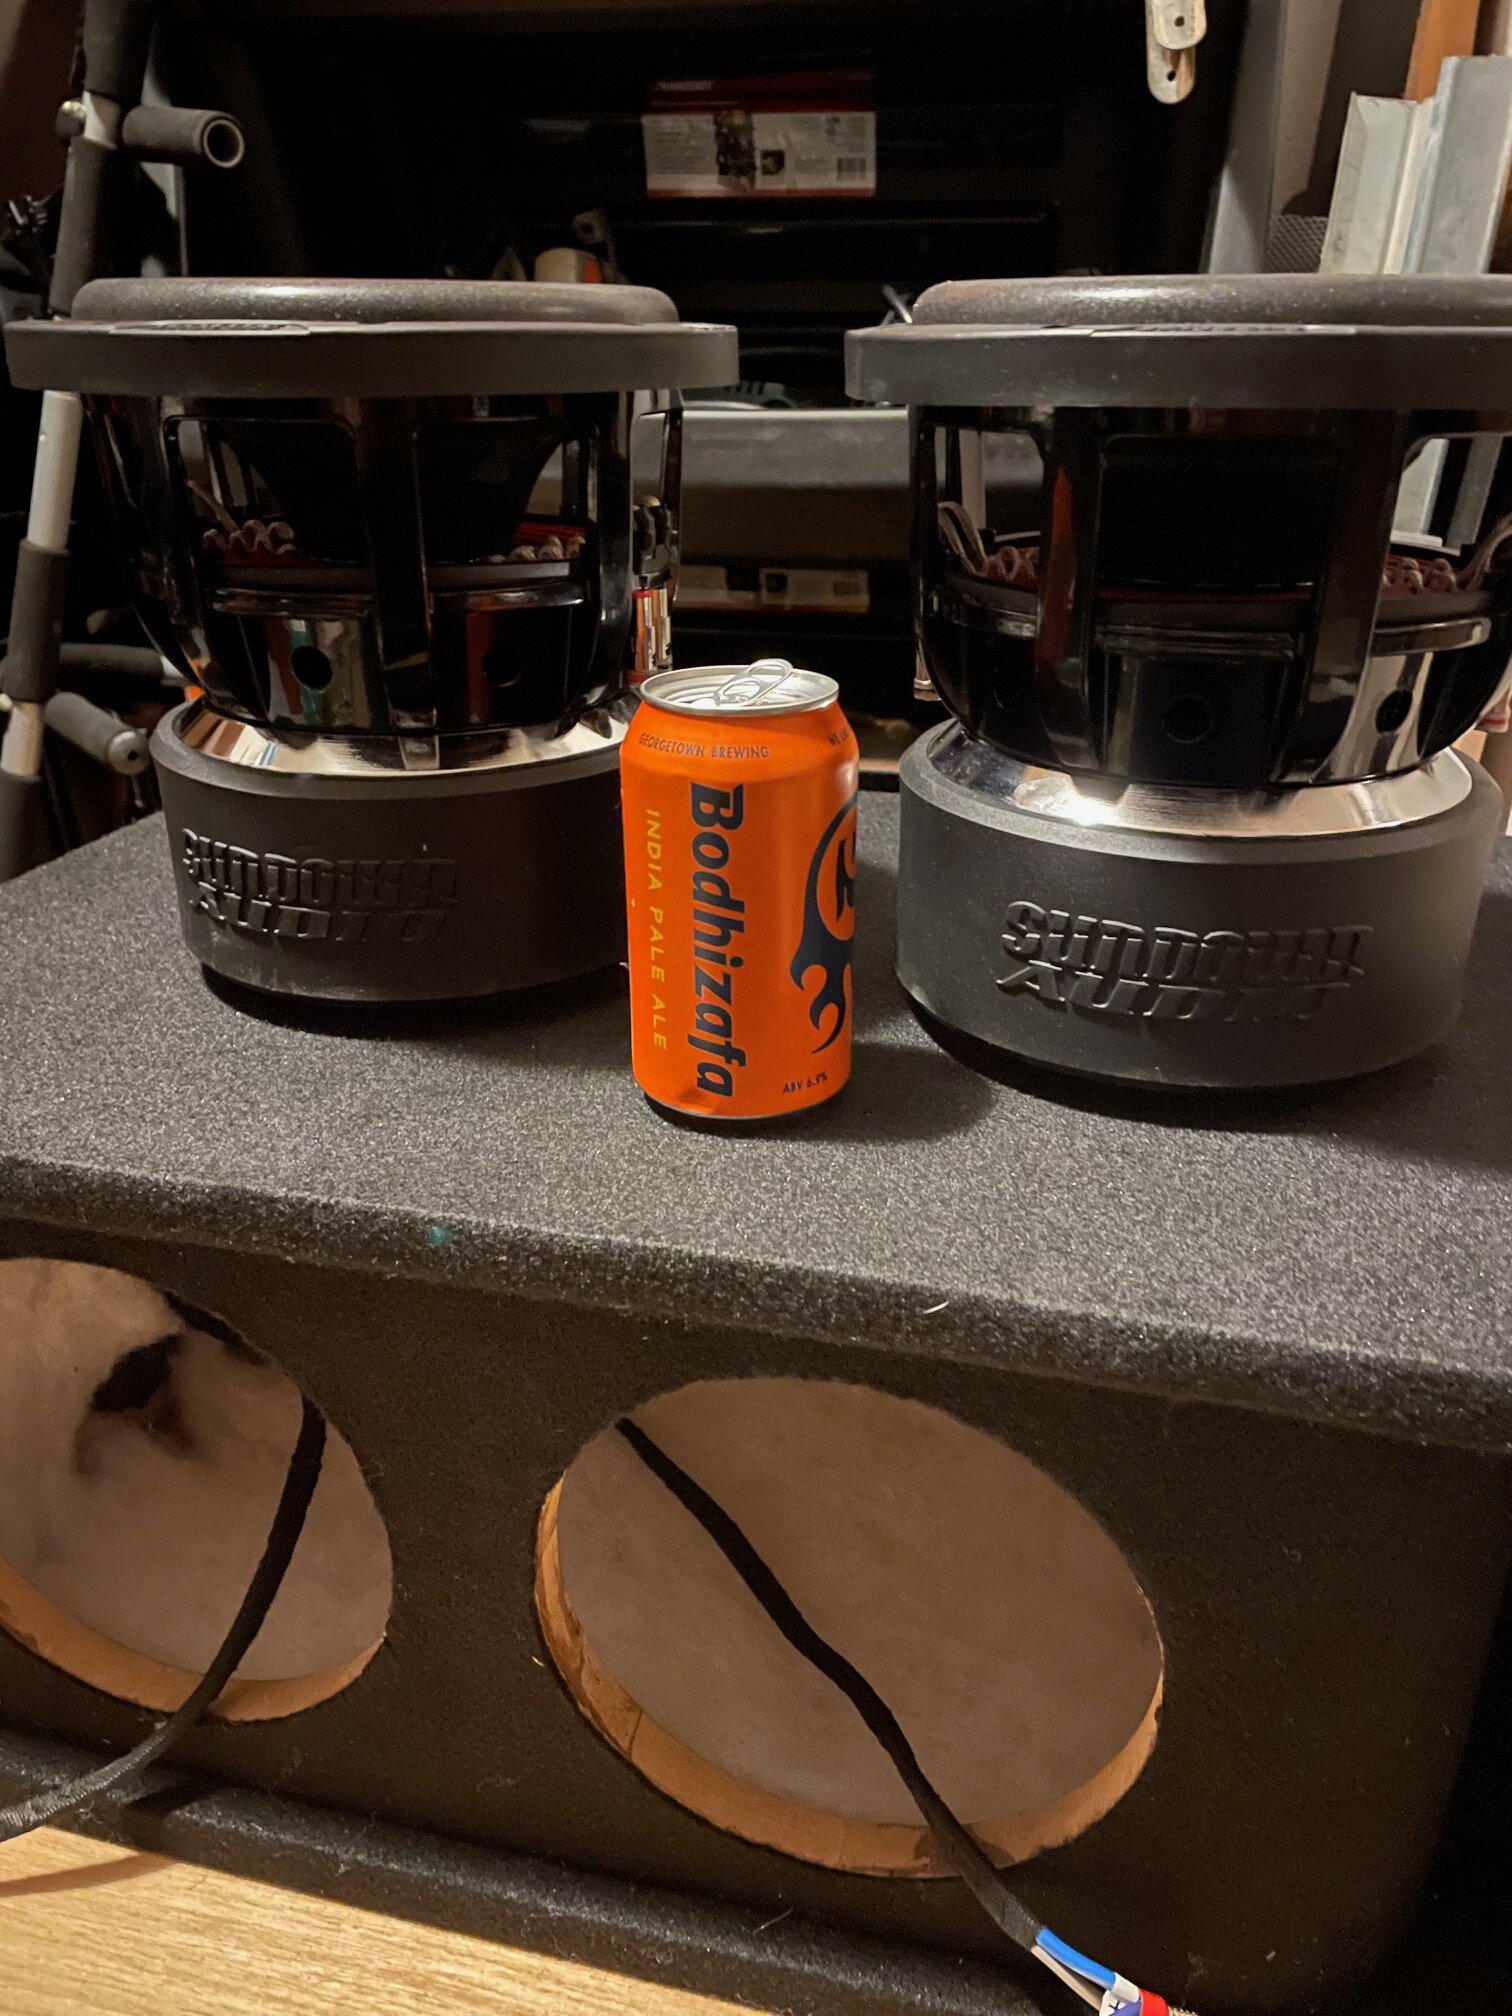
progress is slow but i got the port cut and in today for testing and 3 out of the 5 sub amps installed its enough for some low power testing /checking making sure the enclosure doesnt have anything loose etc hopefully ill have enough time this weekend to get all 5 wired up and playing3 points
-
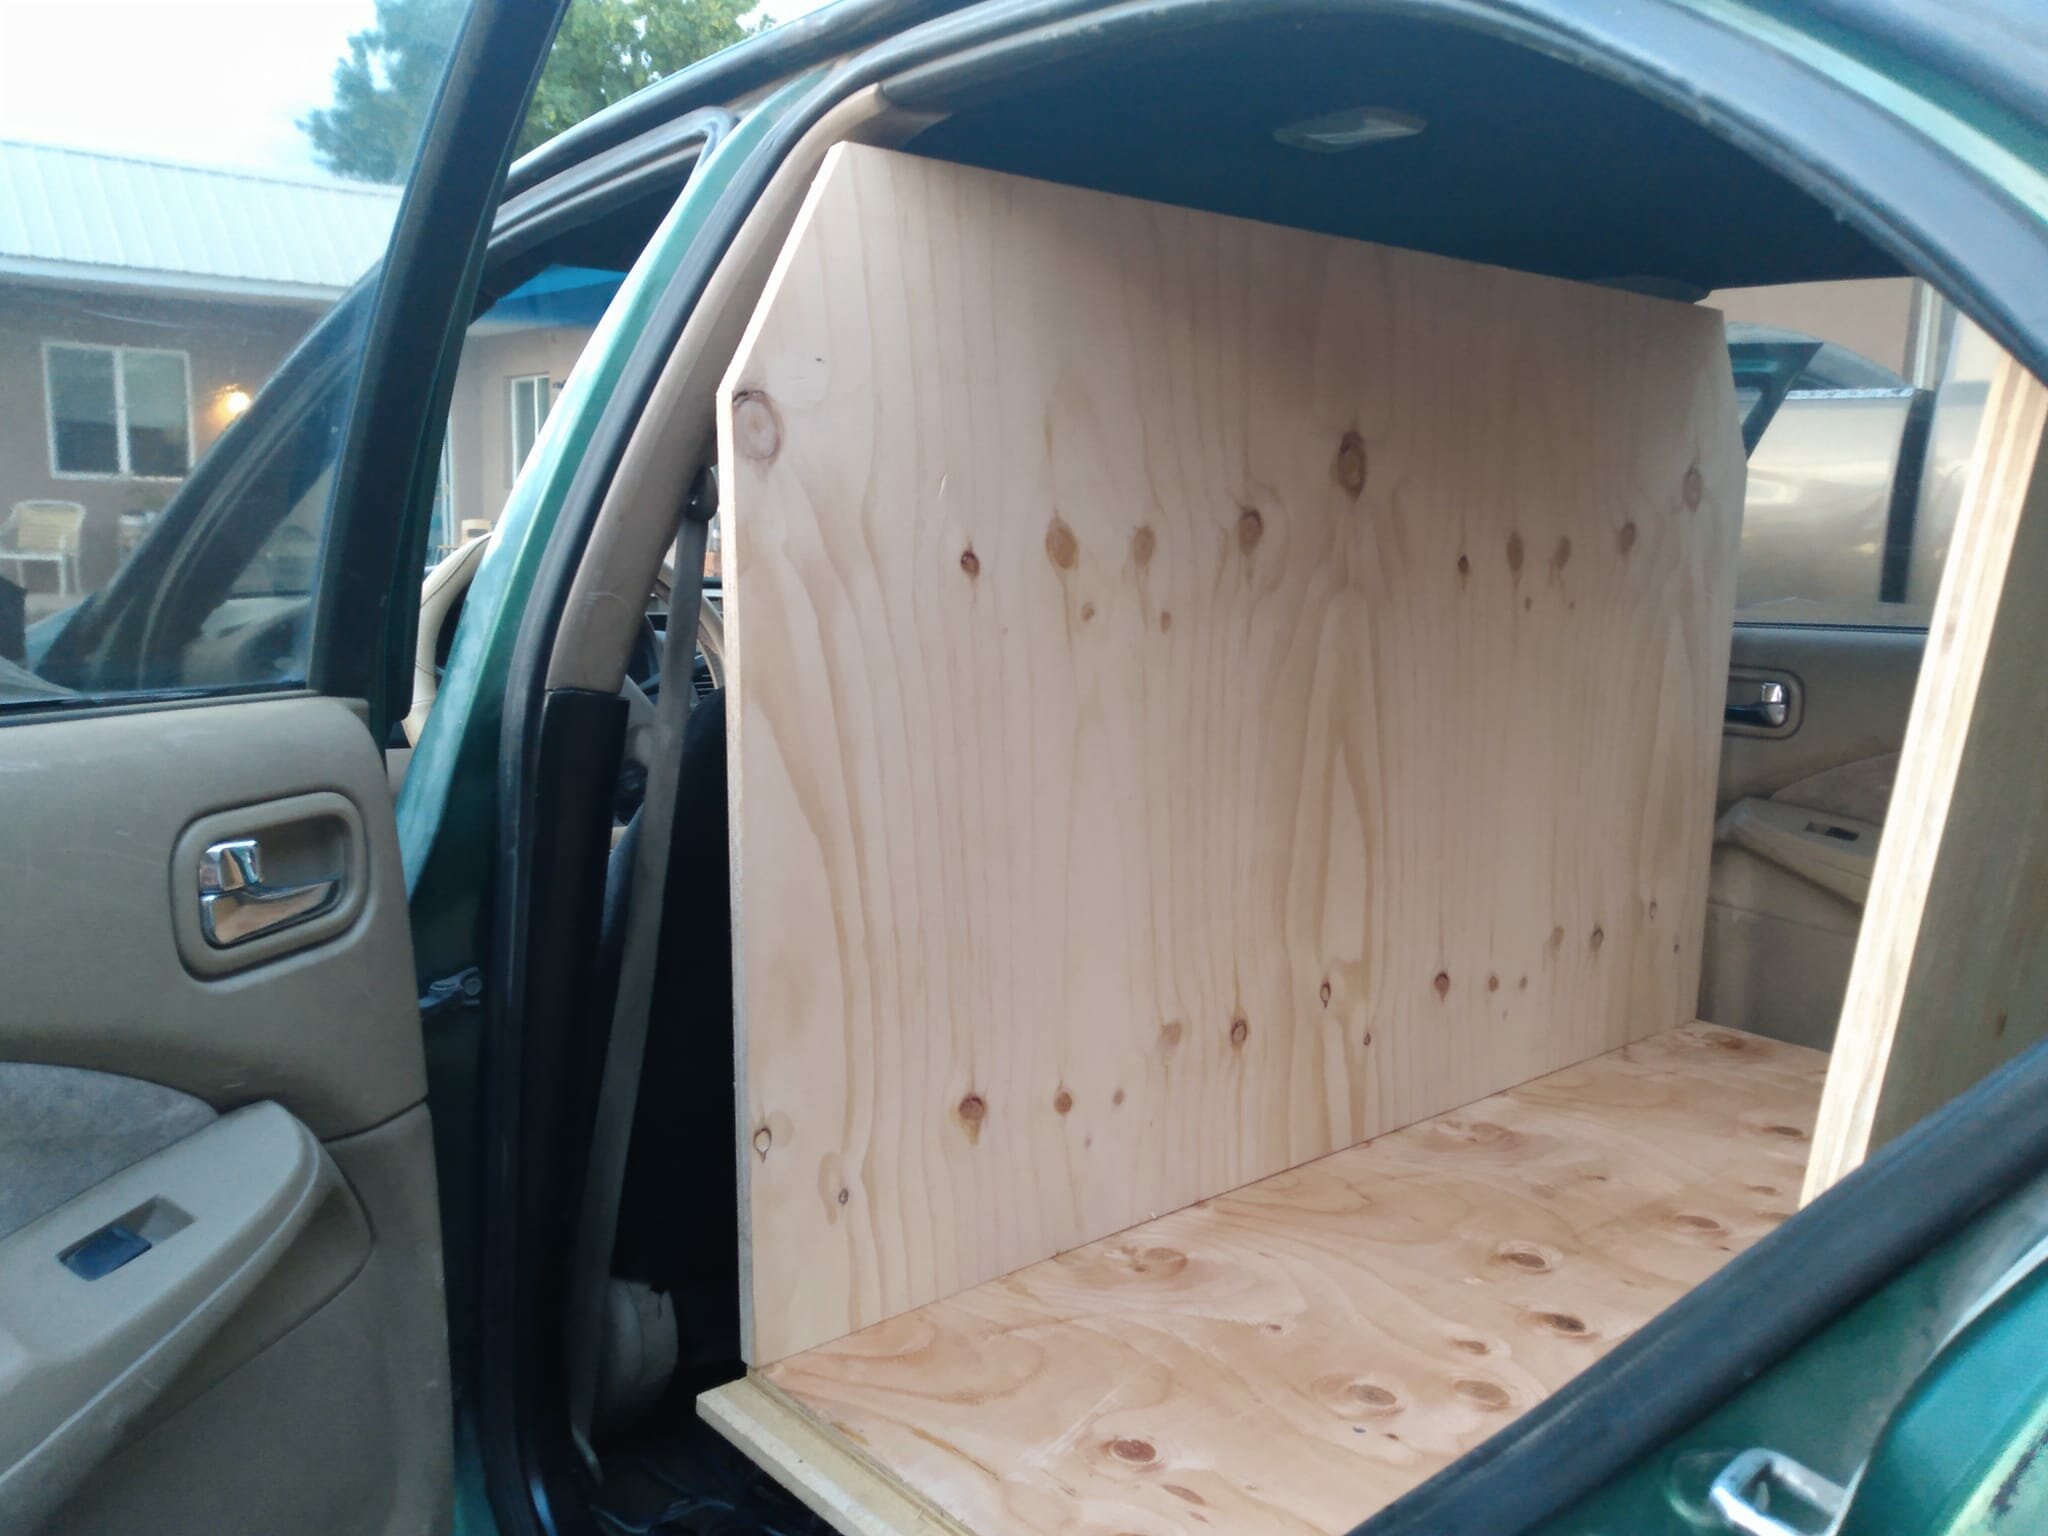
closer , waiting ont he first 2 baffle layers to dry and then i can glue this one to those and install it for real
2 points
-
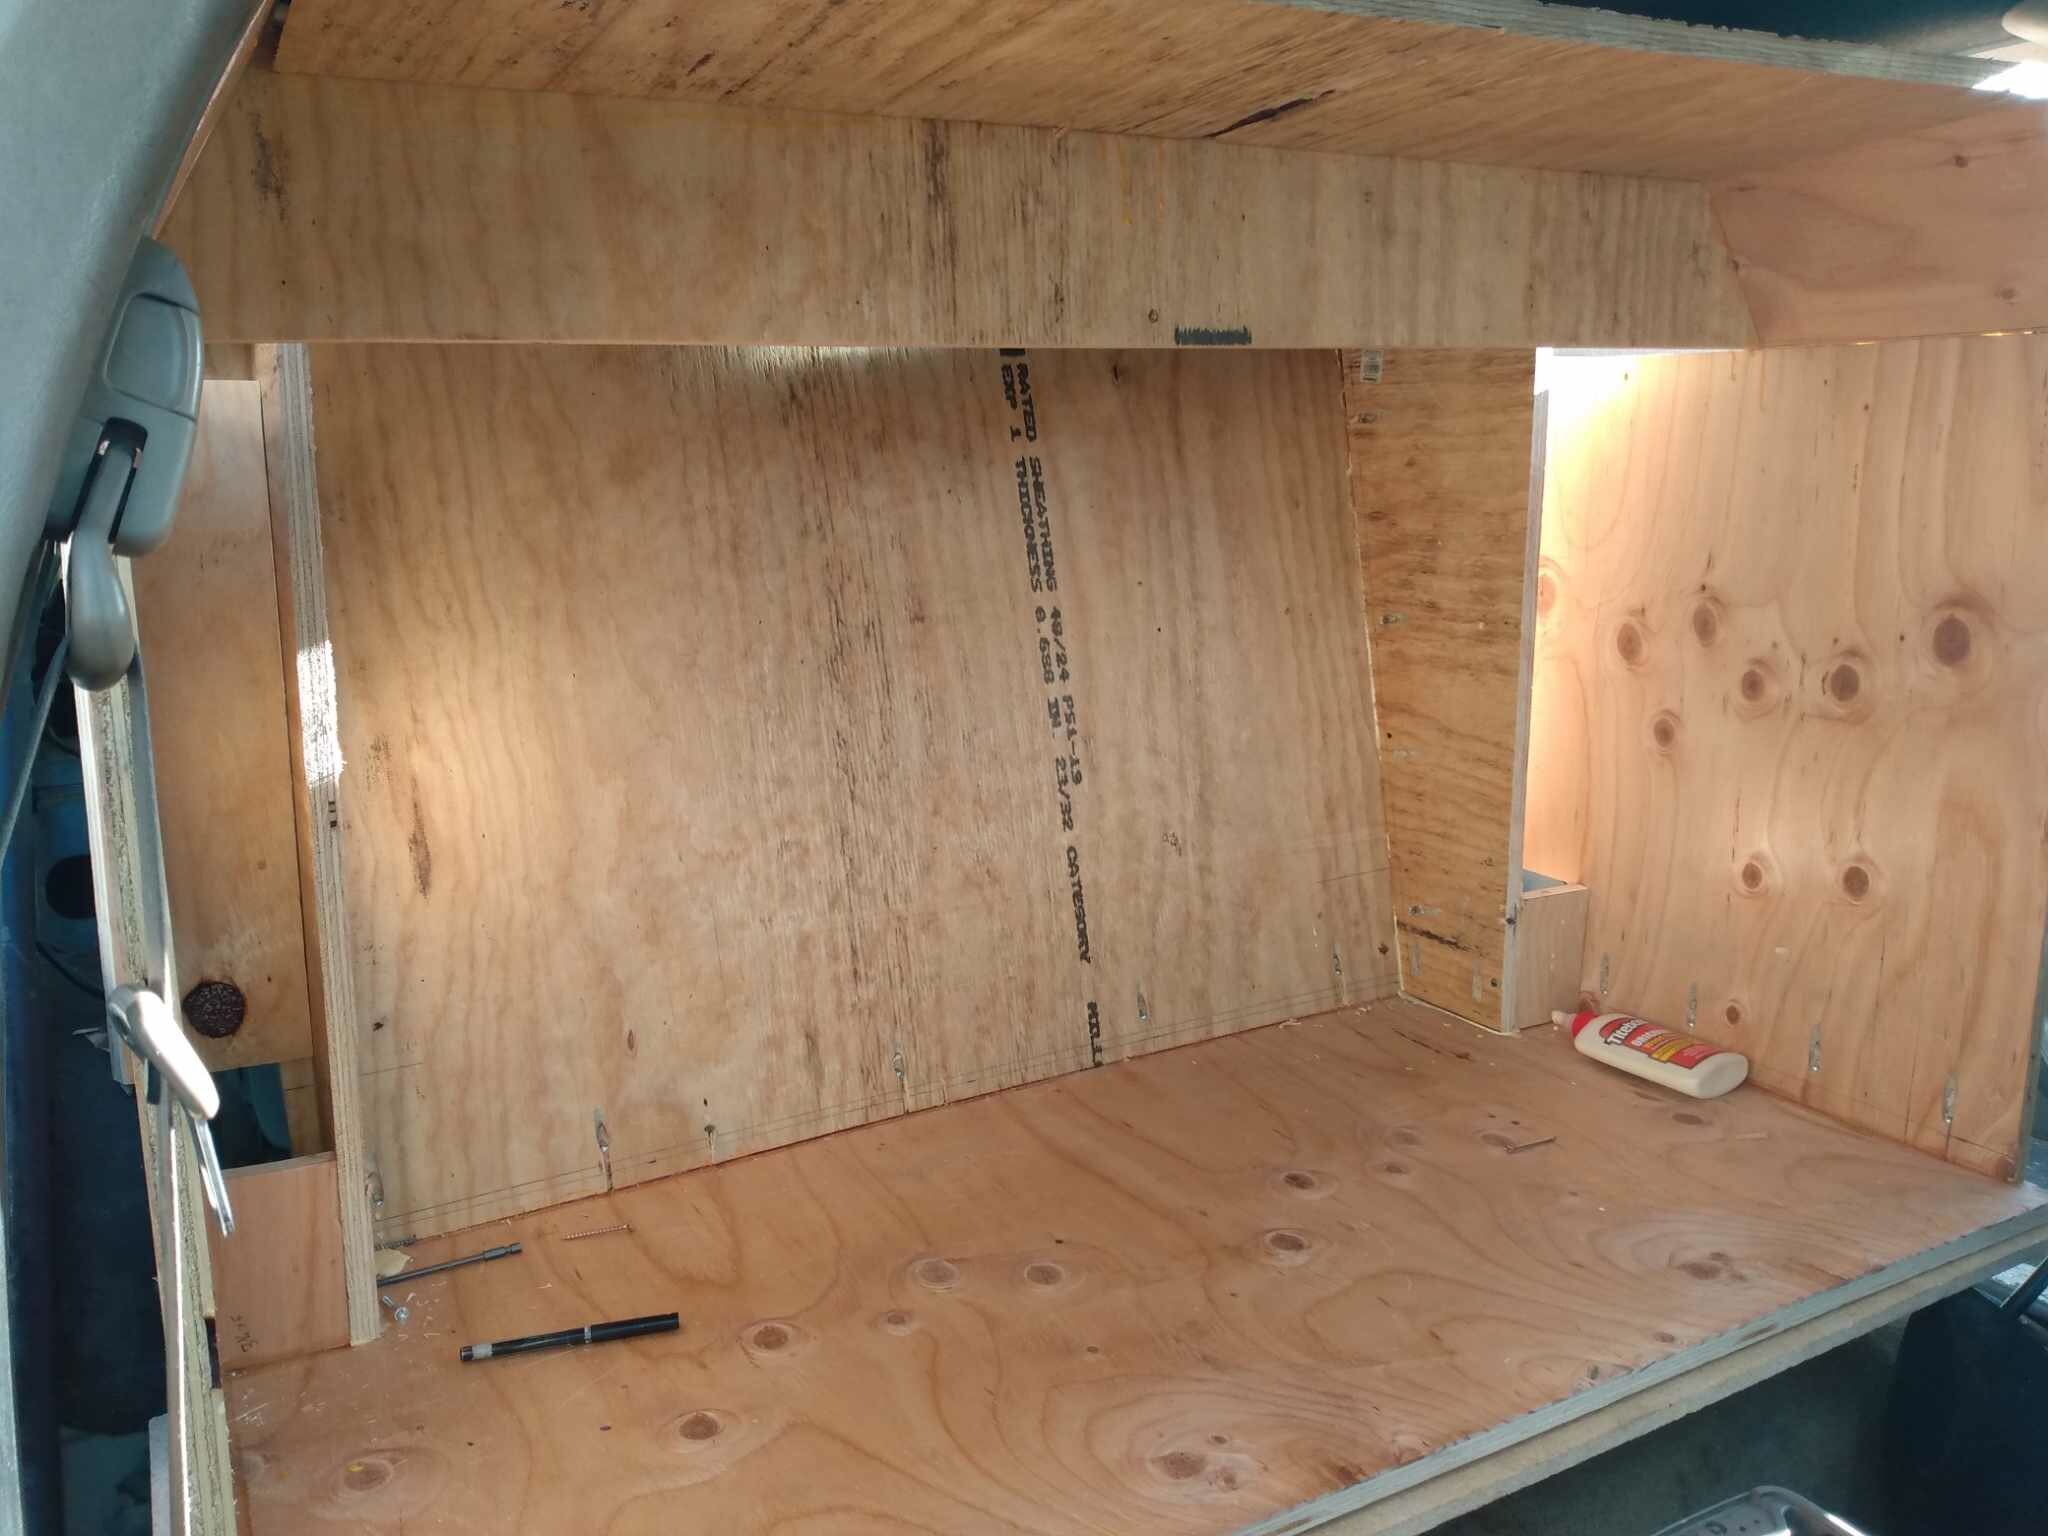
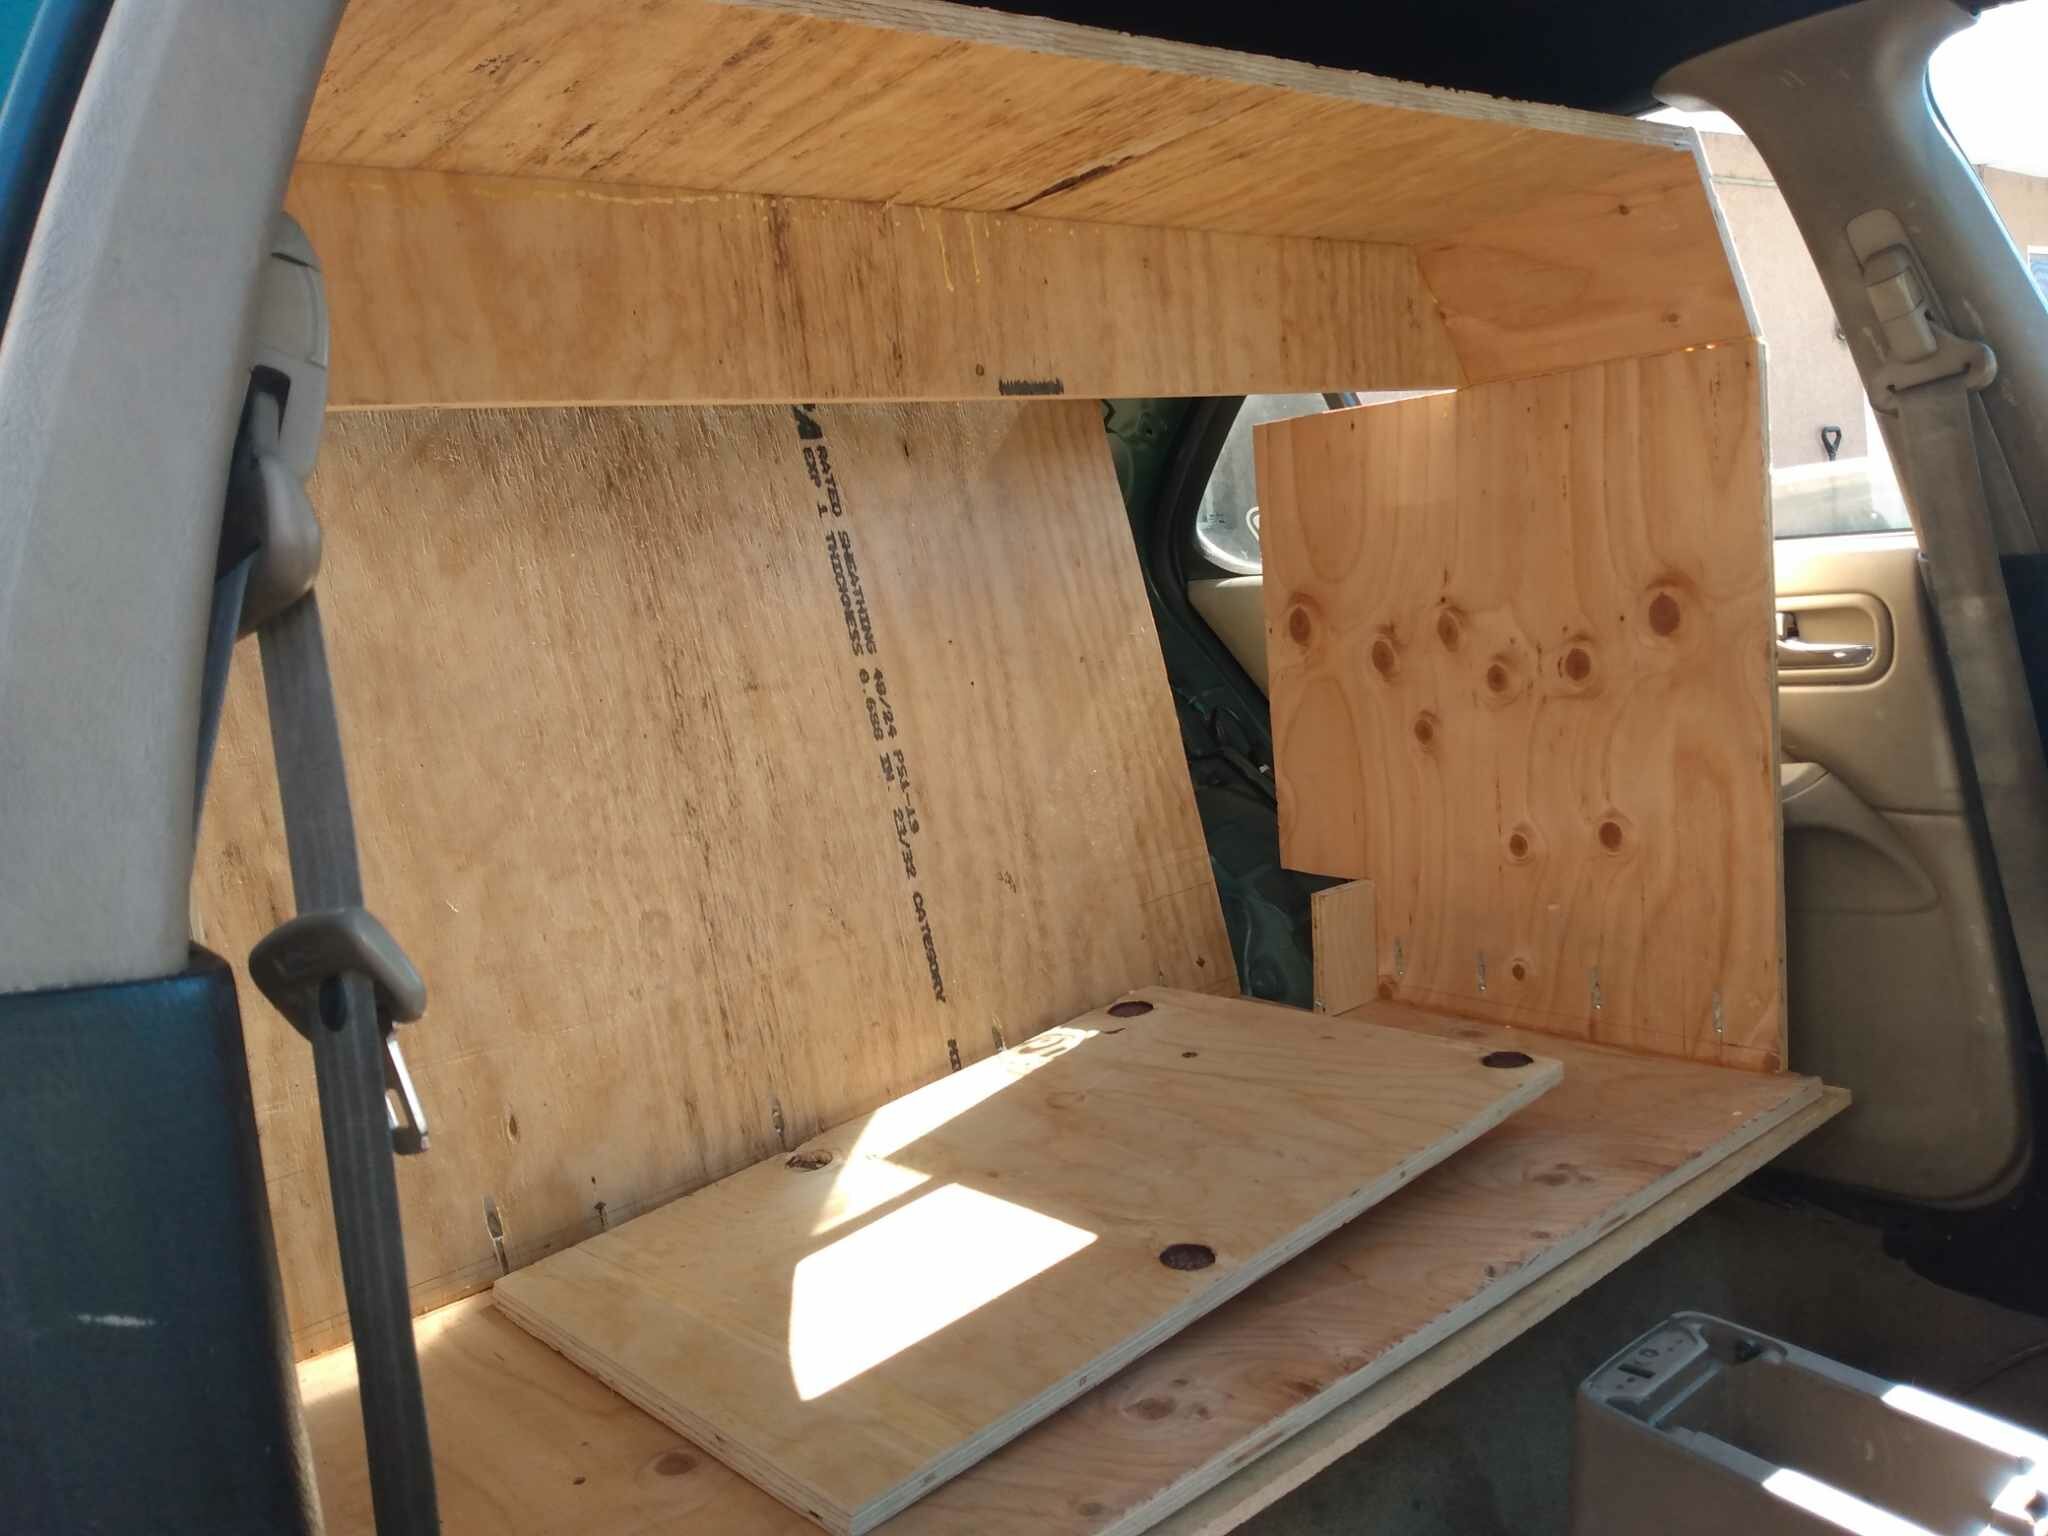
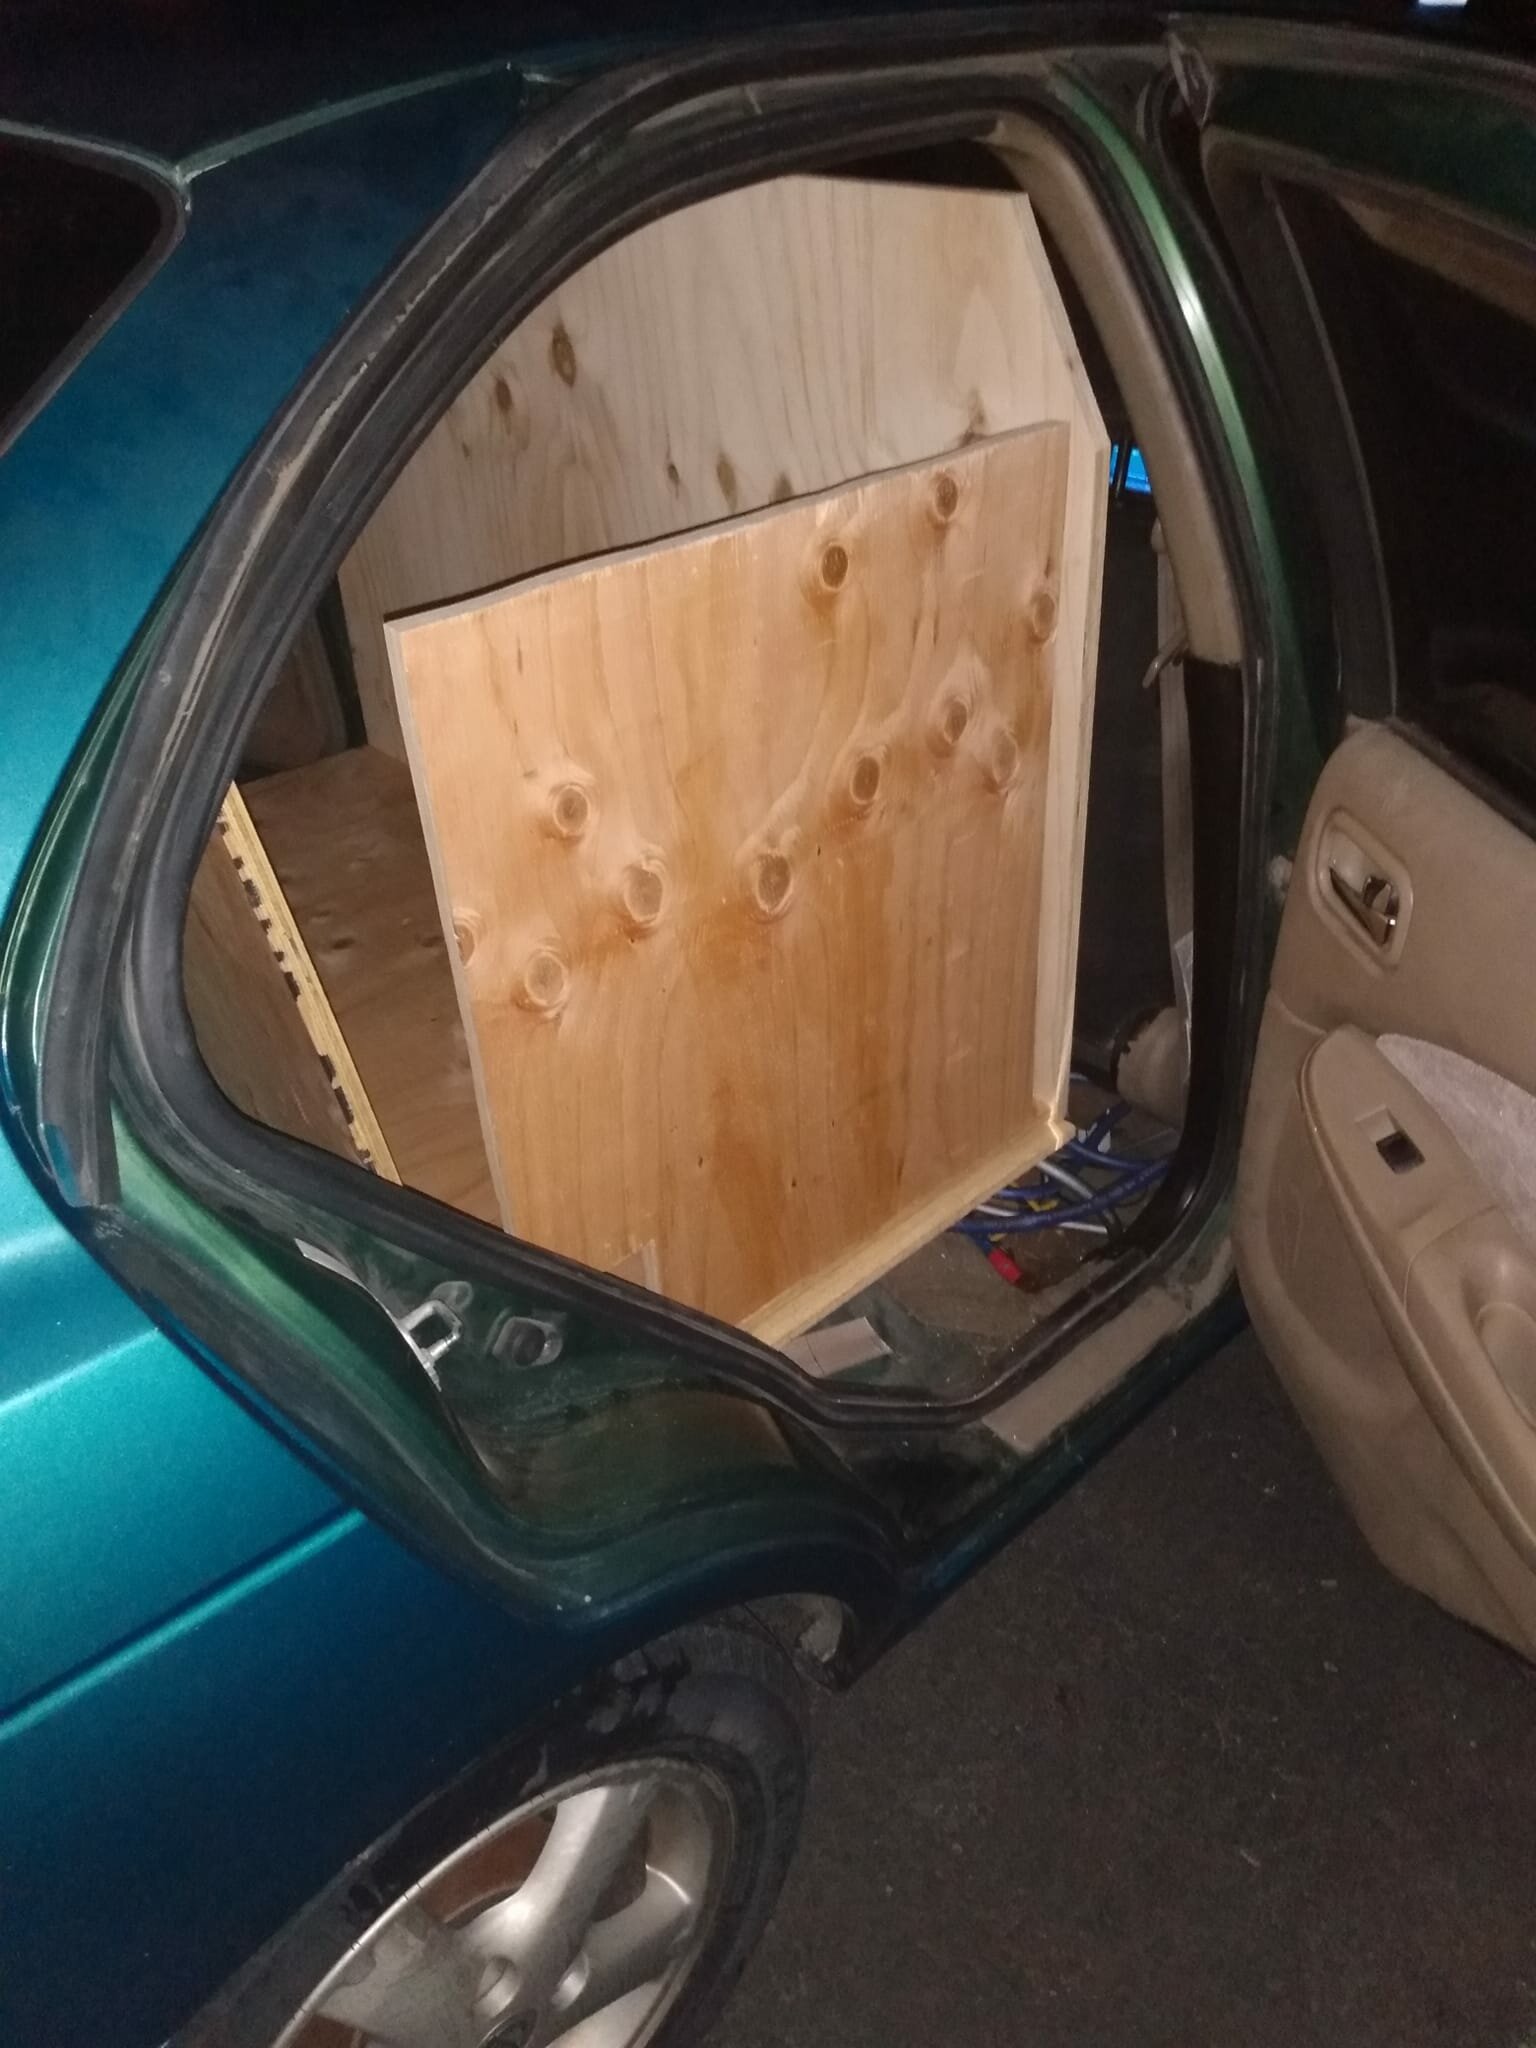
getting the inner shell done tonight
2 points
-
2 points
-
Who remembers when I use to post my "REALTIME" videos? Well they are coming back2 points
-
getting older sure does suck2 points
-
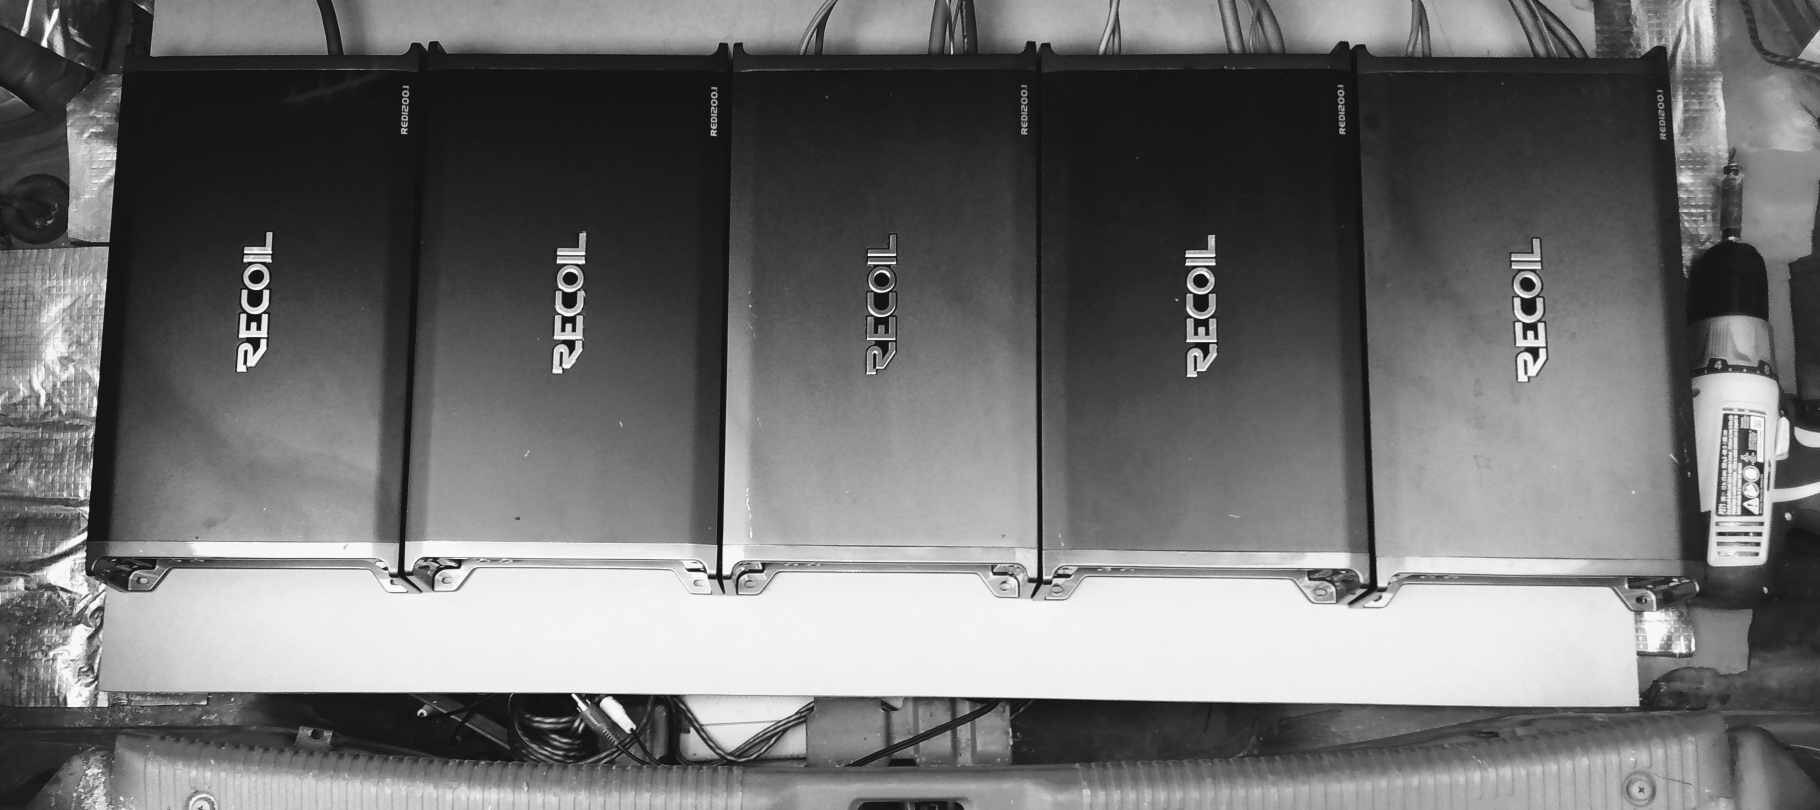
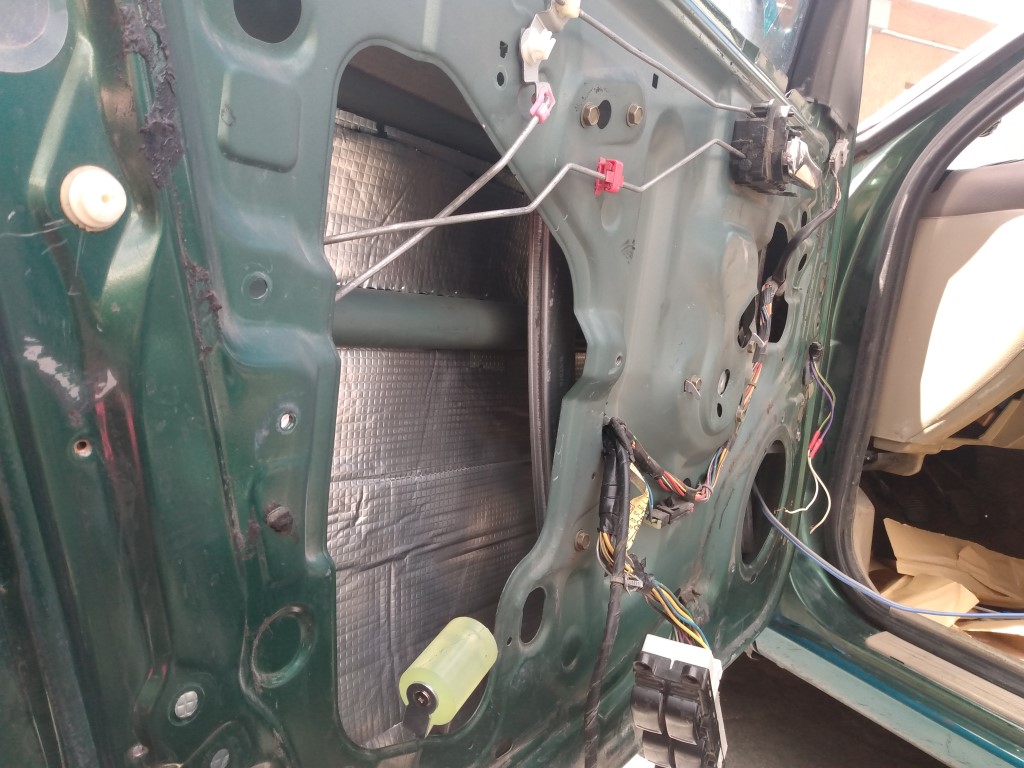
recoil has new amps coming amp ill be getting 3x of the 2500's to replace the 1200's , i also did start to deaden the doors got the driver side door outer skin done today , hoping to get one door done each day , i think im going to get some 150 mil stuff to do the inner panel with instead of using the 394mil stuff on that as well
2 points
-
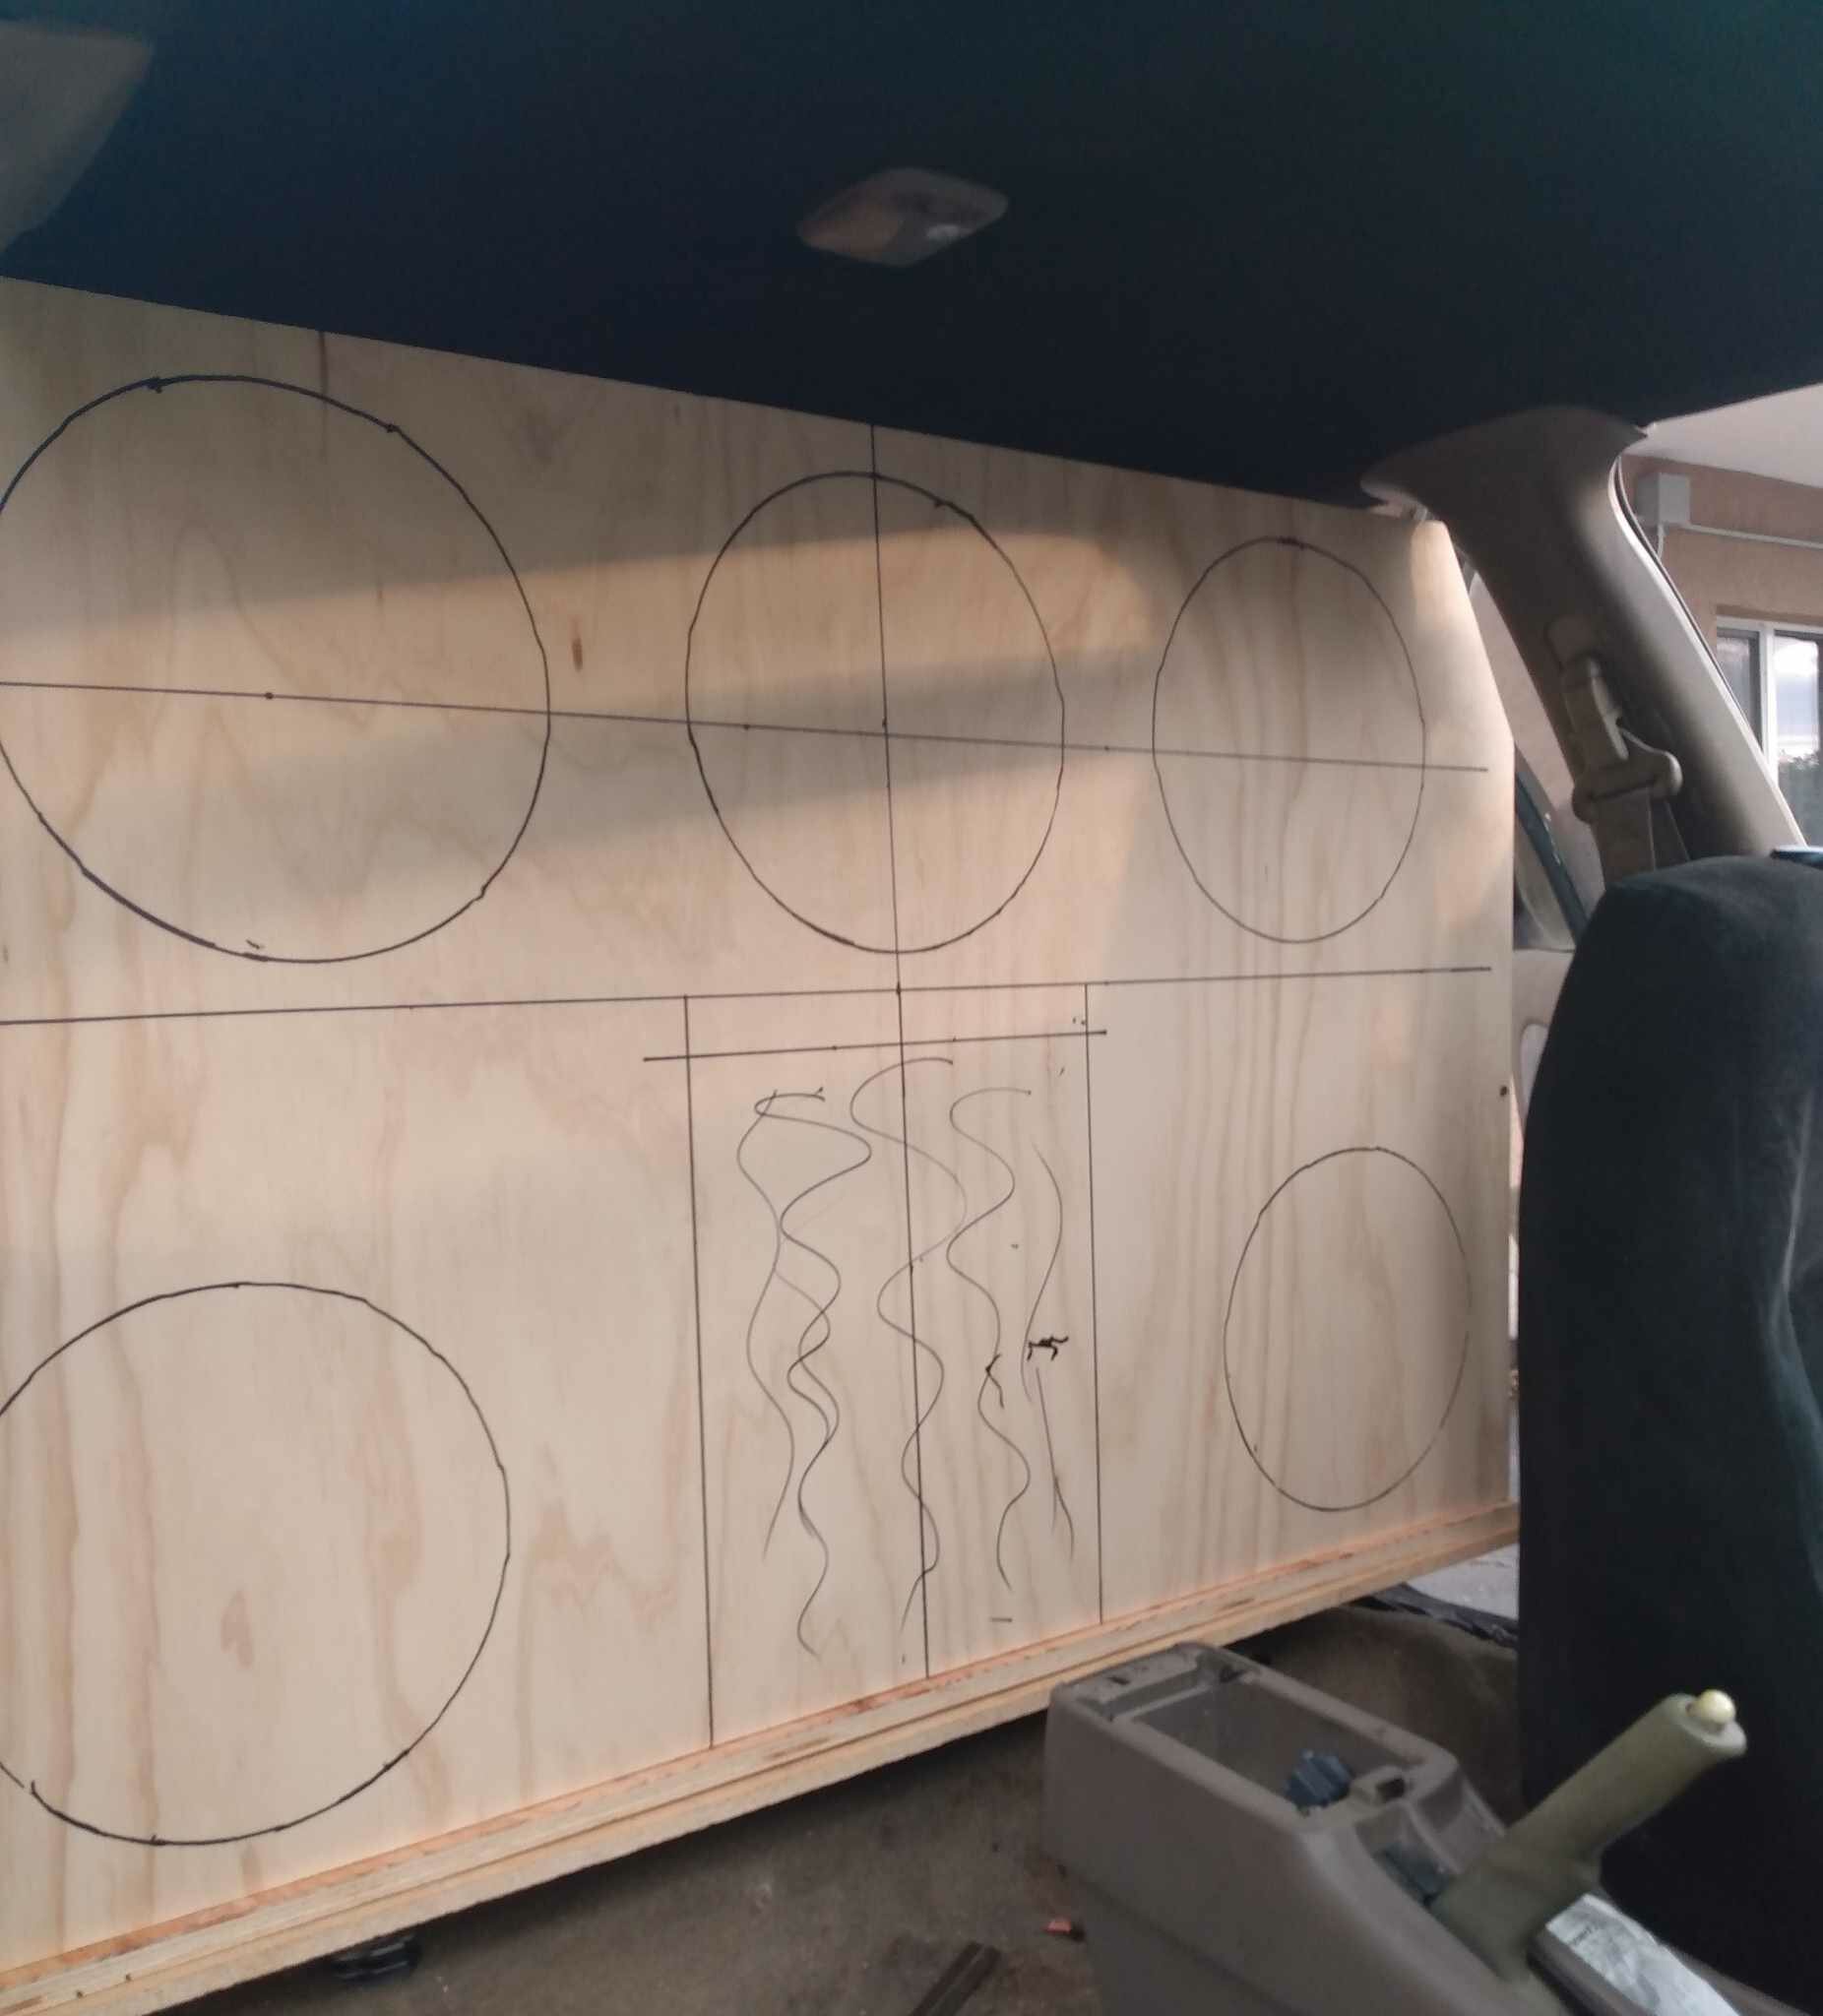
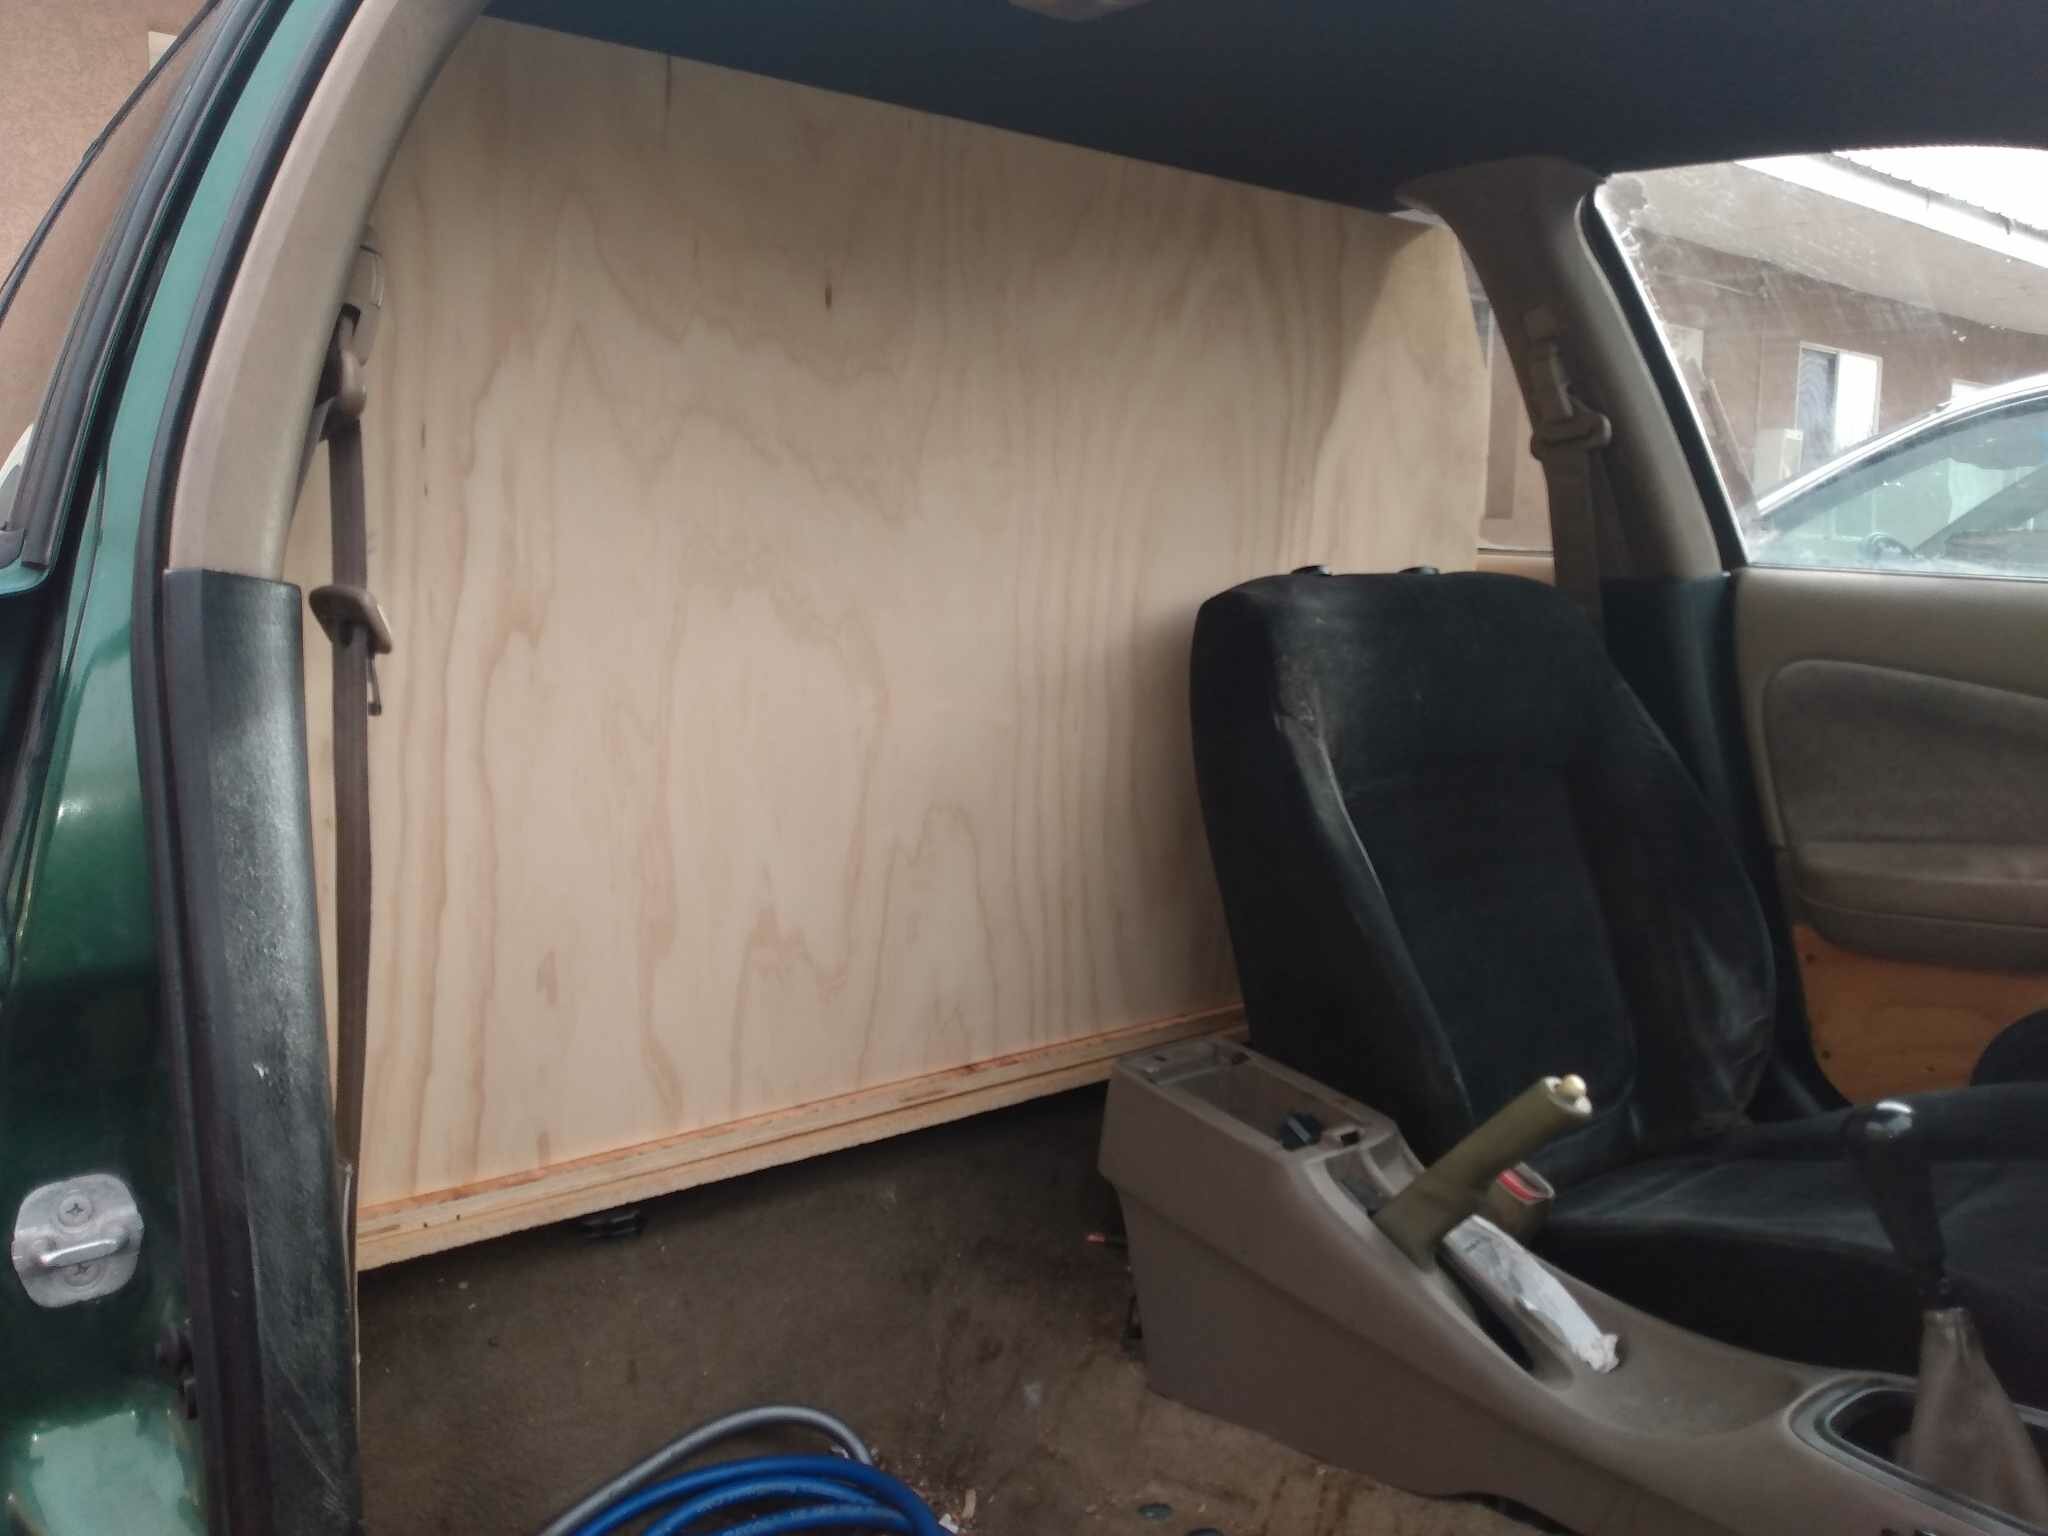
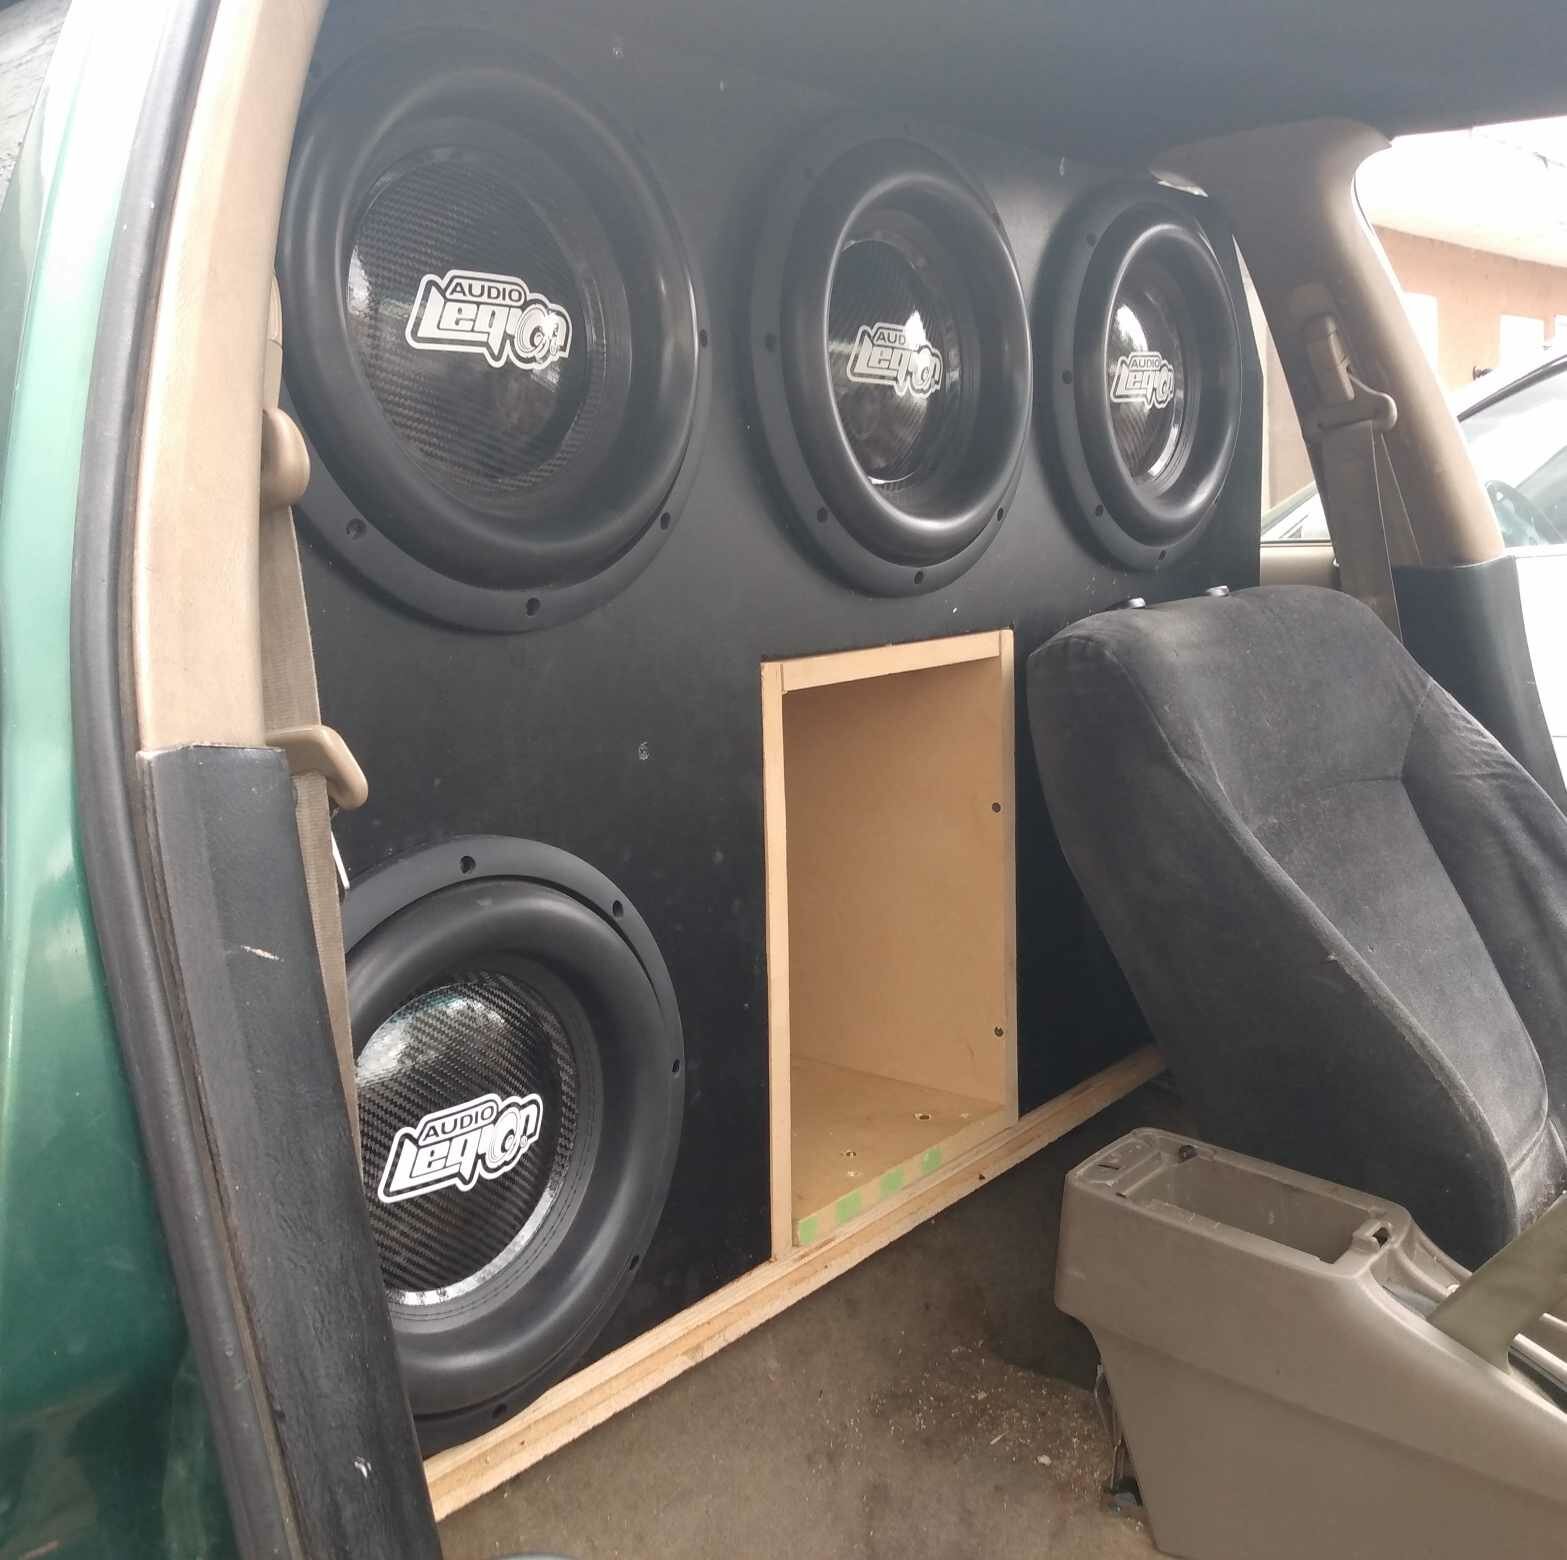
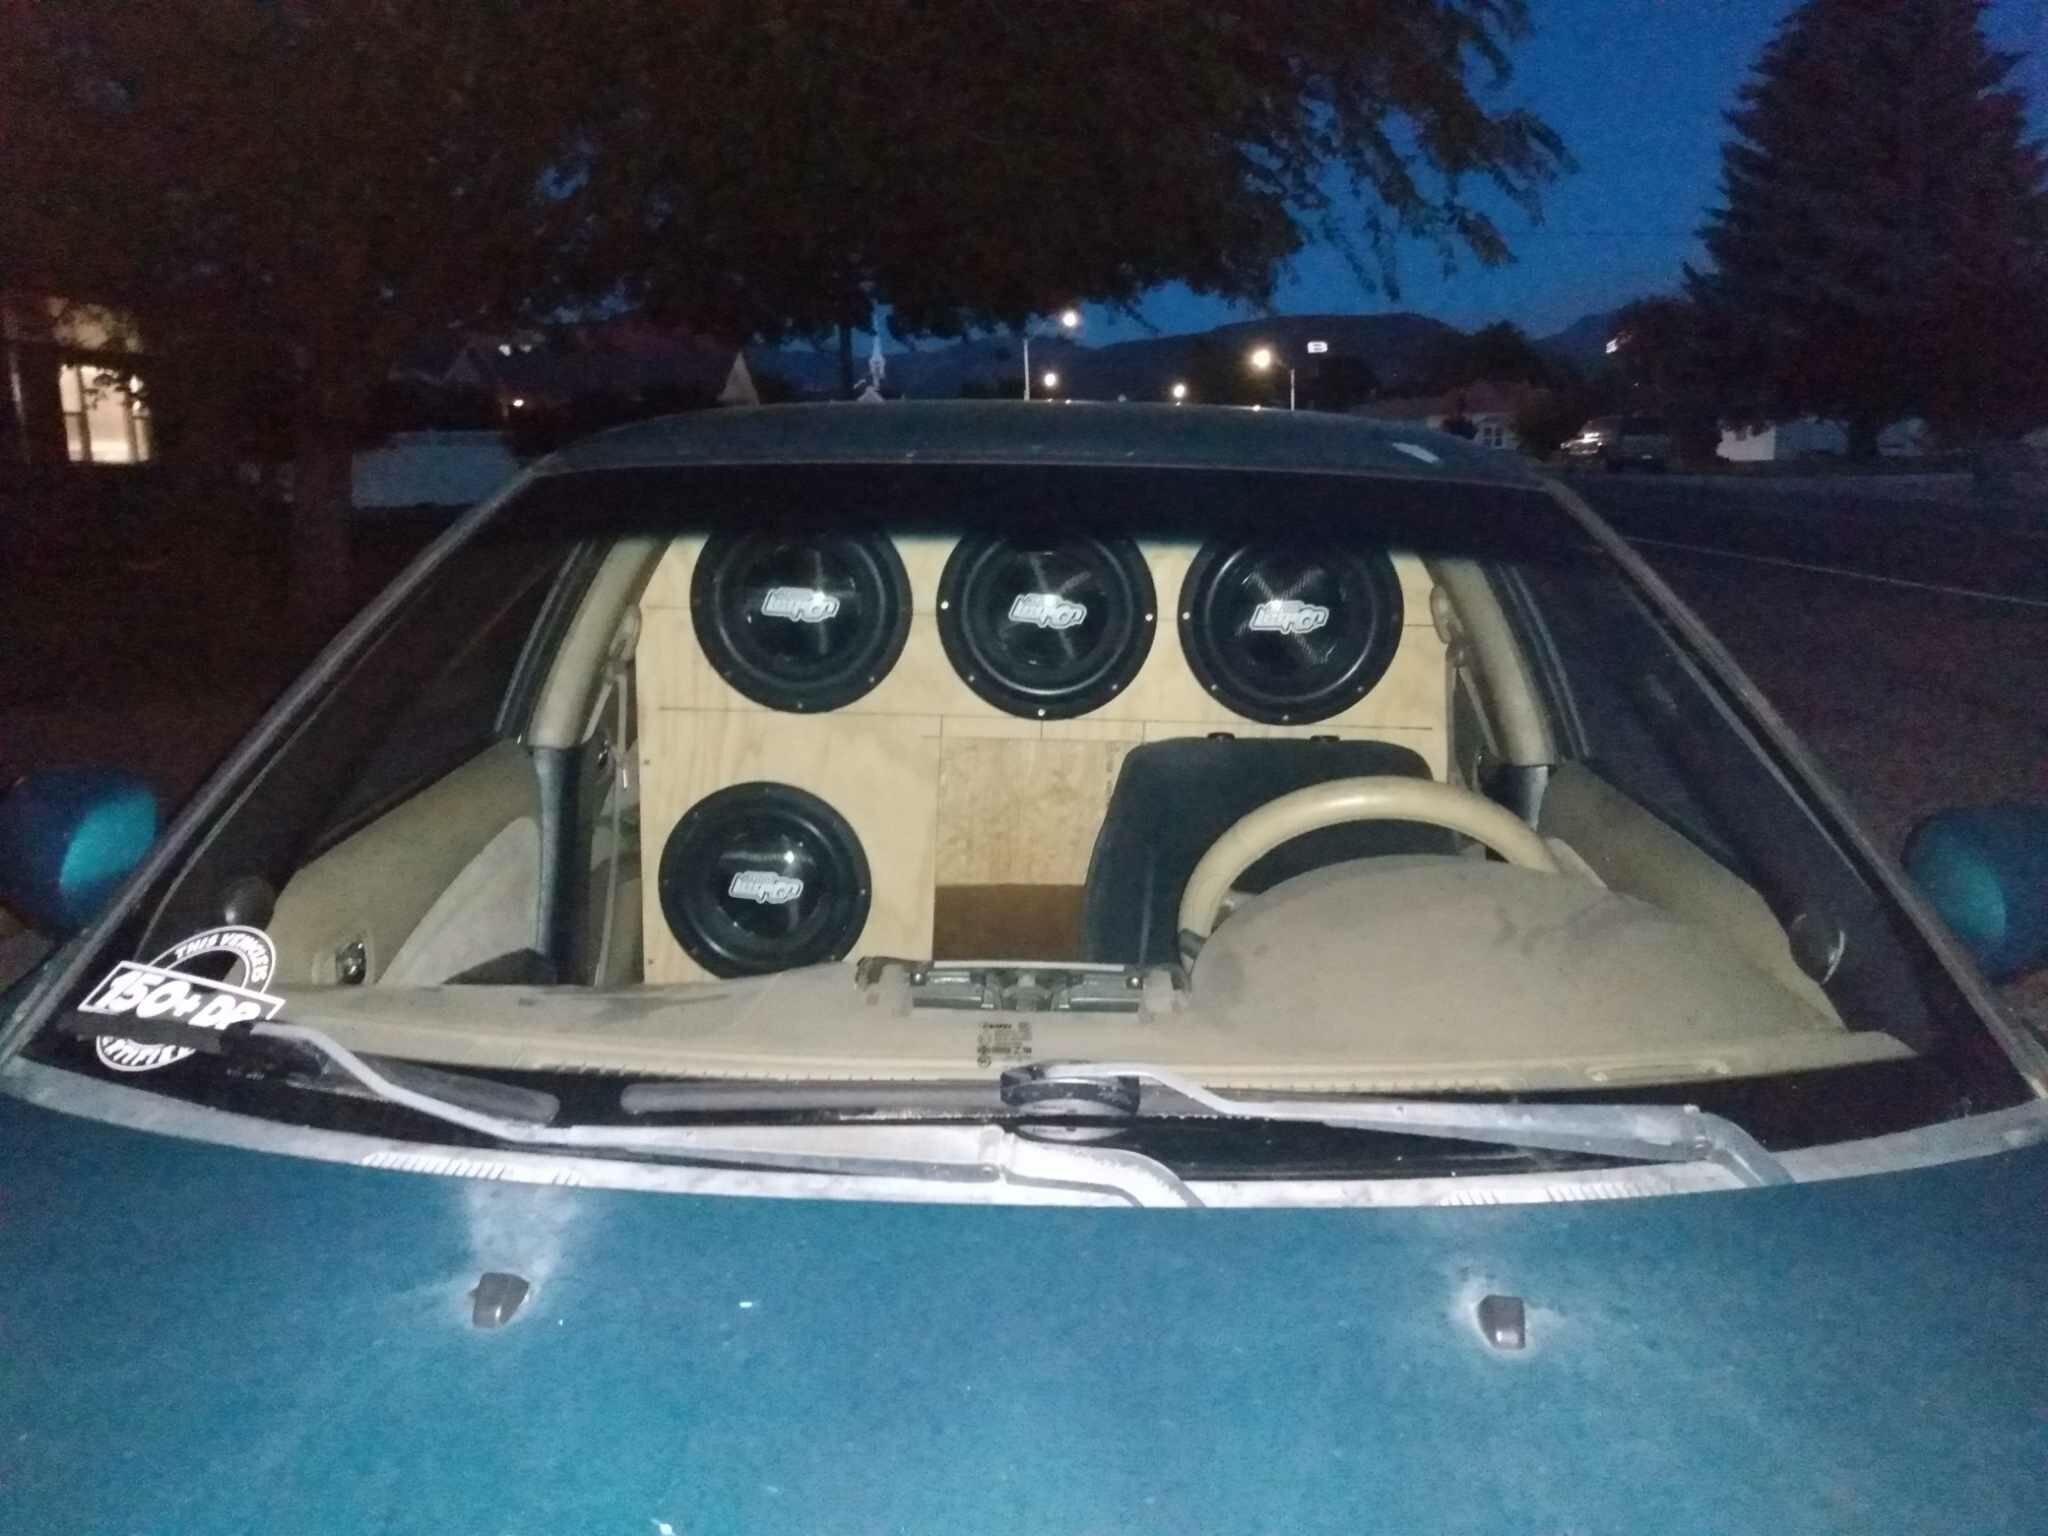
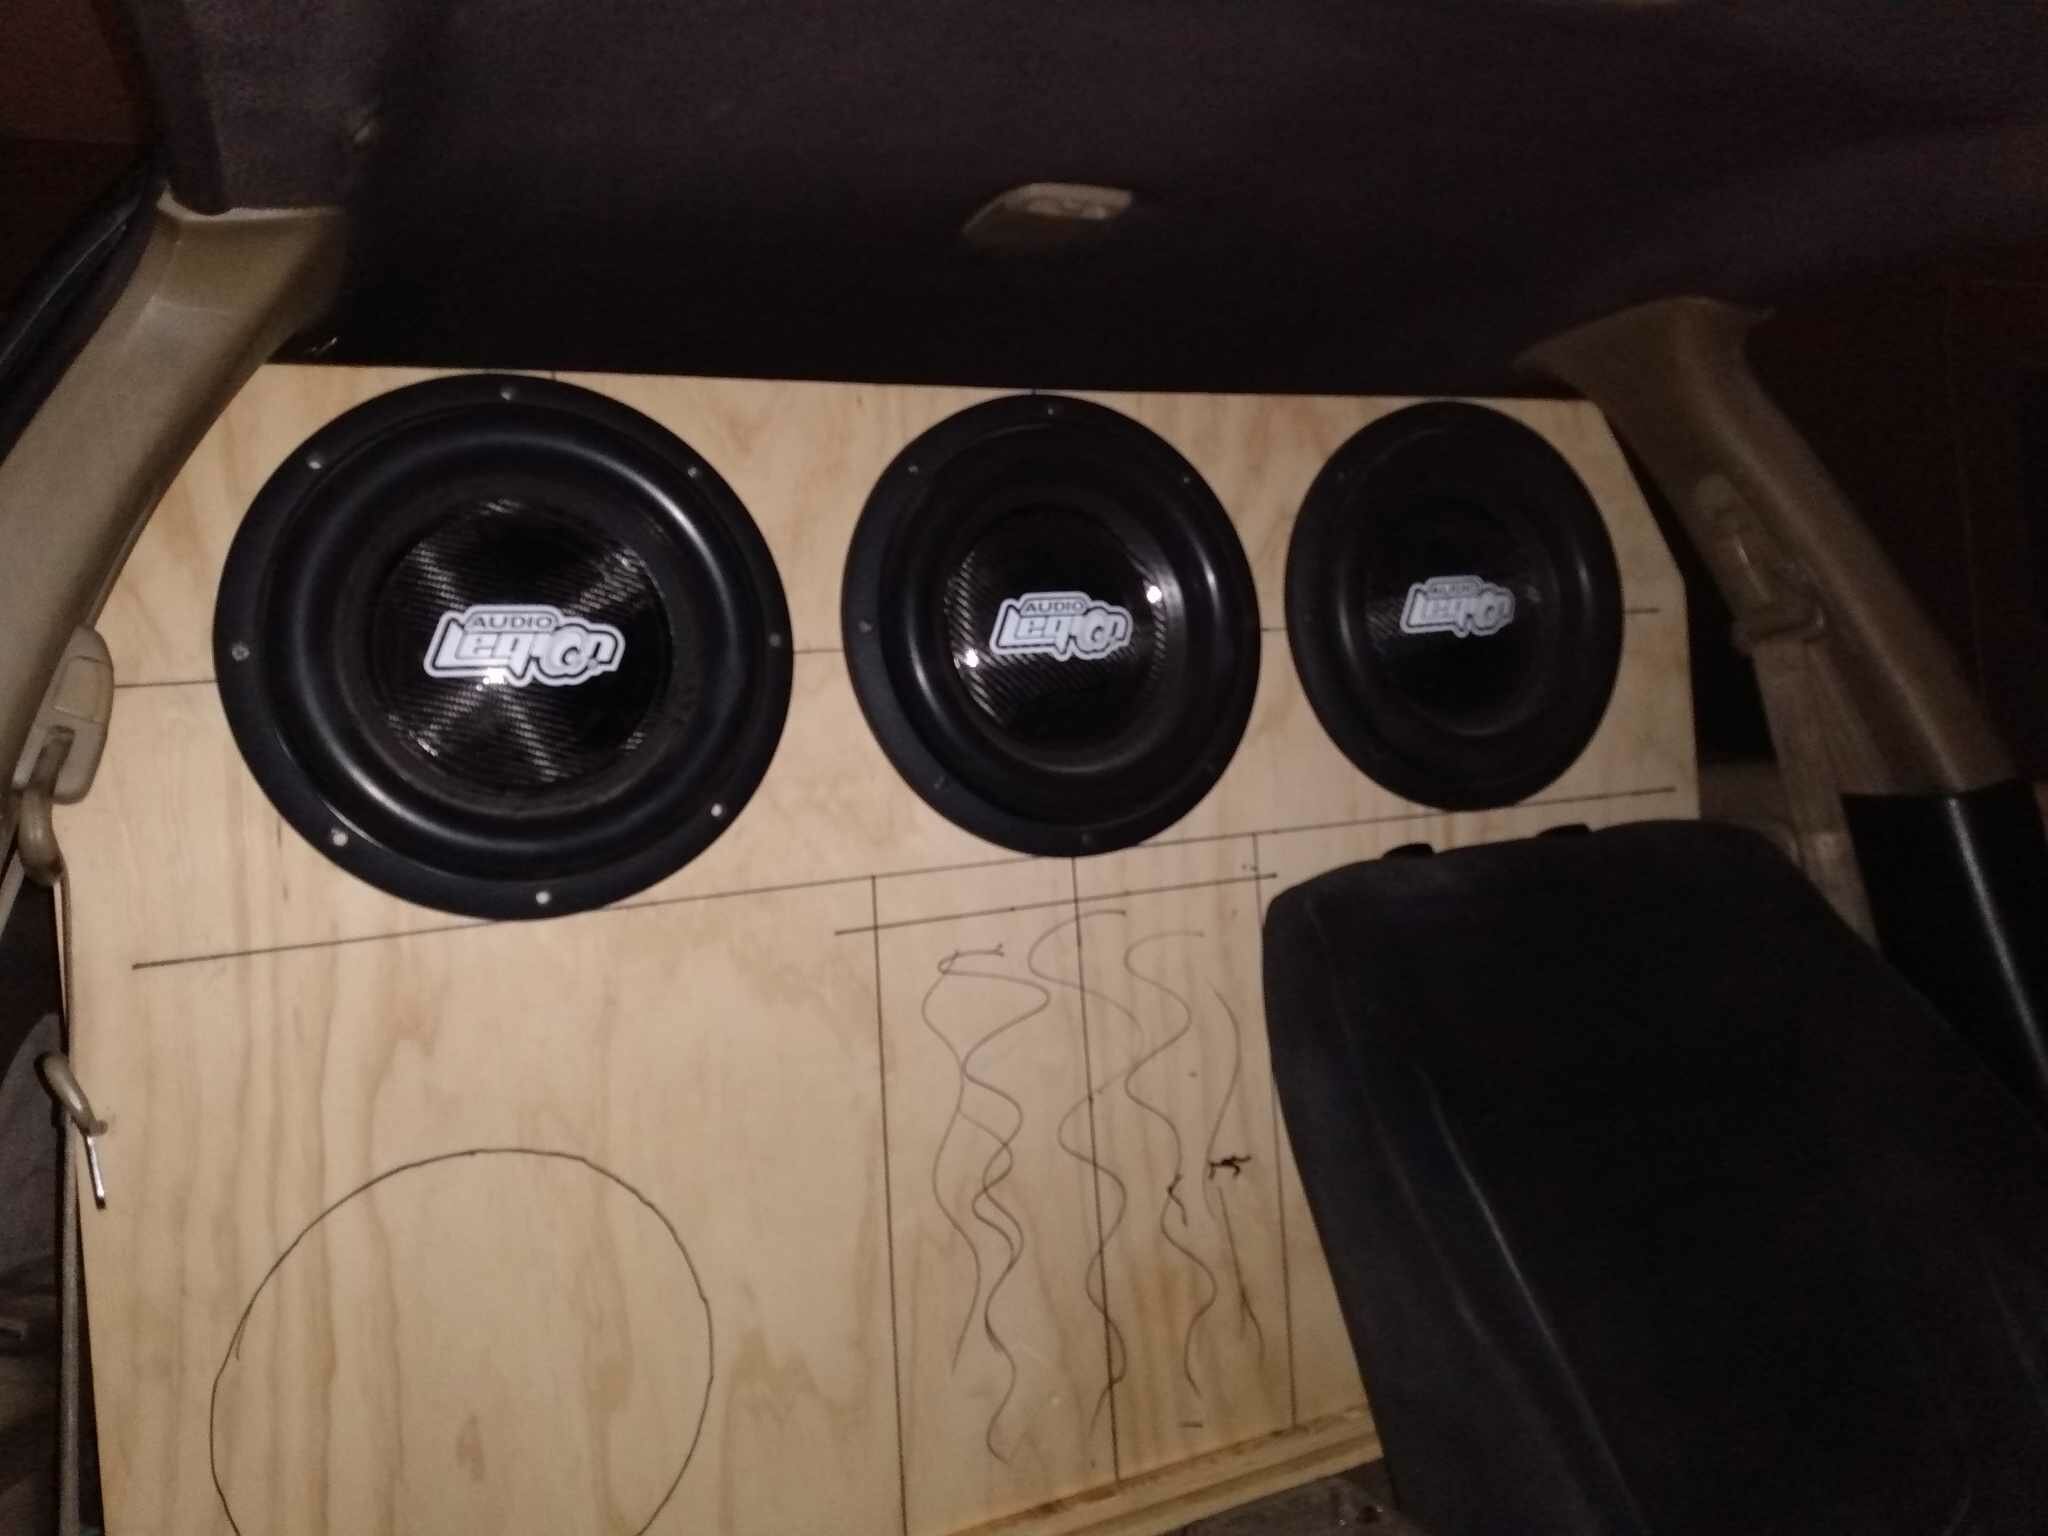
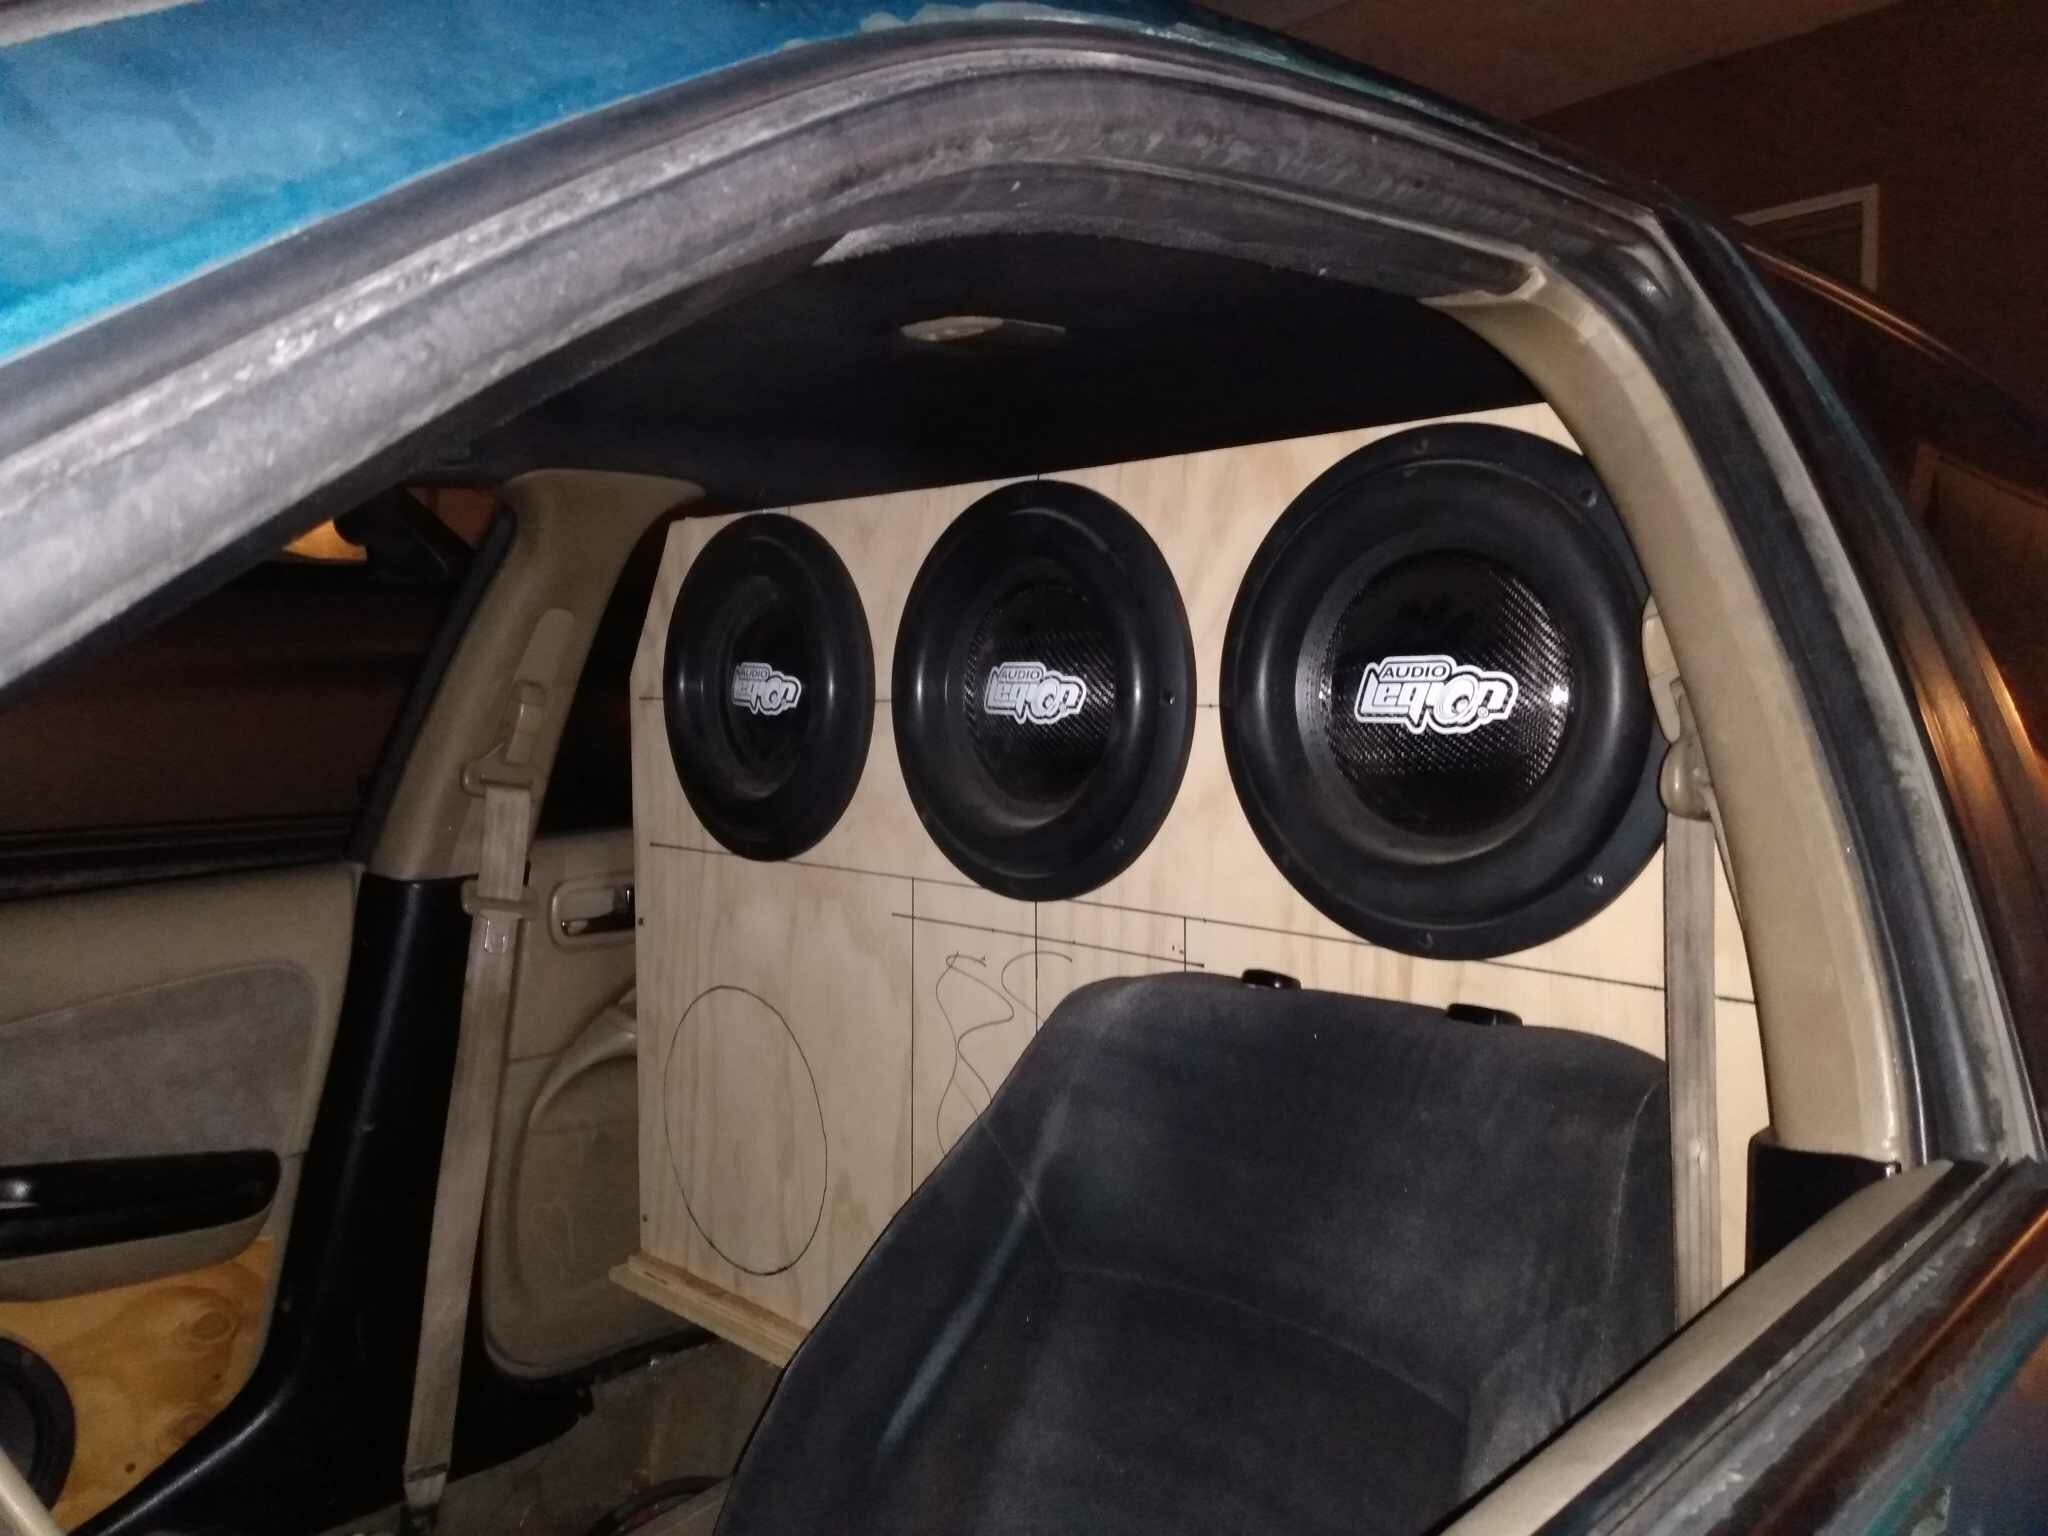
finally got started on it heres some pics form today tipping out the trunk build and starting to mock panels up front baffle will be tripple thick with dbl layer everywere else inner panels are a lil bit cheaper ply with the outer layers being 13 ply layout is going to be 3 subs across the top , and 2 on the bottoms on left and right of the baffle with a 225sqin swapable slot port tuned for 28hz for daily use and more then likley 45hz for burping
1 point
-
From March 15th to March 20th, revitalize your projects with top-notch American-made sound and heat insulation from Second Skin. Whether you're tackling a car restoration, home improvement, or any other project, our high-quality insulation products are here to enhance your experience. Use code SPRING15 at checkout to enjoy a generous 15% discount on your purchase. Why Choose Second Skin? Premium quality American-made insulation Superior sound and heat insulation properties Trusted by professionals and enthusiasts alike Don't miss out on this limited-time offer to save on your Spring projects! Upgrade your insulation and upgrade your results with Second Skin. Visit our website now and start saving! 🛒🔊🔥 TAKE ME TO THE SHOP →
1 point
-
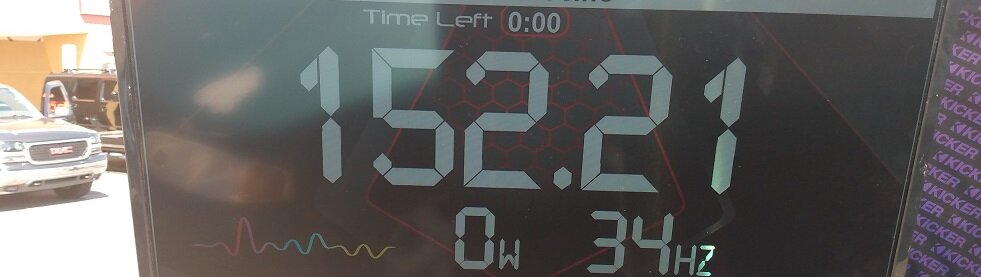
Some 56 square inches of total port area, two ports half that number for each port.1 point
-
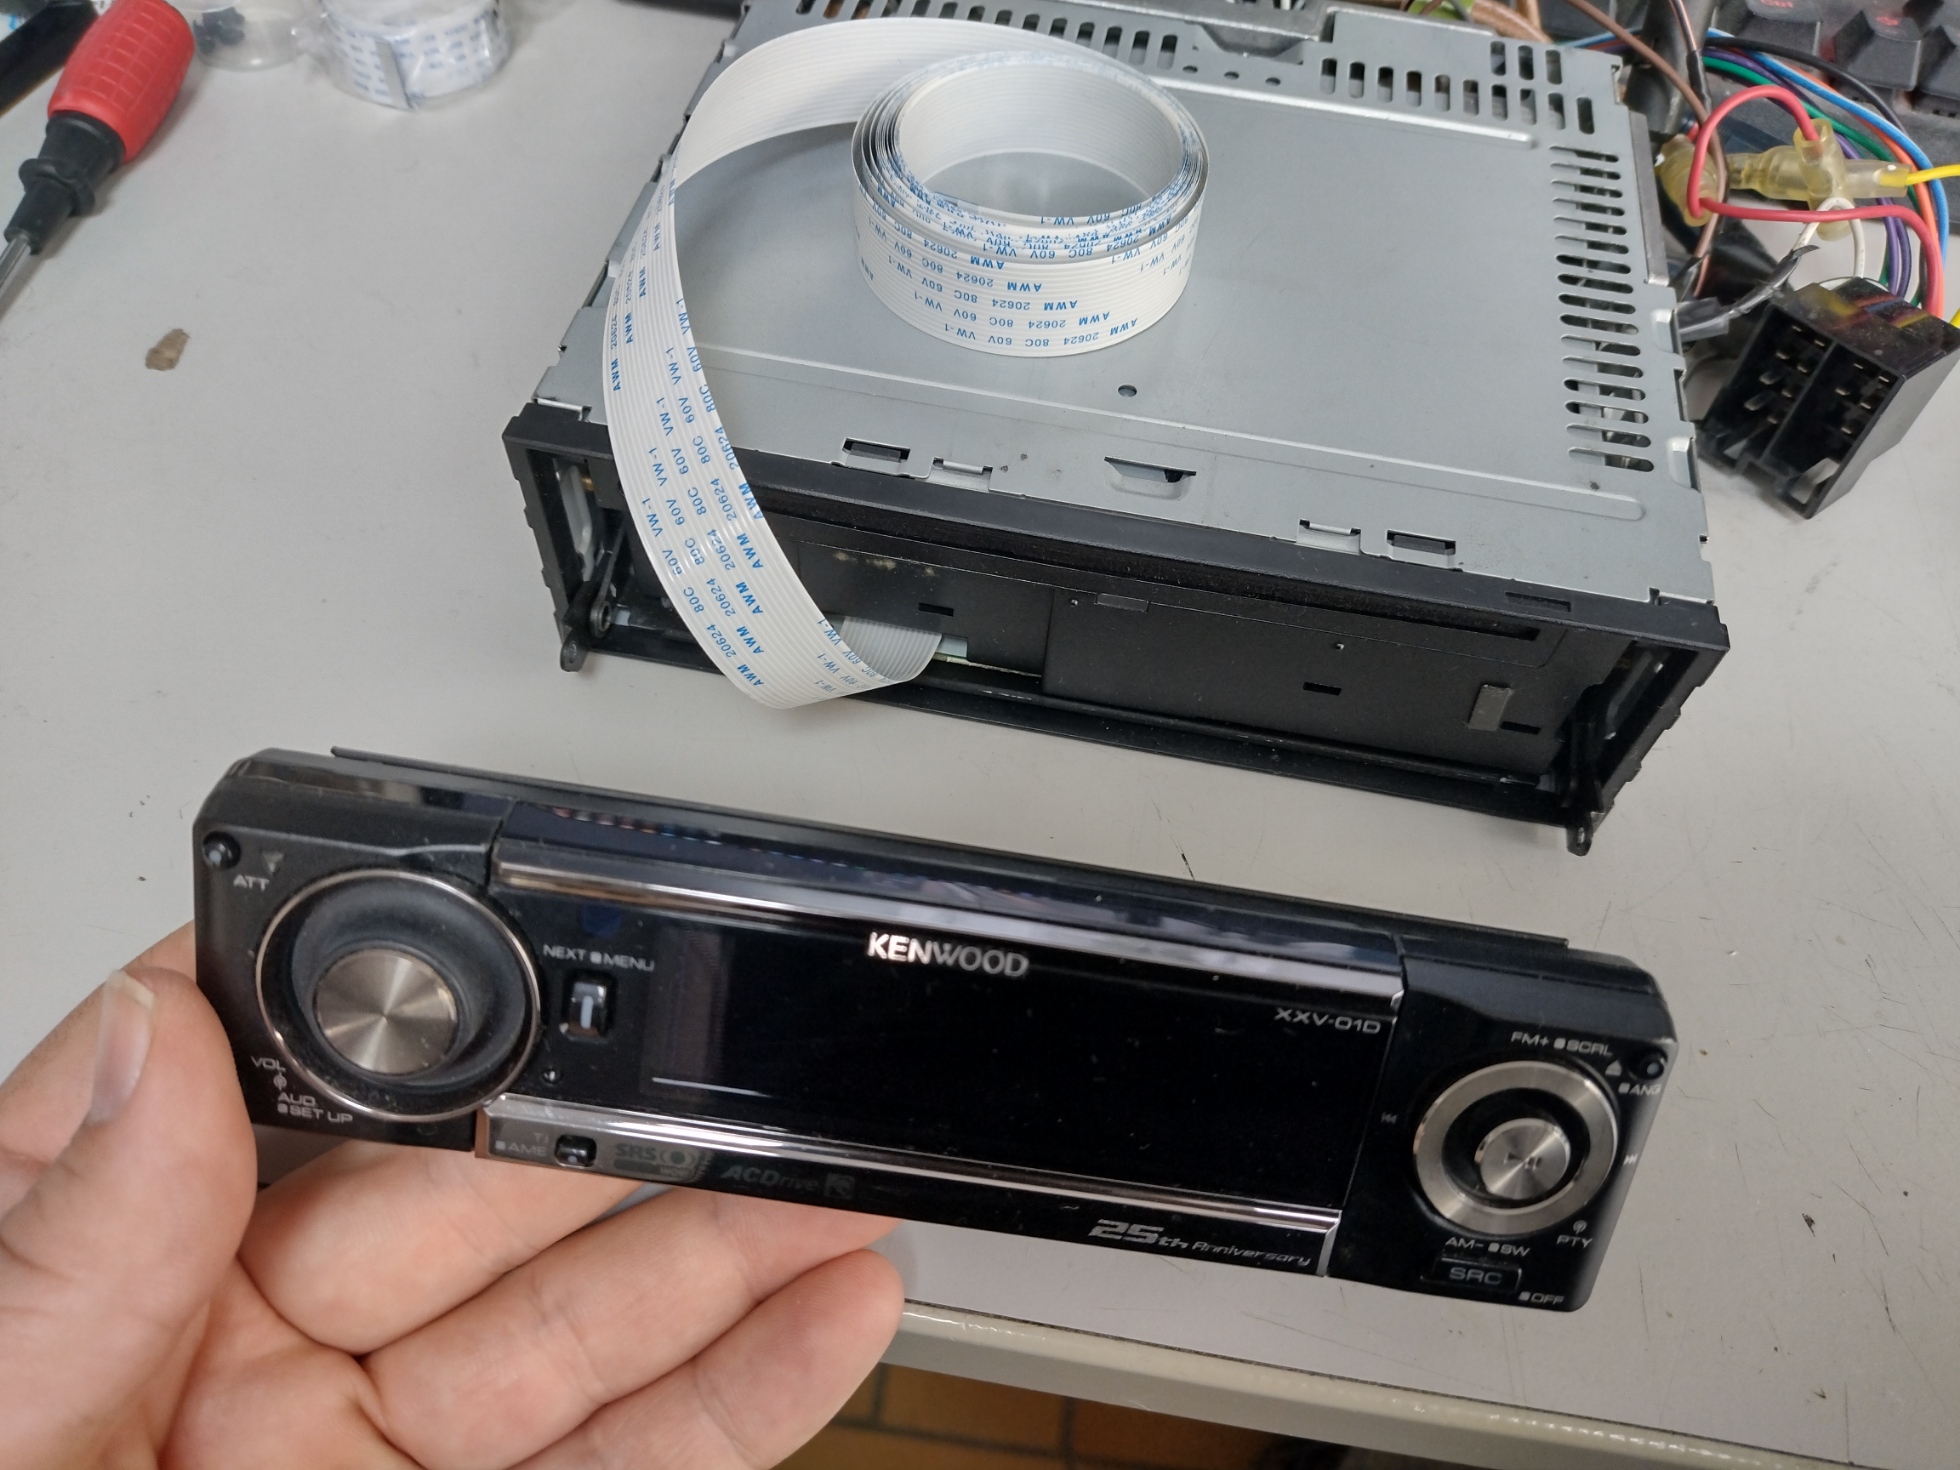
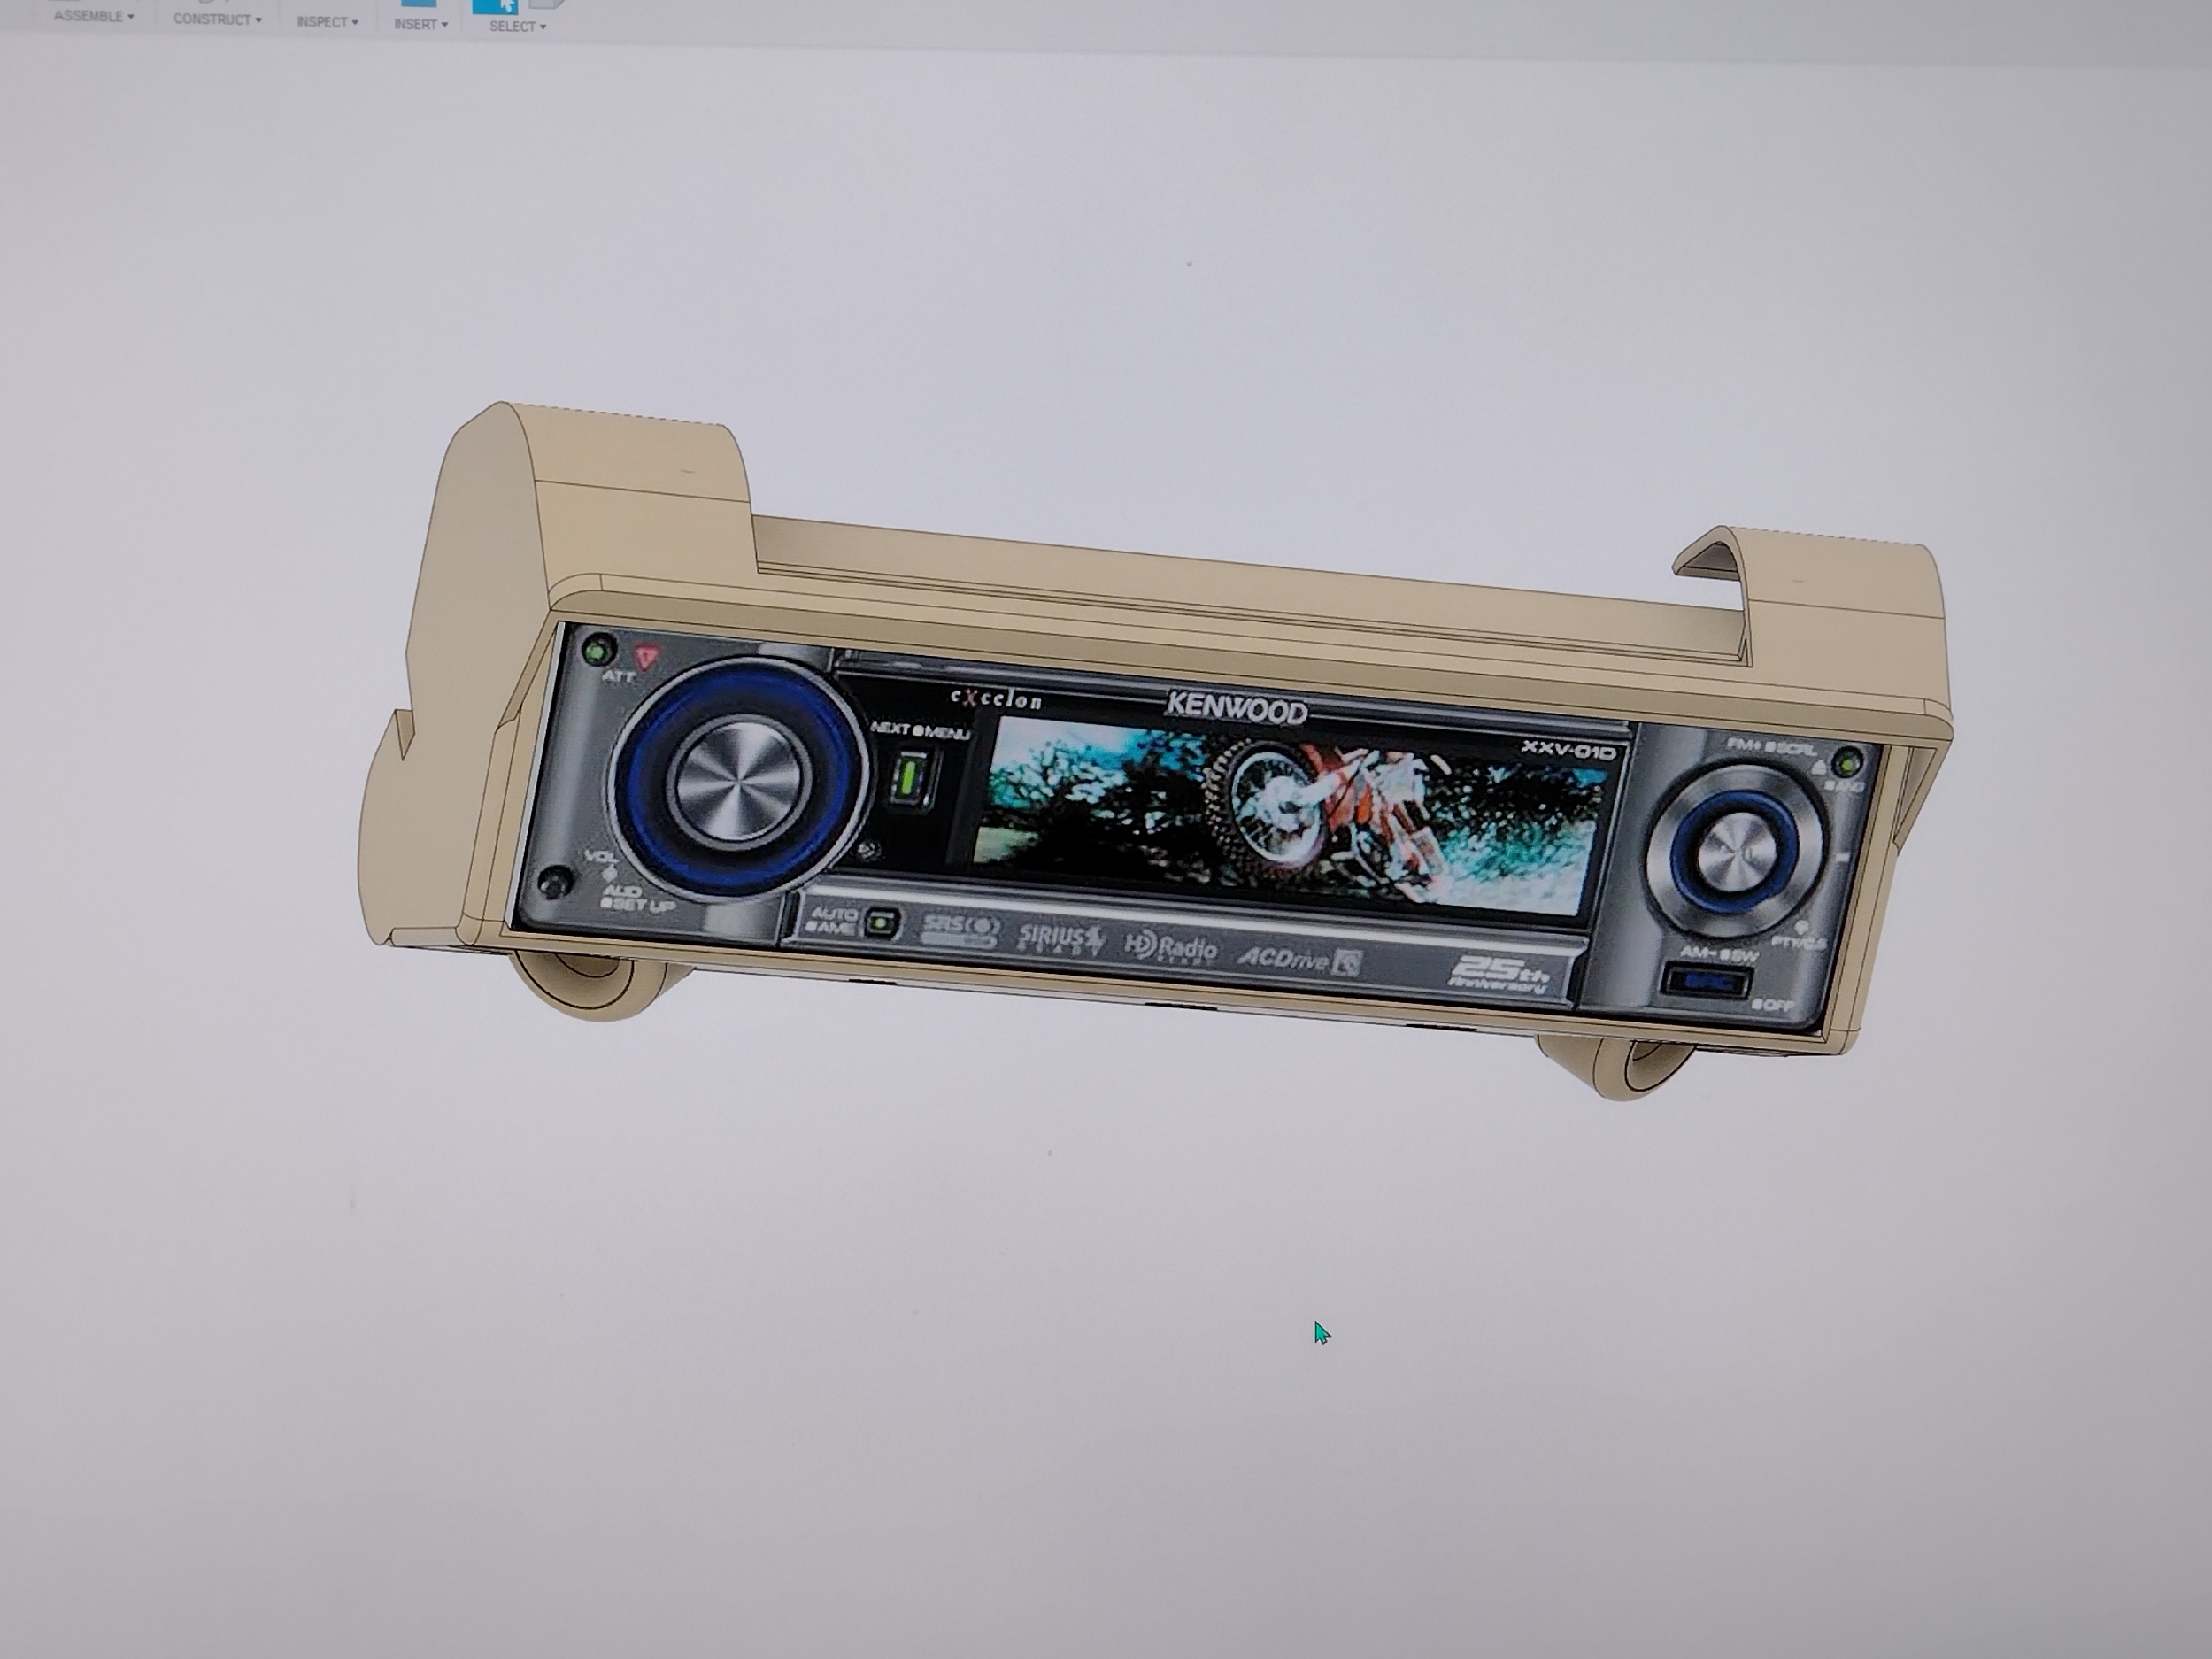
I am installing a new stand alone audio system in my Lexus LS430. The Mark Levinson system will not be used anymore. All alterations are reversible. I am using the Kenwood XXV-01D 25th anniversary headunit. The control panel is installed in the ceiling area, the radio itself in the glove compartment. I have extended the flat cable to seperate the panel and the radio. I have drawn a new enclosure for the control panel which is located in the area where you normally store a pair of sunglasses. The glass break sensors and the button to switch these on or off are implemented in the housing.
1 point
-
Subs get stinky when they had enough power, but I wouldn't try that method on type rs, that is a method more adequate for SPL drivers. BTW make very sure you entered valid data to WinISD or you may be led to the wrong conclusions.1 point
-
You just need to make sure your subs do not go over Xmax at the operating power, but since your amplifier exceeds by far the RMS of your subs you will have to be very careful not going too far, generally oversized enclosures and sub overpowering in a hazardous mix with a very likely outcome of subs mechanical damage so you need to set the gain of the amp not to the clipping point but rather lesser that the subs can can tolerate. You can find maximum power in a similar way as before, in WinISD up power until Xmax is reached in the enclosure size you chose and you can clamp the amp to roughly reach that power and set gains accordingly so you can't go over the limit on normal use.1 point
-
Correct. The reason for so many is due to some people using multiple runs of power wire from the front of the vehicle to the back. In my truck for example I have 9 positive runs of 1/0 and 9 negative runs of 1/0 (18 total) coming from my 3 alts under the hood to the back batteries. So when people have larger systems with over 1600amps worth of alternator charging, multiple 5,000+ watt rms amps, etc one single run of 1/0 or even 4/0 coming from under the hood simply cant handle the current load. Now take into consideration of the length of said wire which reduces its current rating, resistance and voltage drop in the wire, hell even if you're pulling the maximum current limit from whatever wire you're running your going to have to factor in heat and even more resistance. So that is why there's multiple spots for additional wires to be connected so you can adapt to your needs and overcome obstacles and restrictions in the wire. Hopefully that helps.1 point
-
You can forget about impedance rise, as long as you are not a competitor or you are not fine tuning an exotic type of enclosure, you just need to have a good working electrical system that is in the level of the amp you are using, good wiring correctly installed, a good amp that does the power it claims, and proper gain settings procedures, it is worth learning about that as well as owning a cheap little scope or a DD-1, if you can source 2K to your subs you will see a big jump in output and you will be pretty satisfied with the results.1 point
-
Cool. None of my enclosures even have screws. Never had a "leak" or anything break apart. Odd. 80 amp, and not blowing the fuse. You are no where near, peak power. Not even half. Sooooo, your good. No breaking shit,.. from power anyway. Edit- maybe just a really poorly built enclosure. I've never, in my decades of audio, had the privilege of seeing anyone "blow" their box apart,, unless it was a pile of wood just hucked together, or a prefab. Even then, it wasnt from "power". But good luck to your goal mate.1 point
-
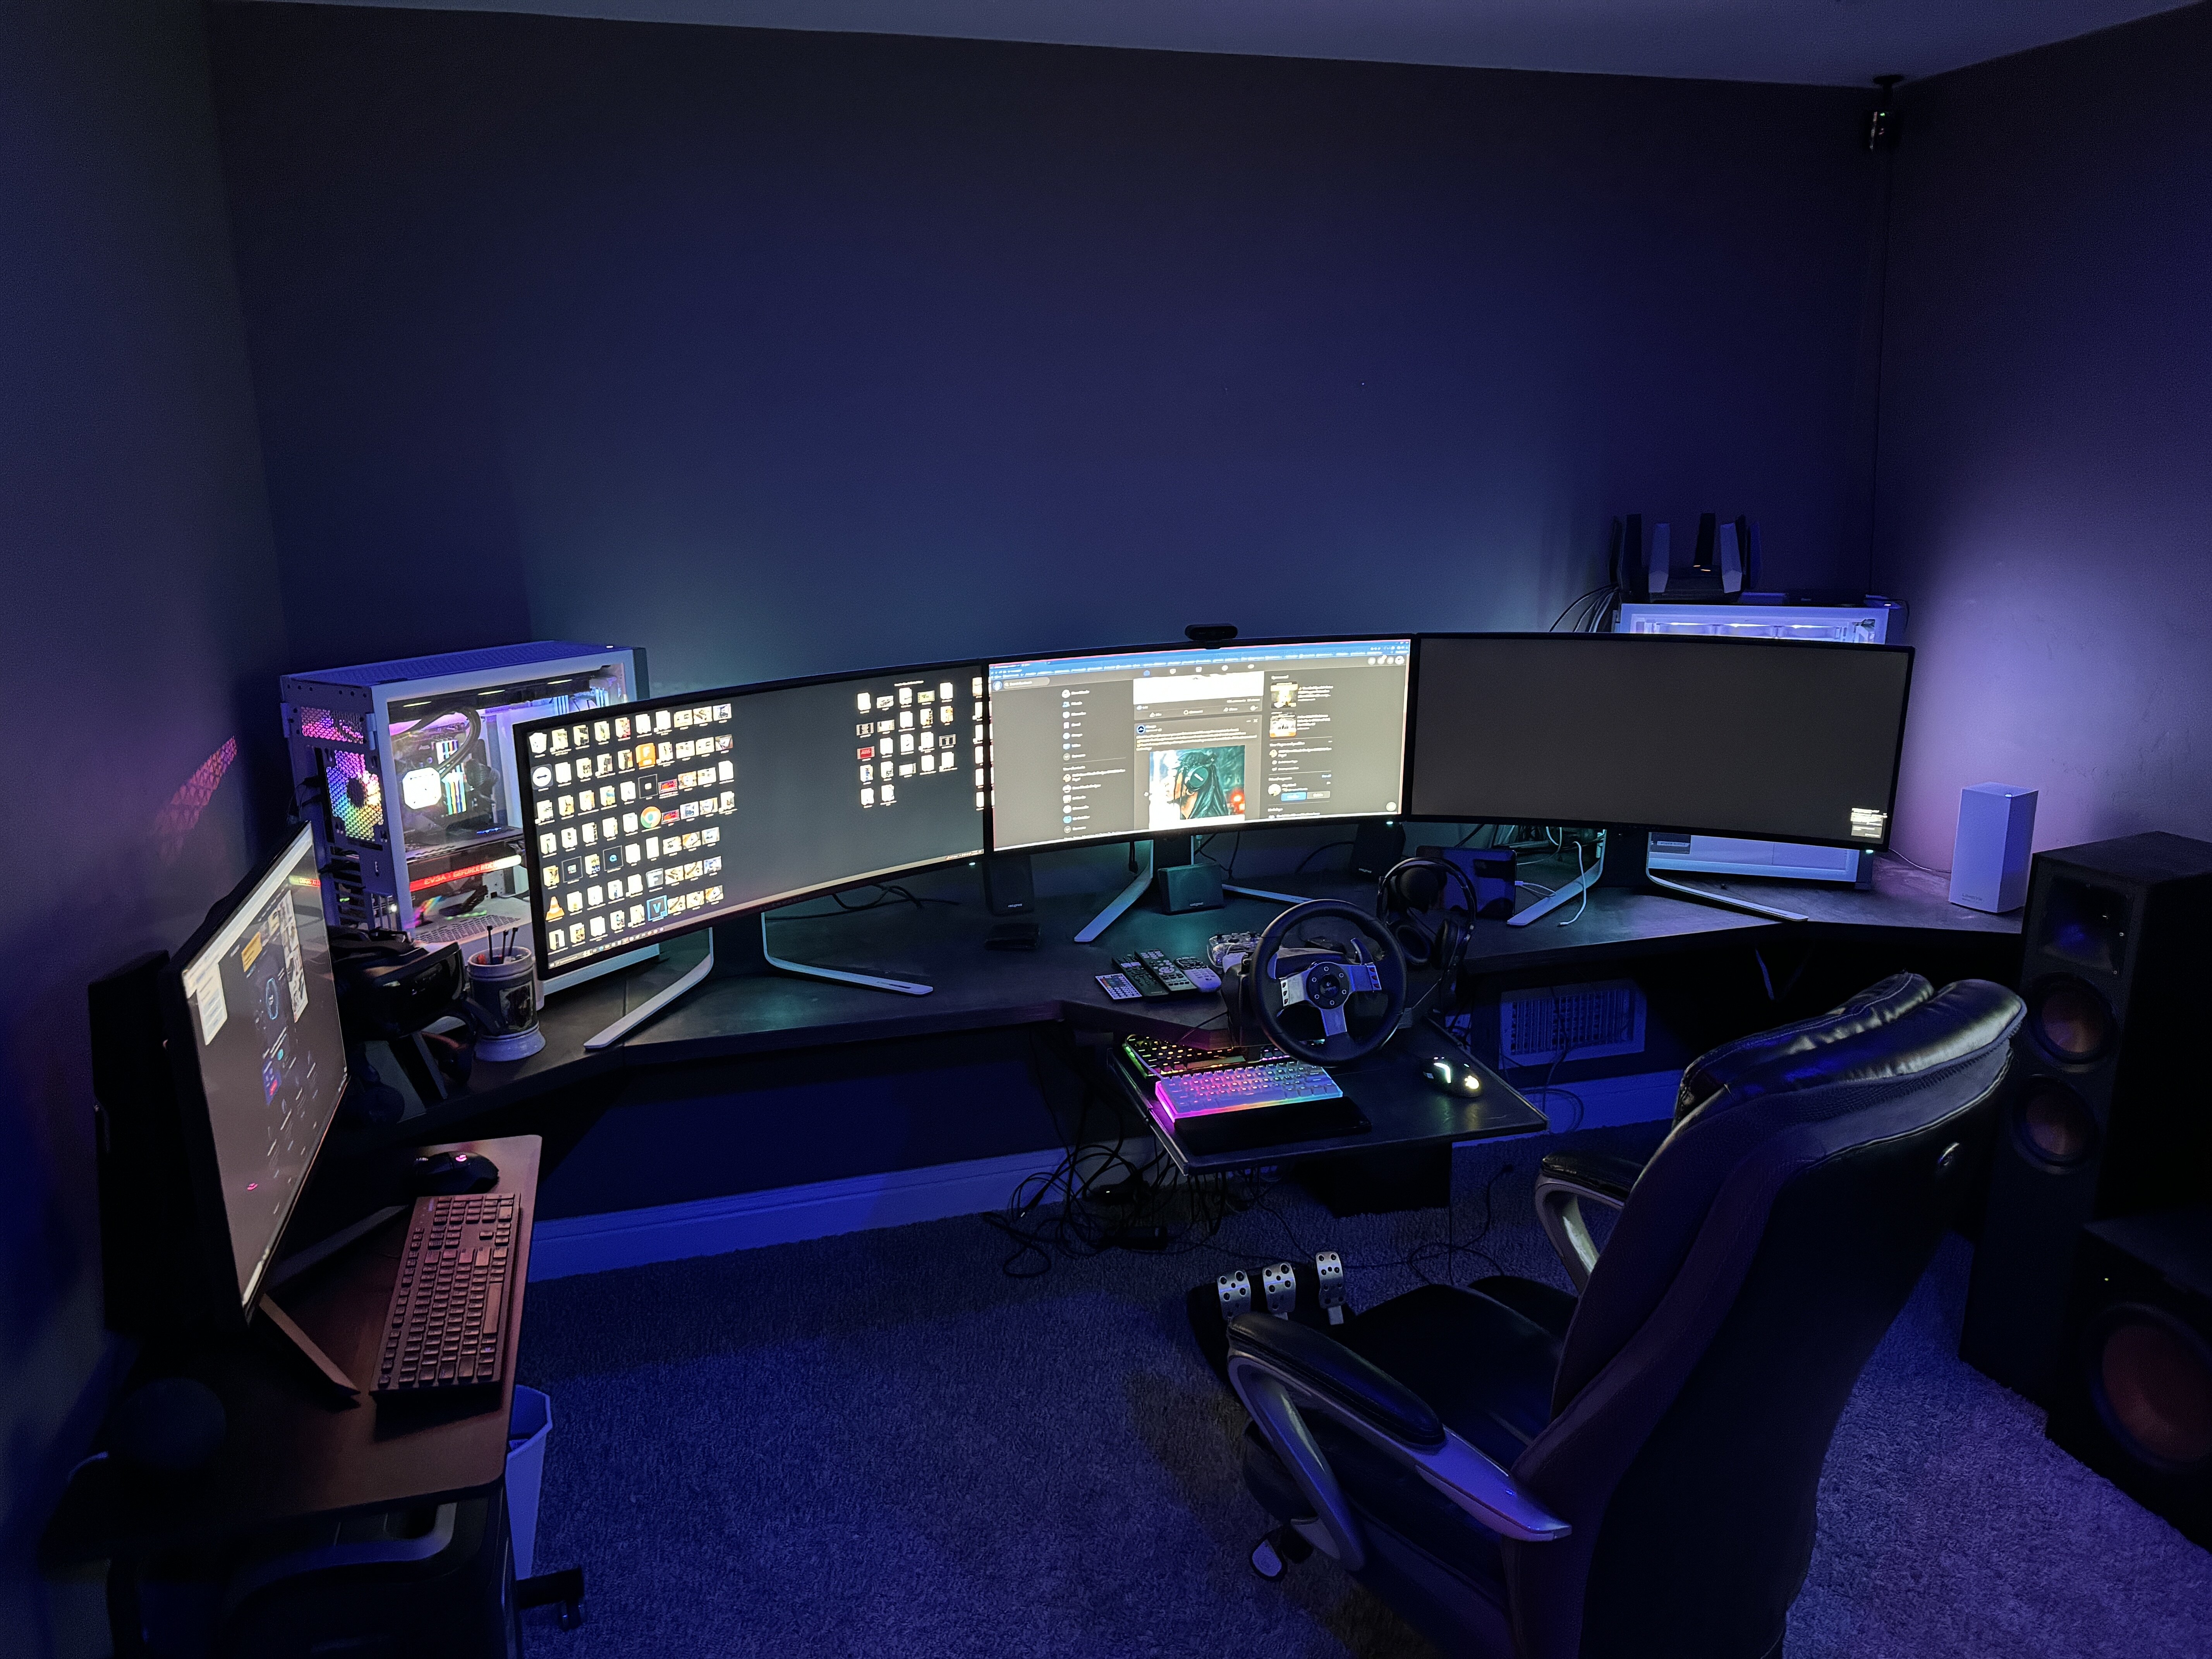
Jesus my guy. Come play some warzone with me. Edit- my next buy is a 240 (plus) Hz oled. Maybe the Rog rig. Not sure. May wait a tick. Monitors are just getting sooooo good. But, i want a rad oled thats wicked fast. Just 2 g7 240hz (27 and 32 inch) here. I want a nice oled.1 point
-
Done!1 point
-
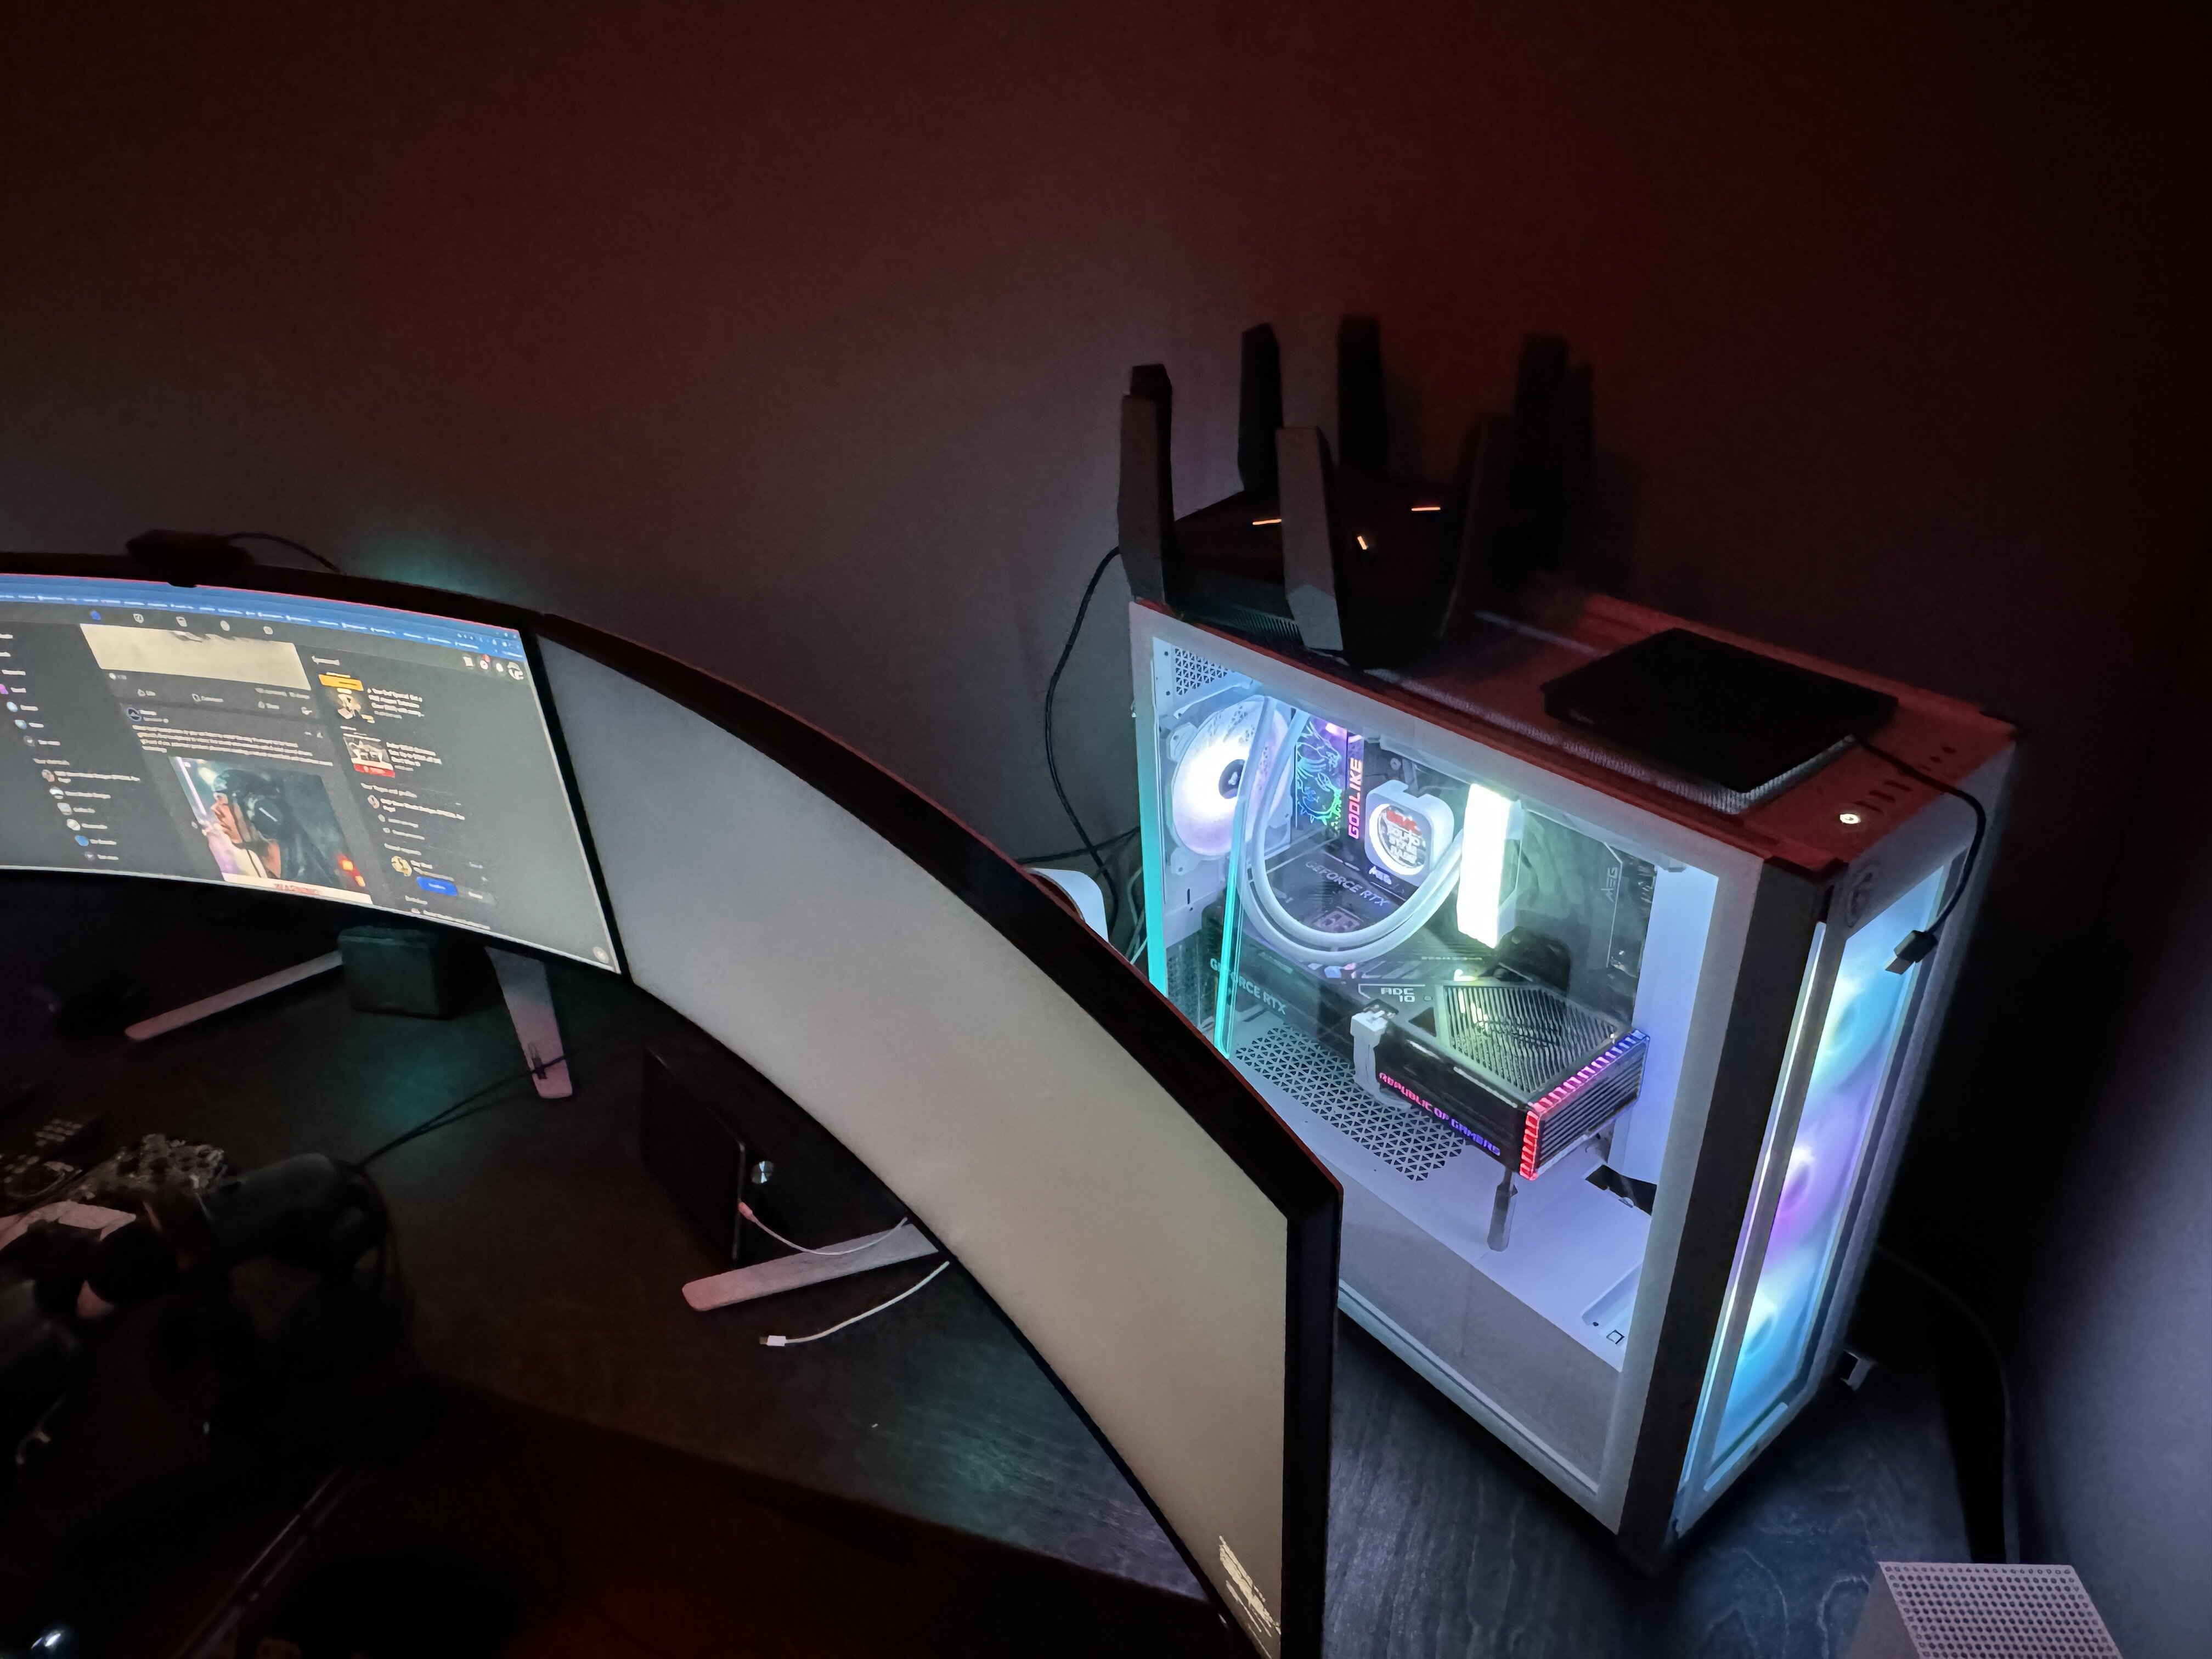
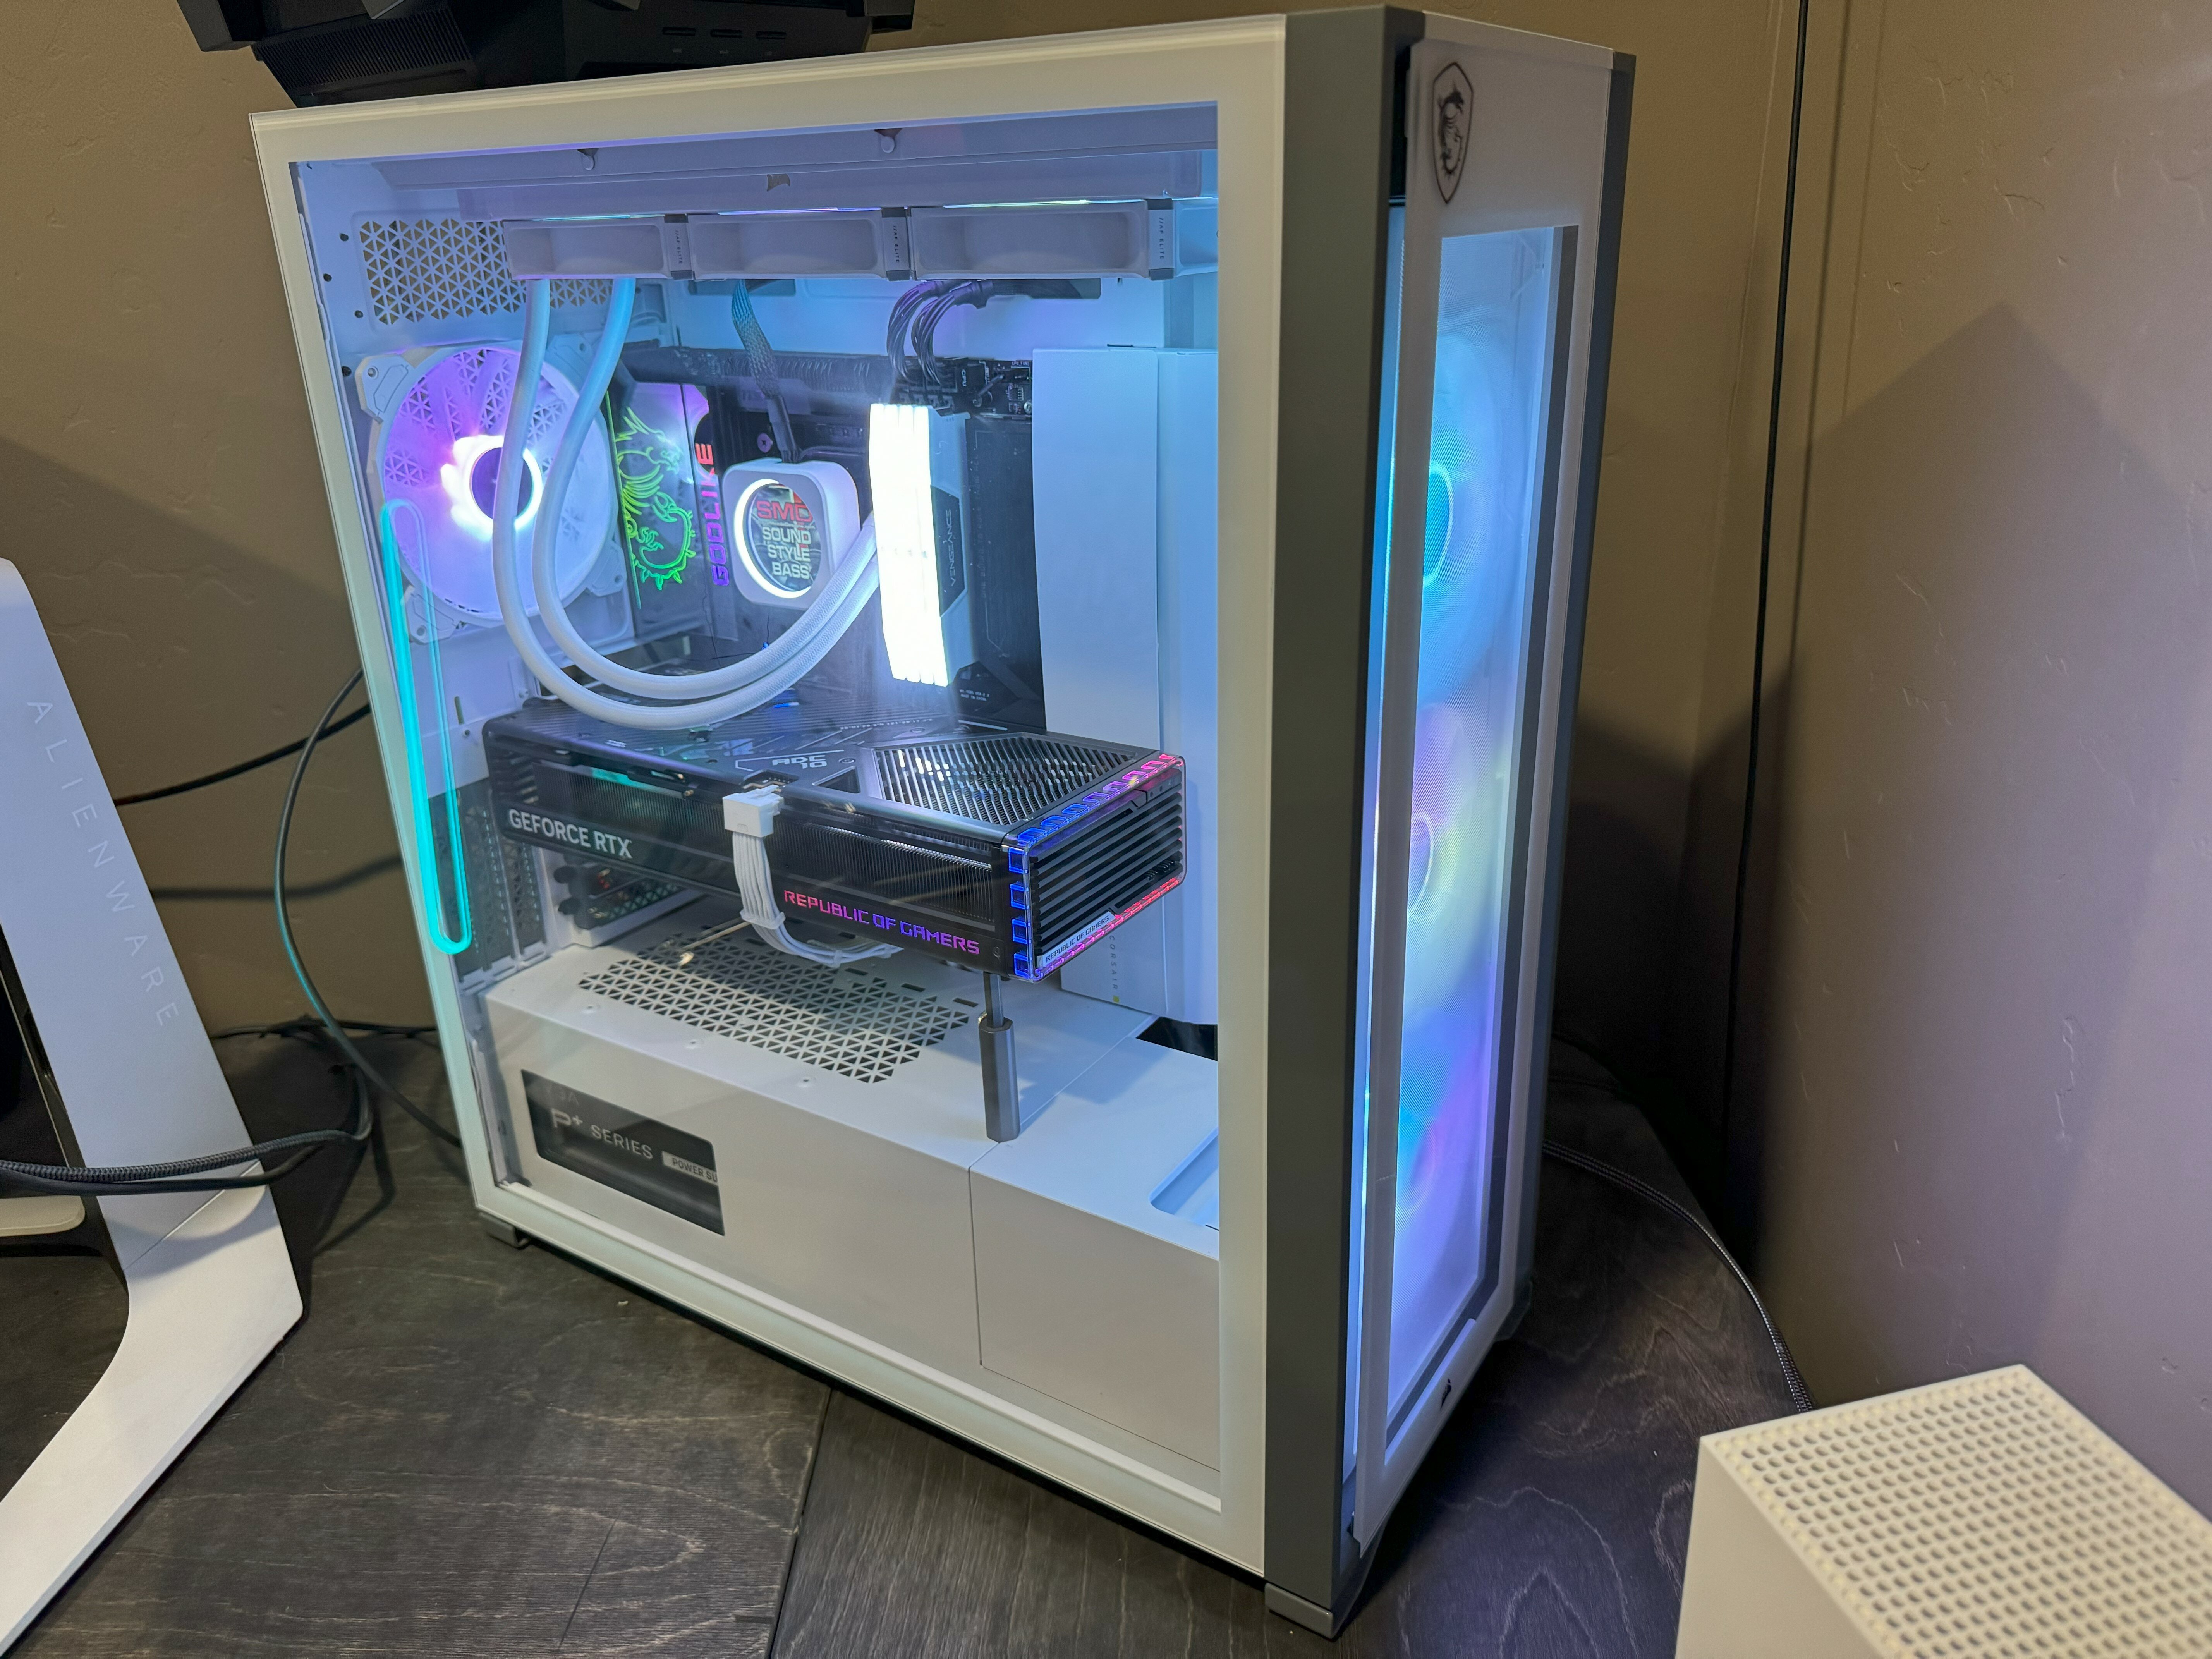
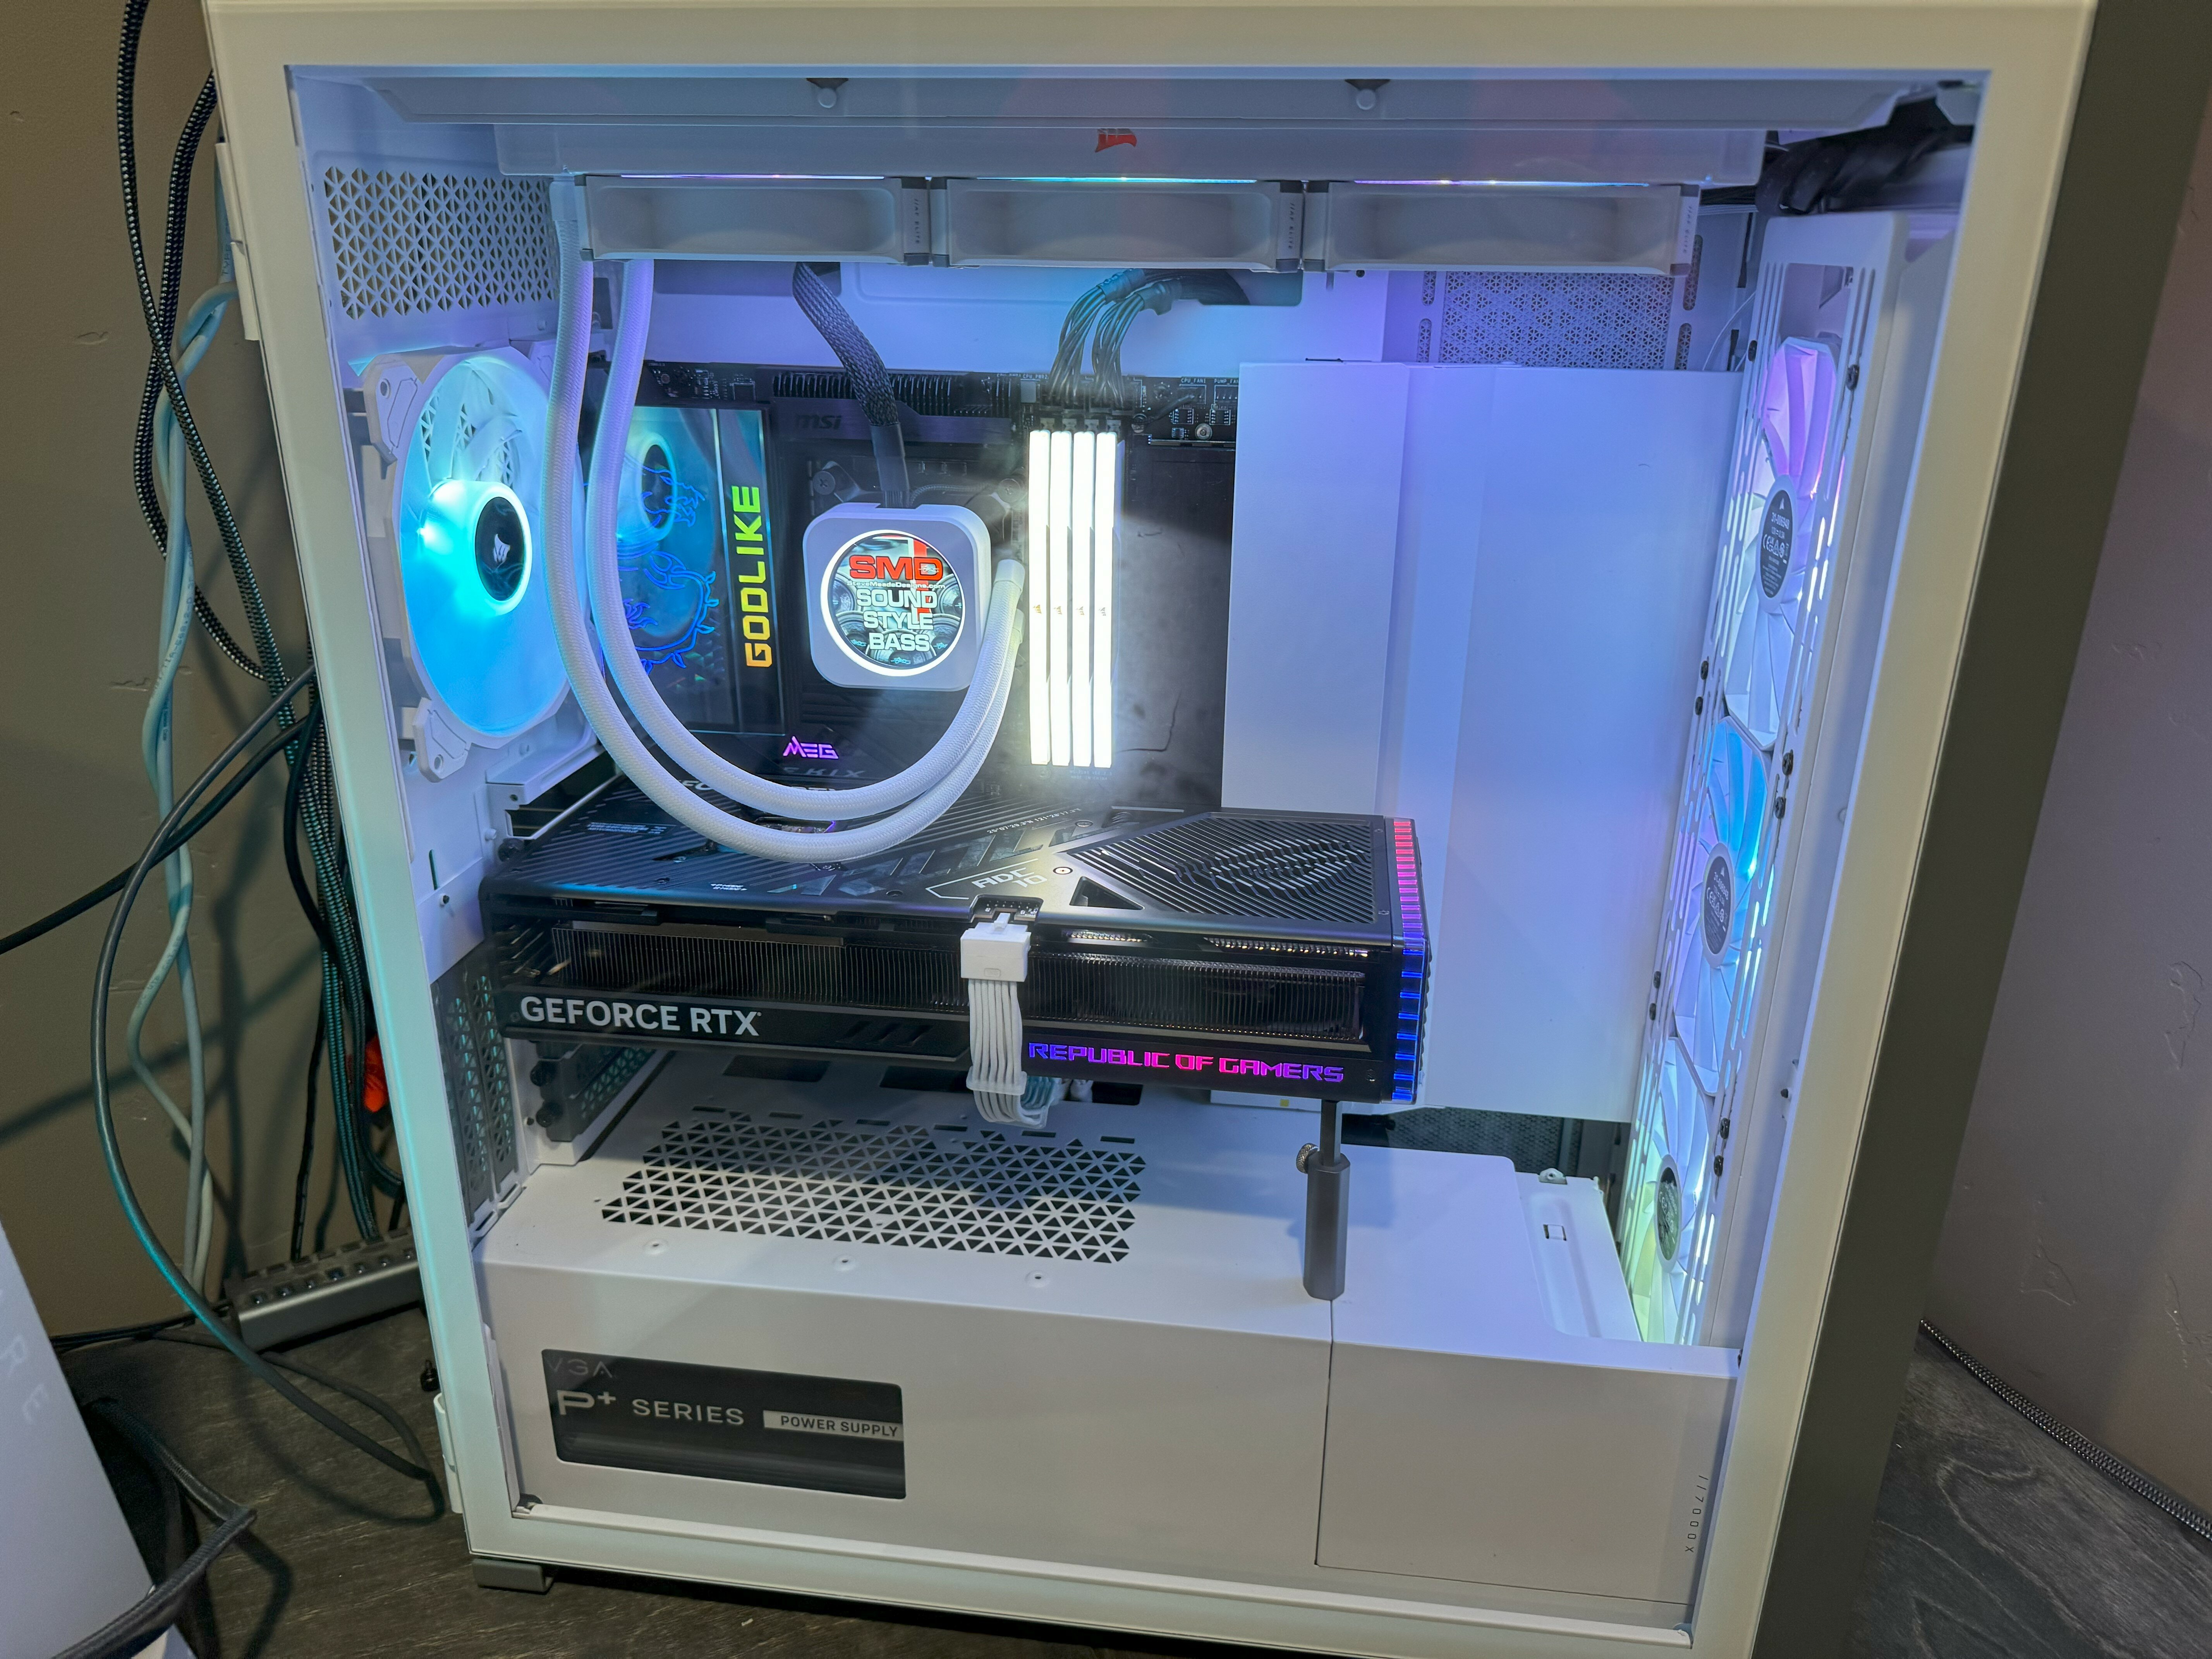
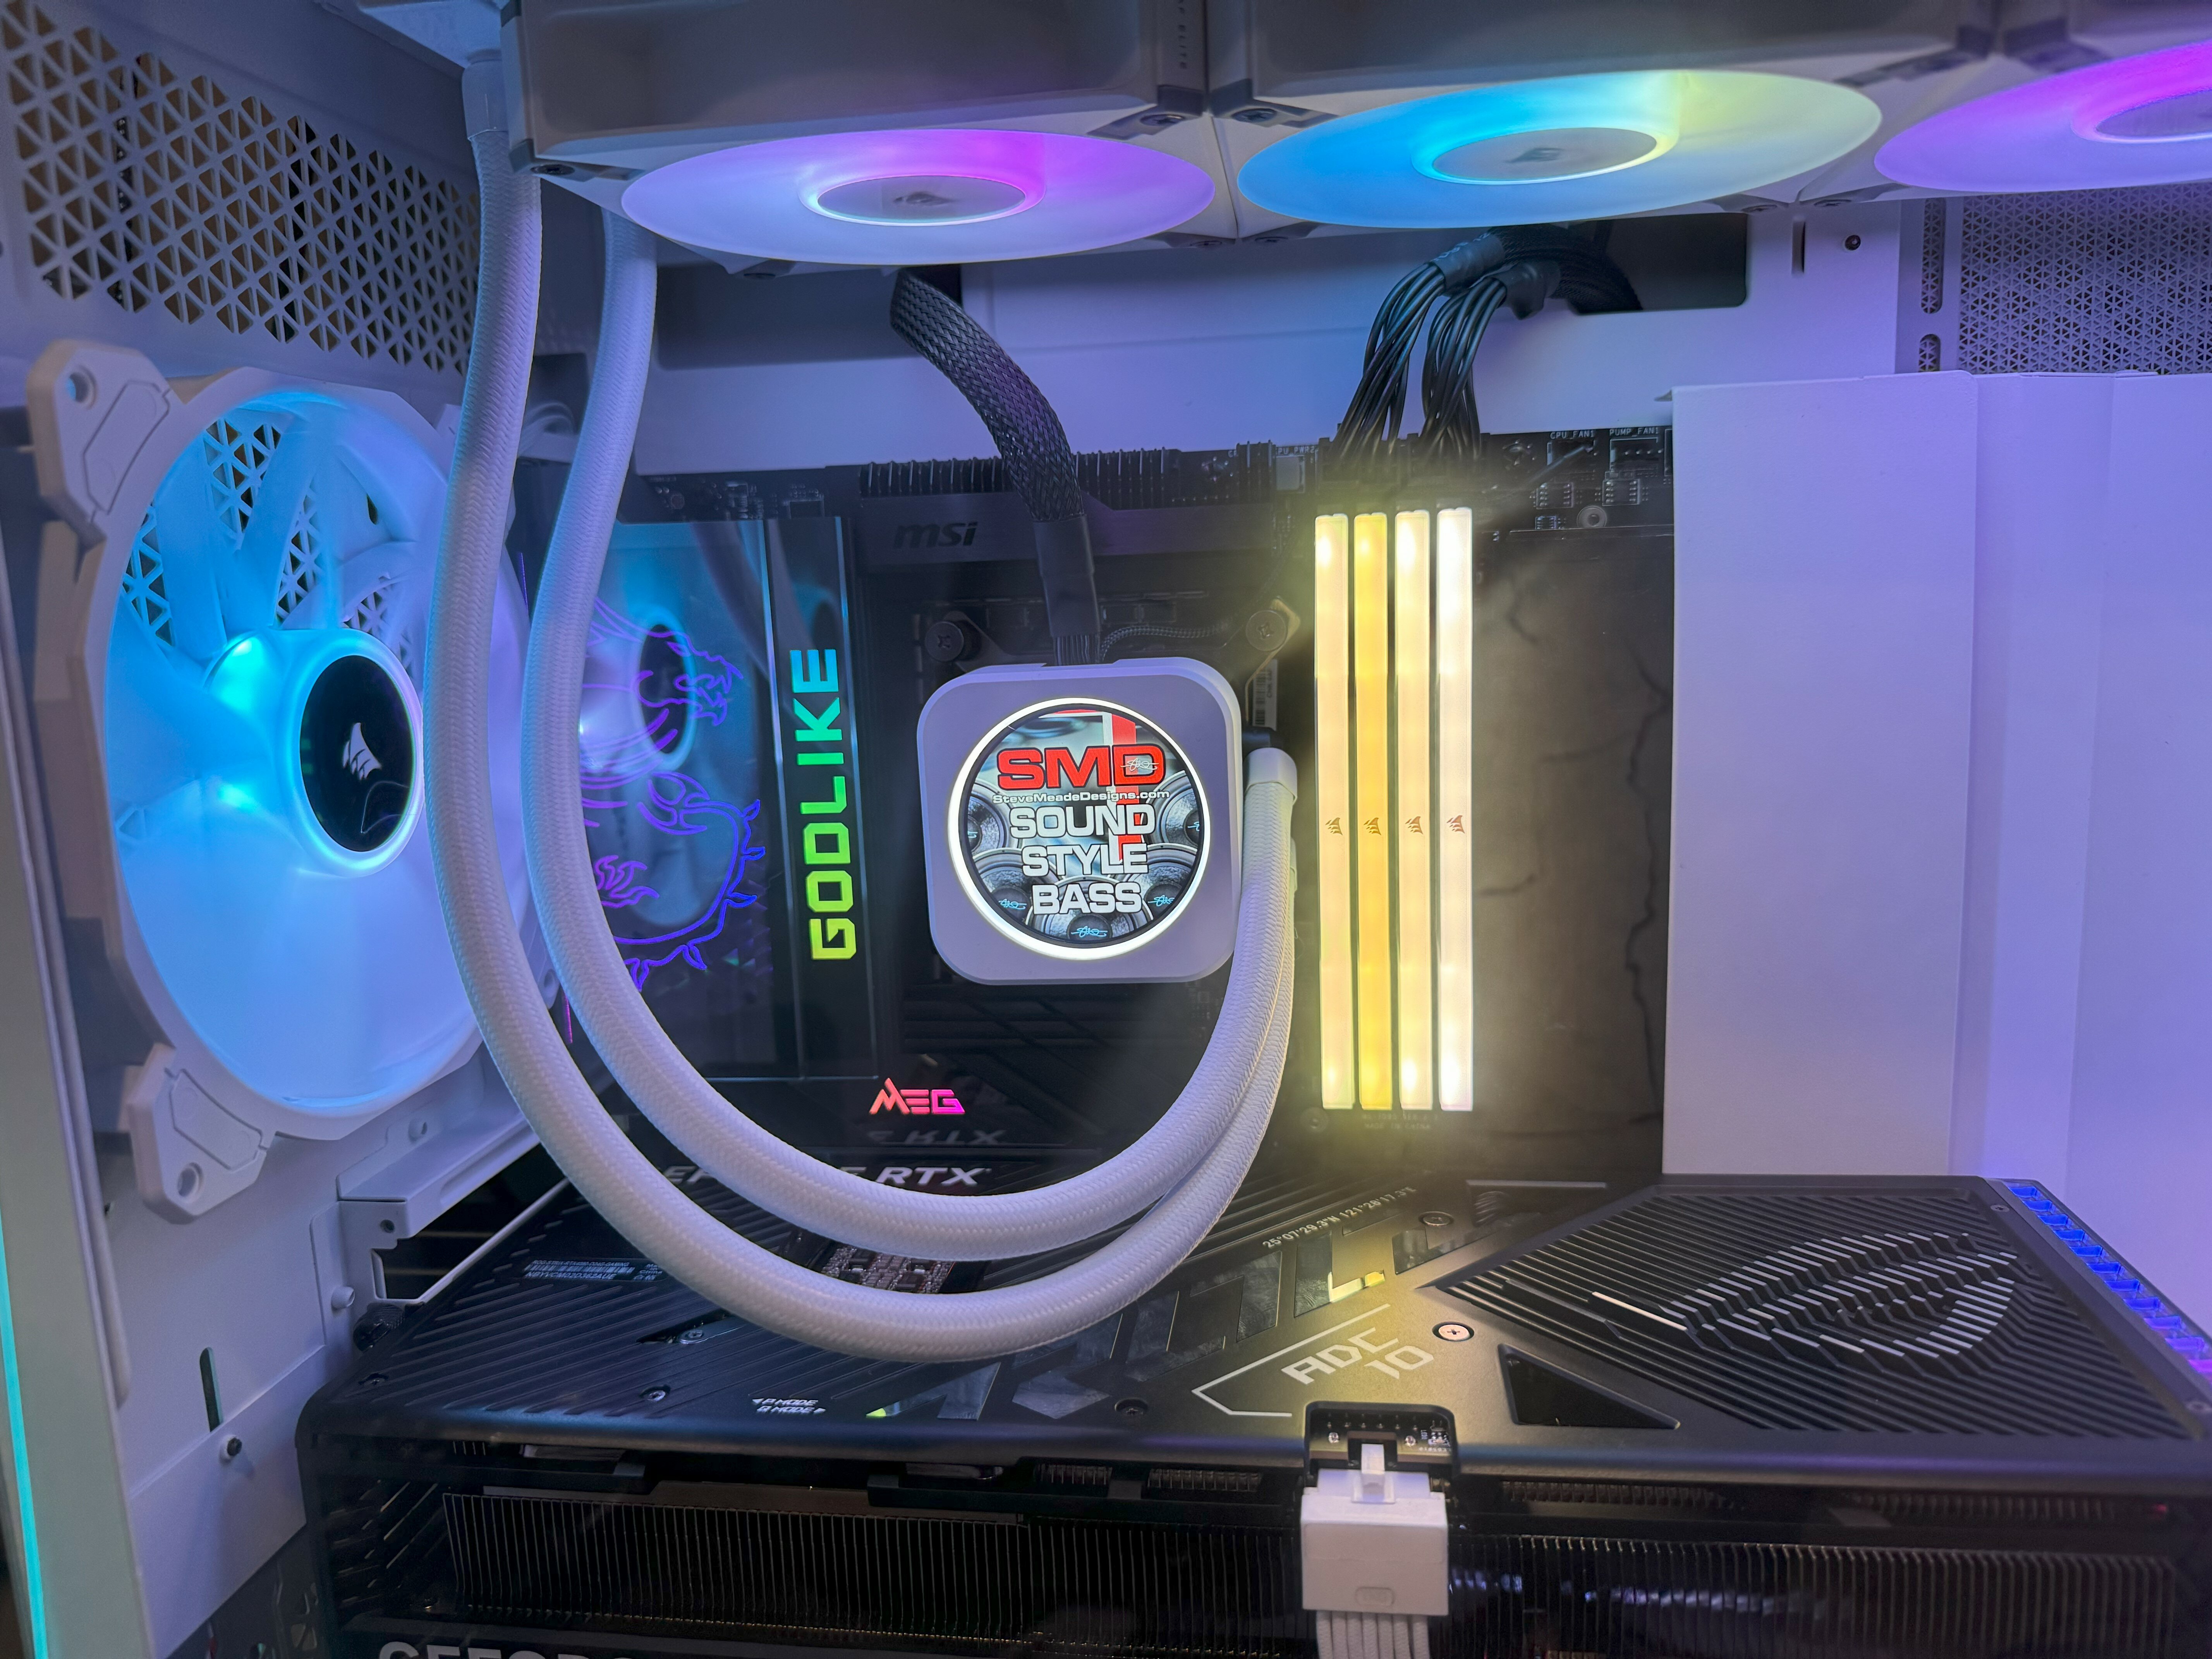
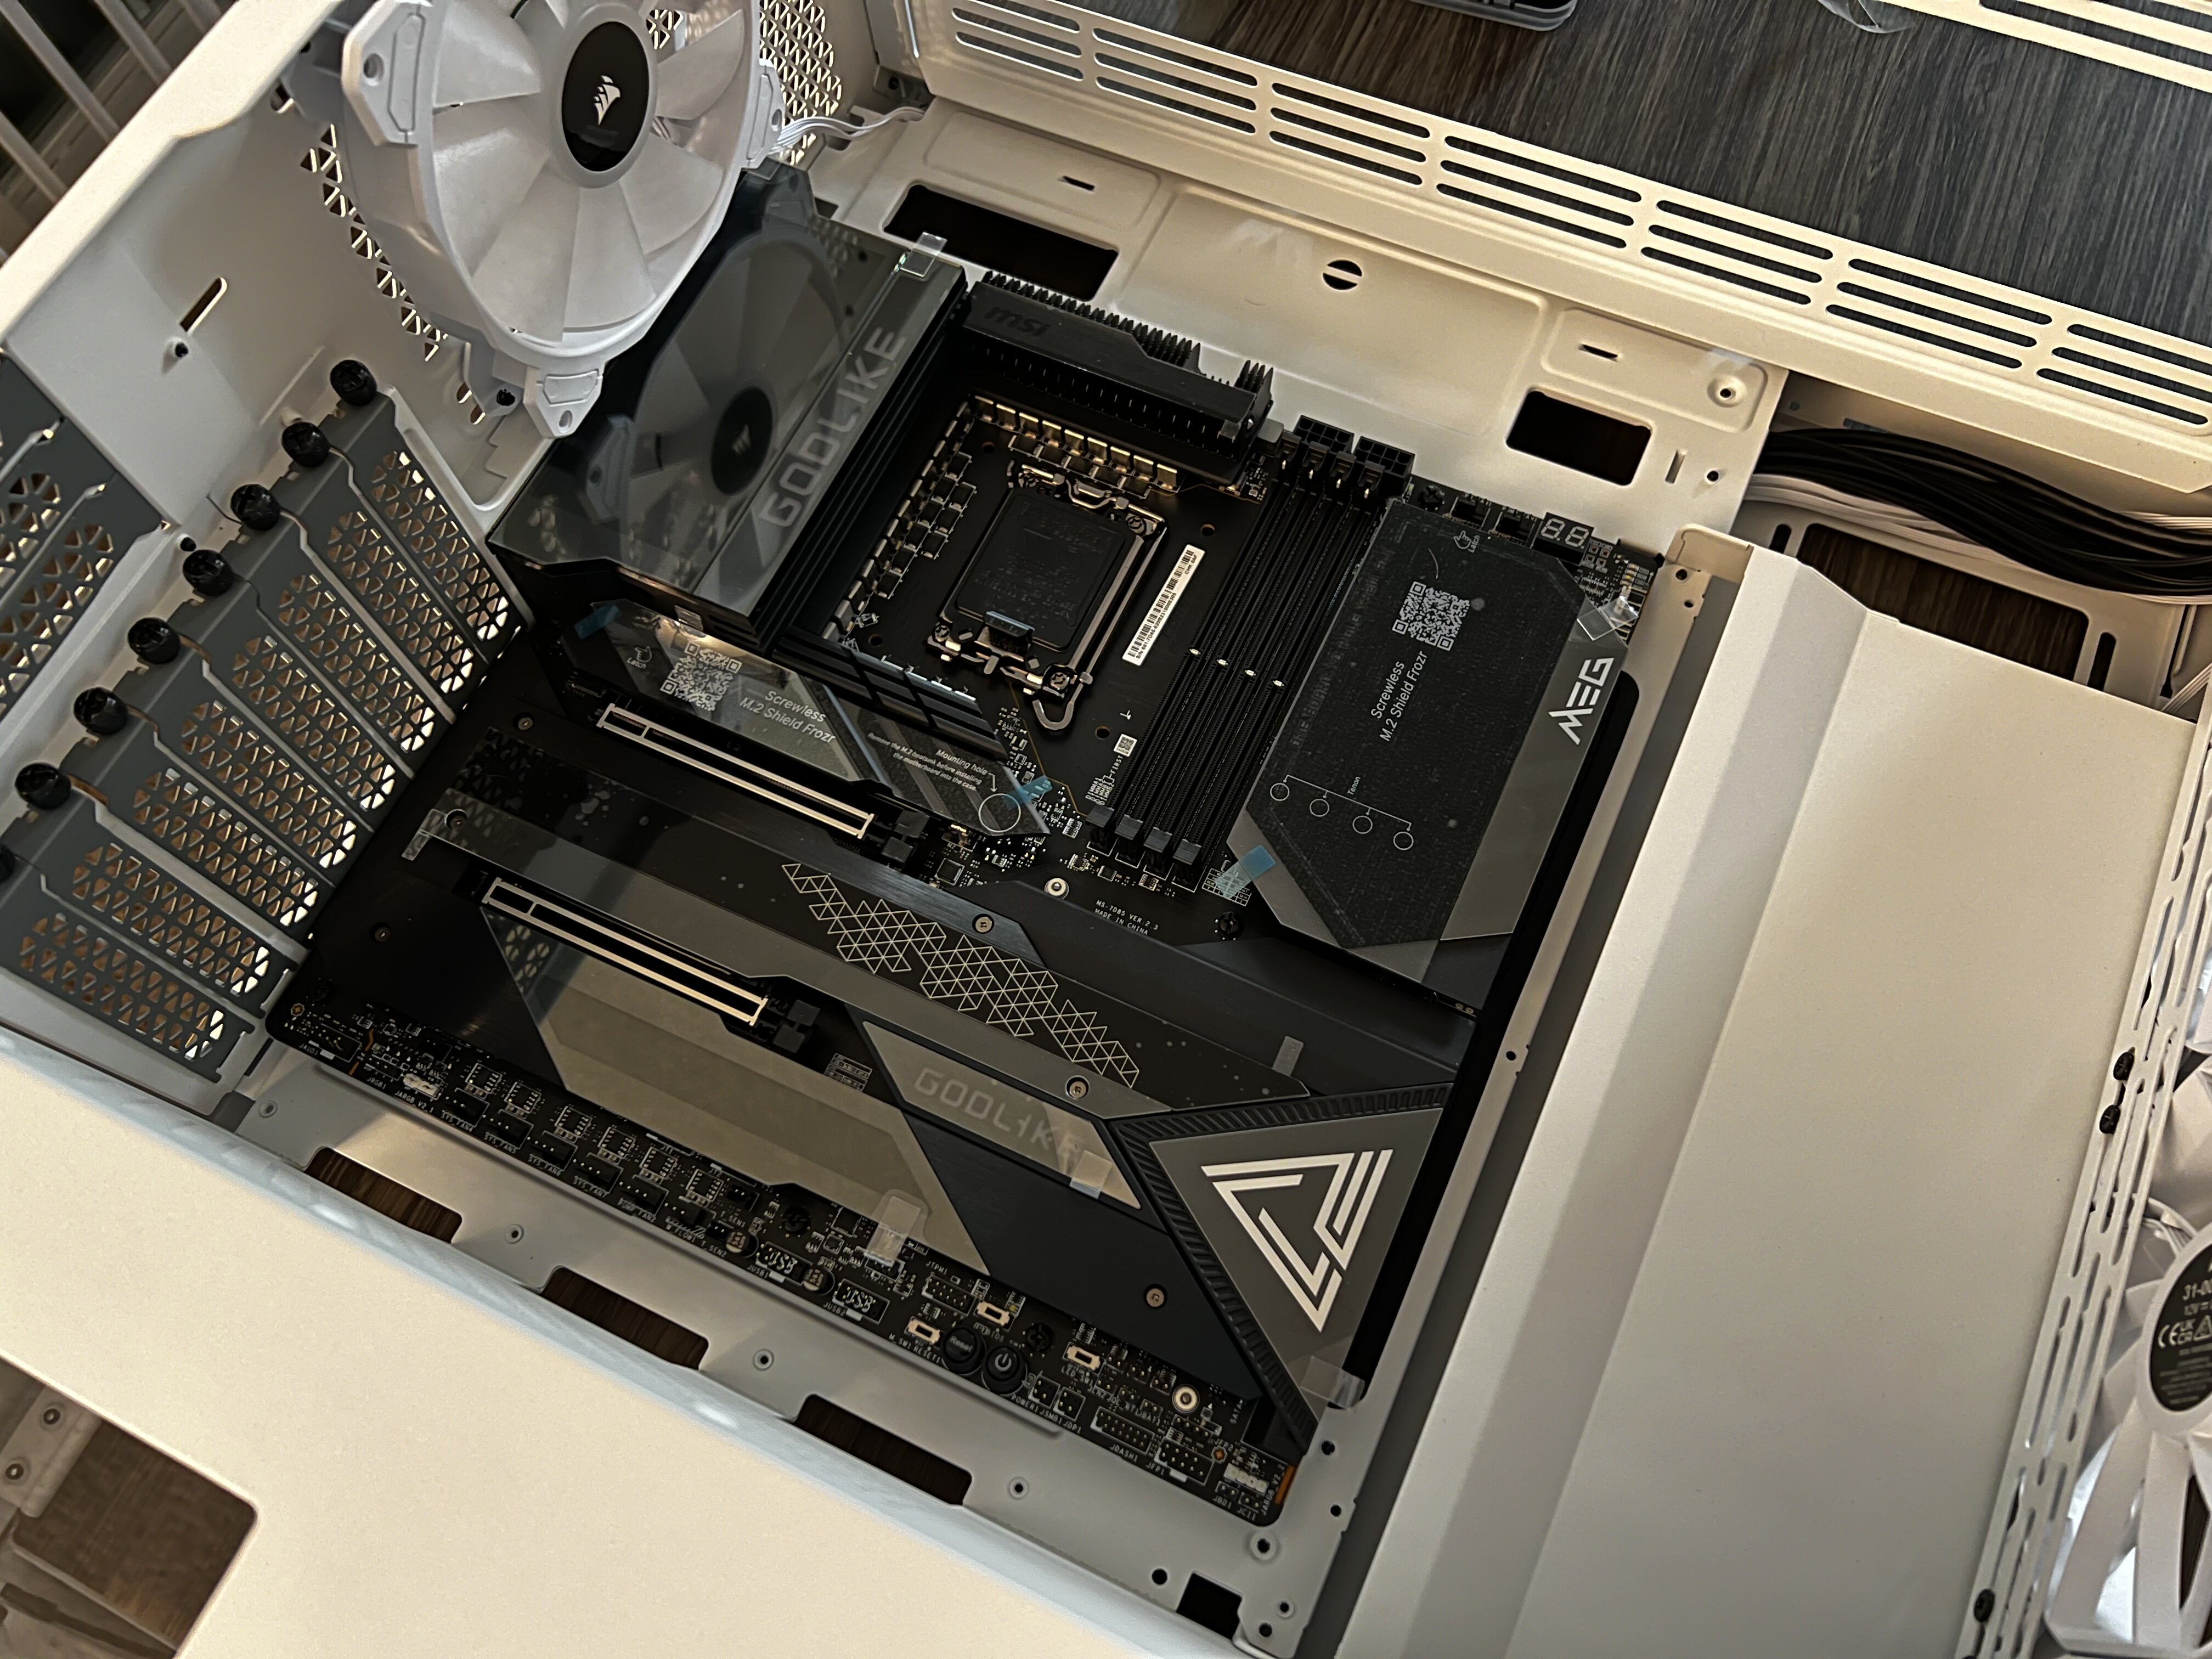
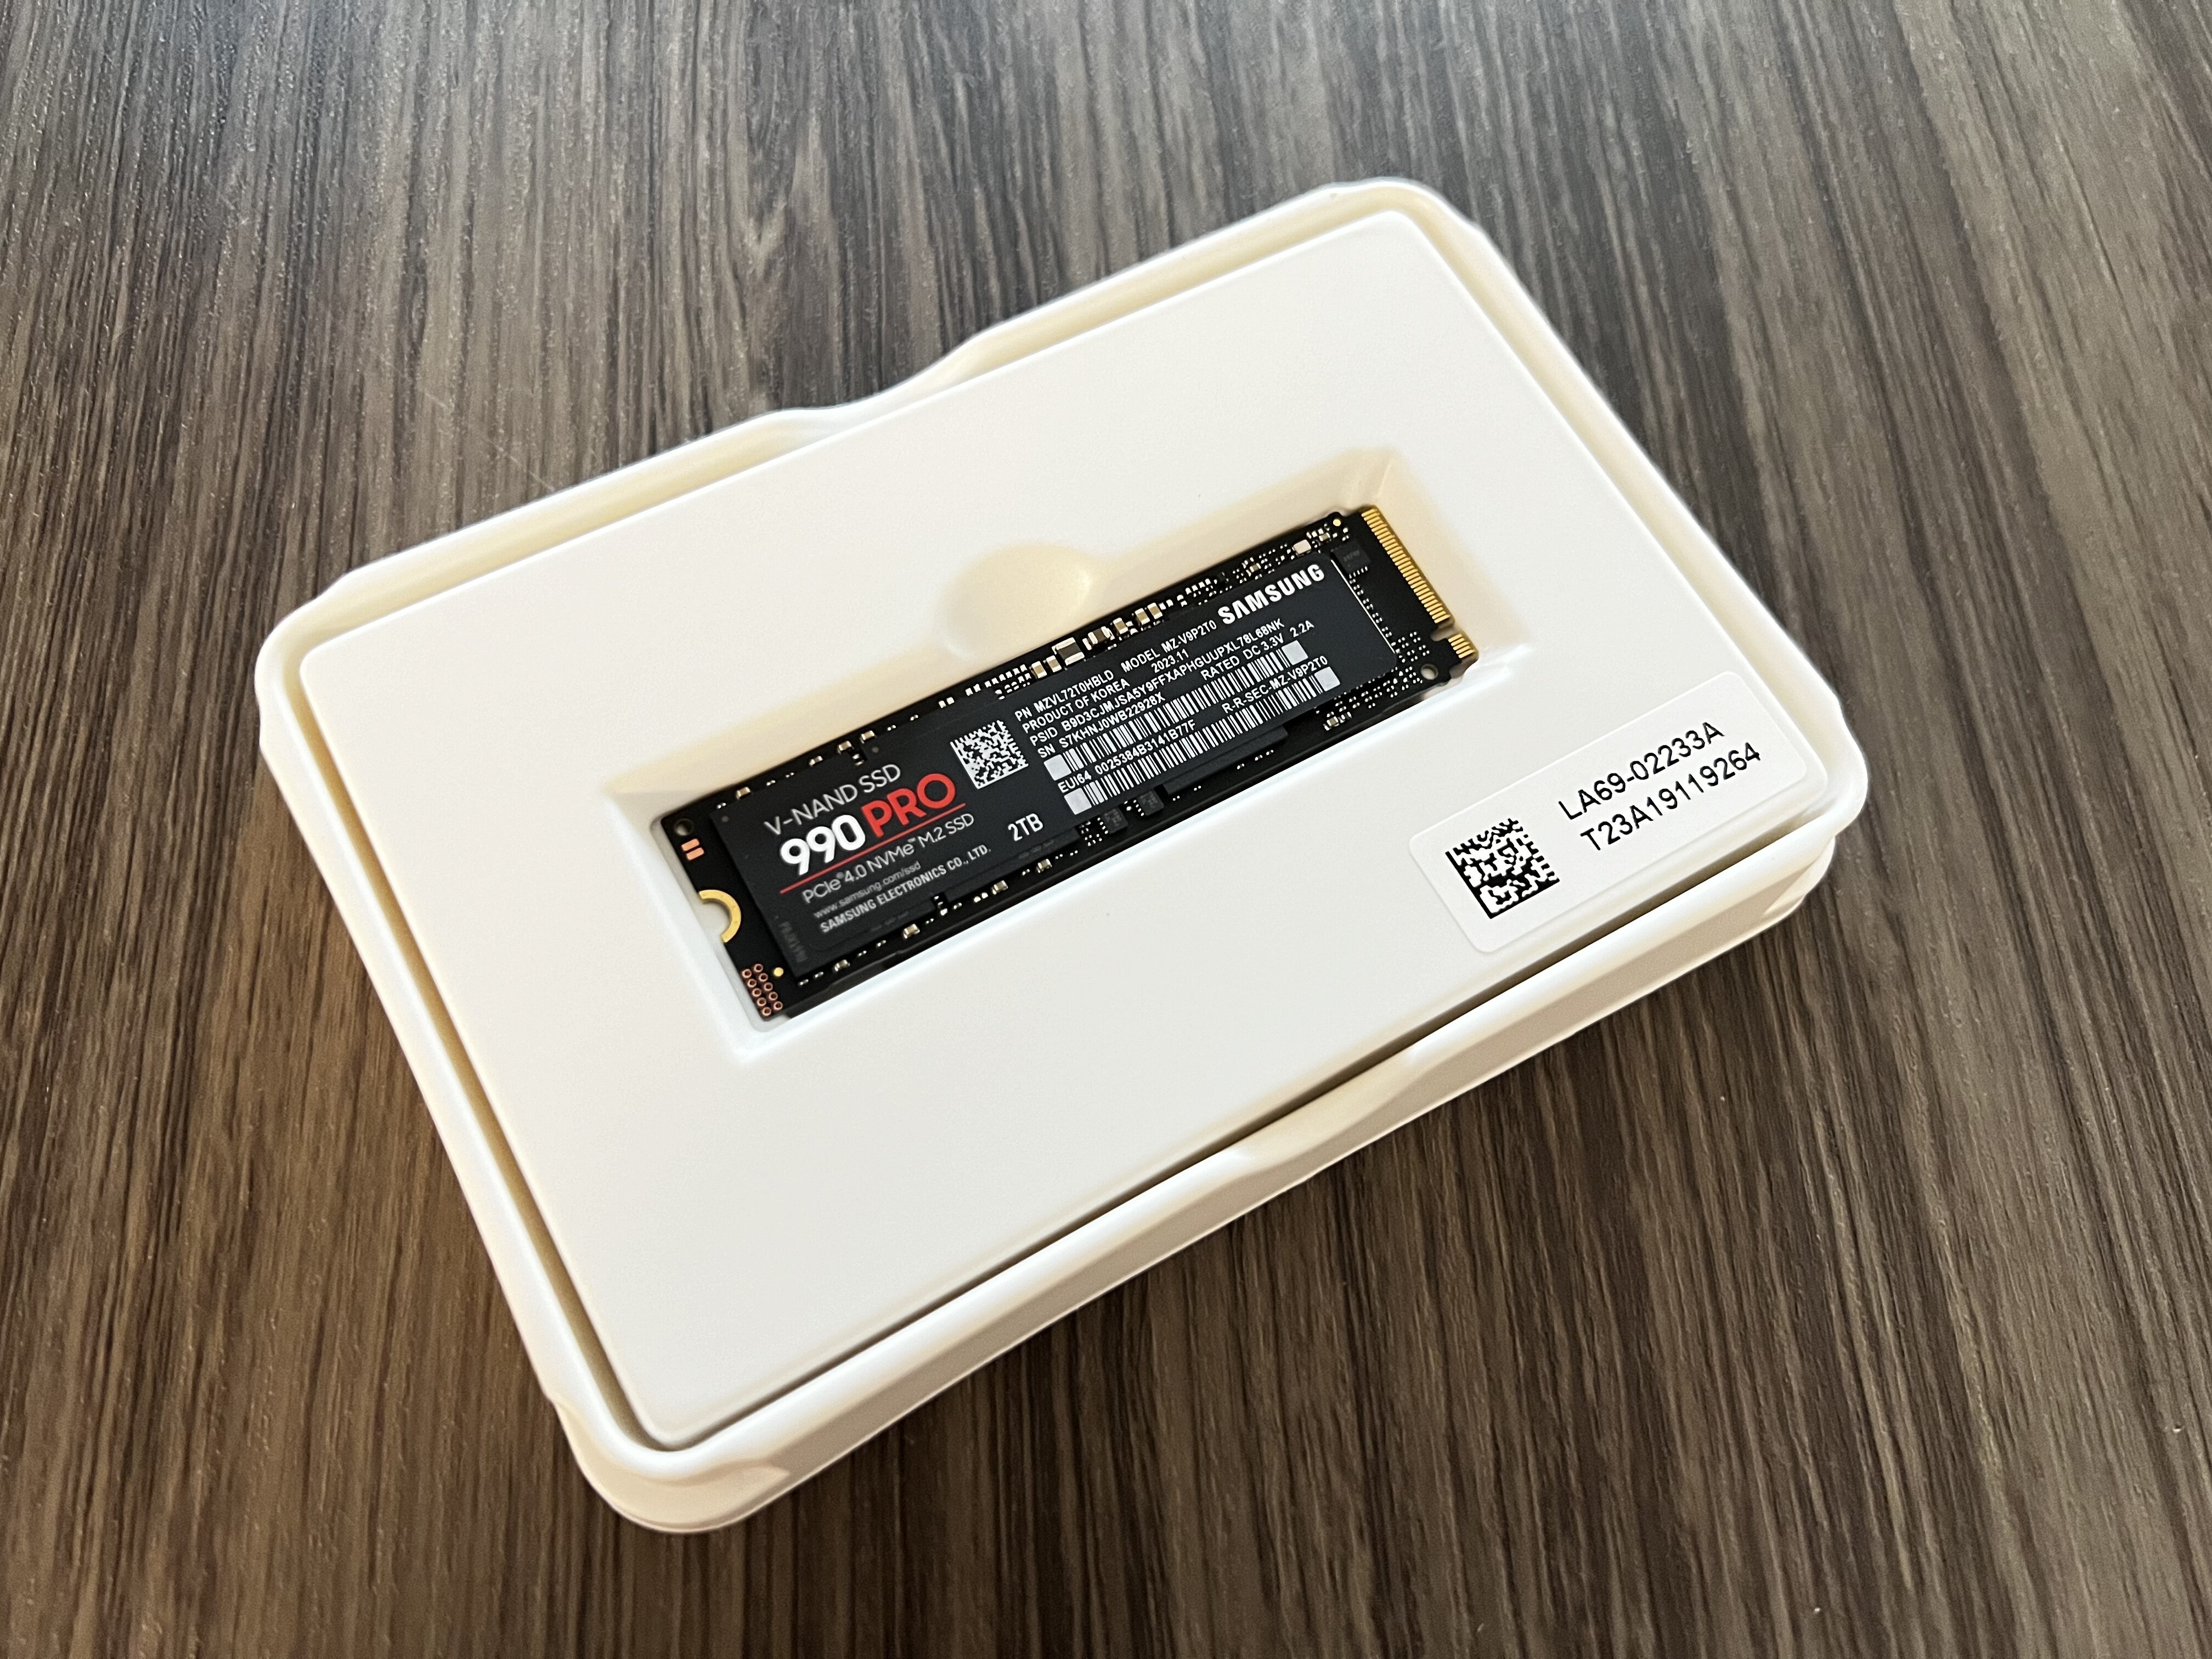
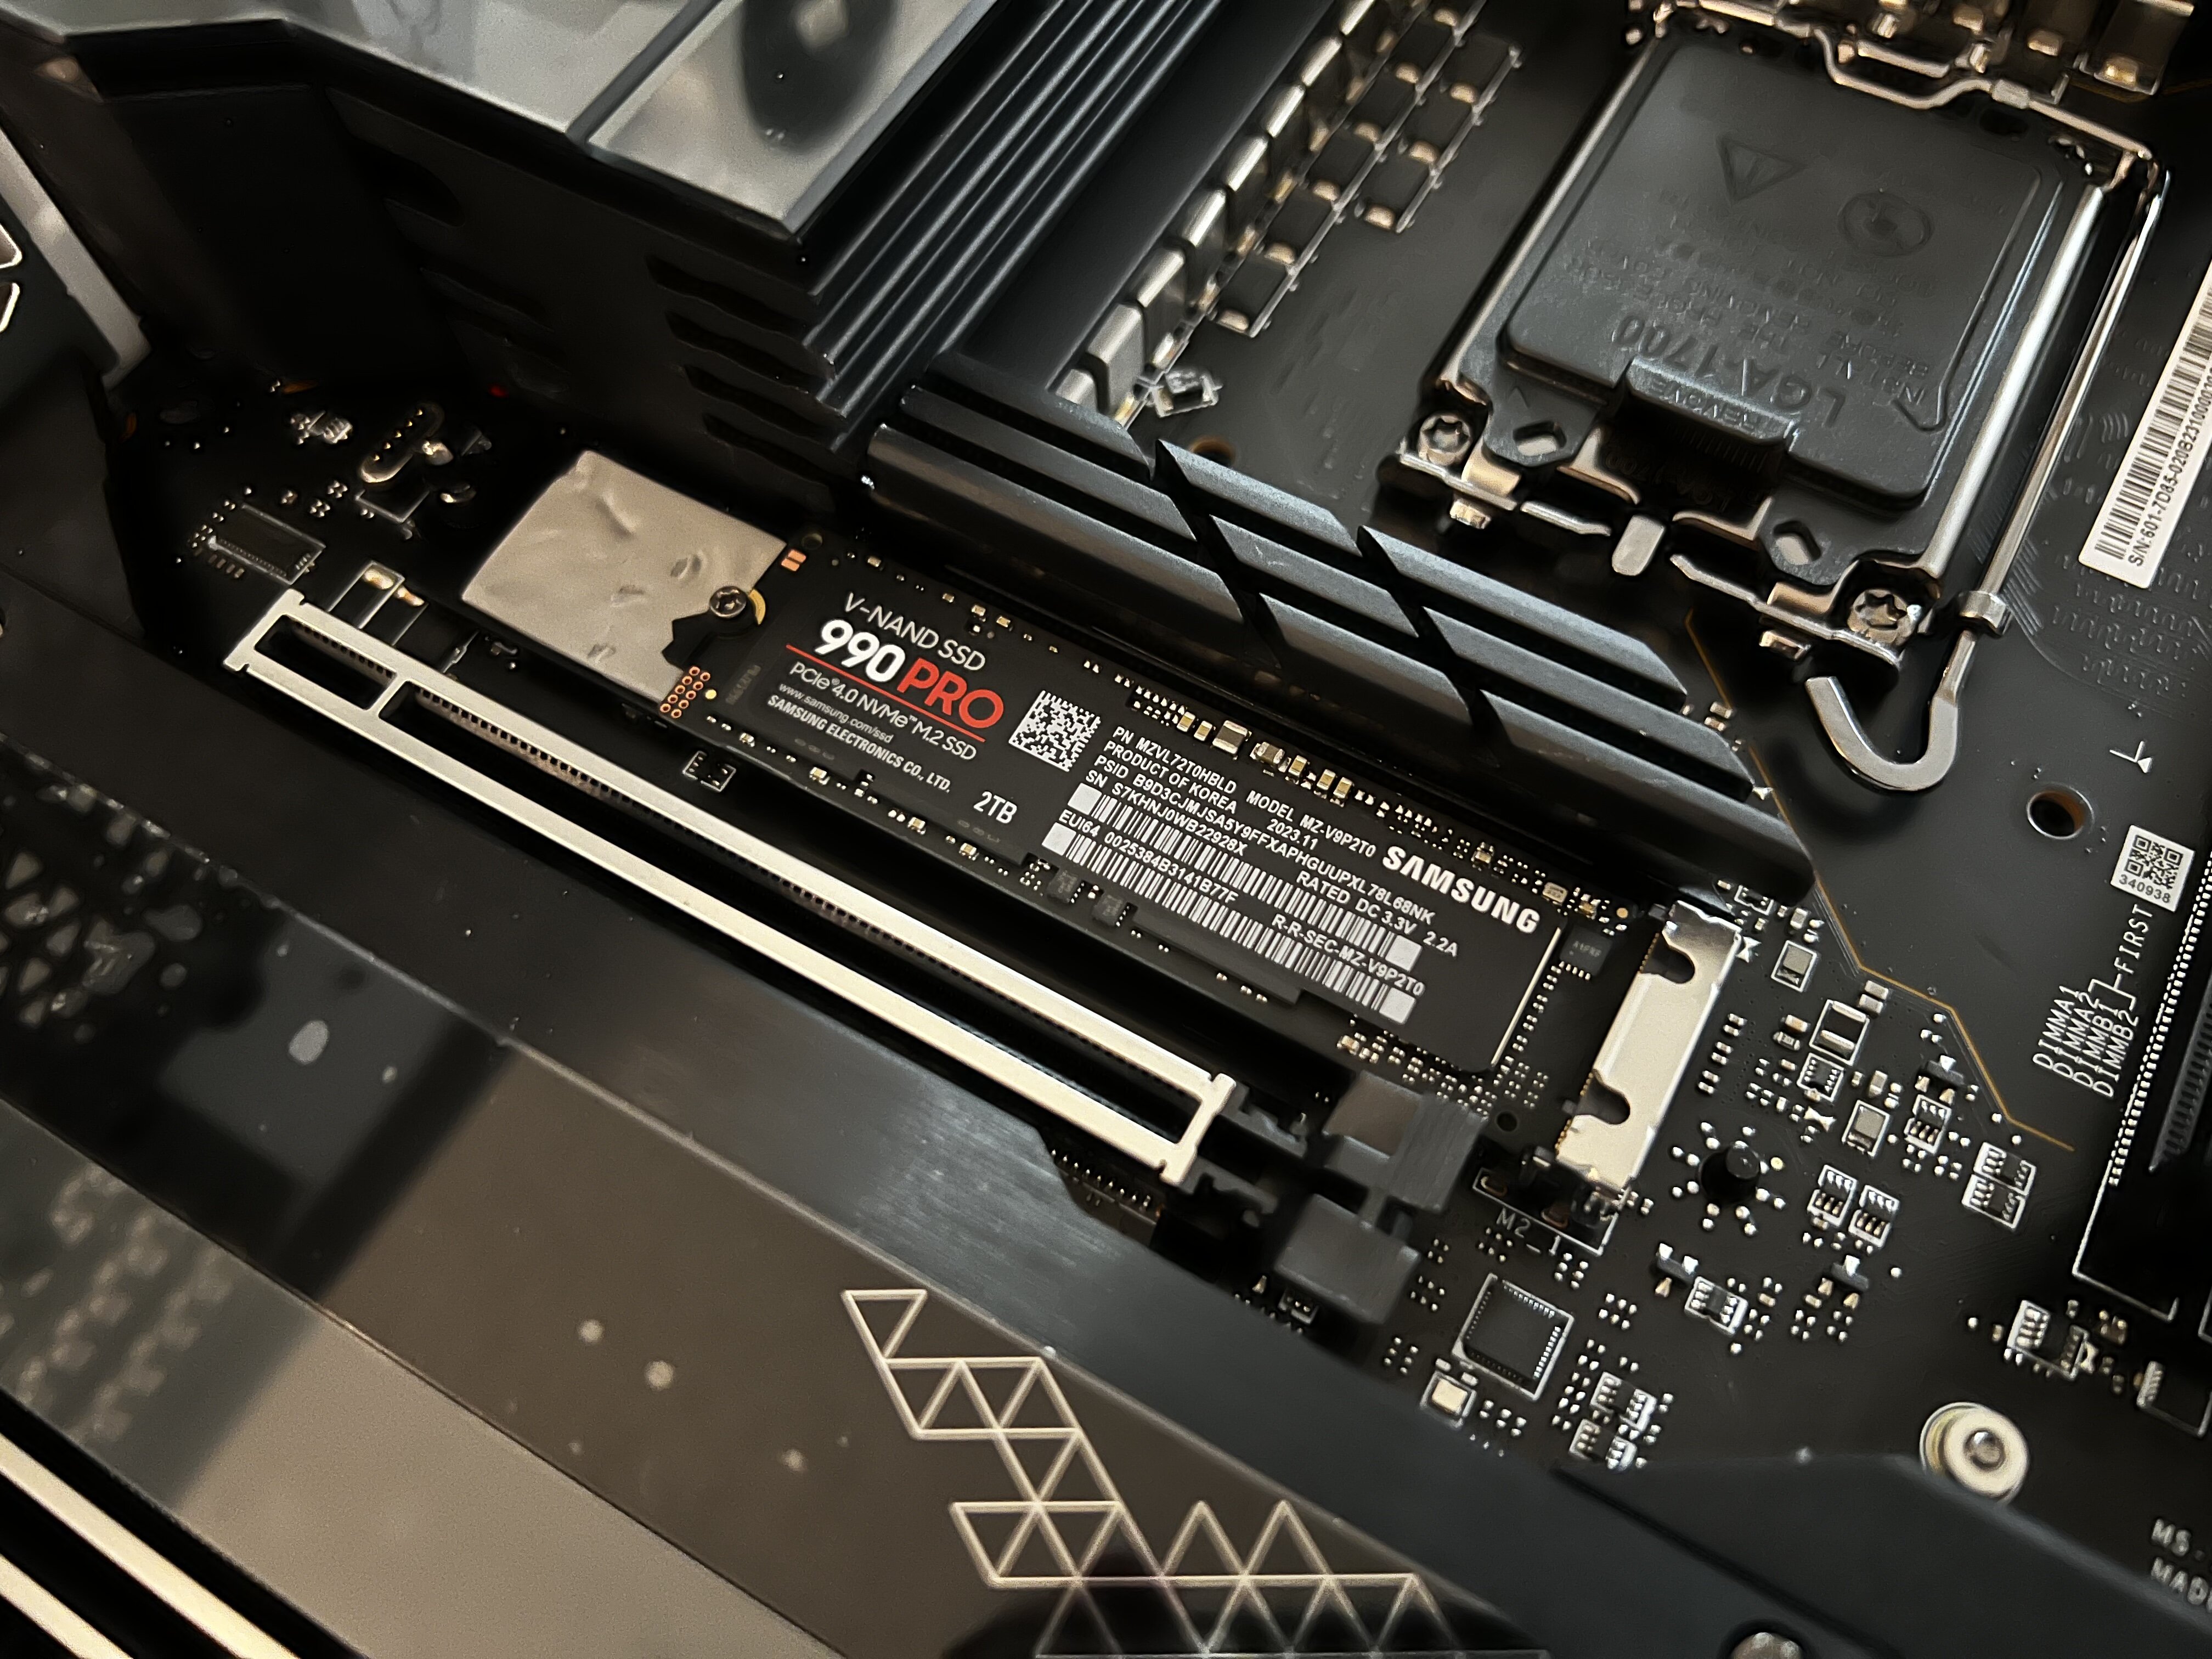
I still cant get over how huge those 4090s are LOL. Like putting an cinderblock on your motherboard.1 point
-
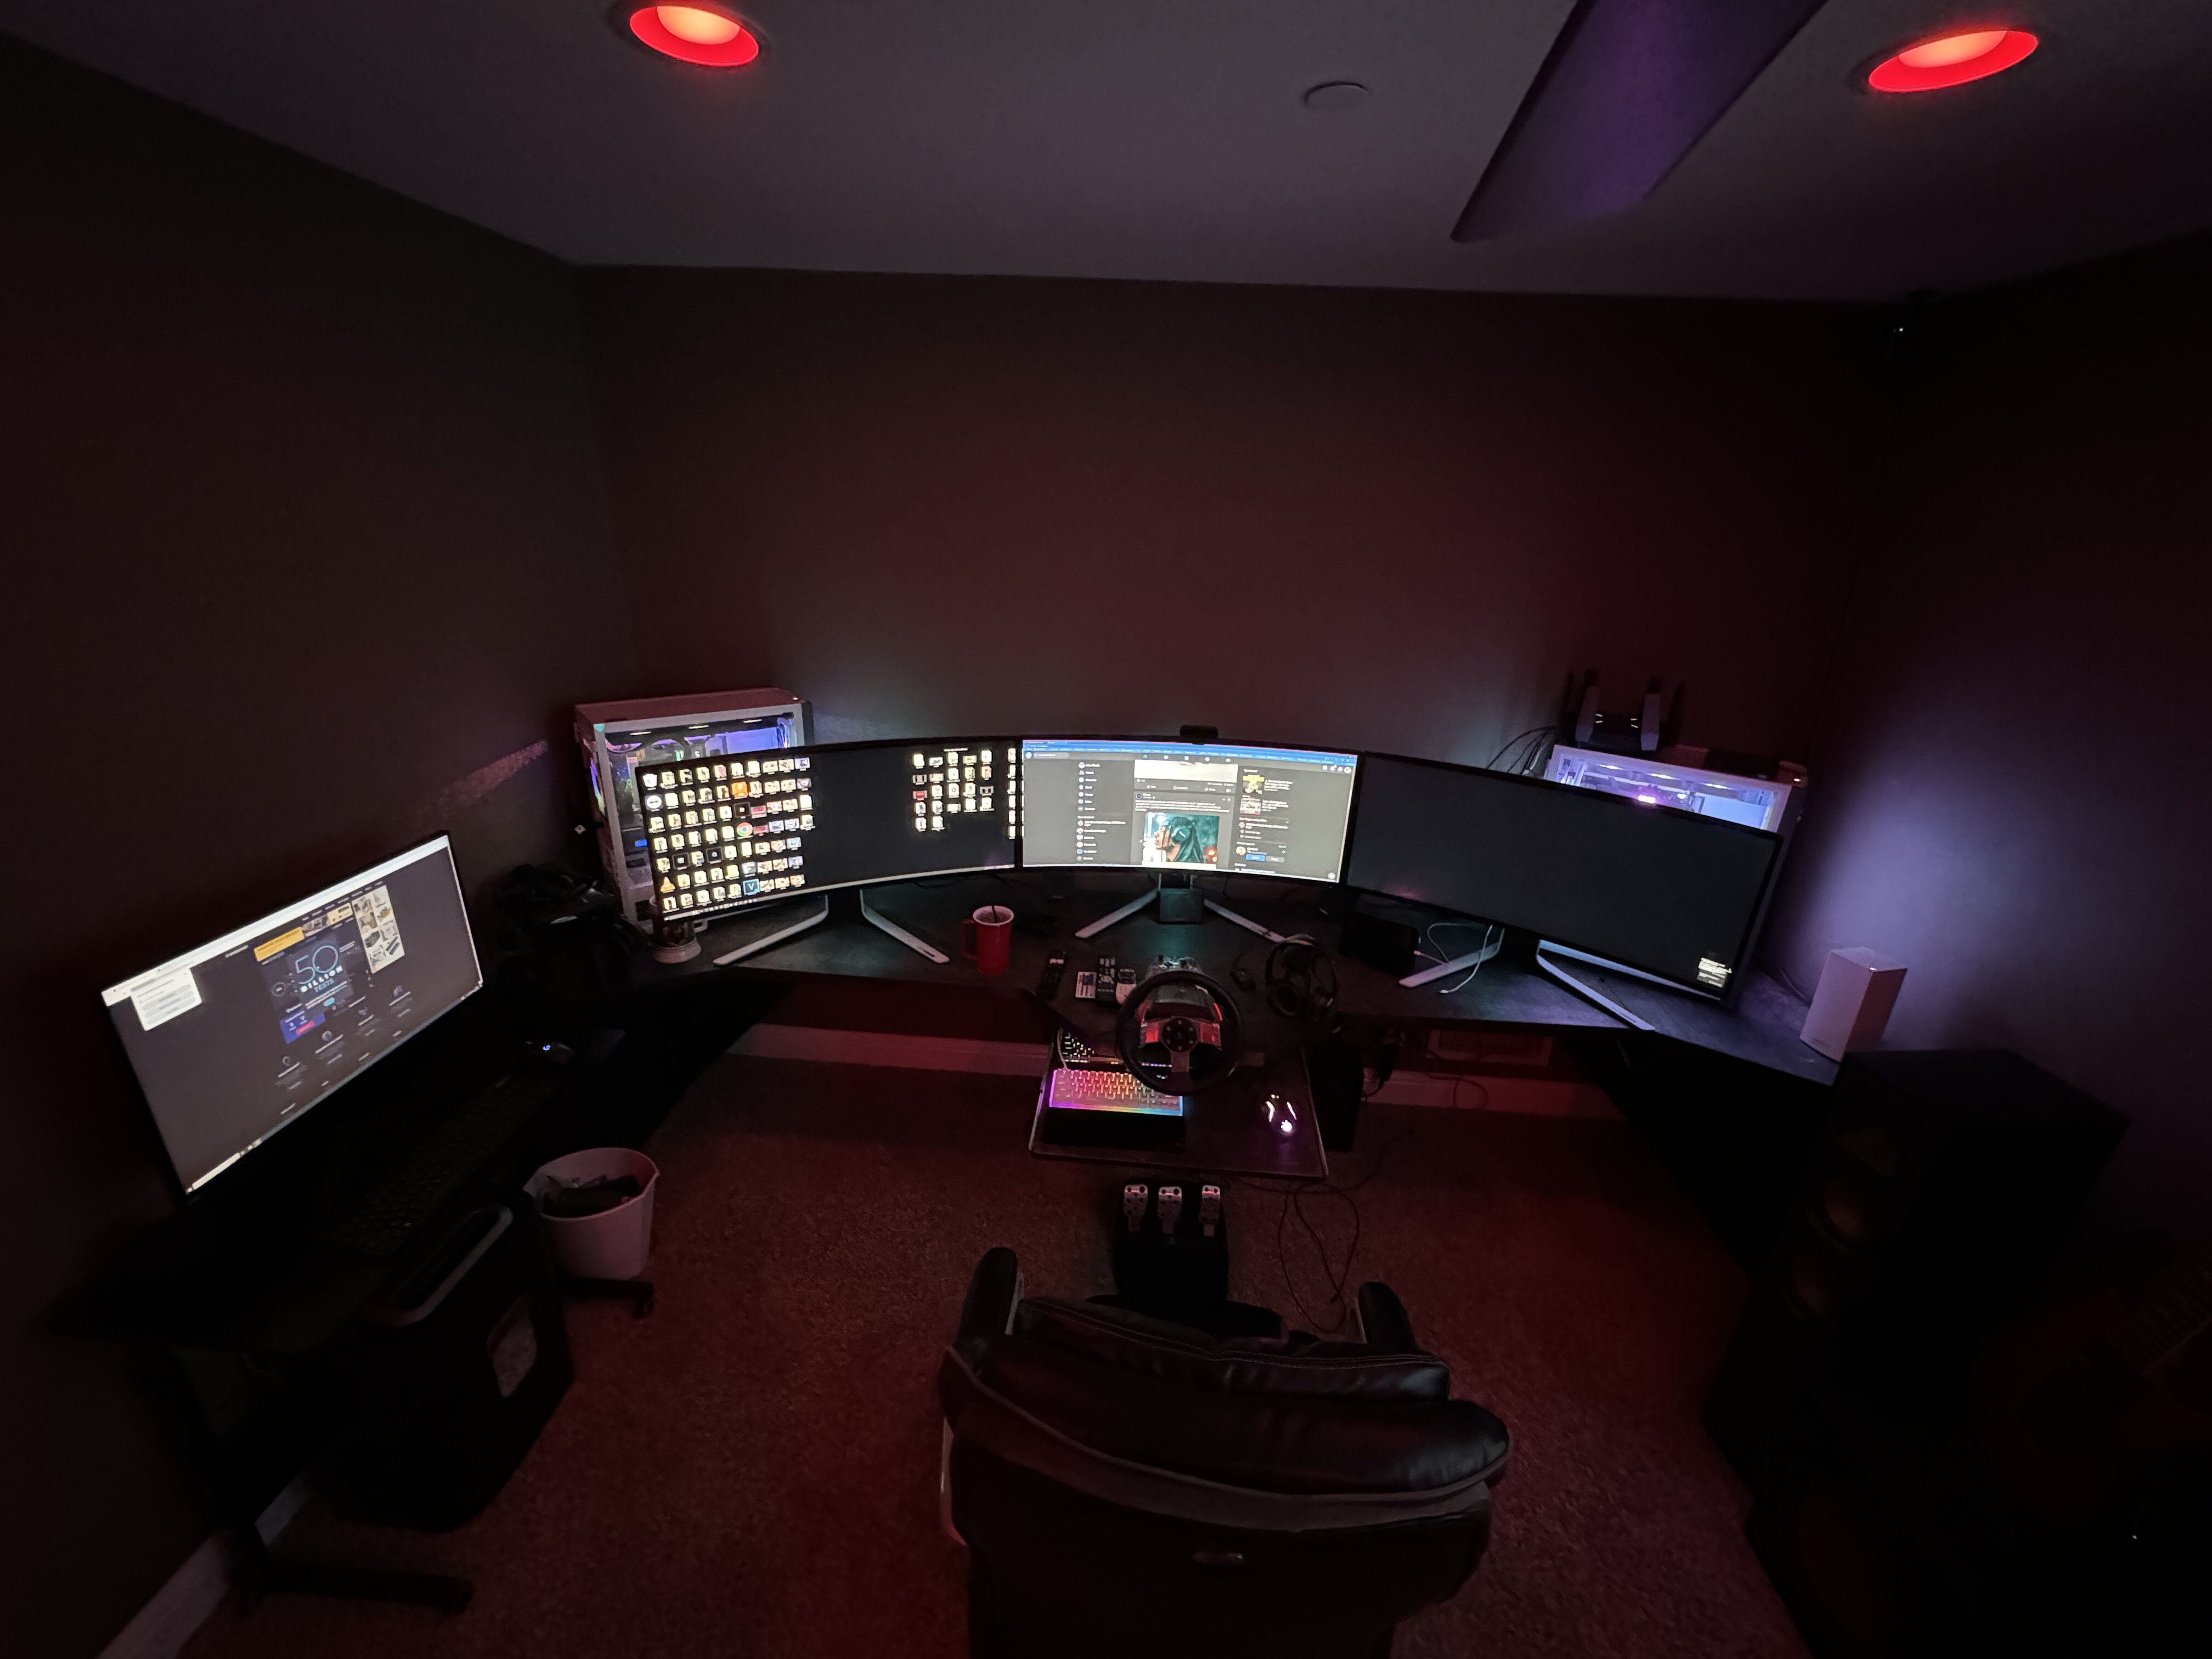
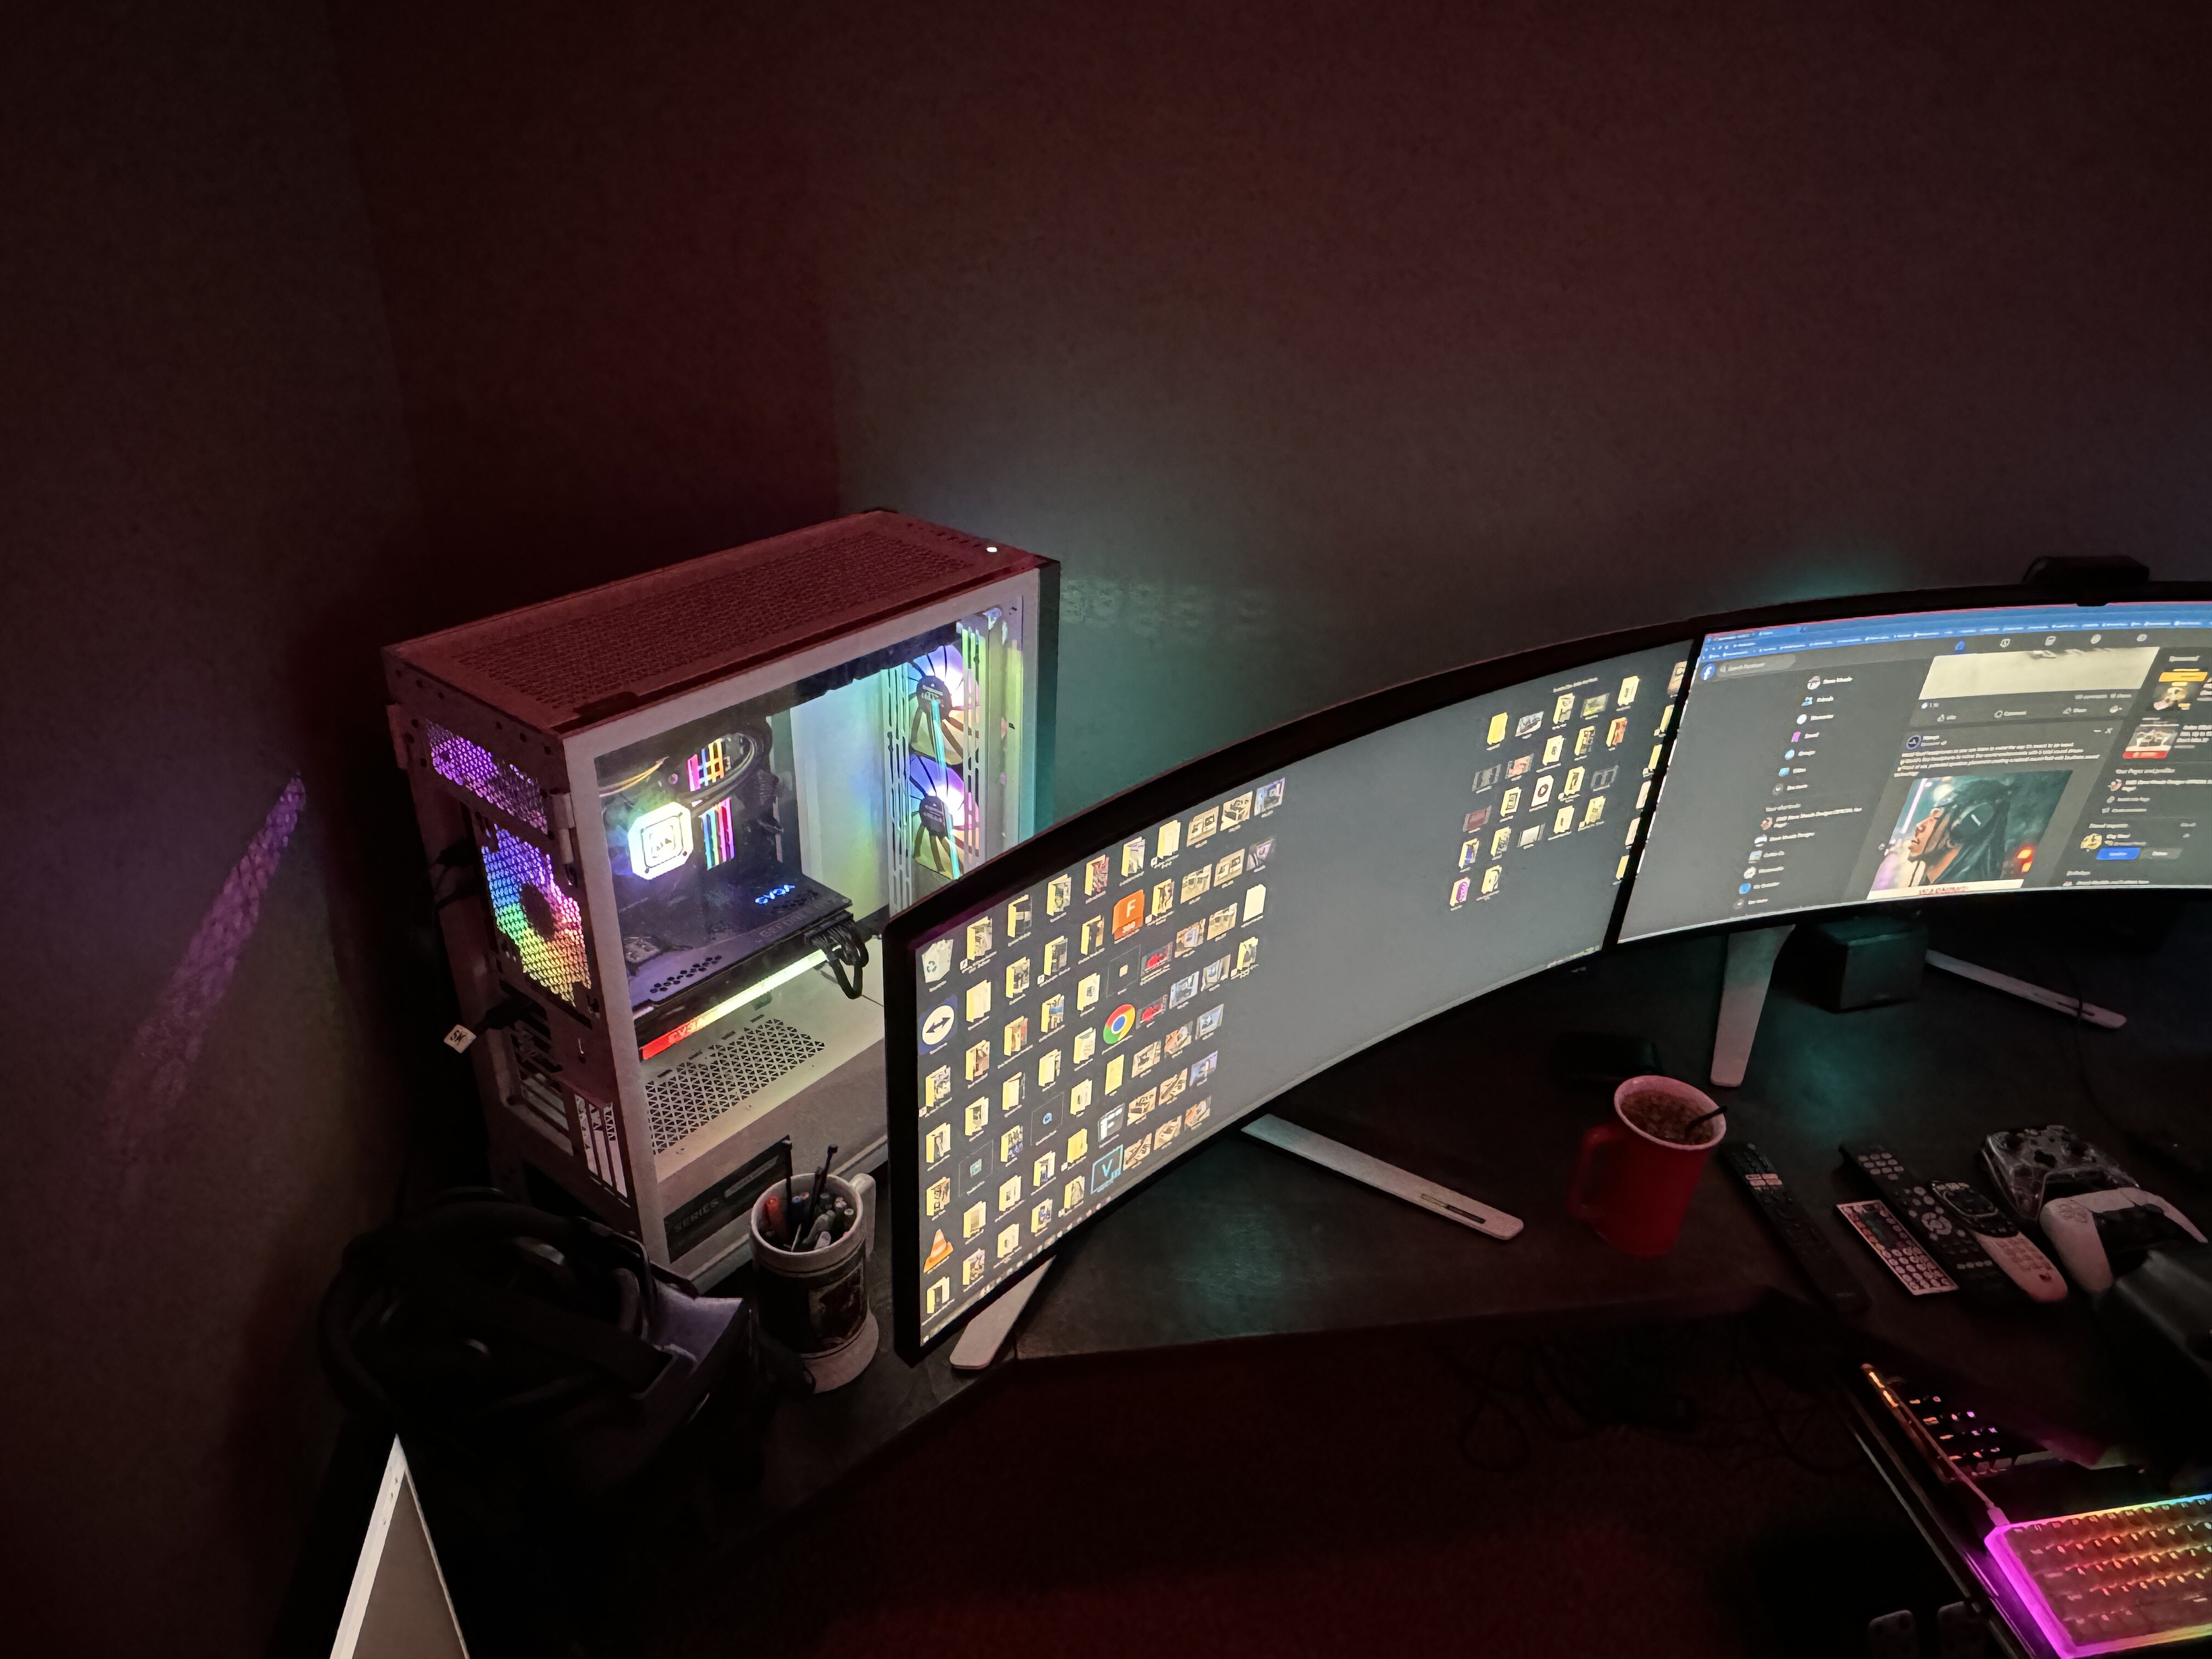
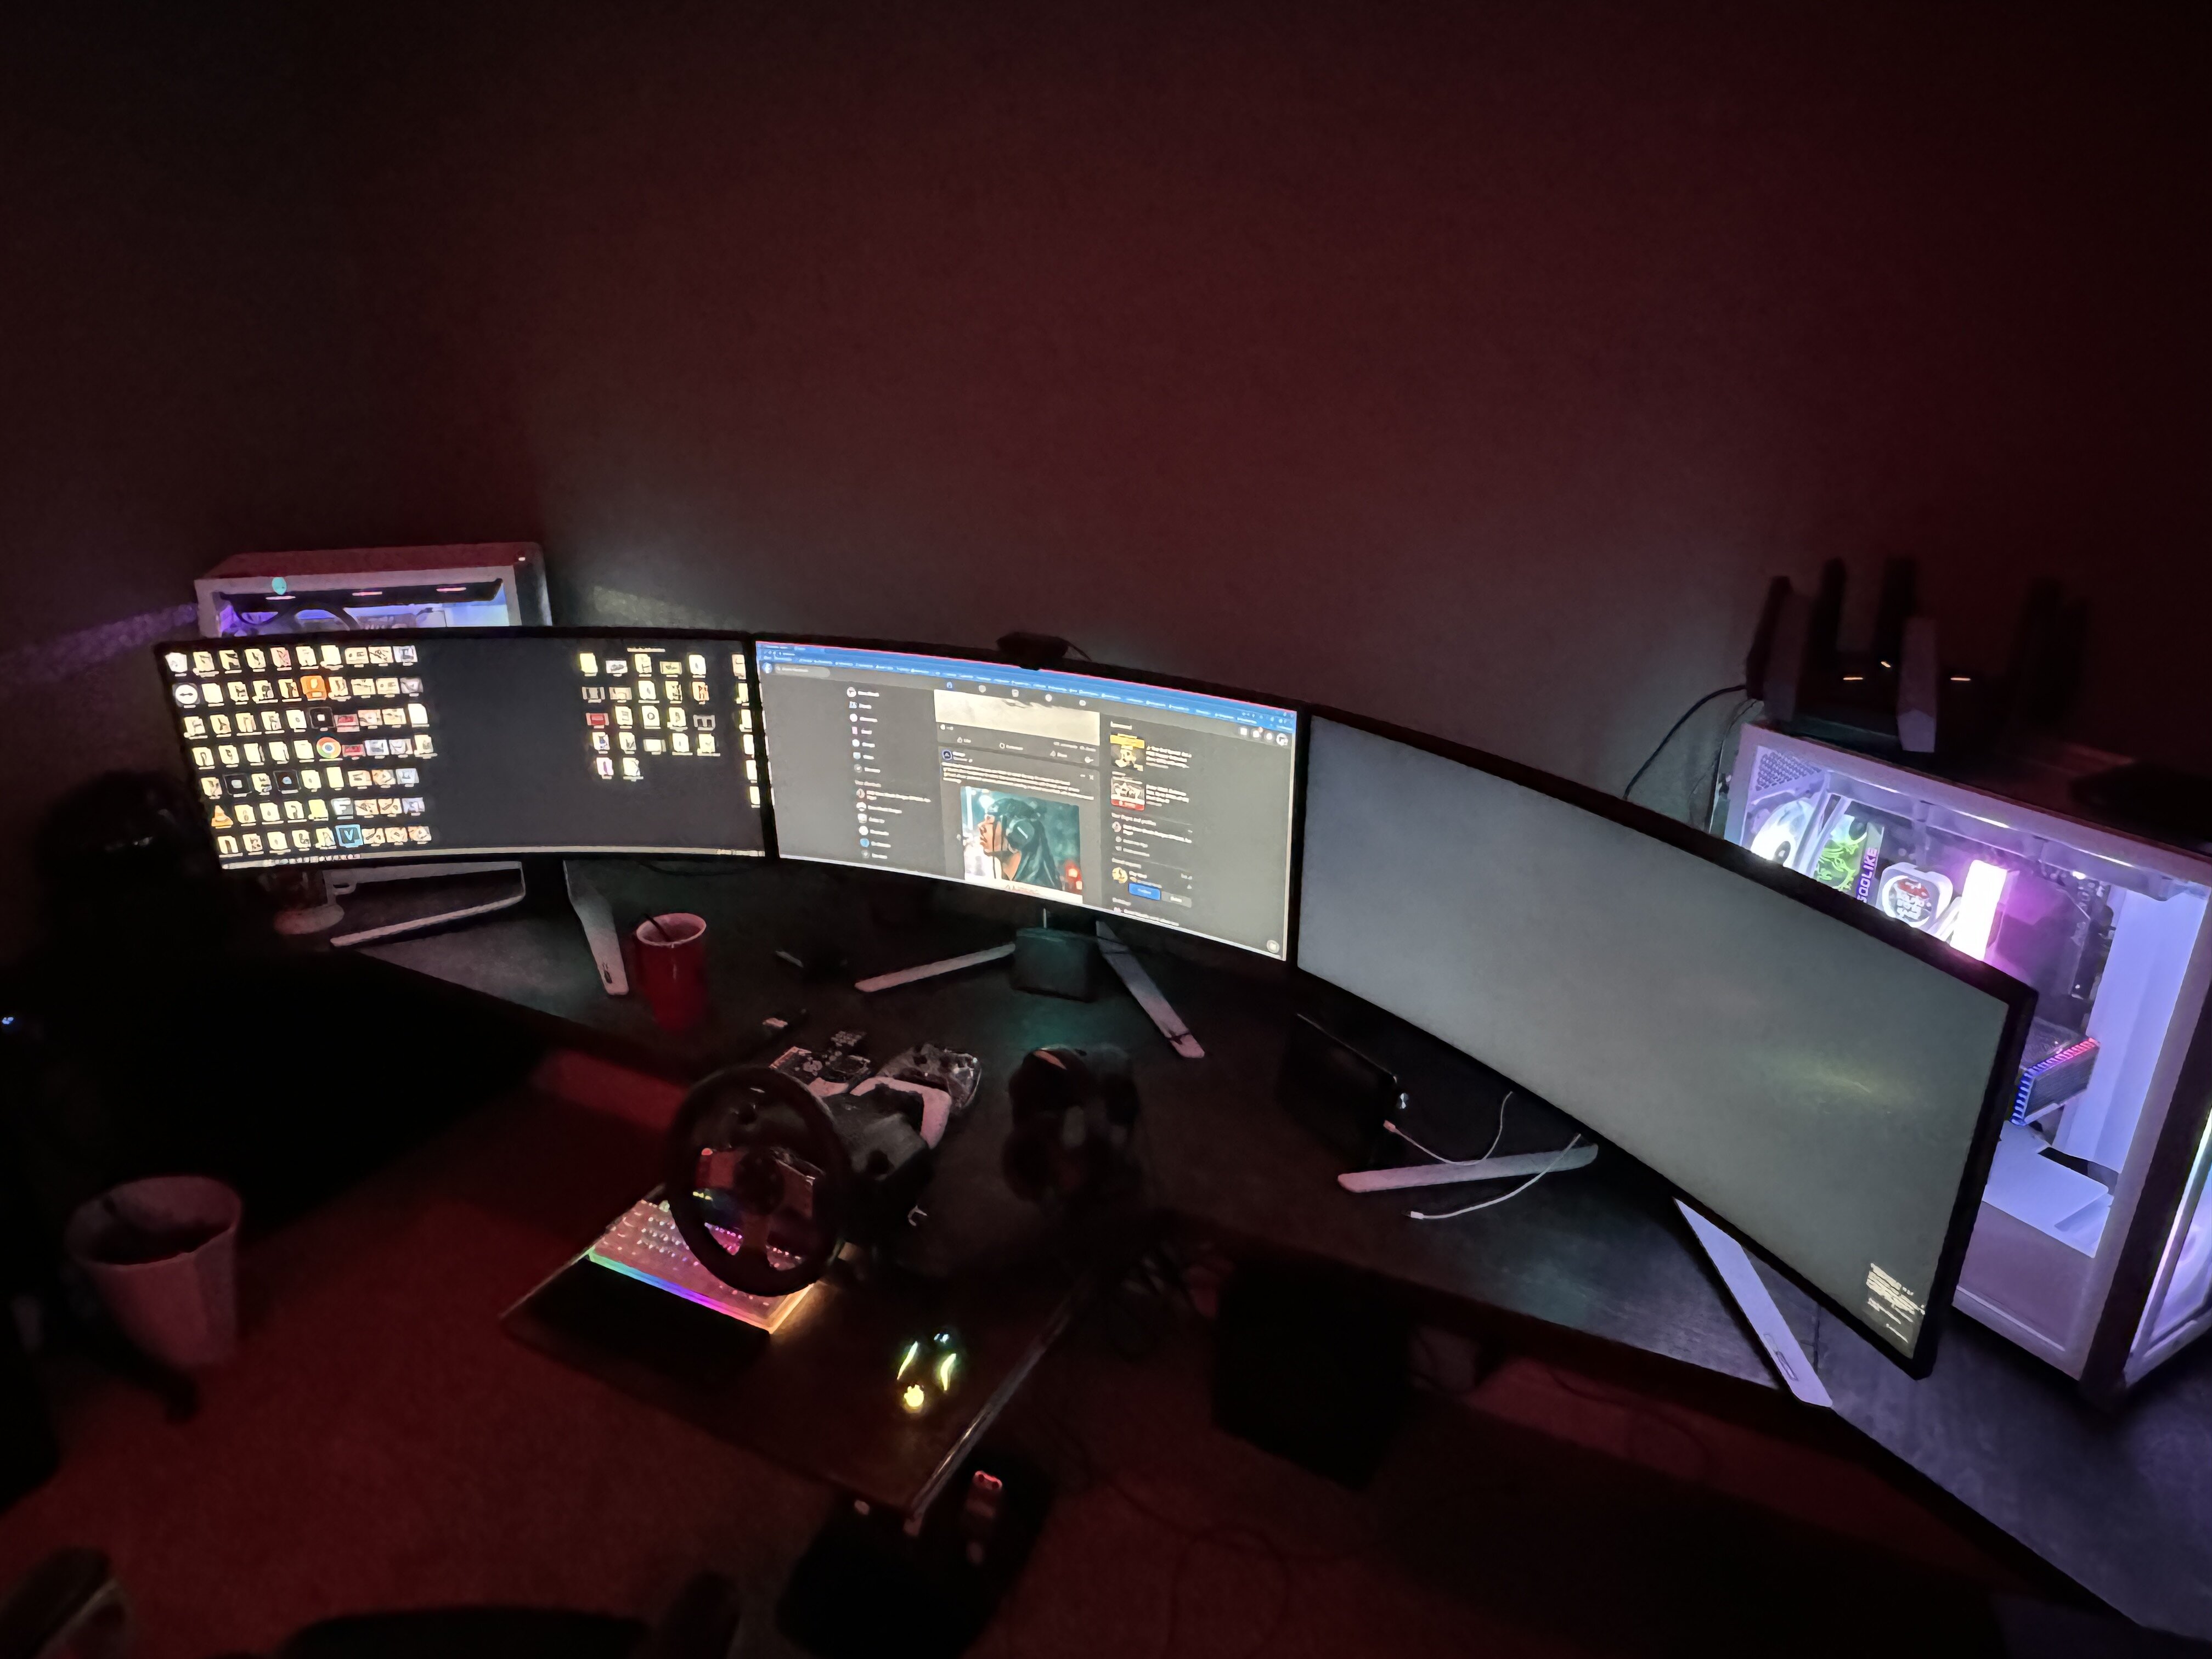
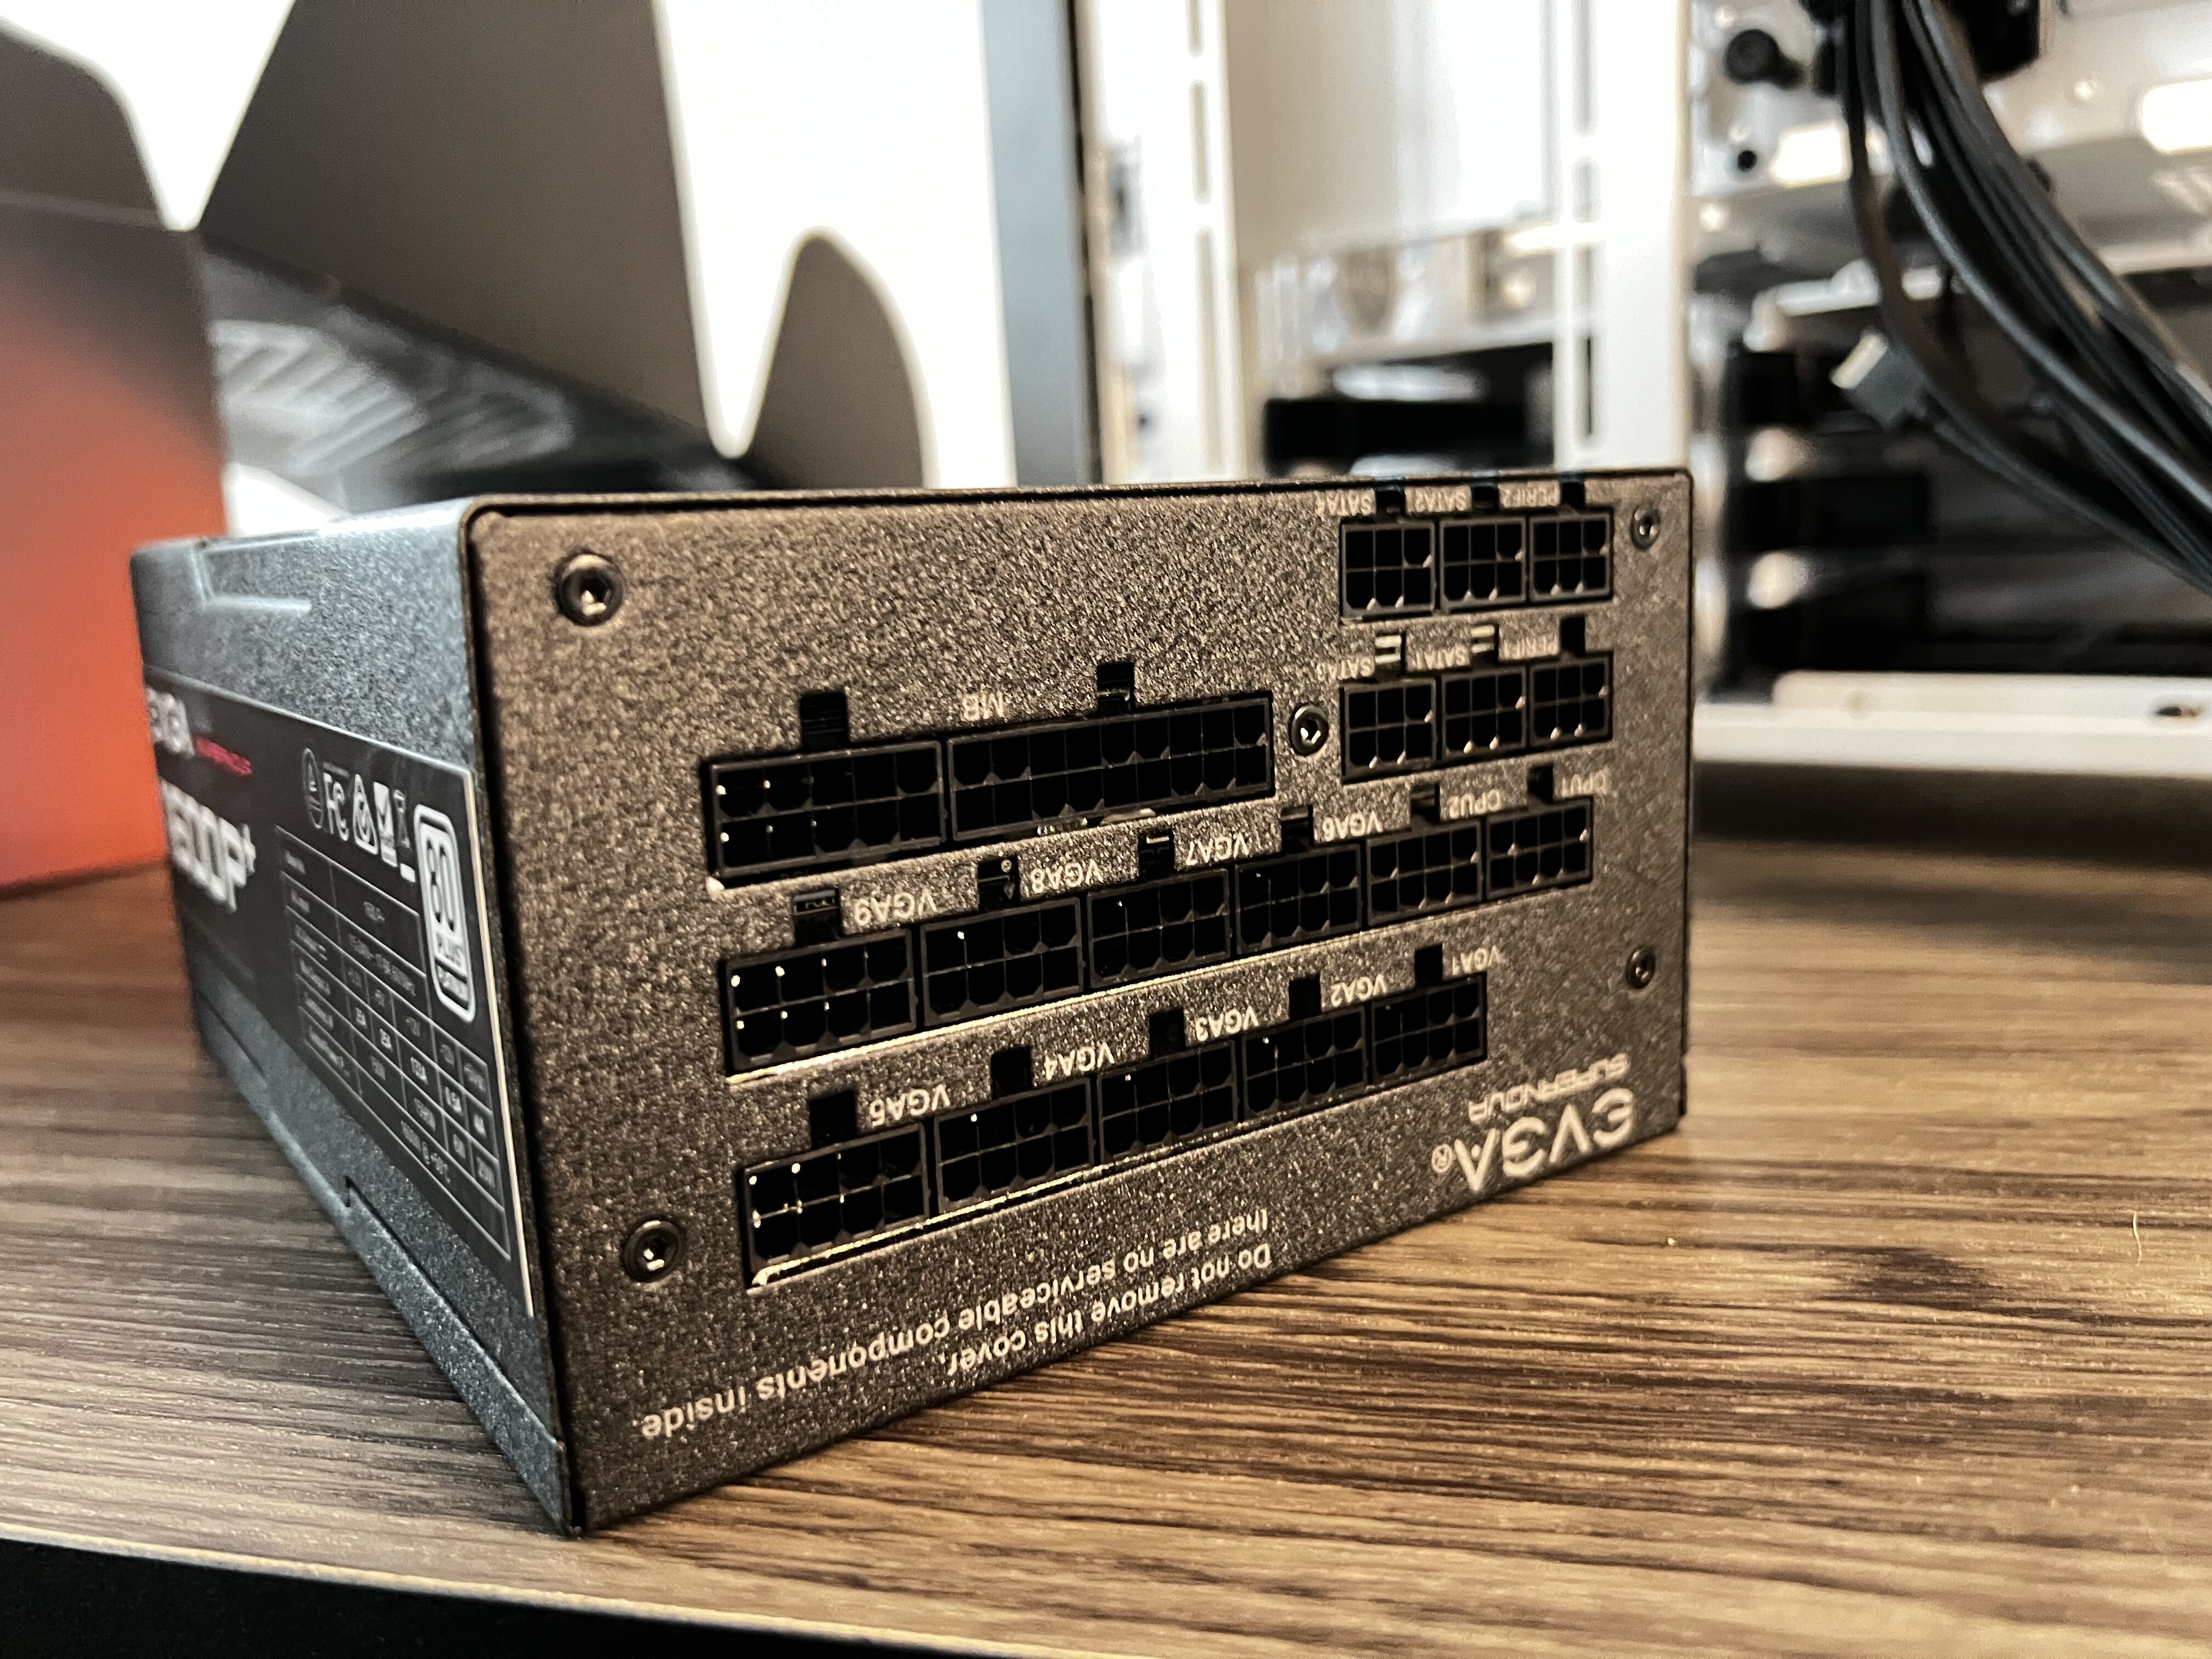
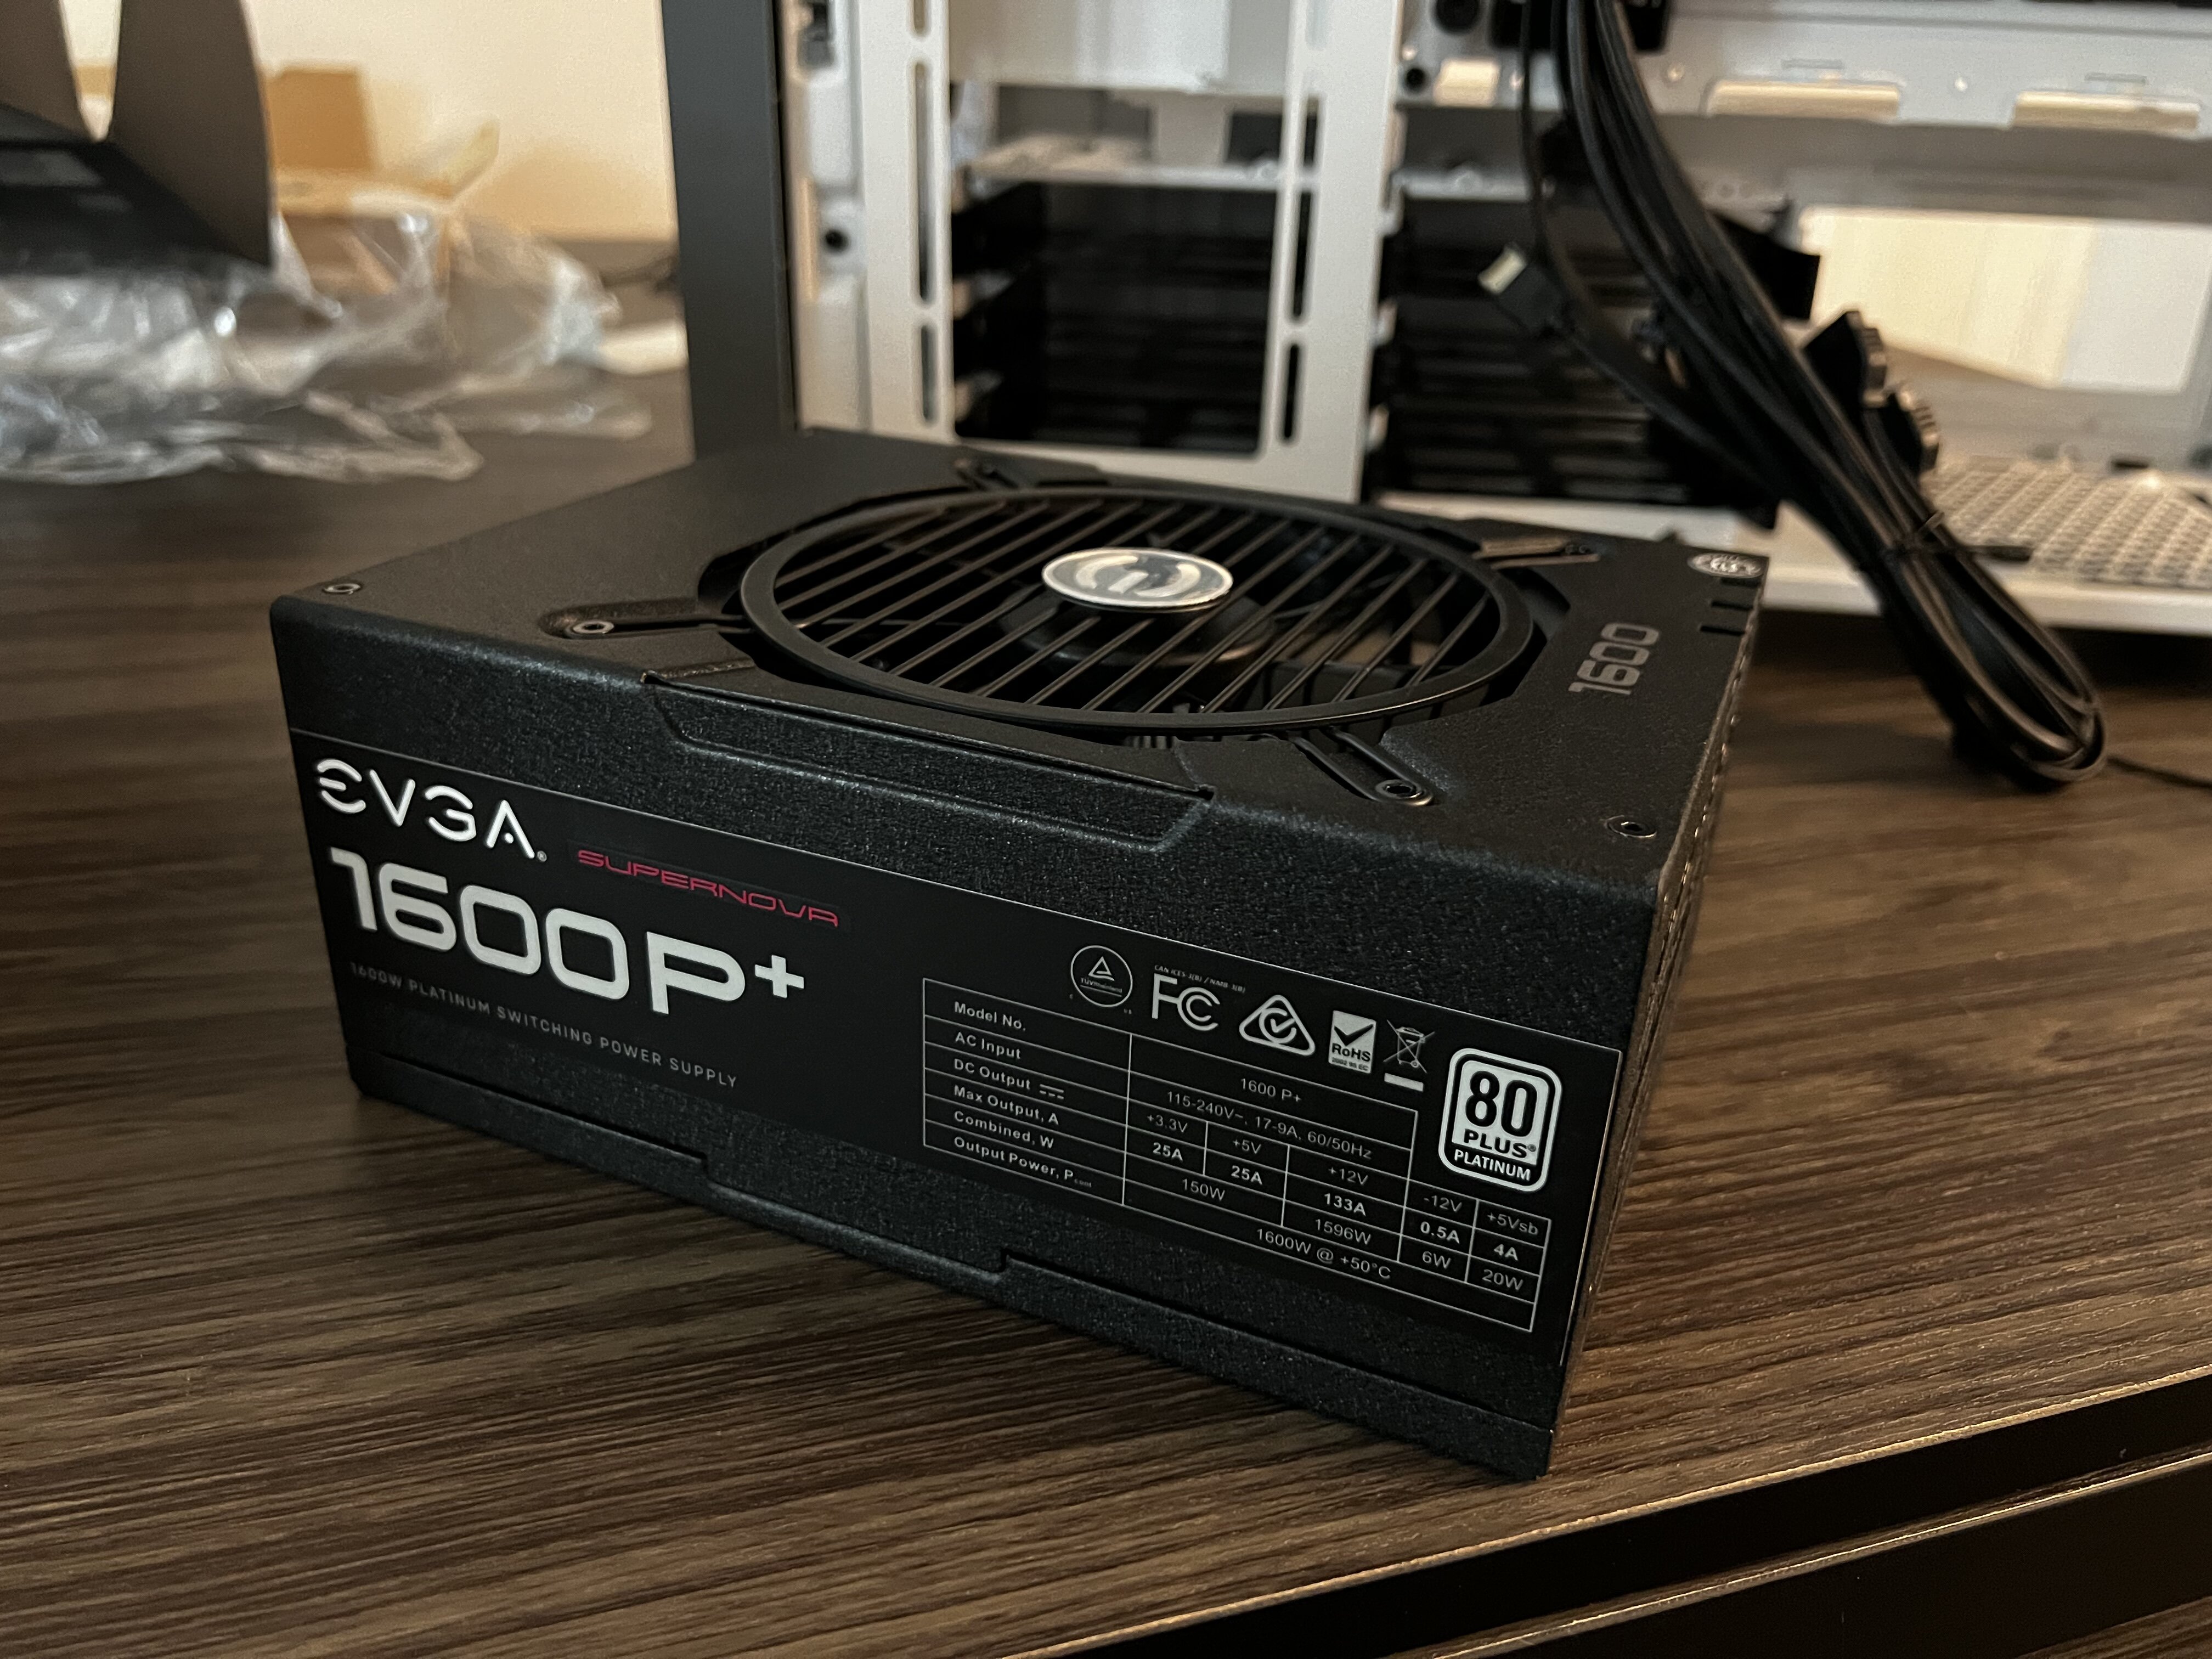
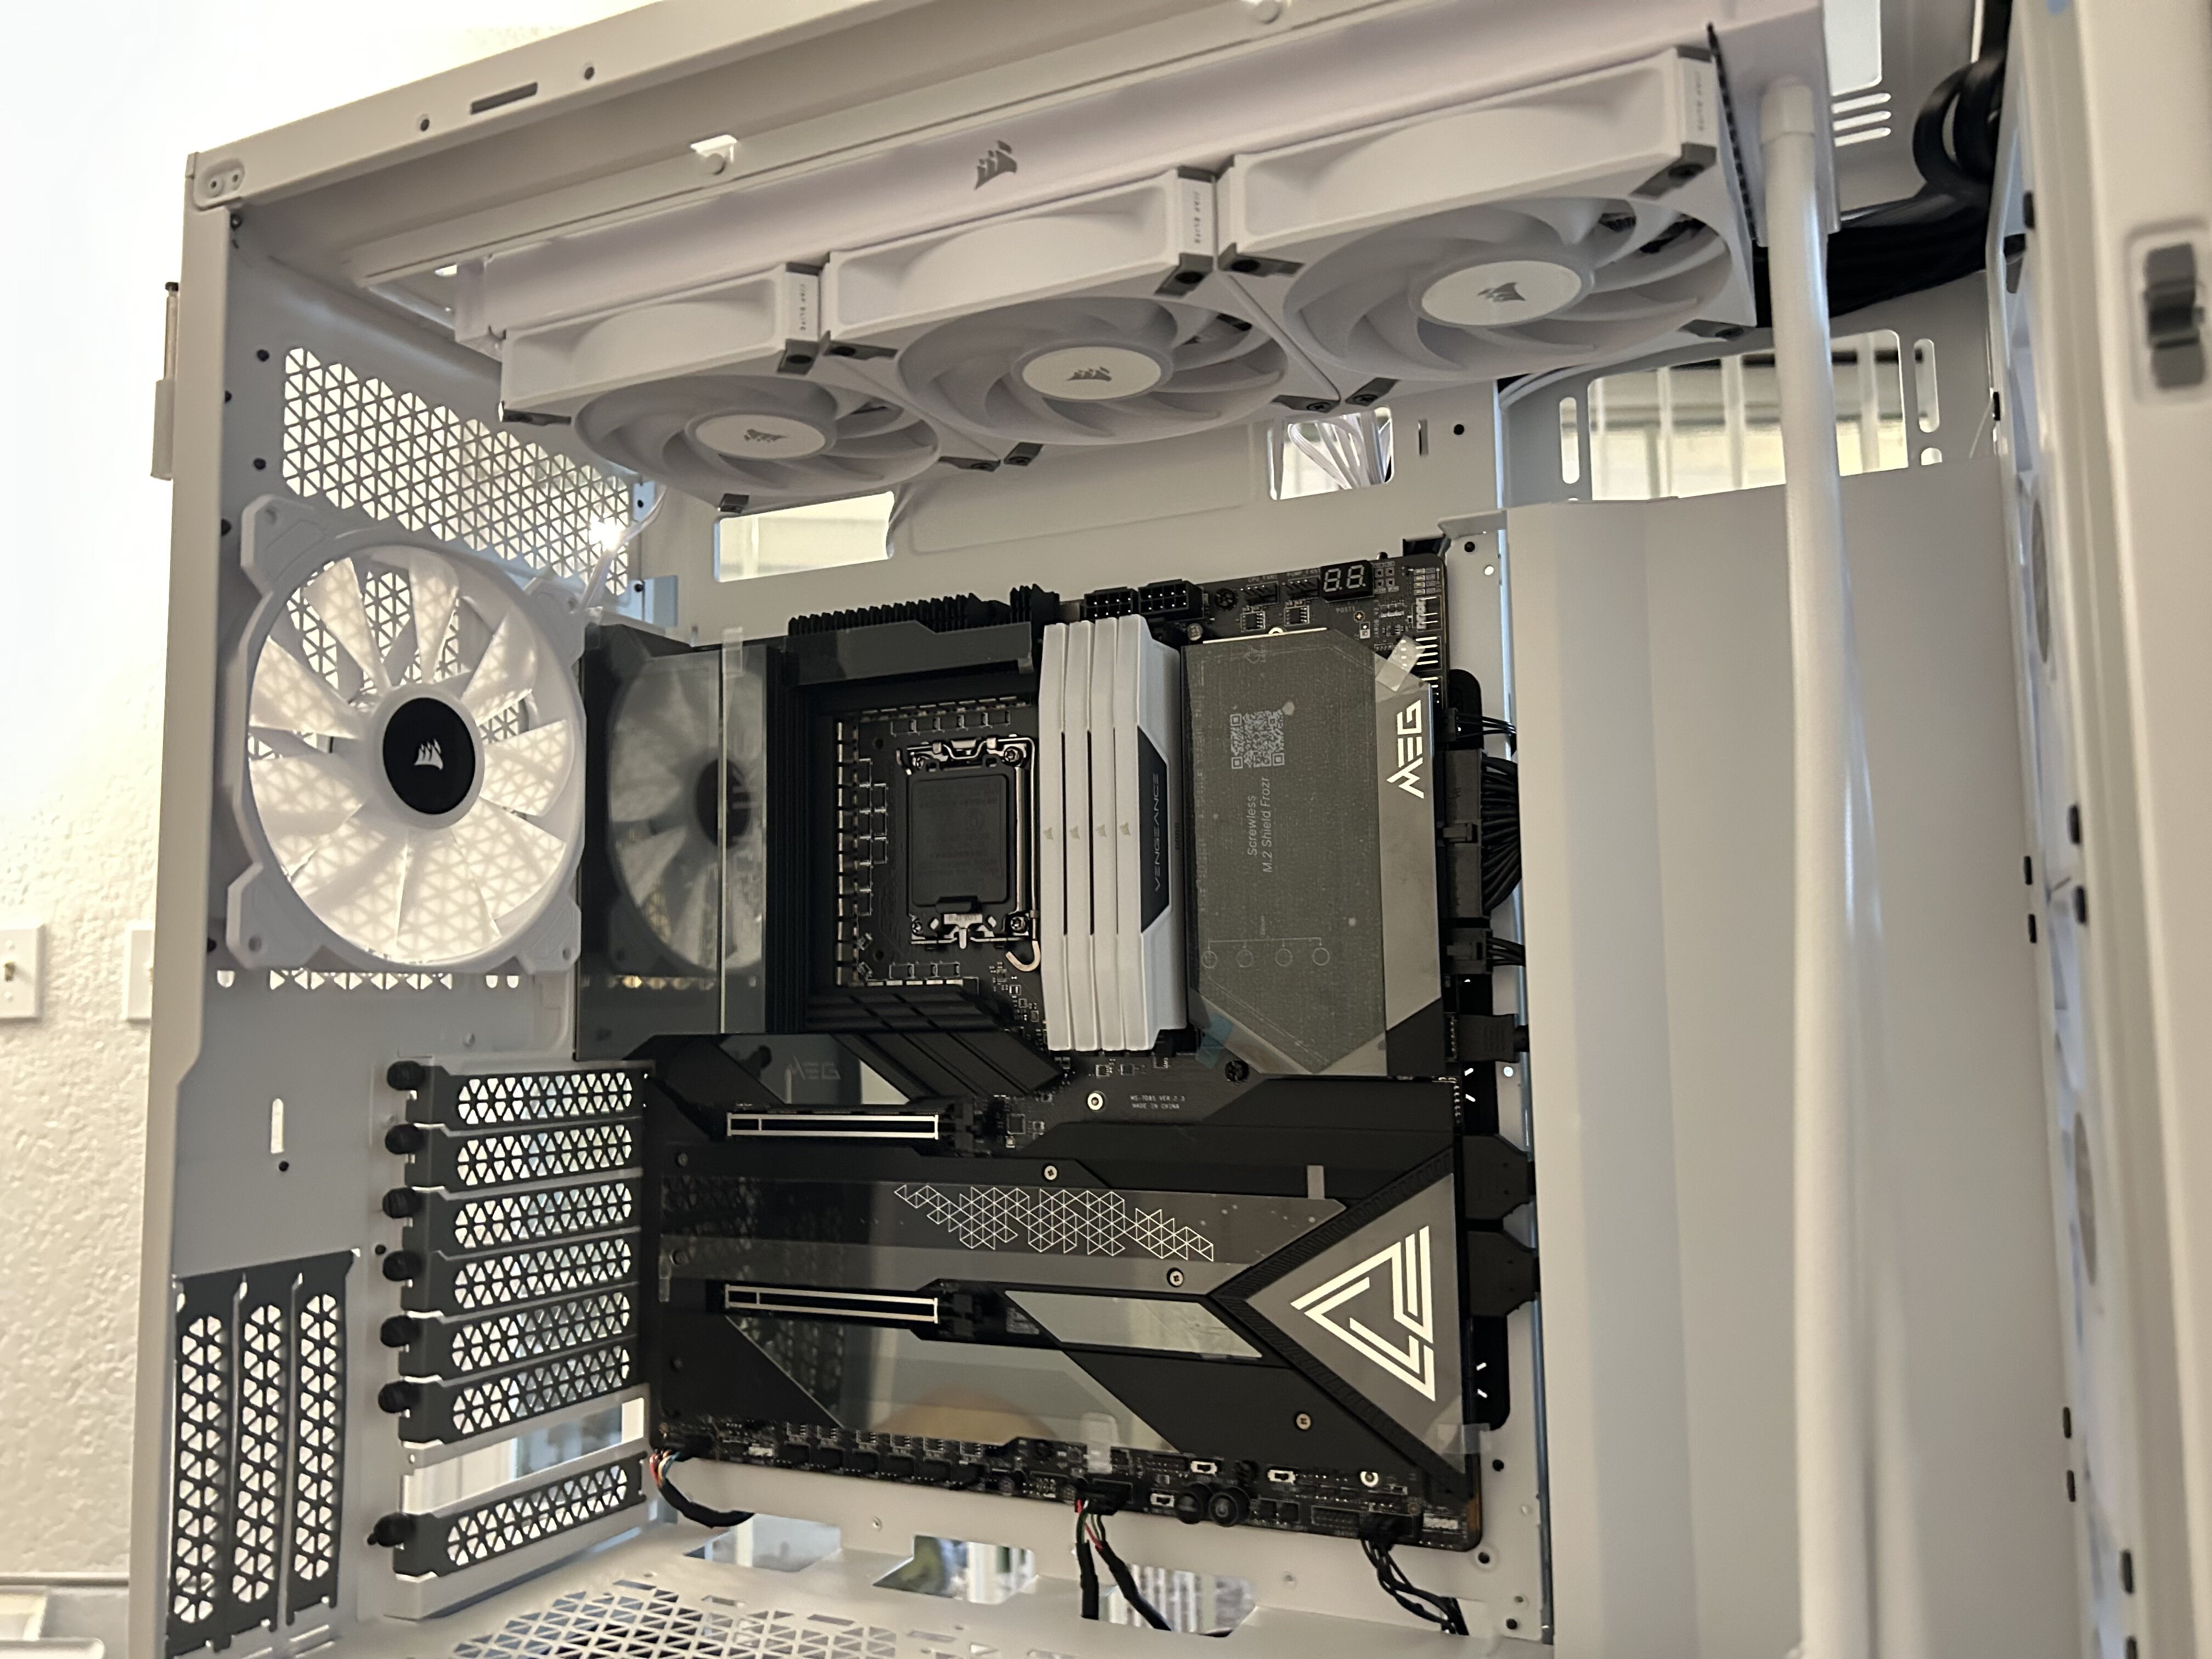
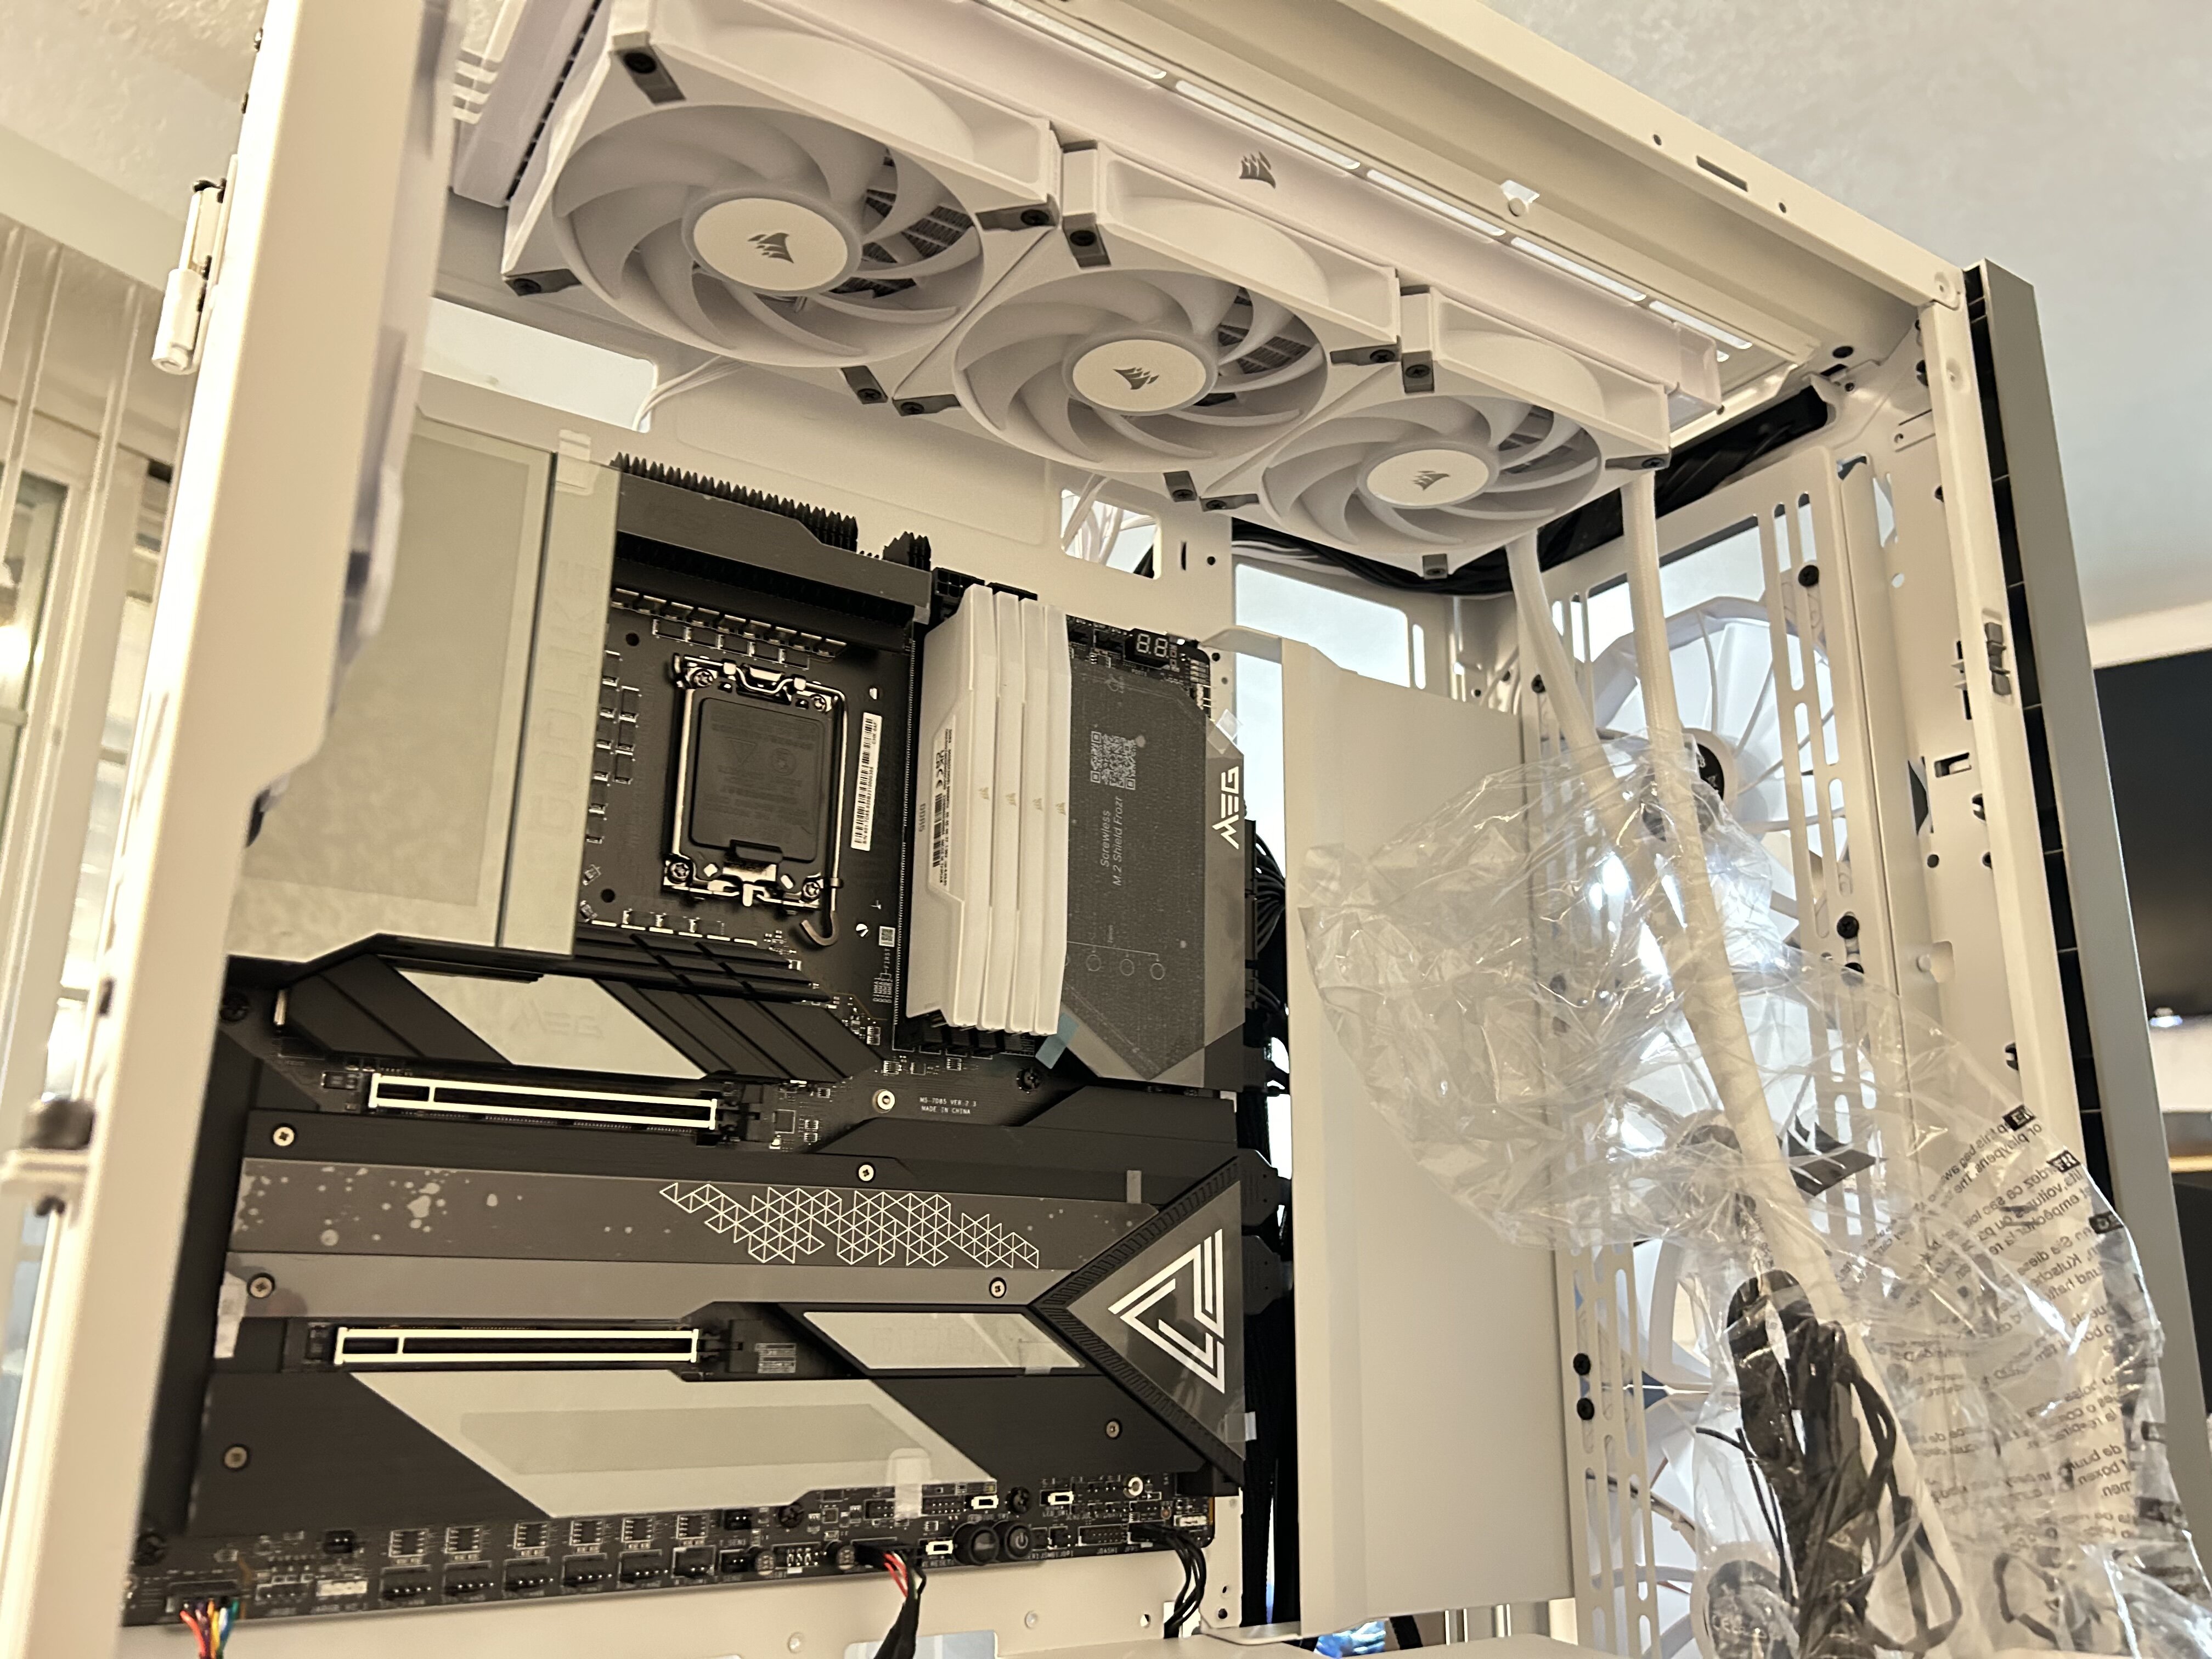
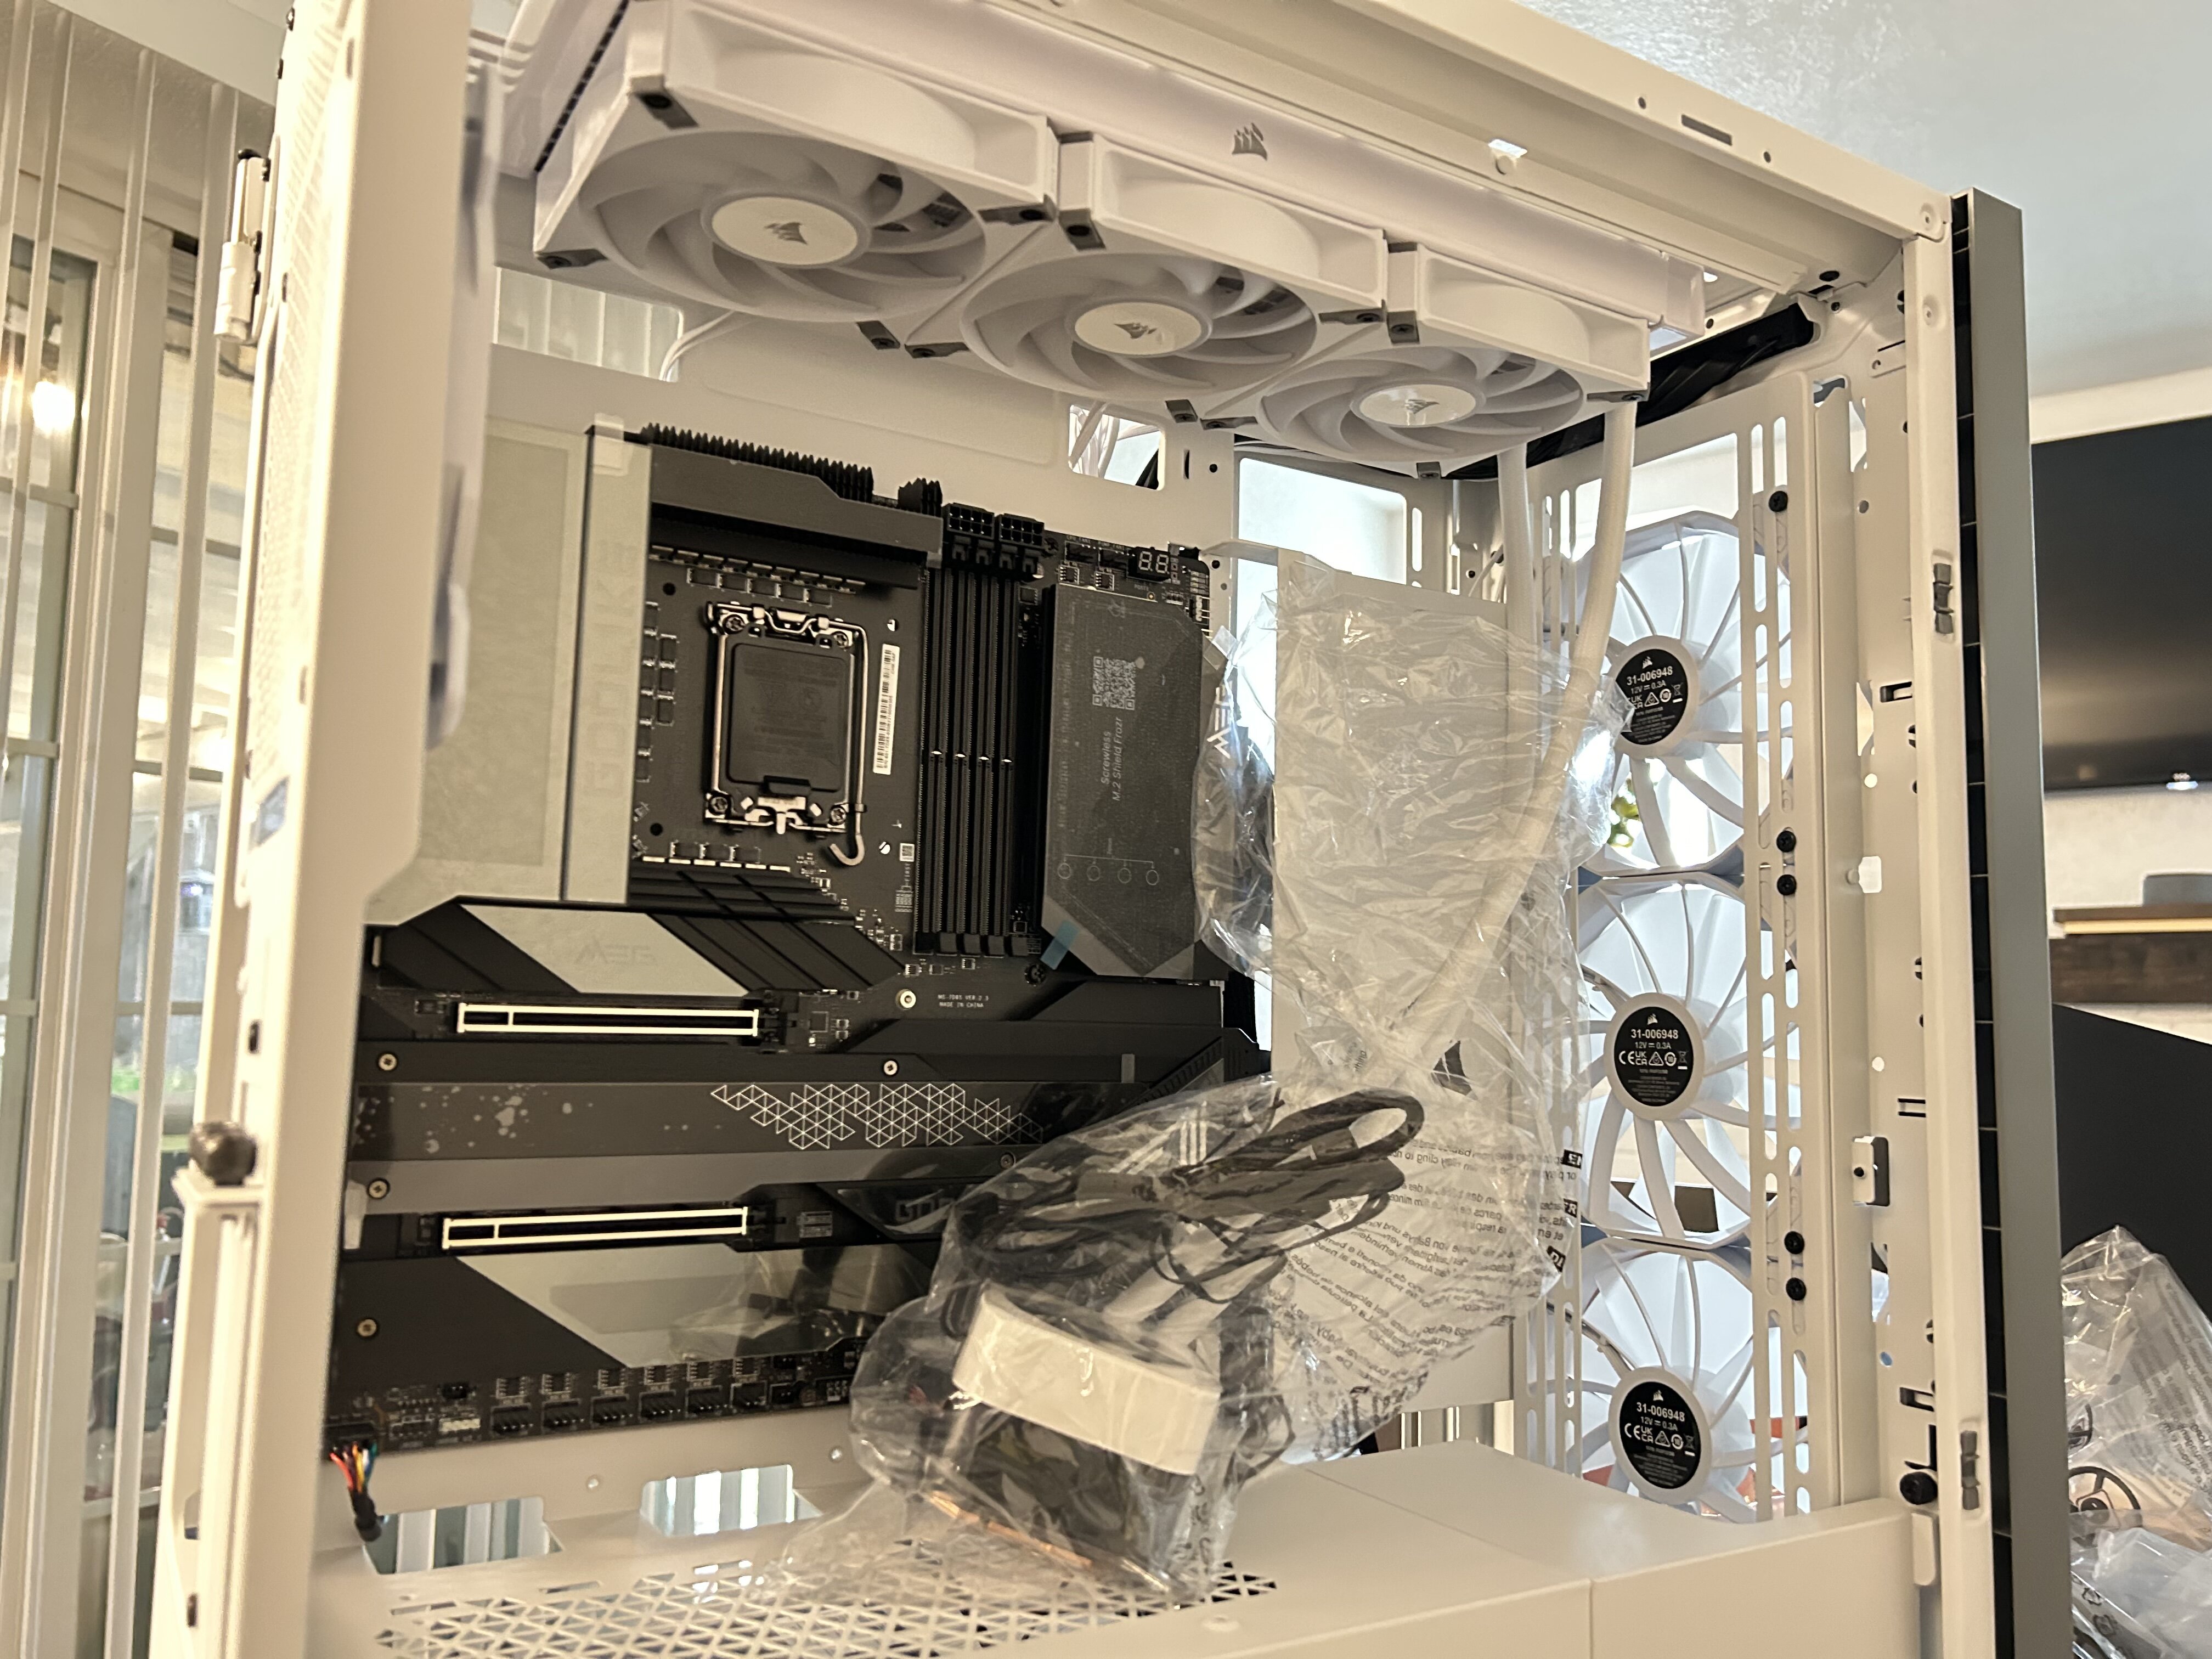
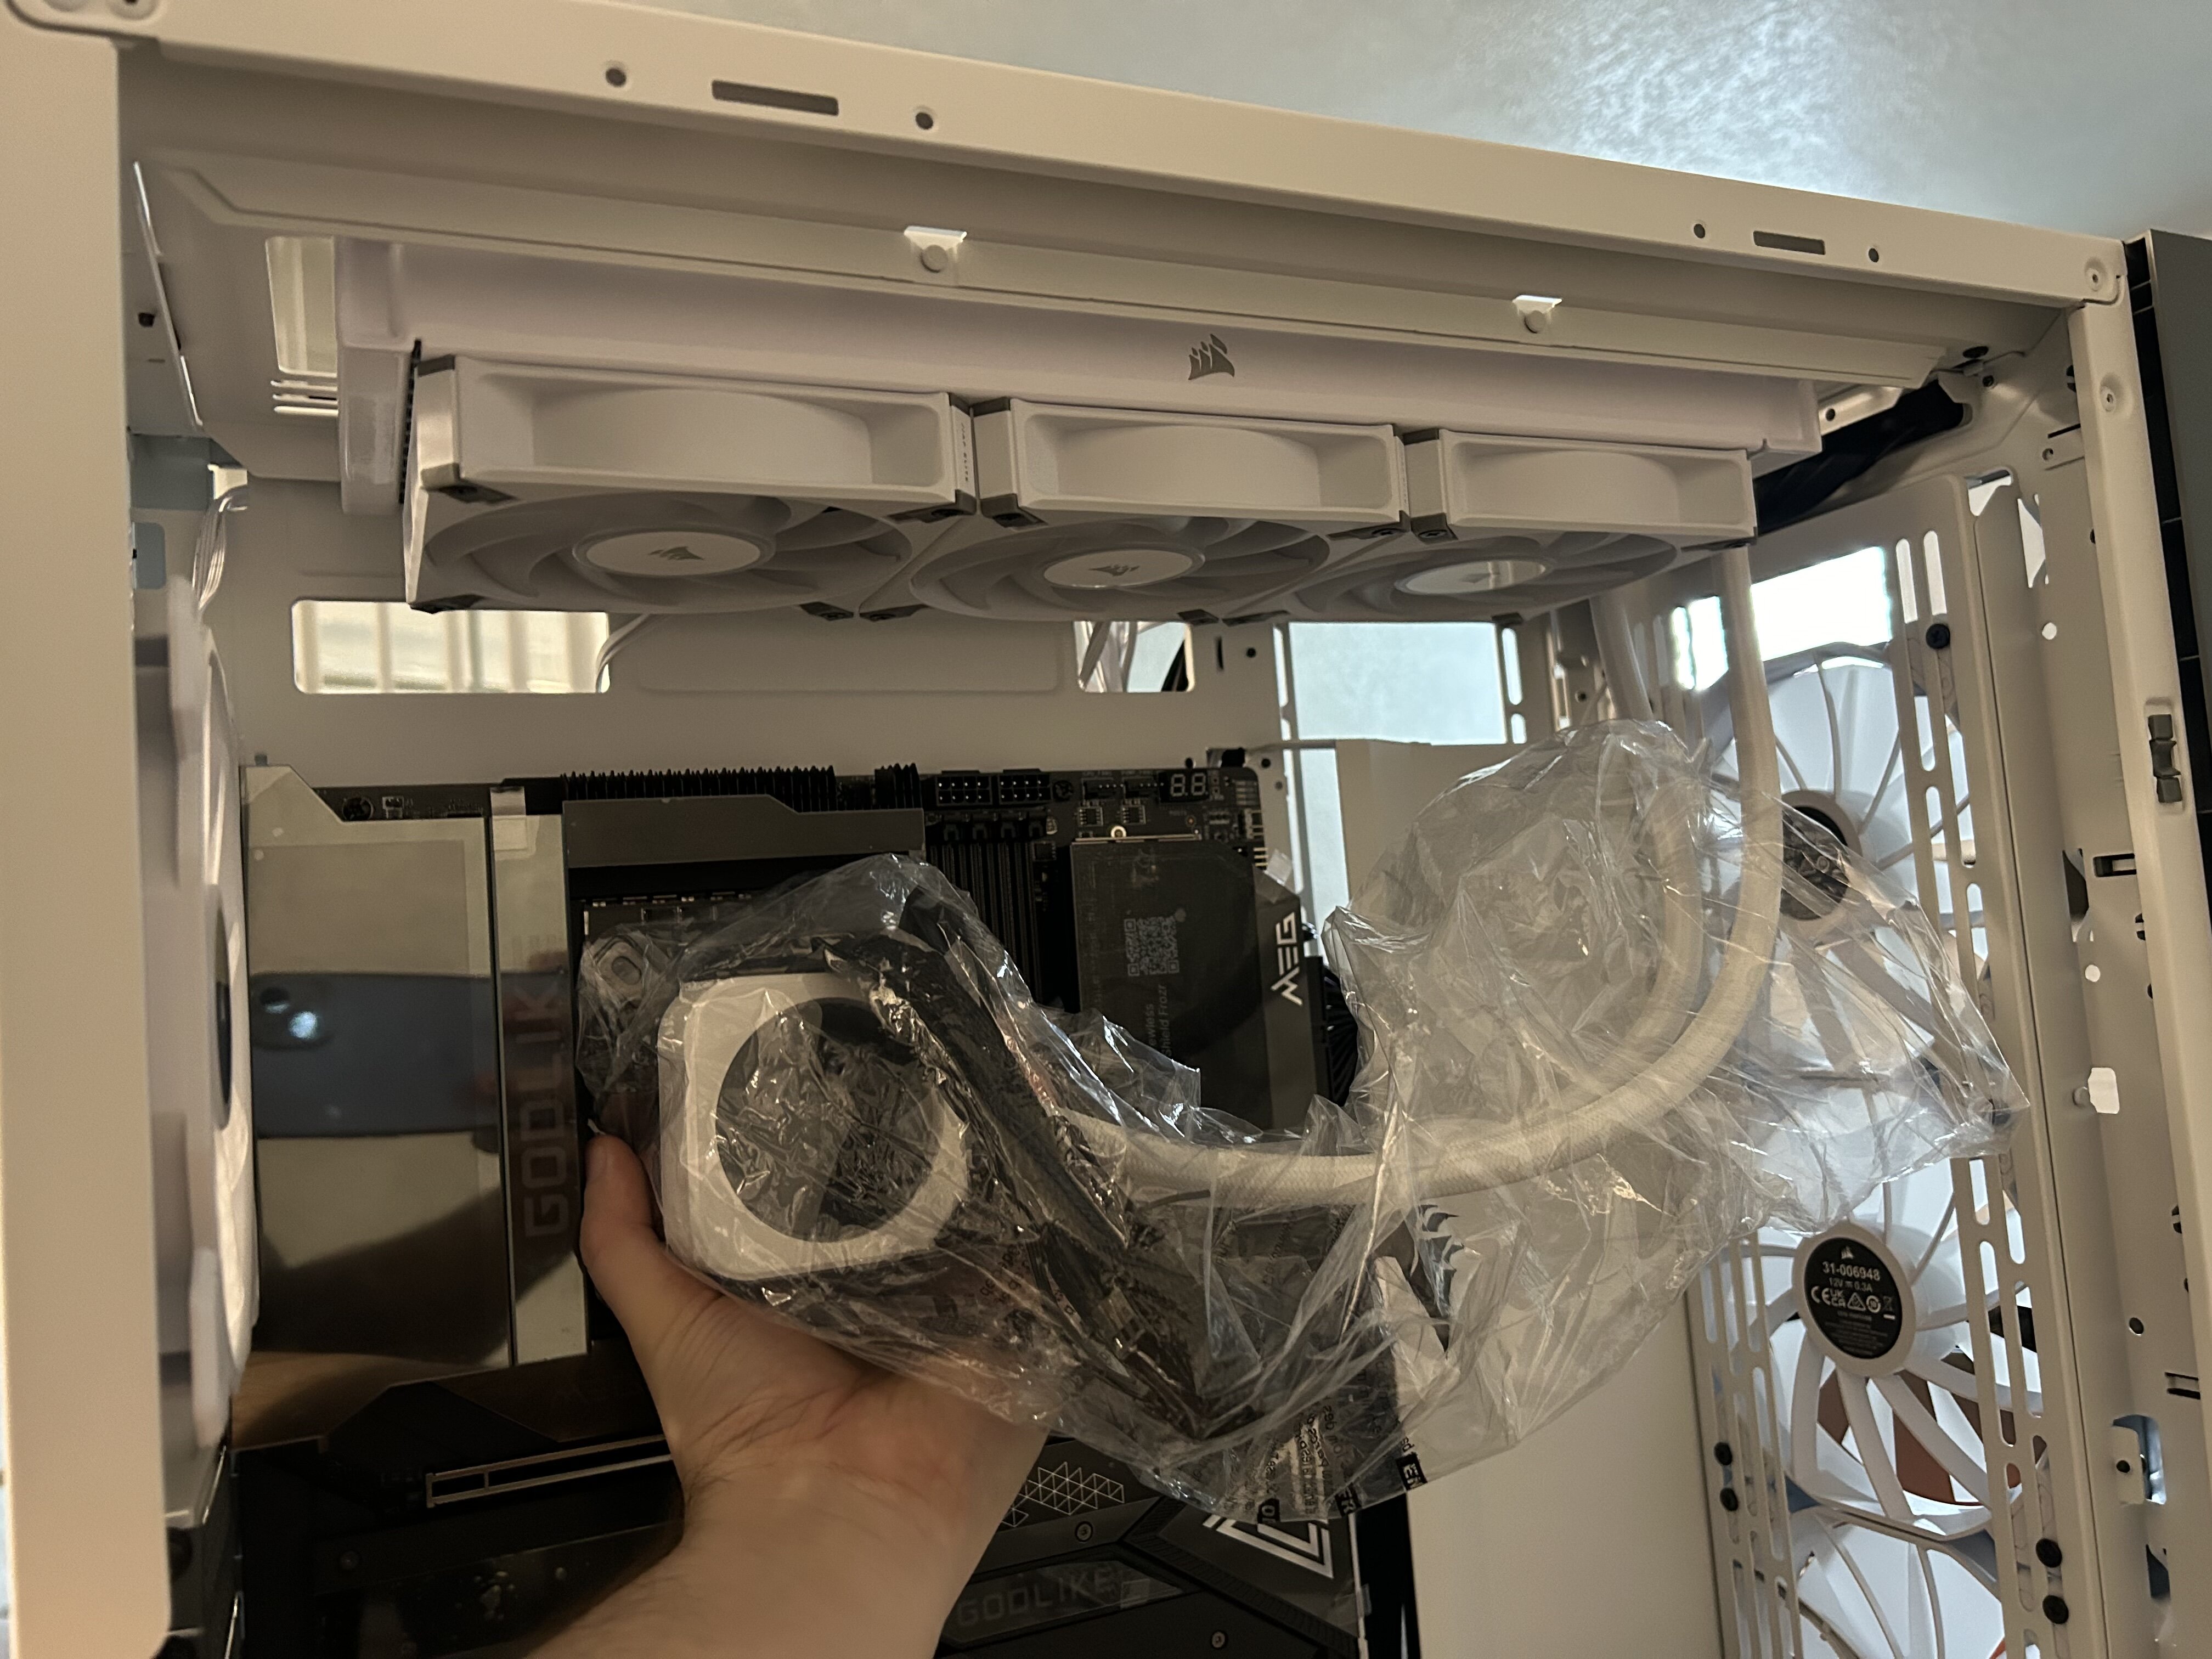
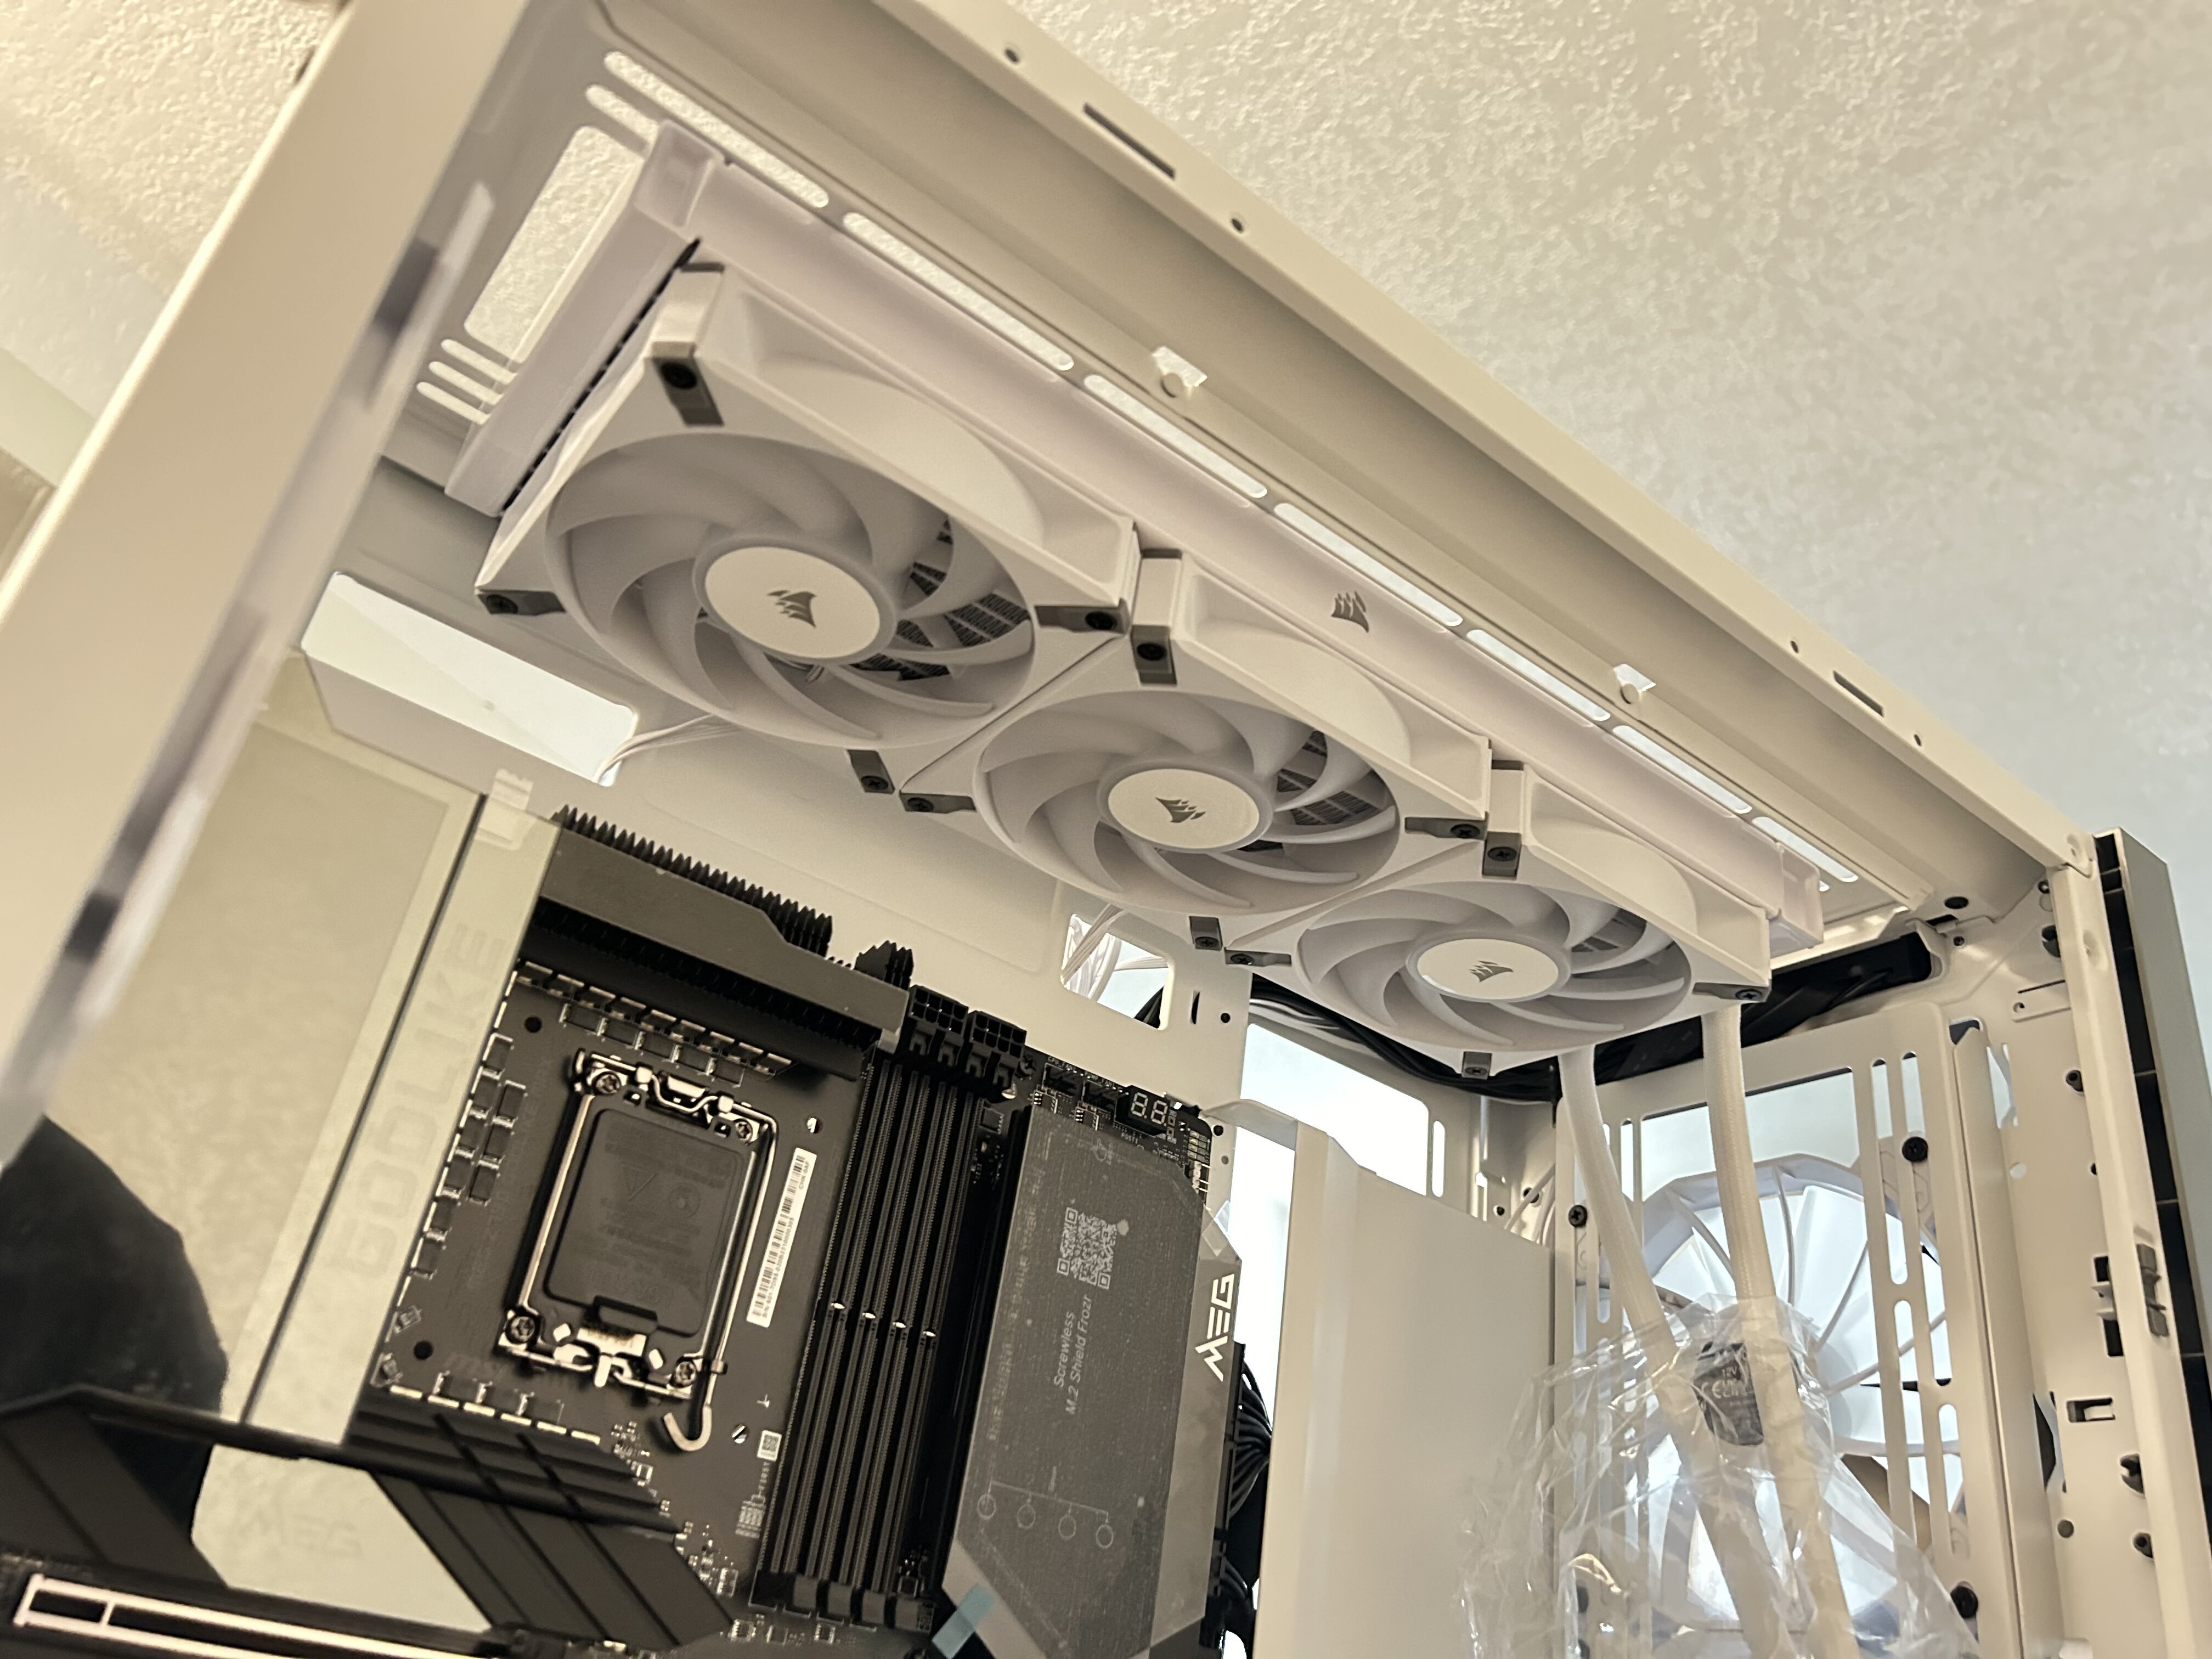
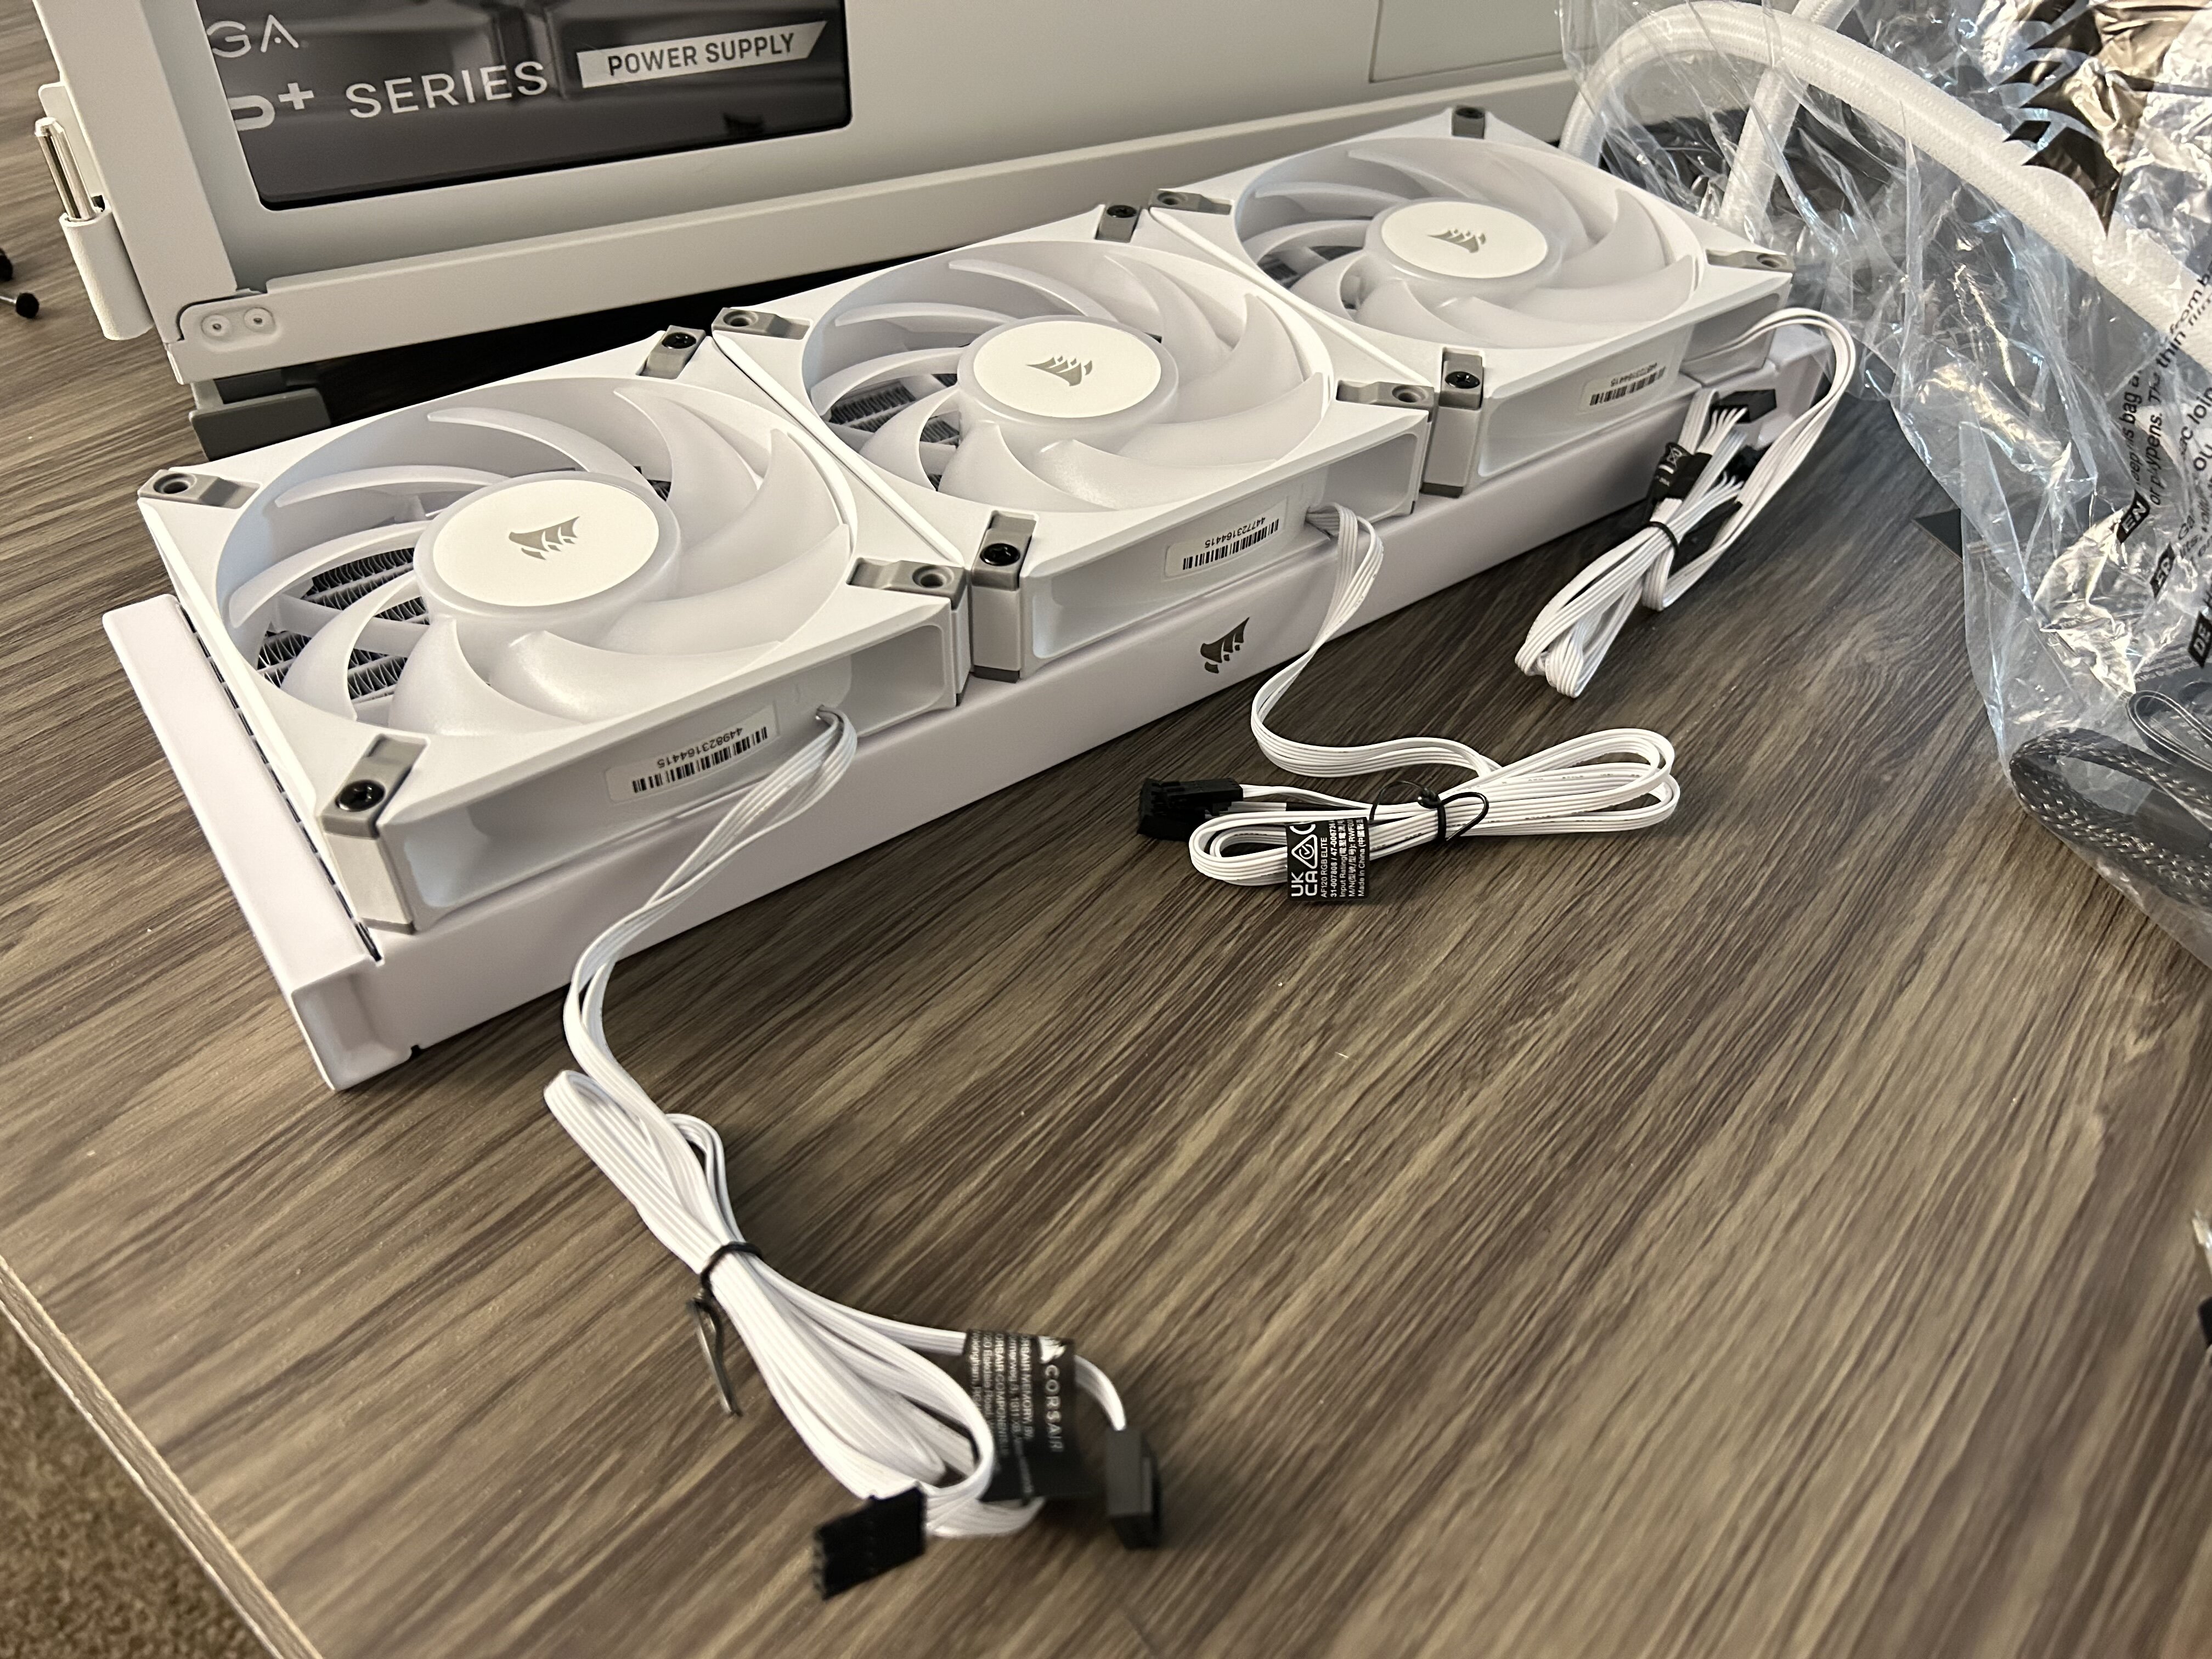
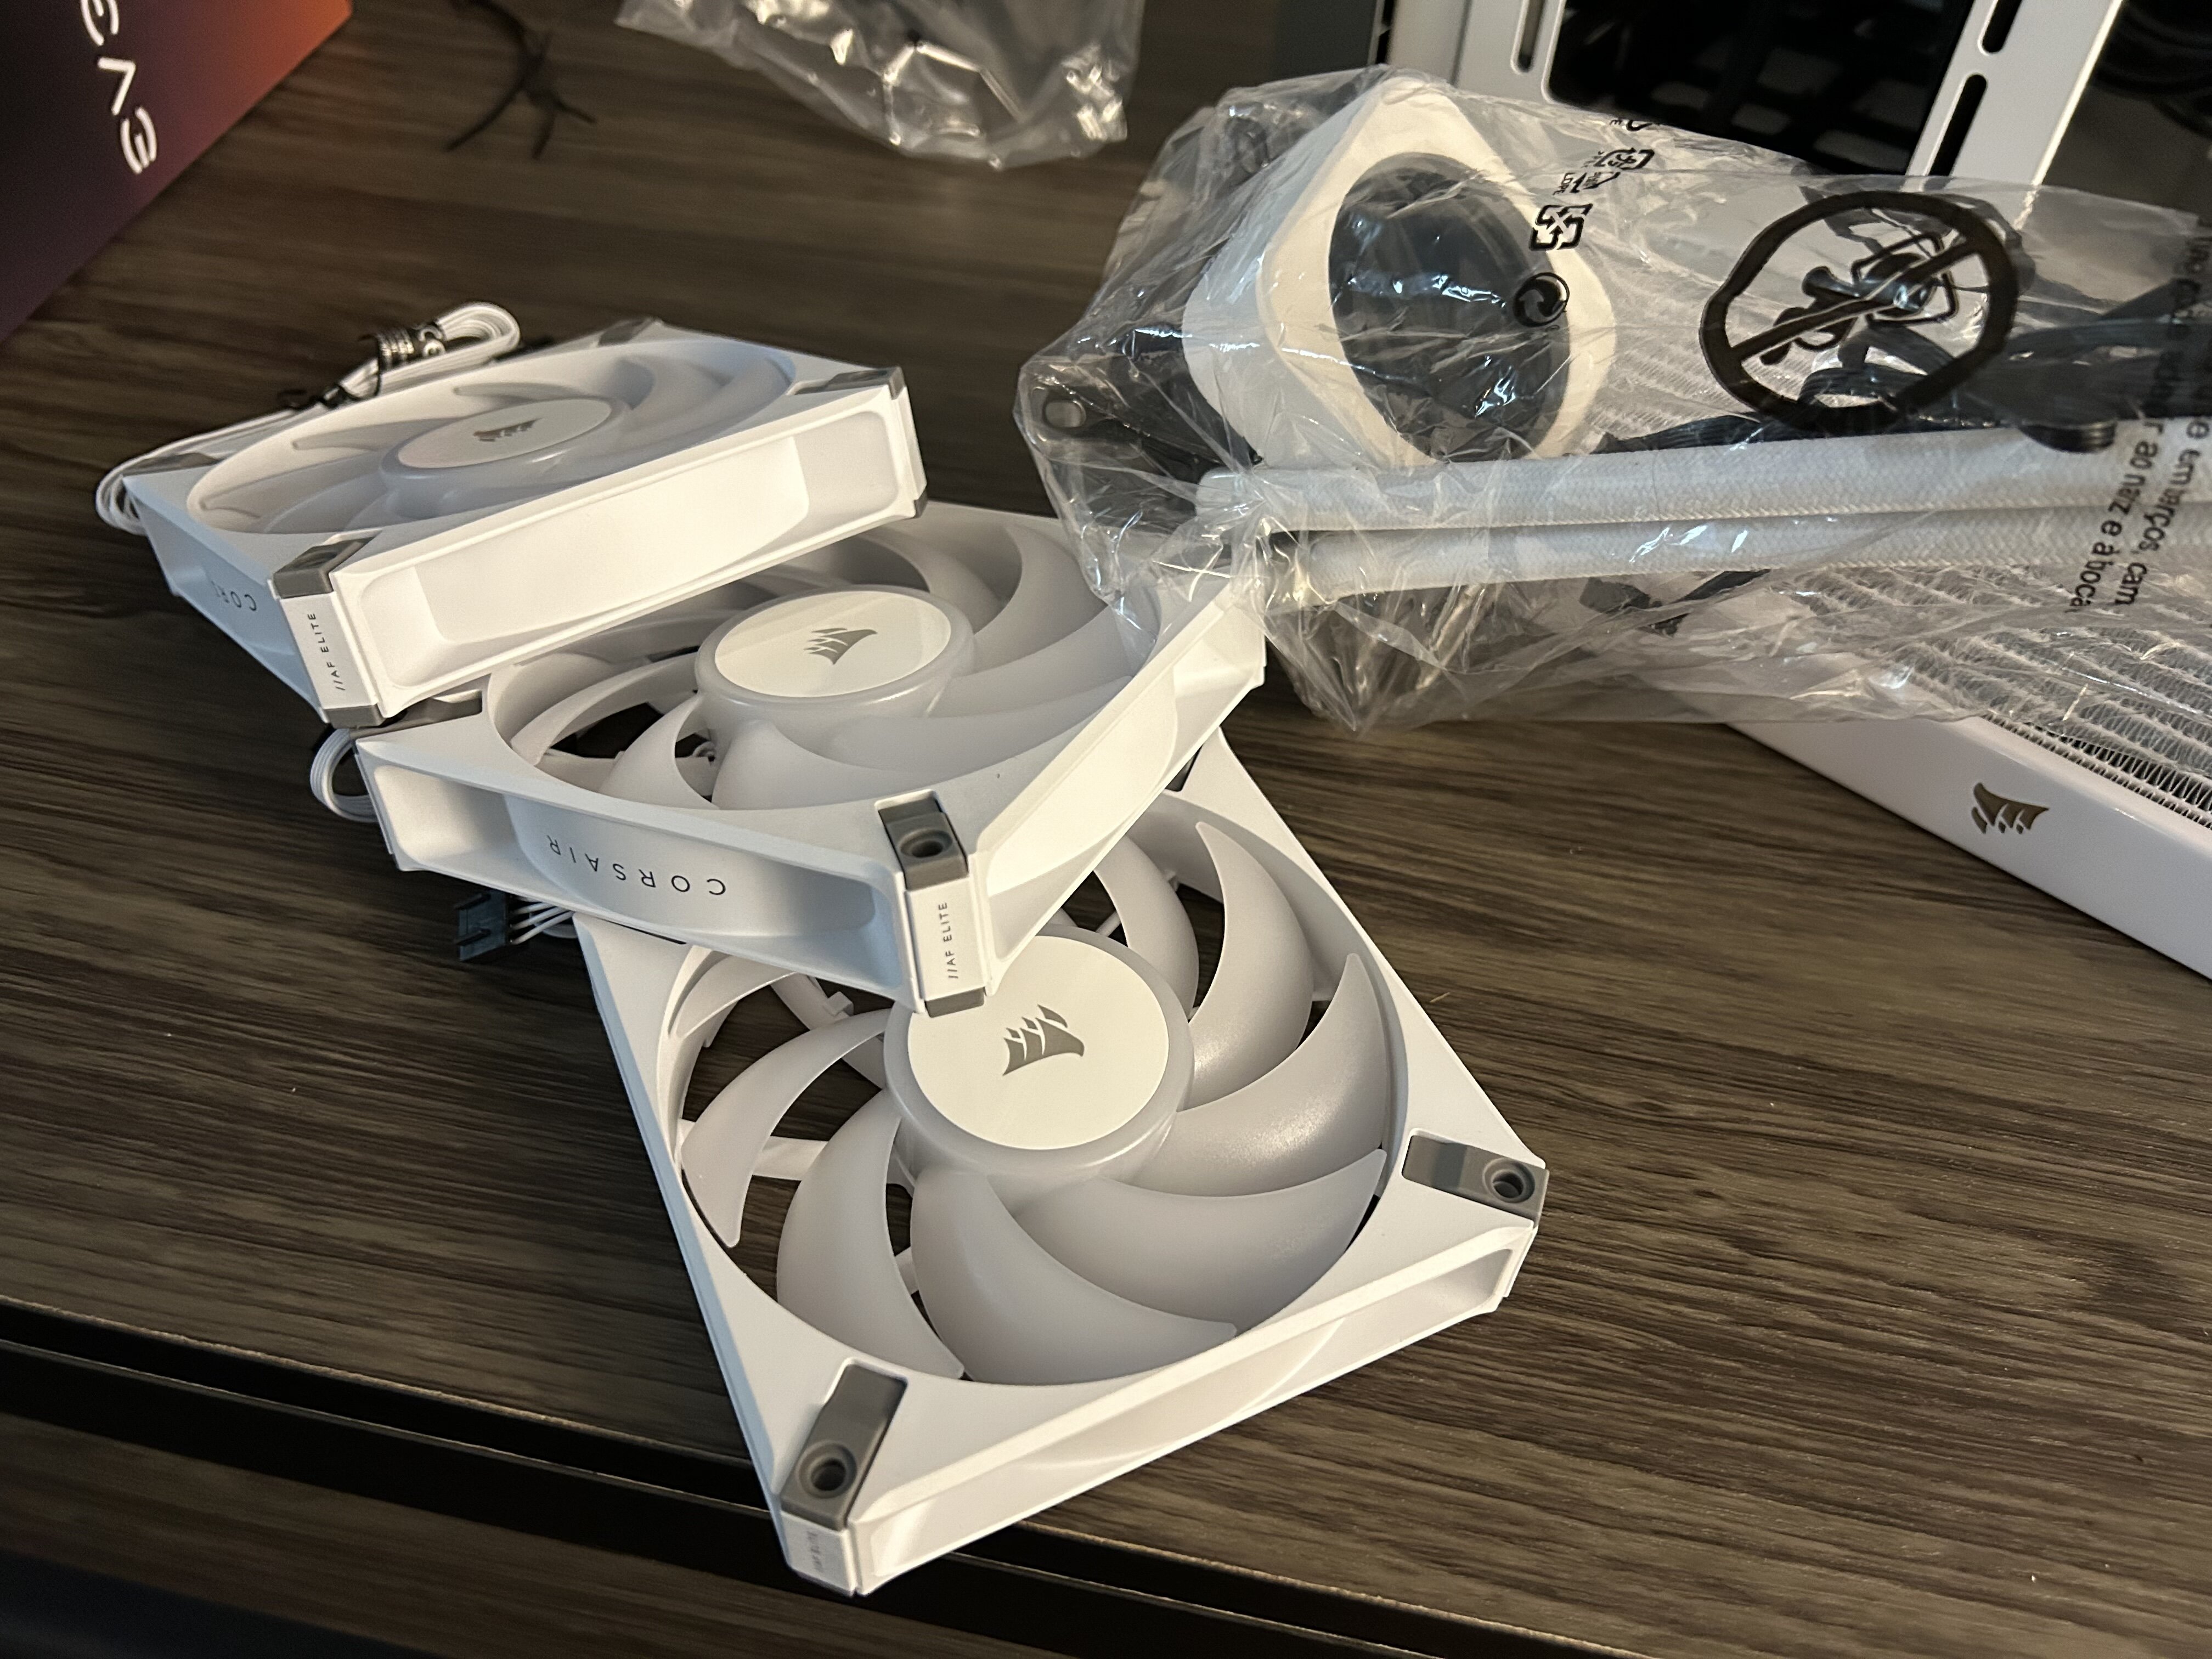
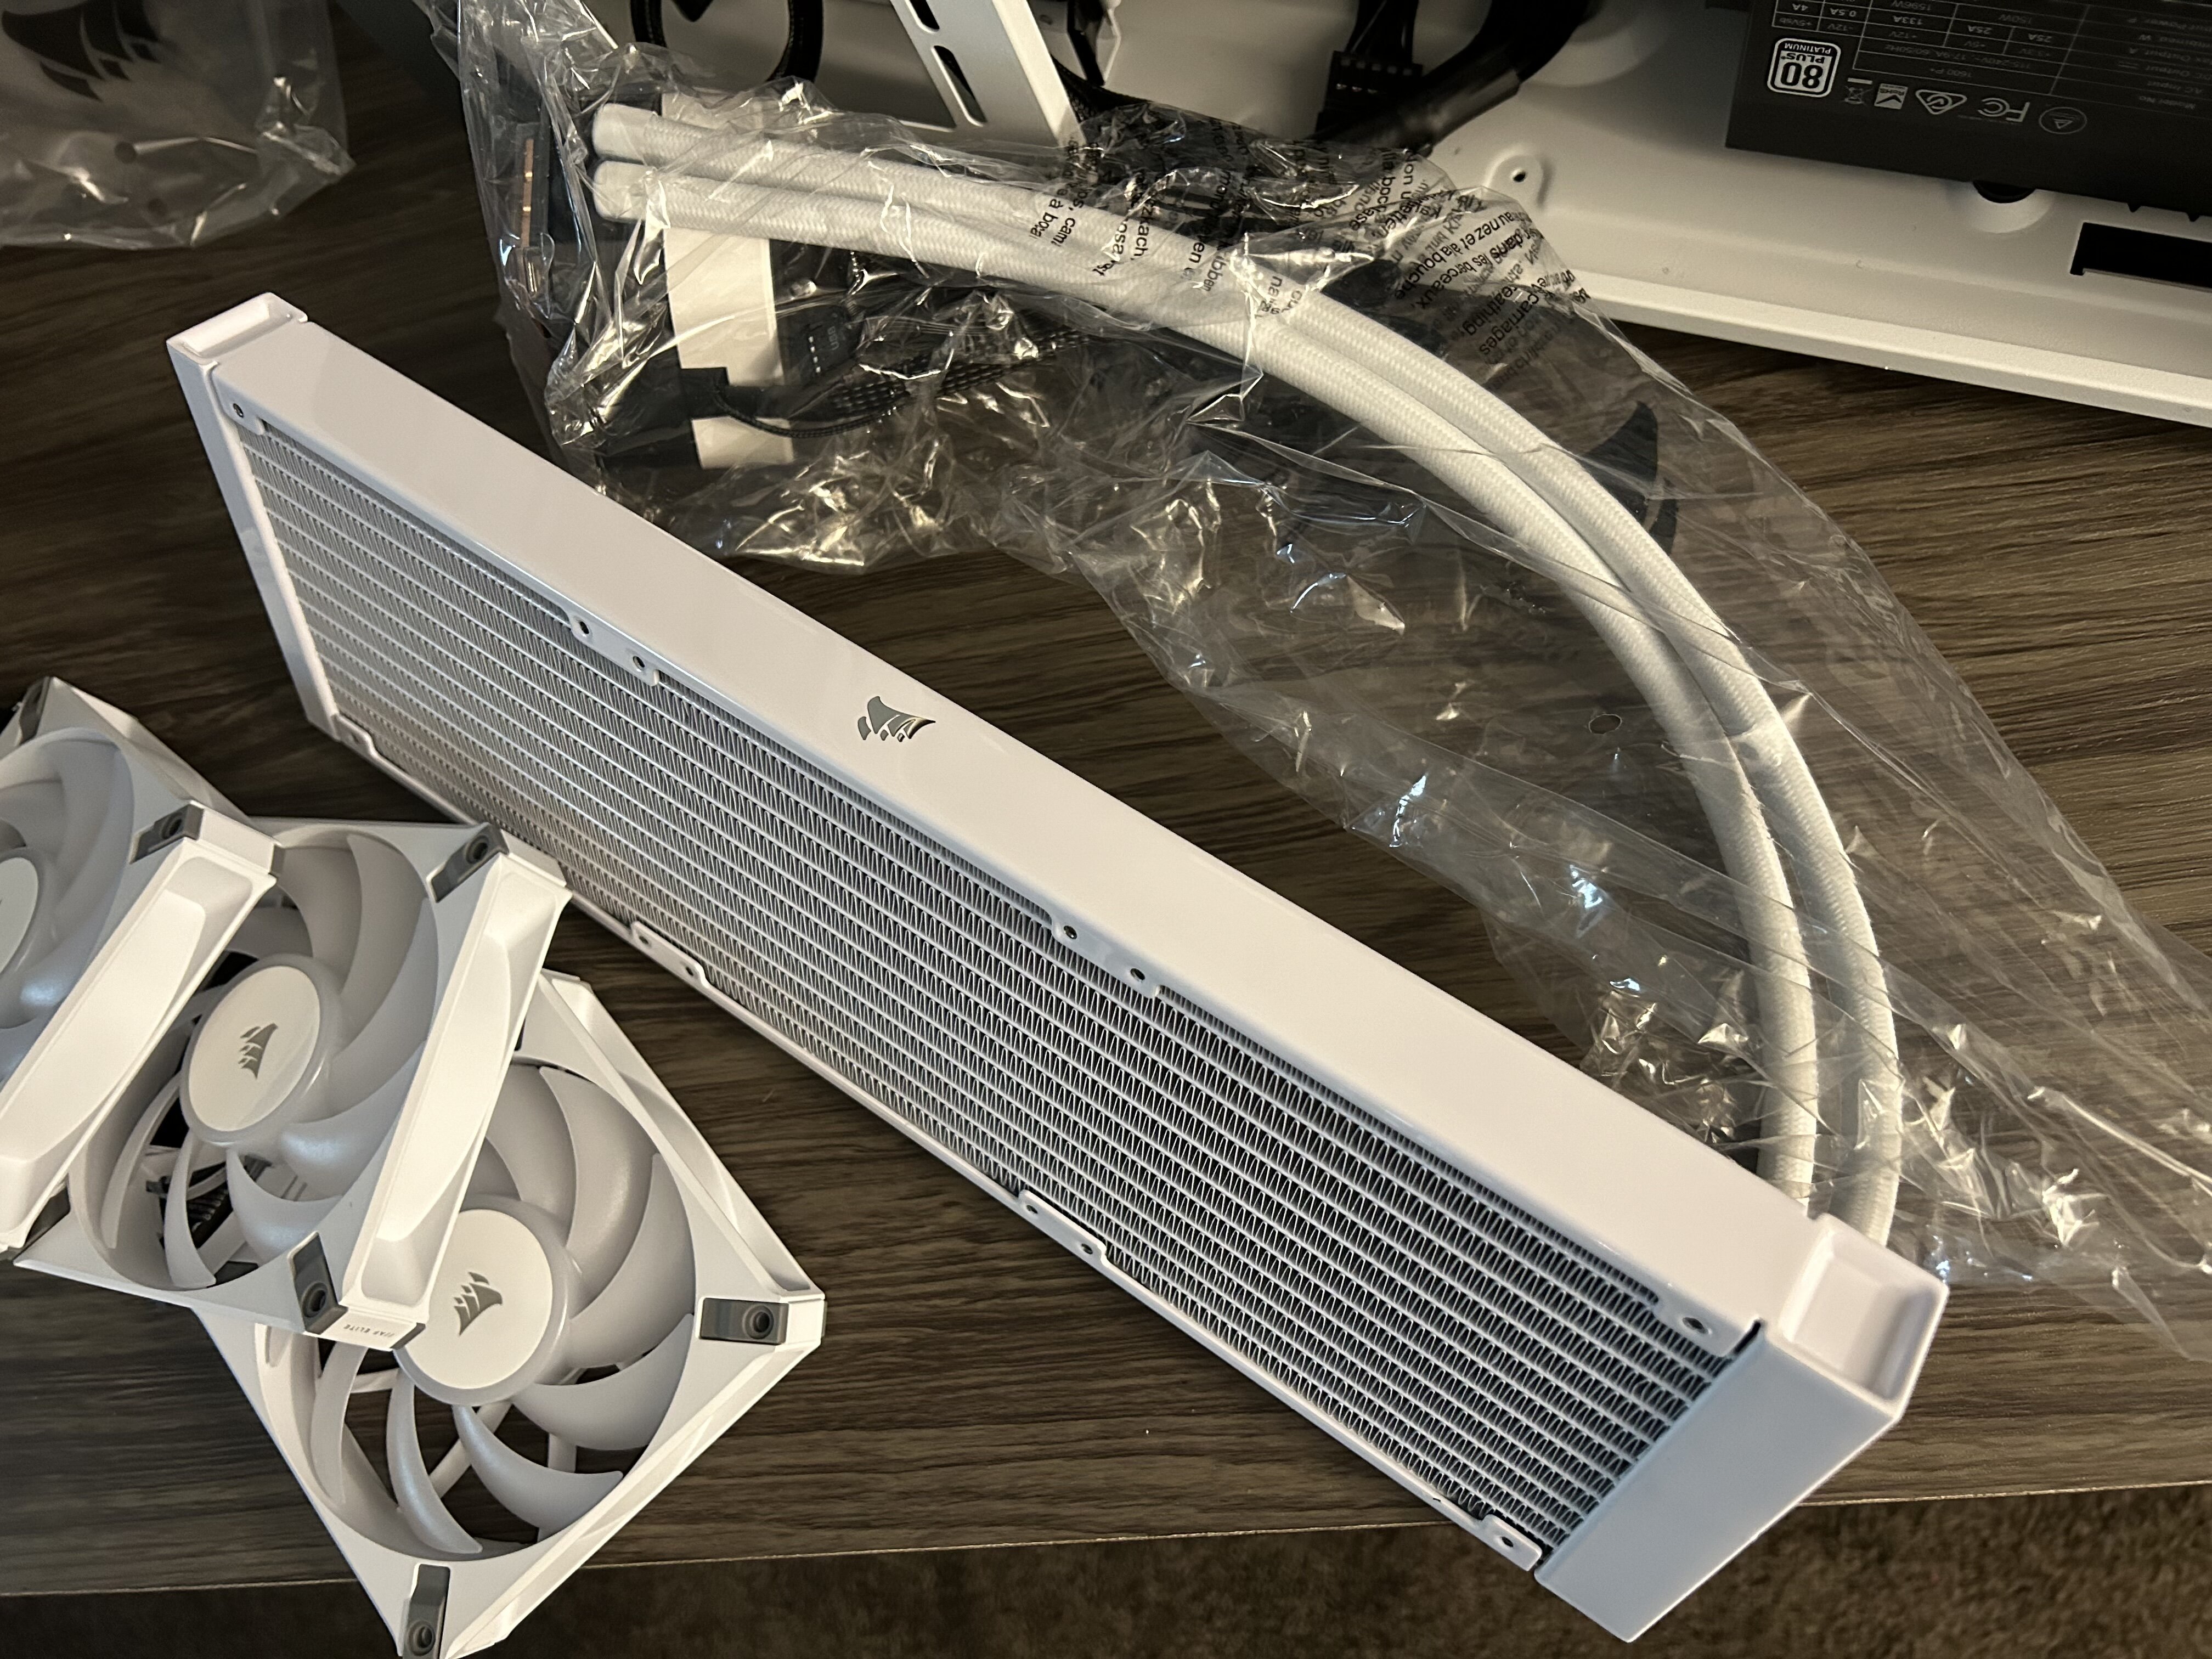
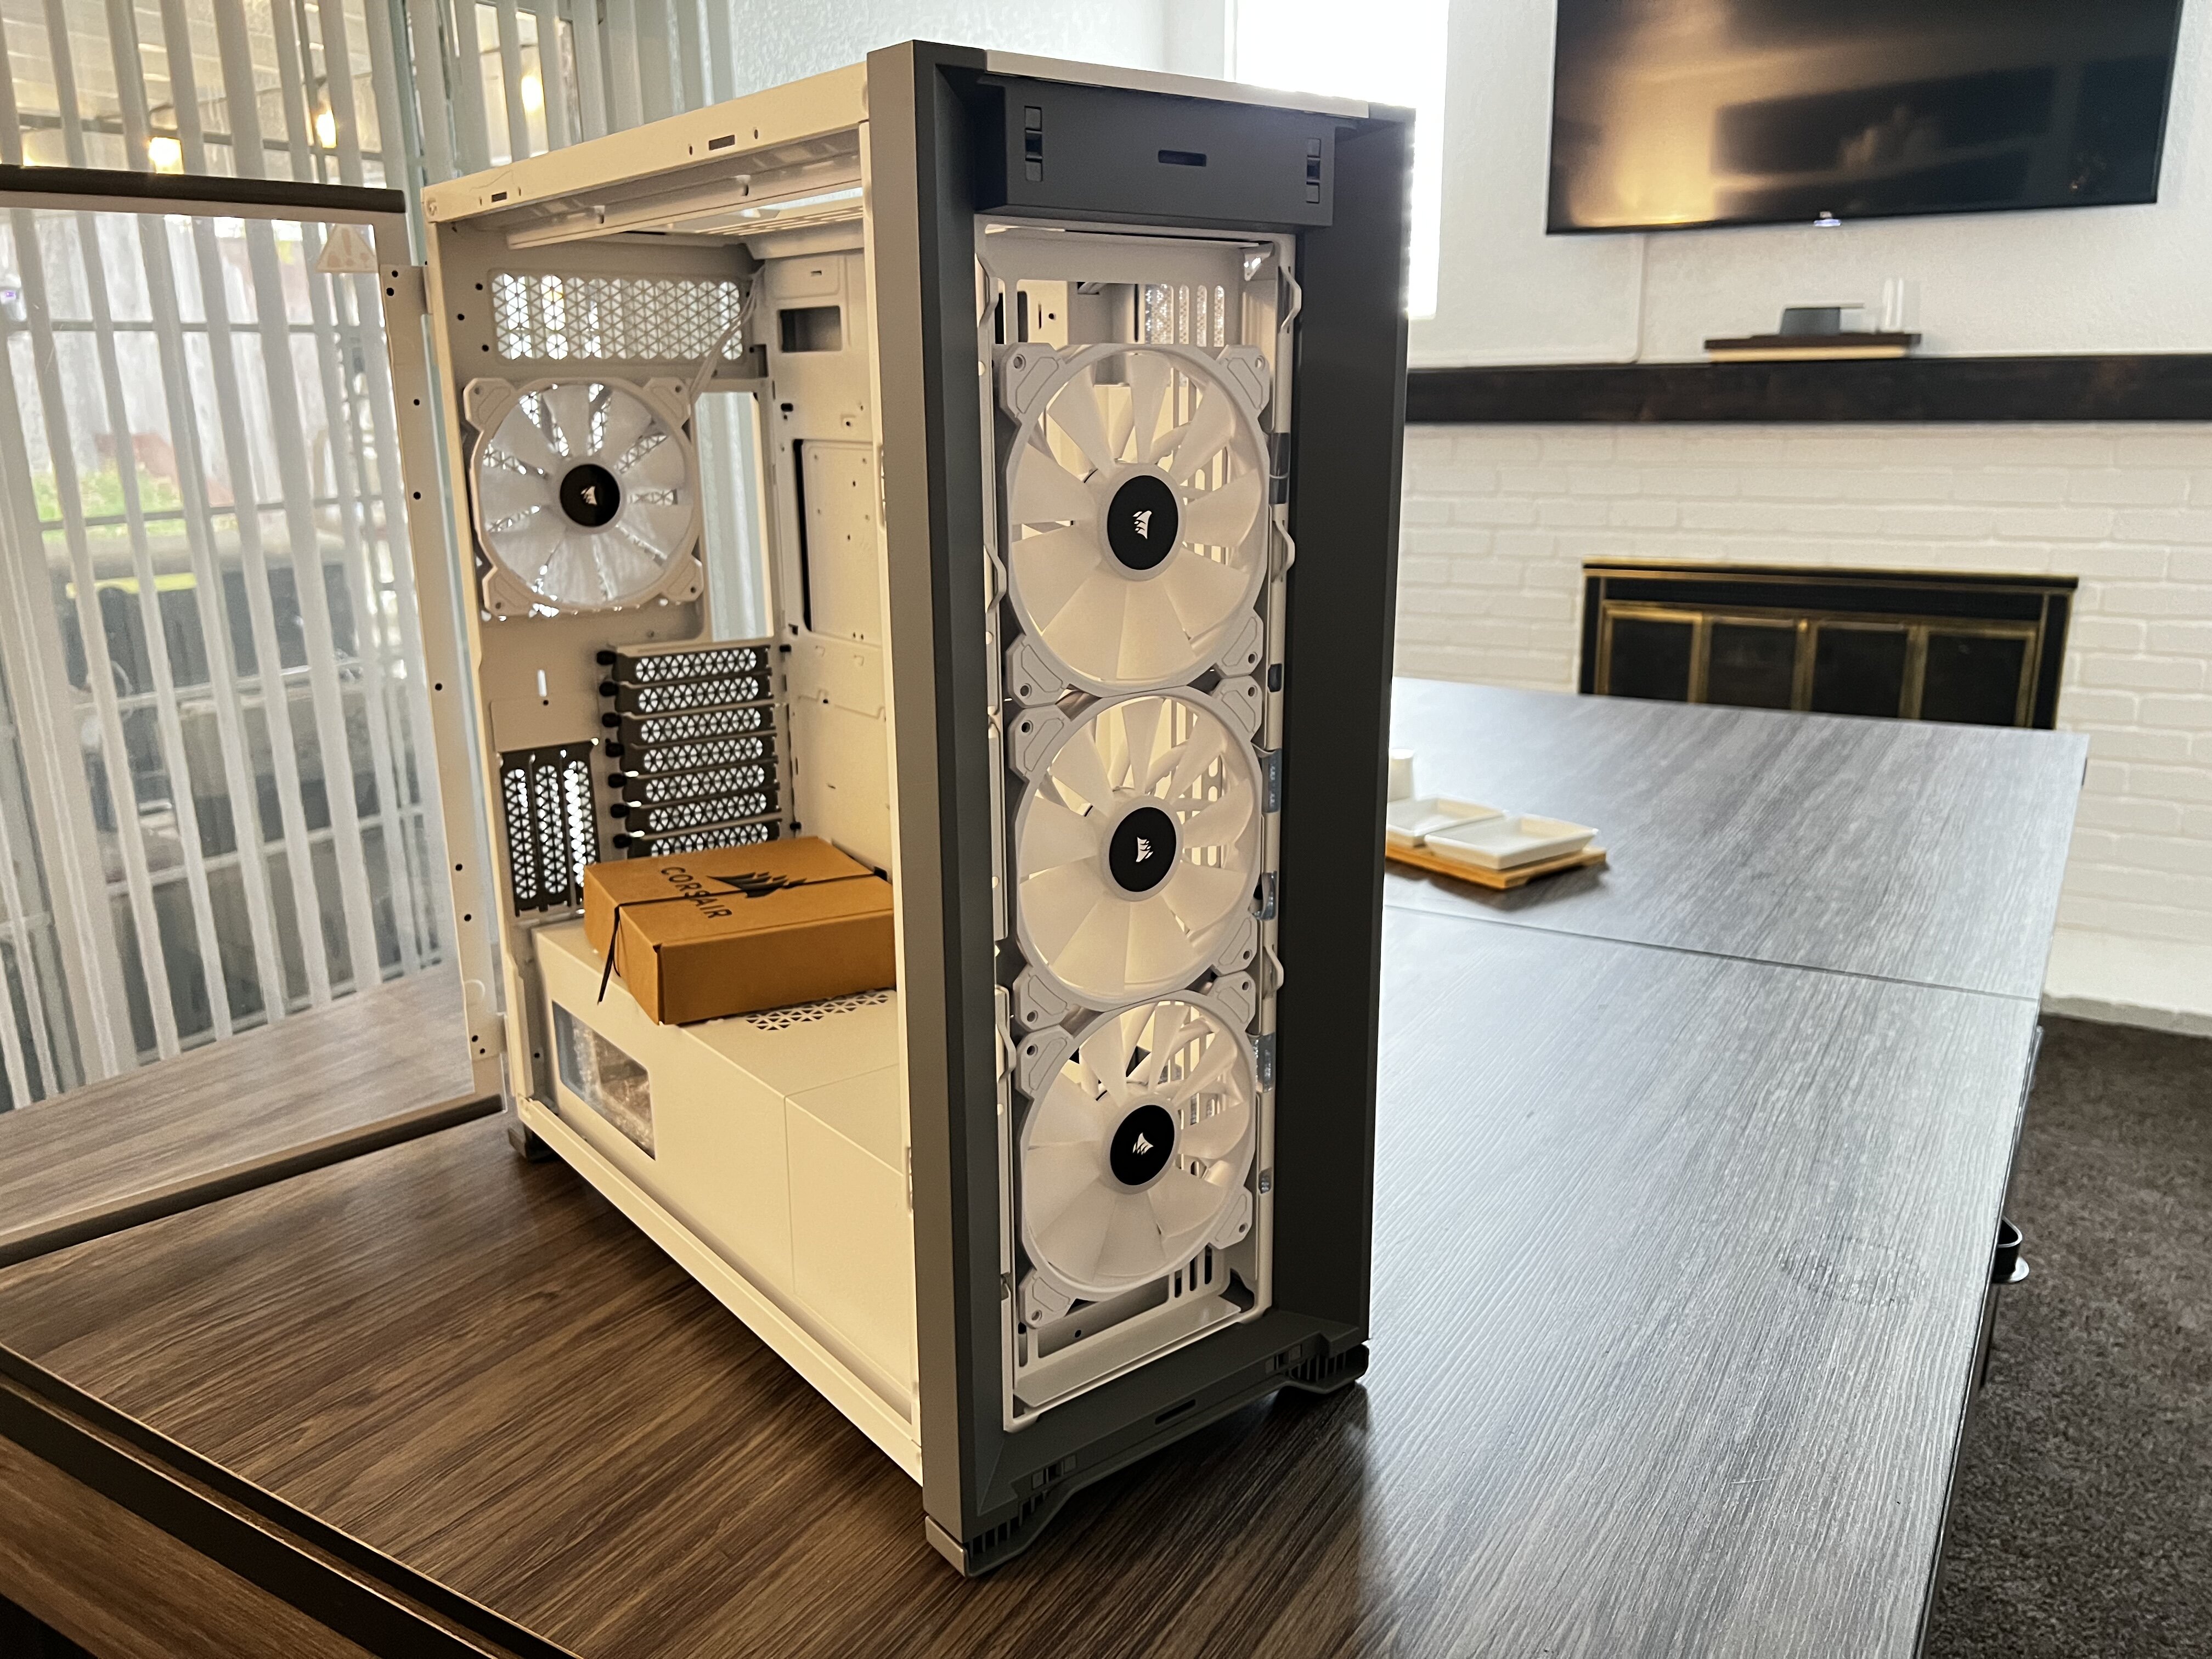
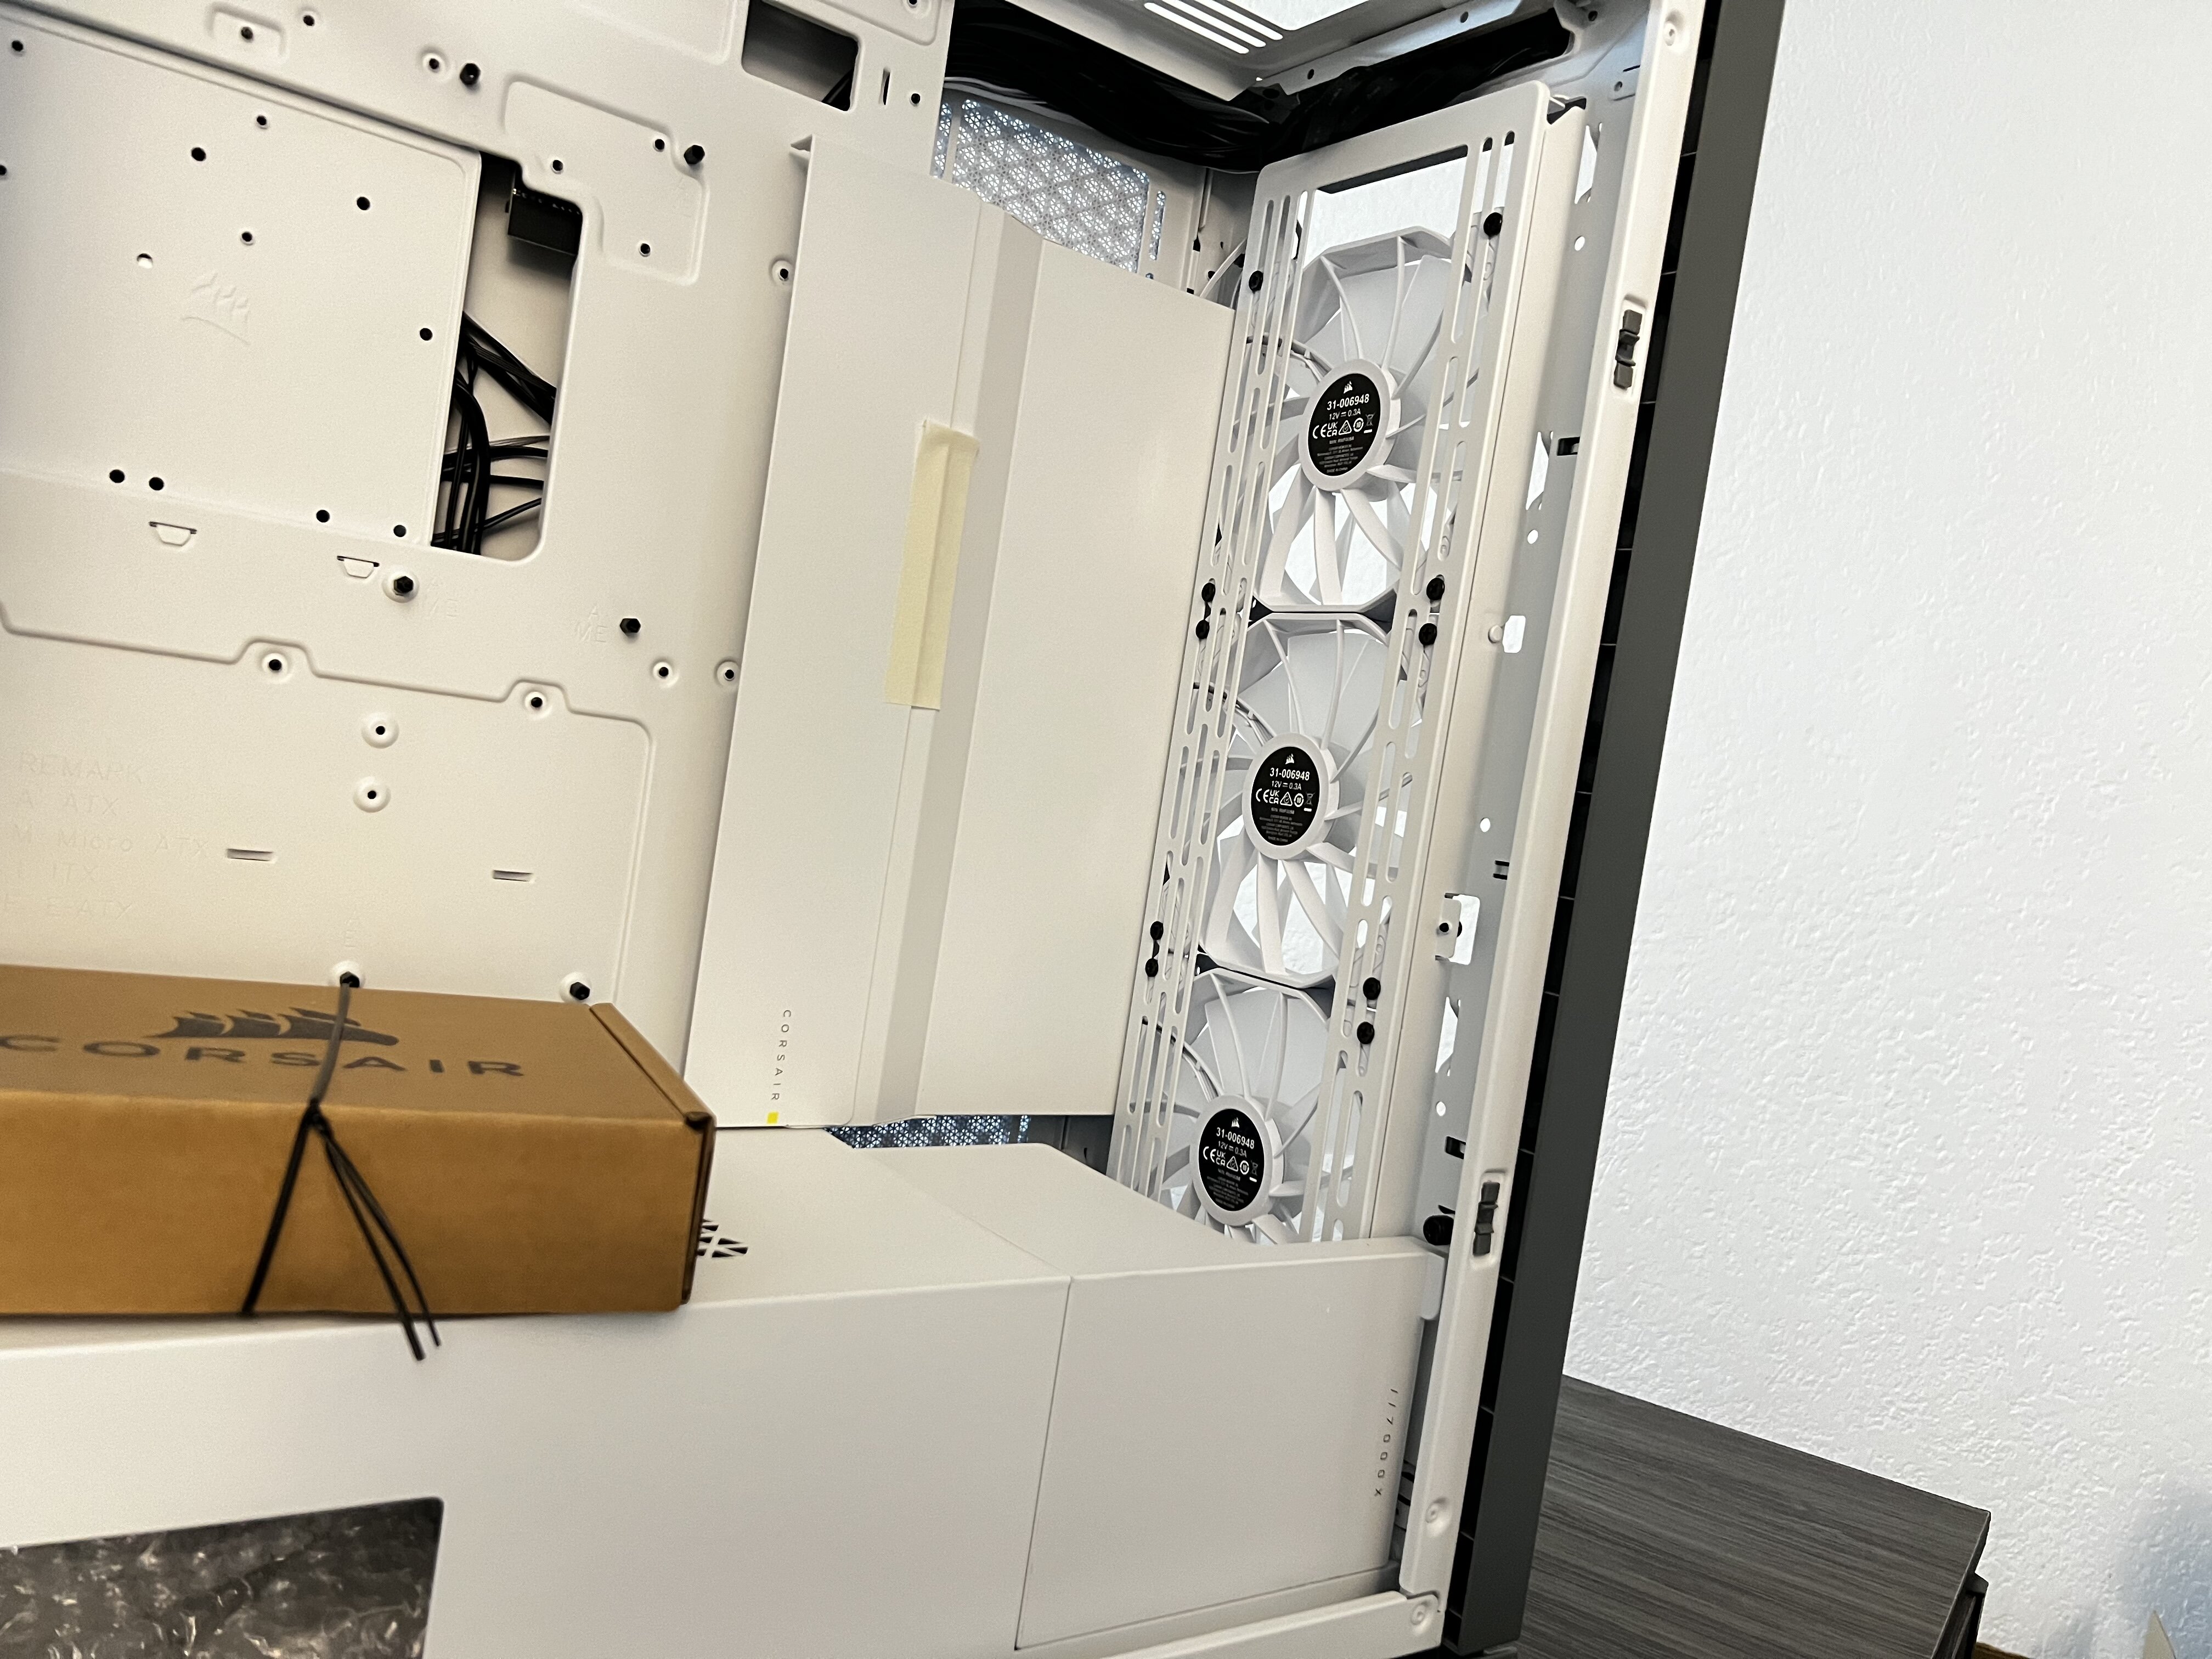
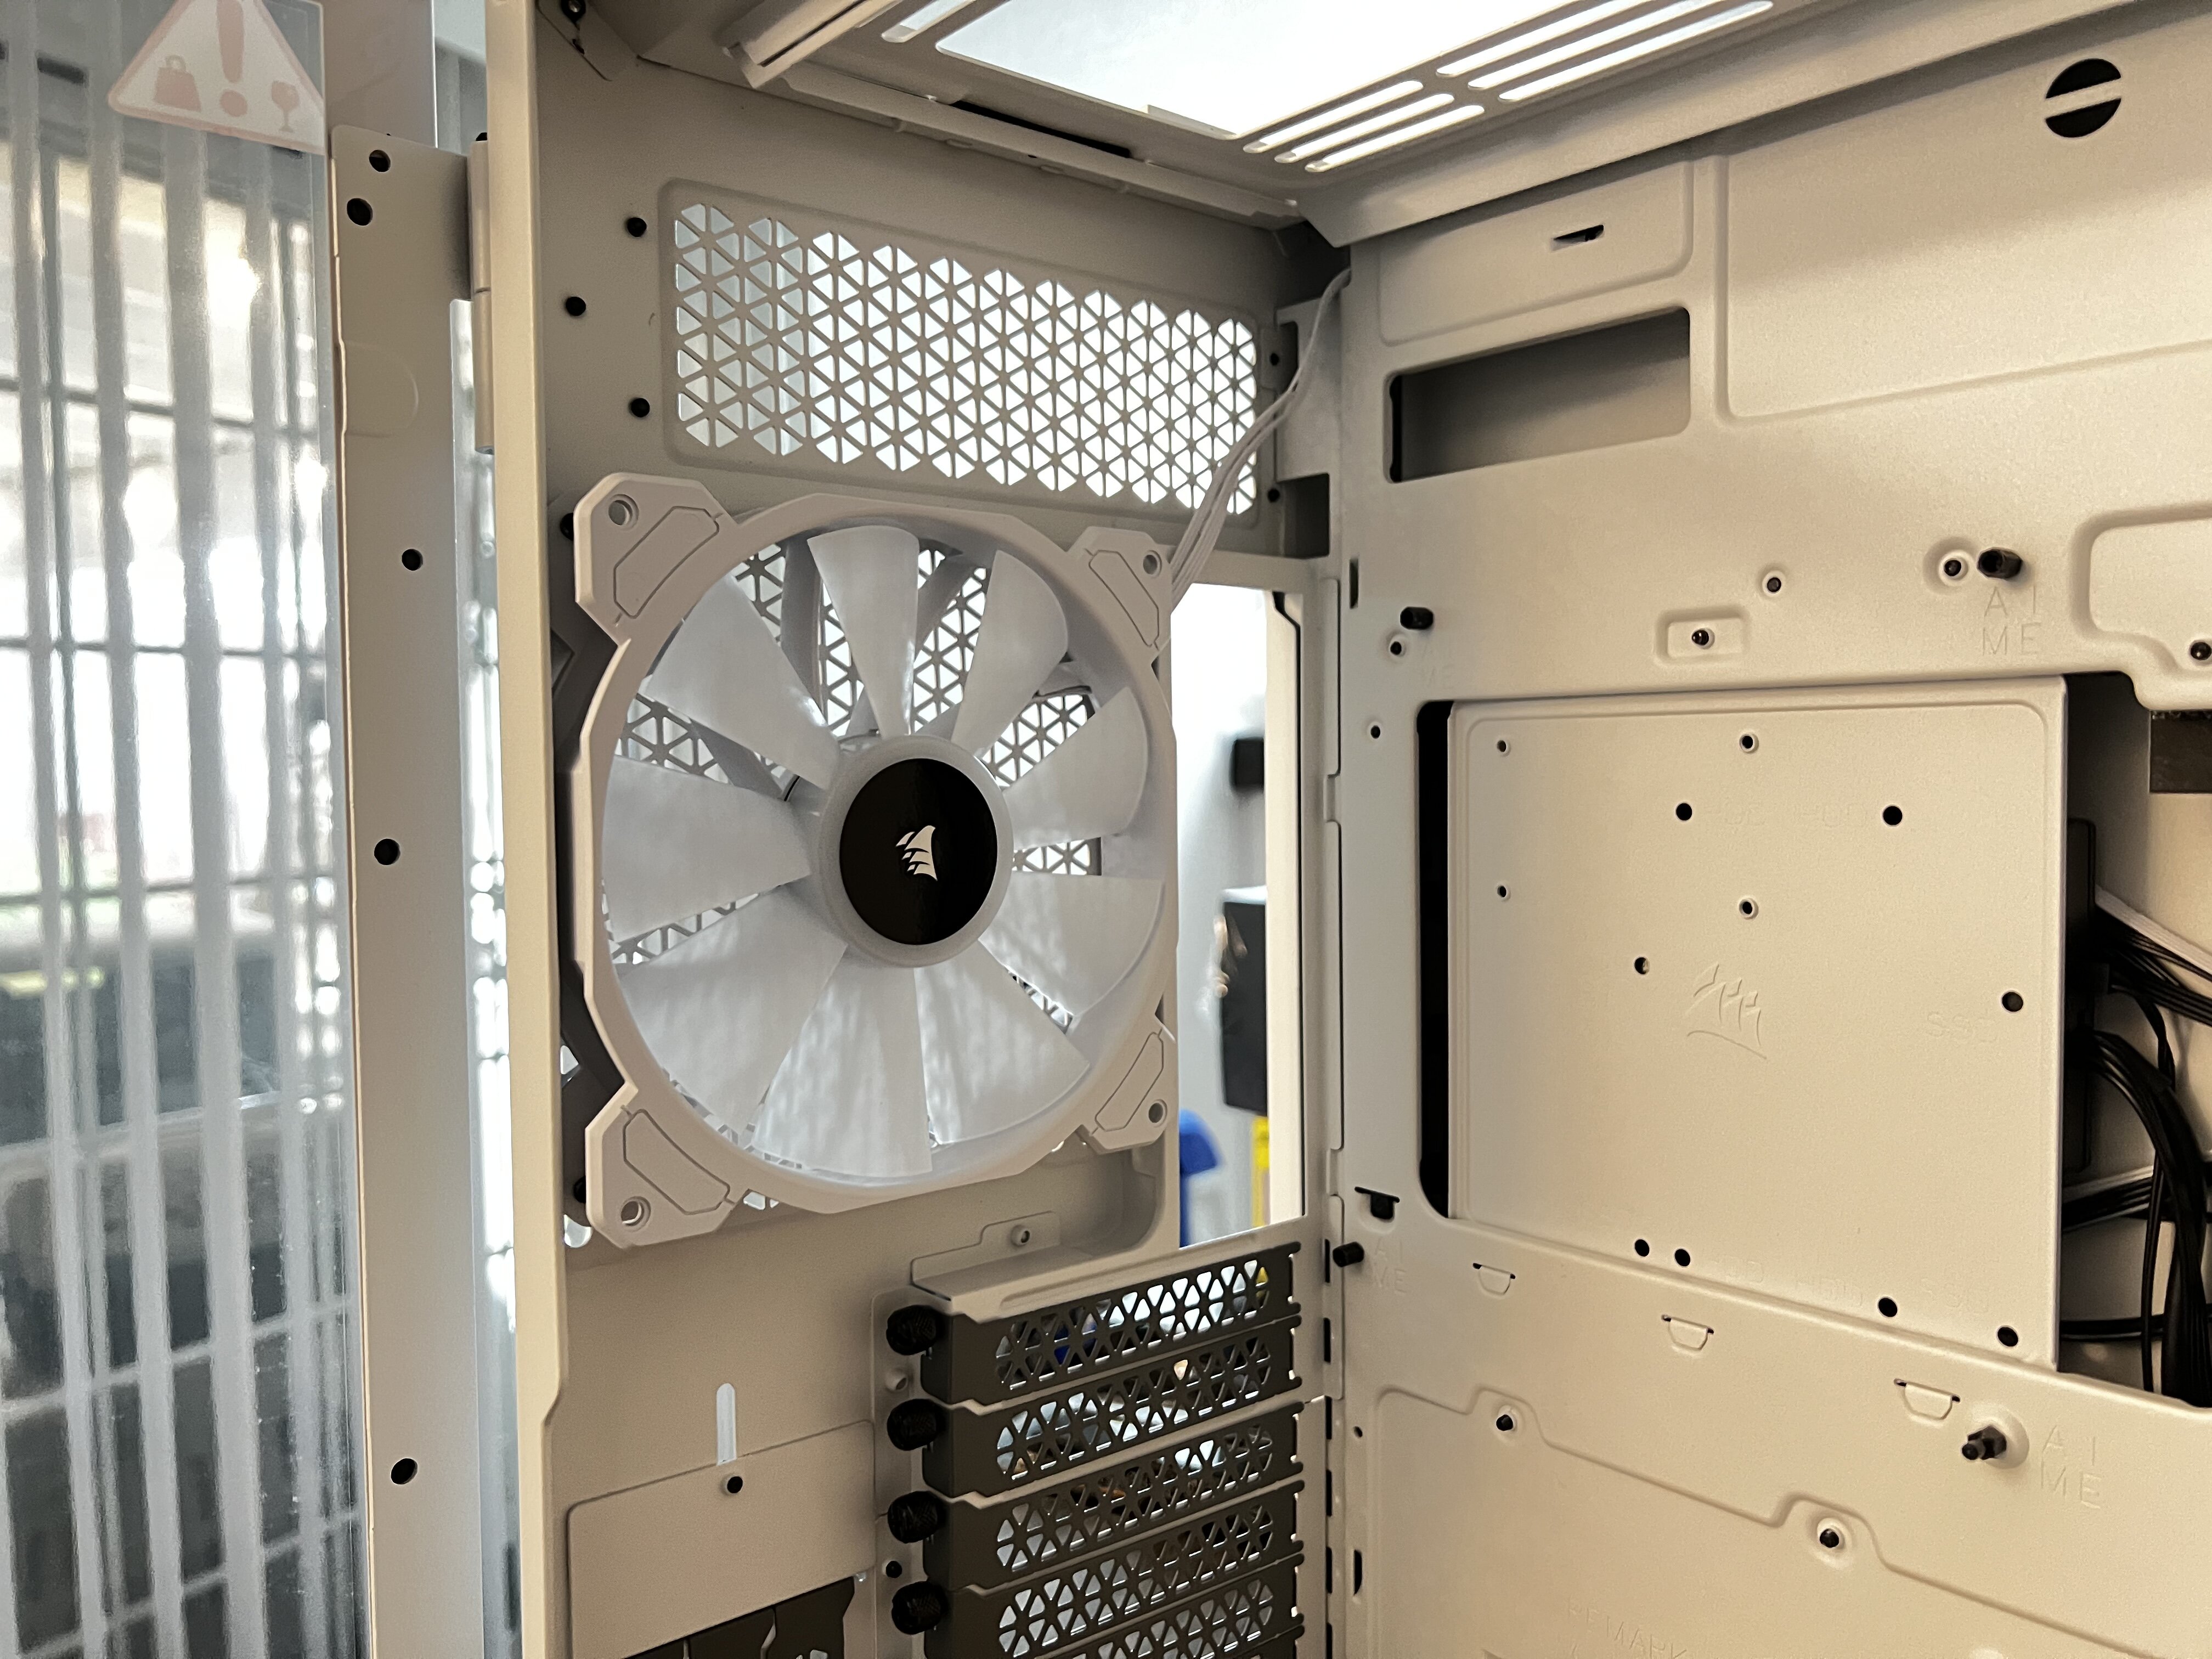
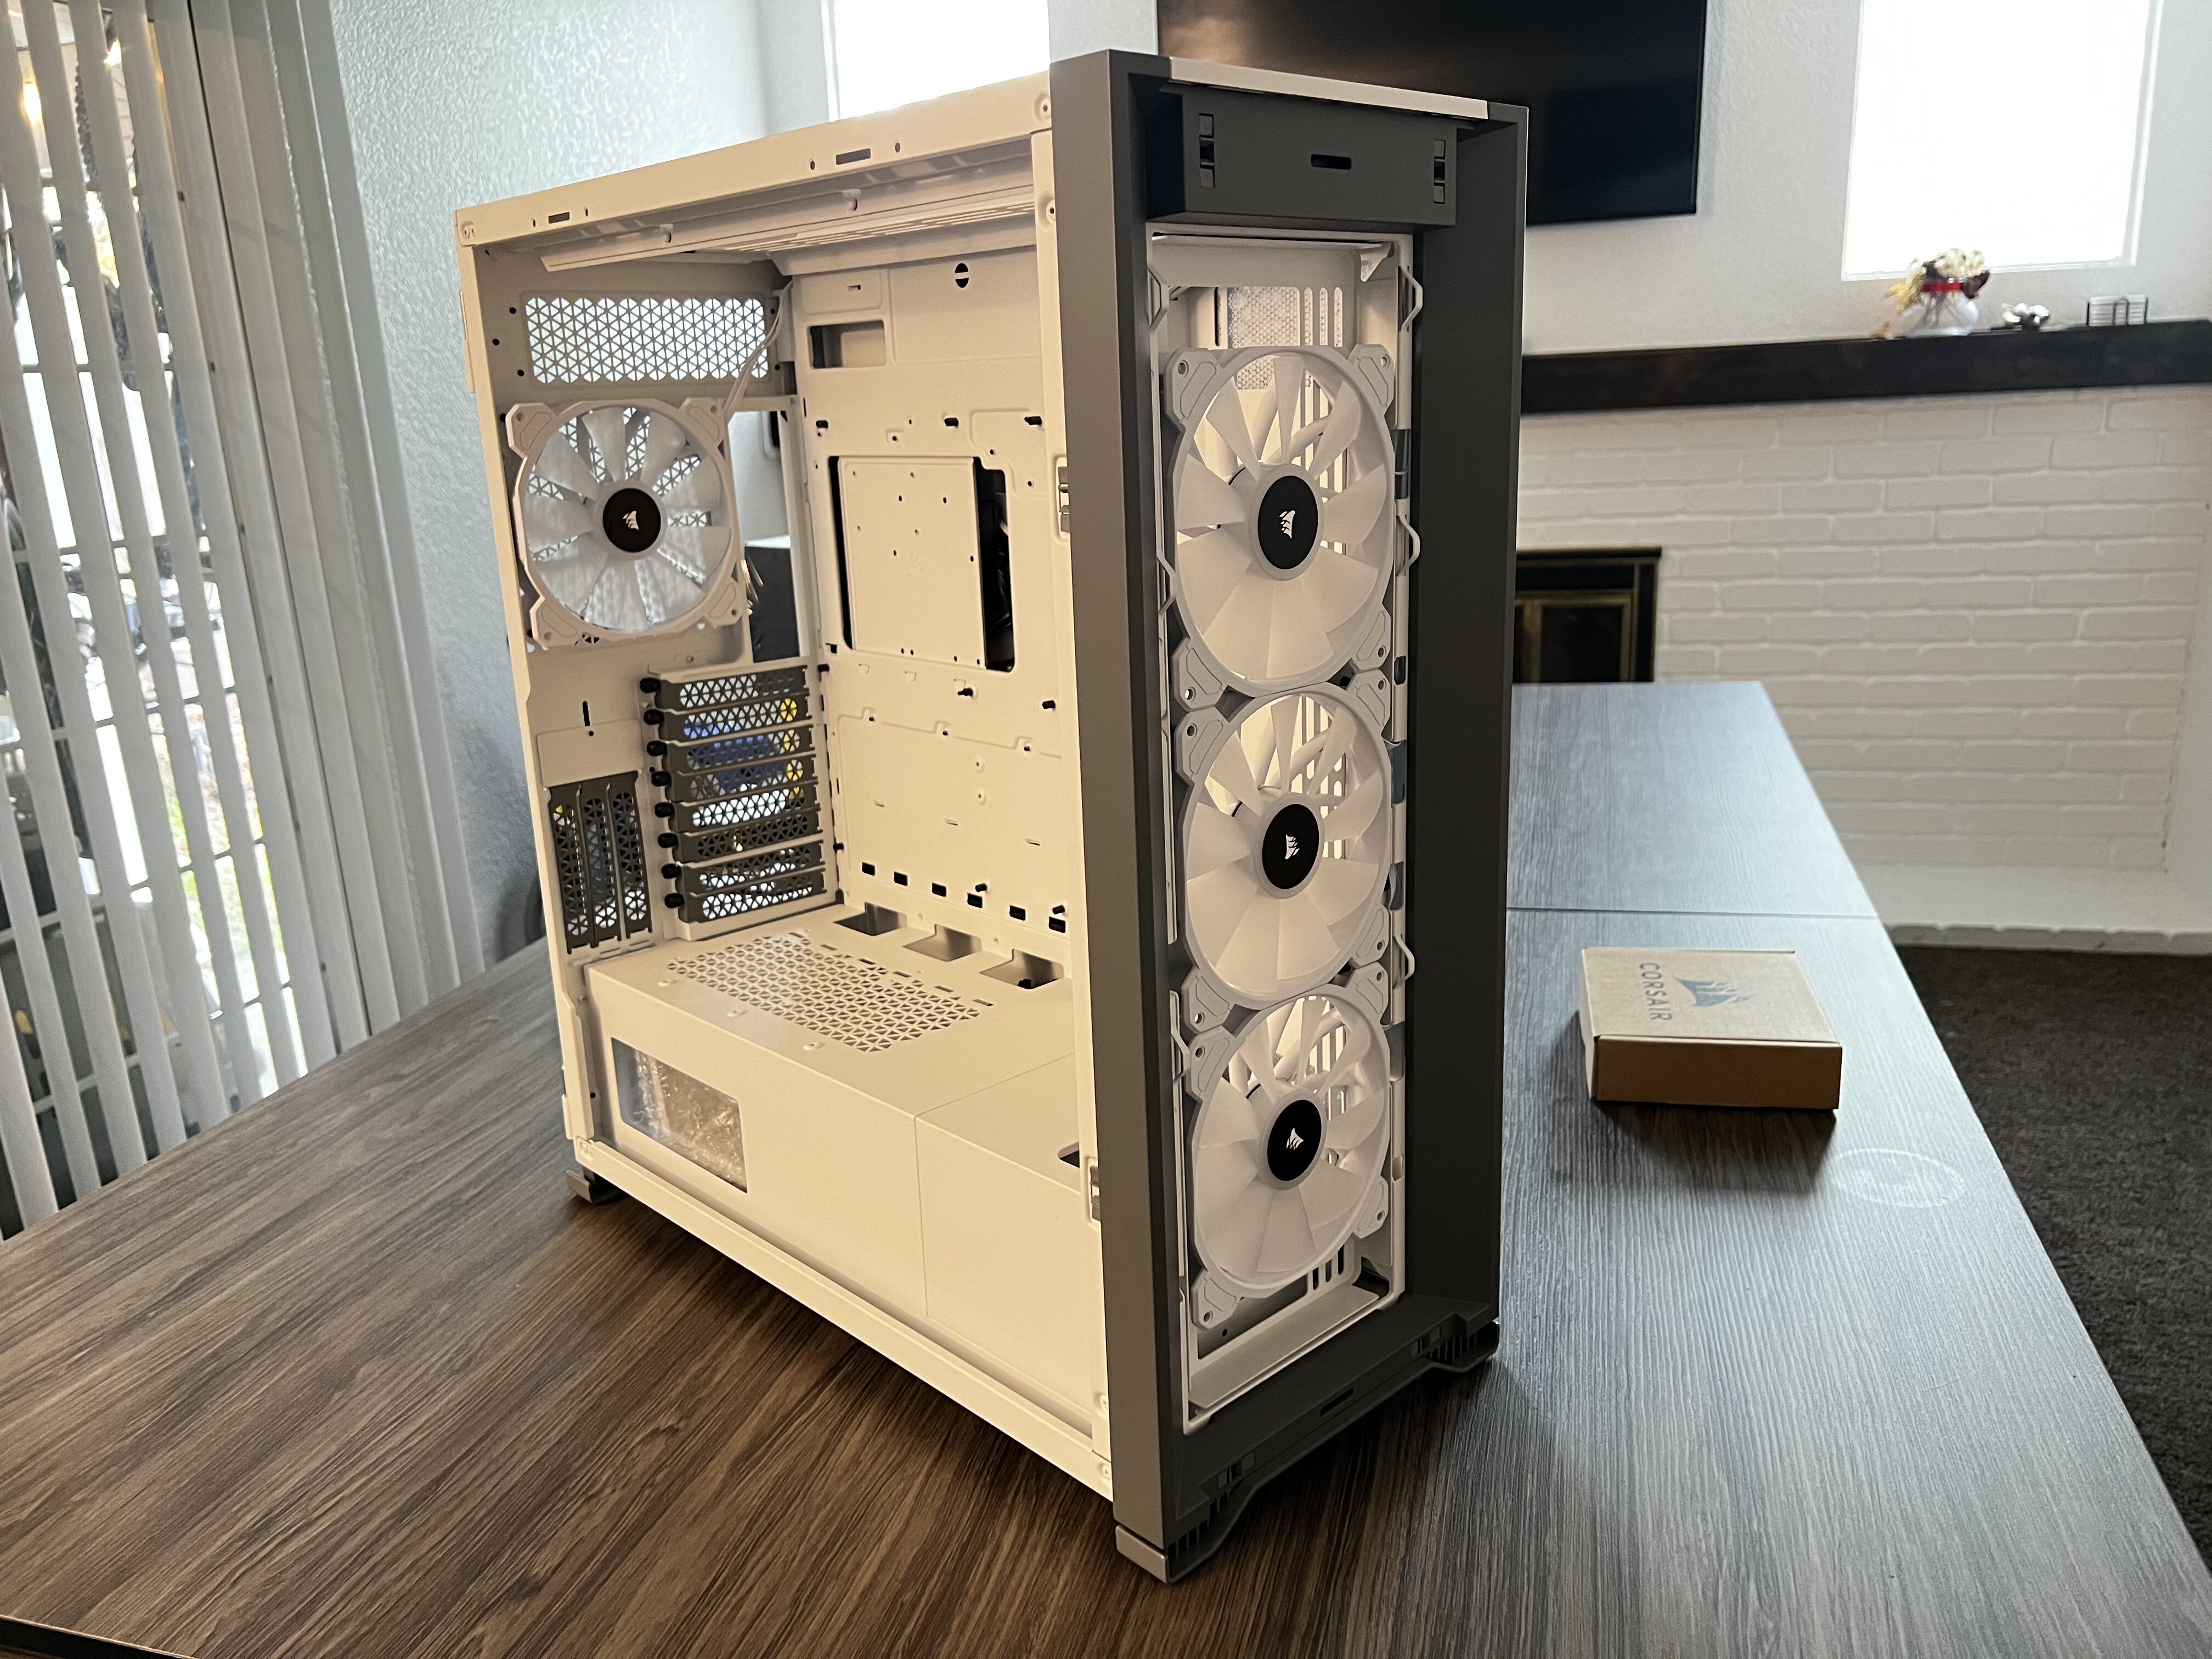
dueling gaming pc’s 😁 I networked the drives so I can use the “older” pc as a storage server also. Win! The one on the left is the previous PC but with an RTX 3090 in it. The 4090 was migrated over to the new tower.
1 point
-
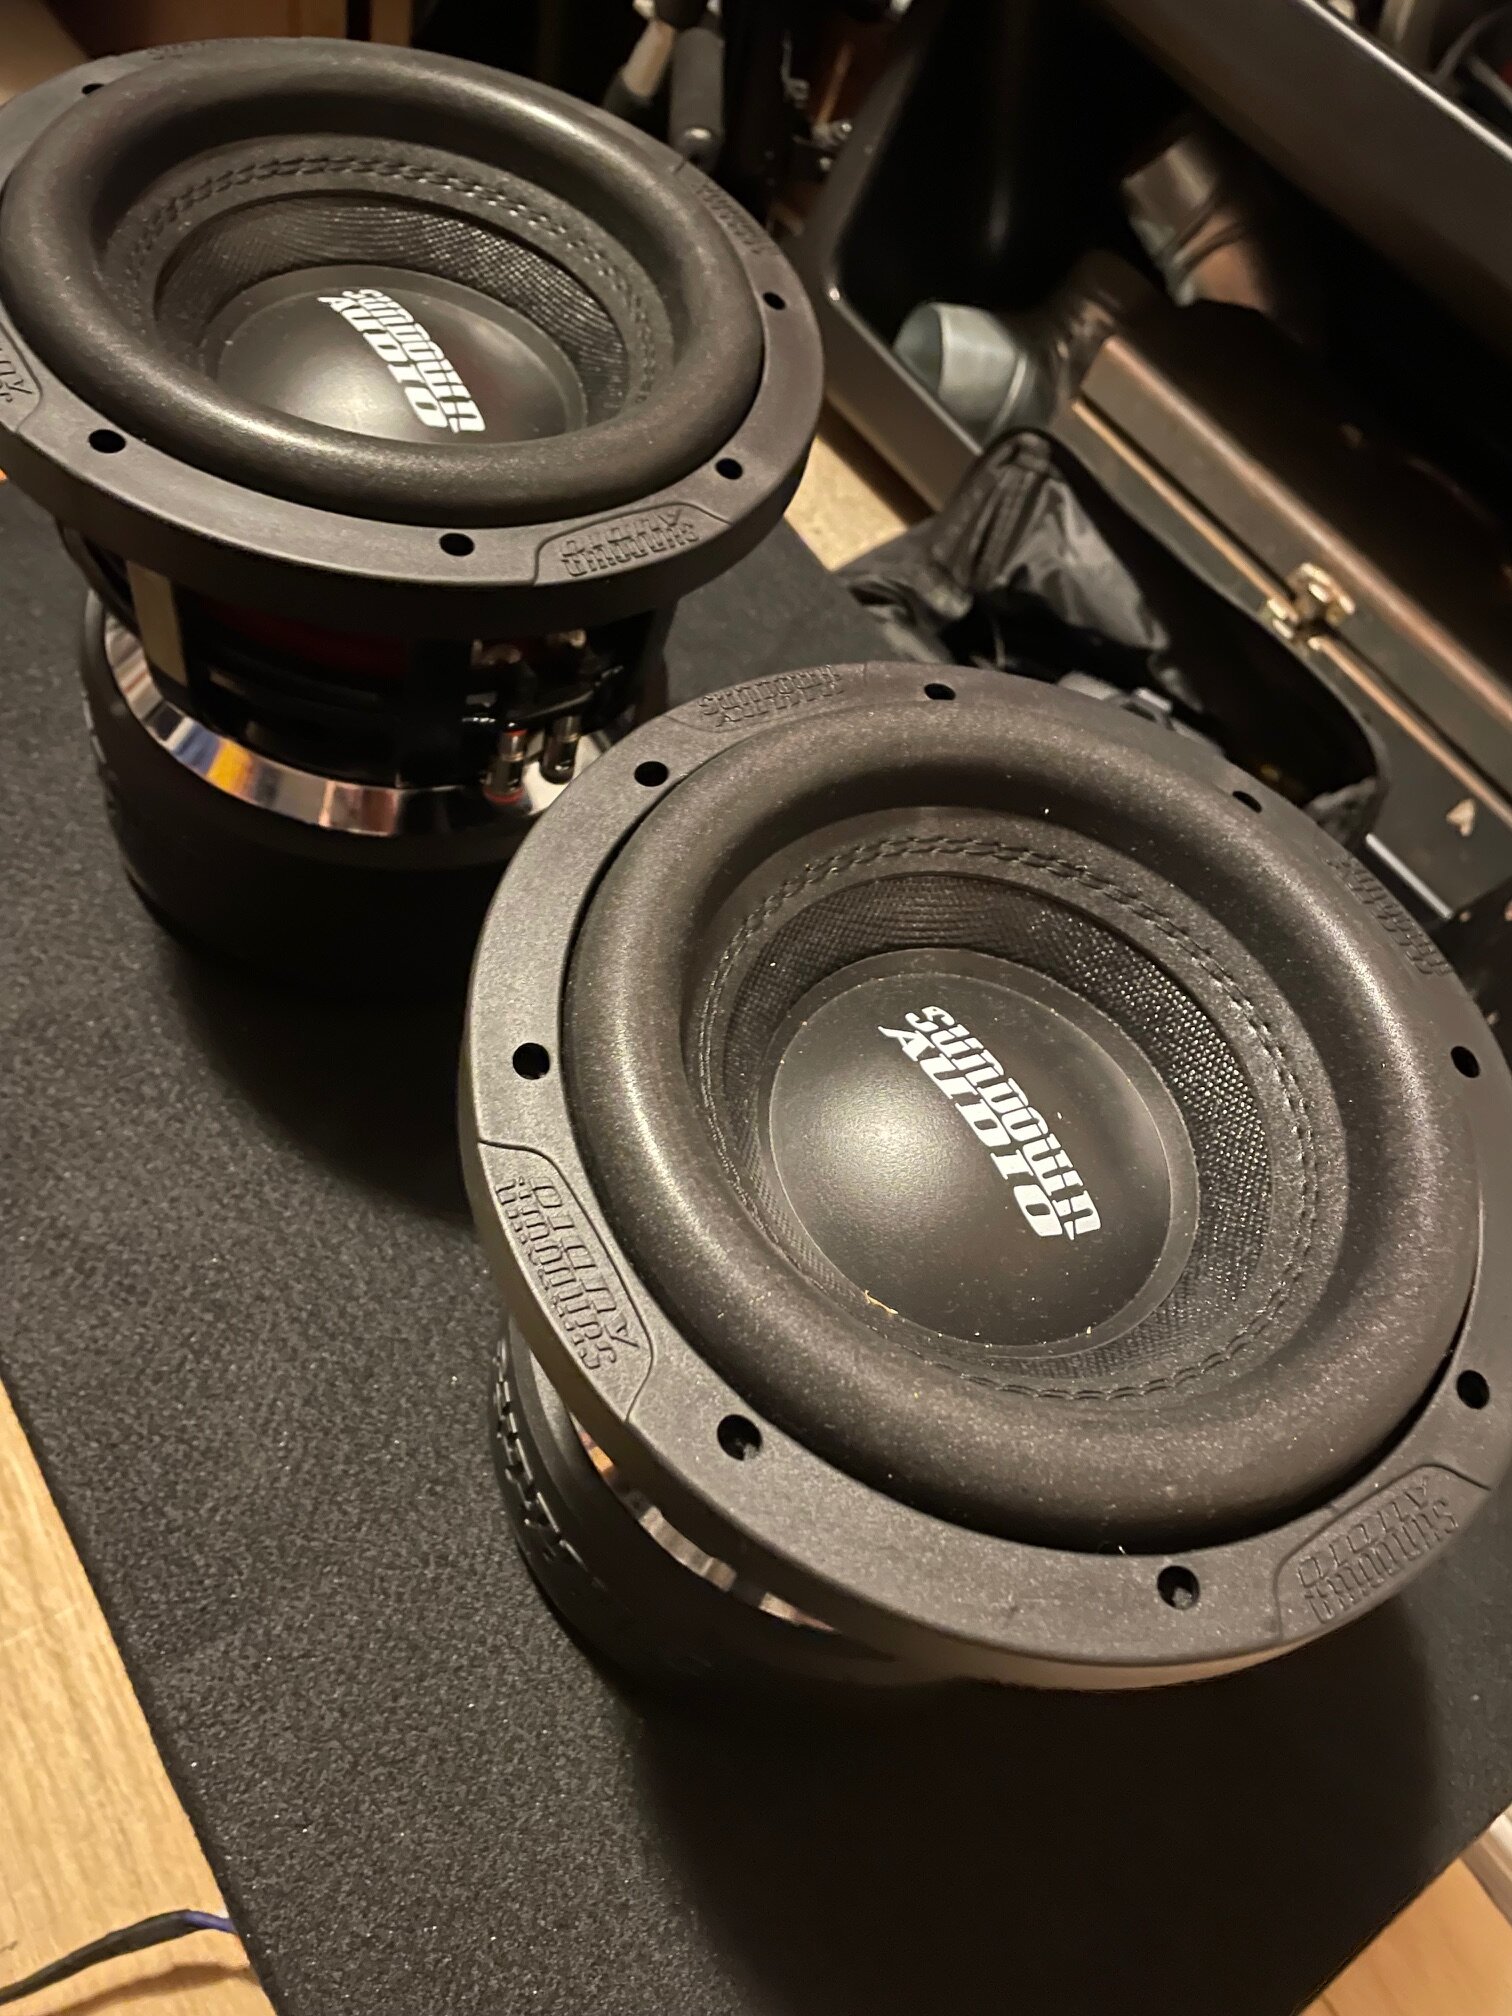
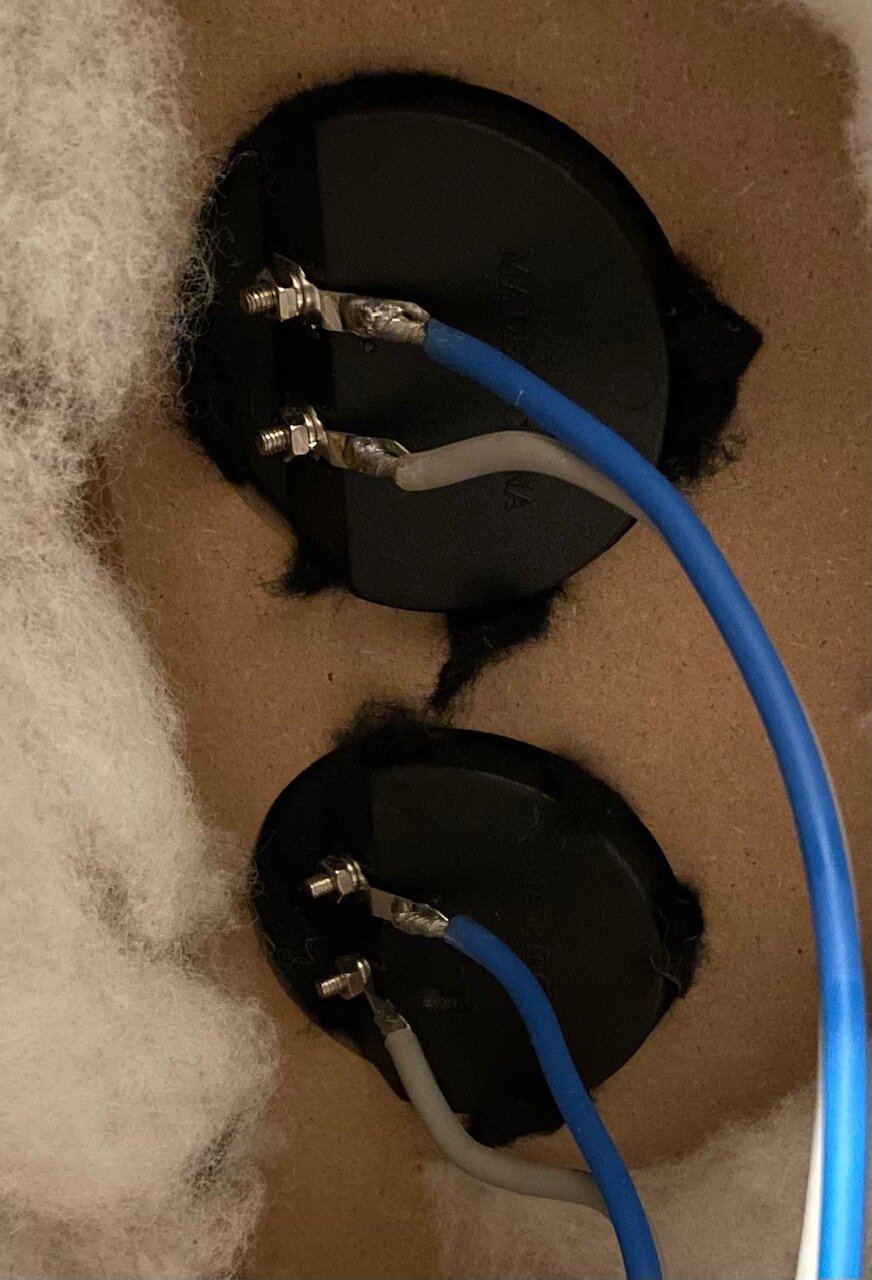
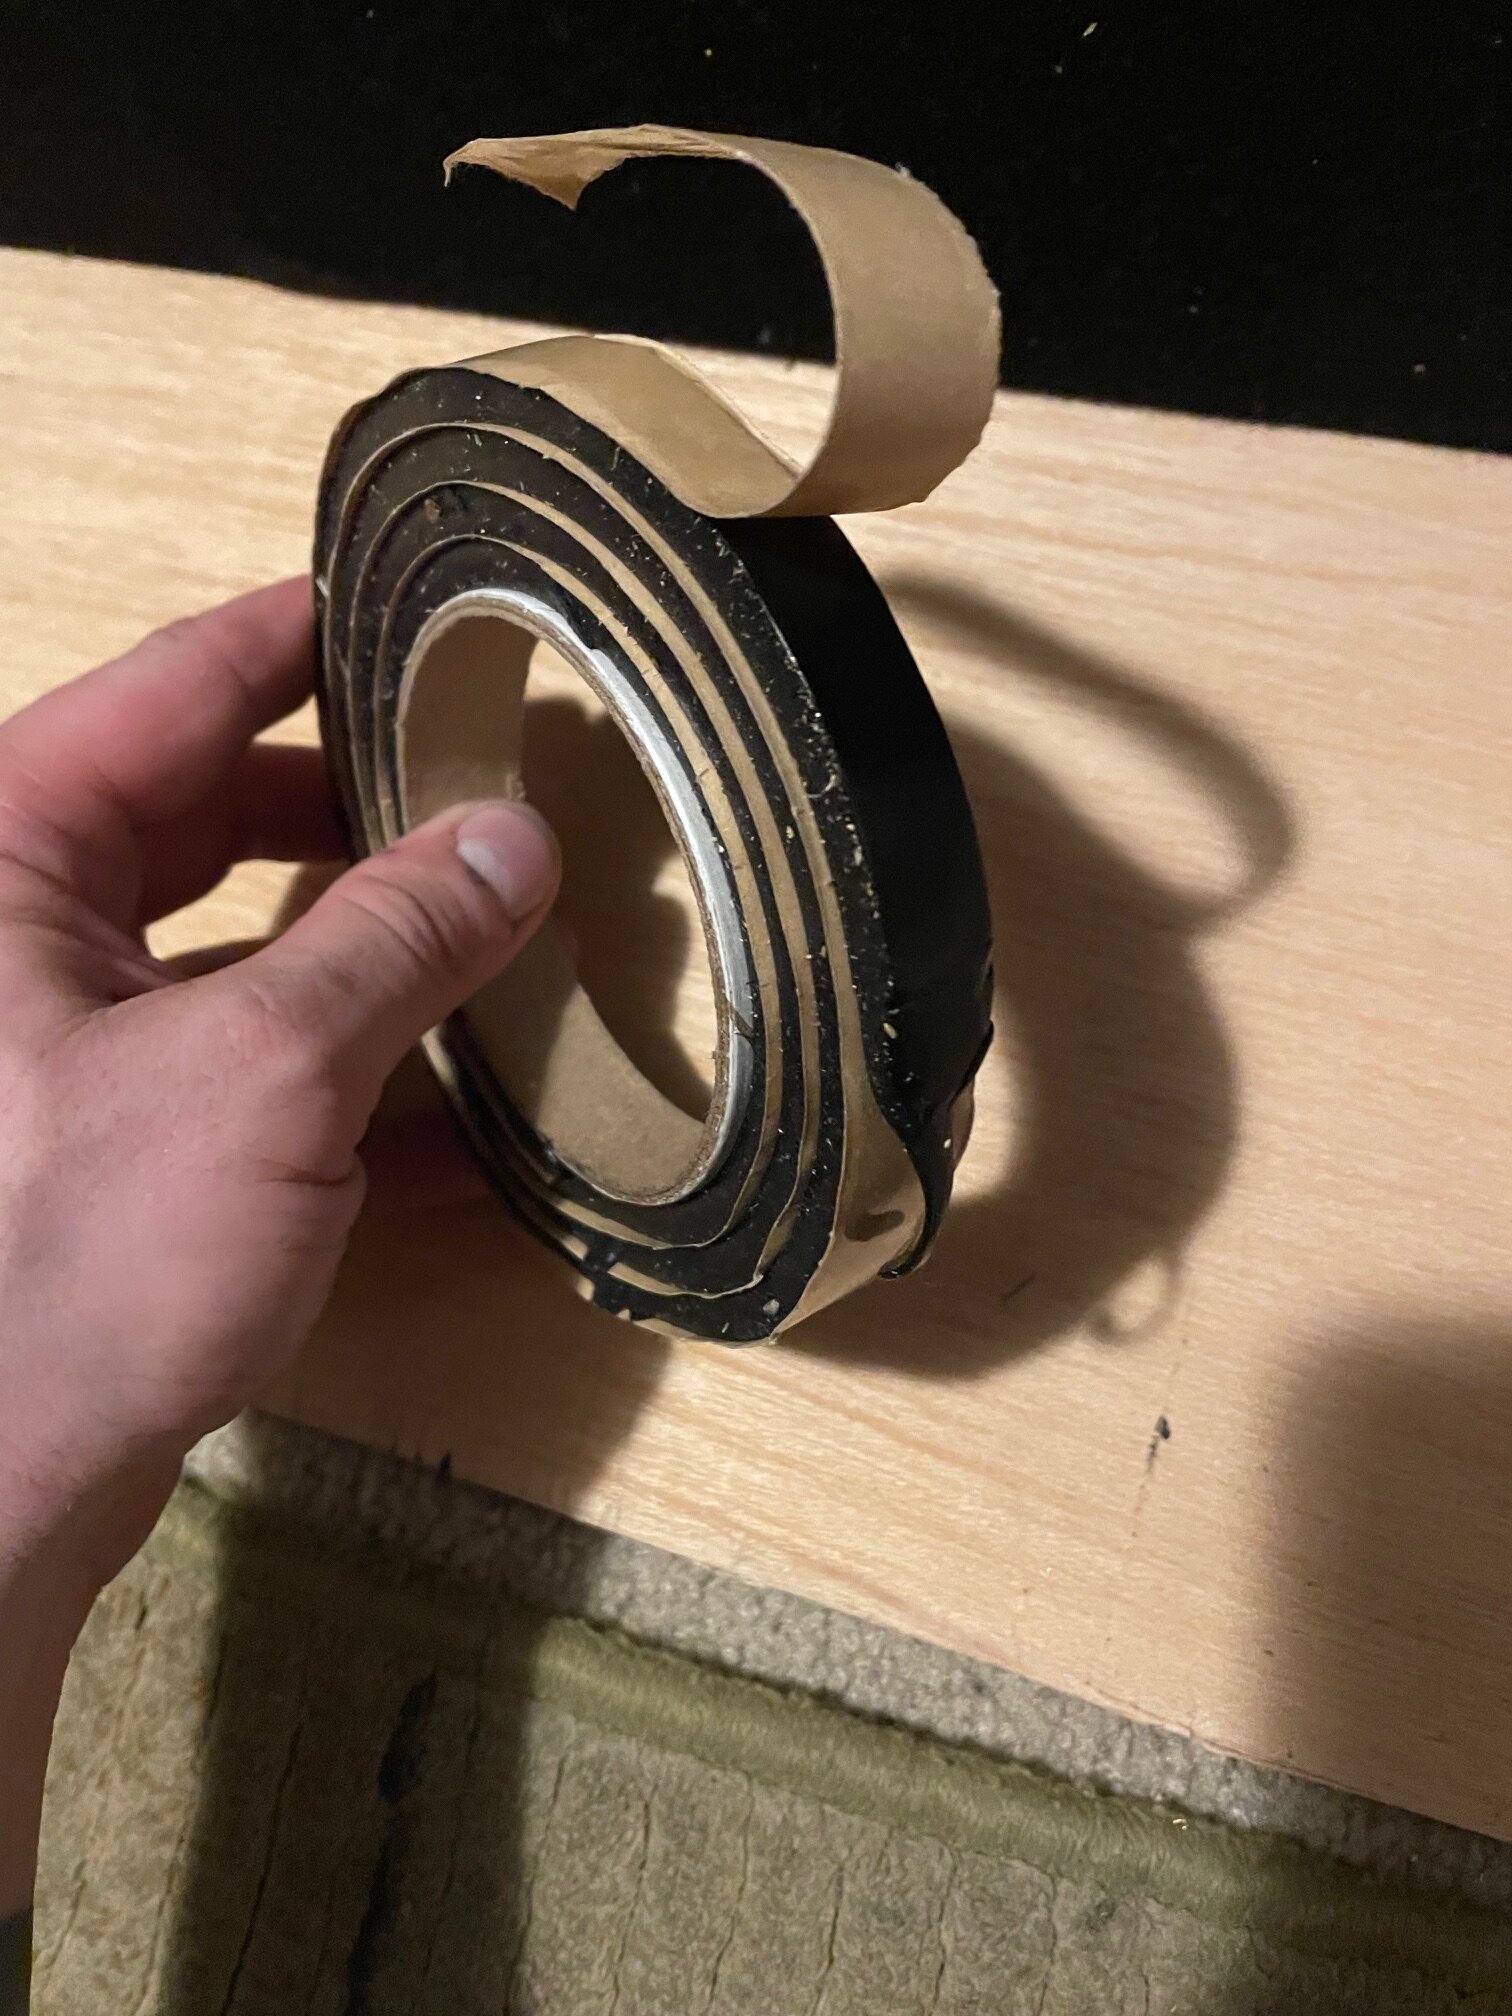
Alright now for the fun stuff. For subs I'm going with 2 Sundown audio x-8v.4's. Why? because 8's are Rad, and I'm trying to keep my care as usable as possible. But also because it's different. The original plan was 3 but I was having difficulty making a box for three that would work within my size constraints and the SA 2500.1 D would struggle to run 3. Maybe down the line I'll go for broke and run 4 off of a beefy 4k for shits and giggles, but most likely I'll sell off the extra 8. The Box that the subs are sitting on is a CT Sounds dual 8 enclosure with 3/4 MDF, a kerf port tuned to 39hz, and abou .81cu ft per woofer. It's on the smaller side but it was cheap and I figured it would be good to compare against a future box with a full 1cu ft per woofer and 32hz tuning. But first, I needed to fix a few things. These Cup terminals. Known for being leaky, So lets fix that. This is some Second Skin Butyl Rope that I had leftover from my last build. This stuff rocks. It's especially good at silencing license plates. This worked for me before with a sealed enclosure, just gotta really work it into the cracks. Next I put some ferrules on the wires because ferrules are awesome And Last I used a little Tessa tape (Fabric Tape) just to make sure the wires don't rattle against the box. And that's pretty much where I have to stop, at least until I gut my other car, and start building an amp/battery Rack.
1 point
-
I haven't looked into their sub parameters to see if they are good. I can only suggest to get someone to design an enclosure for you (or go with a program that can give you data back on how the box will theoretically perform). I have a tough time when people go with general port areas and ratios. Just because it plays doesn't mean it's right or optimal.1 point
-
You can also setup your gains low making sure power delivered is within drivers specs. No one is to say if that distorted signal will make any difference, It's all about being prepared to prevent a bad outcome. Much luck and if you have any other questions let us know.1 point
-
For the port size and length you should model the enclosure in a program like winisd that will show you the port air velocity and excursion so you can see how different sizes of port will effect how it all performs. You don't need anything to direct the airflow to the ports except for a flared end piece. Keep the end of the port away from the back wall by at least the diameter of the port. I.E. a 4 inch diameter port should have at least 4 inches clearance at the end of the port.1 point
-
Sure you can do that for some moderate improvement, larger improvements involve greater cone area like for example doing 2 15s, if doing a larger than recommended box and tuning higher requires you setting up your subsonic filter higher to prevent sub bottoming out.1 point
-
Depens on what you mean by "together" but if I imagine right you would have a parallel tuned 6th order bandpass, still that would be useless because in such enclosures the chamber sizes are of different sizes, port area and port tuning of each port are vastly different, in other words that wouldn't work at all.1 point
-
You are running 1300W of power in your audio, no need for any other electrical upgrades if just playing music, No need to be checking your voltage unless something in your car is not working properly, the amps will work just fine in the 12-14V range no problem. If you are just curious as to why the voltage is being regulated the way it does, just have your electrical checked and then ask your concerns, to me, if your car works fine and your audio works fine I would just leave it alone.1 point
-
Usually the negative speaker wire output is fine to use, however on some amps if it don't work then the negative battery terminal will work as well. Most amps the negative speaker terminal and the negative battery terminal are tied together, but thats not always the case and thats really the only time you need to use the negative terminal or vice versa.1 point
-
There is a thread, though it maybe buried now that has a bunch of radios that people tested with the dd-1 for max undistorted volume. you will probably have to search for it though. If the radio is not showing distortion direct through the rca's or while attached to an amp with the gain at 0 when you use a 0db tone for 40hz and 1000hz then it is safe to say the radio is distortion free at max volume through the rca preouts. In that case then set your amp(s) using your desired overlap -5, -10, etc db level at the maximum headunit volume. You could use a lower volume if you really wanted but it won't change much except the fact that the radios preout voltages (5 volts as you said in your case) typically wont be achieved unless the volume is all the way up. So if your volume goes to 40 and its clean at 40 you will get 5 volts preout voltage, but say if it goes to 40 but you set it to 20 to tune your amps then your rca preout voltage will only be 2.5volts or there abouts which will require you to increase the gain on the amp to compensate for that lower signal due to having lesser preout voltage. So you should just use the max cleanest volume.1 point
-
i have a Alpine 9887 and a scope, the RCA outs dont clip at full volume. the internal amp clips at volume 21 out of 351 point
-
1 point
-
Not sure the chambers are of different sizes but even if they were with sealed there is no much difference in performance for normal to larger than normal internal volumes, say 1 cubic feet and 1.2 cubic feet will sound largely the same. If those subs are the lanzar st max12s those may play better in ported box rather than sealed. To answer your question it's better to cut a circle in the dividers rather than take them out to preserve the box strength.1 point
-
I can't believe I remembered my old logins! I haven't done audio in YEARS! But I just grabbed me my first (fixer upper) SUV and was like, "Back in the day, I always said I'd do something crazy if I got me an SUV." This is the only audio forum I've ever been a part of so... Here I am, checking you guys out lol. Coincidentally, I asked this same question as I was typing the website in 😂. To answer your question though, I got away from audio and started building me some "fast" stuff. I got this SUV with a blown head gasket for the winter just to have a 4wd beater so I didn't have to drive my fun cars in the crappy weather. Once I did the gasket, that itch came back like crazy, VERY QUICKLY lol. So Im now actively installing some old stuff that I had in plastic from the last car I did audio in, God knows how long ago, just hoping it'll hold me over and not make me wanna spend some money 😂 But, Hi all! Good to see y'all AND the site are still kicking!1 point
-
If you have a subpar electrical you can go with this: Rockford Fosgate Power T1500-1BDCP It will give you like 1200W at 4 ohm and close to 2K at 2 ohm, it is expensive unfortunately but it can work on bad electrical also fits 4AWG cable. There are cheaper alternatives, Taramps smart 3 bass and the SIA series from sundown BUT full bridge amps need costly perfect electrical, 12.5 V minimum under max load or these amps can get damaged. These type of amps better leave alone in entry level systems.1 point
-
next step is paint1 point
-
No, I didn't miss word it. I was just wrong. Thank you for the clarification. I thought it measured both. I must admit, I only skimmed through the manual lol.1 point
-
Wrong, I still cant understand how people think this or maybe you worded it wrong but the DD-1 will NEVER measure clipping. You will have distortion long before clipping is ever seen on an oscilloscope. Once the red light on the DD-1 lights up you hit 1% THD so by the time the wave is becoming deformed on an oscilloscope you are so far beyond that 1% THD that the DD-1 is looking for.1 point
-
Yes, you can and should use the DD-1 on your DSP as well. Treat your DSP as a headunit, use the 0db tone and the appropriate tone for the appropriate channel outputs (IE, 1khz for front/rear dedicated dsp outputs, and 40hz for dedicated sub outputs on your dsp), this way you have the maximum clean a/c voltage output from your DSP. Also make sure all EQs on the DSP are flat when doing this as well! Now the one thing to be careful of is the a/c voltage output, you don't want to set it higher than your amps inputs can handle, so after tuning with the DD-1 you may want to check the rca a/c voltage output of the DSP because the DSP can and will take your 4v rca signal and turn it into 6-9+ volts output. So if your amps can only handle a 5volt input then you will want to back the voltage down some on the DSP, and then go and match voltage for each output. Then use the DD-1 on your amplifiers using the appropriate tones with your desired gain overlap setting (-5db, -10db, etc). I think my Audison Bitone DSP was putting out 11.7 volts clean when tuned with my DD-1 but I backed all the levels down to 4.5volts that I verified with my multimeter and then I have my amp gains up about 1/8, its very very little.1 point
-
I'm still alive...... and still an asshole!1 point
-
OK . . . when I got the call from Steve yesterday on the second T15kw, I gotta tell you that I was pretty excited - so excited that I walked over to engineering right away and shared the news with the T15kw build team, and of course Tony D'. You should of seen the look on their faces . . . everyone is very excited about this project - a single vehicle with two T15kws . . . the thought of that just stands the hair up on the back of my neck! We're even more excited that Northern Cal's mad scientiest is behind it! Who better to ensure that these amplifiers will perform to their fullest than Steve Meade? I read about the last five pages of the thread and all I'm going to say is that two T15kws will be more than enough power for any and all speakers Meade can cram into this vehicle. What you have to take into consideration is that the T15kw is not like any other amplifer on this planet. Although it is a class A/B amplifier, it does not behave like one in many respects. Furthermore, it does not sound like any Class A/B amplifier these ears have ever heard - and I've owned some nice ones! To NOT use Hybrid Technology power on the mids and highs - now that would be criminal! When you guys think of power in watts, you're bound by the amplifier technology of today - one has to think differently when talking about Hybrid Technology amplification. Certainly, a watt is a watt - but traditional amplifier behave quite differently from the T15kw when driven into clipping . . . I think it's about time for Tony D' to make a forum appearance at SMD so that he can elaborate on what I speak of. What do you guys think?1 point


.jpg.f809fa8c50cc4818e85a732427df03ed.jpg)


.thumb.jpeg.ea1098a3d79242024885c0220d6c7c67.jpeg)